

Add Booking
Create a booking yourself from the admin, such as for phone, email or in-person sales, using the step-by-step Add Booking wizard.
Introduction
Use the Add Booking wizard when a customer books with you by phone, email, or in person. You pick the customer, the trip and date, any add-ons, and how the payment is handled, and the wizard works out the price as you go.
Available from WP Travel Engine 6.9.0.
How it differs from a checkout booking
- No card is charged. You record money you already received, or create a payment link.
- The booking confirmation email is not sent when you create the booking [verify]. Use Actions > Resend Confirmation Email on the booking if you want to send it.
- You only need the number of travelers. Names can be added later.
- The booking carries the Manual badge in the Booking Dashboard.
Open the wizard
- Go to WP Travel Engine > Bookings.
- Click Add New at the top of the page.
The New Booking wizard opens over the Bookings list. The Order Summary on the right keeps a running Total so far. Use Back and Continue to move between steps, or click a step you have already reached.
The steps
Accommodation, Extra Services, and Travel Insurance appear only when the matching add-on is active, and you can skip them.
- Customer Details
- Trip and Date
- Accommodation (add-on)
- Extra Services (add-on)
- Travel Insurance (add-on)
- Payment
- Review and Create
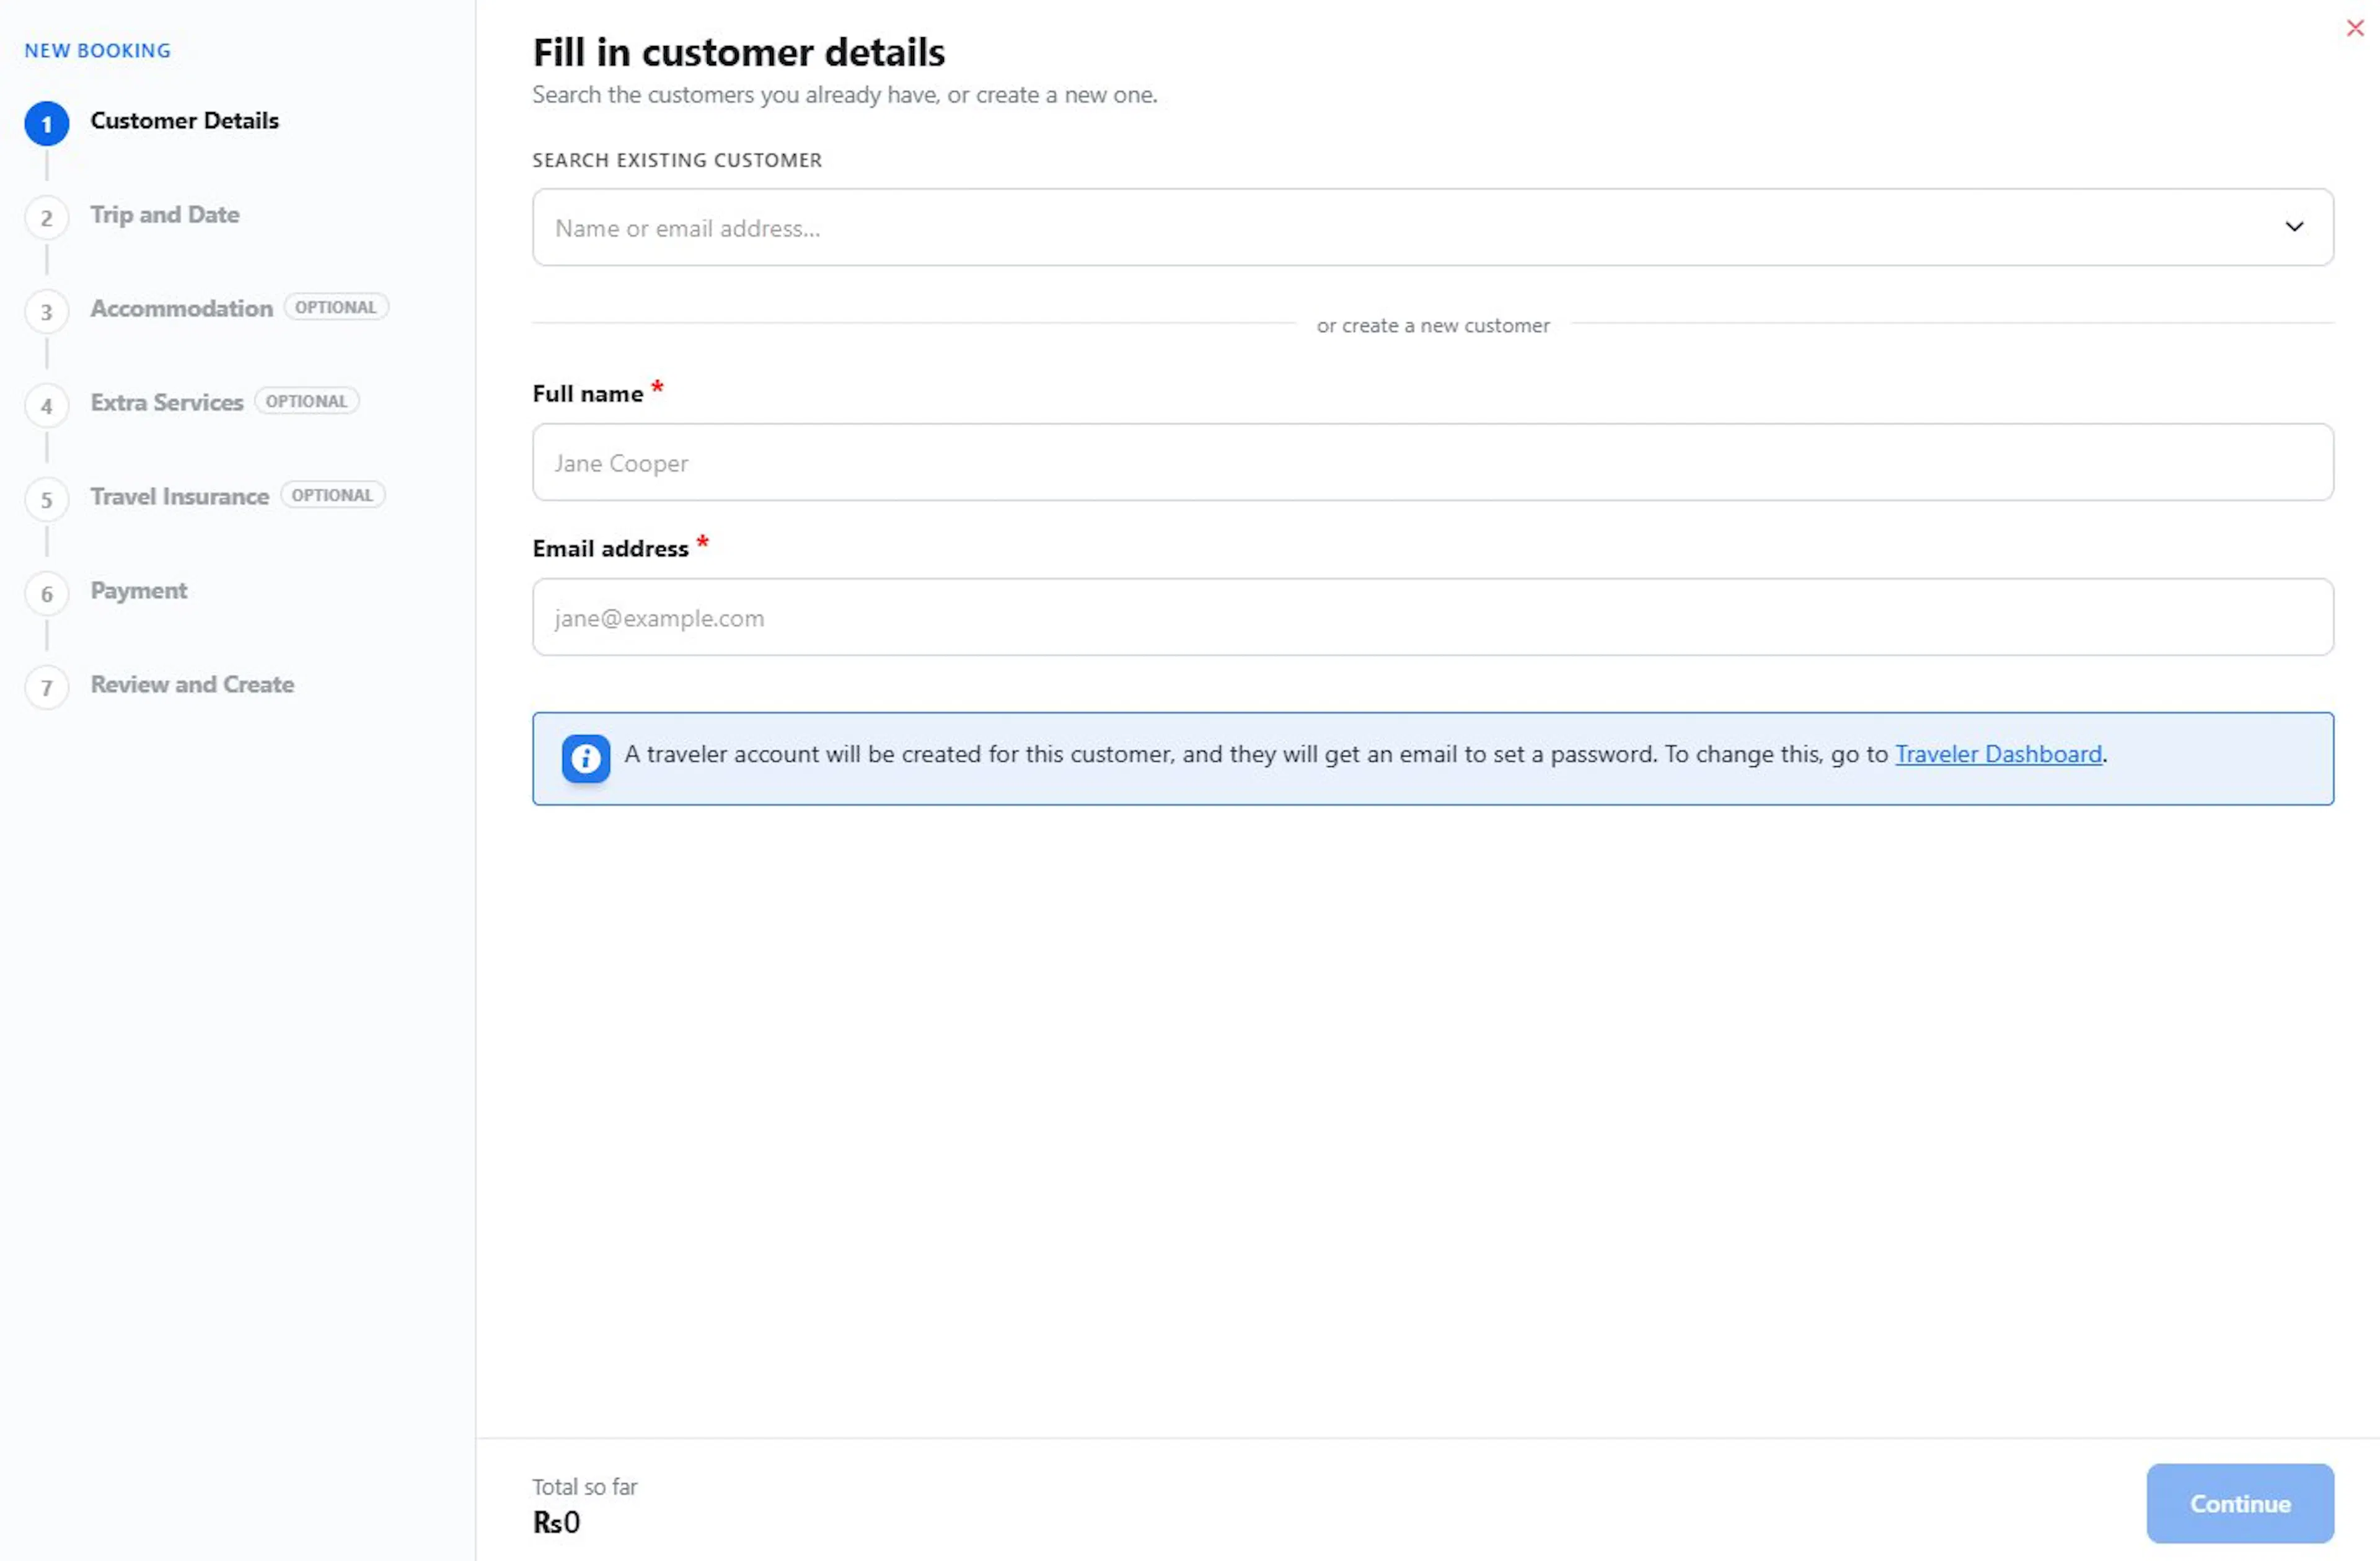
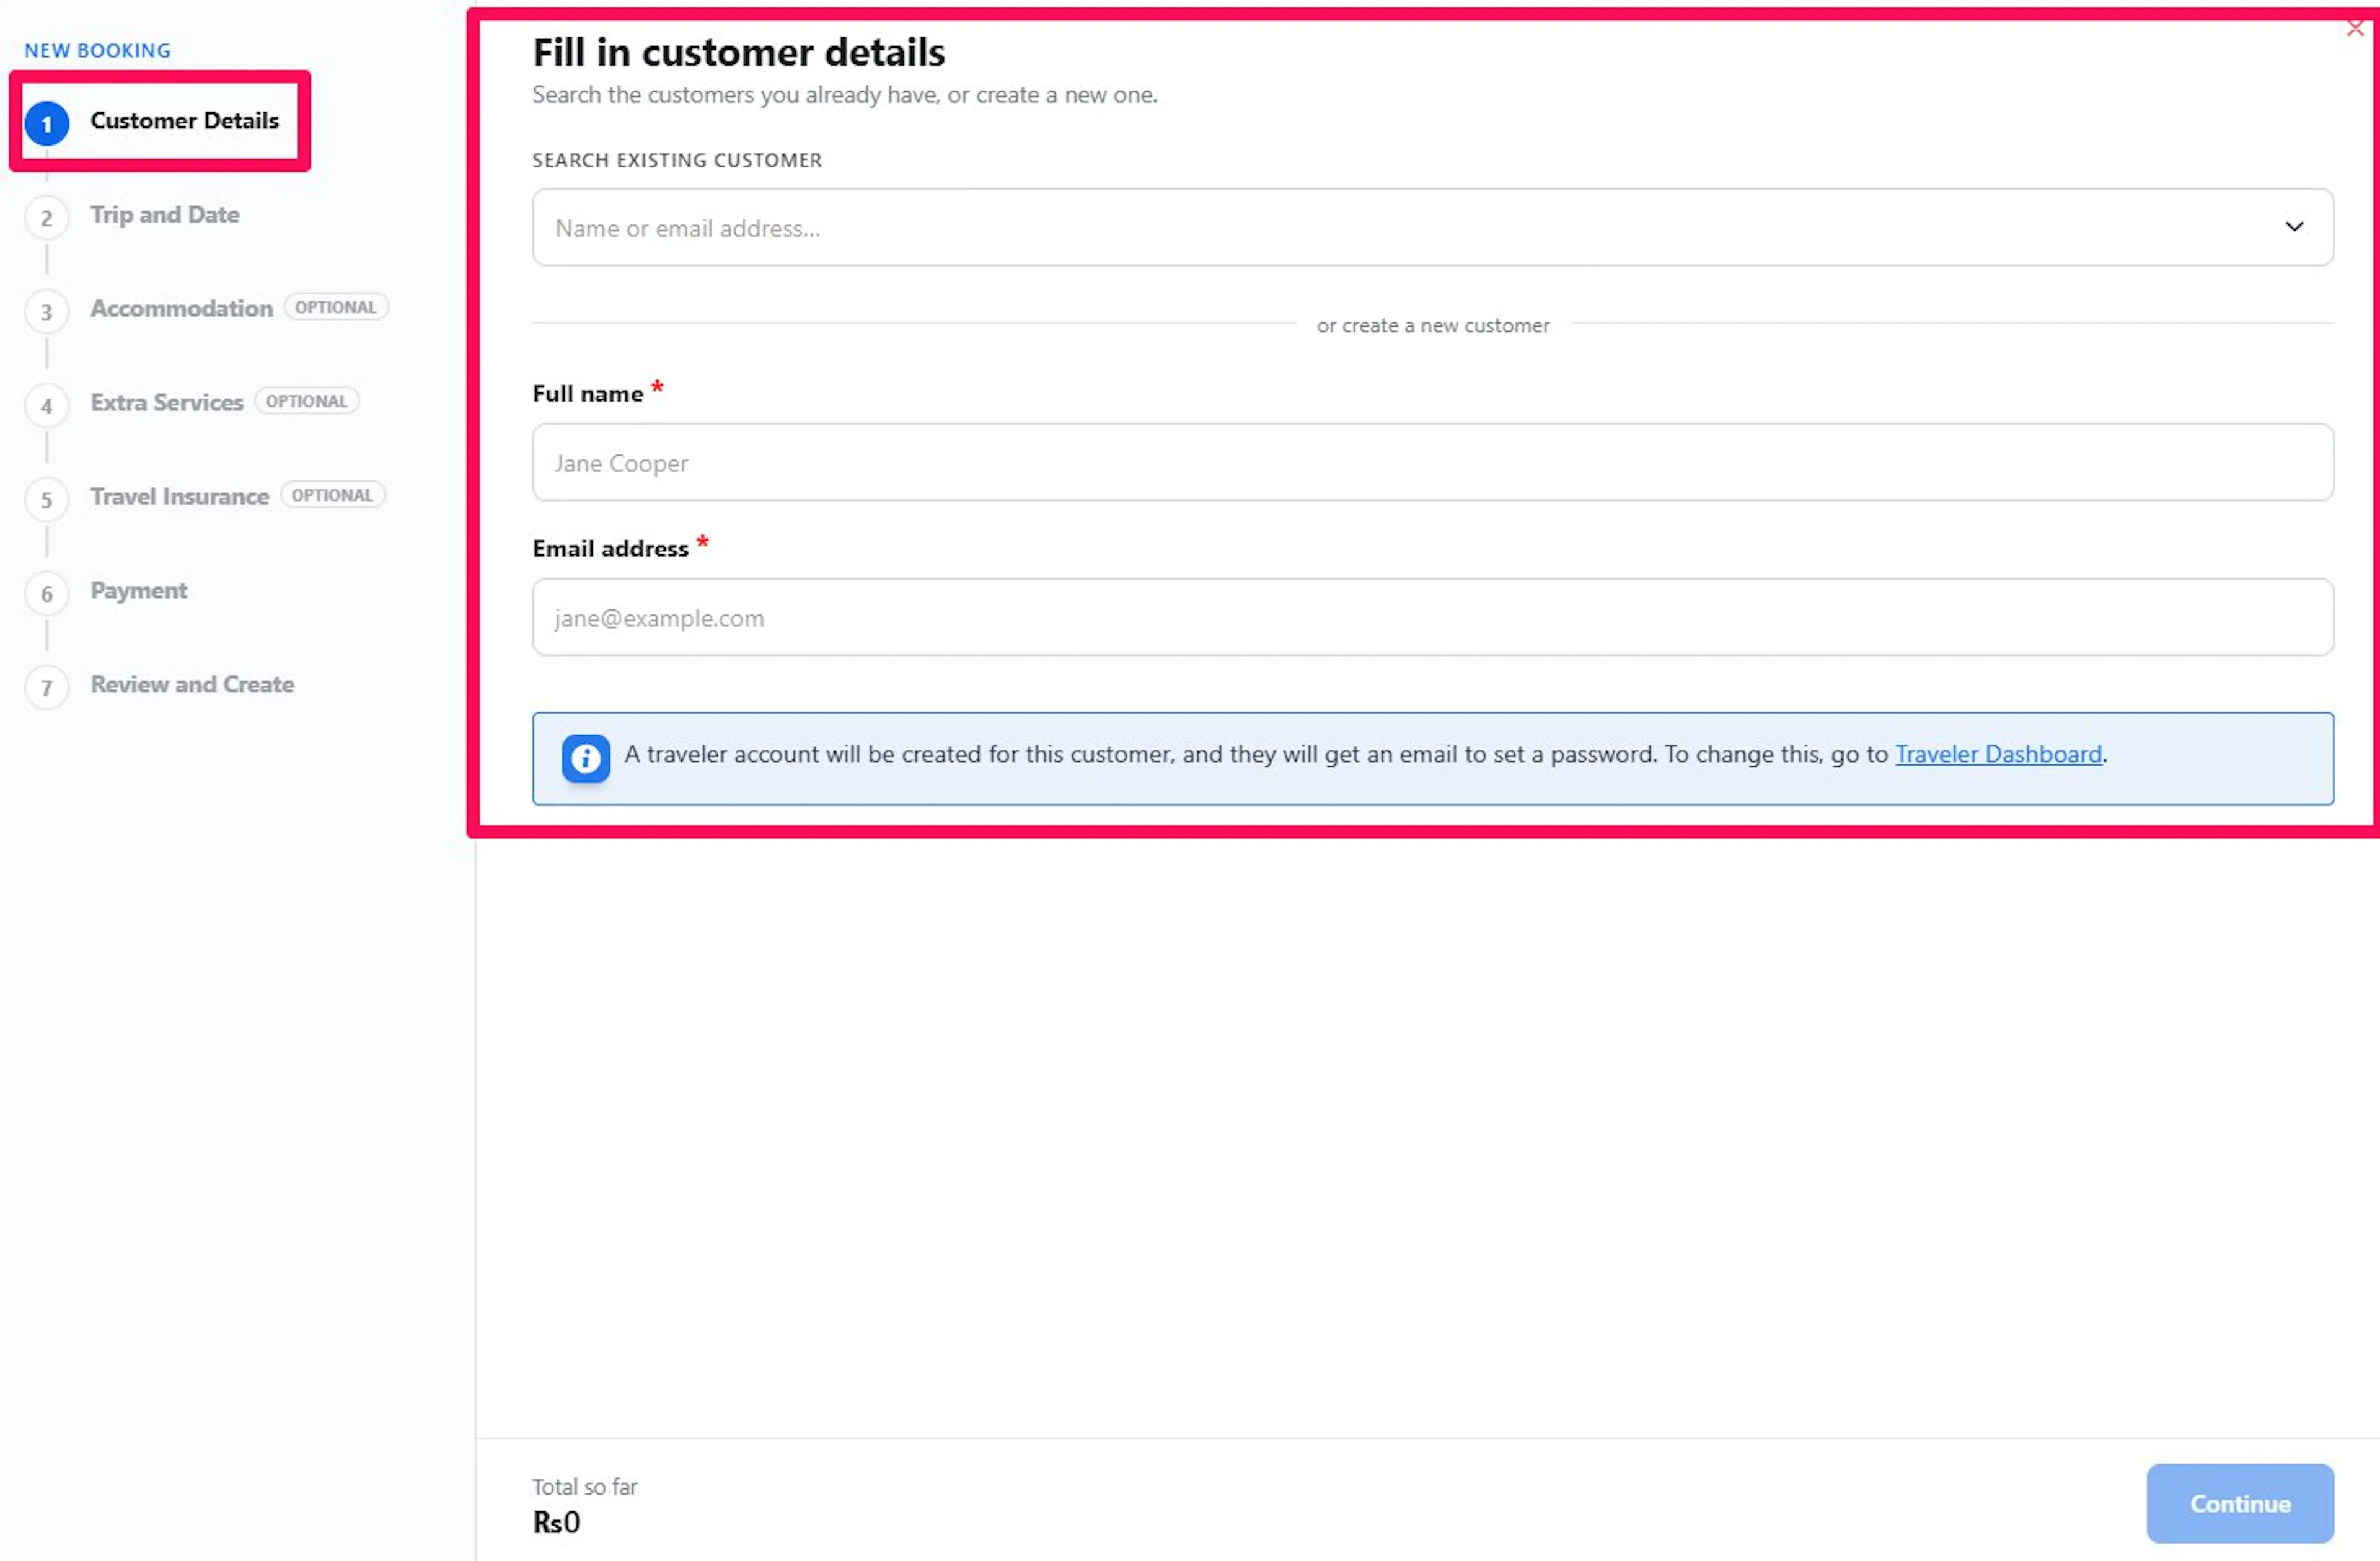
1. Customer Details
- Search existing customer: type a name or email and pick the customer. Their name shows under Booking for. Click Change customer to pick someone else.
- Or create a new customer: enter a Full name and an Email address.
How your account settings affect the customer
The How should traveler accounts get created? setting in your Traveler Dashboard settings decides what happens. A notice shows when you create a new customer.
- Automatically at checkout or Travelers register themselves: a Traveler Dashboard account is created, and the customer gets an email to set a password.
- Do not create an account: no account is created. The details are saved on the booking, but the customer cannot log in.
Enter a correct email. It is where the account email and payment reminders go.
2. Trip and Date
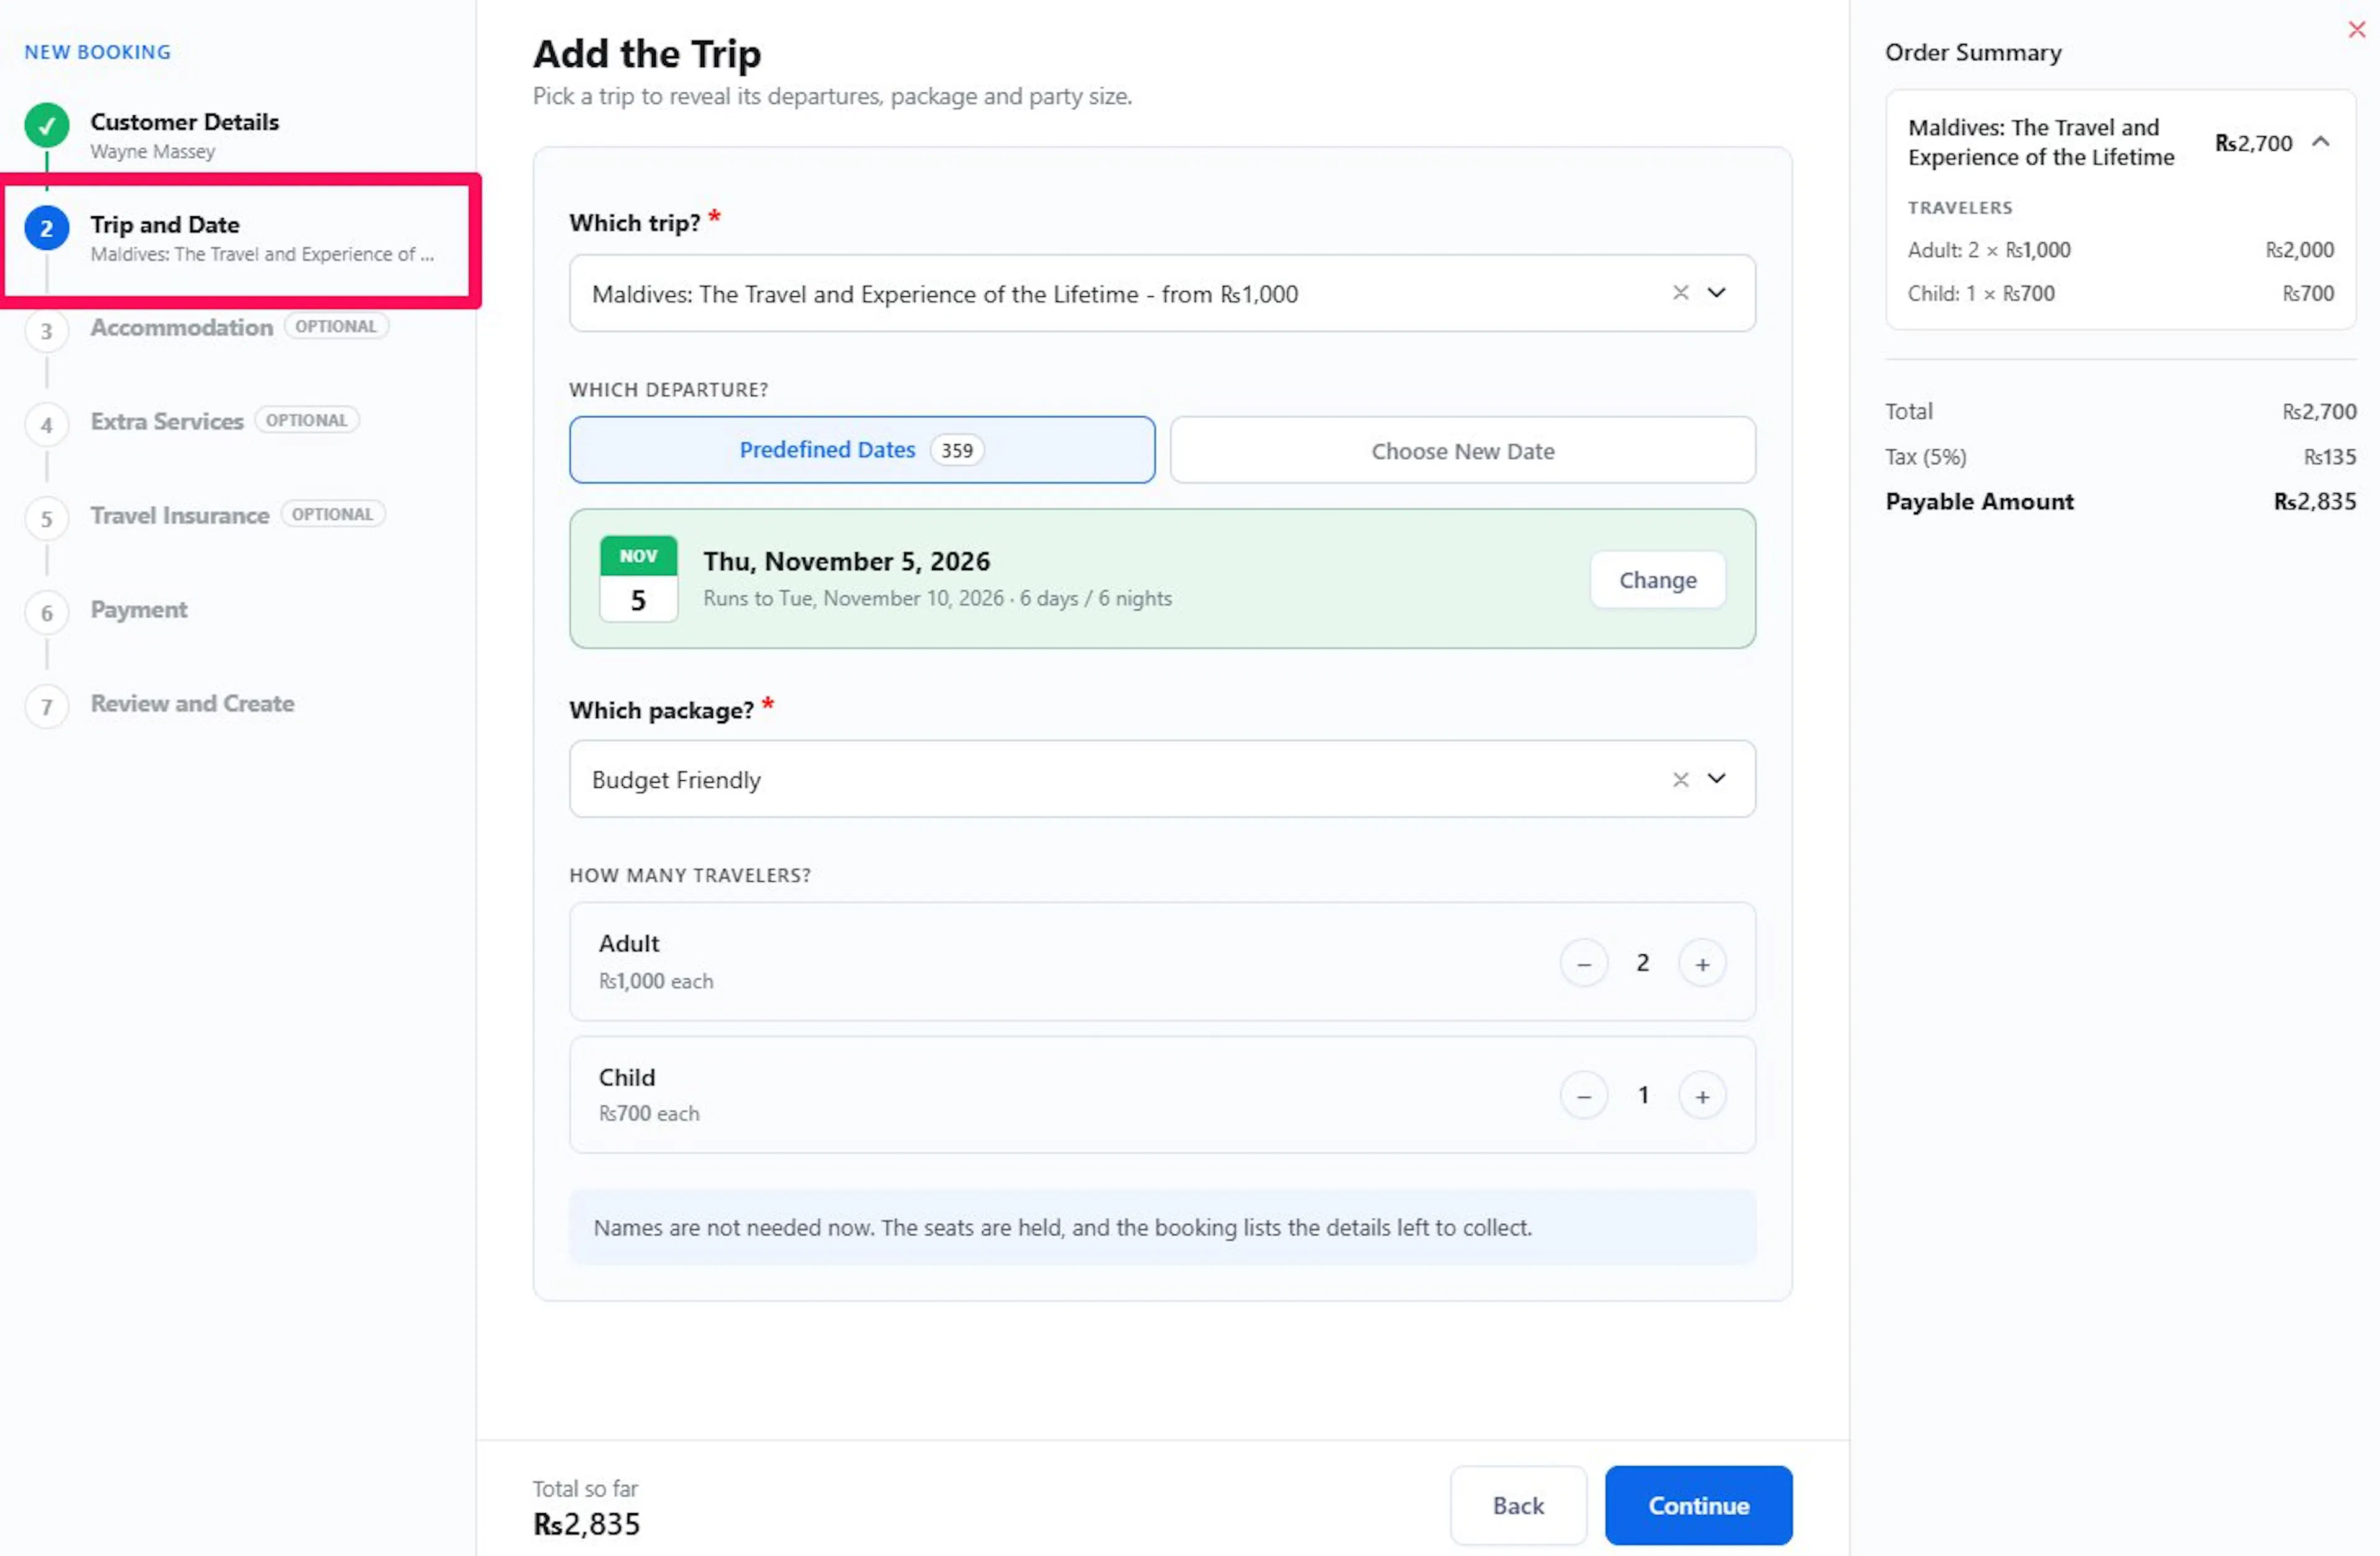
- Which trip? Pick a trip, or choose Custom Trip… and enter a Custom trip name (for example, Private charter to Lukla). A custom trip is saved as a draft trip.
- Which departure? Pick a date under Predefined Dates. Each shows the seats left, and a full date shows FULL. Or choose Choose New Date and enter a Start date and End date.
- What time do they start? Pick a time slot or use Set own time.
- Which package? Pick a package, or choose Custom Package… and enter a Custom package name.
- How many travelers? Use the plus and minus buttons for each traveler type.
If you add more travelers than the seats left, the wizard warns you but lets you continue. Seats are not tracked for custom packages, custom dates, or custom time slots, so manage availability for these bookings yourself.
Manual bookings created using the new booking flow automatically reduce the available seats. However, manual bookings created before this update do not reduce seat availability.
3. Accommodation (optional)
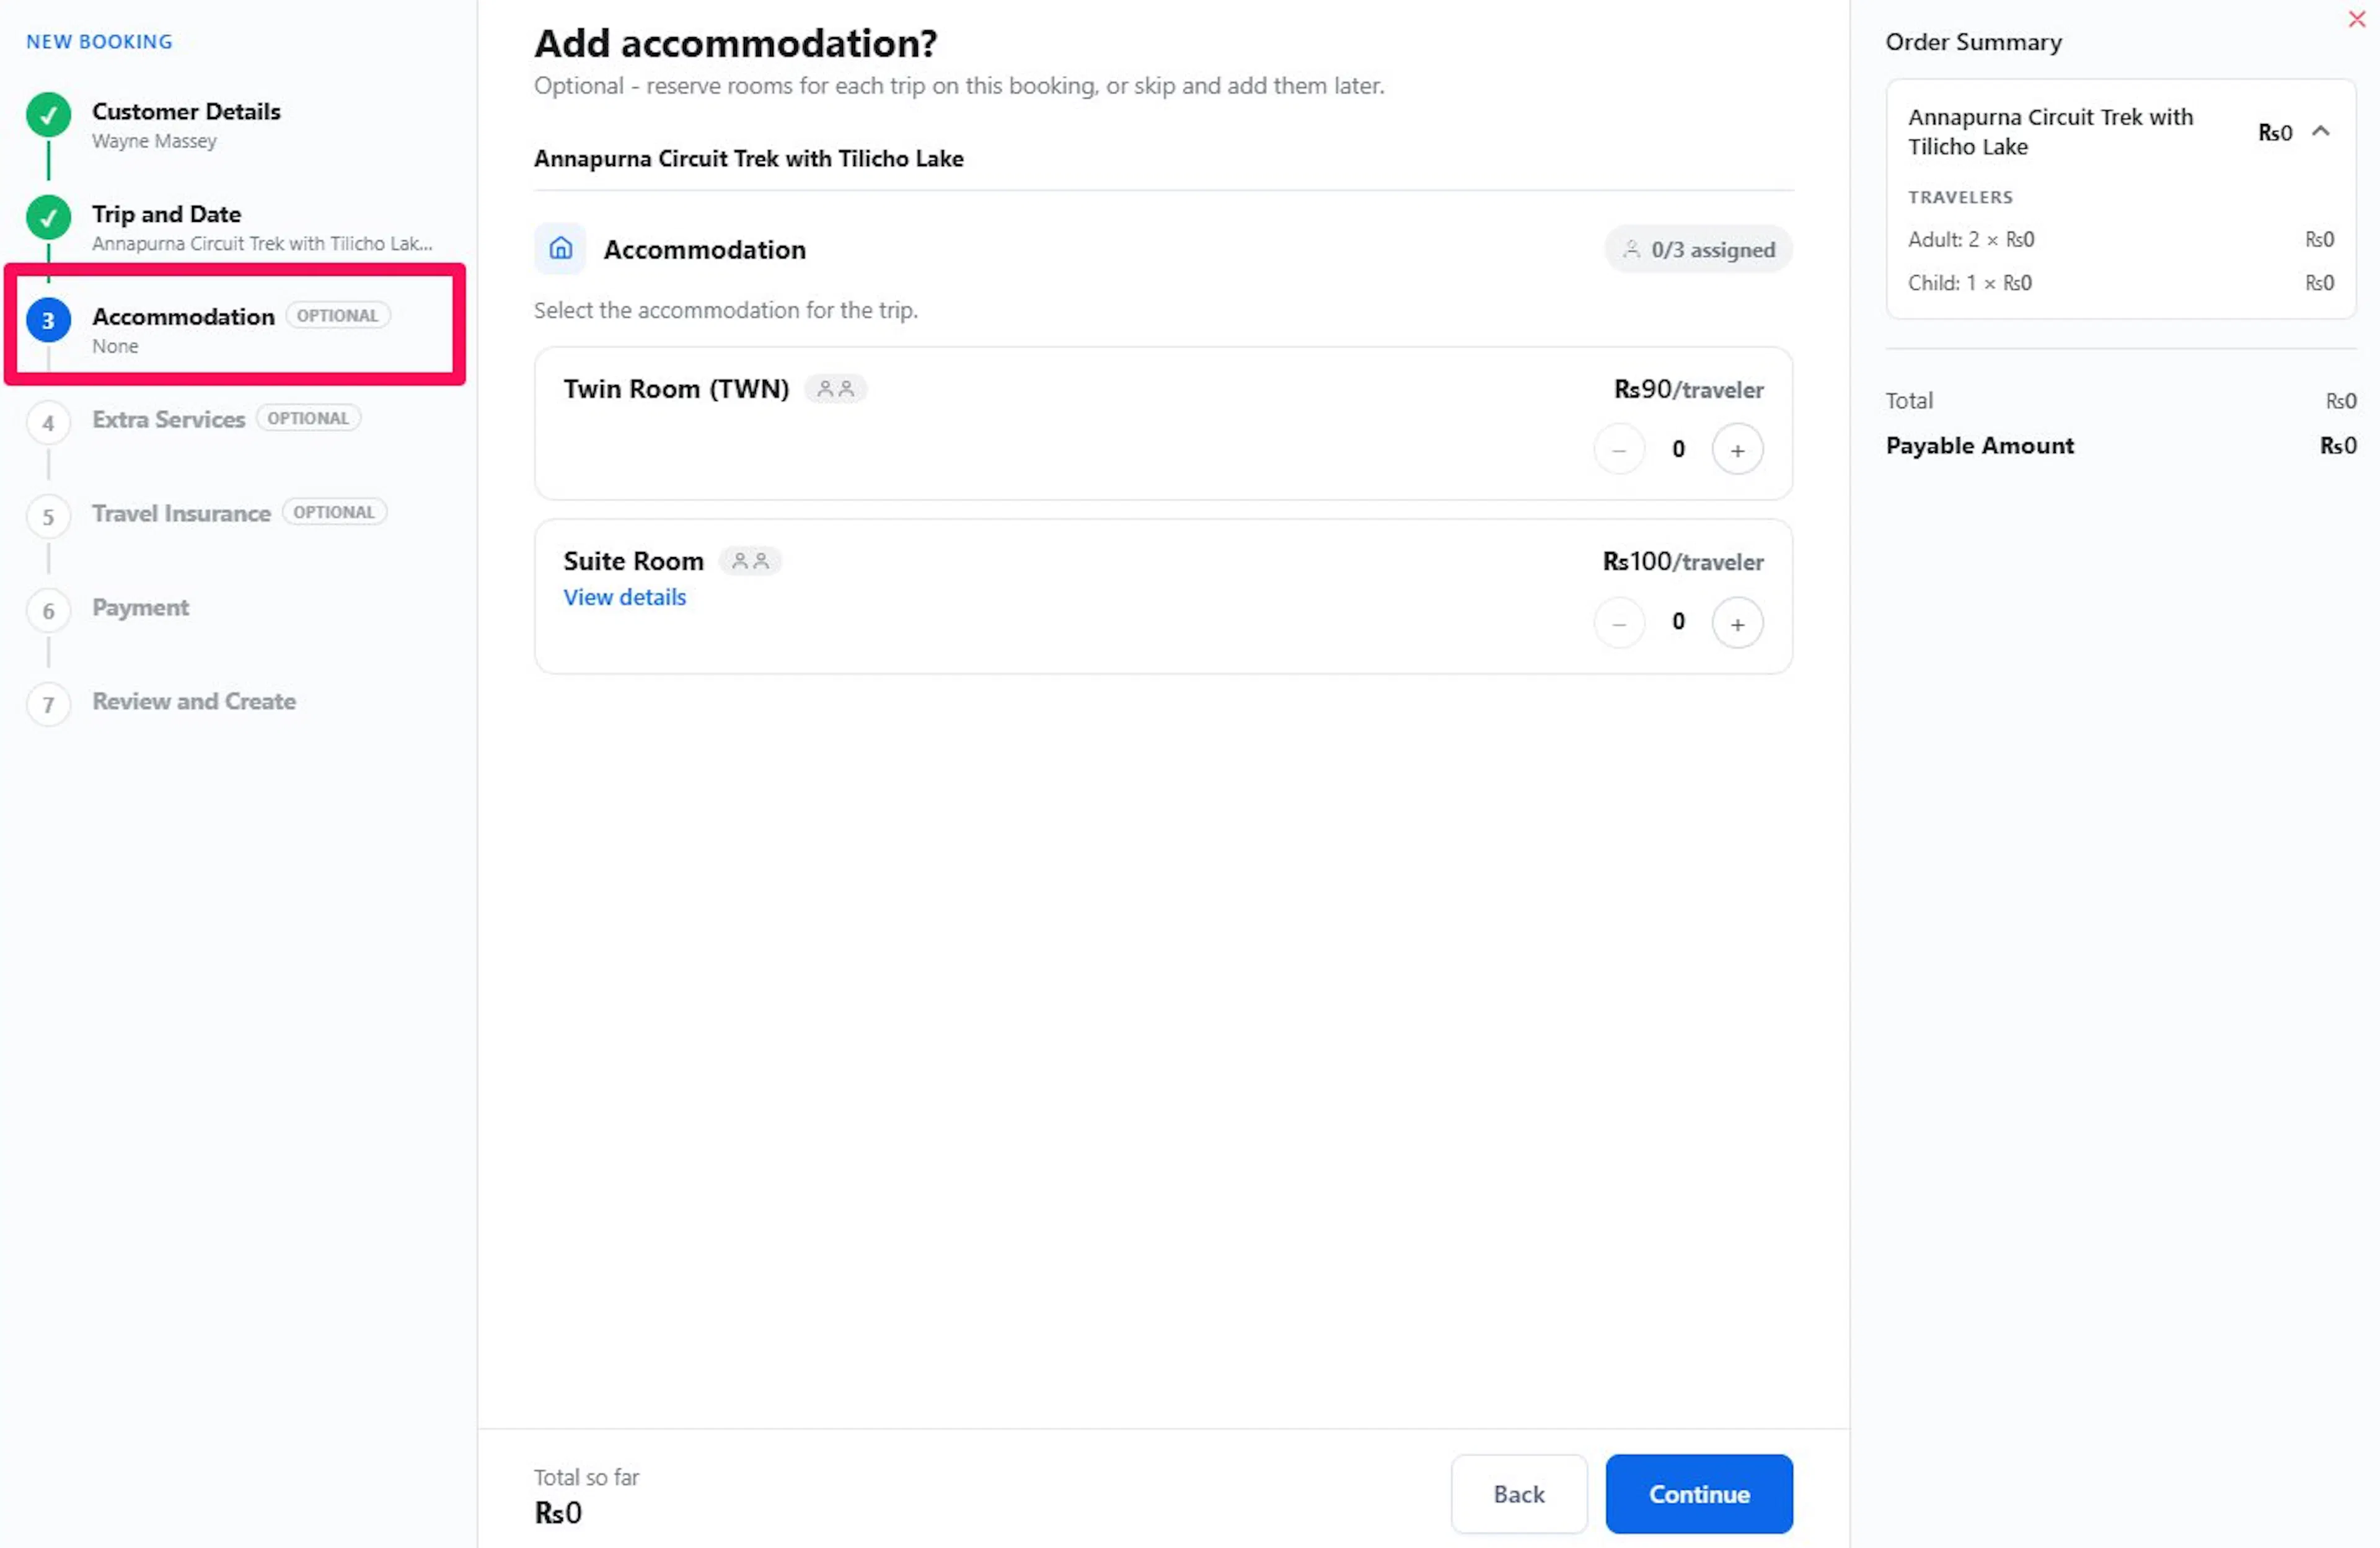
Requires the Accommodation add-on. Pick the trip, date, and travelers first, because rooms are offered per date and assigned to travelers. Each room shows whether it is Shared, how many are left, and its price. Warnings tell you when you go over availability or add more places than travelers.
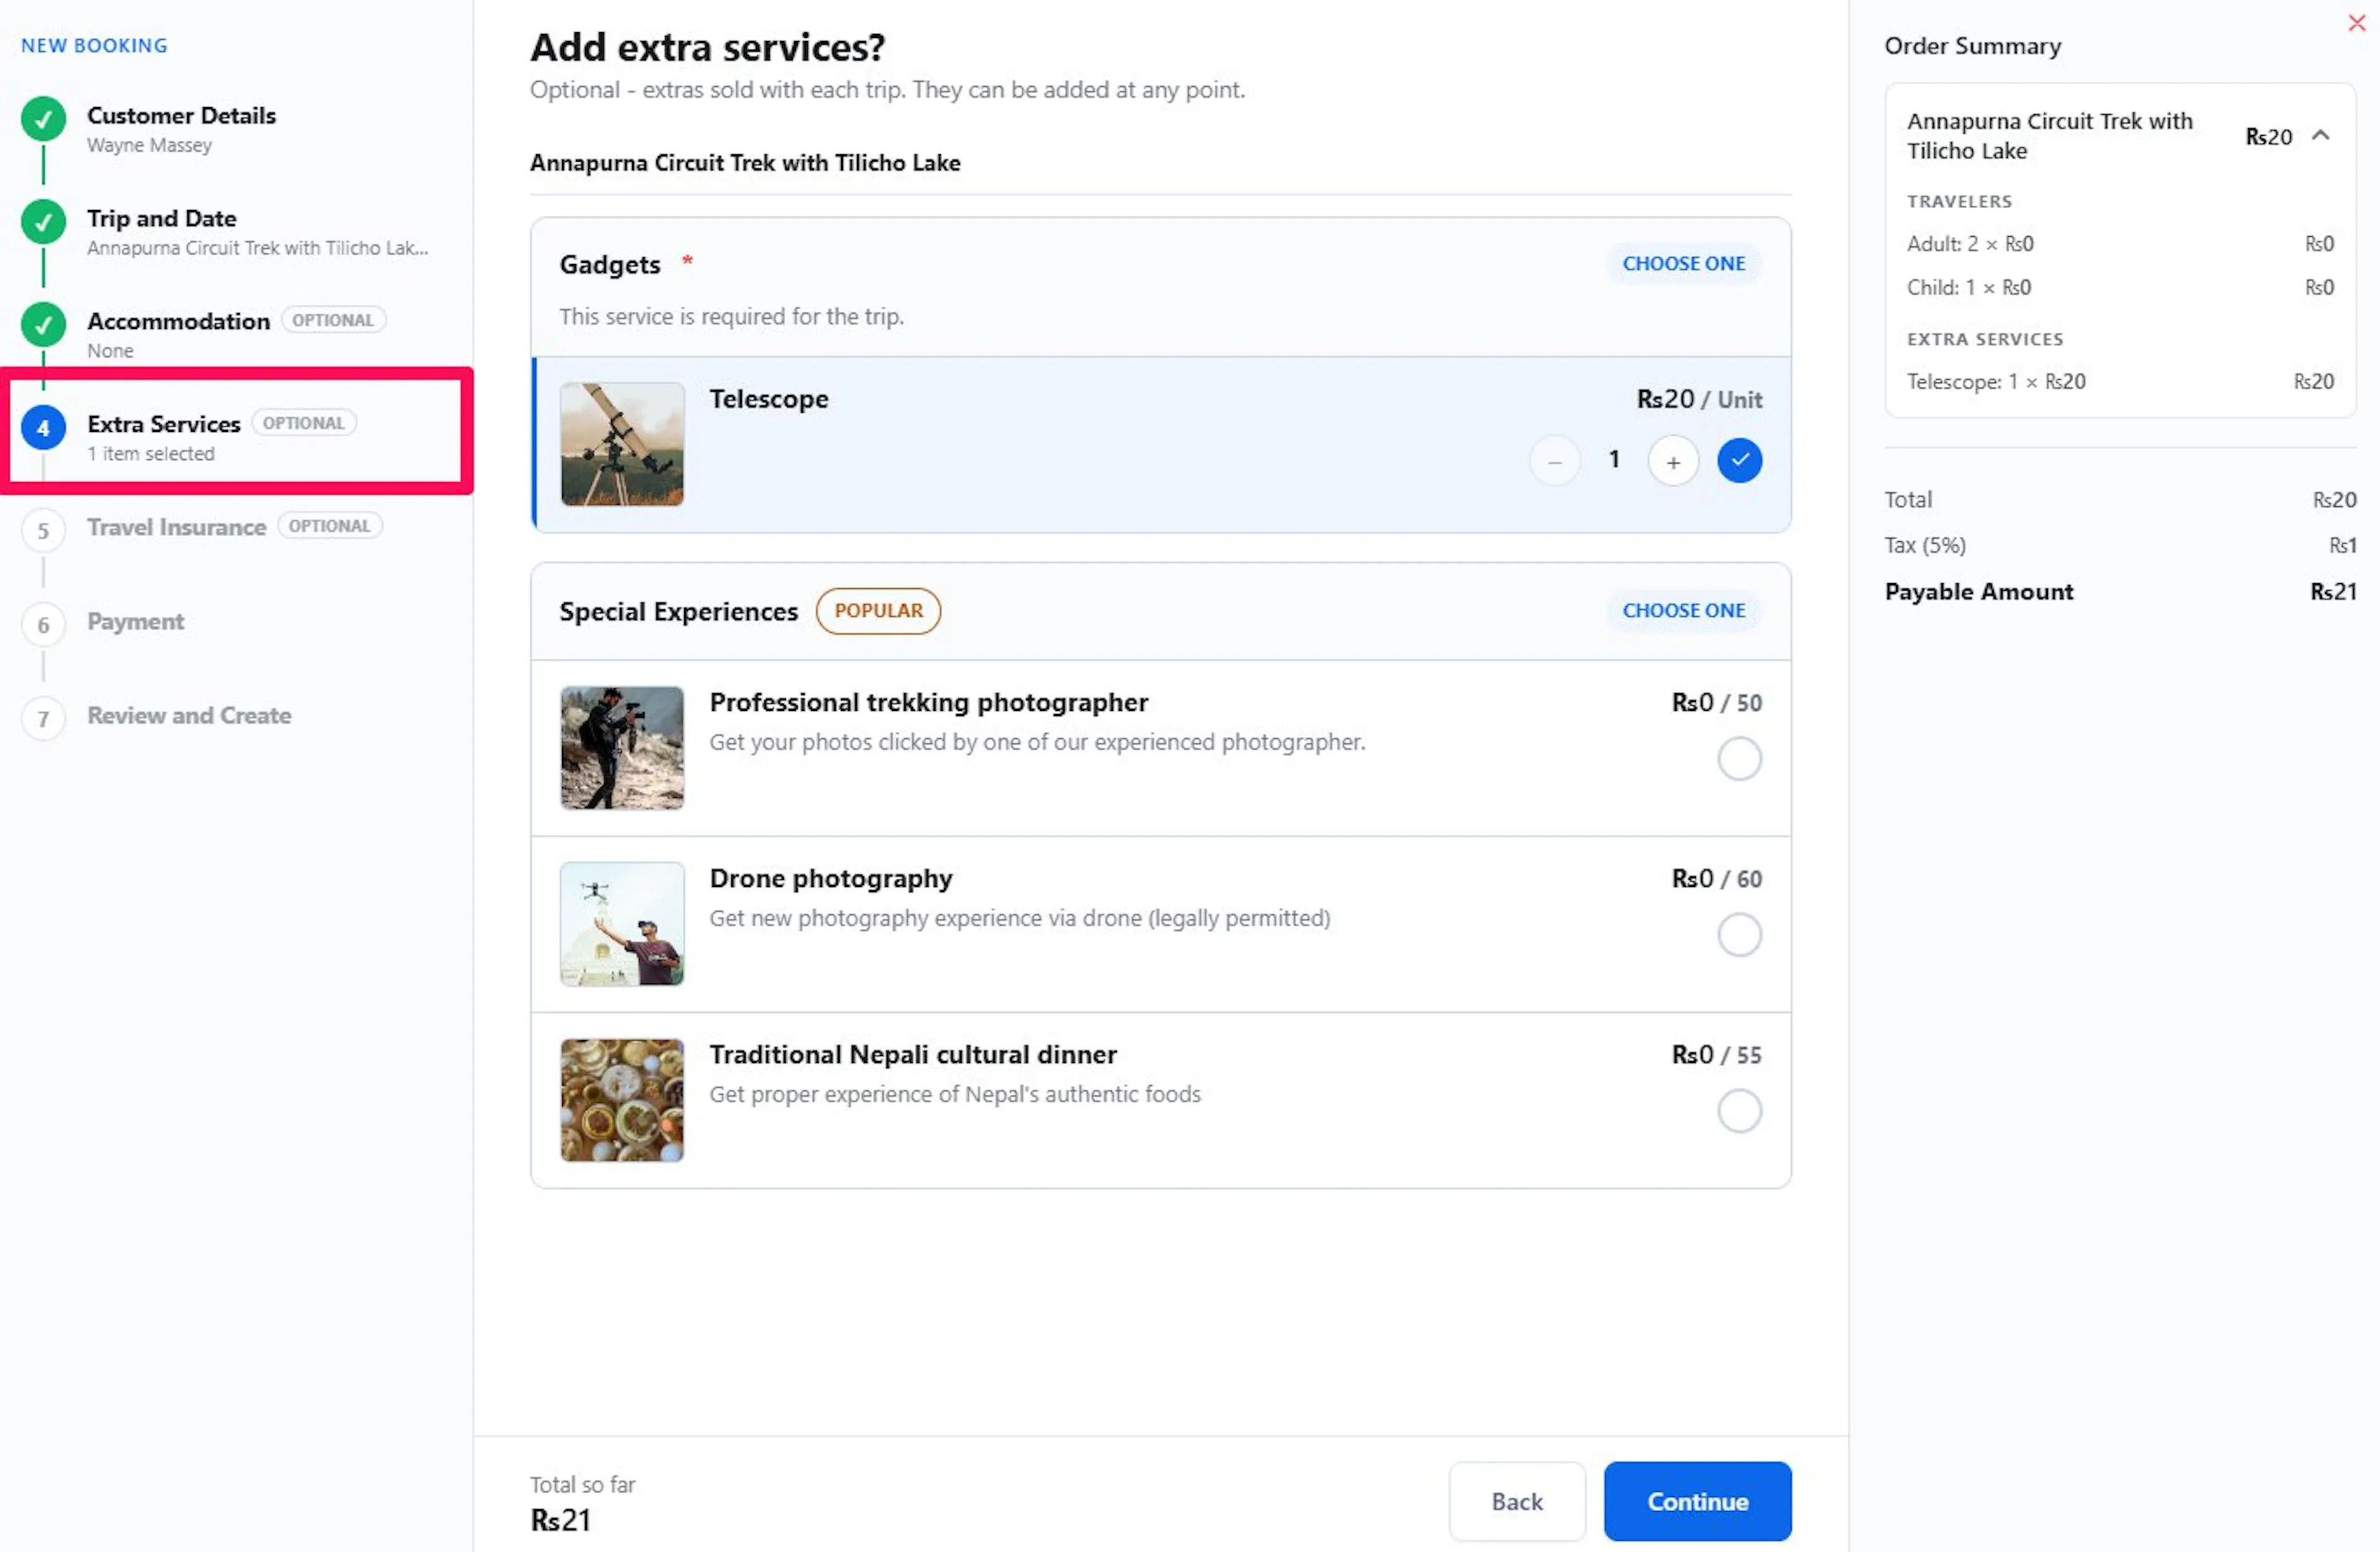
4. Extra Services (optional)
Requires the Extra Services add-on. Required services can be skipped in the admin. Services already on the trip are marked as Already on this trip.
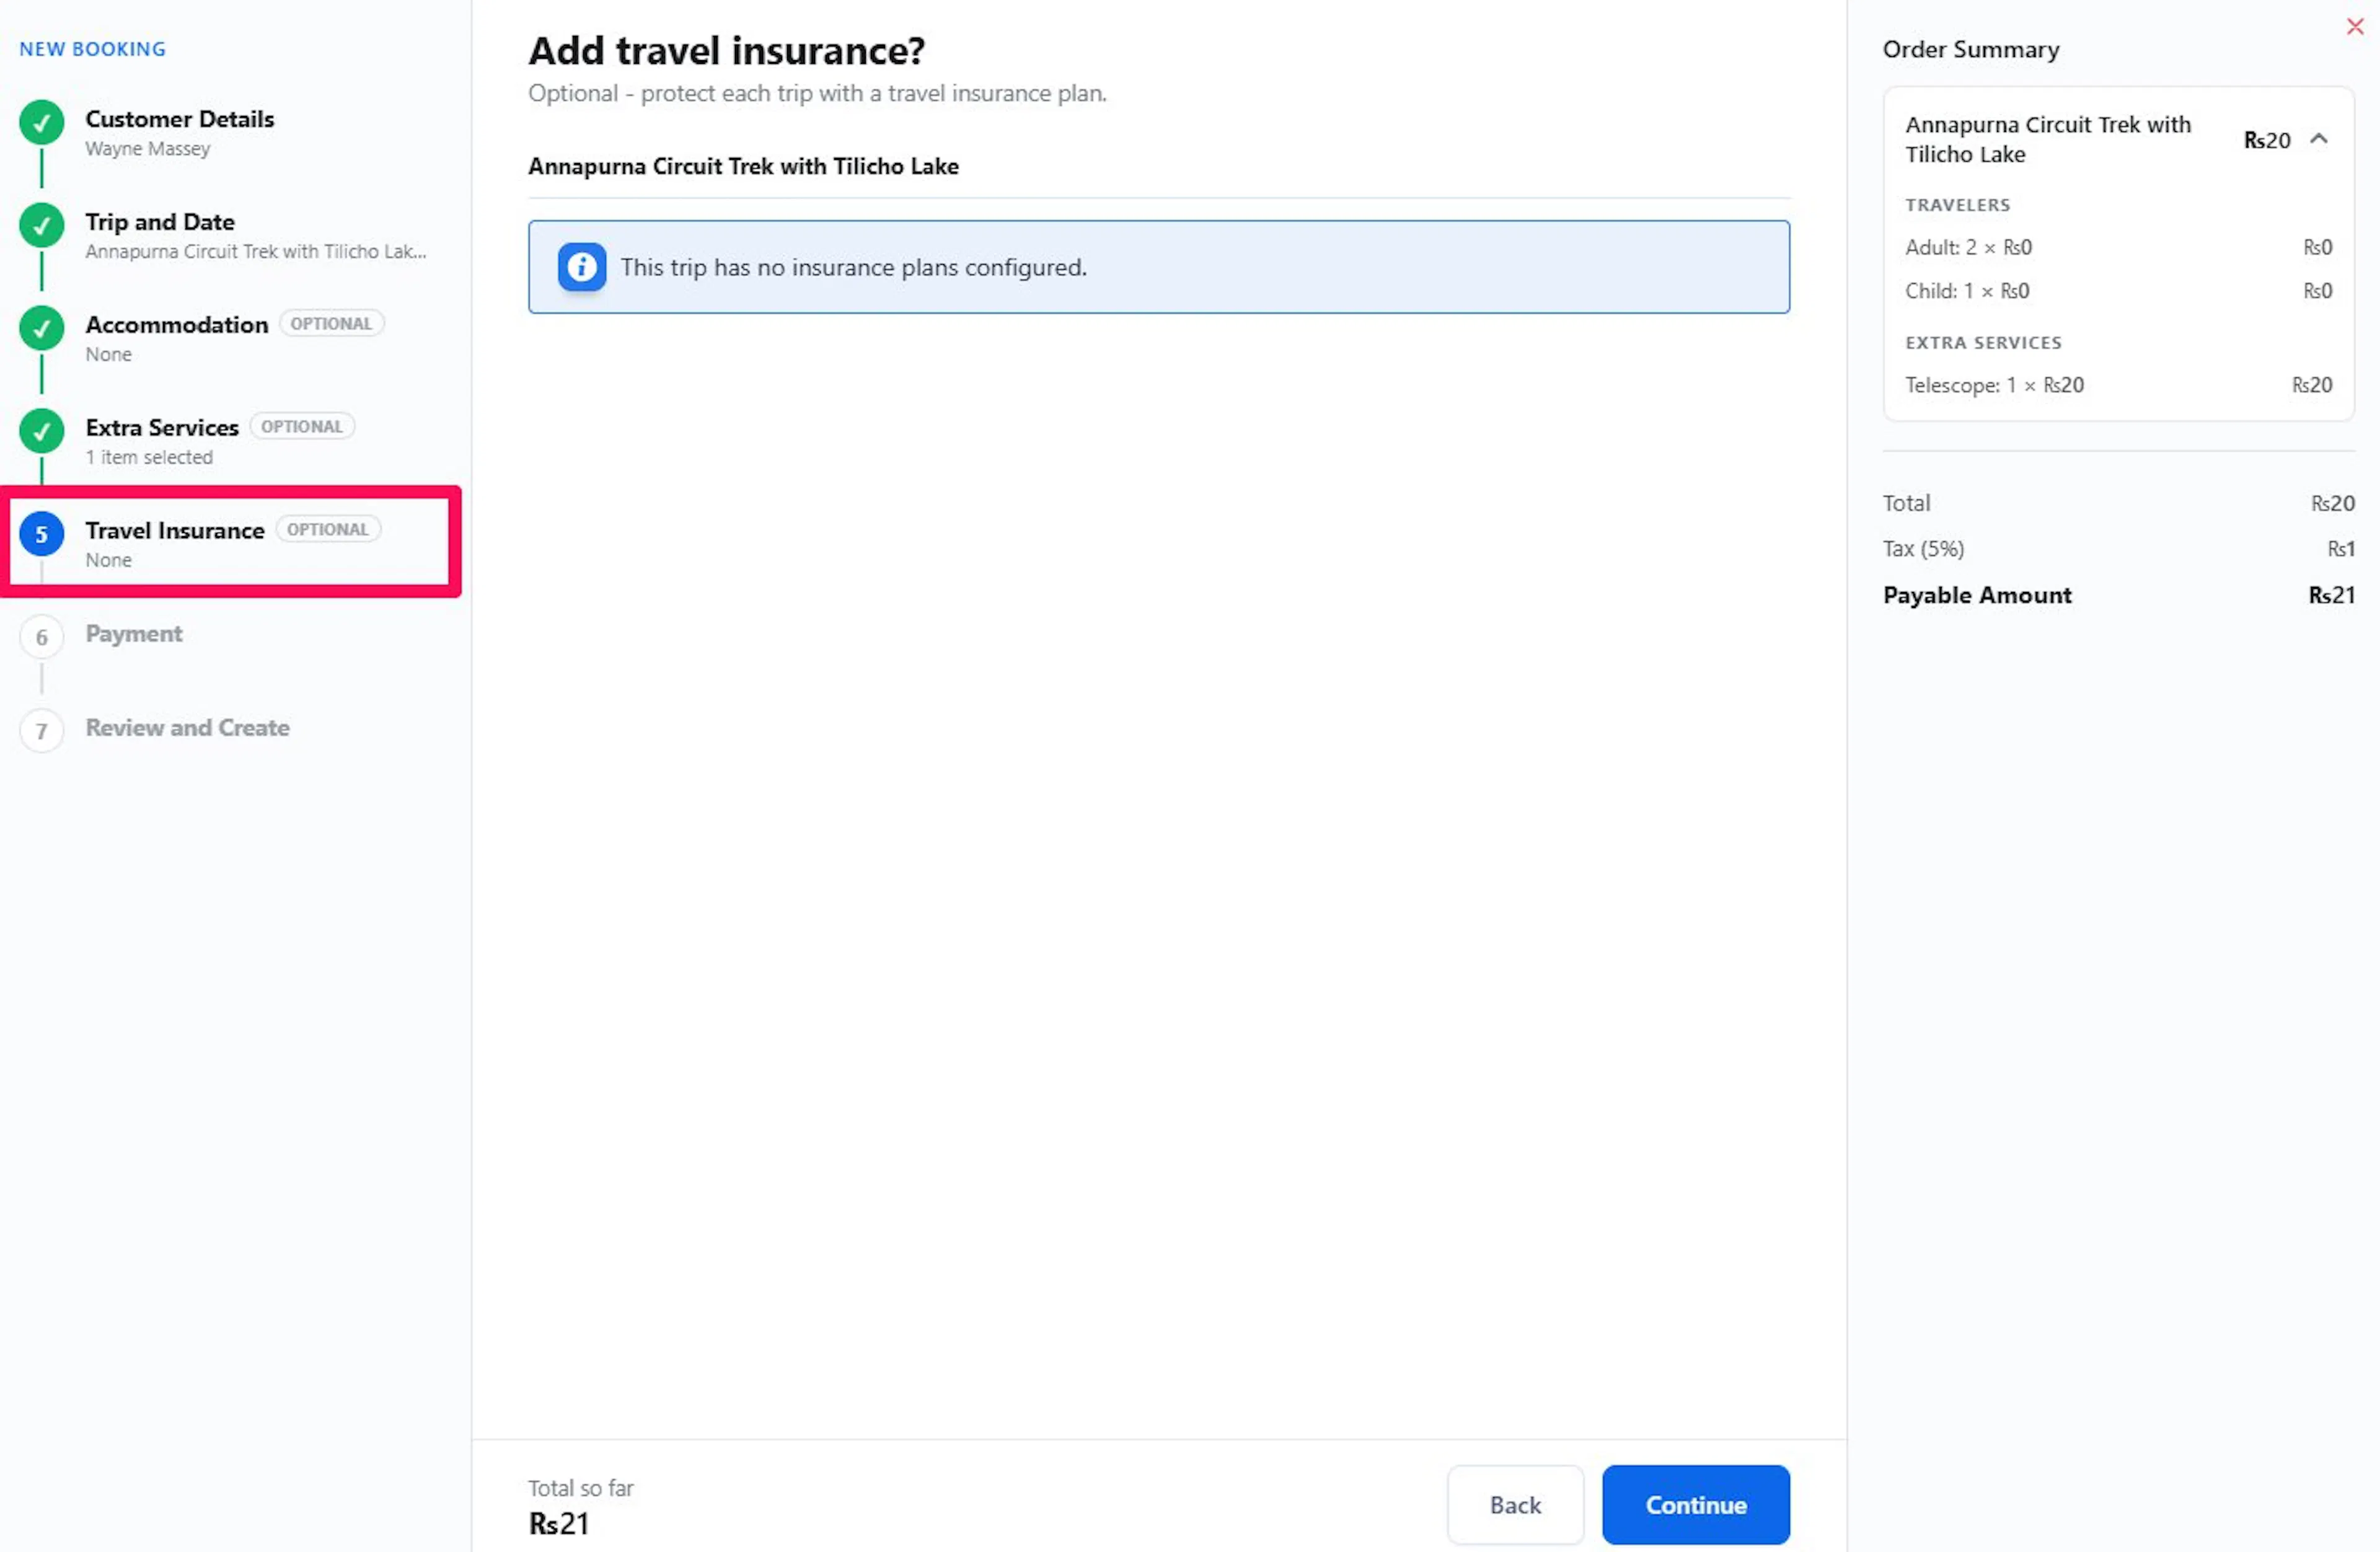
5. Travel Insurance (optional)
Requires the Travel Insurance add-on. Pick the trip first, because plans are set per trip. The wizard tells you when insurance is required.
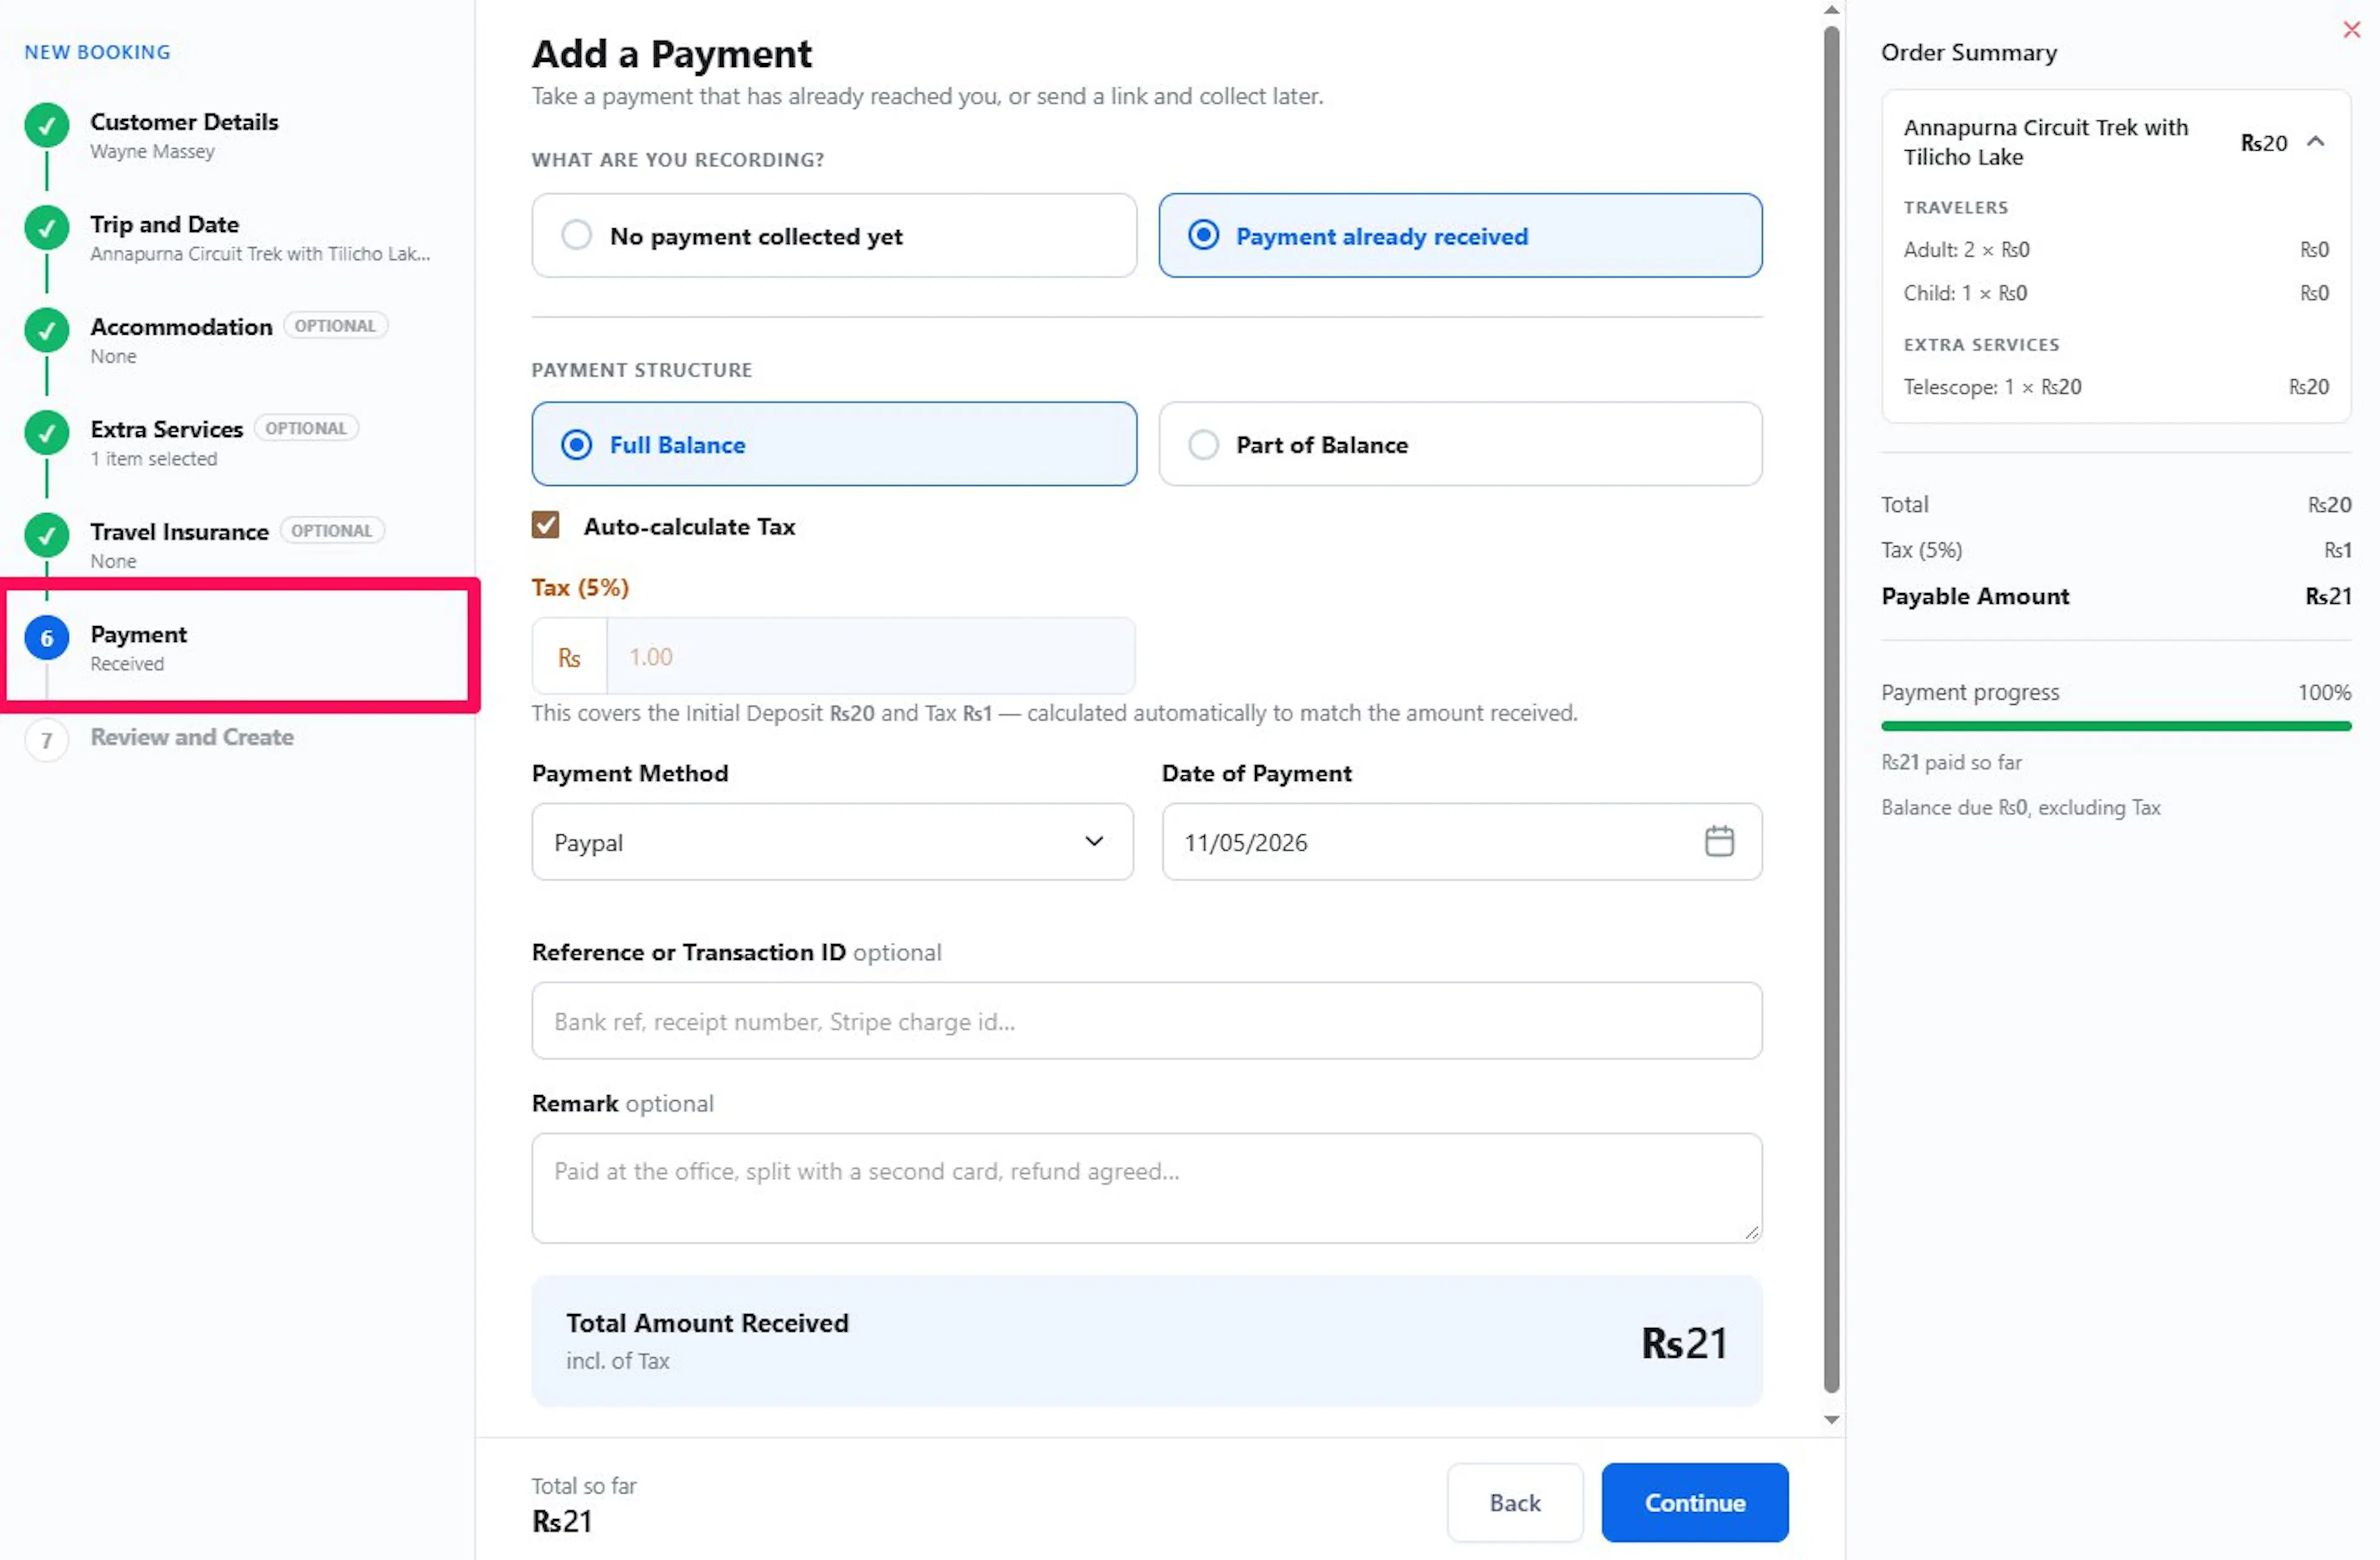
6. Payment
Under What are you recording? choose:
- No payment collected yet: a payment link is created when you save. Send it to the traveler, and the booking updates itself once they pay.
- Payment already received: record money that has reached you.
Set the Payment structure: Full Balance Due, or Part of Balance Due with a Deposit Type (% of Balance Due or Fixed amount) and Deposit Value.
For a payment already received, also enter Deposit Received (it cannot be more than the balance due), Auto-calculate (it works out tax and fees for you), Payment Status, Payment Method, Date of Payment, Reference or Transaction ID, and a private Remark.
For a payment link, check the Amount on the Payment link. It includes tax but not the booking fee.
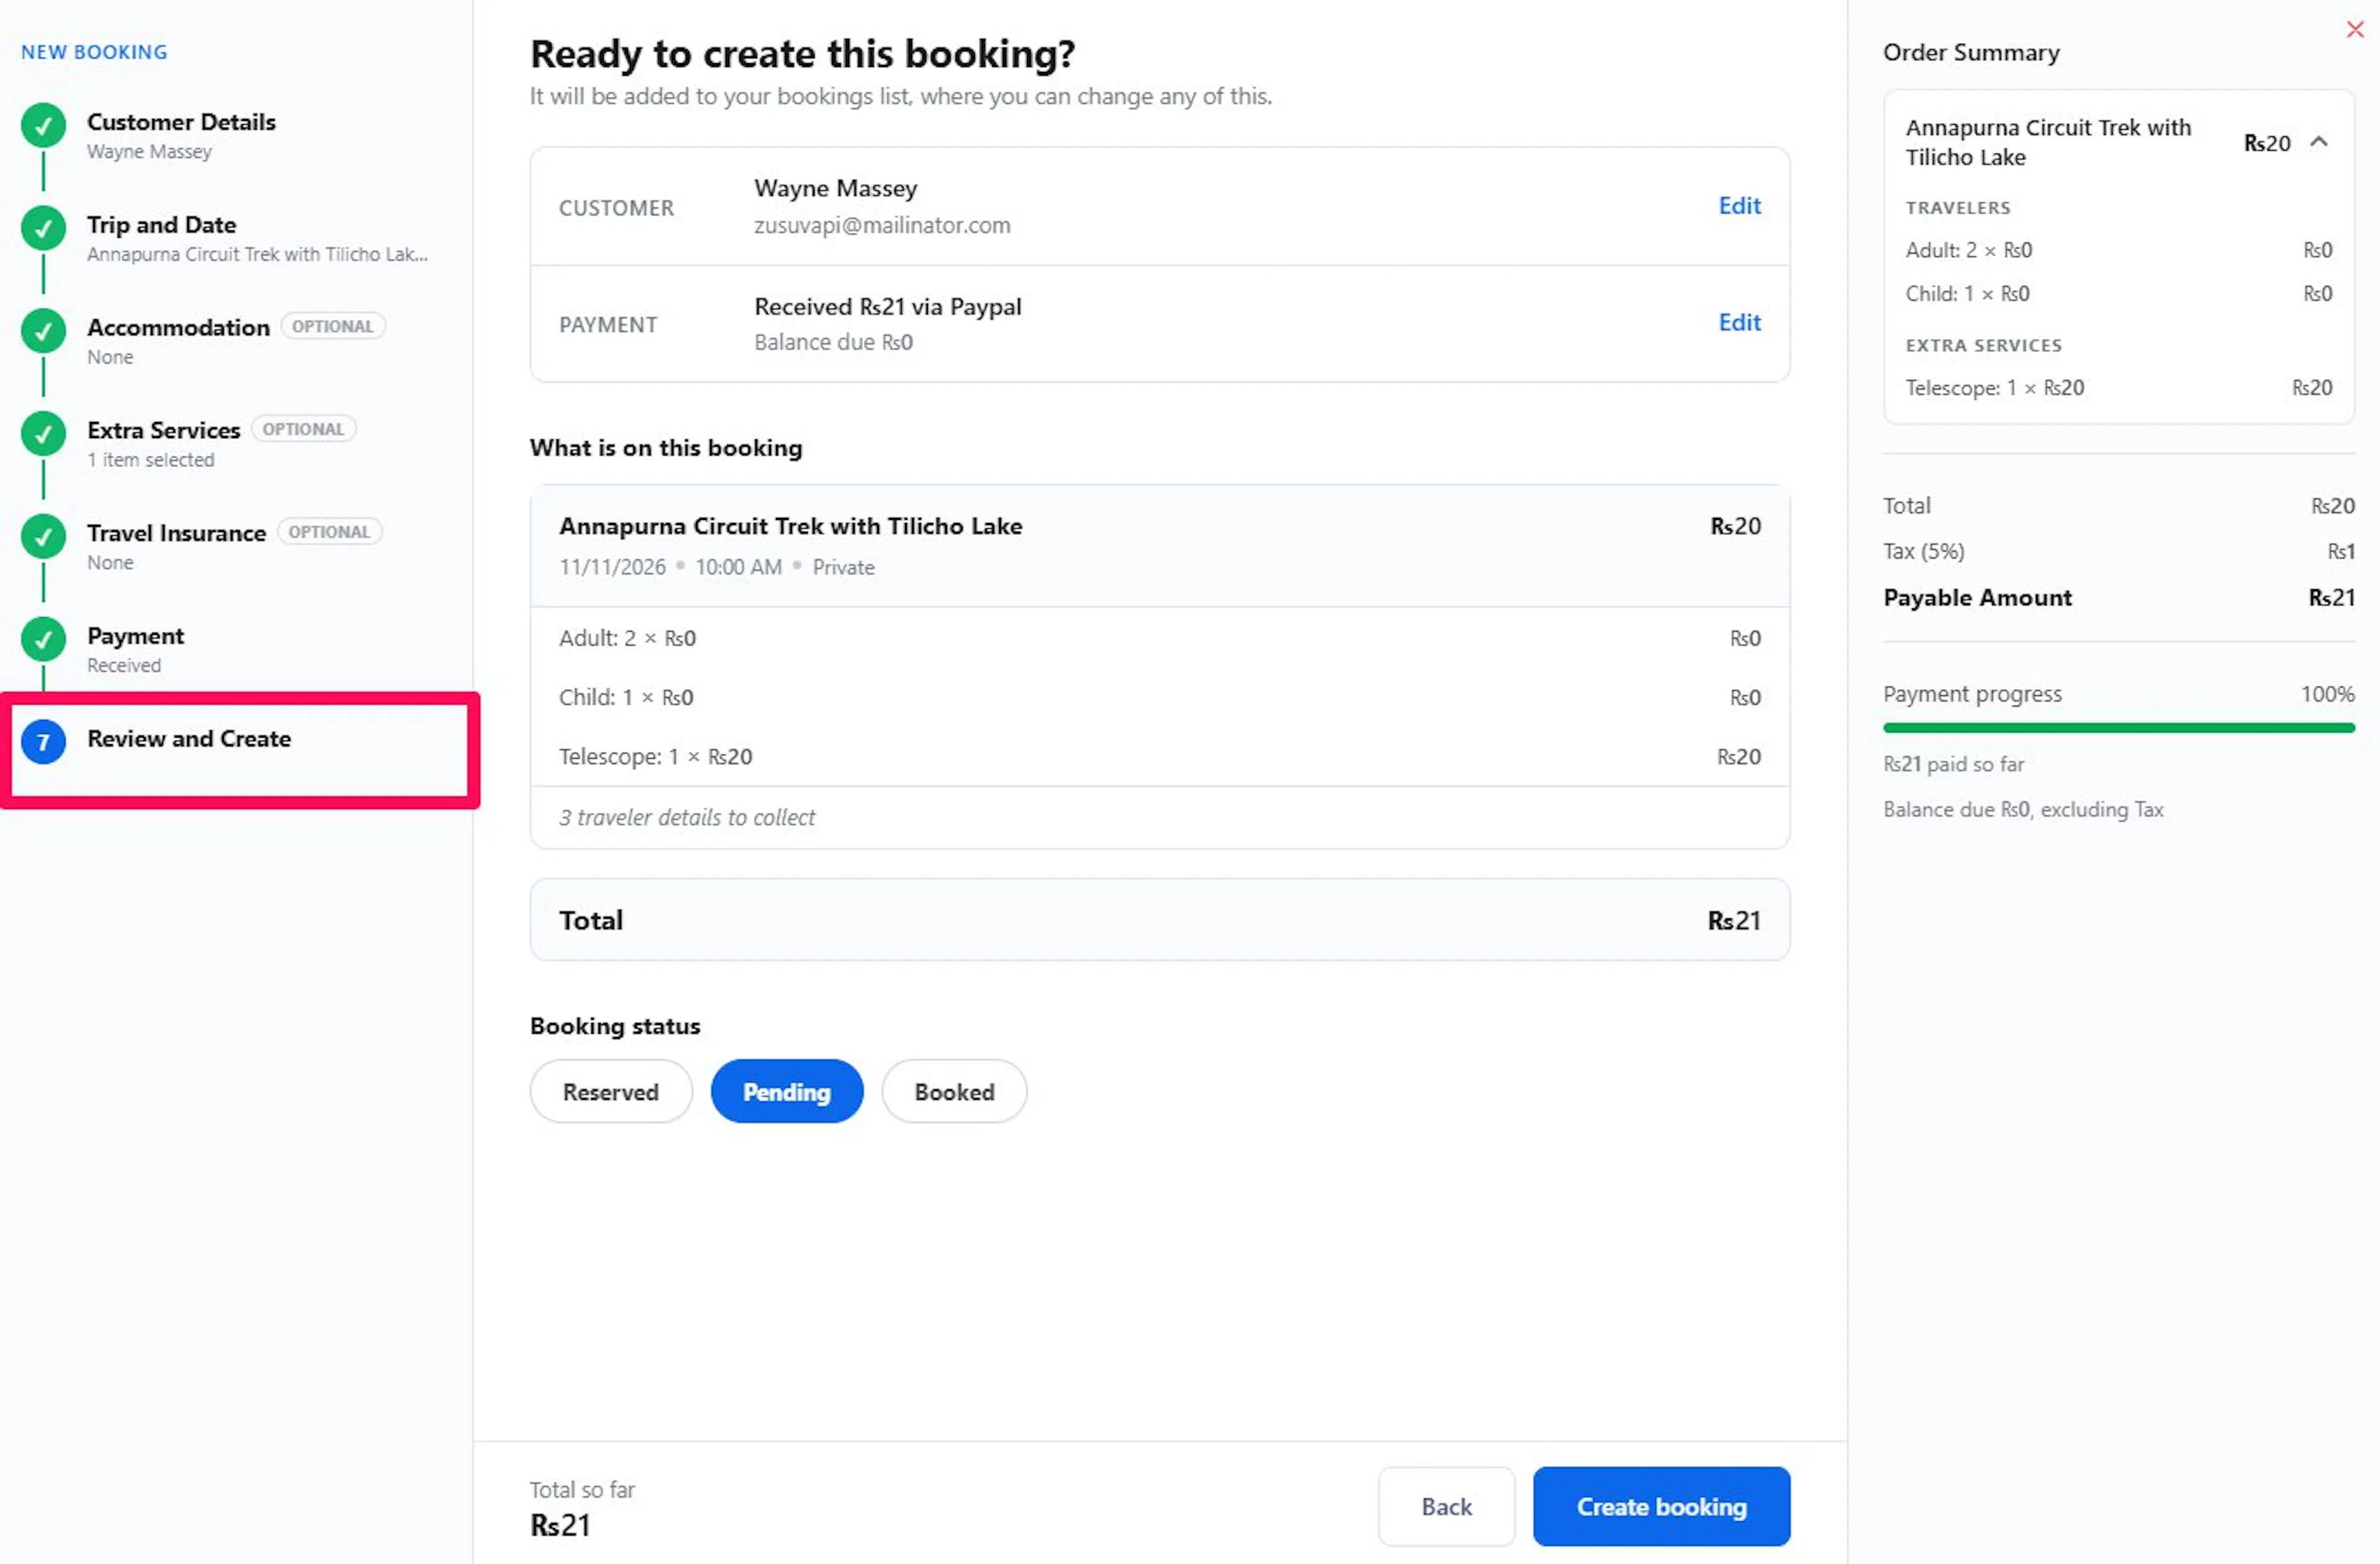
7. Review and Create
Check everything under Ready to create this booking? Each part has an Edit link back to its step. Choose the Booking status: Reserved, Pending (the default), or Booked. Click Create booking.
The booking opens on its booking page. If something goes wrong, you see: The booking could not be created. Nothing was saved.
After you create the booking
Open the booking to add traveler details, record payments, send the payment link, or edit anything else. See Manage a Booking and Booking Payments.
If you're still stuck or have a question we didn't cover, our support team is happy to help. Reach out at our support page and we'll get you sorted.