

WooCommerce Payment Gateway
Learn how to connect WooCommerce to WP Travel Engine so you can accept trip payments, set checkout pages, and match your booking currency.
Overview
The WooCommerce Payment Gateway addon lets you accept trip payments through payment methods supported by WooCommerce.
WooCommerce is a separate WordPress plugin that handles online payments and checkout. This addon connects WooCommerce to WP Travel Engine so your travelers can pay for trips through your WooCommerce payment setup.
This is useful if you want to offer payment methods that already work with WooCommerce. For example, you might use it for a one-day city tour, a multi-day trek, or a seasonal package with optional add-ons like gear rental.
Once this is set up, your customers will move from trip booking to WooCommerce checkout. We will start with what you need before you begin.
What you'll need before you start
Before you begin, make sure the required plugins are installed and up to date.
You need these versions before the addon will work properly:
- WP Travel Engine version 5.4.0 or later
- WooCommerce version 6.4 or later
- WP Travel Engine - WooCommerce Payment Gateway version 1.1.1 or later
You can follow the video or the steps below to configure the WooCommerce Payment Gateway.\
Install the WooCommerce Payment Gateway add-on
You need the addon installed before you can turn on WooCommerce payments for your trips.
Before you use the WooCommerce Payment Gateway in WP Travel Engine, install the WooCommerce plugin. WooCommerce handles the checkout and payment side of the booking.
Get the add-on here: WooCommerce Payment Gateway add-on
If you need help installing and activating it, follow how to activate the Pro addon license key.
Once both plugins are in place, you are ready to turn the gateway on inside WP Travel Engine.
Turn on the WooCommerce gateway
This tells WP Travel Engine to send your trip bookings to WooCommerce for payment.
Open the WooCommerce payment settings
In your WordPress dashboard, look at the left sidebar.
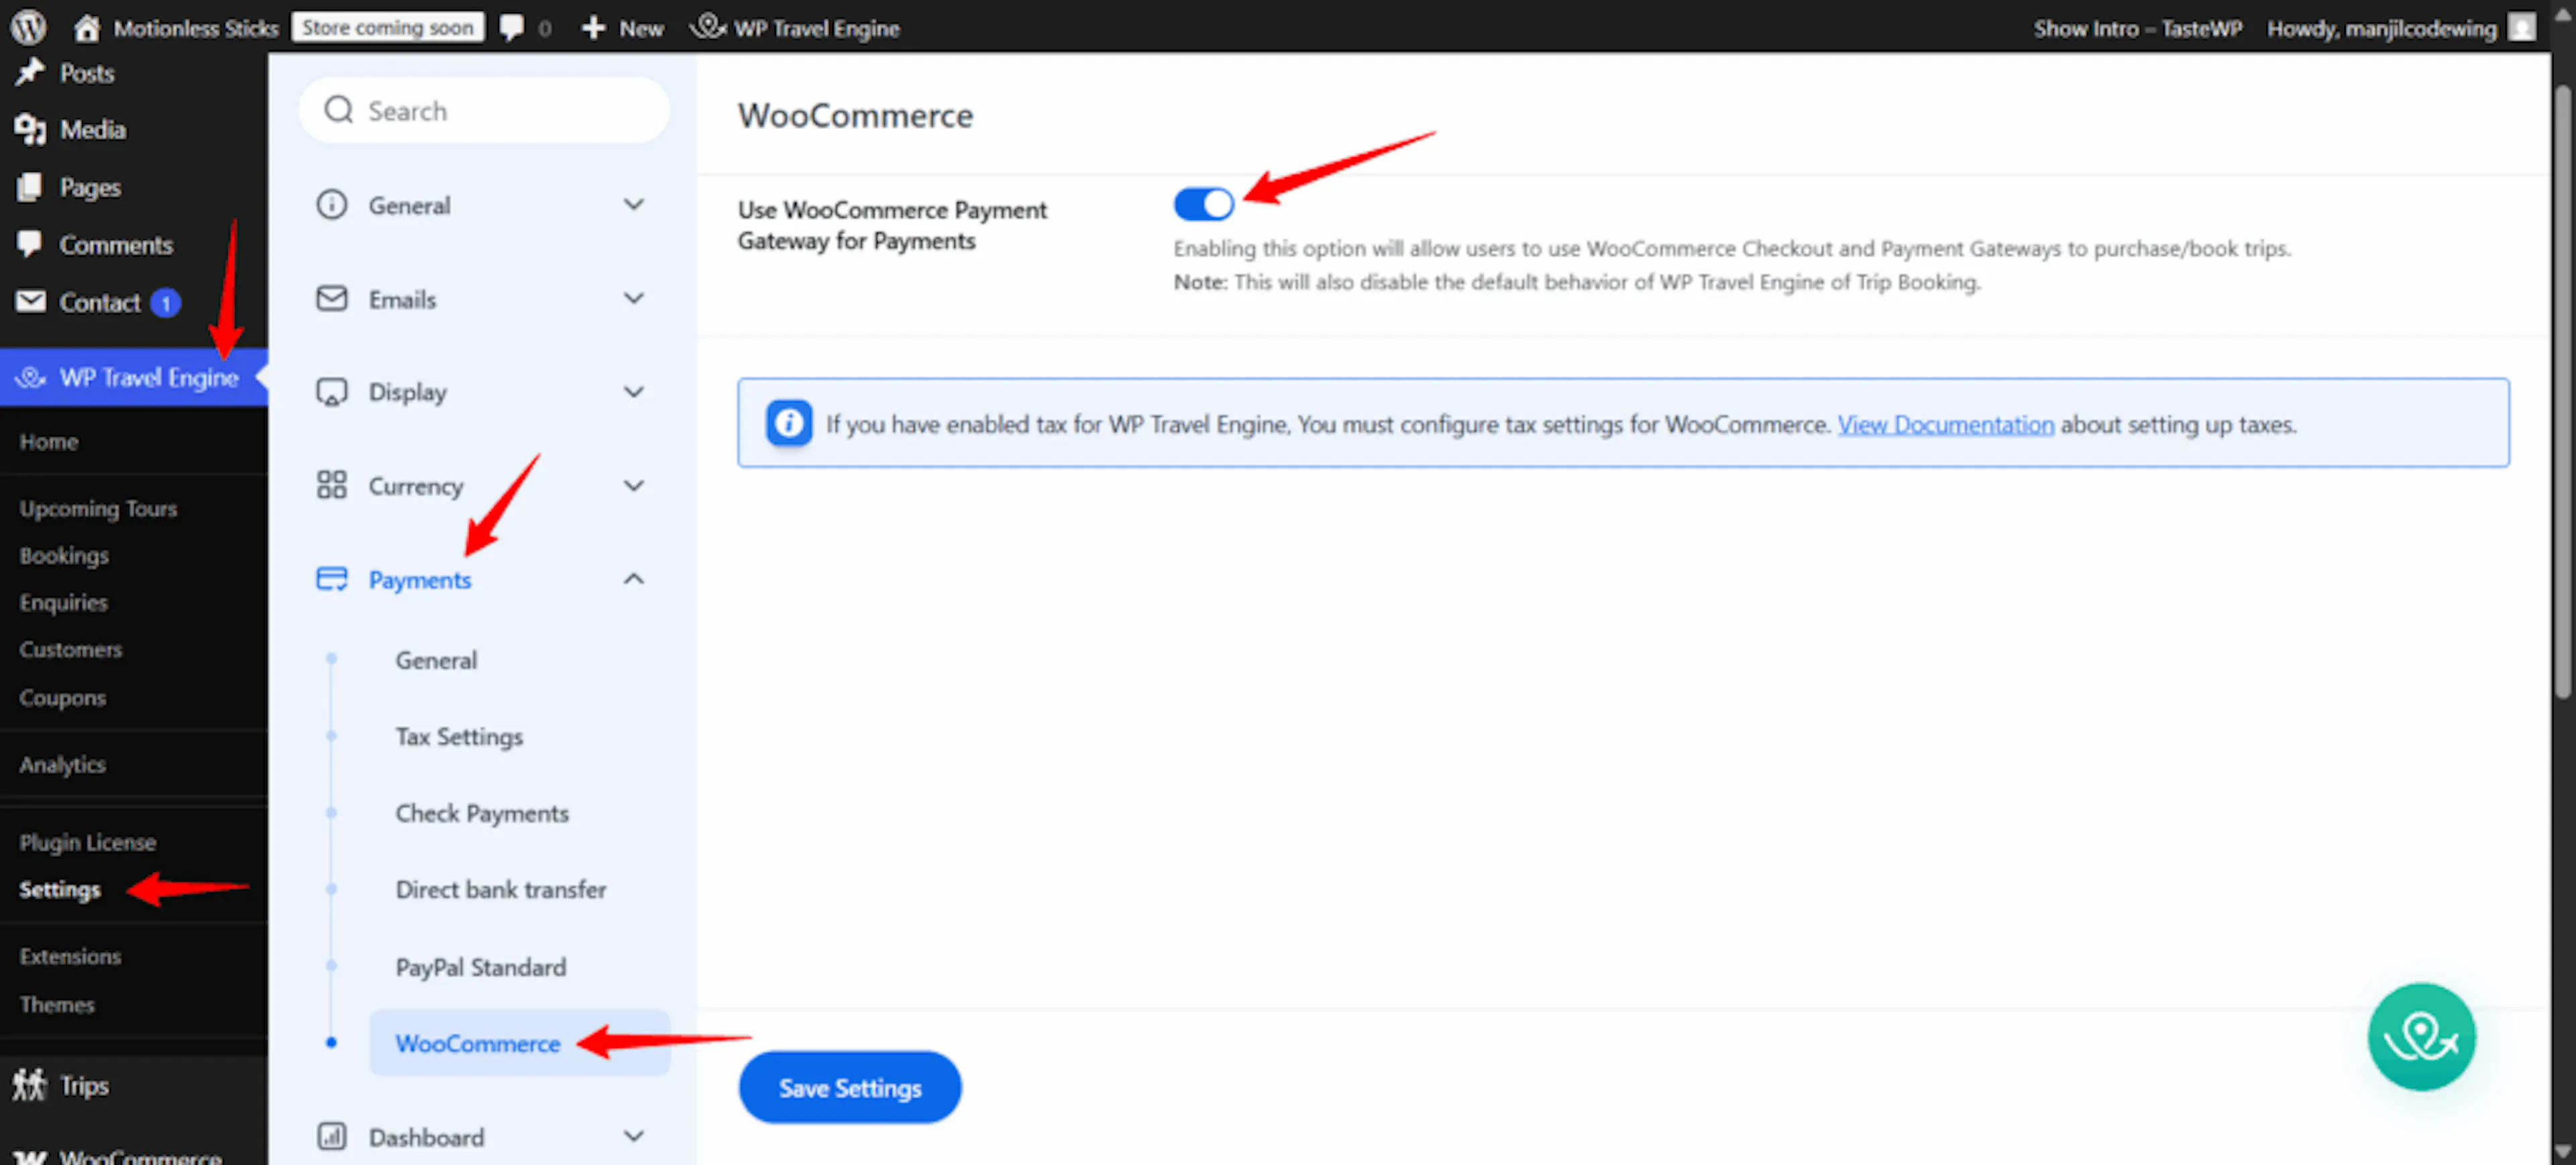
Go to WP Travel Engine > Settings > Payments > WooCommerce.
Enable the gateway
This switch allows customers to pay for trips through your WooCommerce setup.
Turn on the WooCommerce Payment Gateway option.
Save your changes
Saving makes the payment option live in your trip booking flow.
Click Save and Continue.
After this, WP Travel Engine can use WooCommerce during checkout. Next, make sure the correct checkout page is selected.
Set the WooCommerce checkout page
When you enable this gateway, WP Travel Engine automatically assigns a checkout page for each trip.
If no page is assigned, or if you want to use a different one, you can choose it yourself. This matters because it controls where your customer lands when they are ready to pay.
For example, if you sell both private day tours and longer group treks, you may want all bookings to go through one checkout page that matches the rest of your site.
Open Page Settings
This is where you choose the page used for trip checkout.
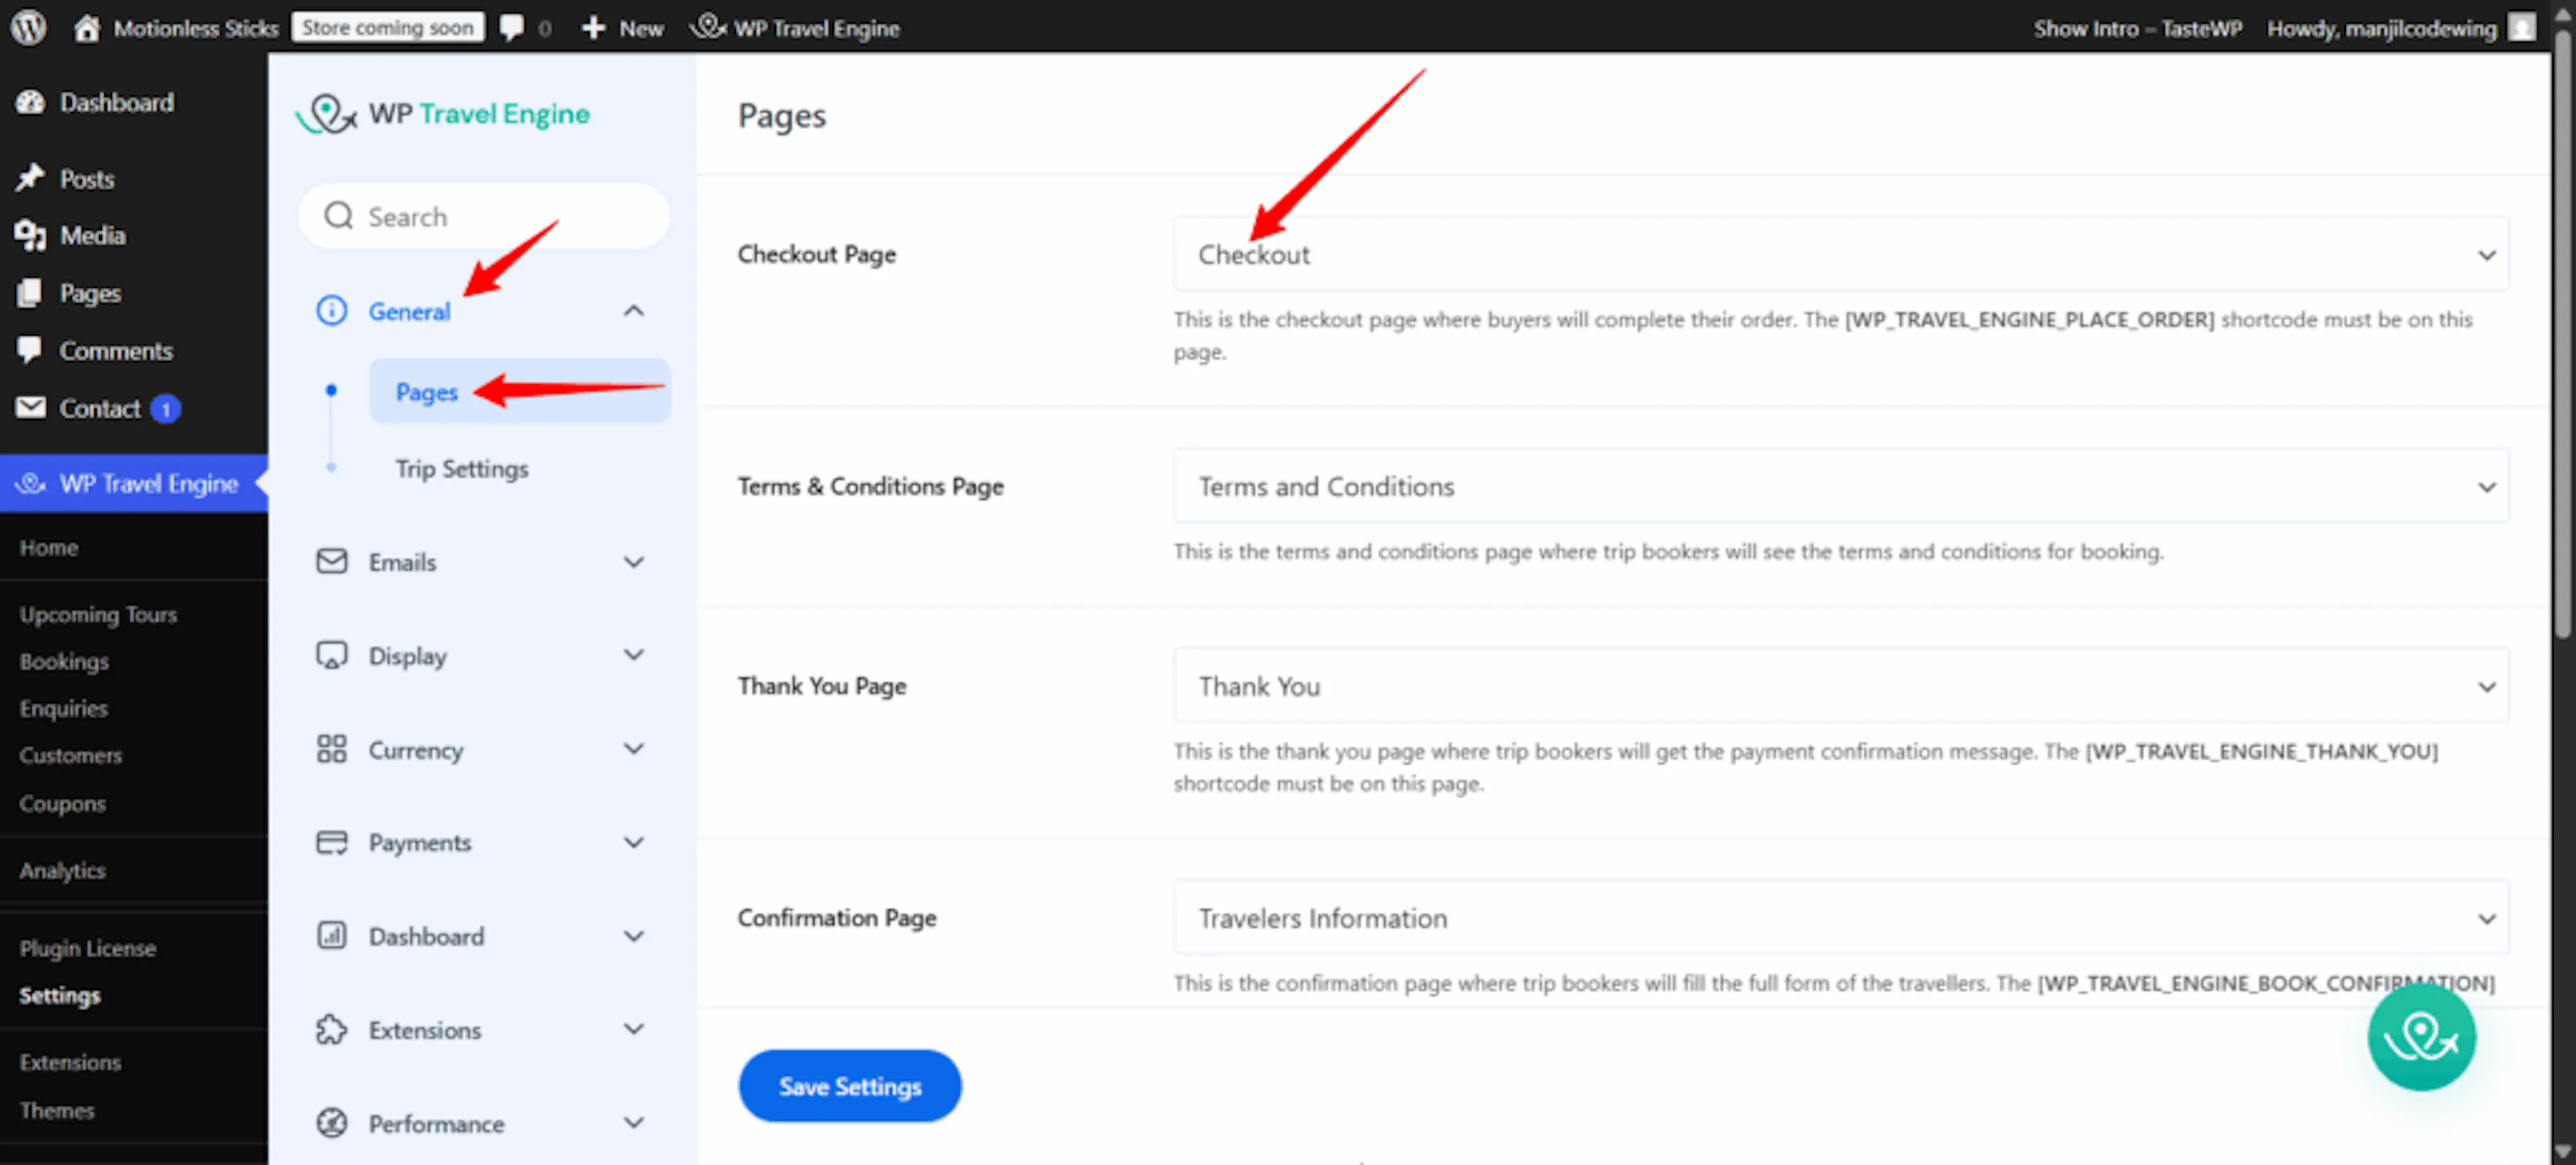
In your WordPress dashboard, go to WP Travel Engine > Settings > General > Page Settings.
Choose your checkout page
This sets the page customers will use to complete payment.
Choose the page you want from the Checkout Page dropdown menu.
Configure related pages
These pages help complete the booking experience after checkout.
Set any other related pages you need, such as Thank You Page and Terms and Conditions.
Save your changes
Saving updates the booking flow for future customers.
Click Save and Continue.
Once the checkout page is set, your customers will have a clear path from trip selection to payment. The last setup step is to match your currency.
Match the currency in WooCommerce
WP Travel Engine and WooCommerce need to use the same currency.
If the currencies do not match, your prices can appear differently during checkout. That can confuse customers and create extra work for you.
For example, if your Everest Base Camp trek is priced in USD in WP Travel Engine, WooCommerce should also be set to USD. The same applies if you use NPR, EUR, or any other currency for your tours.
Open WooCommerce general settings
This is where WooCommerce stores your shop-wide payment settings.
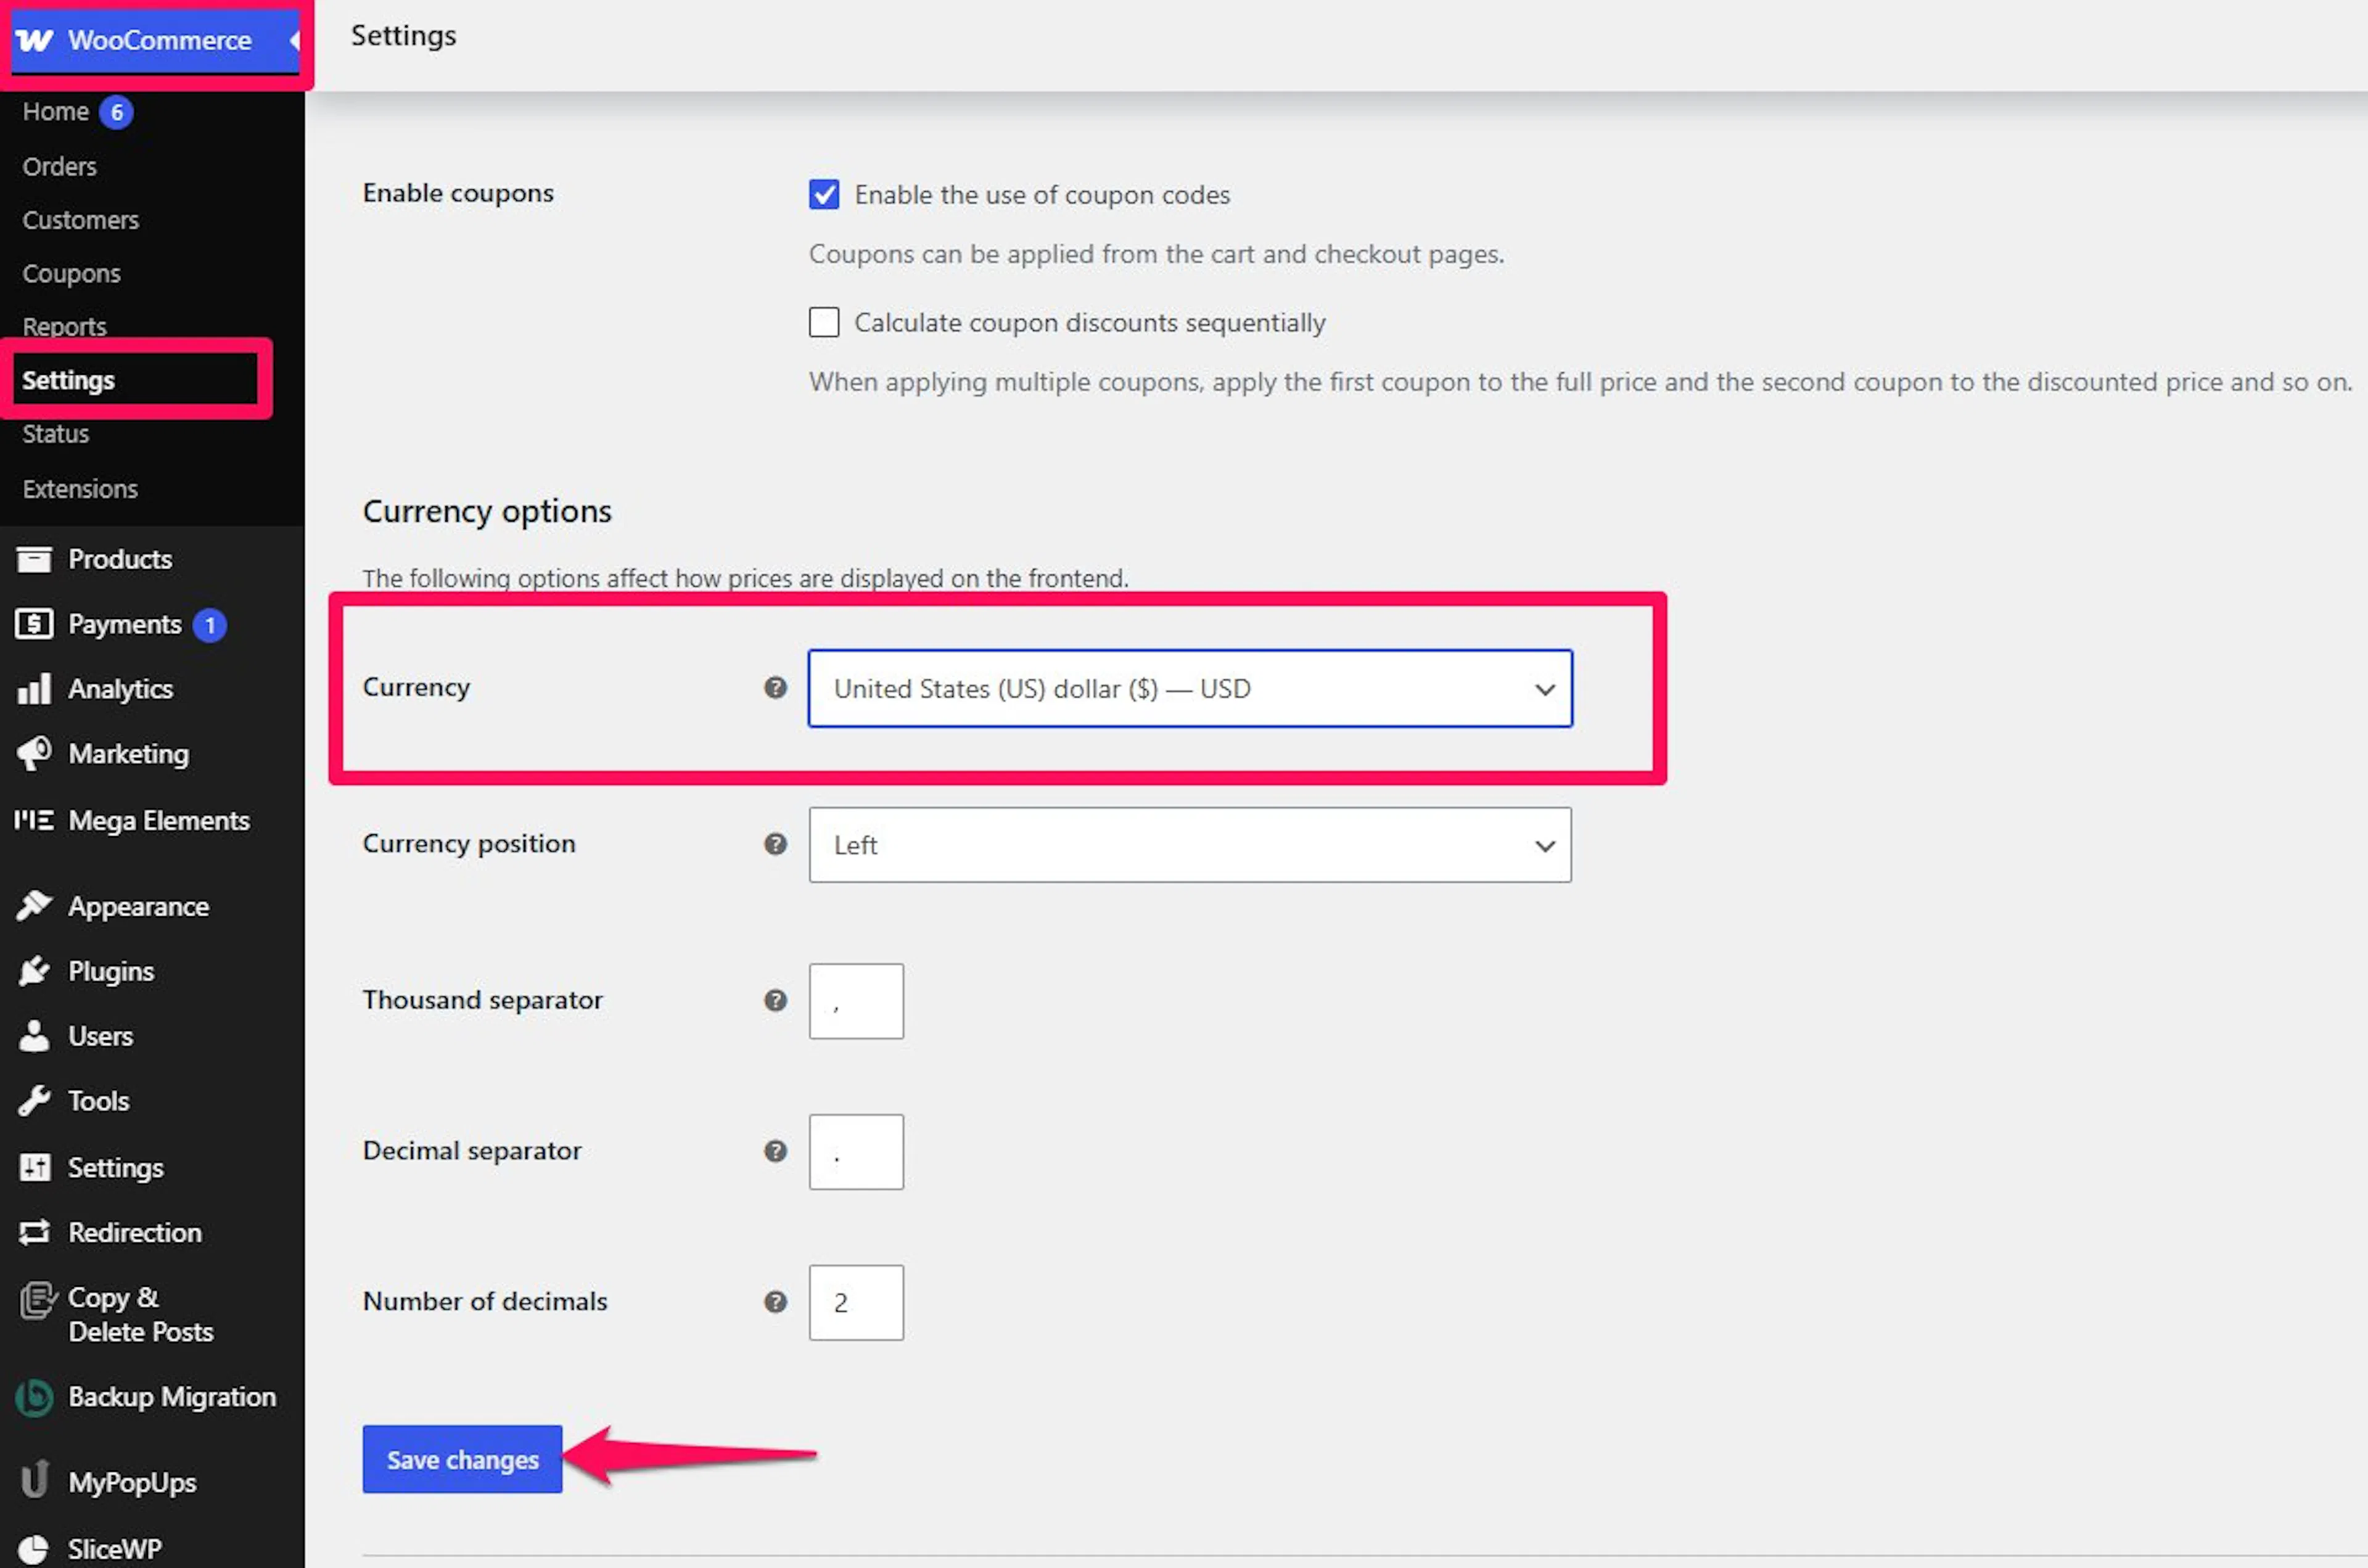
In your WordPress dashboard, go to Dashboard > WooCommerce > Settings > General.
Find the currency options
You need to update the currency used during checkout.
Scroll down to the Currency options section.
Match the WP Travel Engine currency
This keeps your trip price and checkout price aligned.
Select the same currency you already use in WP Travel Engine.
Save your changes
Saving applies the currency to your WooCommerce checkout.
Click Save Changes.
Once the currency matches, your setup is ready for live bookings. Now it helps to know what the customer experience looks like.
What the trip checkout looks like for your customer
After you finish the setup, a customer who books a trip and moves to payment is sent to the WooCommerce Checkout page.
On that page, the customer fills in the required booking details and chooses one of the available payment methods from WooCommerce. After the payment is complete, the customer is taken to the WooCommerce Order Received page.
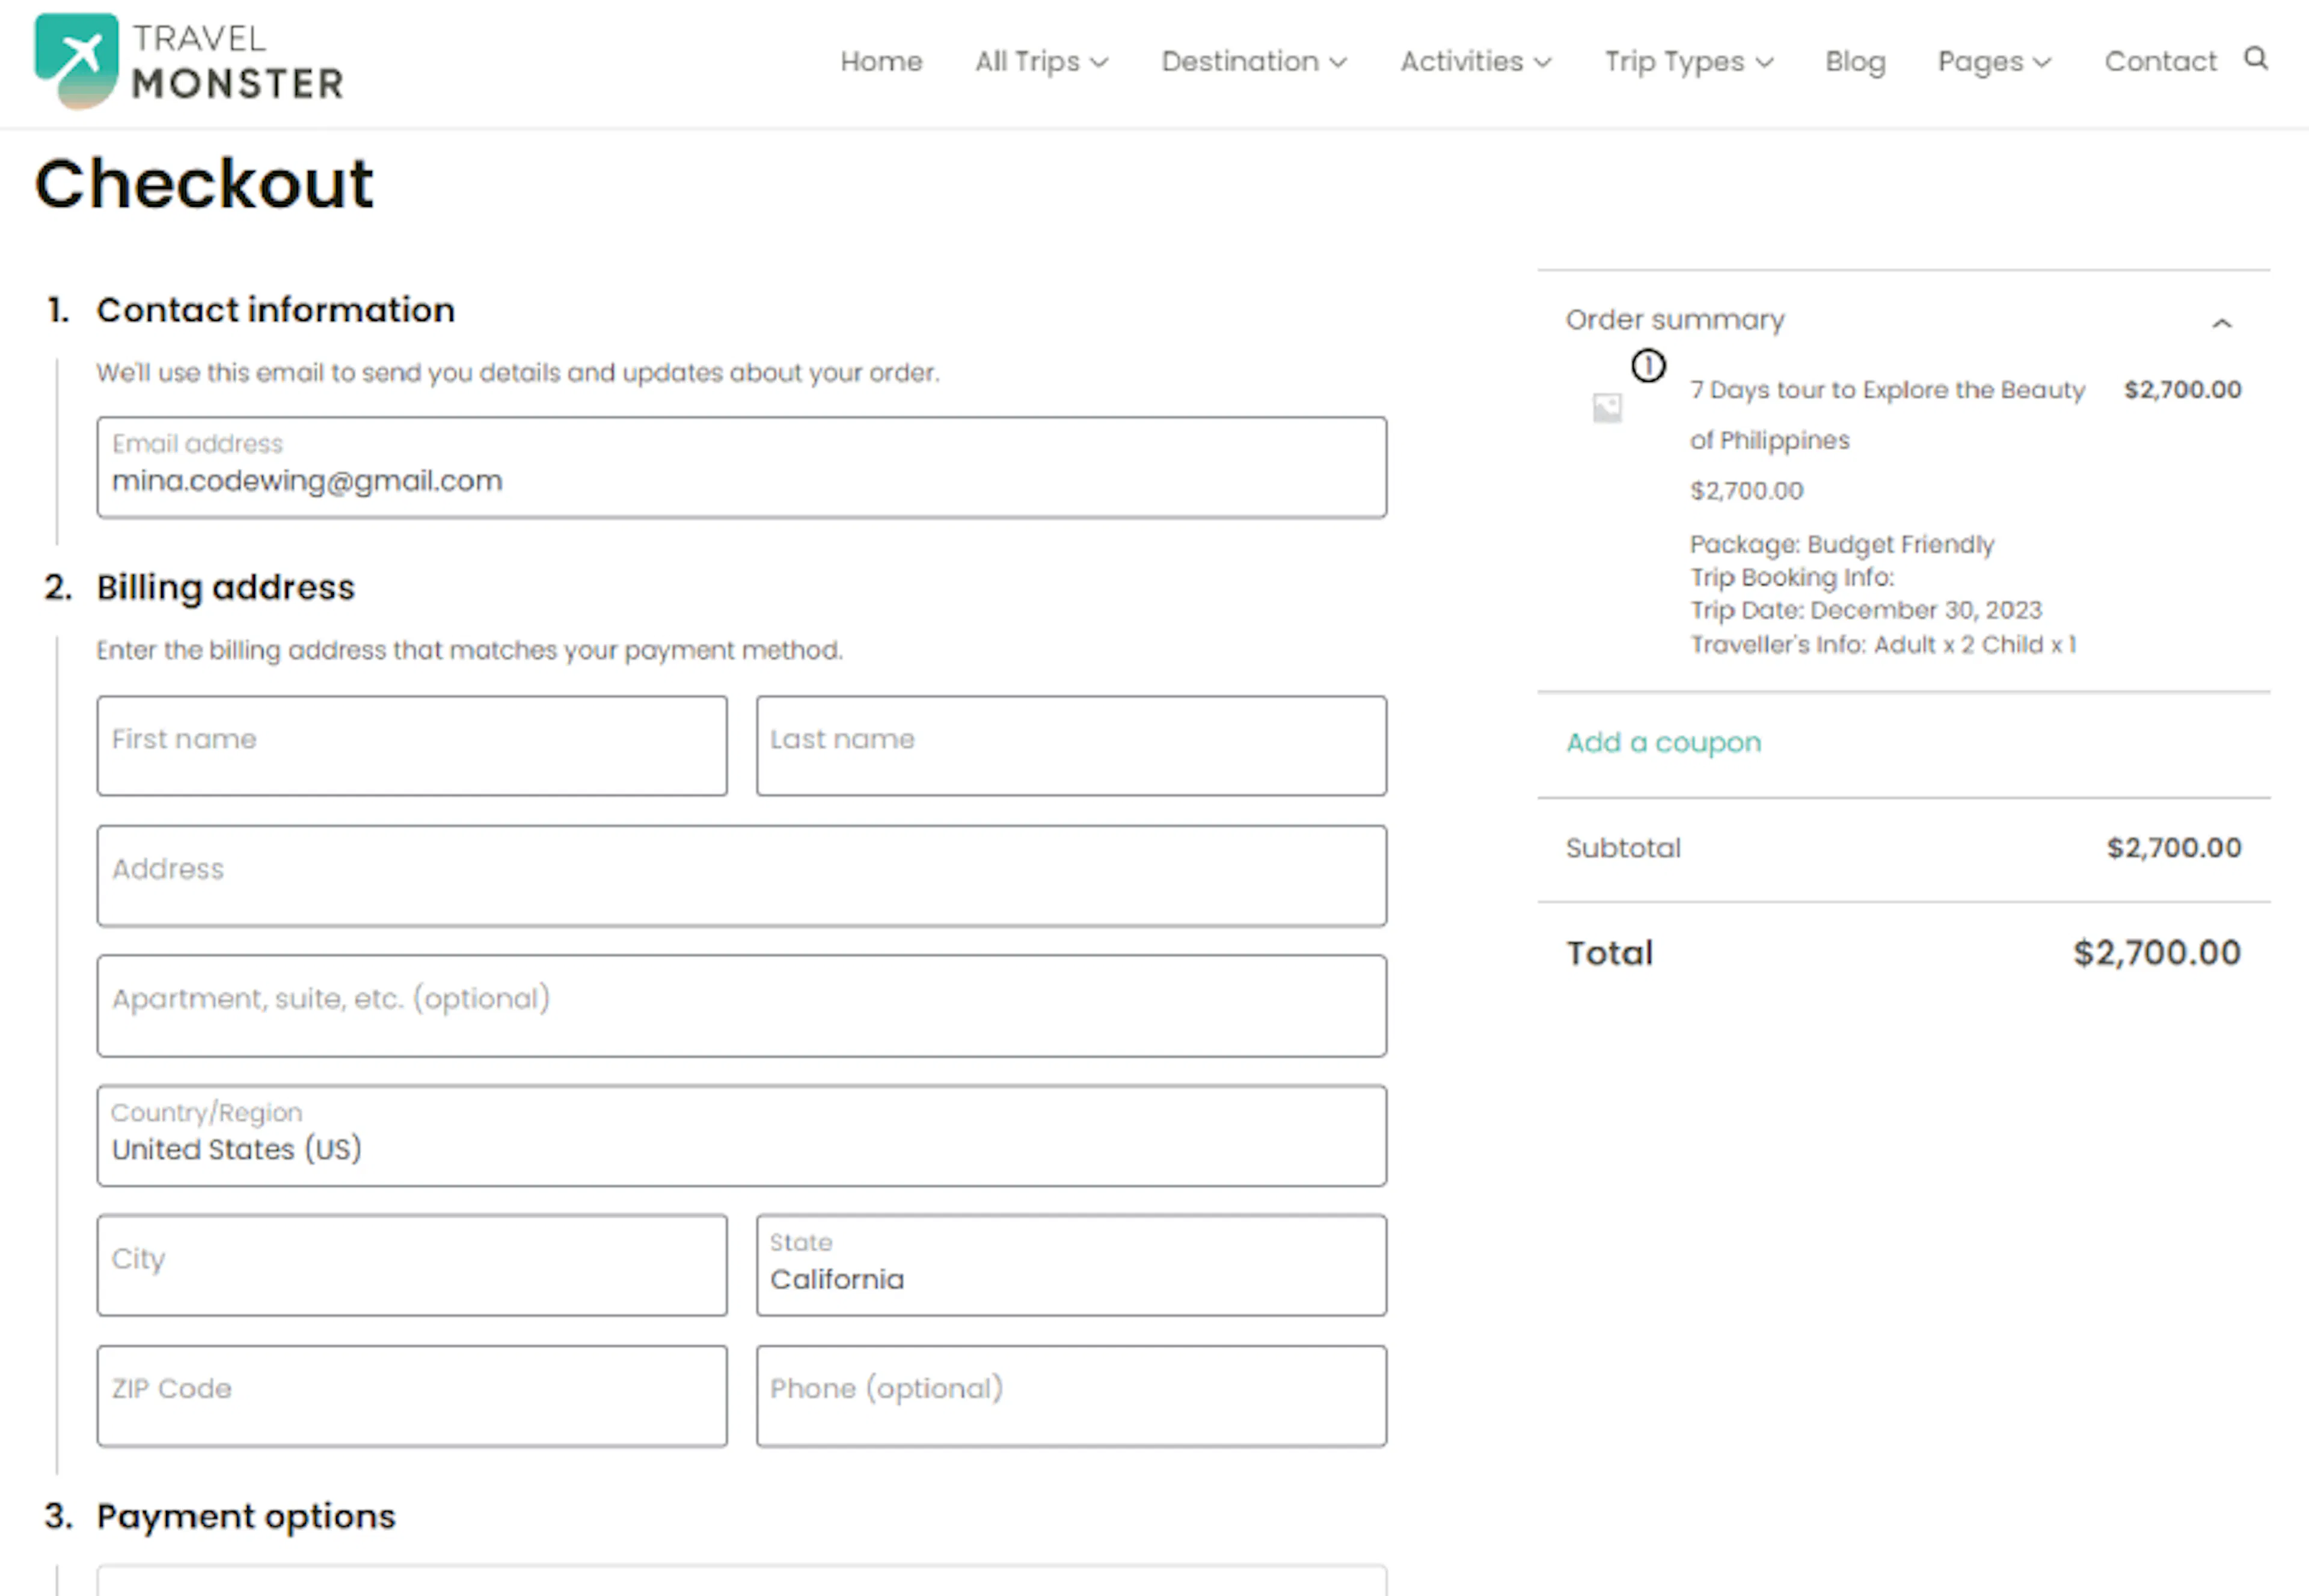
This is the point where the booking and payment come together. For example, a traveler booking a weekend hiking trip can review their details, pay through your active WooCommerce gateway, and then see the order confirmation page right away.
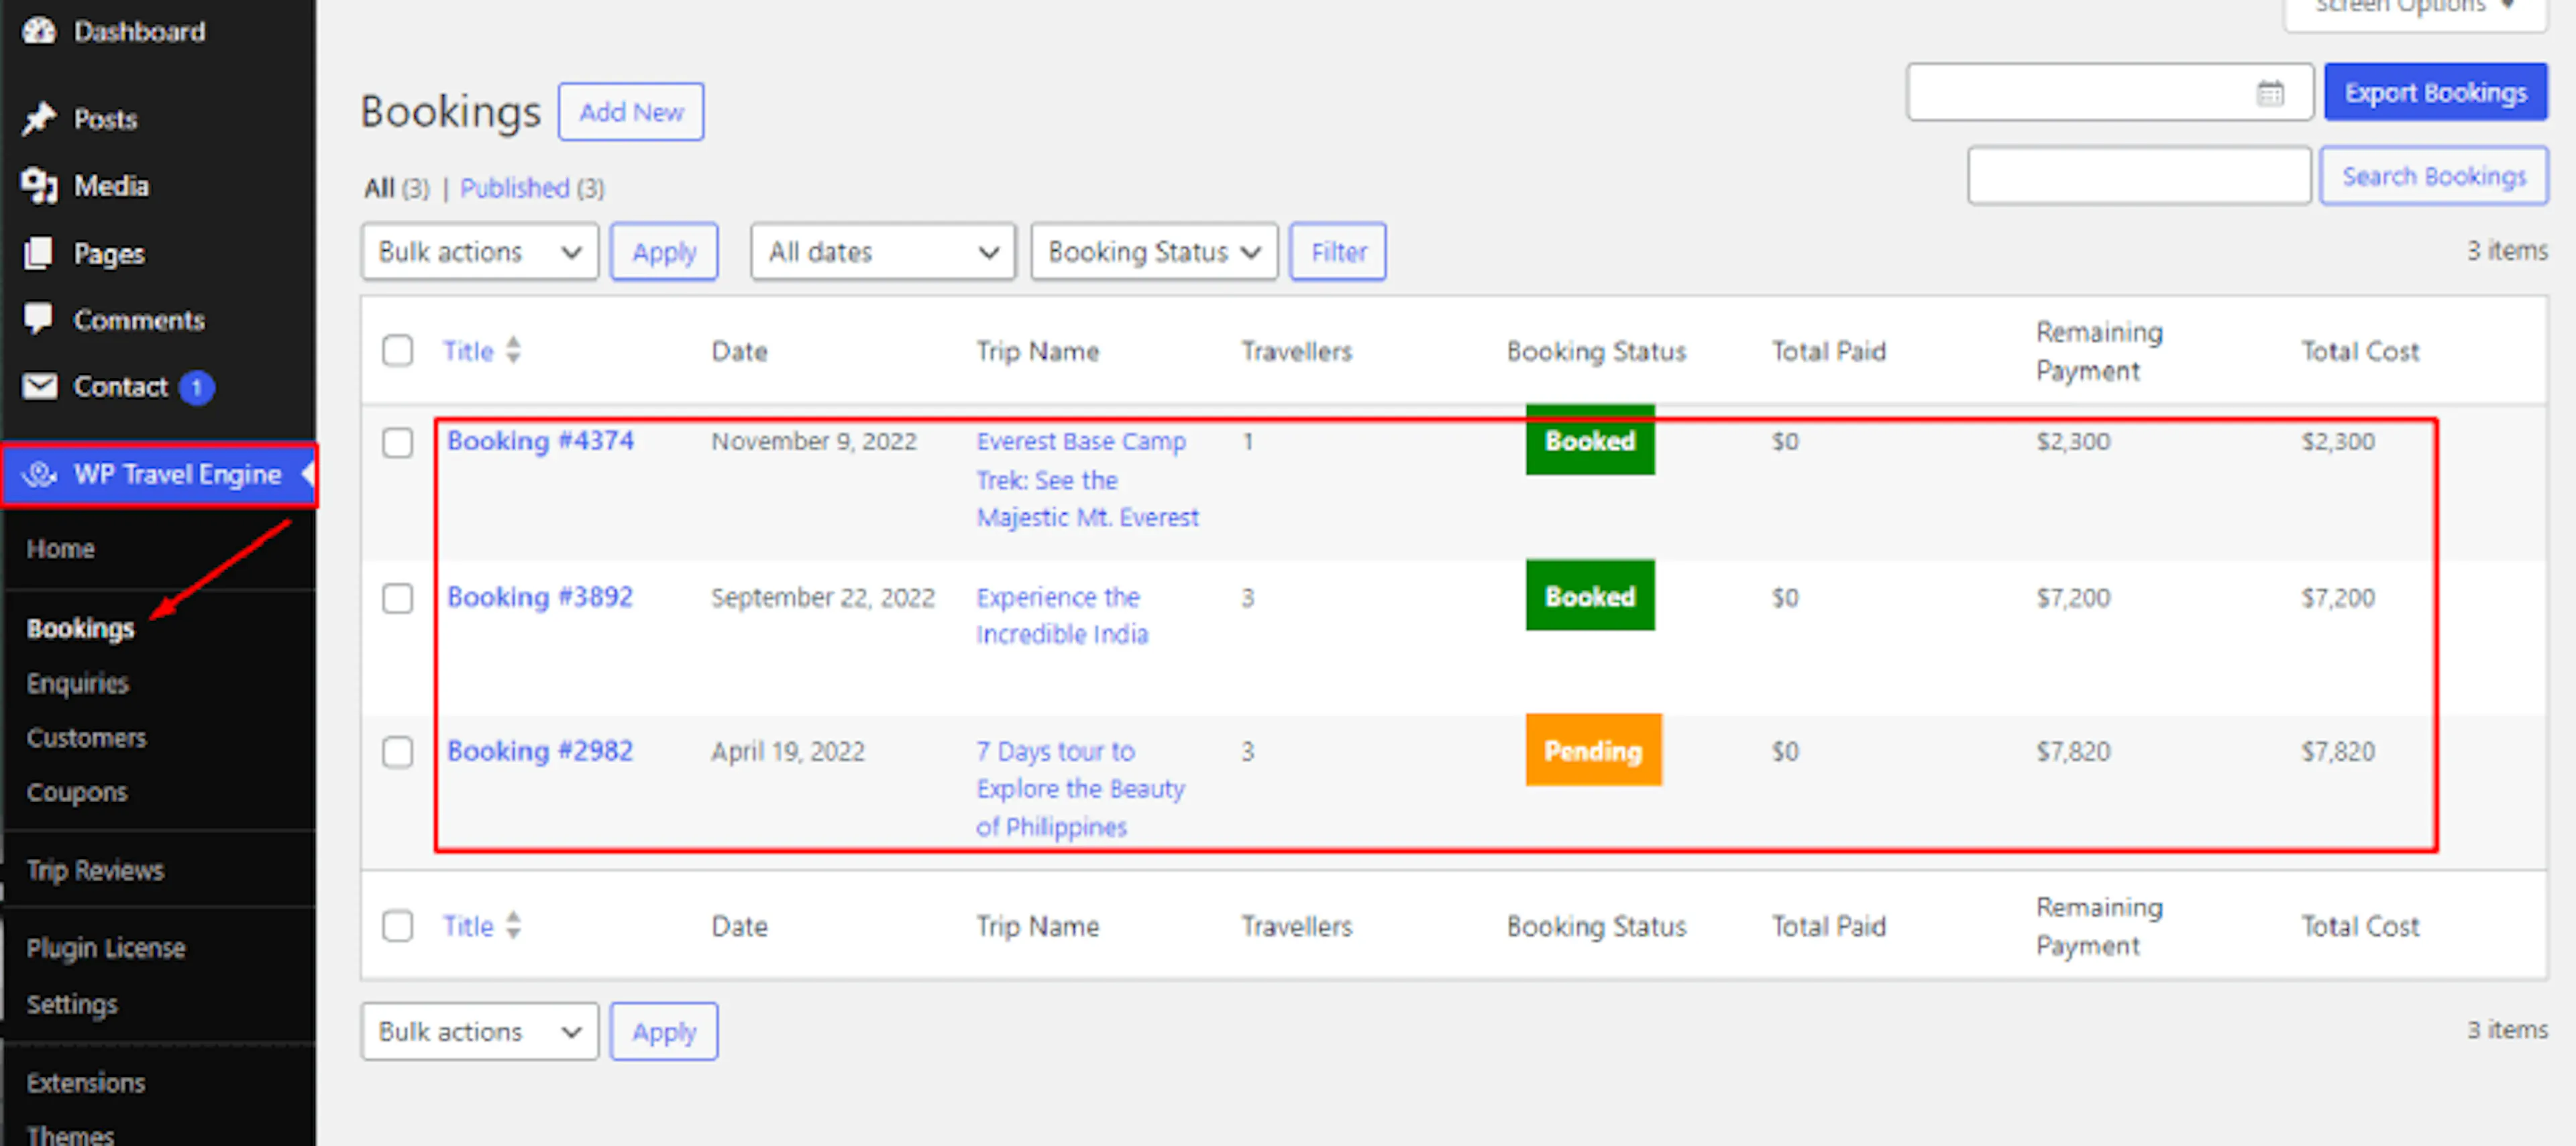
As the site admin, you can check booking details in two places:
- WP Travel Engine > Bookings
- WooCommerce > Orders
If you're still stuck or have a question we didn't cover, our support team is happy to help. Reach out at our support page and we'll get you sorted.