

Setup Static Homepage
Show your tours and welcome message to visitors first instead of a list of blog posts by setting a custom page as your homepage.
Why use a static homepage
When someone visits your website, WordPress shows them a list of your latest blog posts by default. That might not be what you want for your tour business.
A static homepage lets you pick a specific page to show visitors first. You can put anything on that page. A welcome message, your most popular trips, contact details, or photos from your tours. It is the first thing potential customers see, so it should make a good impression.
Your blog posts still have a place. They get their own separate page instead of taking up the front of your site.
Say you run guided mountain treks. You'd probably want visitors to see a warm welcome and your featured trips when they land on your site, not a list of blog posts about trail conditions. That is what a static homepage does for you.
This setup takes about a minute. Once it's done, your homepage and your blog page each have their own job. Your site feels more organized and easier for visitors to explore.
Before you start, you'll need to create the pages you want to use. One page for your homepage content, and if you want to keep a blog section, another page for your posts. If you haven't created these pages yet, go to Pages and then Add New in your WordPress dashboard. The dashboard is the main admin area of your WordPress site. You can find the Pages menu on the left sidebar.
Set a static homepage
Open your homepage settings
This is where WordPress lets you choose what appears on the front page of your site.
Go to Appearance, Customize, Core, and then Homepage Settings. You can find the Appearance menu on the left sidebar of your WordPress dashboard. Clicking Customize opens a live preview of your site with settings in a panel on the left side of your screen.
Switch to a static page
This tells WordPress to show a page you chose, instead of automatically listing your latest posts.
Under Your homepage displays, select A static page.
Choose your homepage and blog pages
Now pick which page does which job.
Under Homepage, select the page you want visitors to see first when they land on your site. Under Posts Page, select the page where your blog posts should appear.
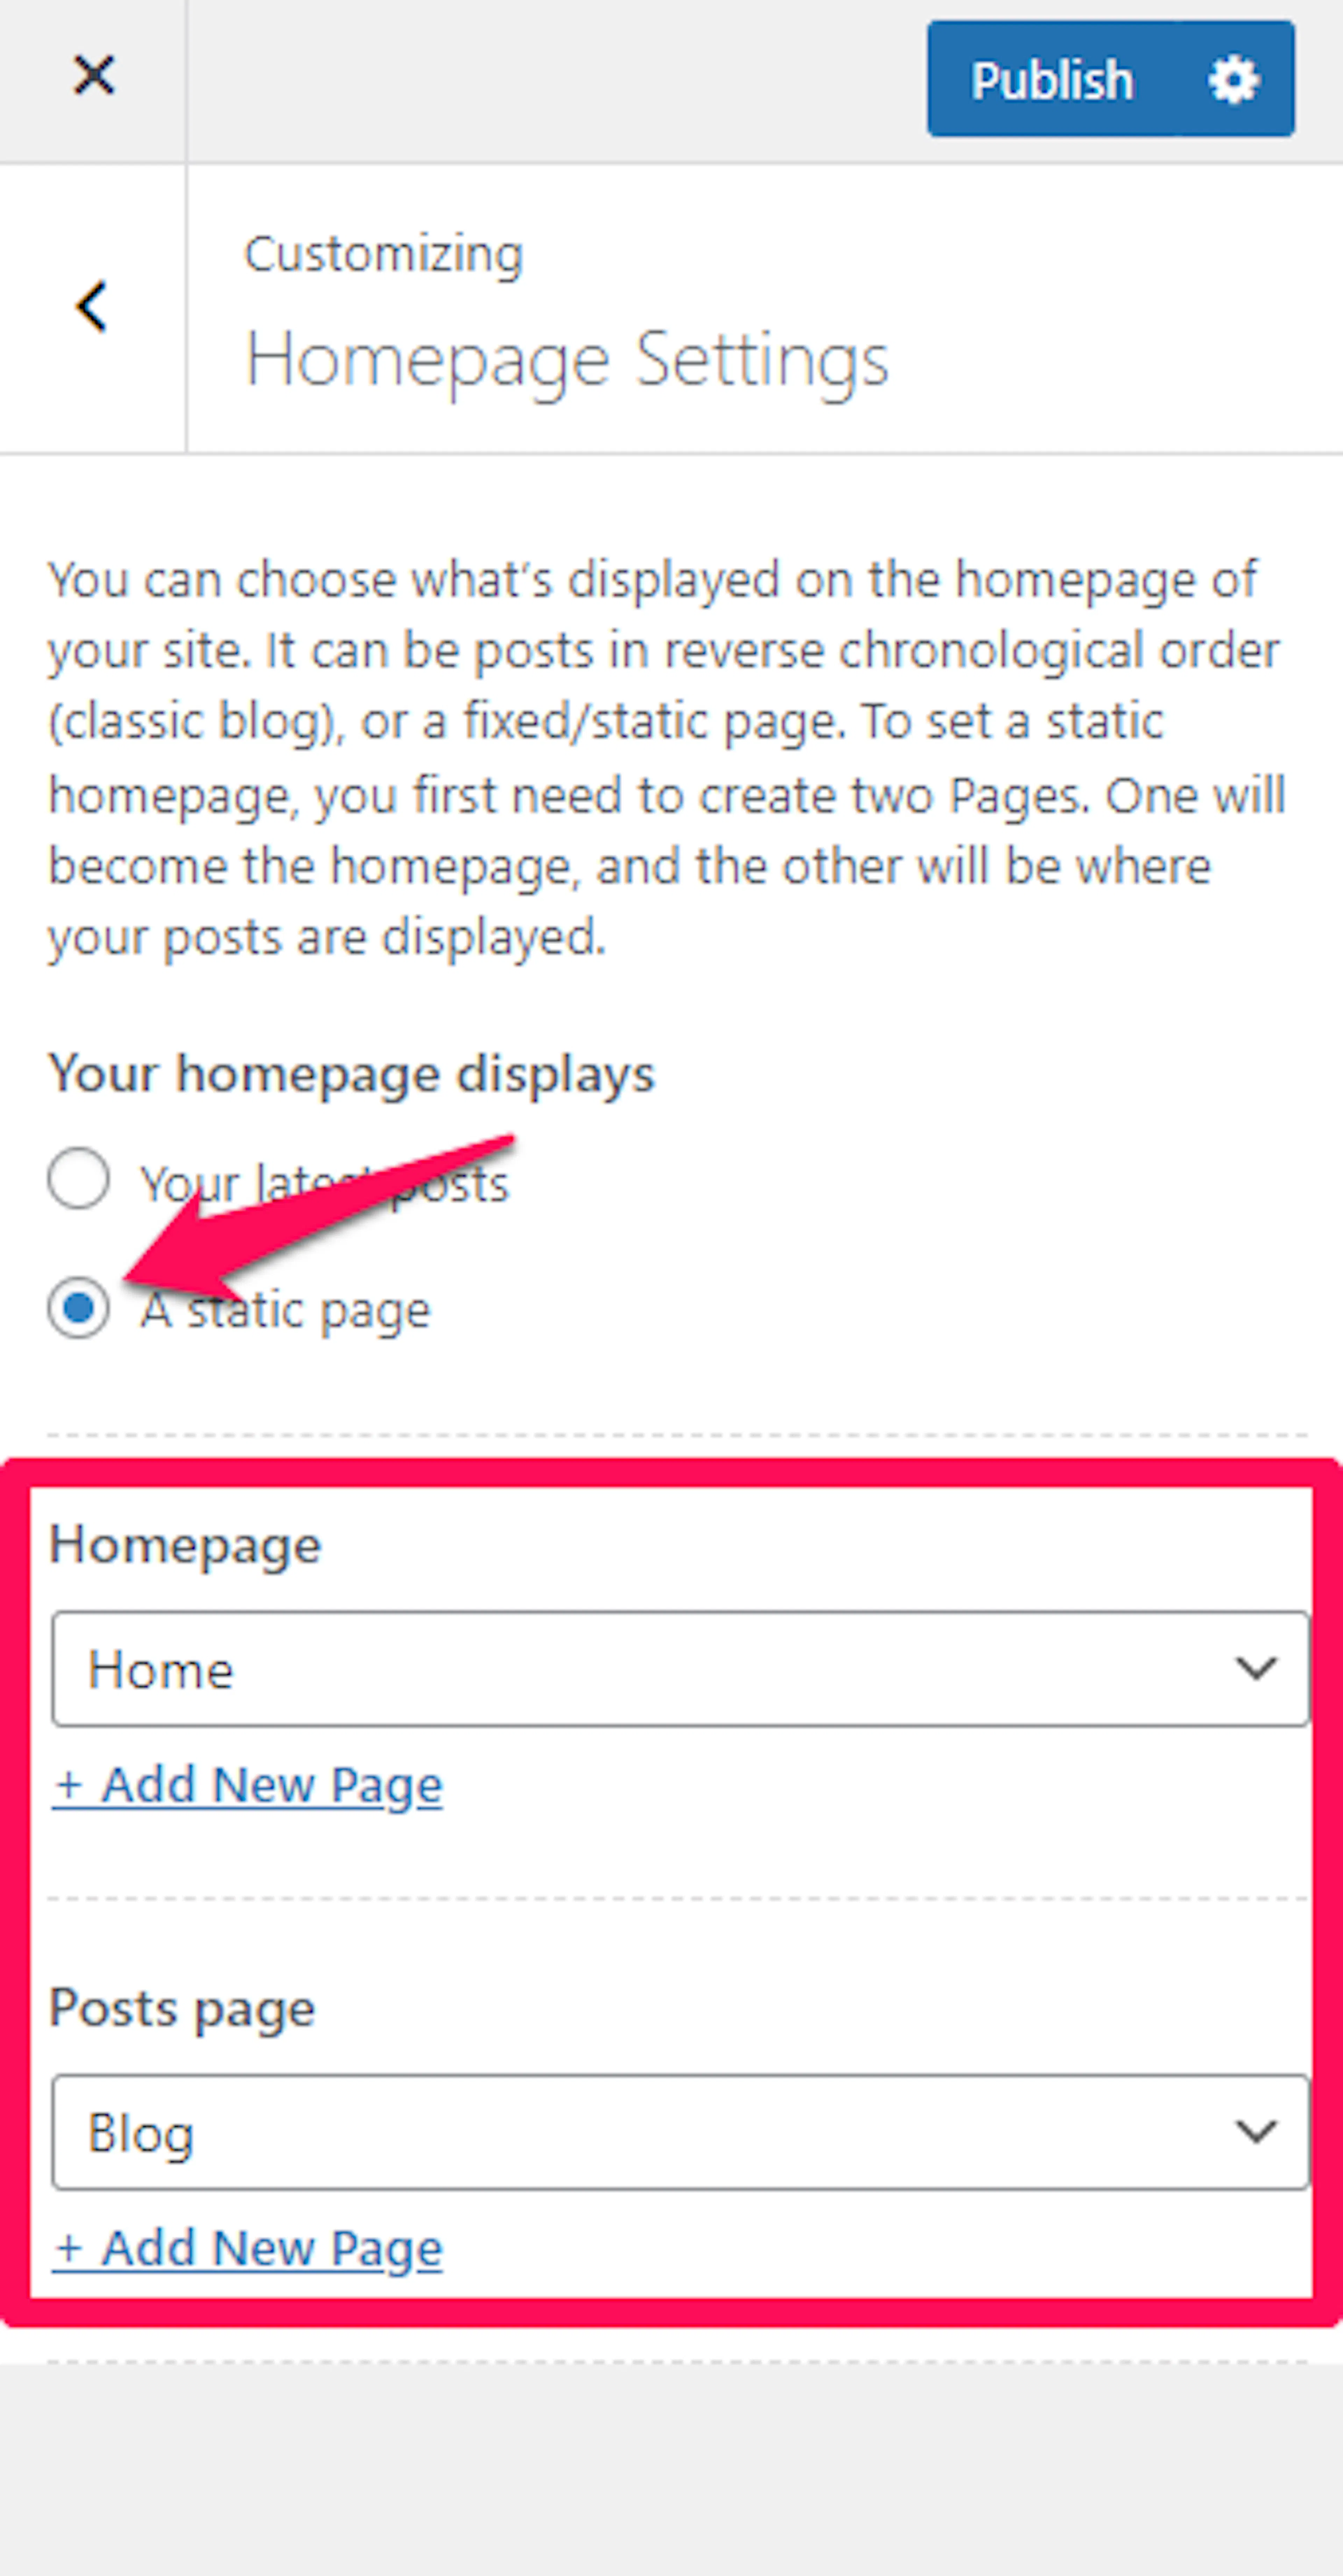
Once both dropdowns are set, you're almost done.
Save your changes
Click Publish at the top right of the Customizer panel. Your new homepage setup is now live on your site.
Check that it worked
Open your website in a new browser tab and take a look. Your homepage should show the static page you selected. Your blog posts should appear on the page you set as the Posts Page.
If something doesn't look right, go back to Appearance, Customize, Core, and then Homepage Settings and double-check that the correct pages were selected. In most cases, a quick check there is all it takes.
Your homepage is now set up the way you want. With the main Travel Monster setup complete, you're in a good place to keep customizing your site. When you're ready for more advanced features, you can explore Travel Monster Pro.
If you're still stuck or have a question we didn't cover, our support team is happy to help. Reach out at our support page and we'll get you sorted.