

Social Login
Let customers sign in faster with Google, Facebook, or LinkedIn, then add those login options to your WP Travel Engine site in a few simple steps.
Social Login gives your customers a quicker way to sign in. Instead of filling out a registration form, they can use their Google, Facebook, or LinkedIn account and get straight to booking.
WP Travel Engine supports Facebook, Google, and LinkedIn. Setting it up takes two parts. First, you create an app with the social provider to get your login credentials. Then, you paste those credentials into your WP Travel Engine settings. It sounds like a lot at first, but once you go step by step, it is very manageable.
You only need to set up the providers you want to offer. If you only want Google login, you can skip the Facebook and LinkedIn sections.
Set up Google Login
Google login is a good place to start if you want a familiar sign-in option for most customers. You will create a Google project, add your site details, and then copy the credentials into WP Travel Engine.
Open the Google API Console
Go to the Google API Console and sign in with your Google account.
Create or choose a project
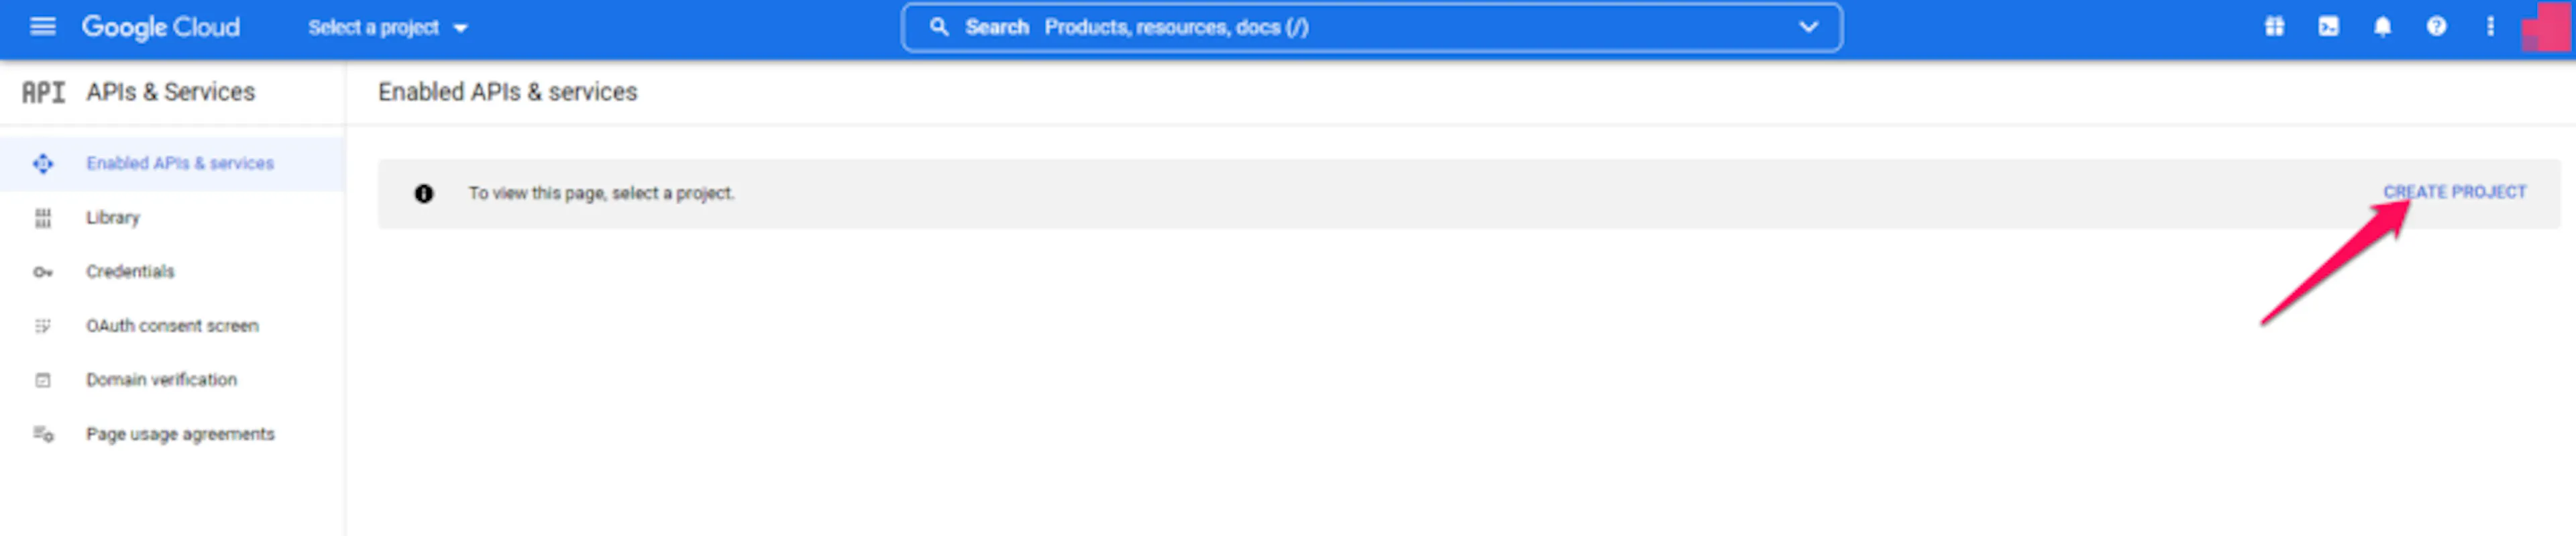
If you do not have a project yet, click Create Project on the right side of the screen.
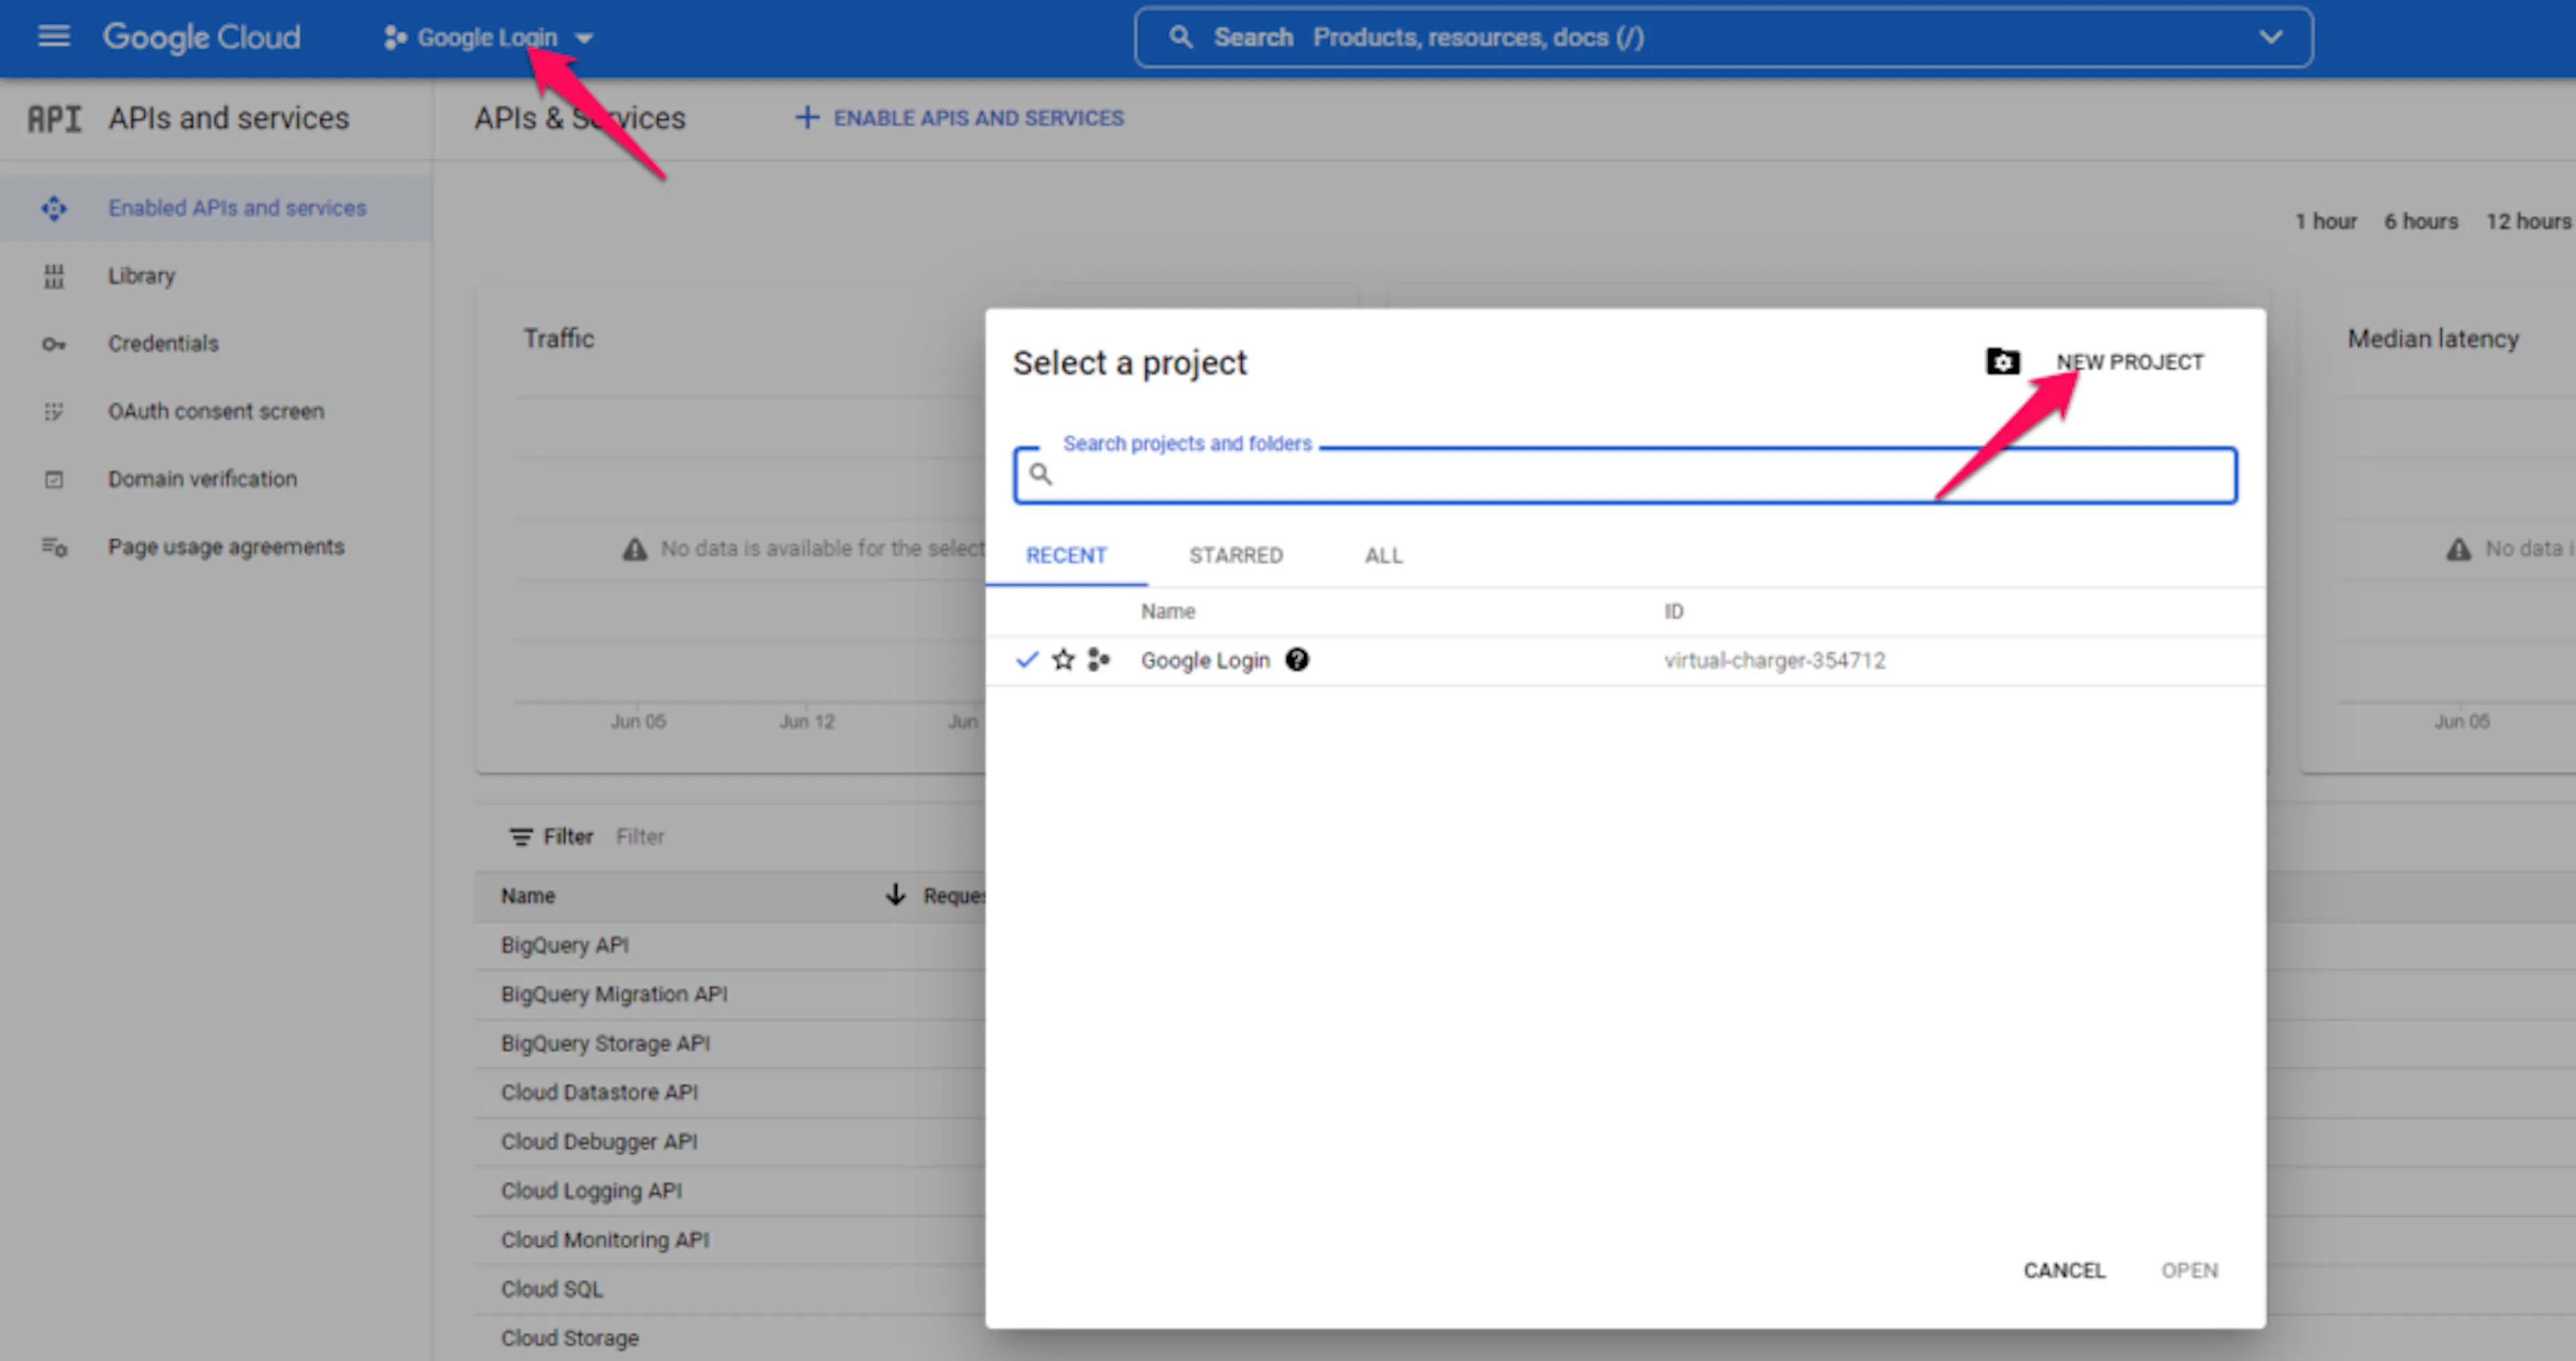
If you already have a project, click the project name in the top bar, then click New Project in the window that opens.
Give the project a name
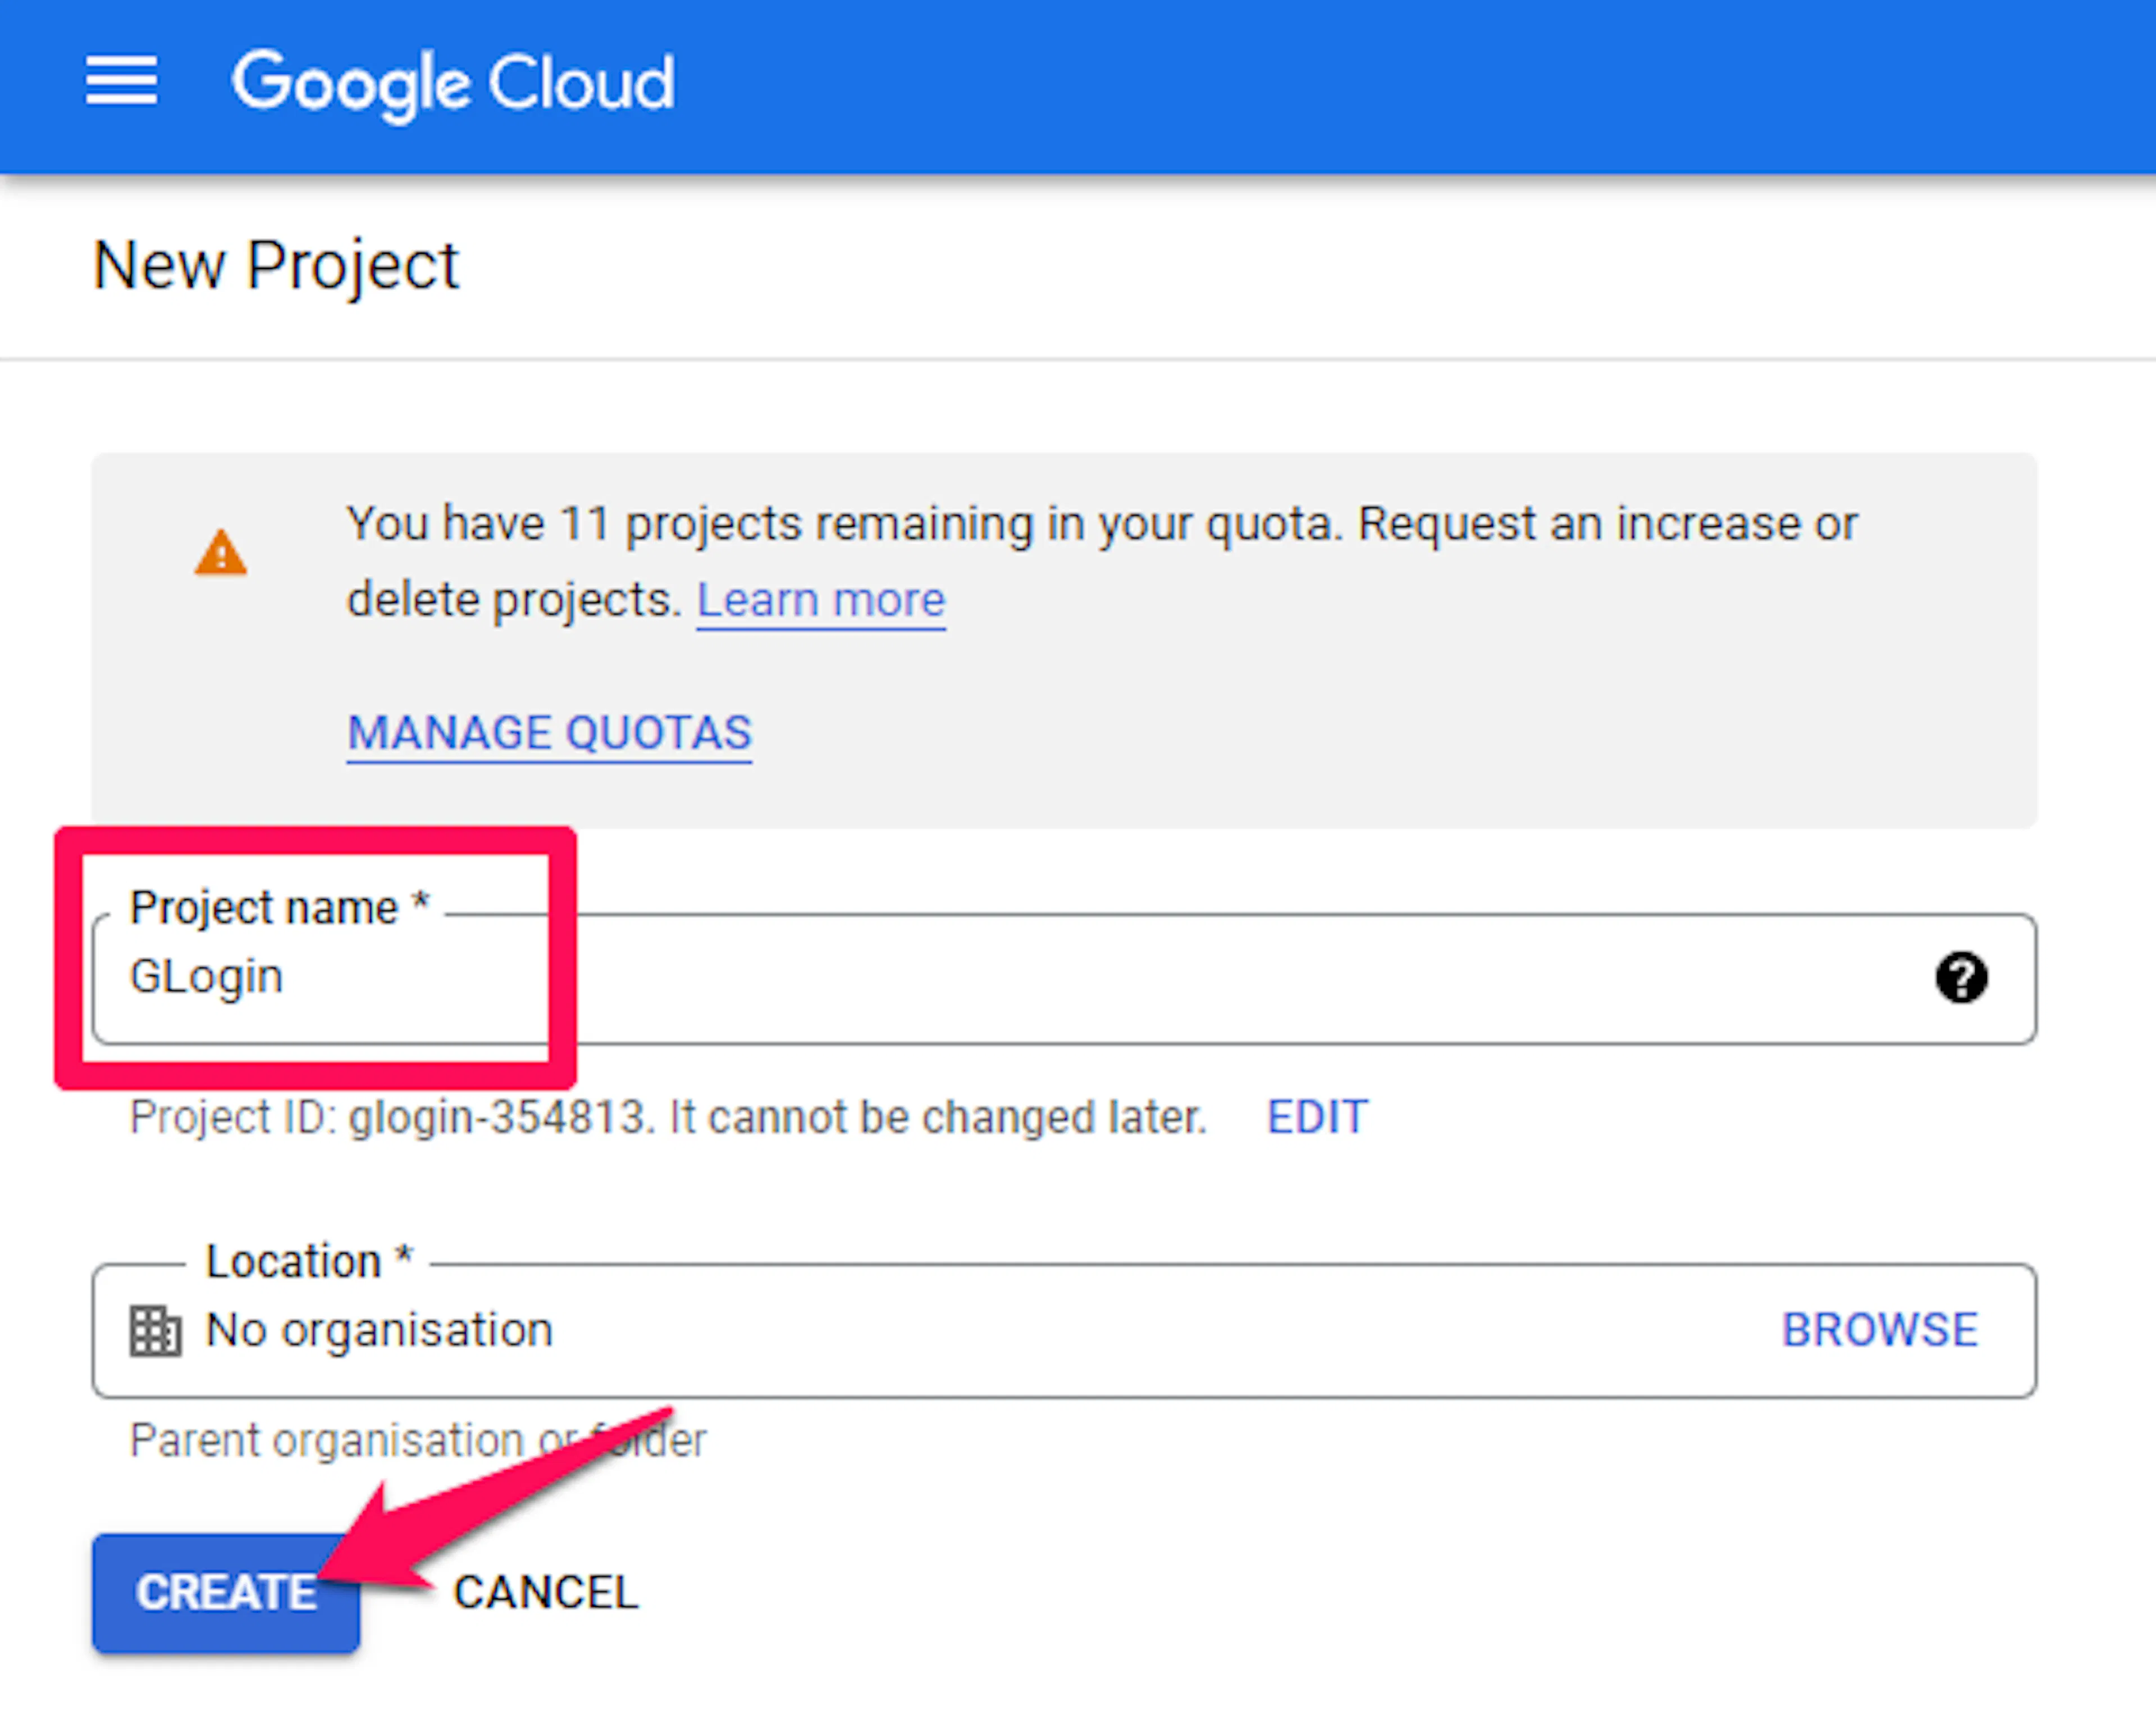
Enter a name for the project and click Create.
When the project is ready, make sure it is selected in the top bar.
Open the OAuth consent screen
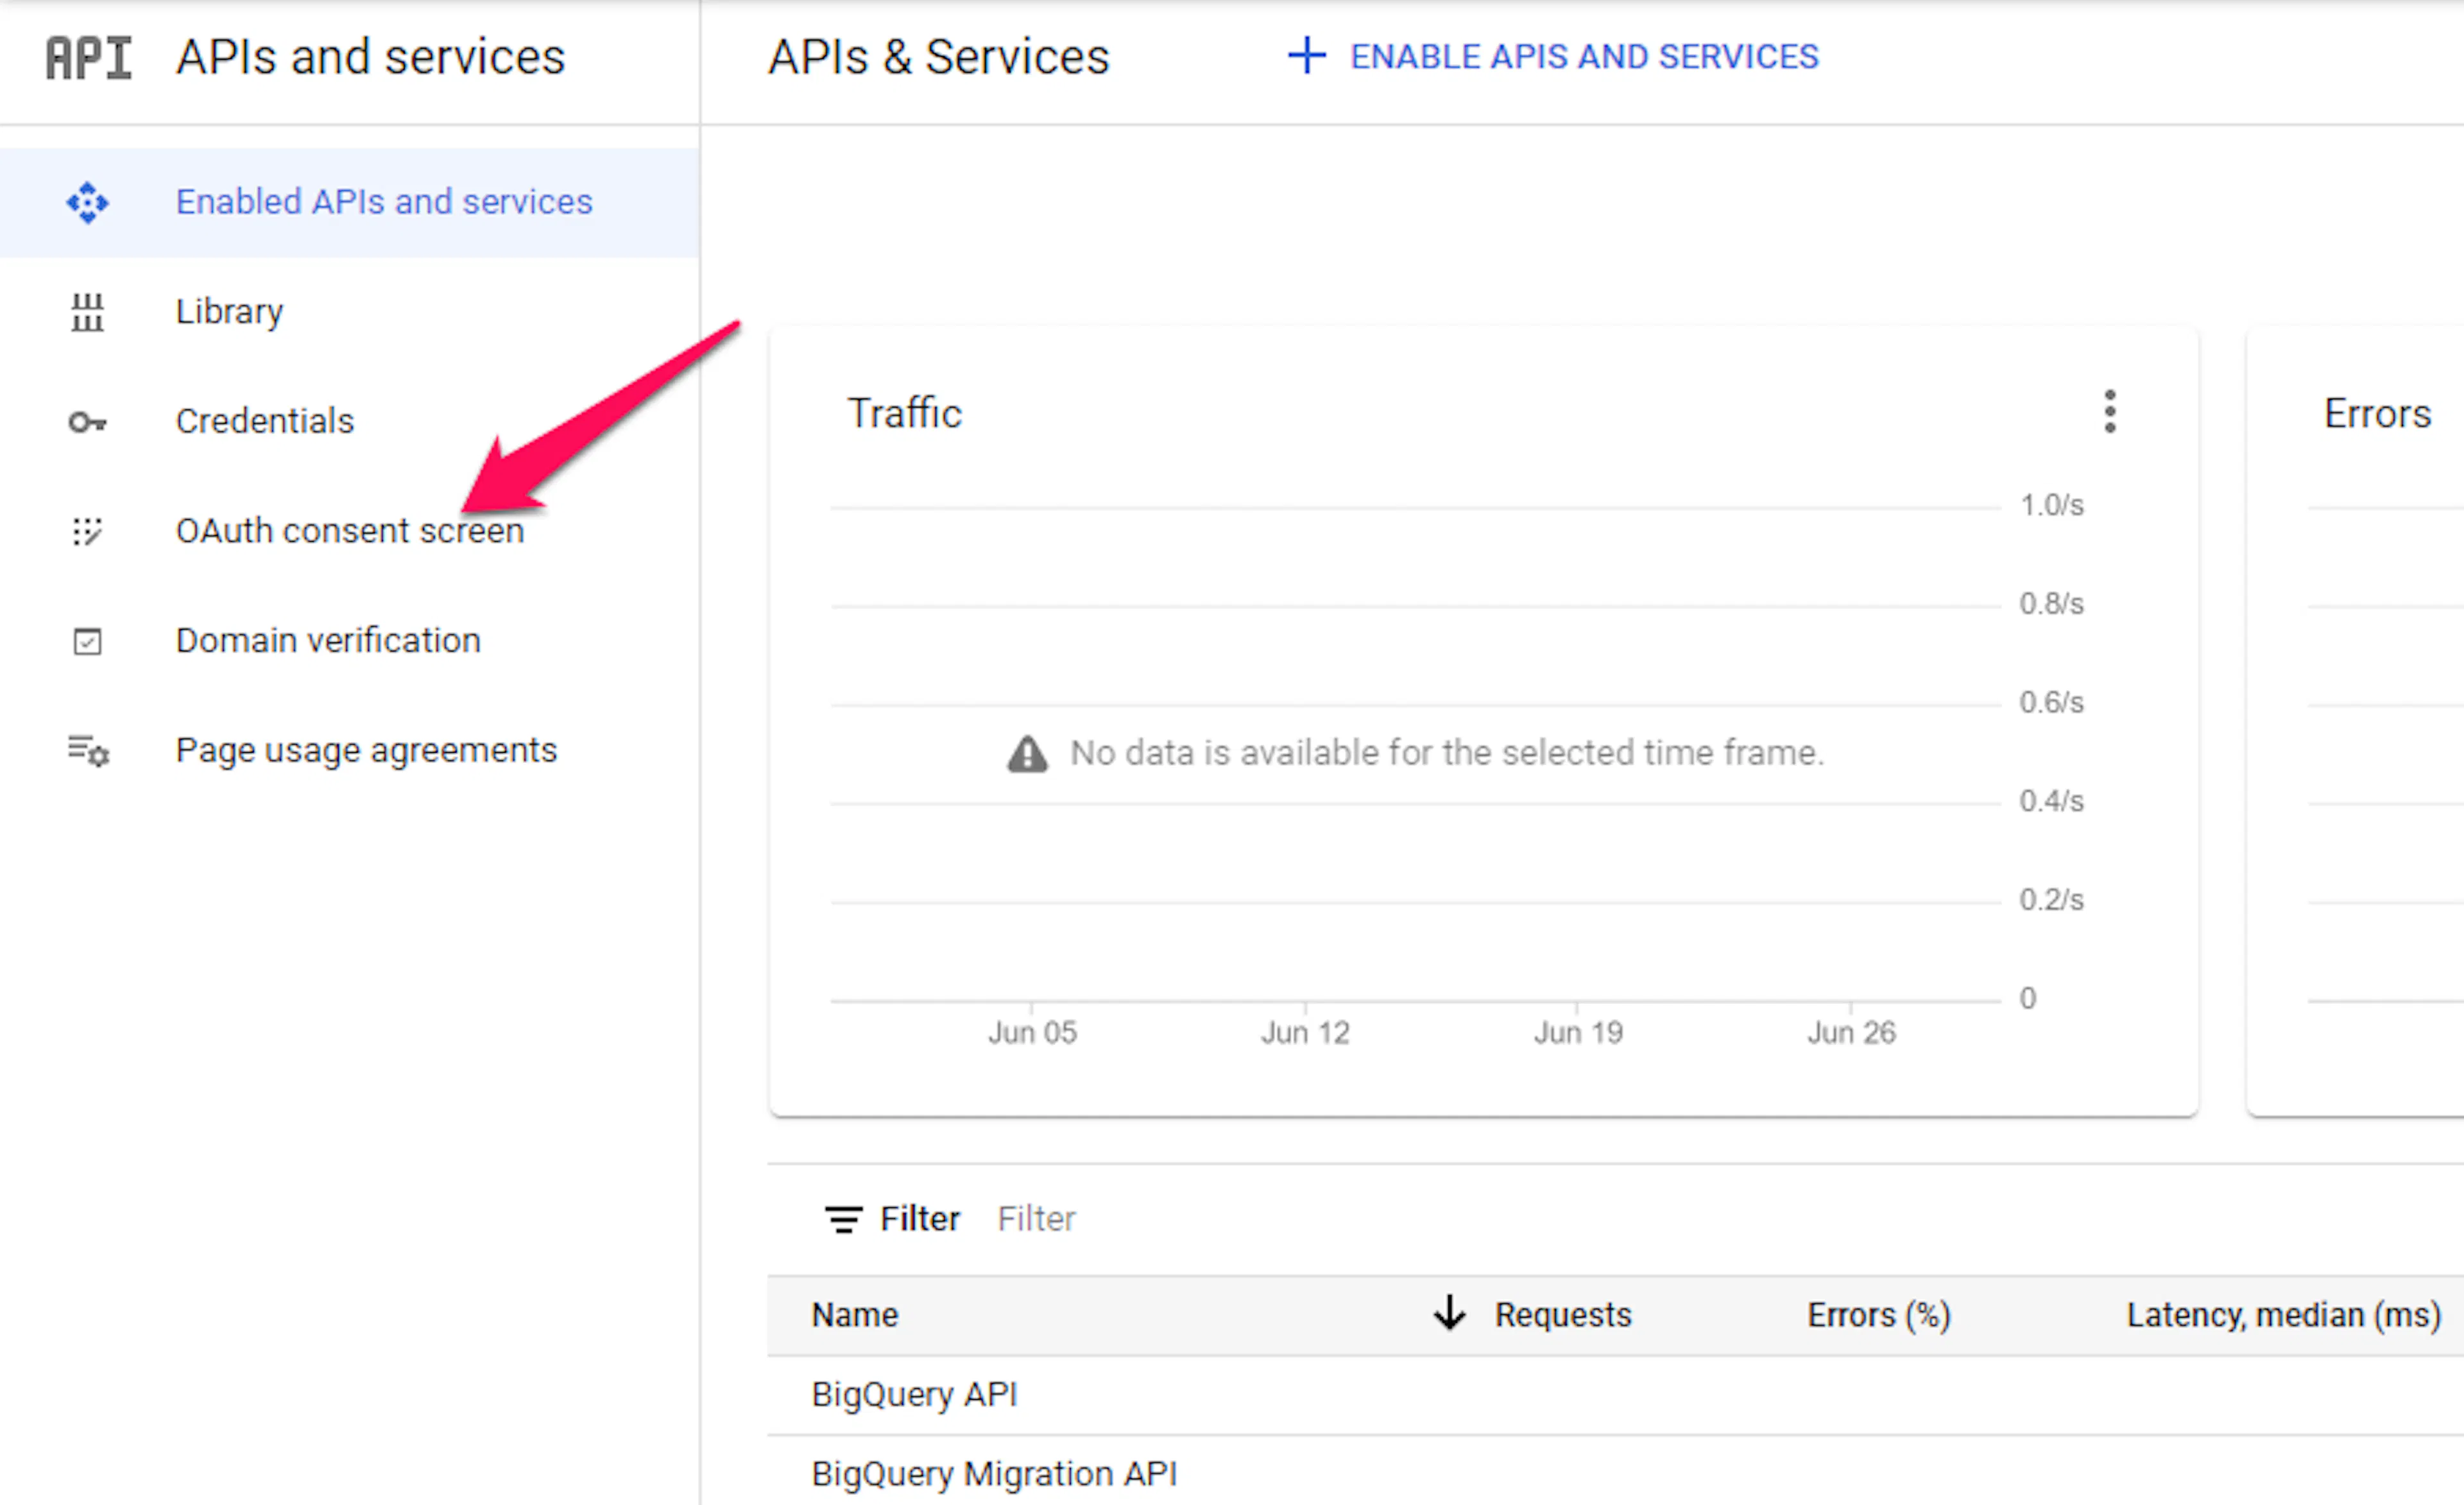
In the left-hand menu, click OAuth consent screen.
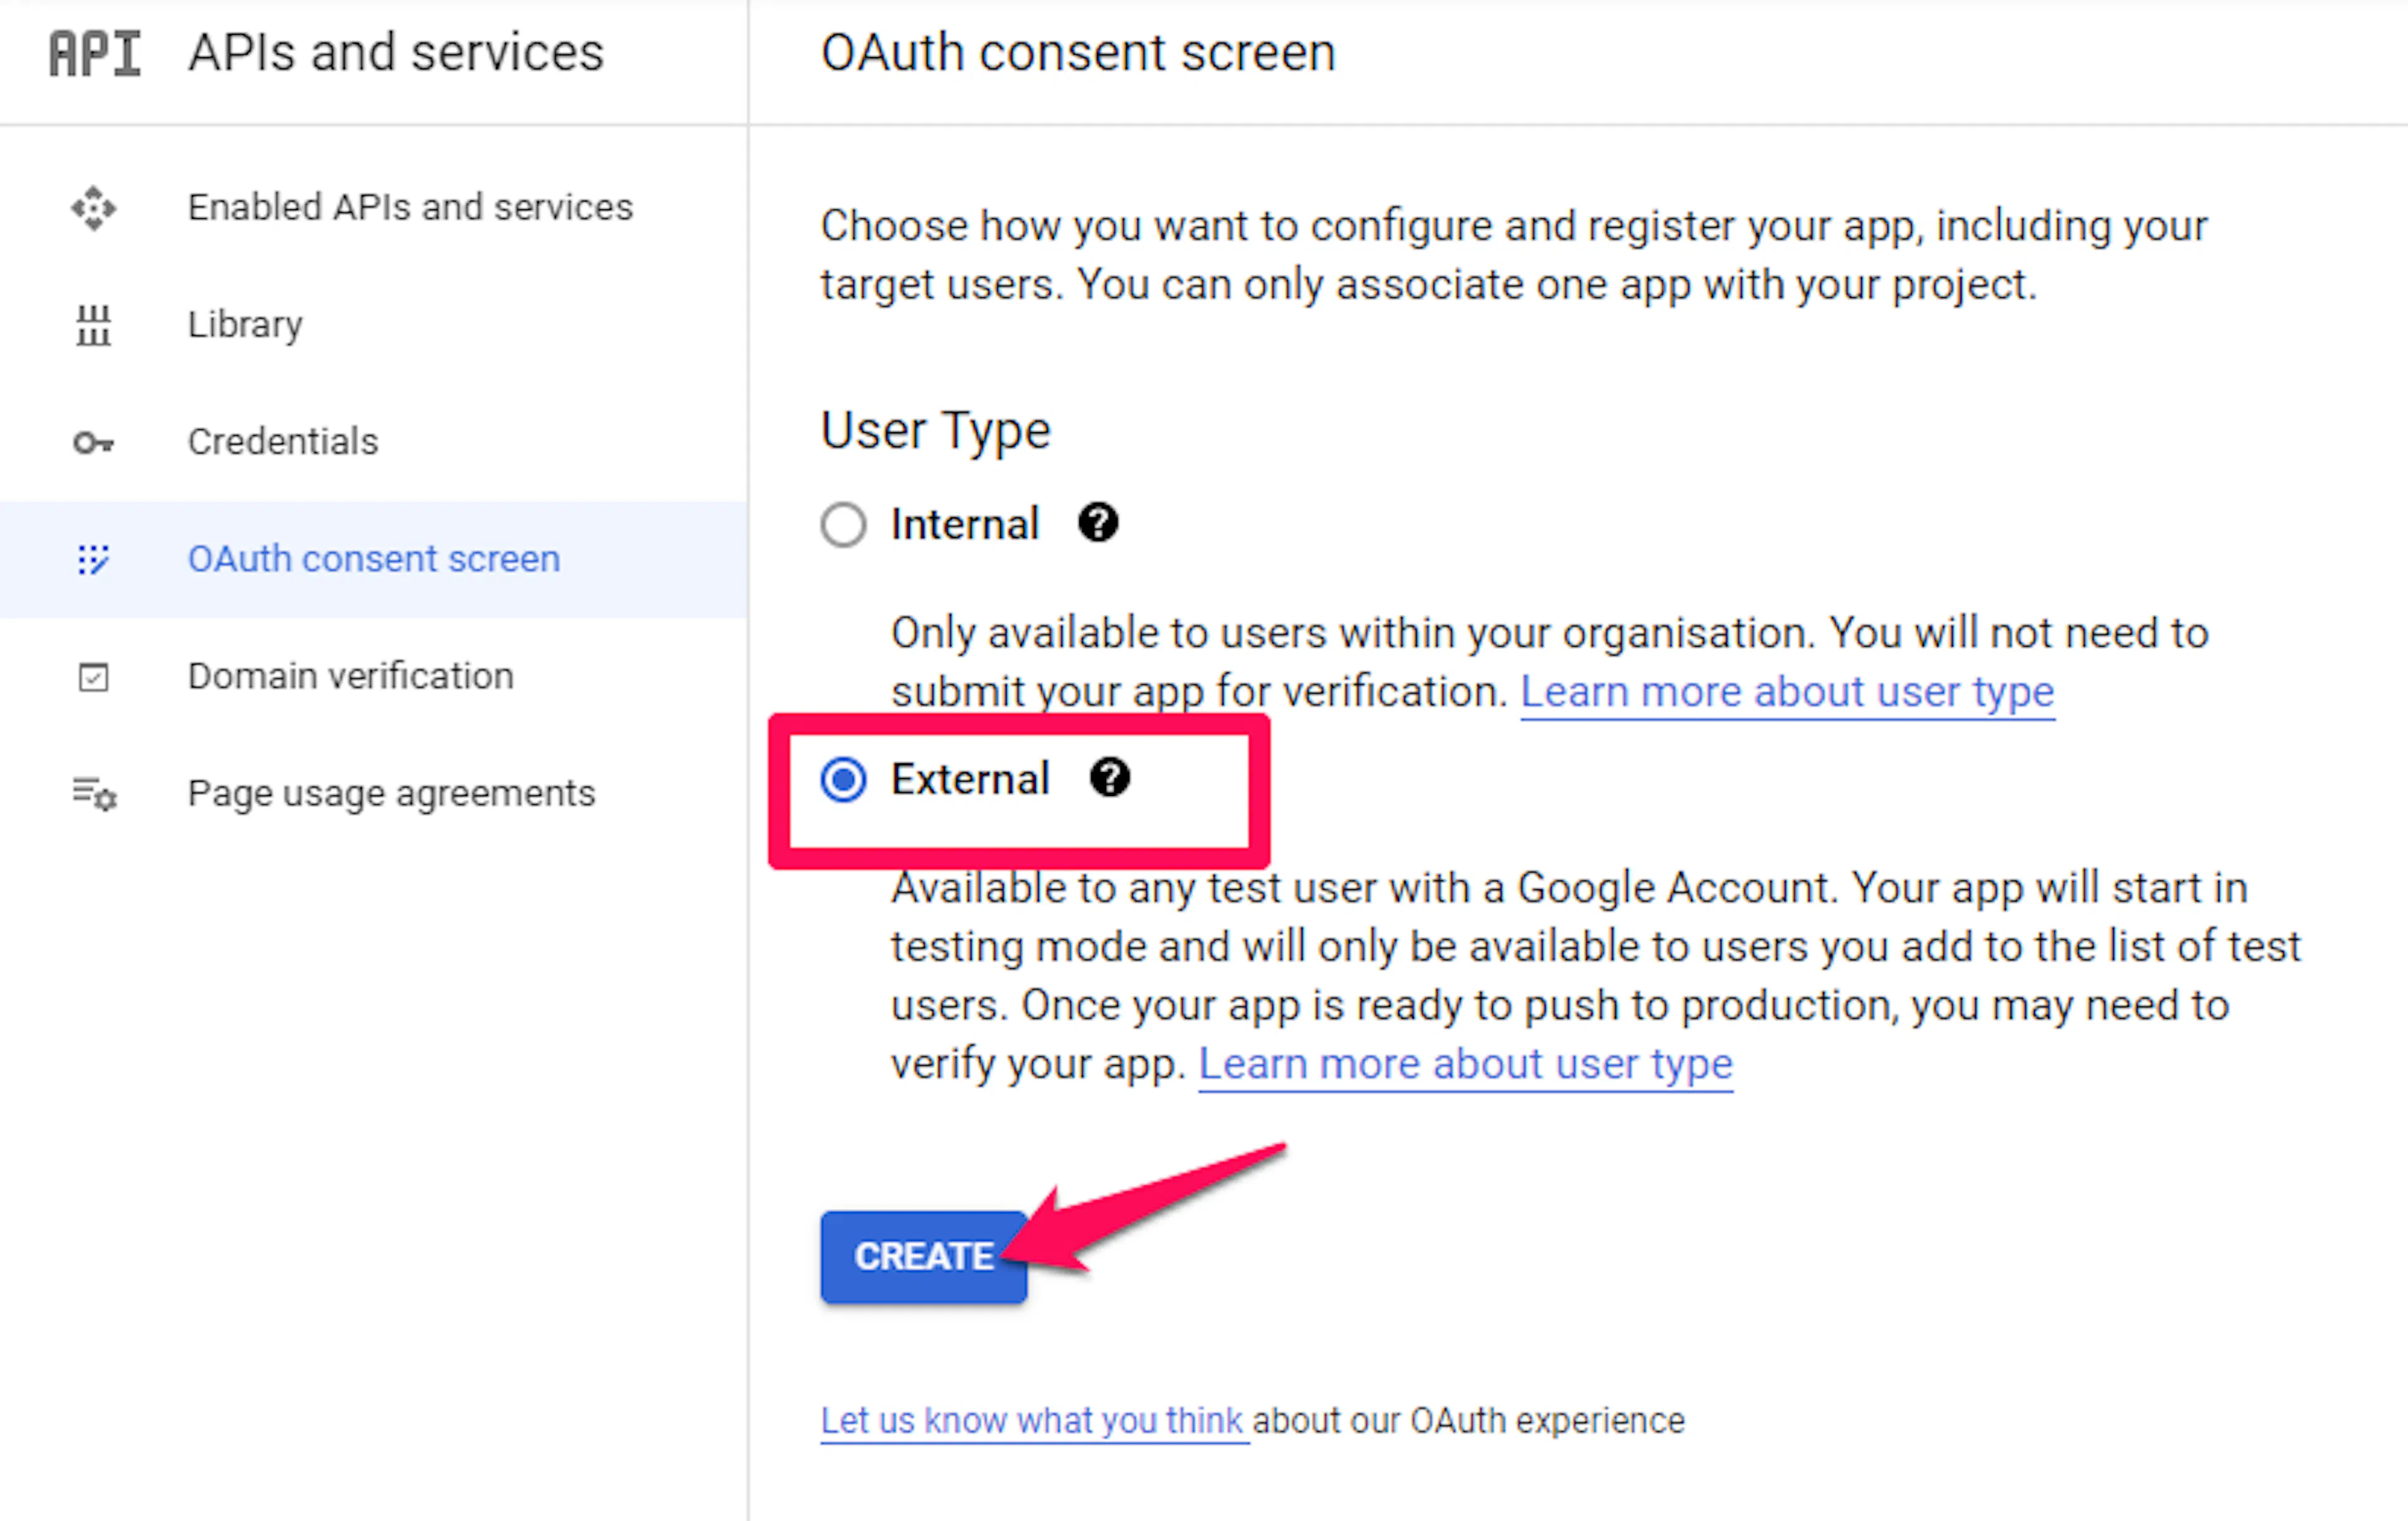
Pick the user type
Choose the User Type that fits your setup, then click Create. If you want anyone with a Google account to sign in, choose External.
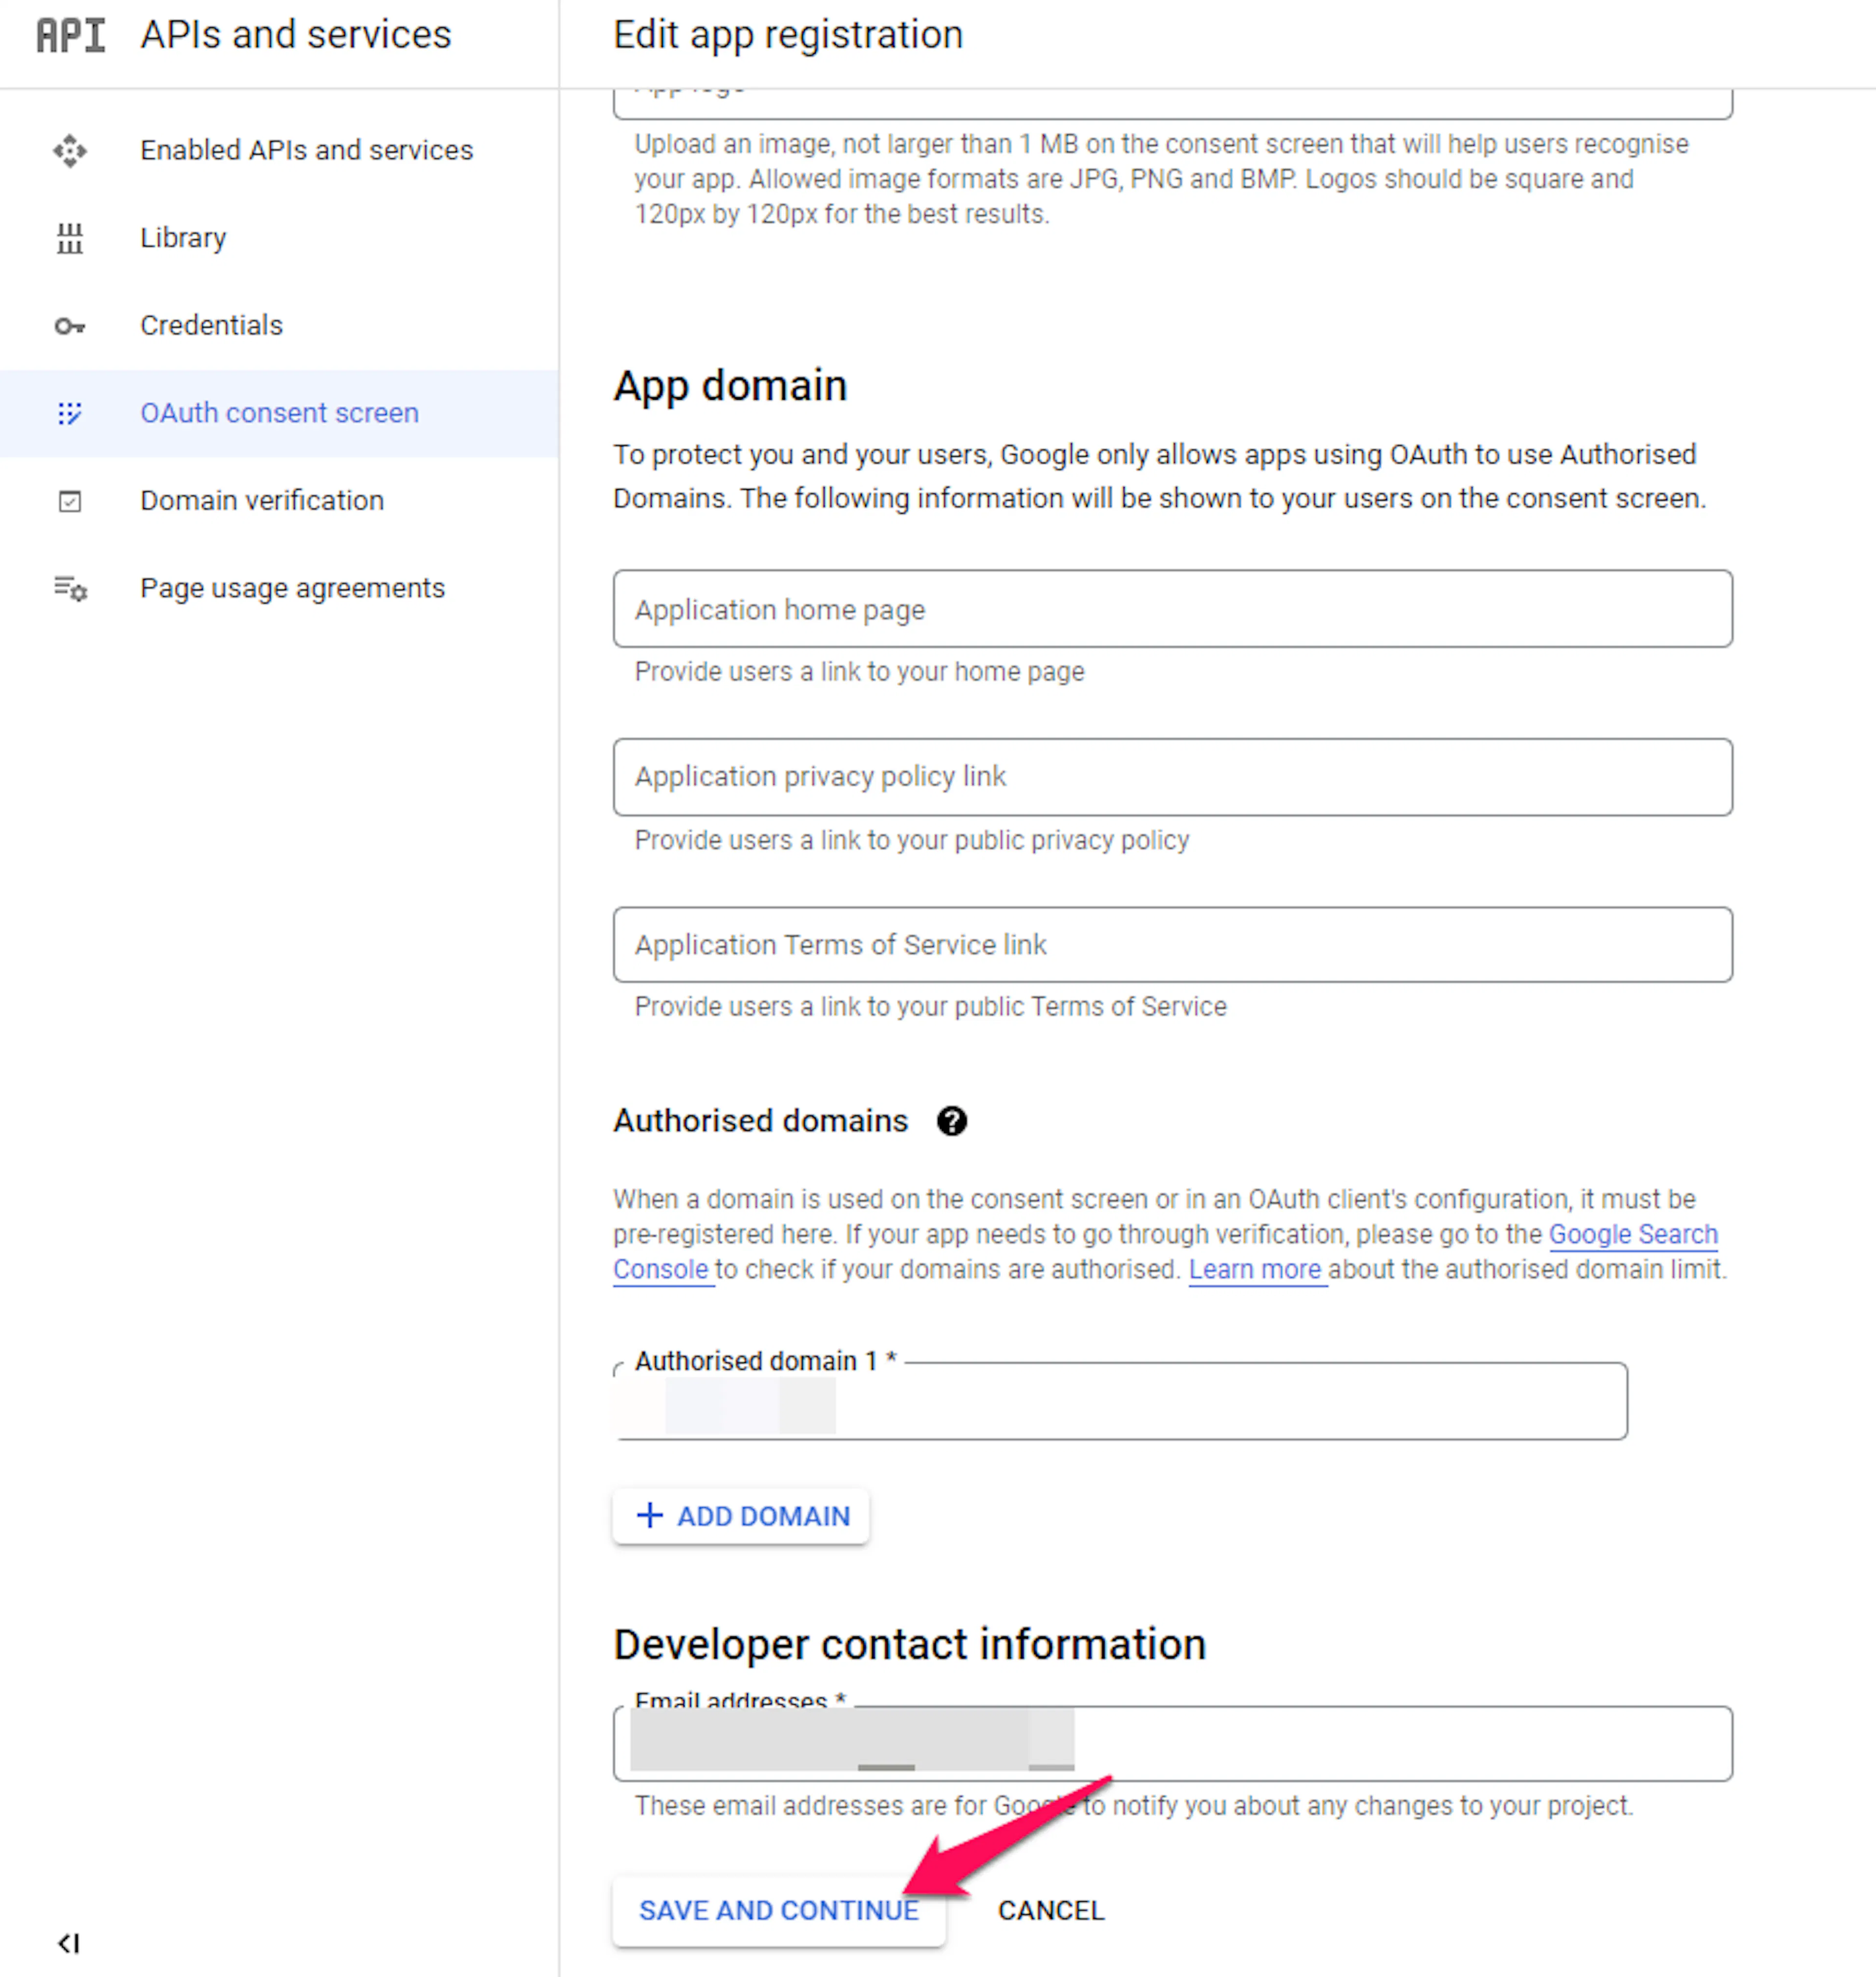
Fill in the consent screen details
- App name: the name people will see on the consent screen
- User support email: an email address users can contact
- Authorised domains: click Add Domain and enter your site domain, such as
yoursite.com - Developer contact information: an email Google can use to contact you about the project
Click Save and continue when you are done.
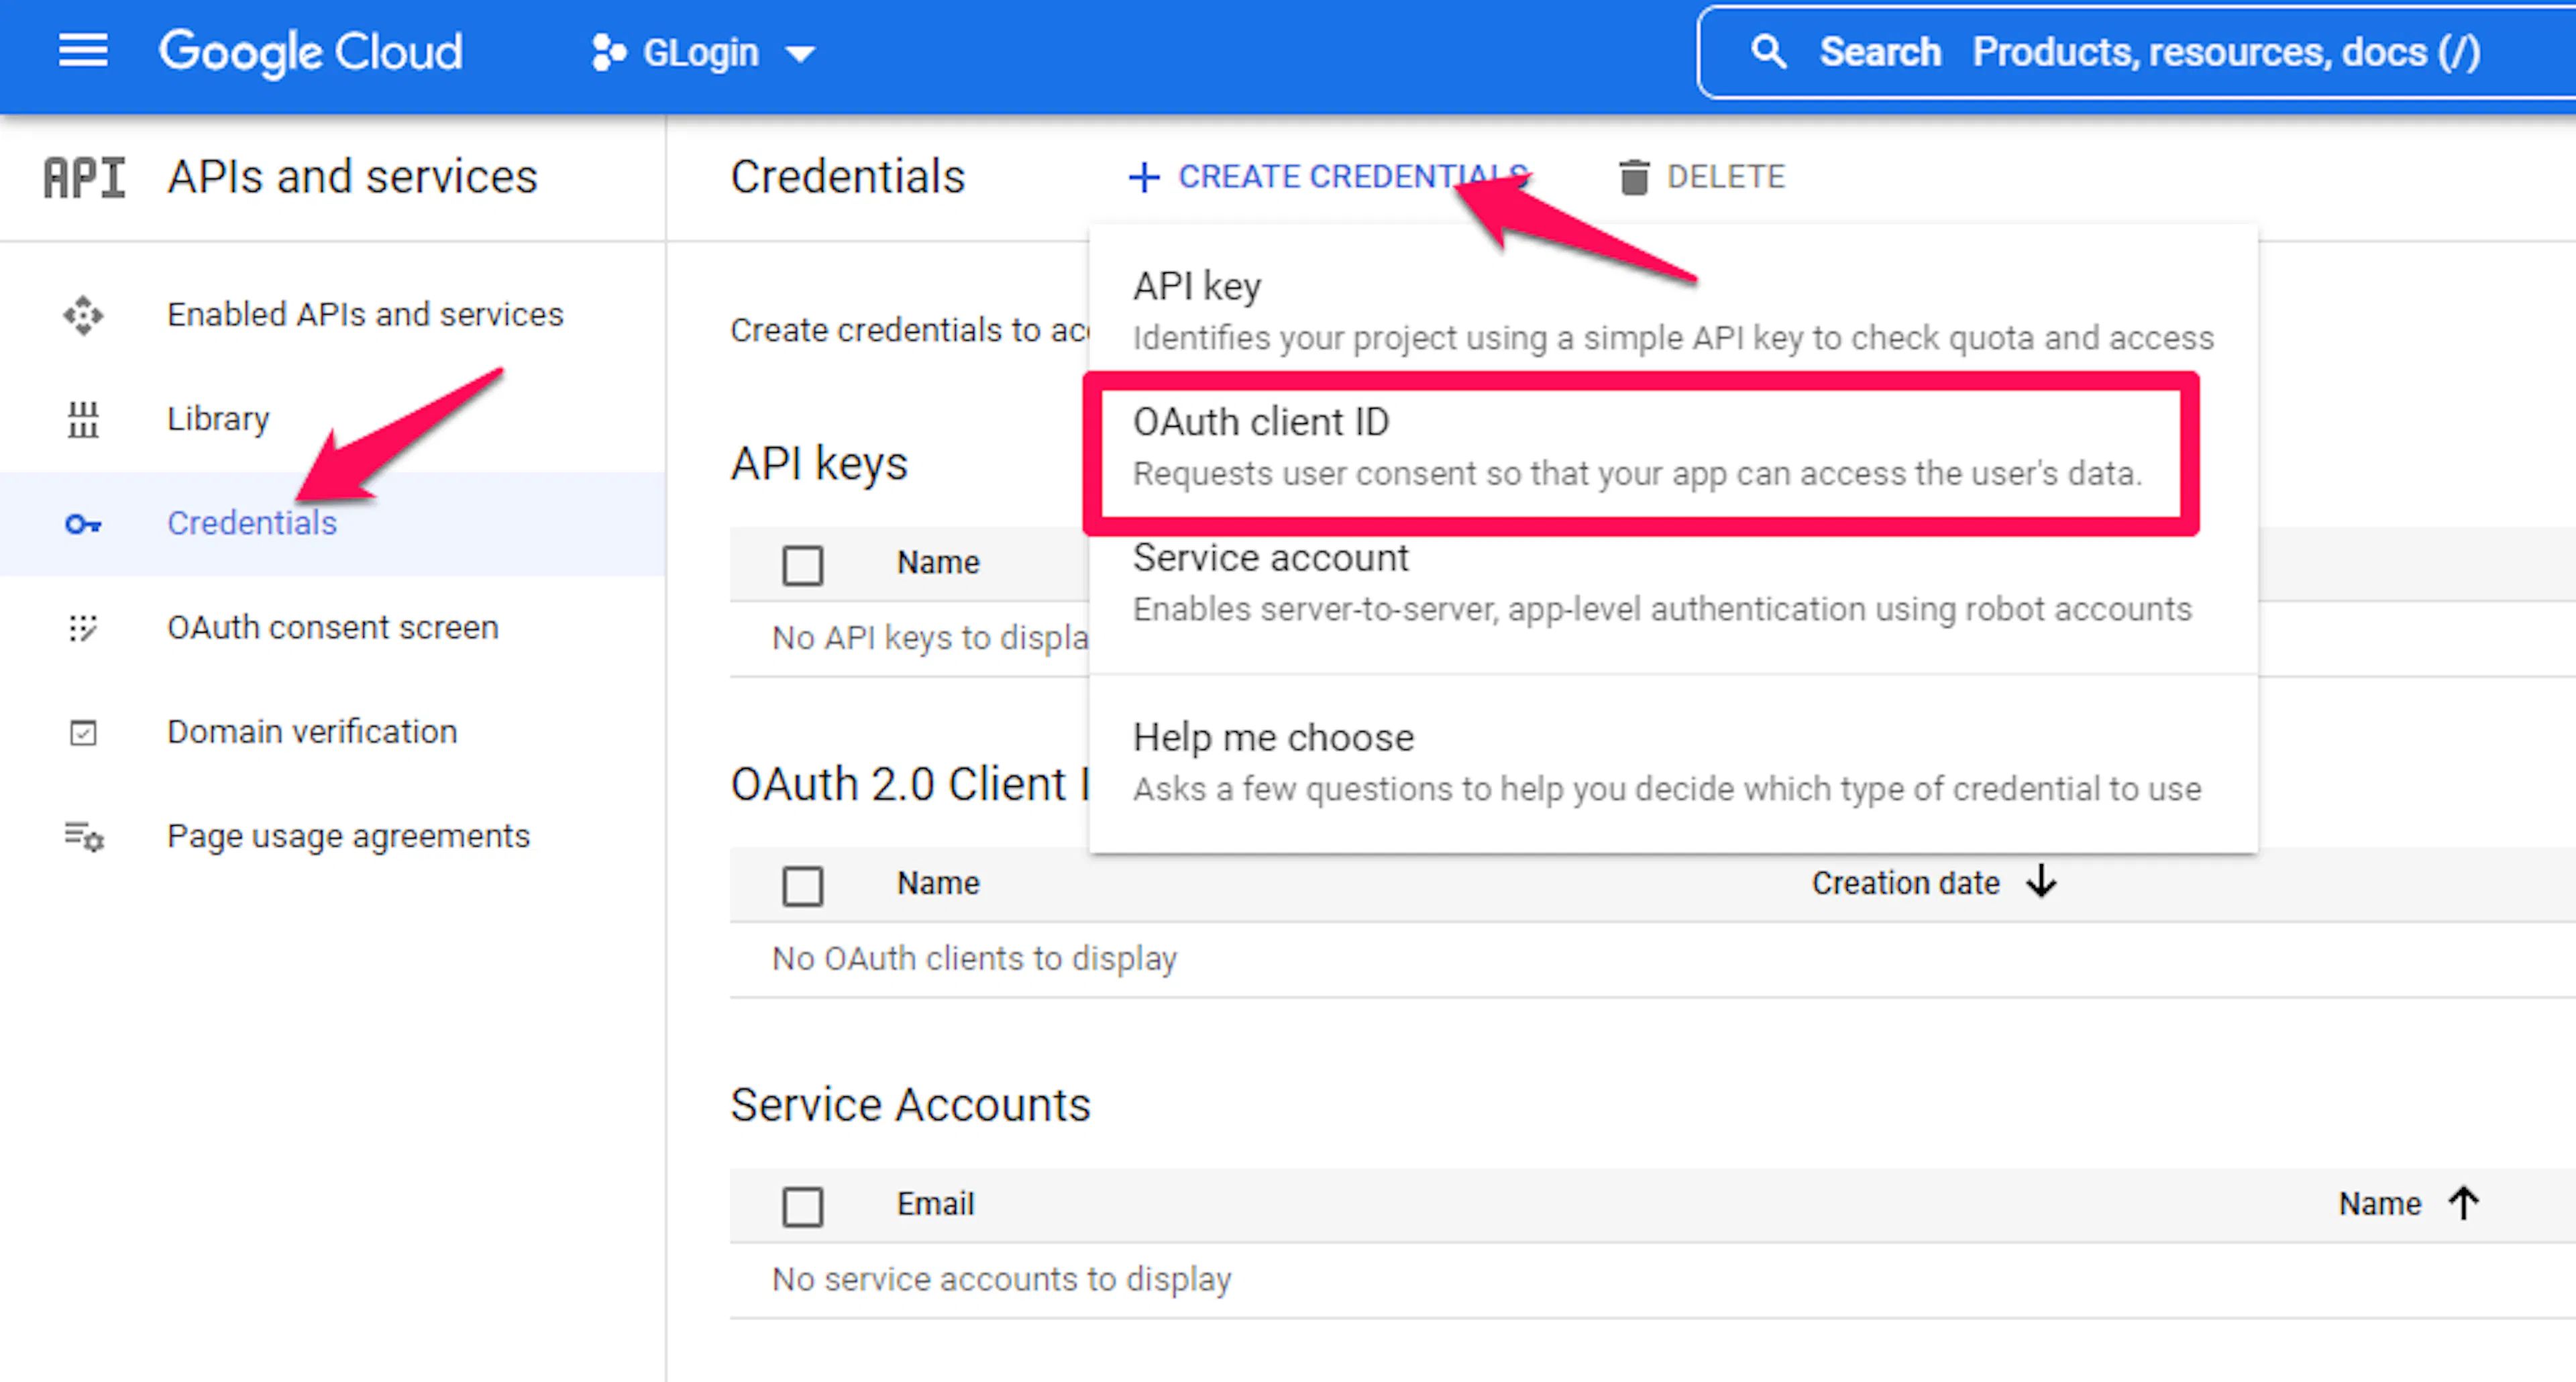
Create your OAuth credentials
Click Credentials on the left, then click Create Credentials at the top and choose OAuth client ID.
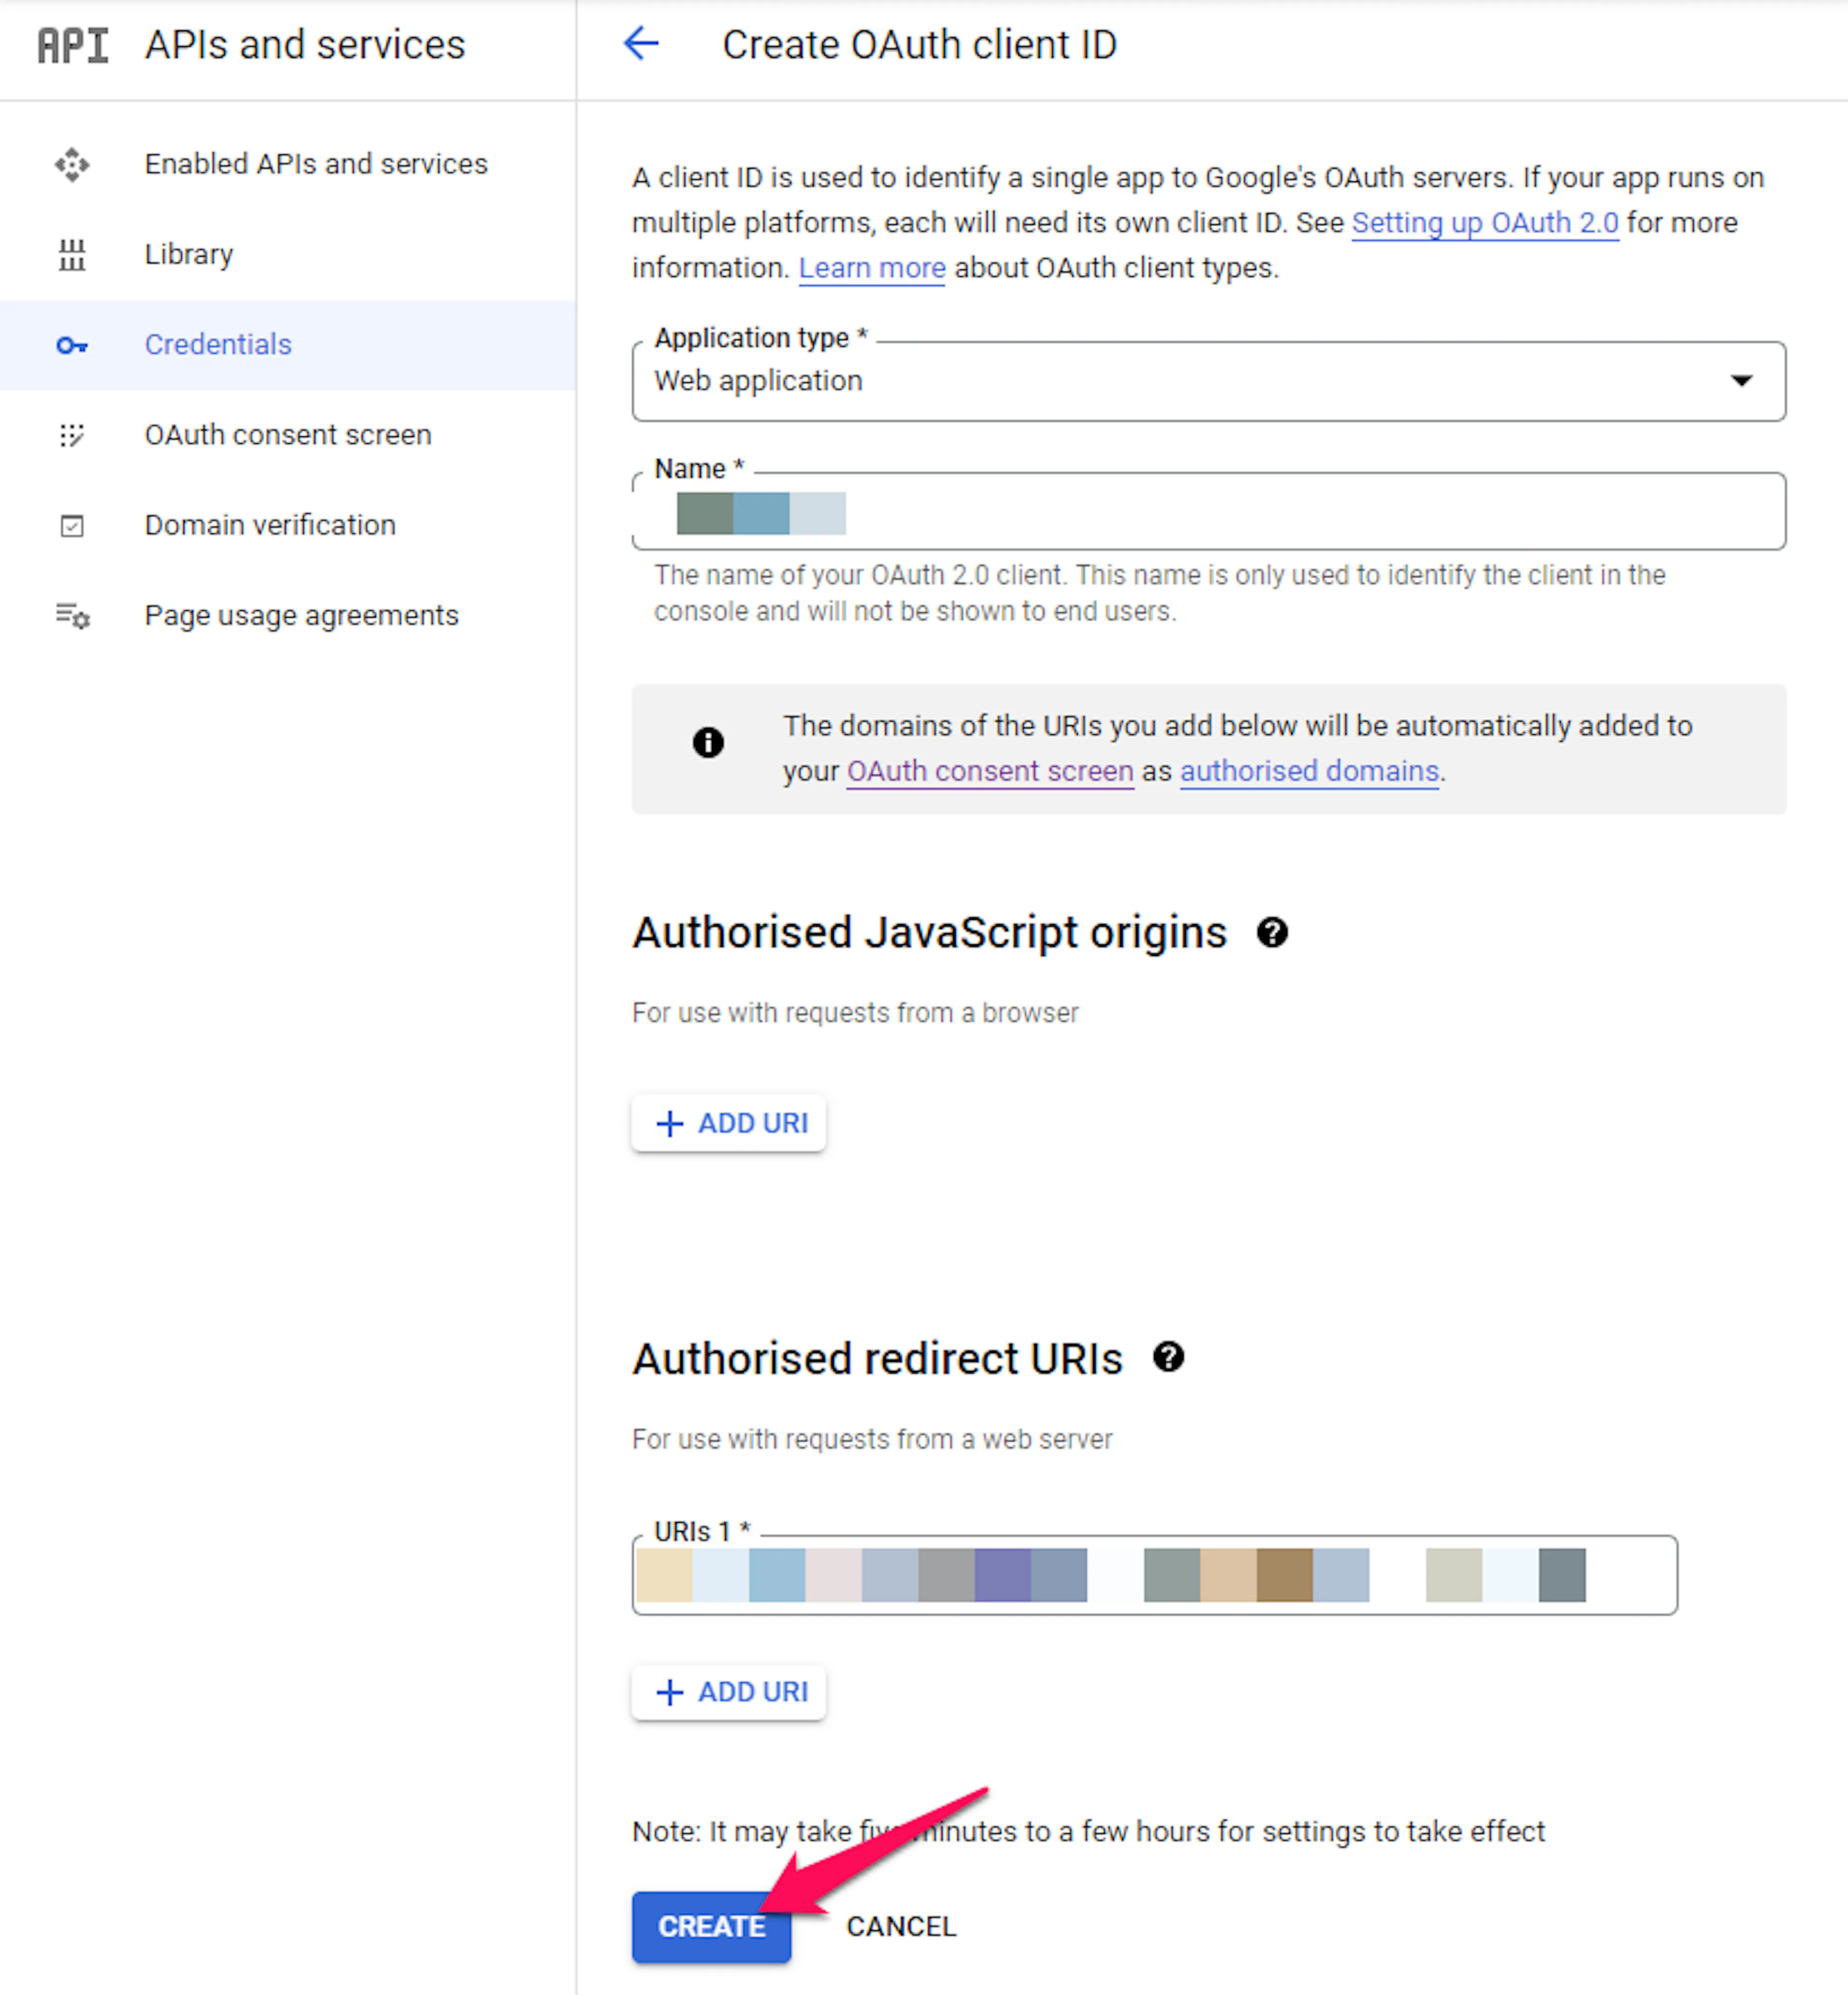
Set up your OAuth client
Choose Web application as the application type and enter a name for the OAuth client ID.
Under Authorised redirect URIs, click Add URI and enter:
https://yoursite.com/wp-login.php?wte_login=google
Replace yoursite.com with your own site URL, then click Create.
Copy the Client ID and Client Secret
A window will show your credentials. If you do not see it, open Credentials from the left-hand menu, click your app name, and copy the Client ID and Client Secret there. You will use both when you add your credentials to WP Travel Engine.
Google apps start in Testing mode. That means only a limited number of people can use them. If you want anyone with a Google account to log in, go to OAuth consent screen, click Publish App under Publishing status, and confirm the change.
Set up Facebook Login
Facebook login takes a few extra details, but the flow is still straightforward. You will create a Facebook app, connect it to your site, and then copy the app credentials into WP Travel Engine.
Sign up as a Facebook developer
While logged in to Facebook, go to the Facebook developer registration page and finish the registration steps. If you already have a developer account, head straight to the Facebook Apps dashboard.
Create your app
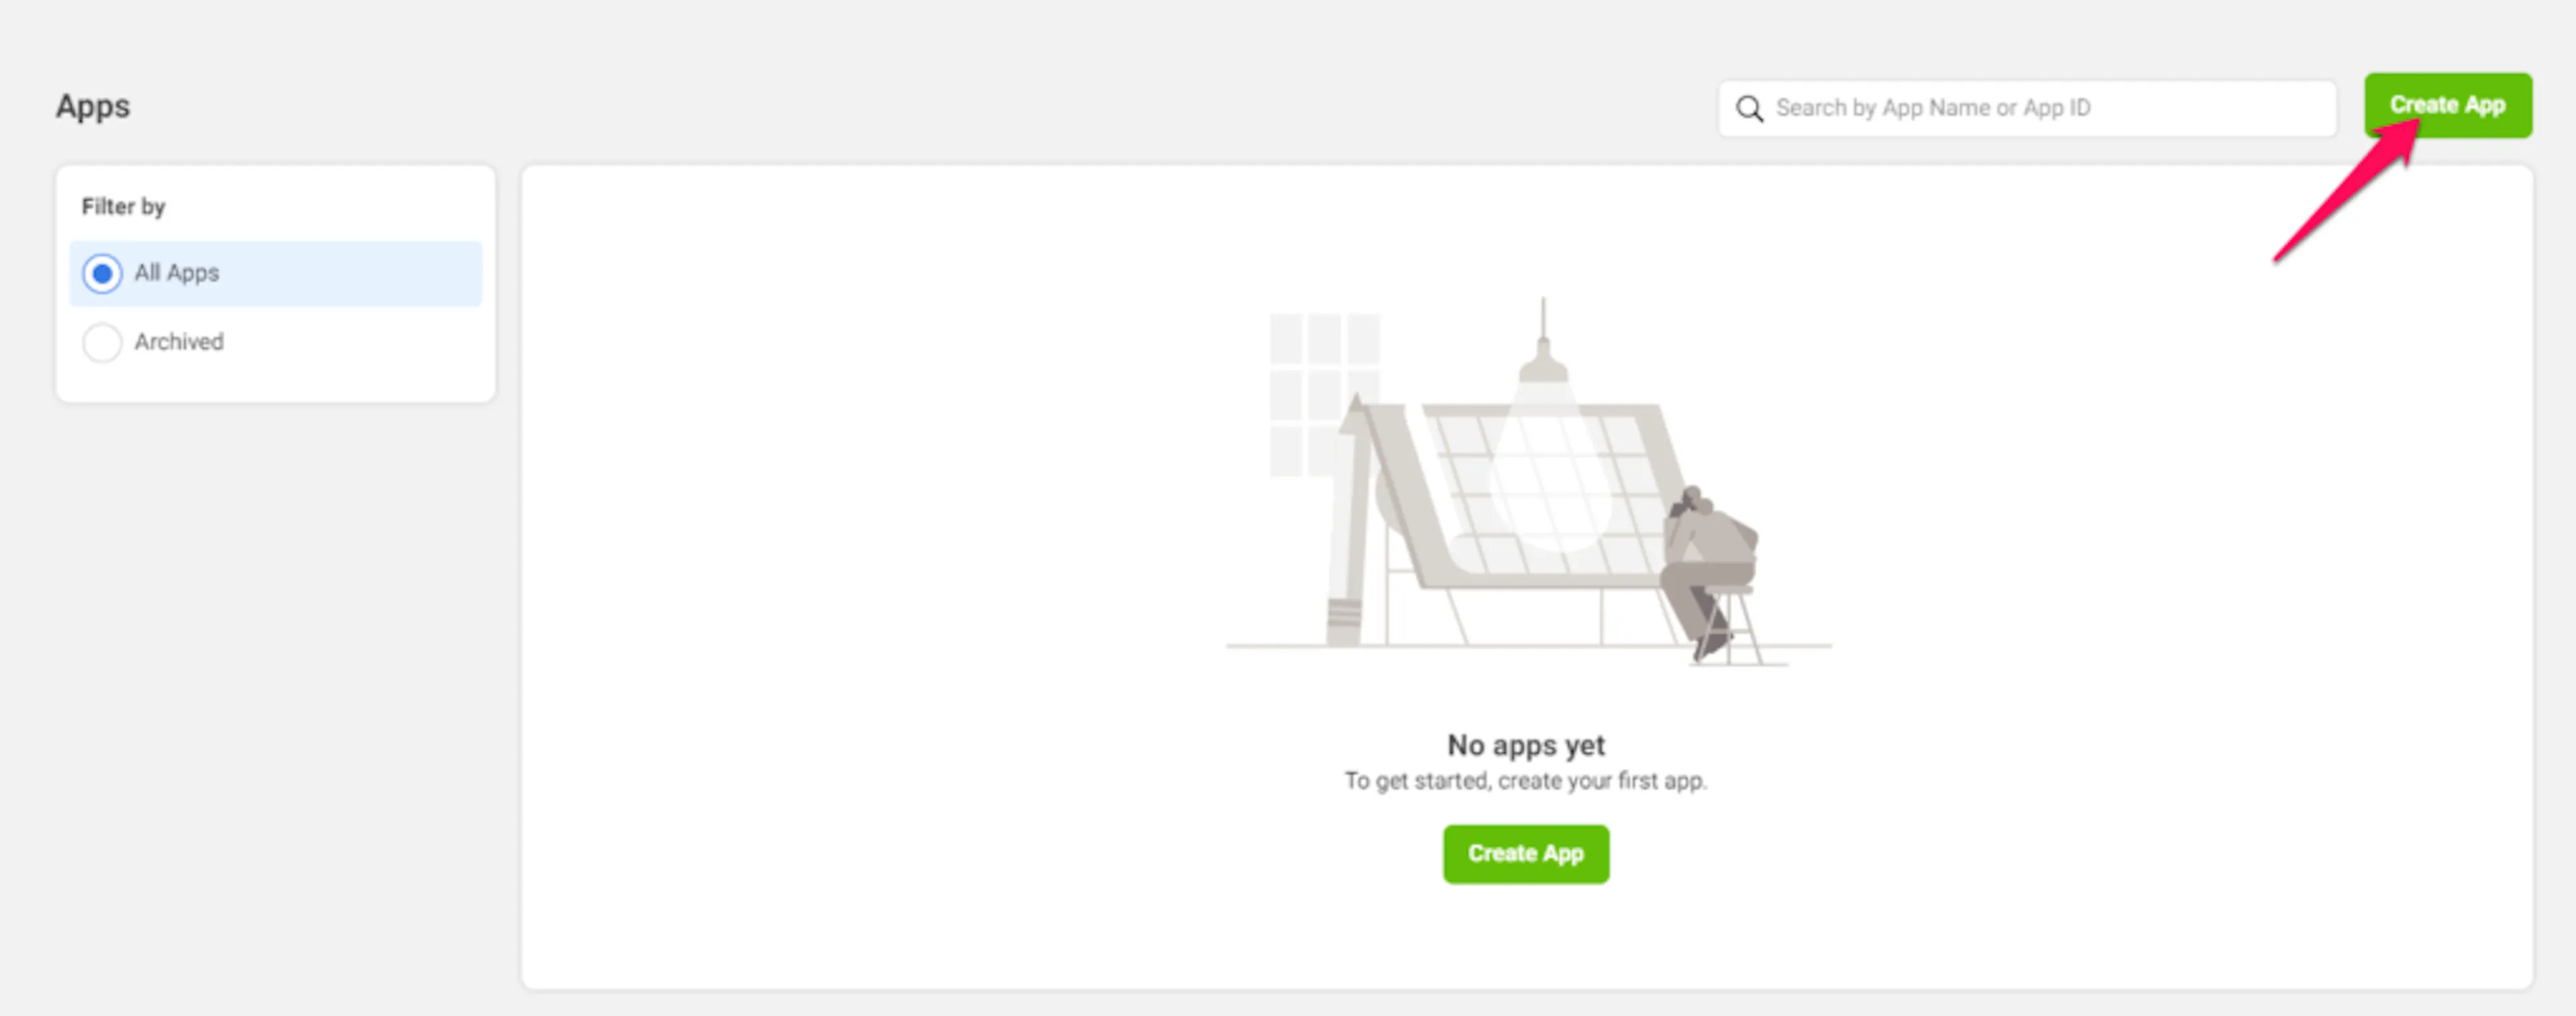
In the Apps panel, click Create App.
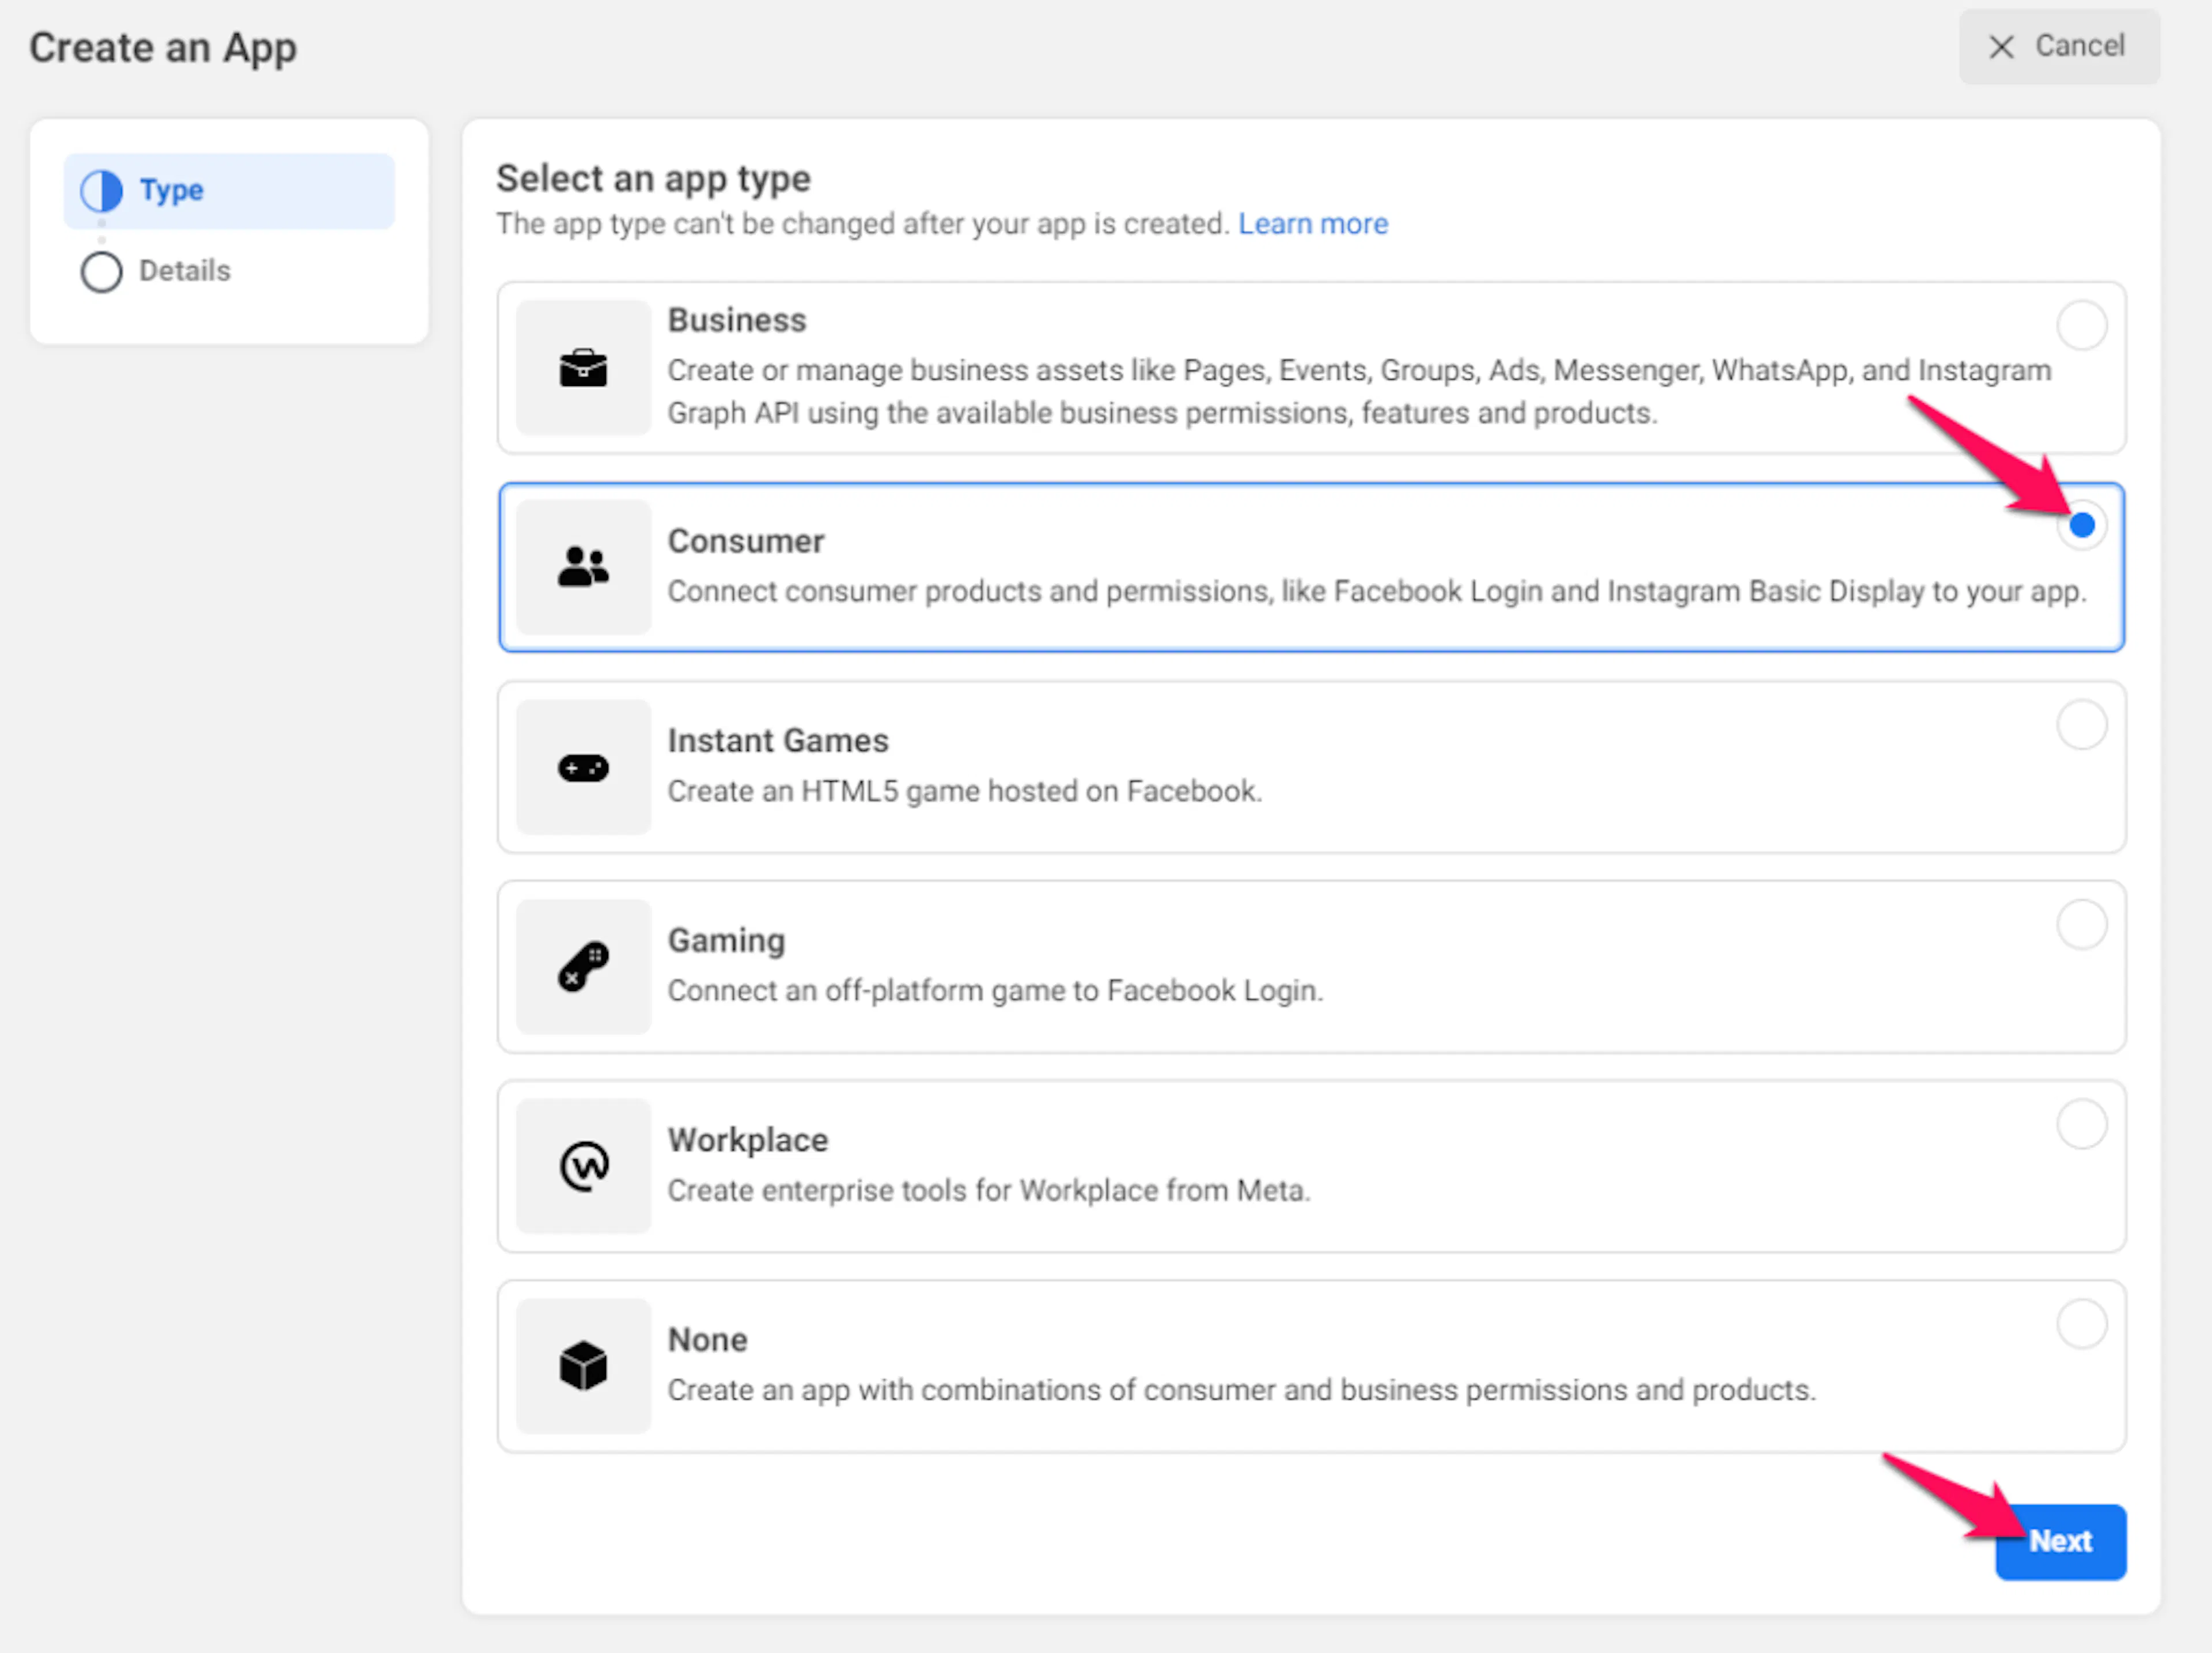
In the popup, choose the Consumer app type and click Next.
Add the app details
Enter an App Display Name, which is what people will see on the consent screen, and an App contact email. You can also add a Business Manager Account if you want to.
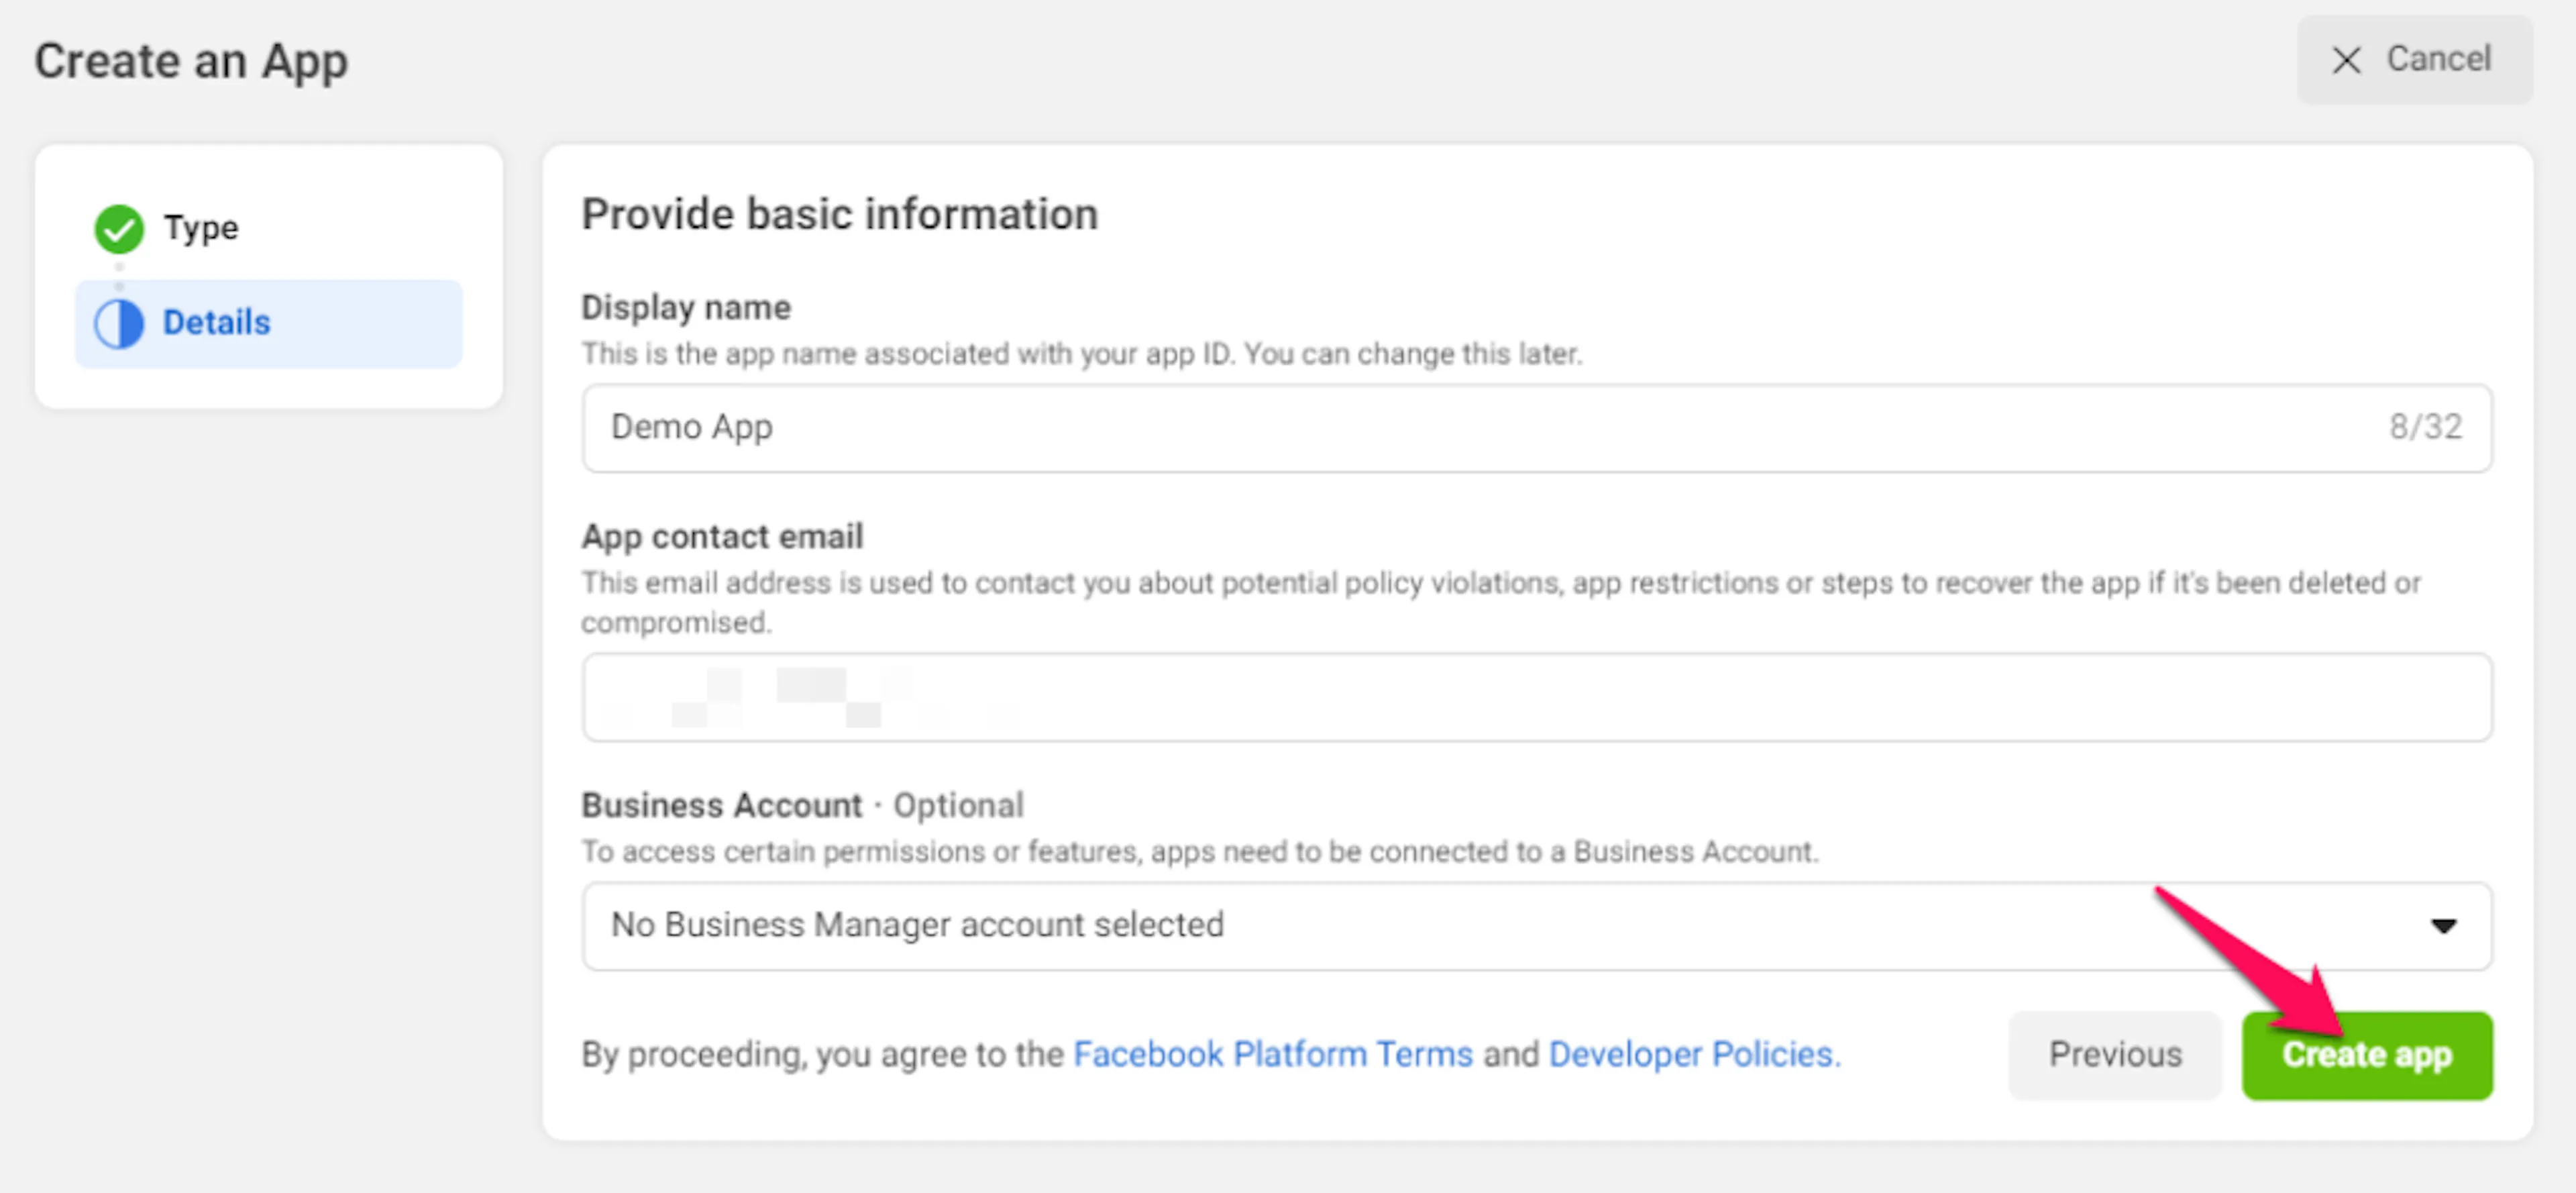
Click Create app and complete the security check.
Set up Facebook Login
Find Facebook Login in the products list and click Set Up.
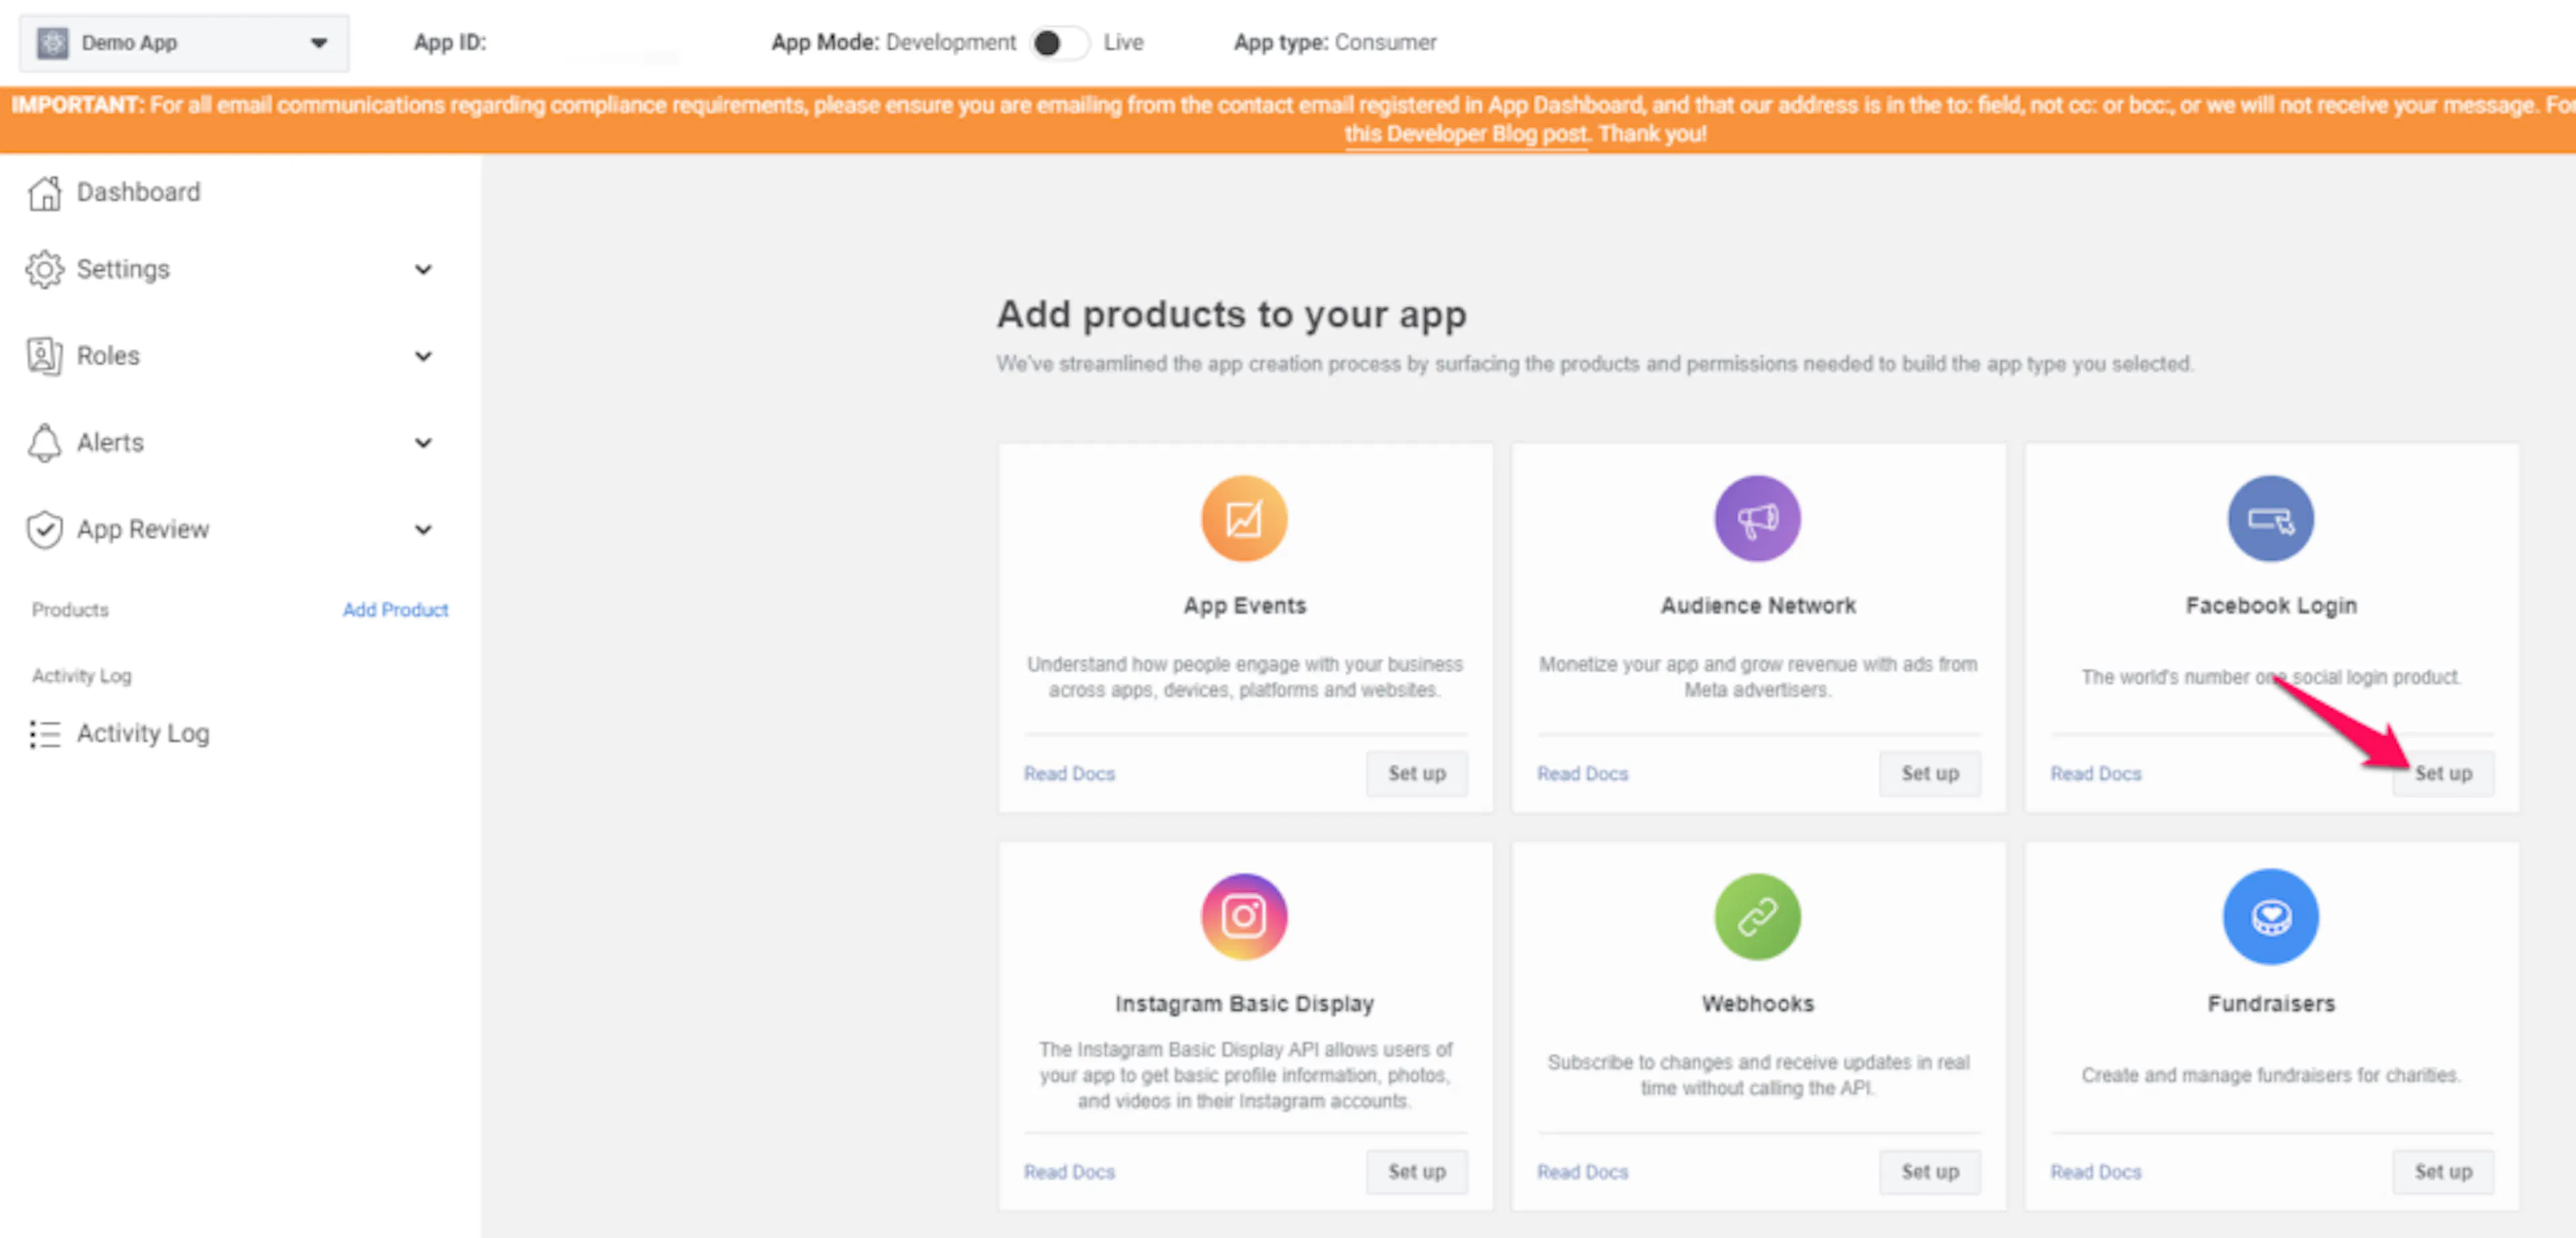
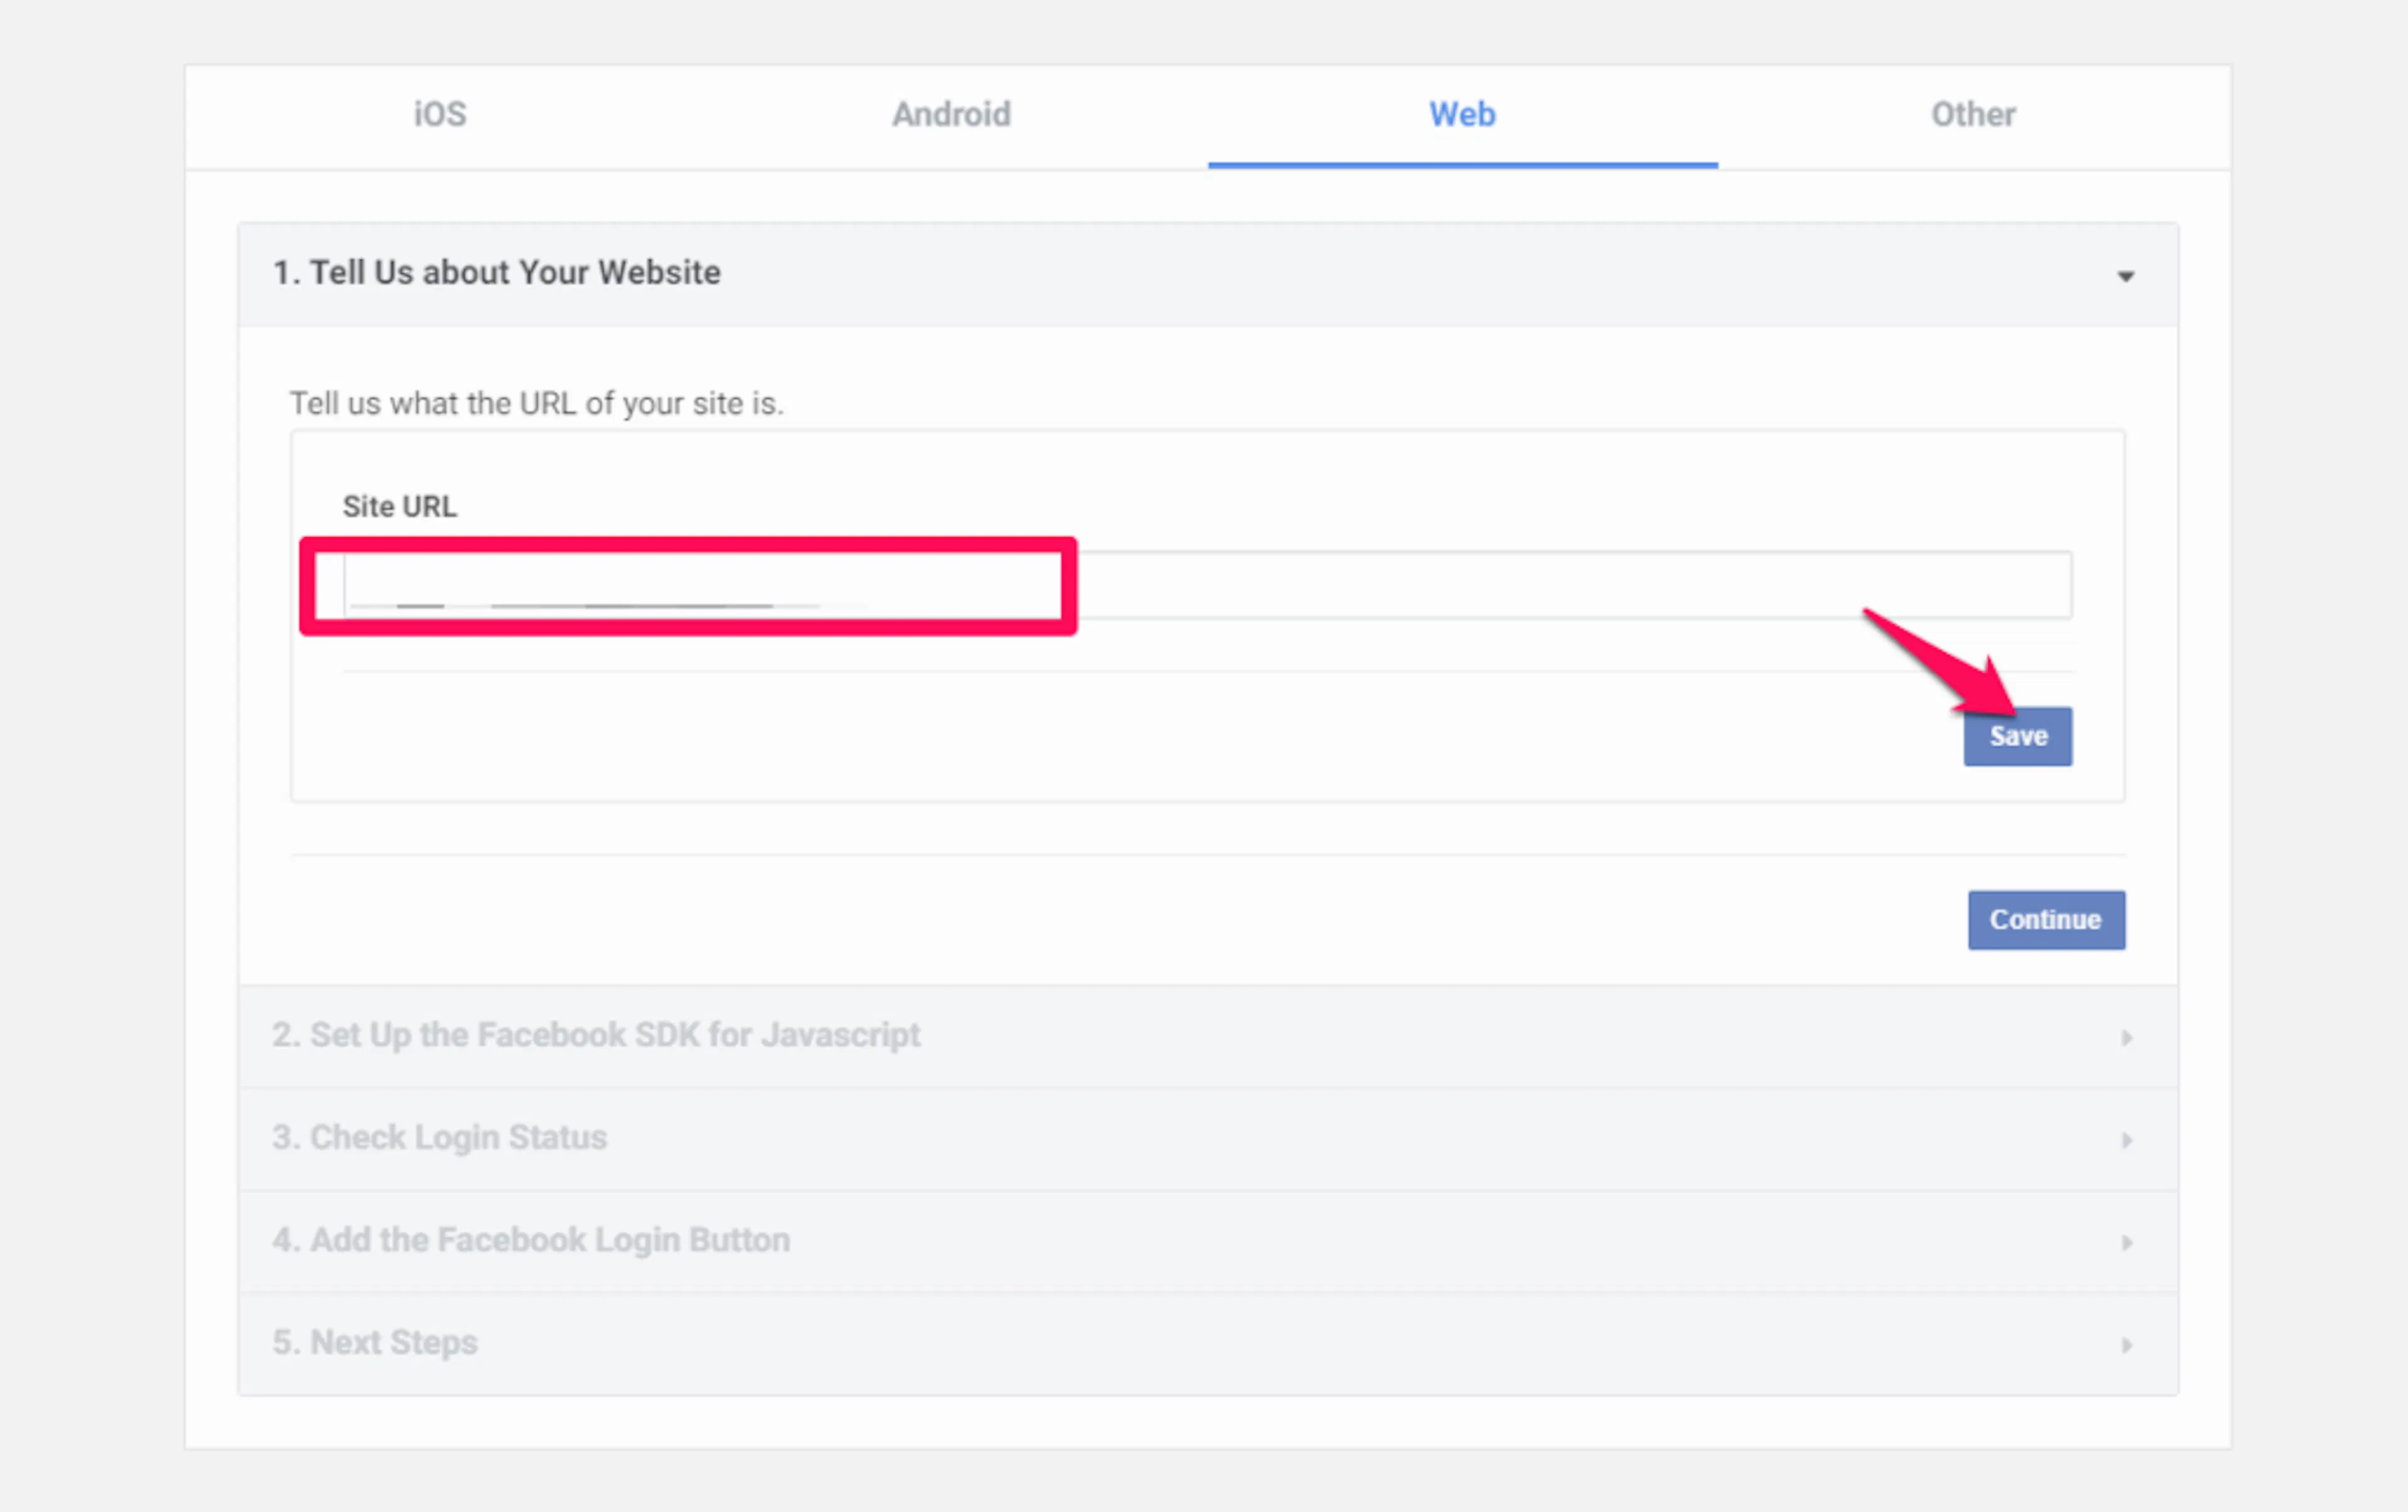
Choose the Web platform, enter your site URL in the Site URL field, and click Save.
Add the OAuth redirect URL
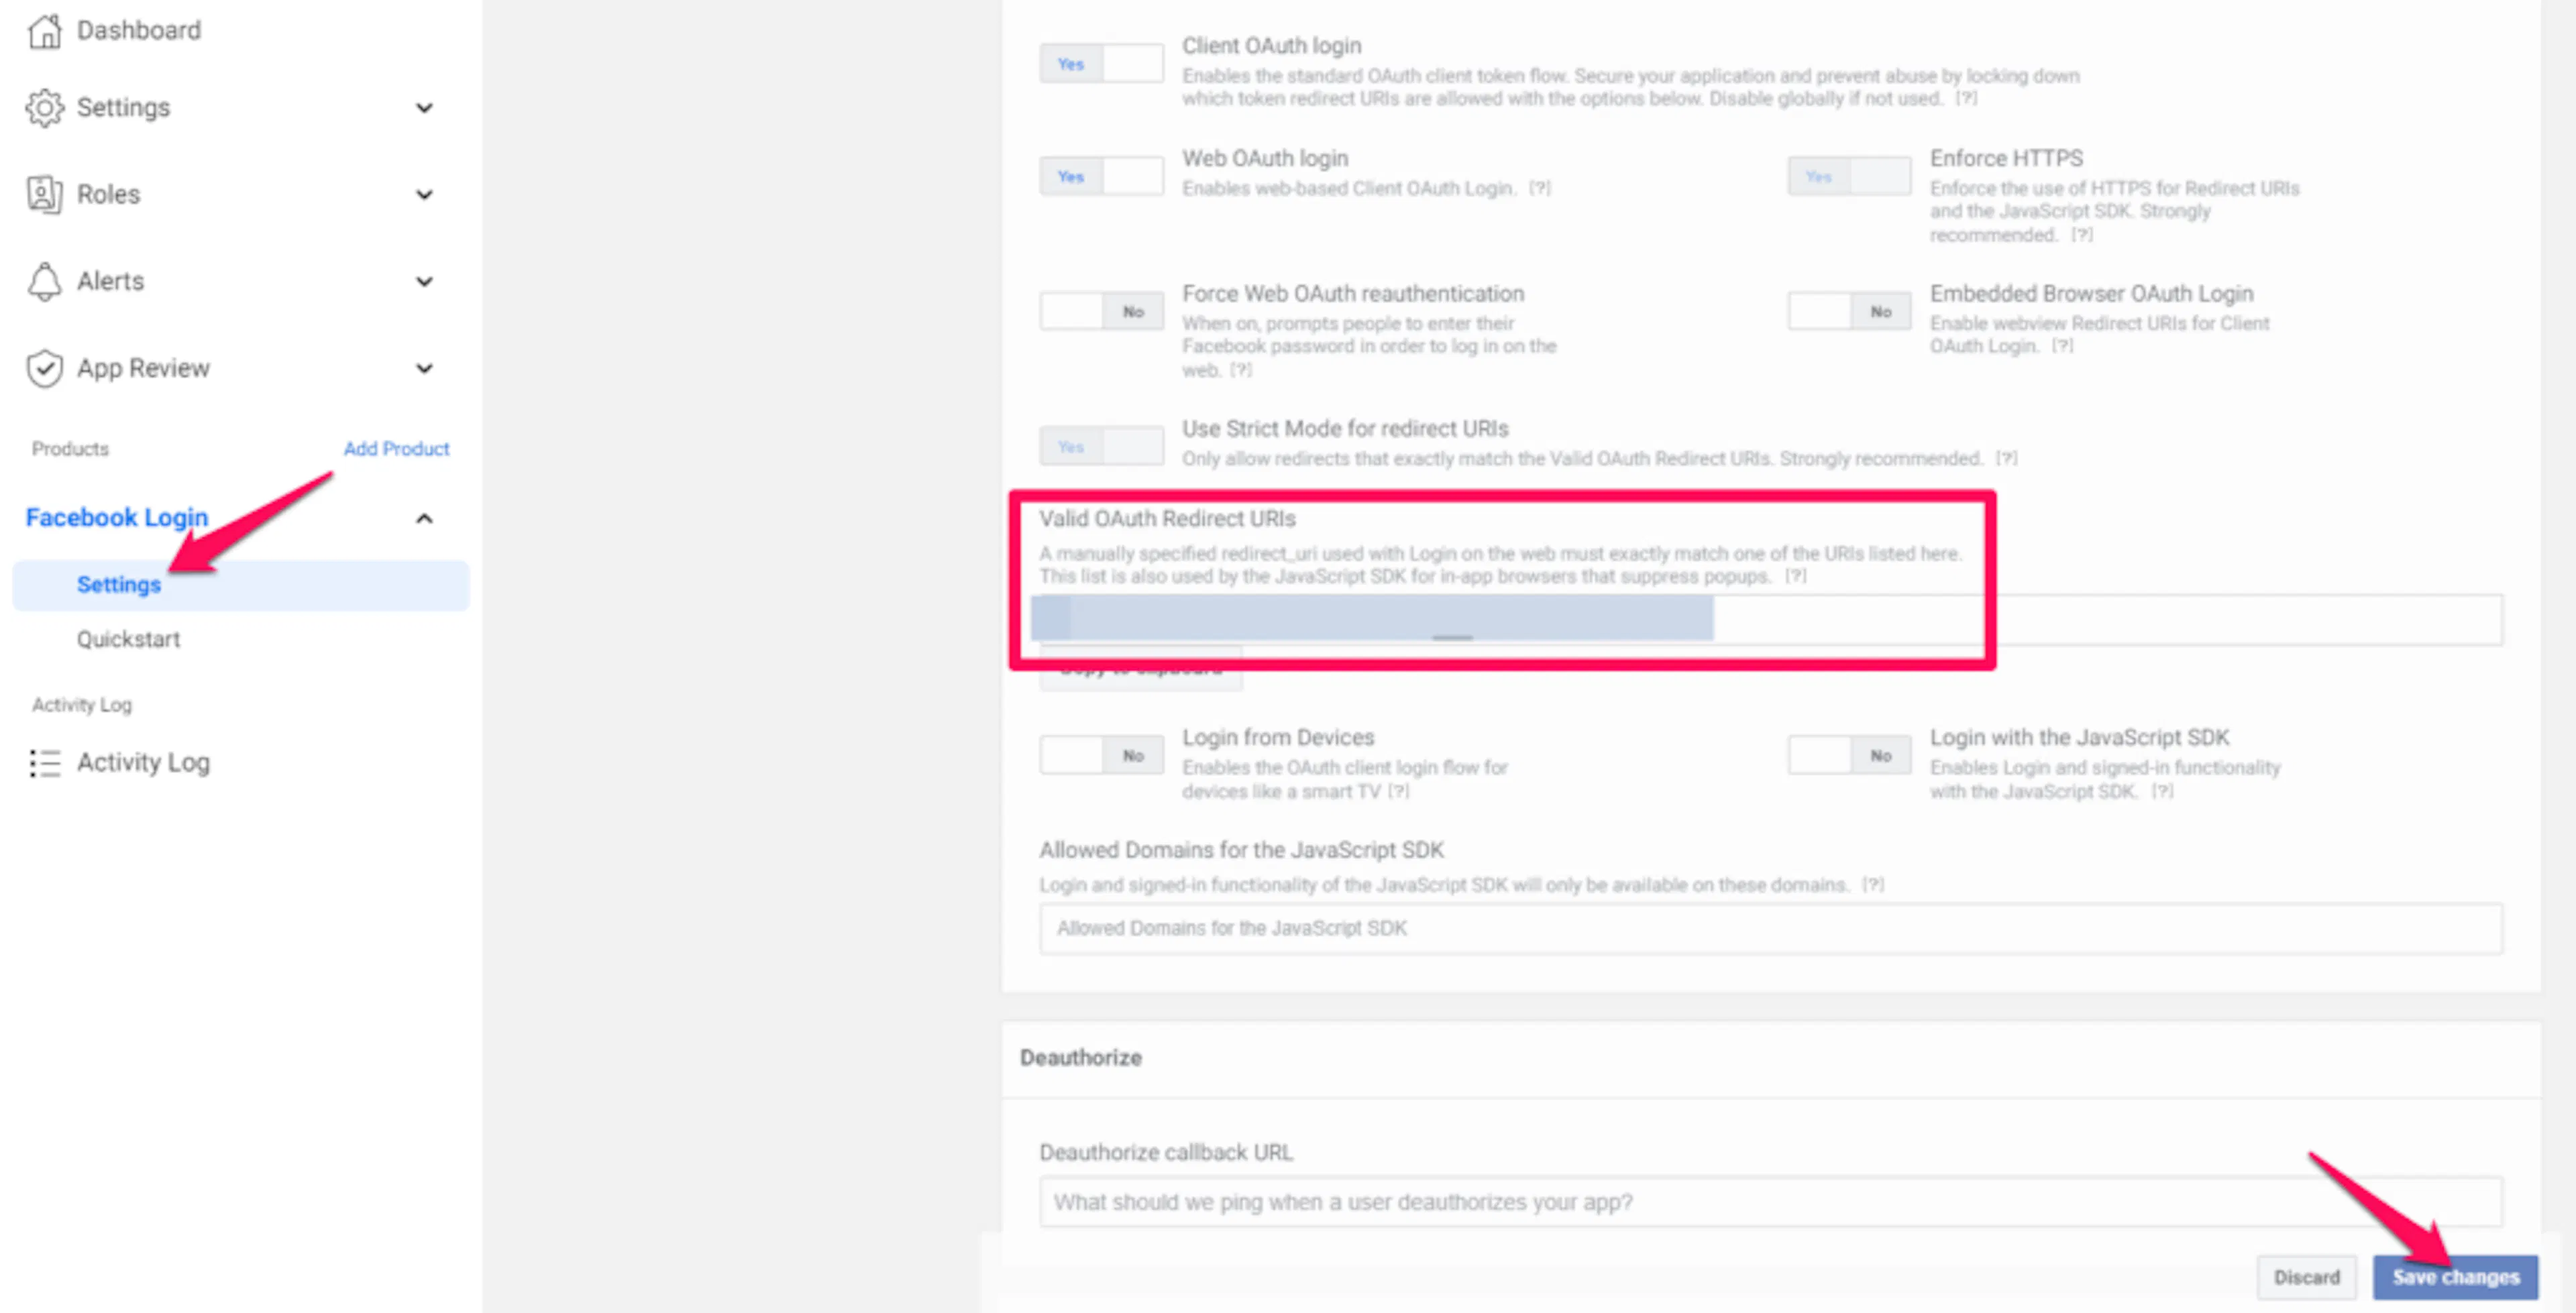
Under Products > Facebook Login > Settings, add this URL to Valid OAuth Redirect URIs:
https://yoursite.com/wp-login.php?wte_login=facebook
Replace yoursite.com with your own site URL, then click Save Changes.
Add your app domain
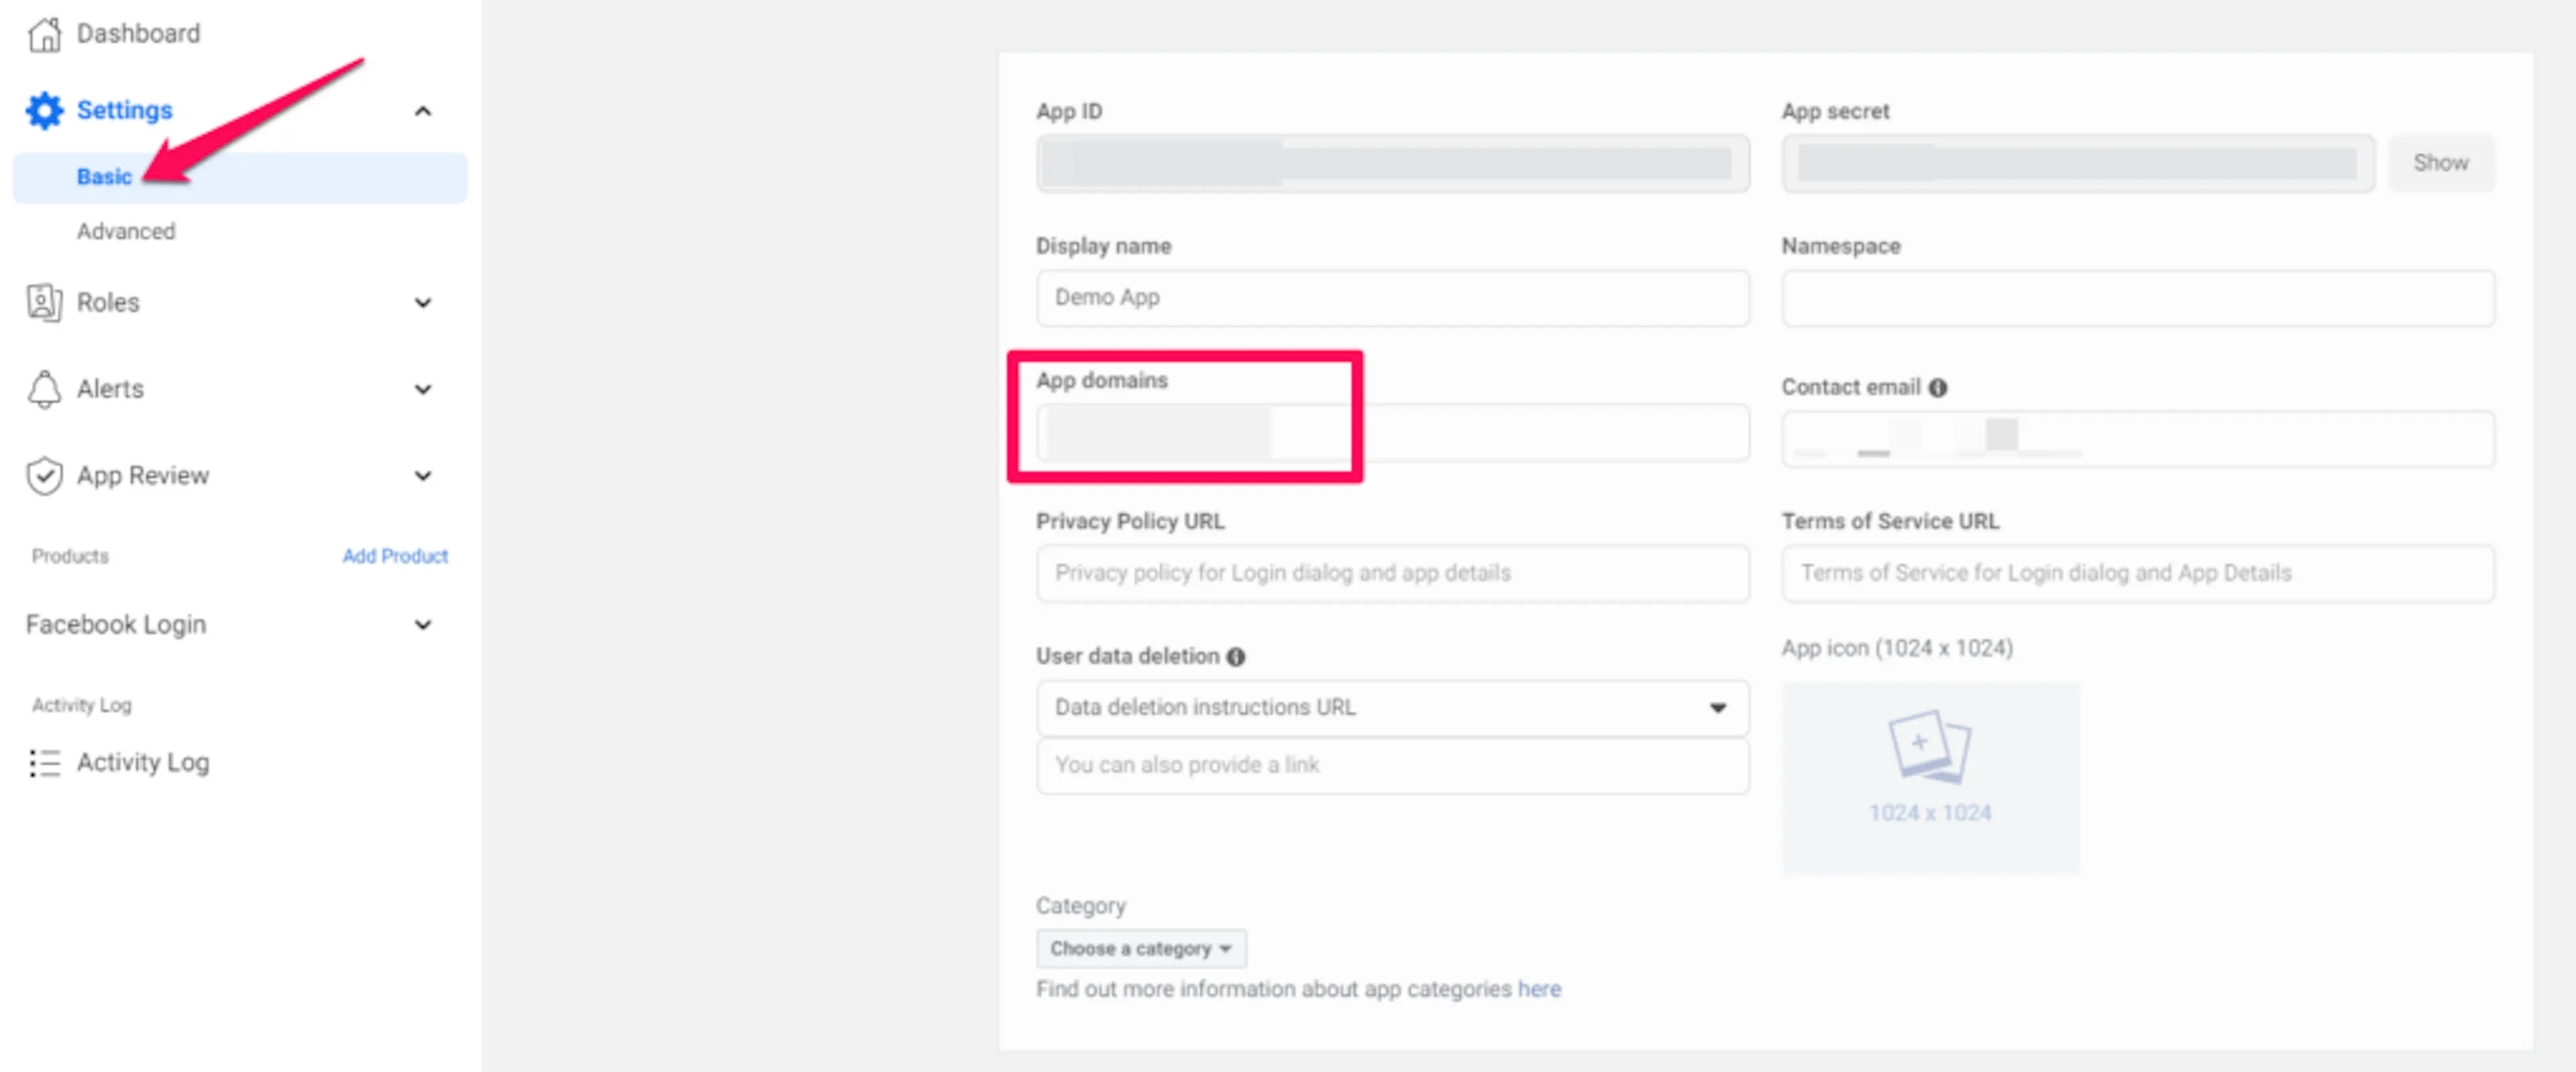
Go to Settings > Basic and enter your site domain in the App Domains field, such as yoursite.com.
Add privacy and data deletion details
Fill in the Privacy Policy URL field with a public page that explains what data you collect and how you use it.
Under User data deletion, choose Data deletion instructions URL and add the link to a page that explains how users can delete their account on your site.
Choose a category and make the app live
Choose a Category and upload an App Icon, then click Save Changes.
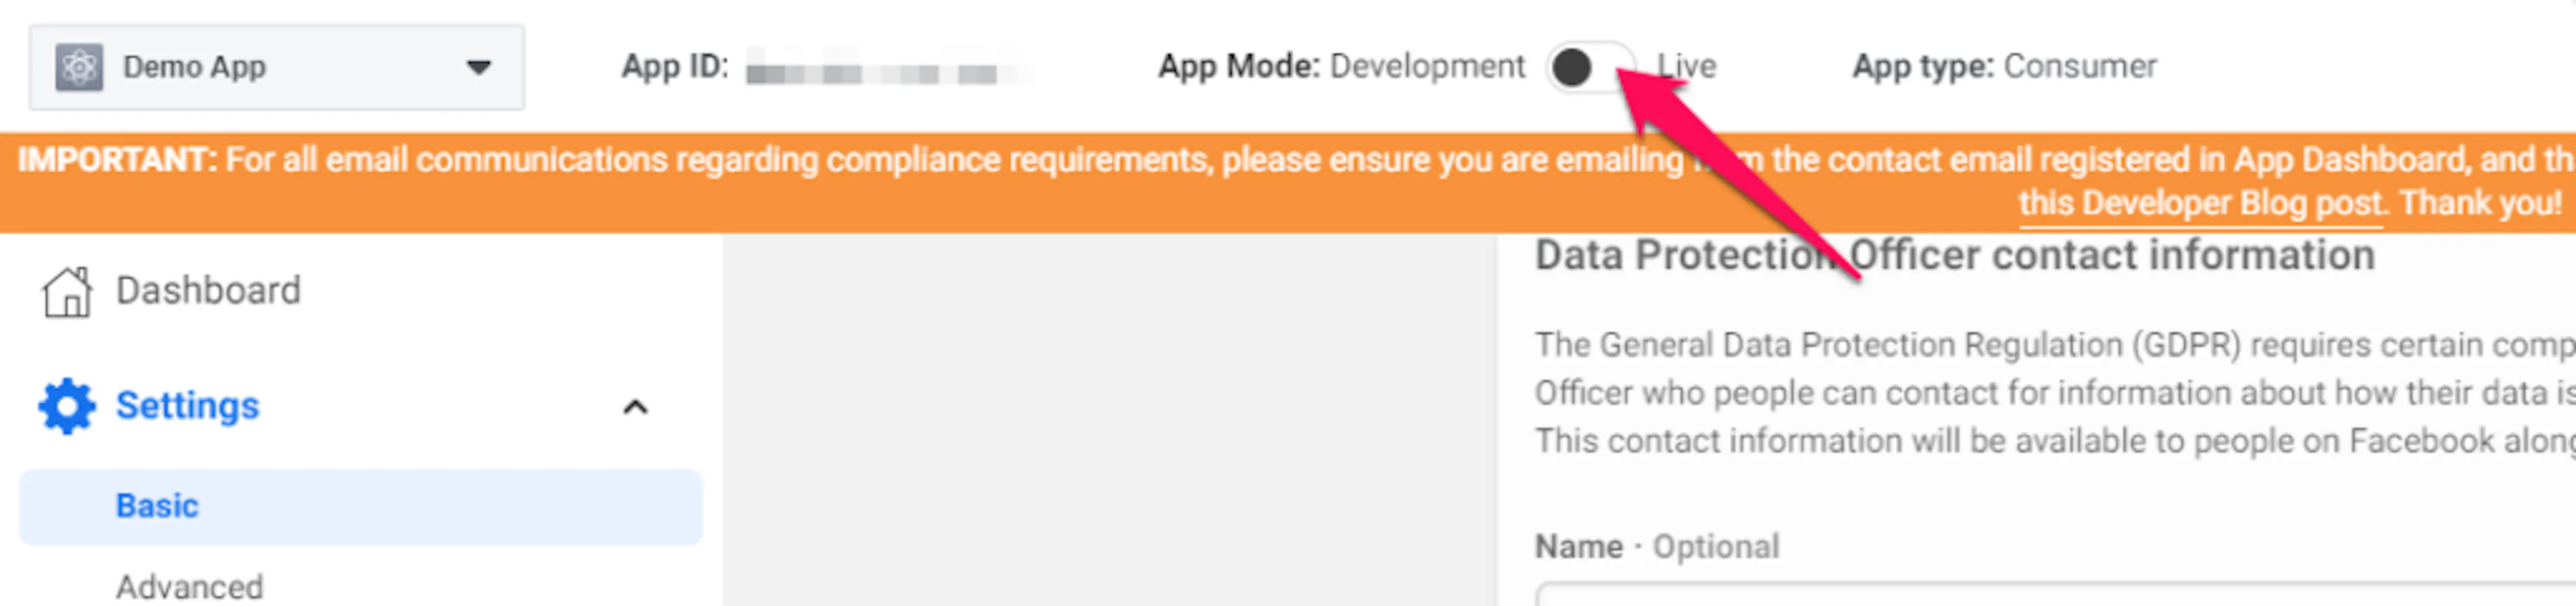
New apps start as private, so only you can log in with them at first. Switch App Mode from Development to Live in the top bar.
Ask for advanced access to permissions
By default, your app only has Standard access, which is not enough for Facebook Login. Go to App Review > Permissions and Features, find public_profile and email, and click Get advanced access next to each one.
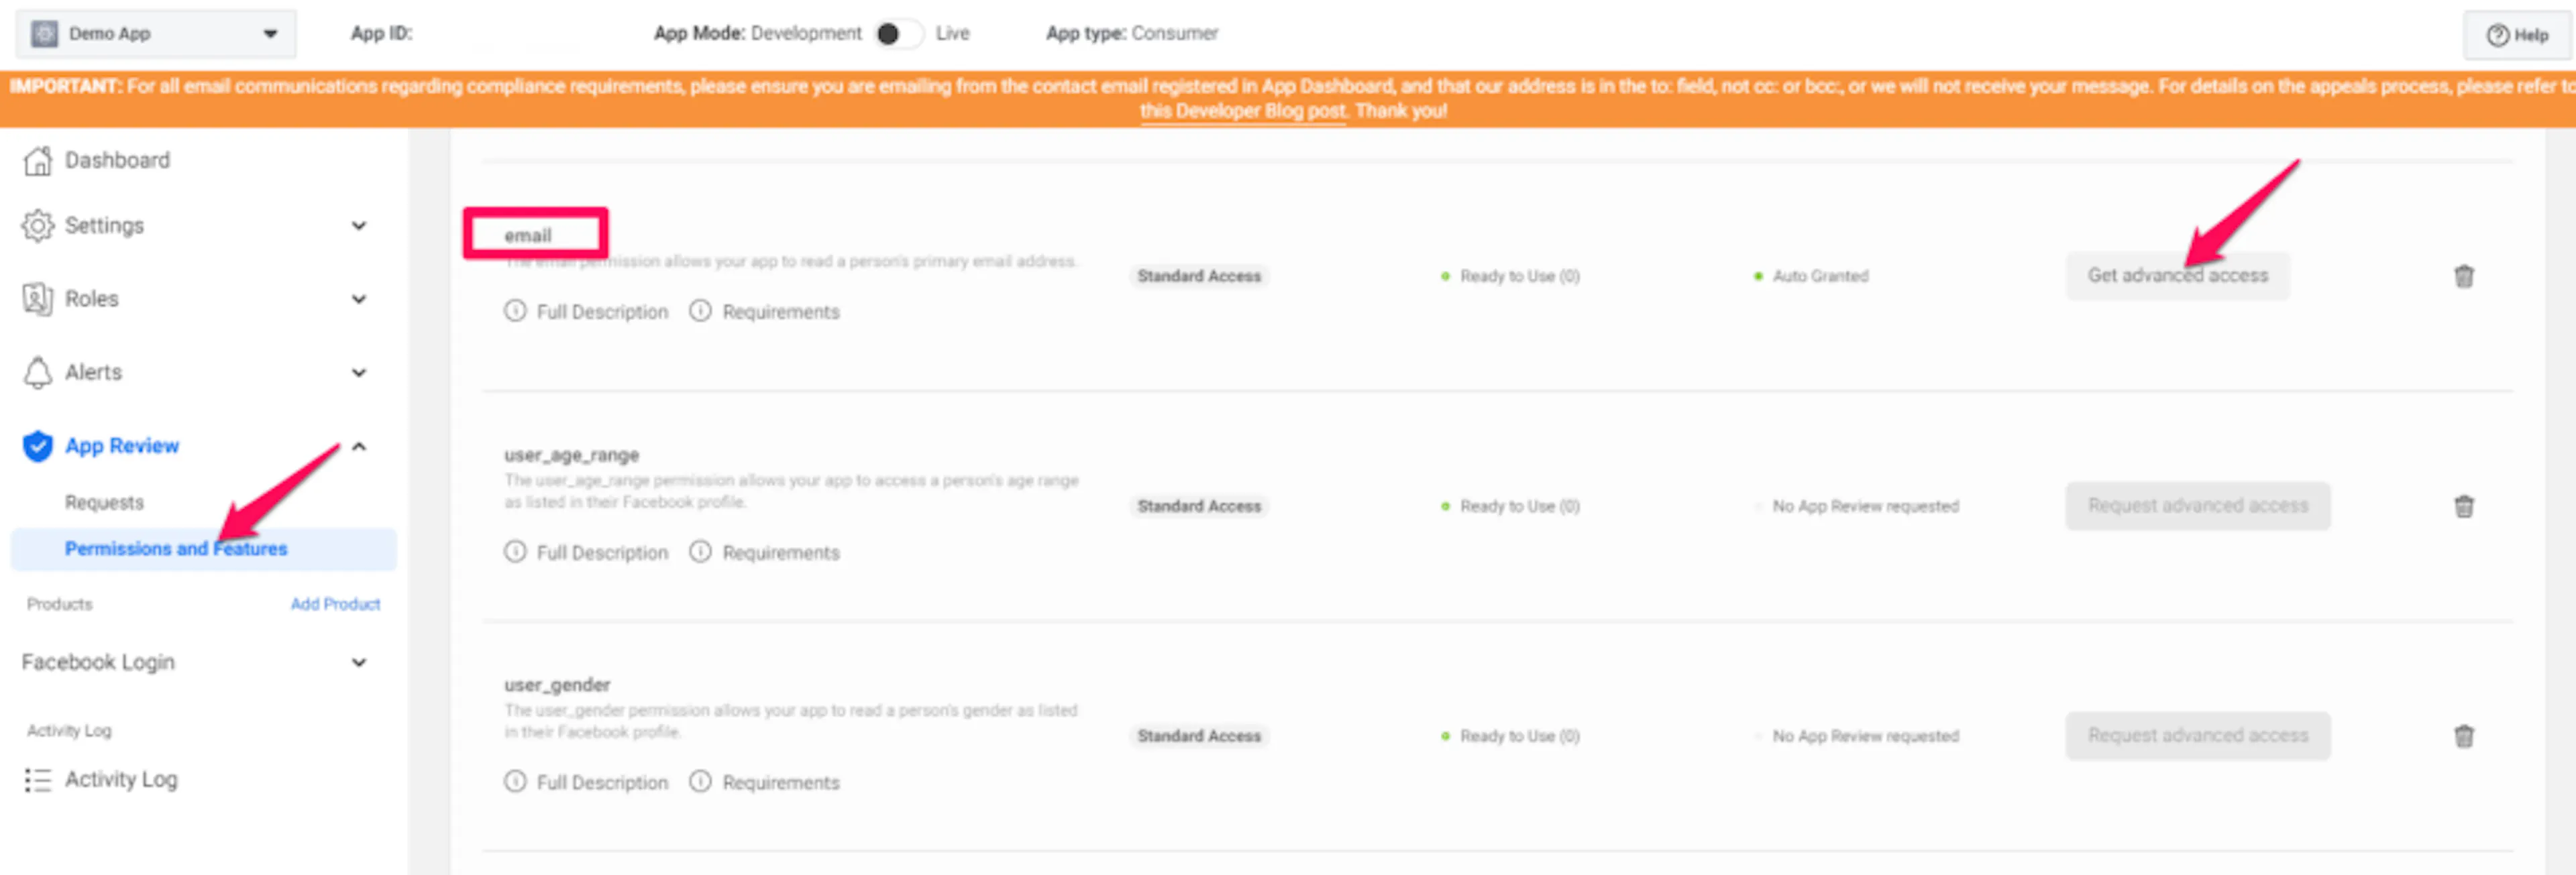
If Facebook will not let you switch from Development to Live mode, check your Privacy Policy URL and Data Deletion URL first. Both pages need to be real, public, and accessible.
Copy the App ID and App Secret
Go to Settings > Basic. You will see your App ID at the top of the page. Click Show to reveal the App Secret. You will use both when you add your credentials to WP Travel Engine.
Set up LinkedIn Login
LinkedIn login is useful if your audience prefers signing in with their professional account. The setup is shorter than the others, and you will only need a few app details before you can connect it to your site.
Create a LinkedIn app
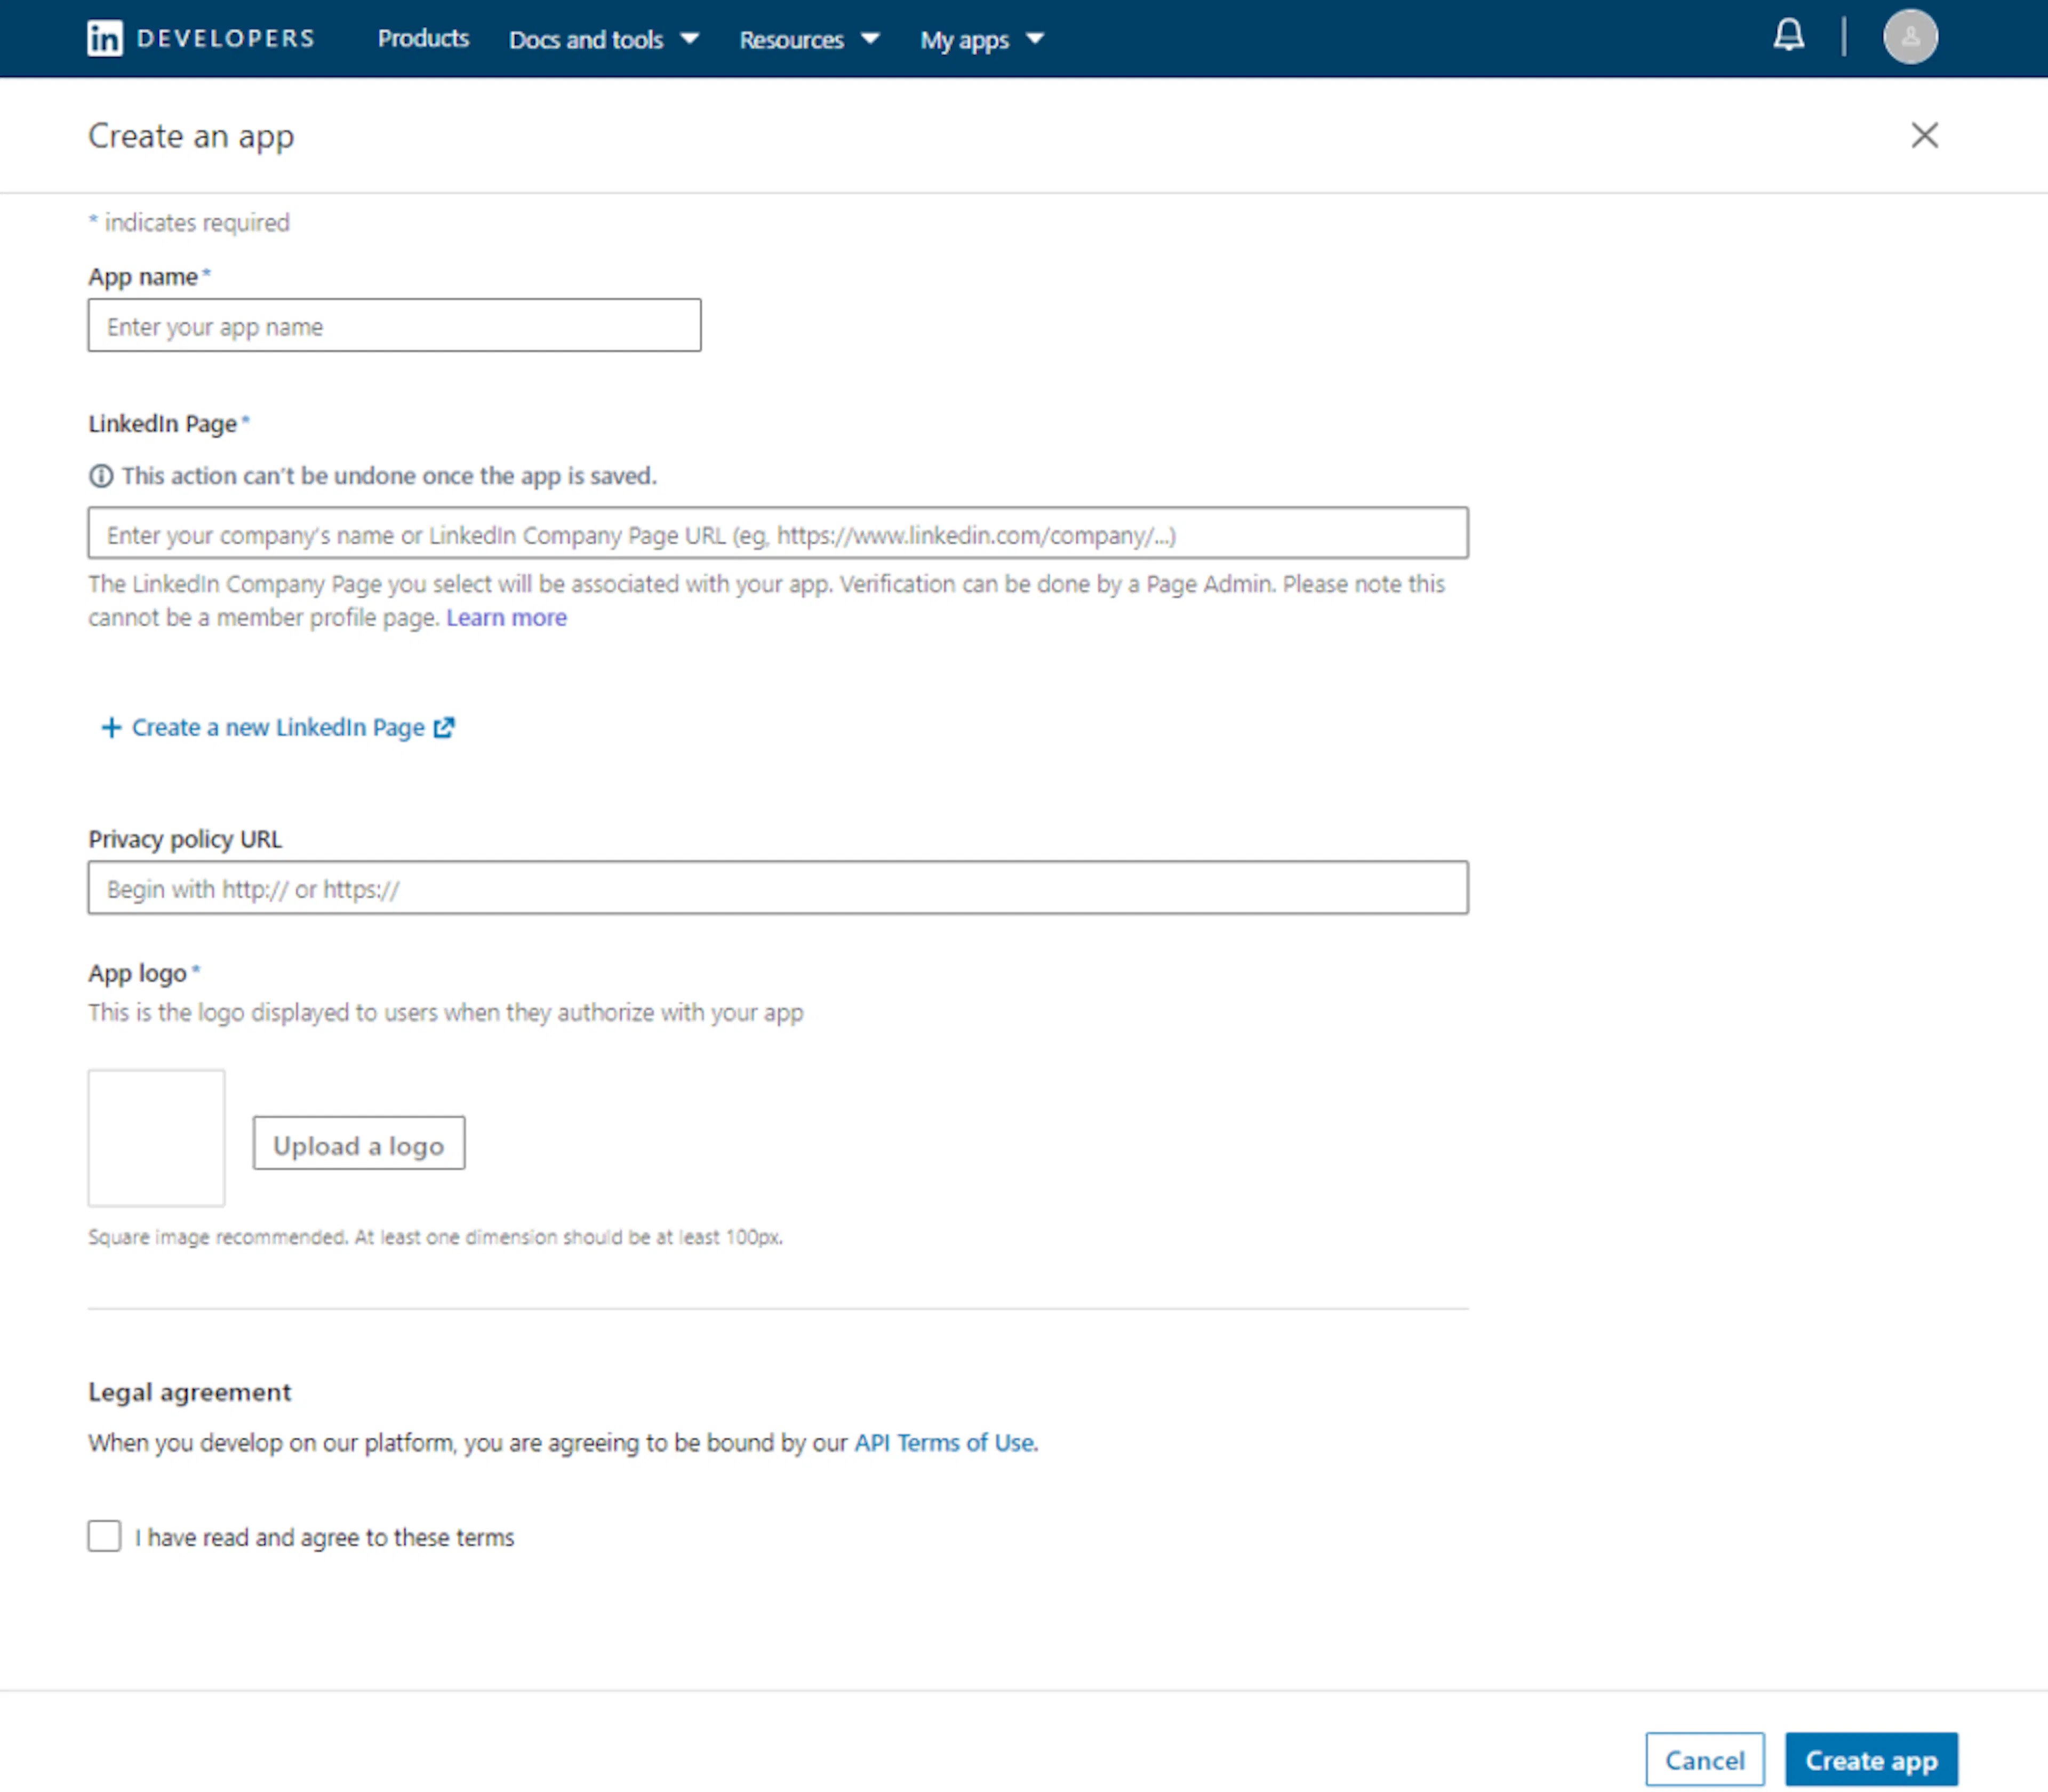
Go to the LinkedIn Developers portal and click Create app. Sign in with your LinkedIn account if needed.
Fill in the app details
- App name: enter a name for your app
- LinkedIn Page: add your LinkedIn Company Page URL, or create a new one
- Privacy policy URL: add the link to your site's privacy policy page
- App logo: upload a logo for your app
Read the terms of service, tick the confirmation box, and click Create app.
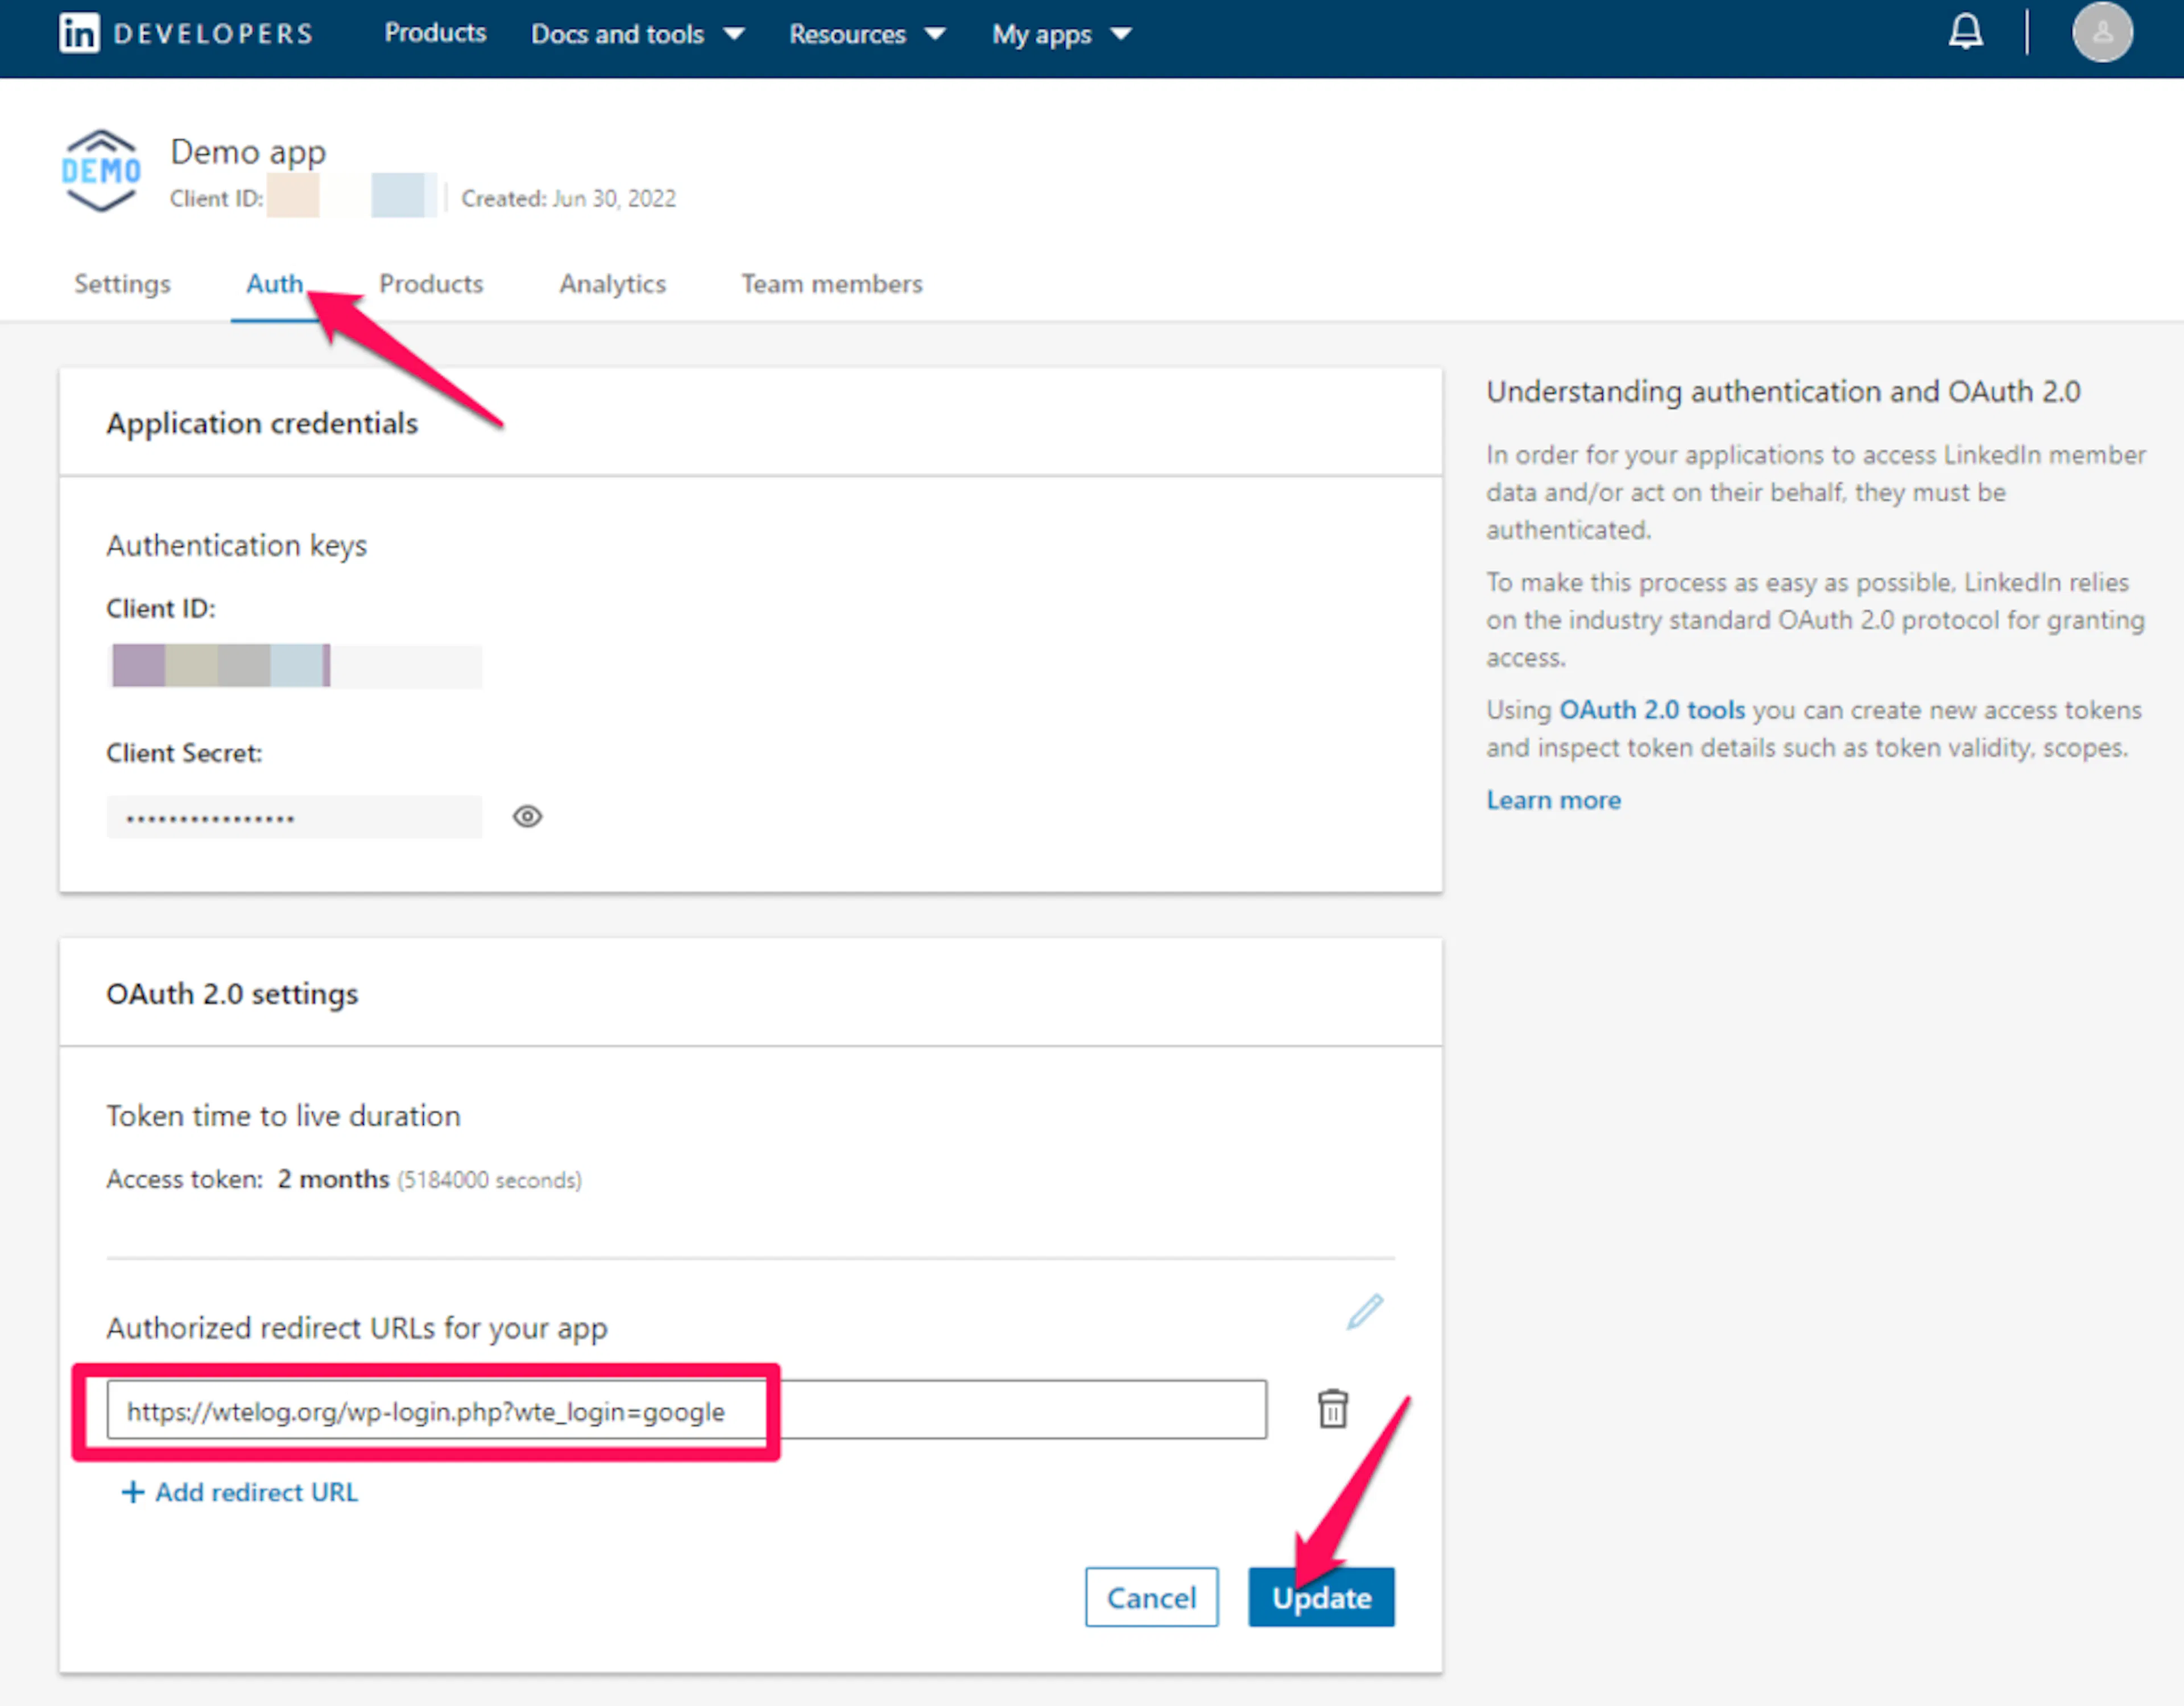
Add an authorized redirect URL
Open the Auth tab and add this URL under Authorized redirect URLs:
https://yoursite.com/wp-login.php?wte_login=linkedin
Replace yoursite.com with your own site URL and click Update.
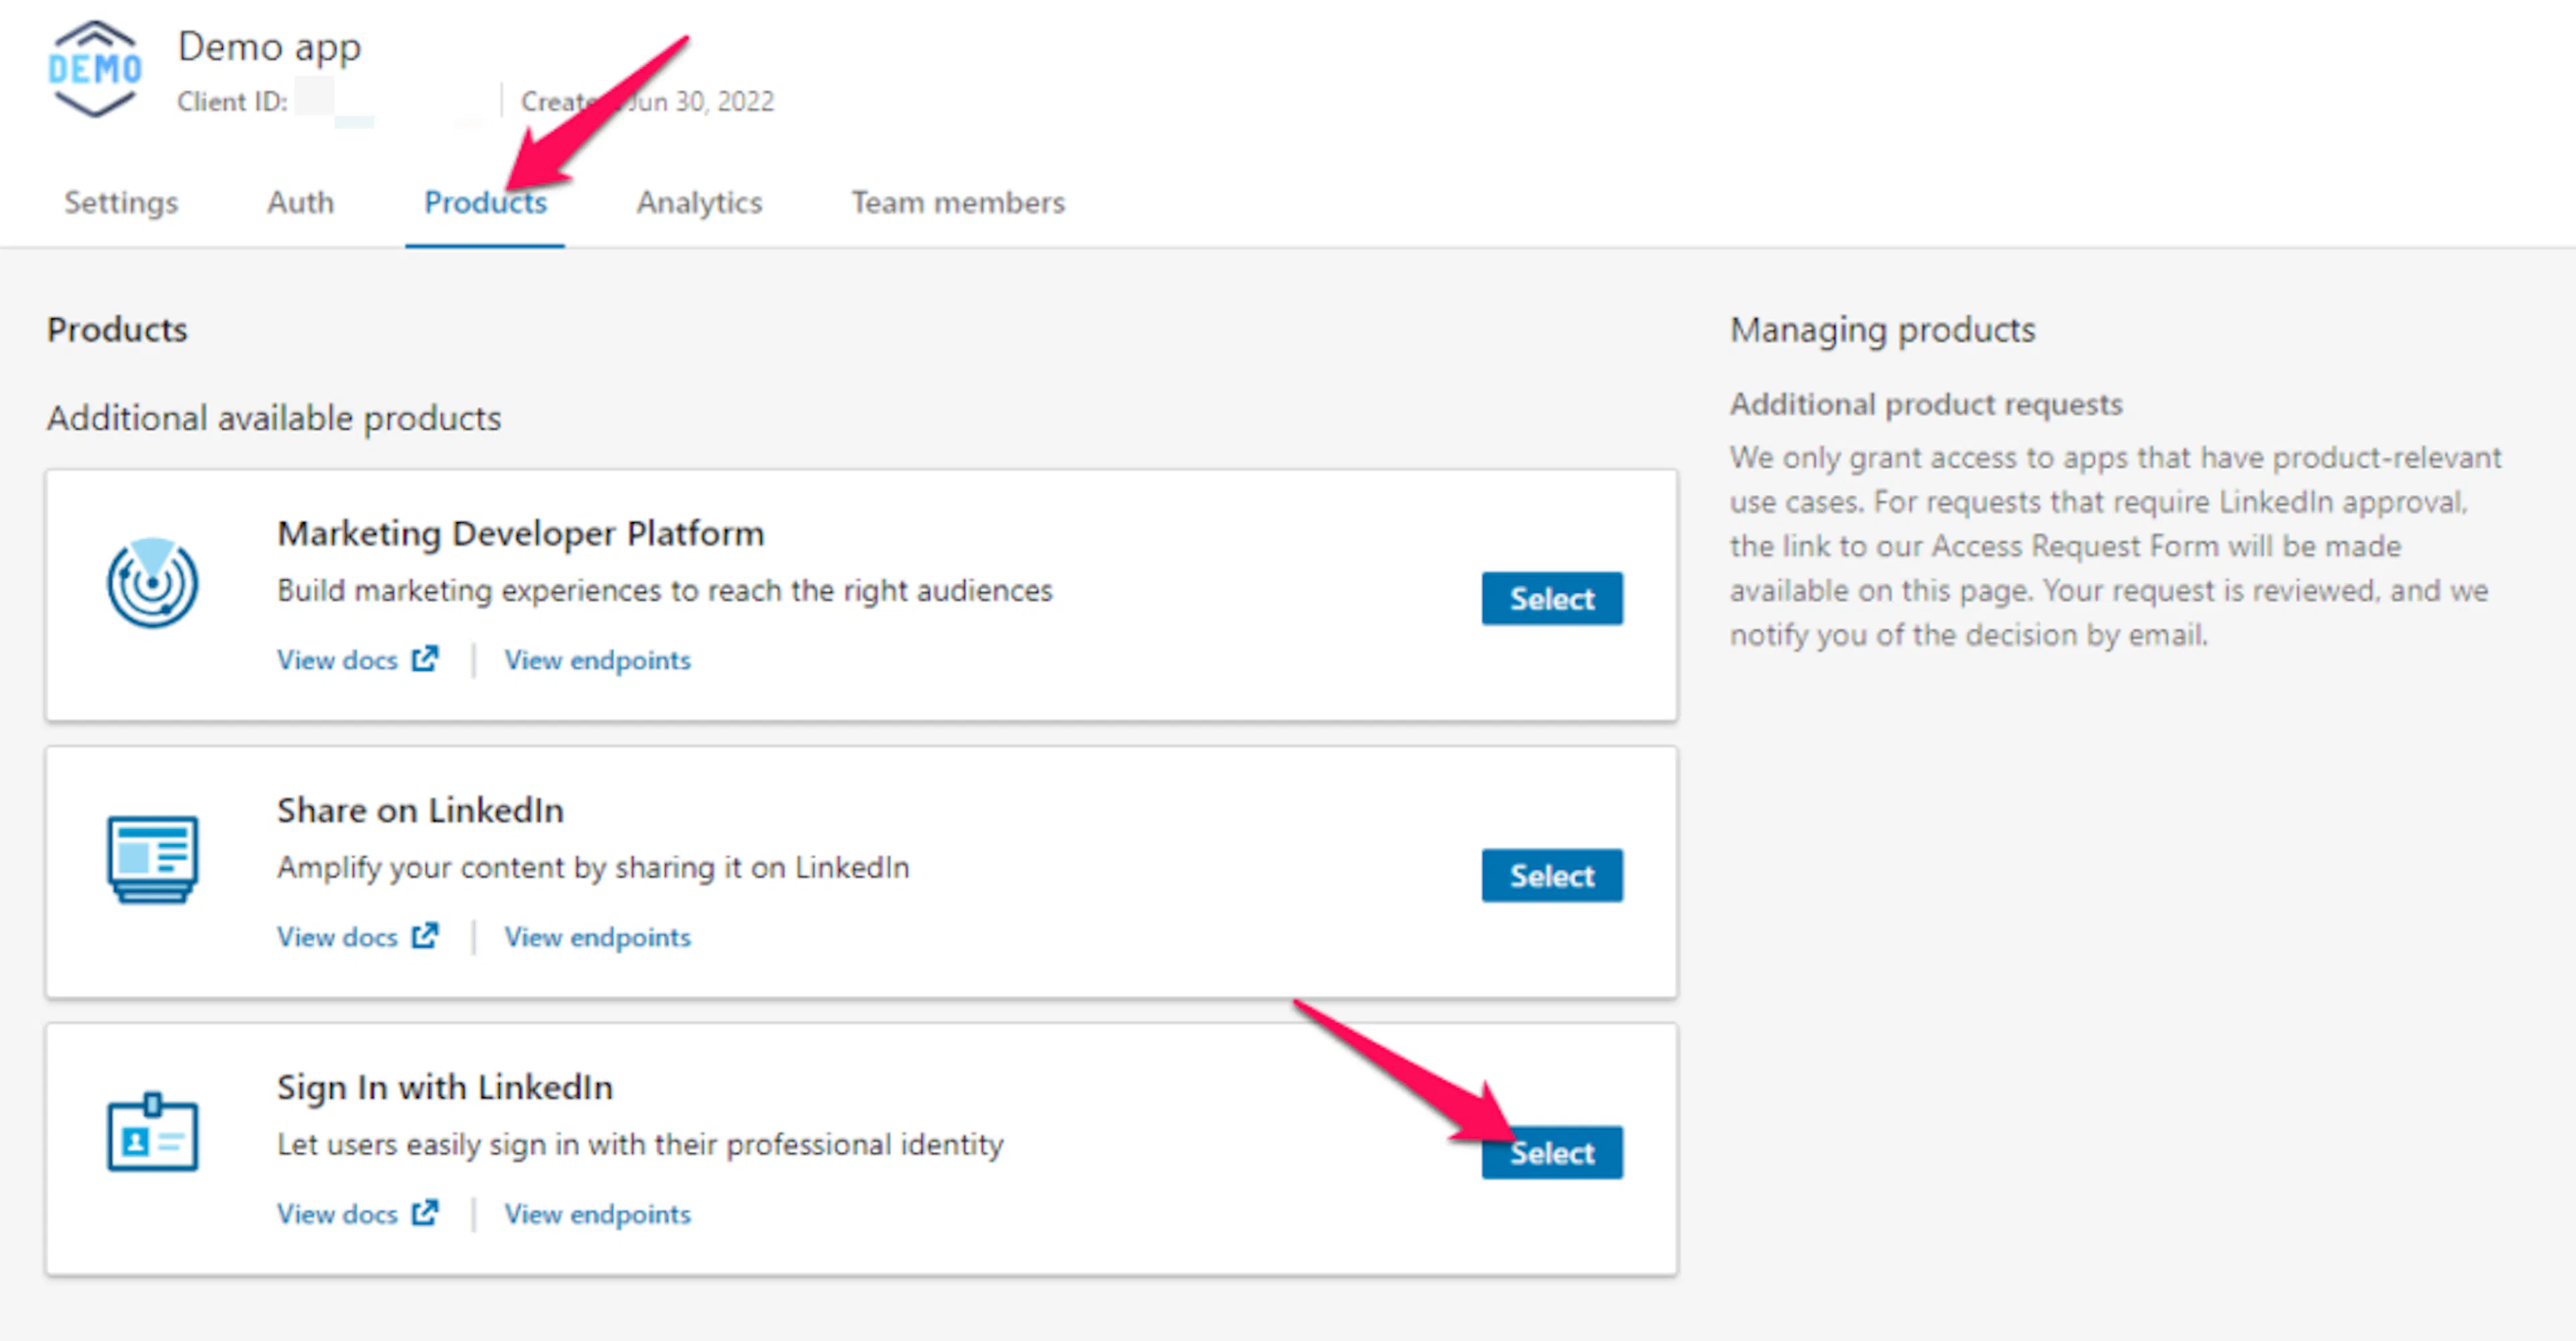
Turn on Sign In with LinkedIn
Open the Products tab and click Select on Sign In with LinkedIn.
Verify your company page
In the Settings tab, verify the company LinkedIn account you selected. You can skip this if you created the company page in the earlier step.
Wait for the OAuth scopes to show up
Go back to the Auth tab and wait a few seconds for r_liteprofile and r_emailaddress to appear under OAuth 2.0 scopes.
Copy the Client ID and Client Secret
When the app is ready, you will find the Client ID and Client Secret key under Application credentials. You will use both when you add your credentials to WP Travel Engine.
Add your credentials to WP Travel Engine
Now that you have the credentials from your social provider, you are ready to add them to your site. In your WordPress admin area, go to WP Travel Engine > Settings > Dashboard > Social Login.
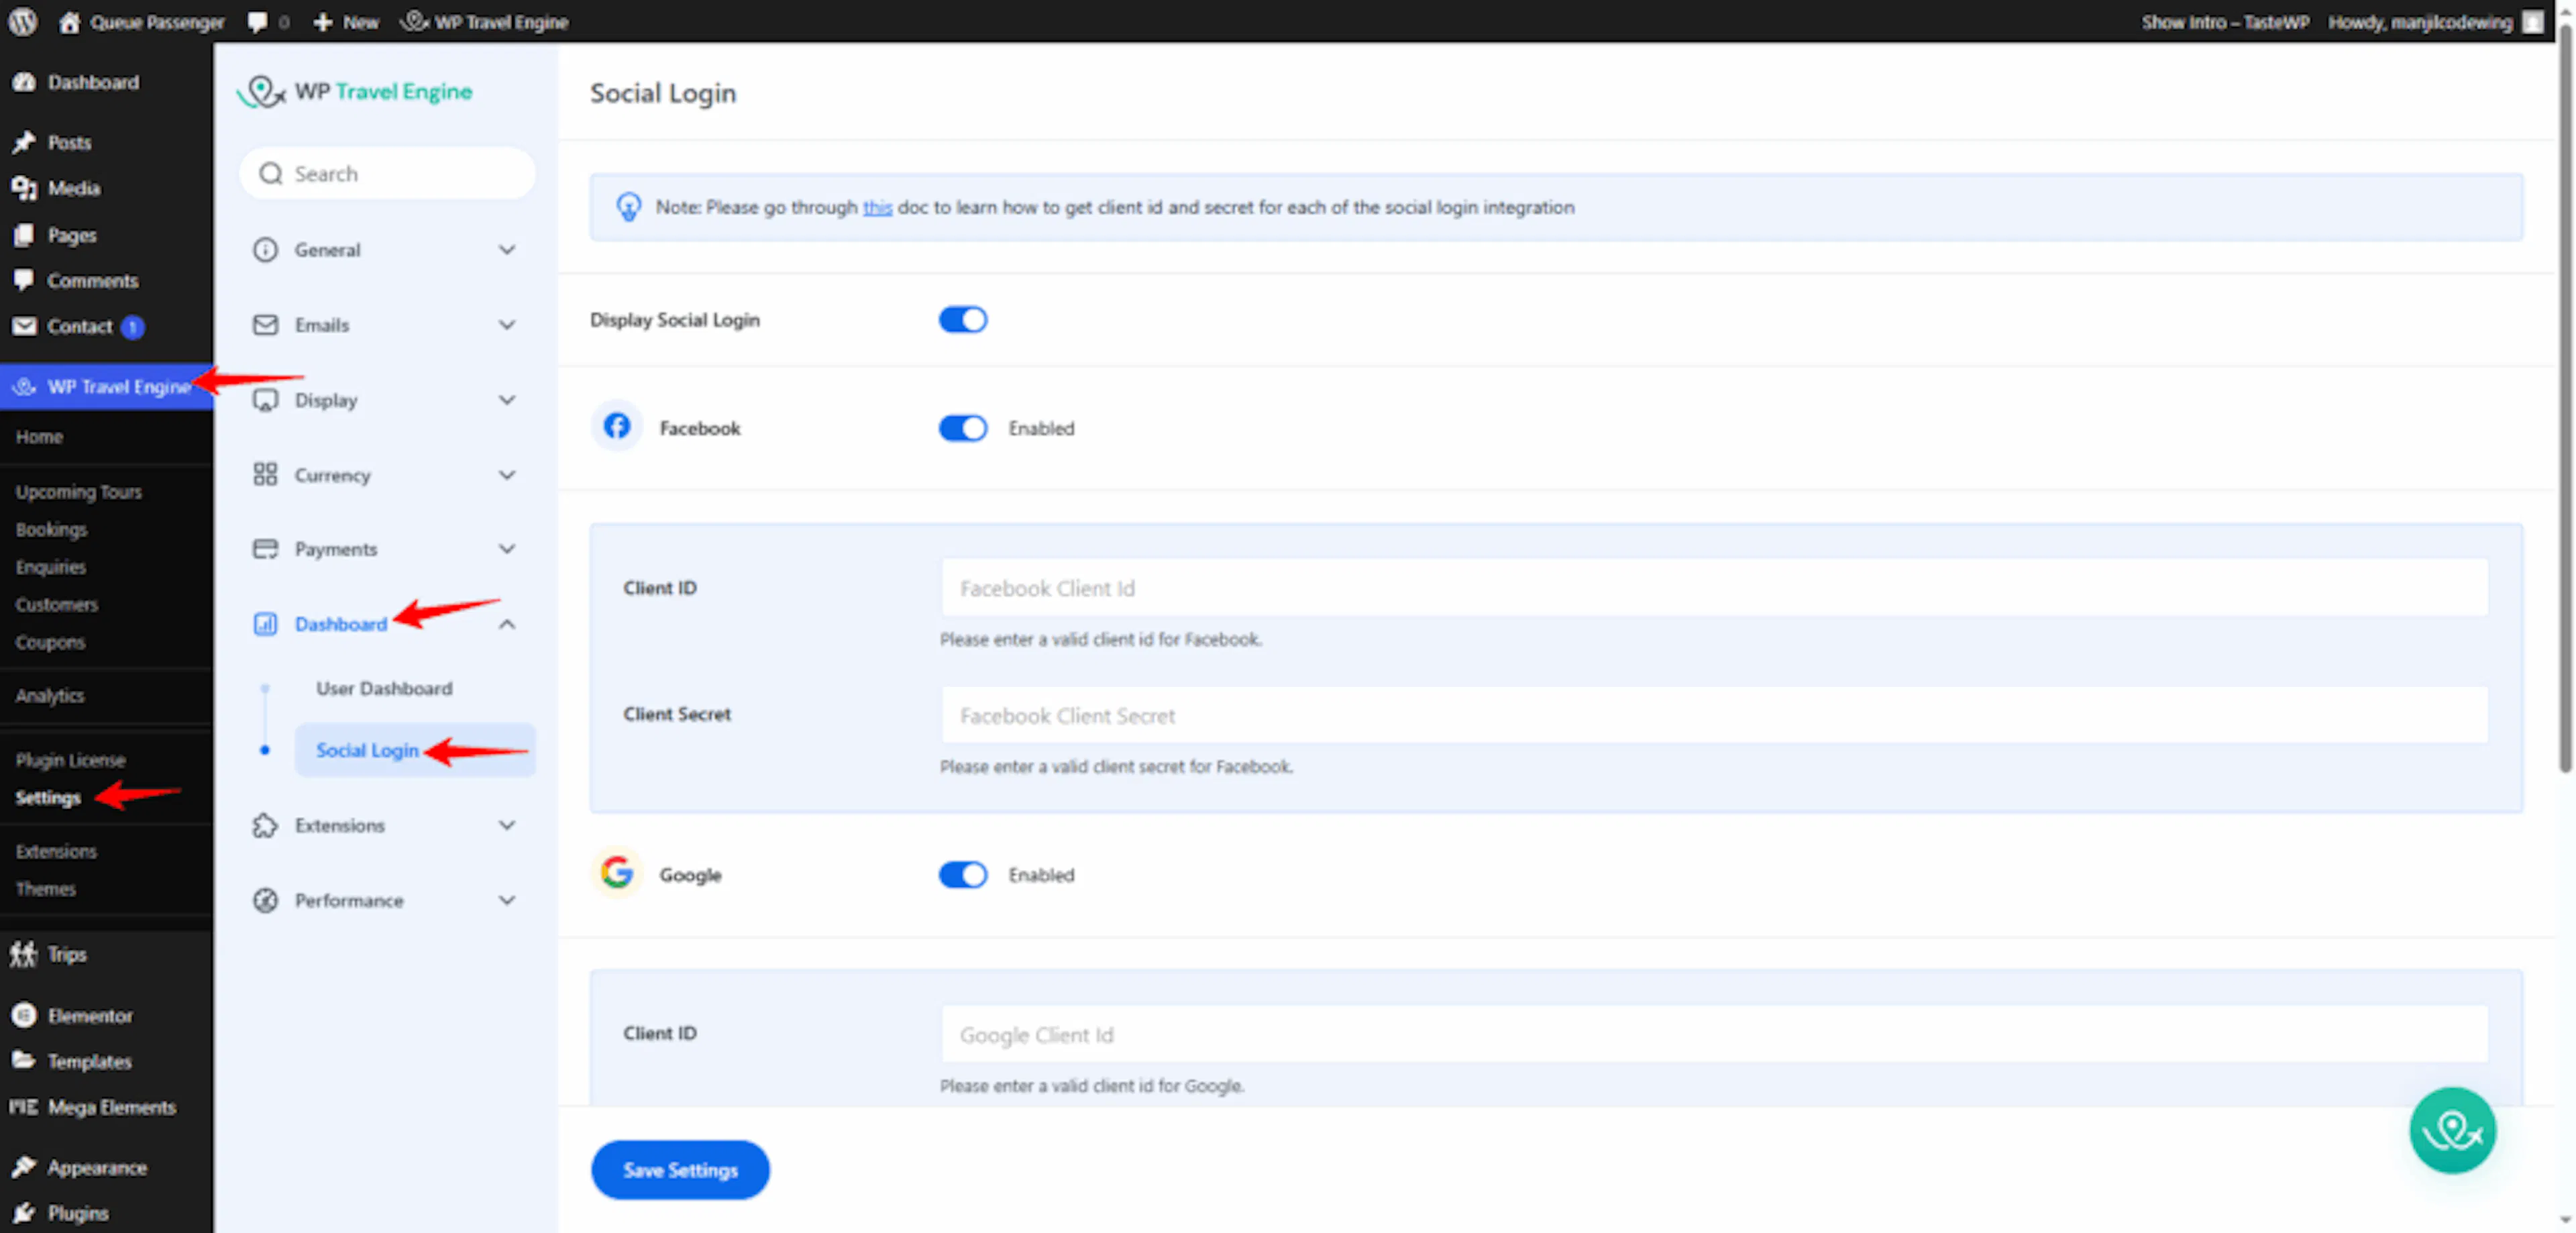
| Setting | Description |
|---|---|
| Display Social Login | Turn this on first to show social login on your WP Travel Engine login page. If this stays off, your provider buttons will not appear. |
| Turn this on if you want to offer Facebook login, then paste in the Client ID and Client Secret from your Facebook app. | |
| Turn this on if you want to offer Google login, then paste in the Client ID and Client Secret from your Google project. | |
| Turn this on if you want to offer LinkedIn login, then paste in the Client ID and Client Secret from your LinkedIn app. |
You can turn on one provider or all three. Your customers will see a button for each provider you enable.
See it on your site
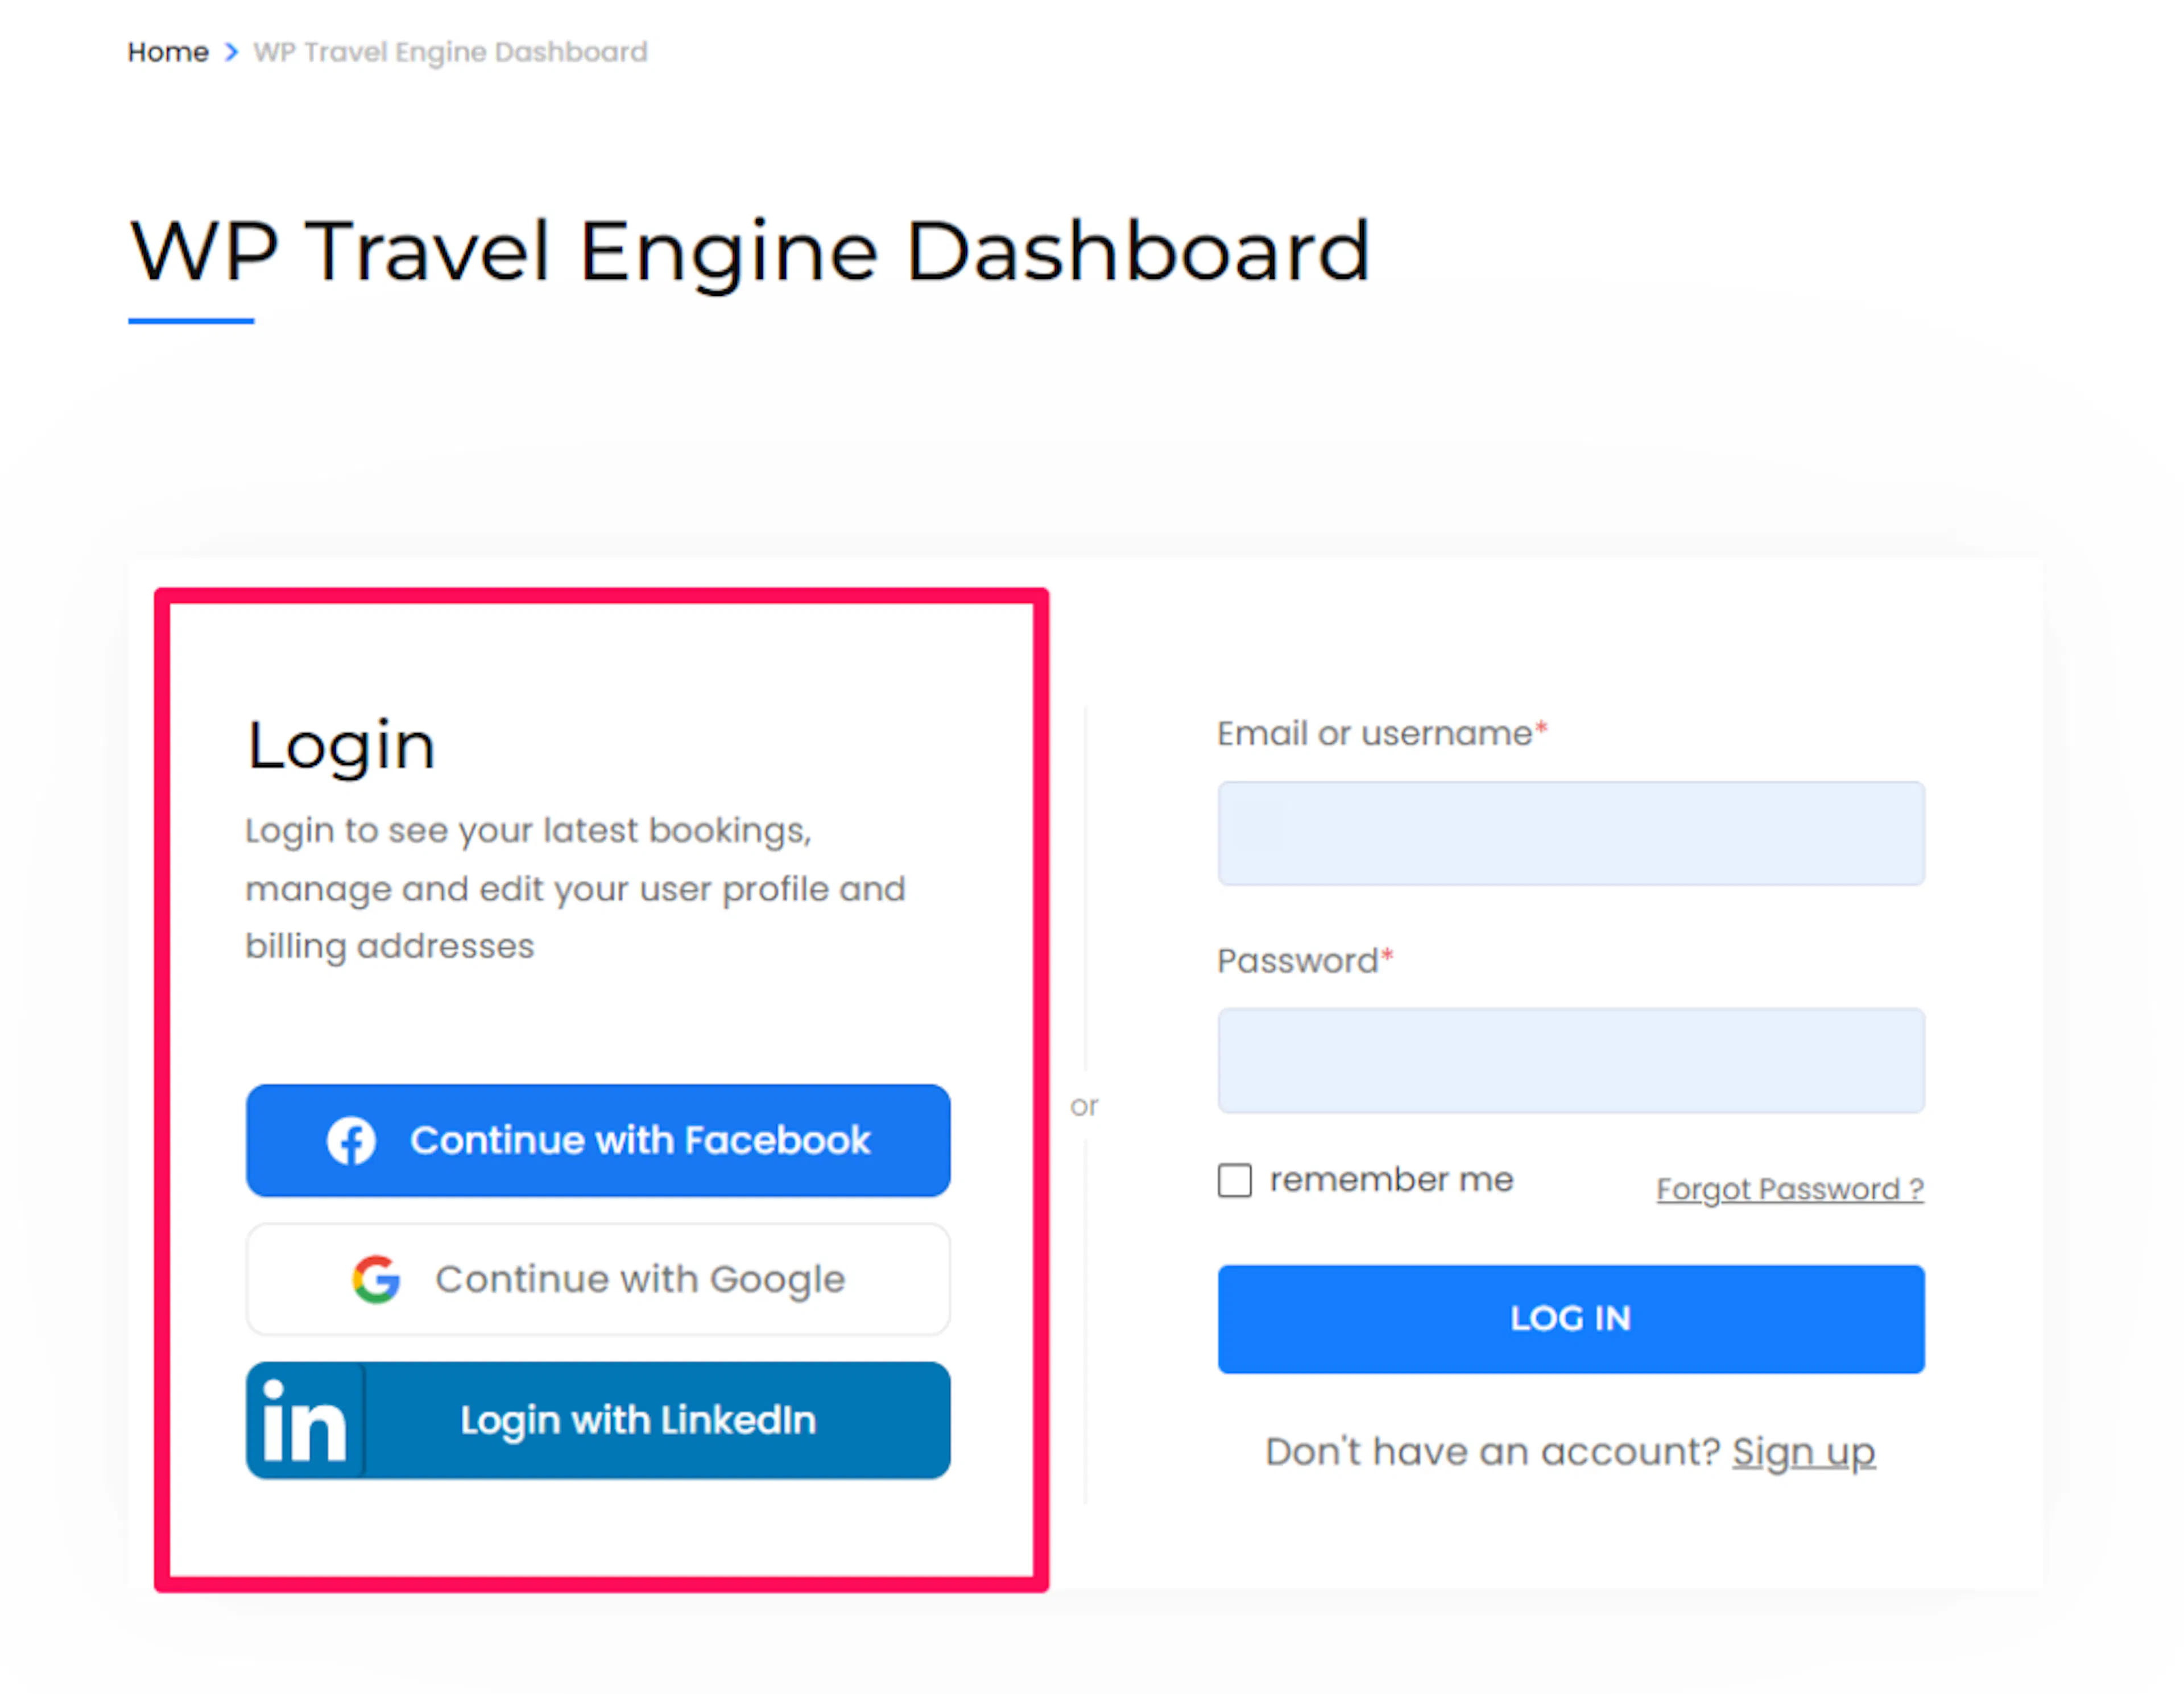
You made it through the setup. Once you save your credentials and enable at least one provider, the social login buttons will show up on your WP Travel Engine login page.
If you're still stuck or have a question we didn't cover, our support team is happy to help. Reach out at our support page and we'll get you sorted.