

How to Configure the Check Payments Settings
Add a custom title, description, and instructions for the Check Payments method on your WP Travel Engine checkout page, Thank You page, and booking emails.
Configure Check Payments settings
Check Payments settings let you add custom information for travelers who pay by check. You can show that information on the checkout page, the Thank You page, and in the booking email.
This helps travelers understand what to do next after they place a booking. Once these details are in place, your check payment option will feel clear and complete.
Before you start, make sure you can log in to your WordPress dashboard. The WordPress dashboard is the main admin area where you manage your website.
Open the Check Payments settings
You need to start in the payment settings area. That is where WP Travel Engine keeps the options for each payment method.
In your WordPress dashboard, look at the left sidebar. Go to WP Travel Engine > Settings > Payments > Check Payments.
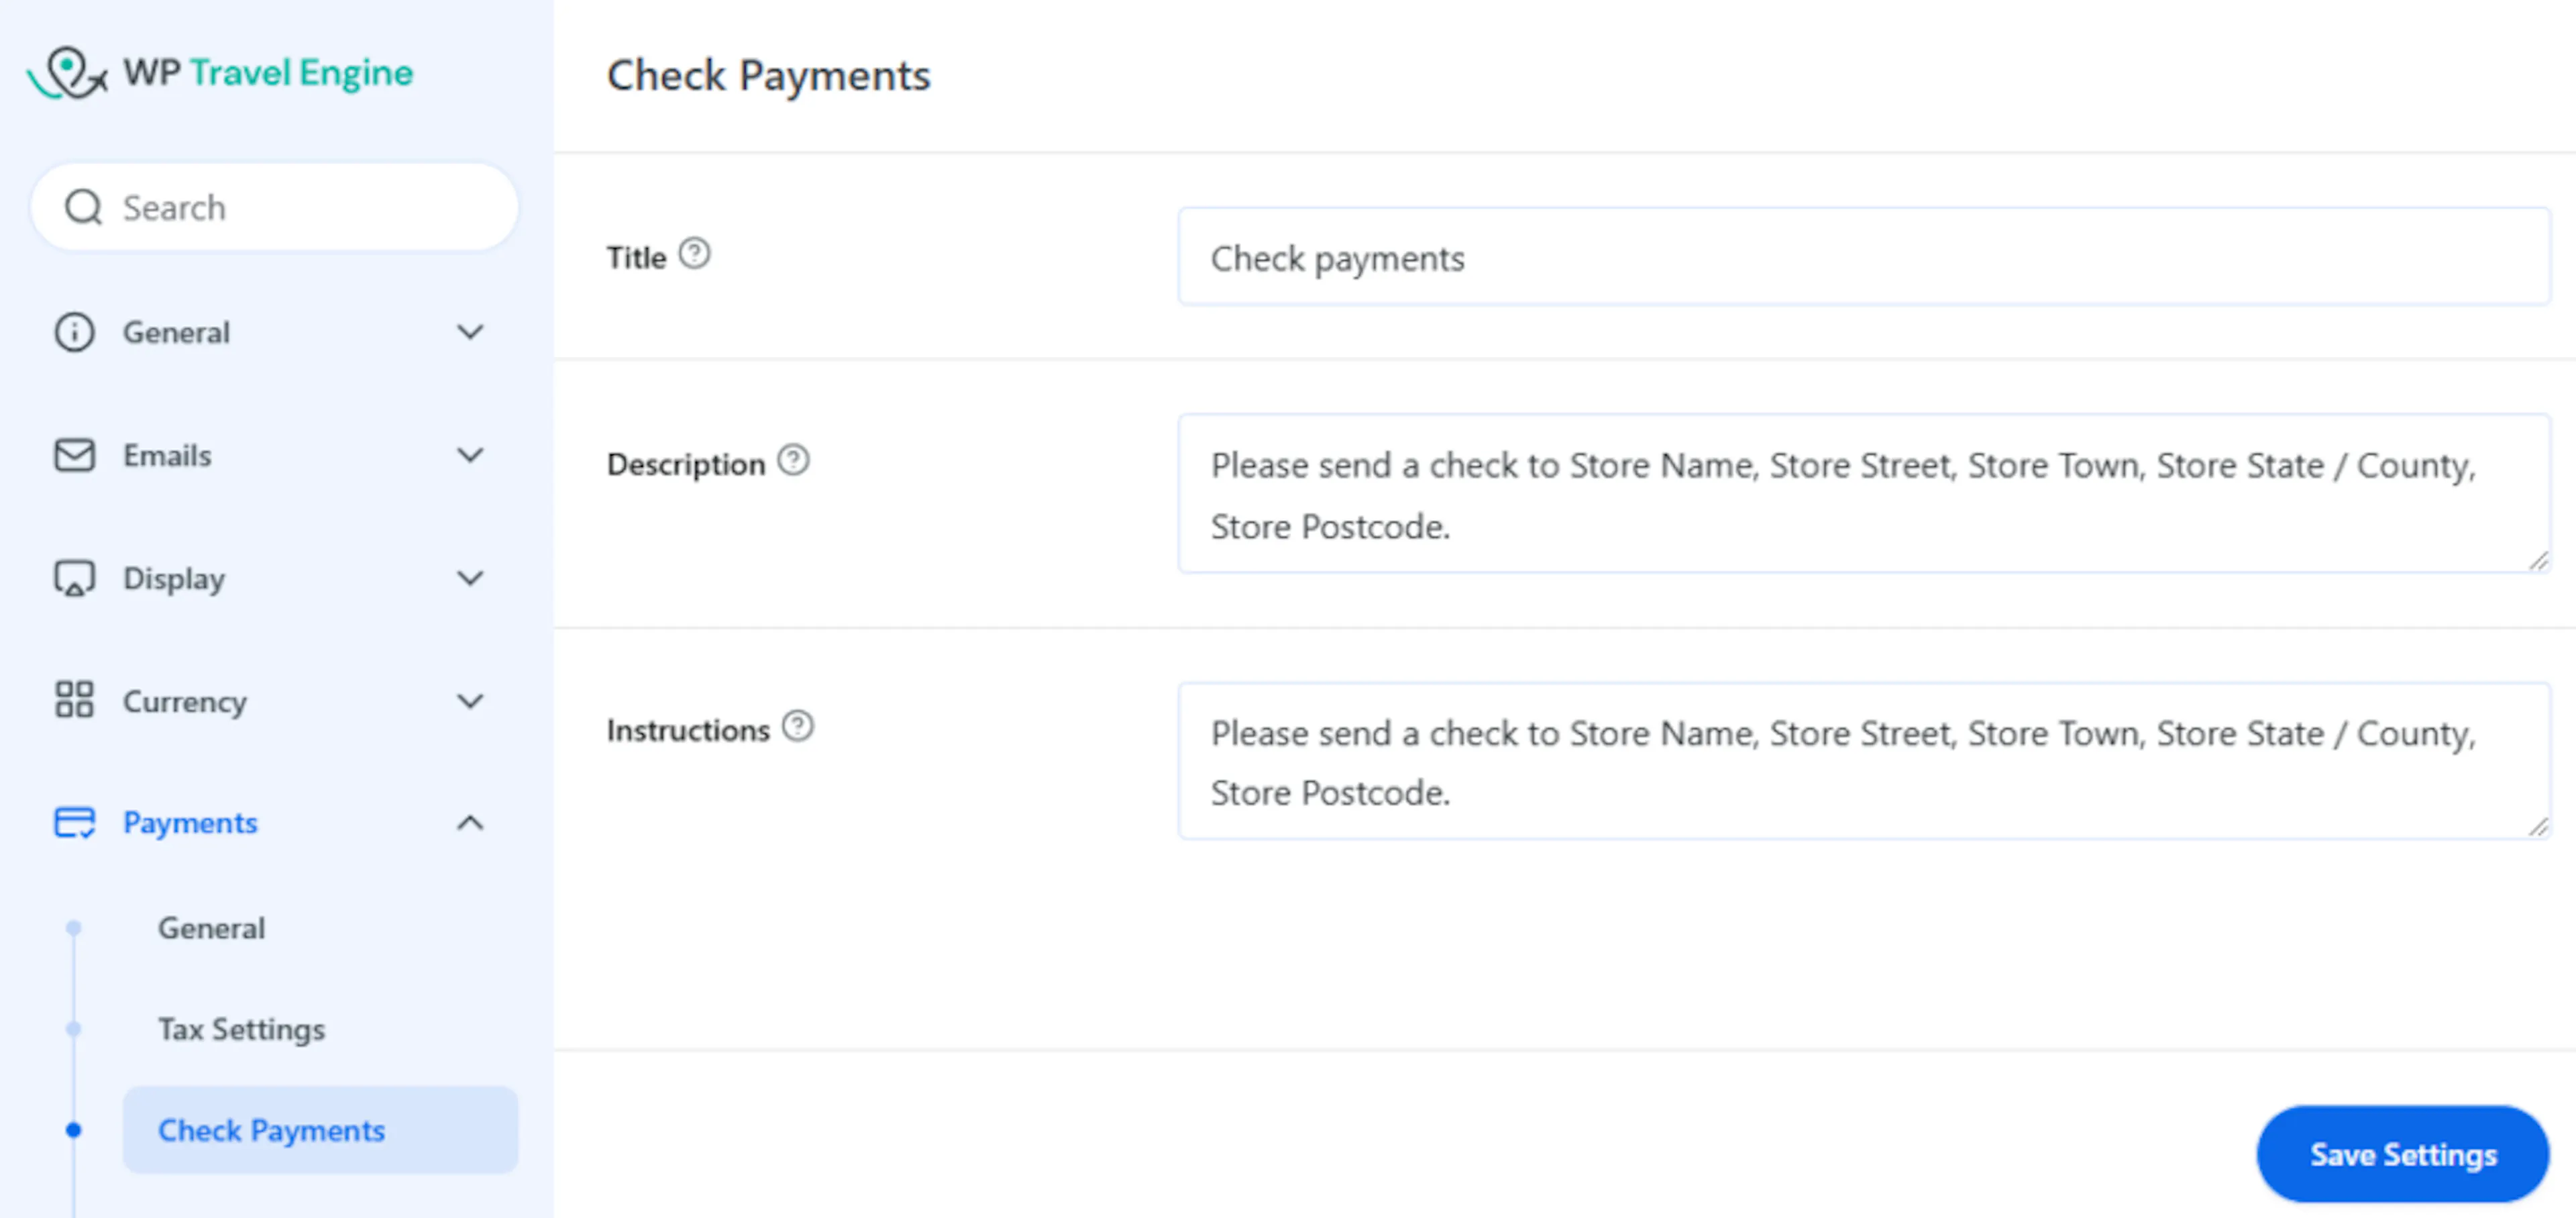
When you open this page, you are in the right place to edit how Check Payments appears to travelers. Next, you can update the text they will see.
Add the payment title
The title is the name travelers see on the checkout page. Use a name that feels clear to the people booking your tours.
Enter your text in the Title field.
For example, a trekking company might use Pay by Check. A tour company that also accepts bank transfer might use Check Payment so travelers can tell the options apart.
Once the title is clear, travelers will know what payment option they are selecting. The next setting gives them a little more detail.
Write a short description
The description appears on the checkout page. It helps travelers understand how this payment method works before they complete their booking.
Enter your message in the Description field.
Keep it short and practical. For example, if you run a multi-day hiking package, you might write: Book your trip now and mail your check within 5 business days to confirm your reservation.
A good description answers the traveler's first question right away. After that, you can add the full next steps in the instruction field.
Add payment instructions for after booking
The instruction field is where you tell travelers what to do after they book. These instructions appear on the Thank You page and in the confirmation email.
Enter your message in the Instruction field.
For example, if you run day tours and private group trips, you could write: Mail your check to Alpine Trails Tours, 18 Market Street, Boulder, CO 80302. Include your booking ID and lead traveler's name with the payment.
This is the best place to share mailing details and any reference information you need. Once you save this text, travelers will see the next steps in the right places.
What each setting does
Use these three settings to guide travelers through the check payment process.
- Title - The title displayed on the checkout page for this payment method.
- Description - A payment description that helps travelers understand how the payment method works.
- Instruction - Specific instructions for travelers, shown on the Thank You page and in the confirmation email.
Use the Instruction field to tell travelers exactly where to mail the check and what reference details to include, such as a booking ID.
If you're still stuck or have a question we didn't cover, our support team is happy to help. Reach out at our support page and we'll get you sorted.