

Configure Checkout Settings
Set up the page where travelers complete their bookings, collect traveler and emergency contact details, show a coupon field, and customize the confirmation message and privacy notice.
When a traveler picks a trip and clicks Book Now, they land on your checkout page. This is where they enter their details and pay. The Checkout settings control what information you collect from them, what they see after booking, and how the page is connected to the rest of your site.
Before you start
You'll need WP Travel Engine installed and active on your WordPress site. If you can see WP Travel Engine in the left-hand menu of your dashboard, you're ready to go.
Opening the checkout settings
- Log in to your WordPress dashboard.
- On the left-hand menu, click WP Travel Engine, then Settings.
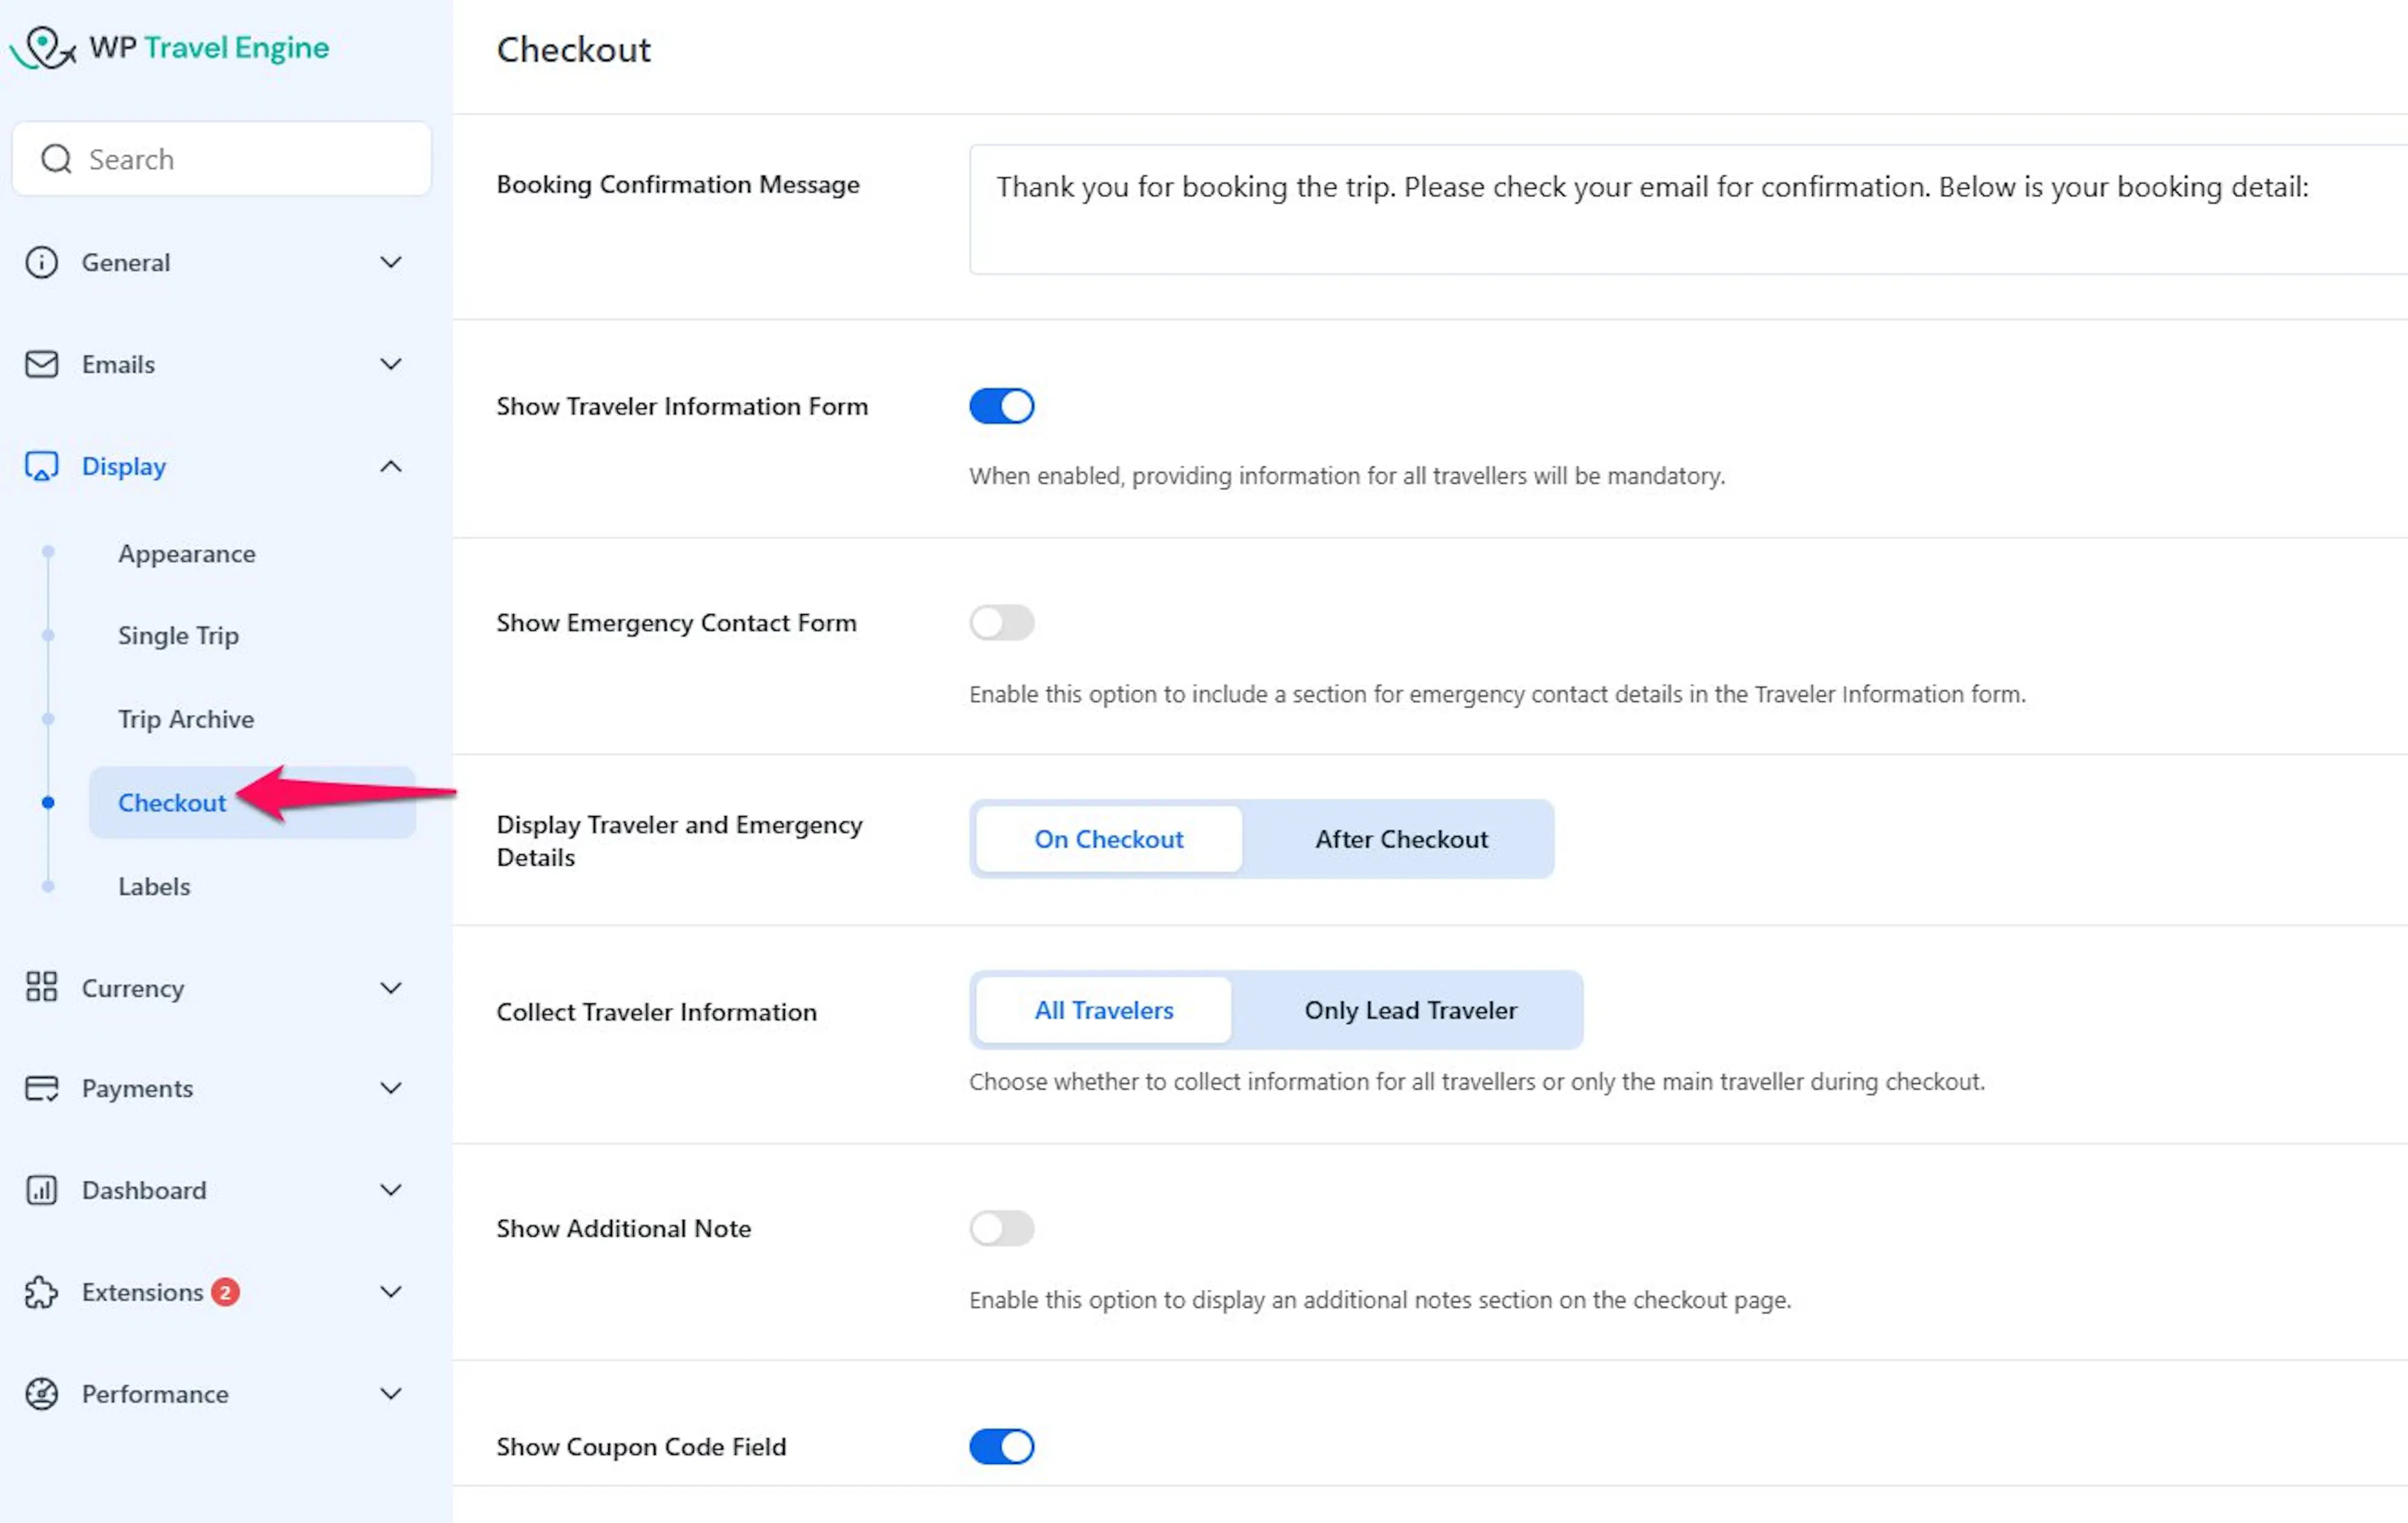
- Click the Display tab, then Checkout from the submenu on the left.
Booking Confirmation Message
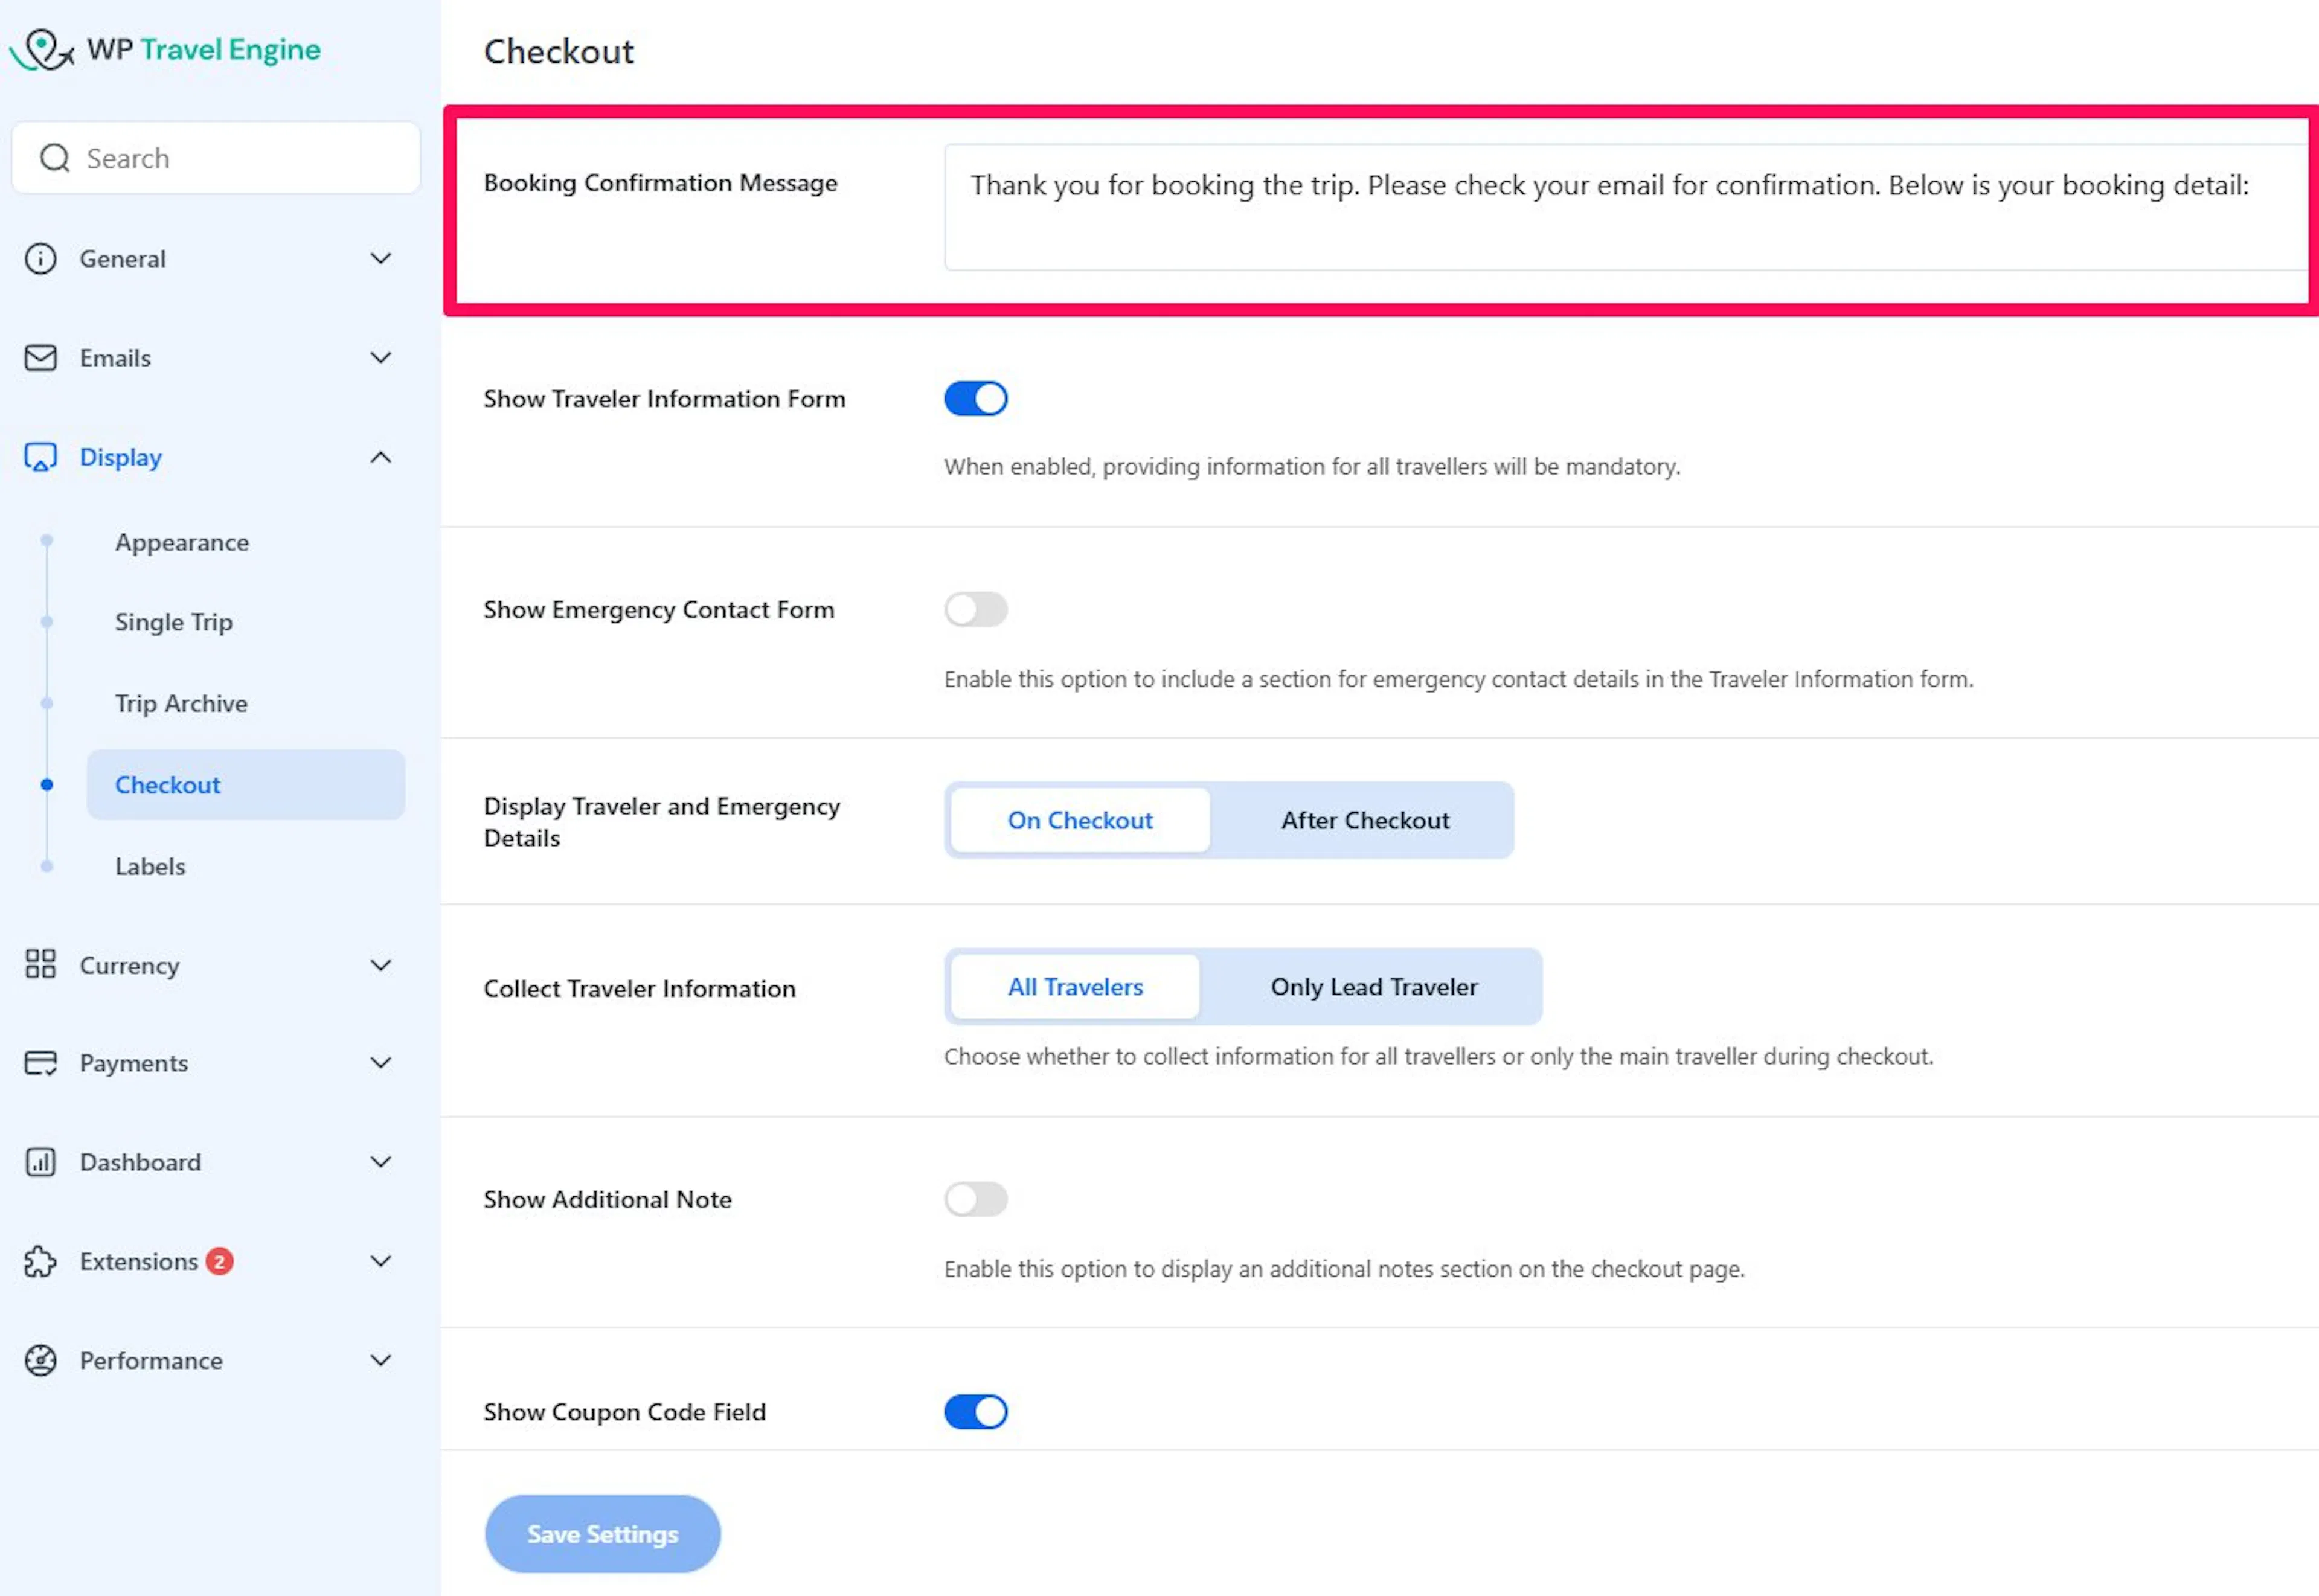
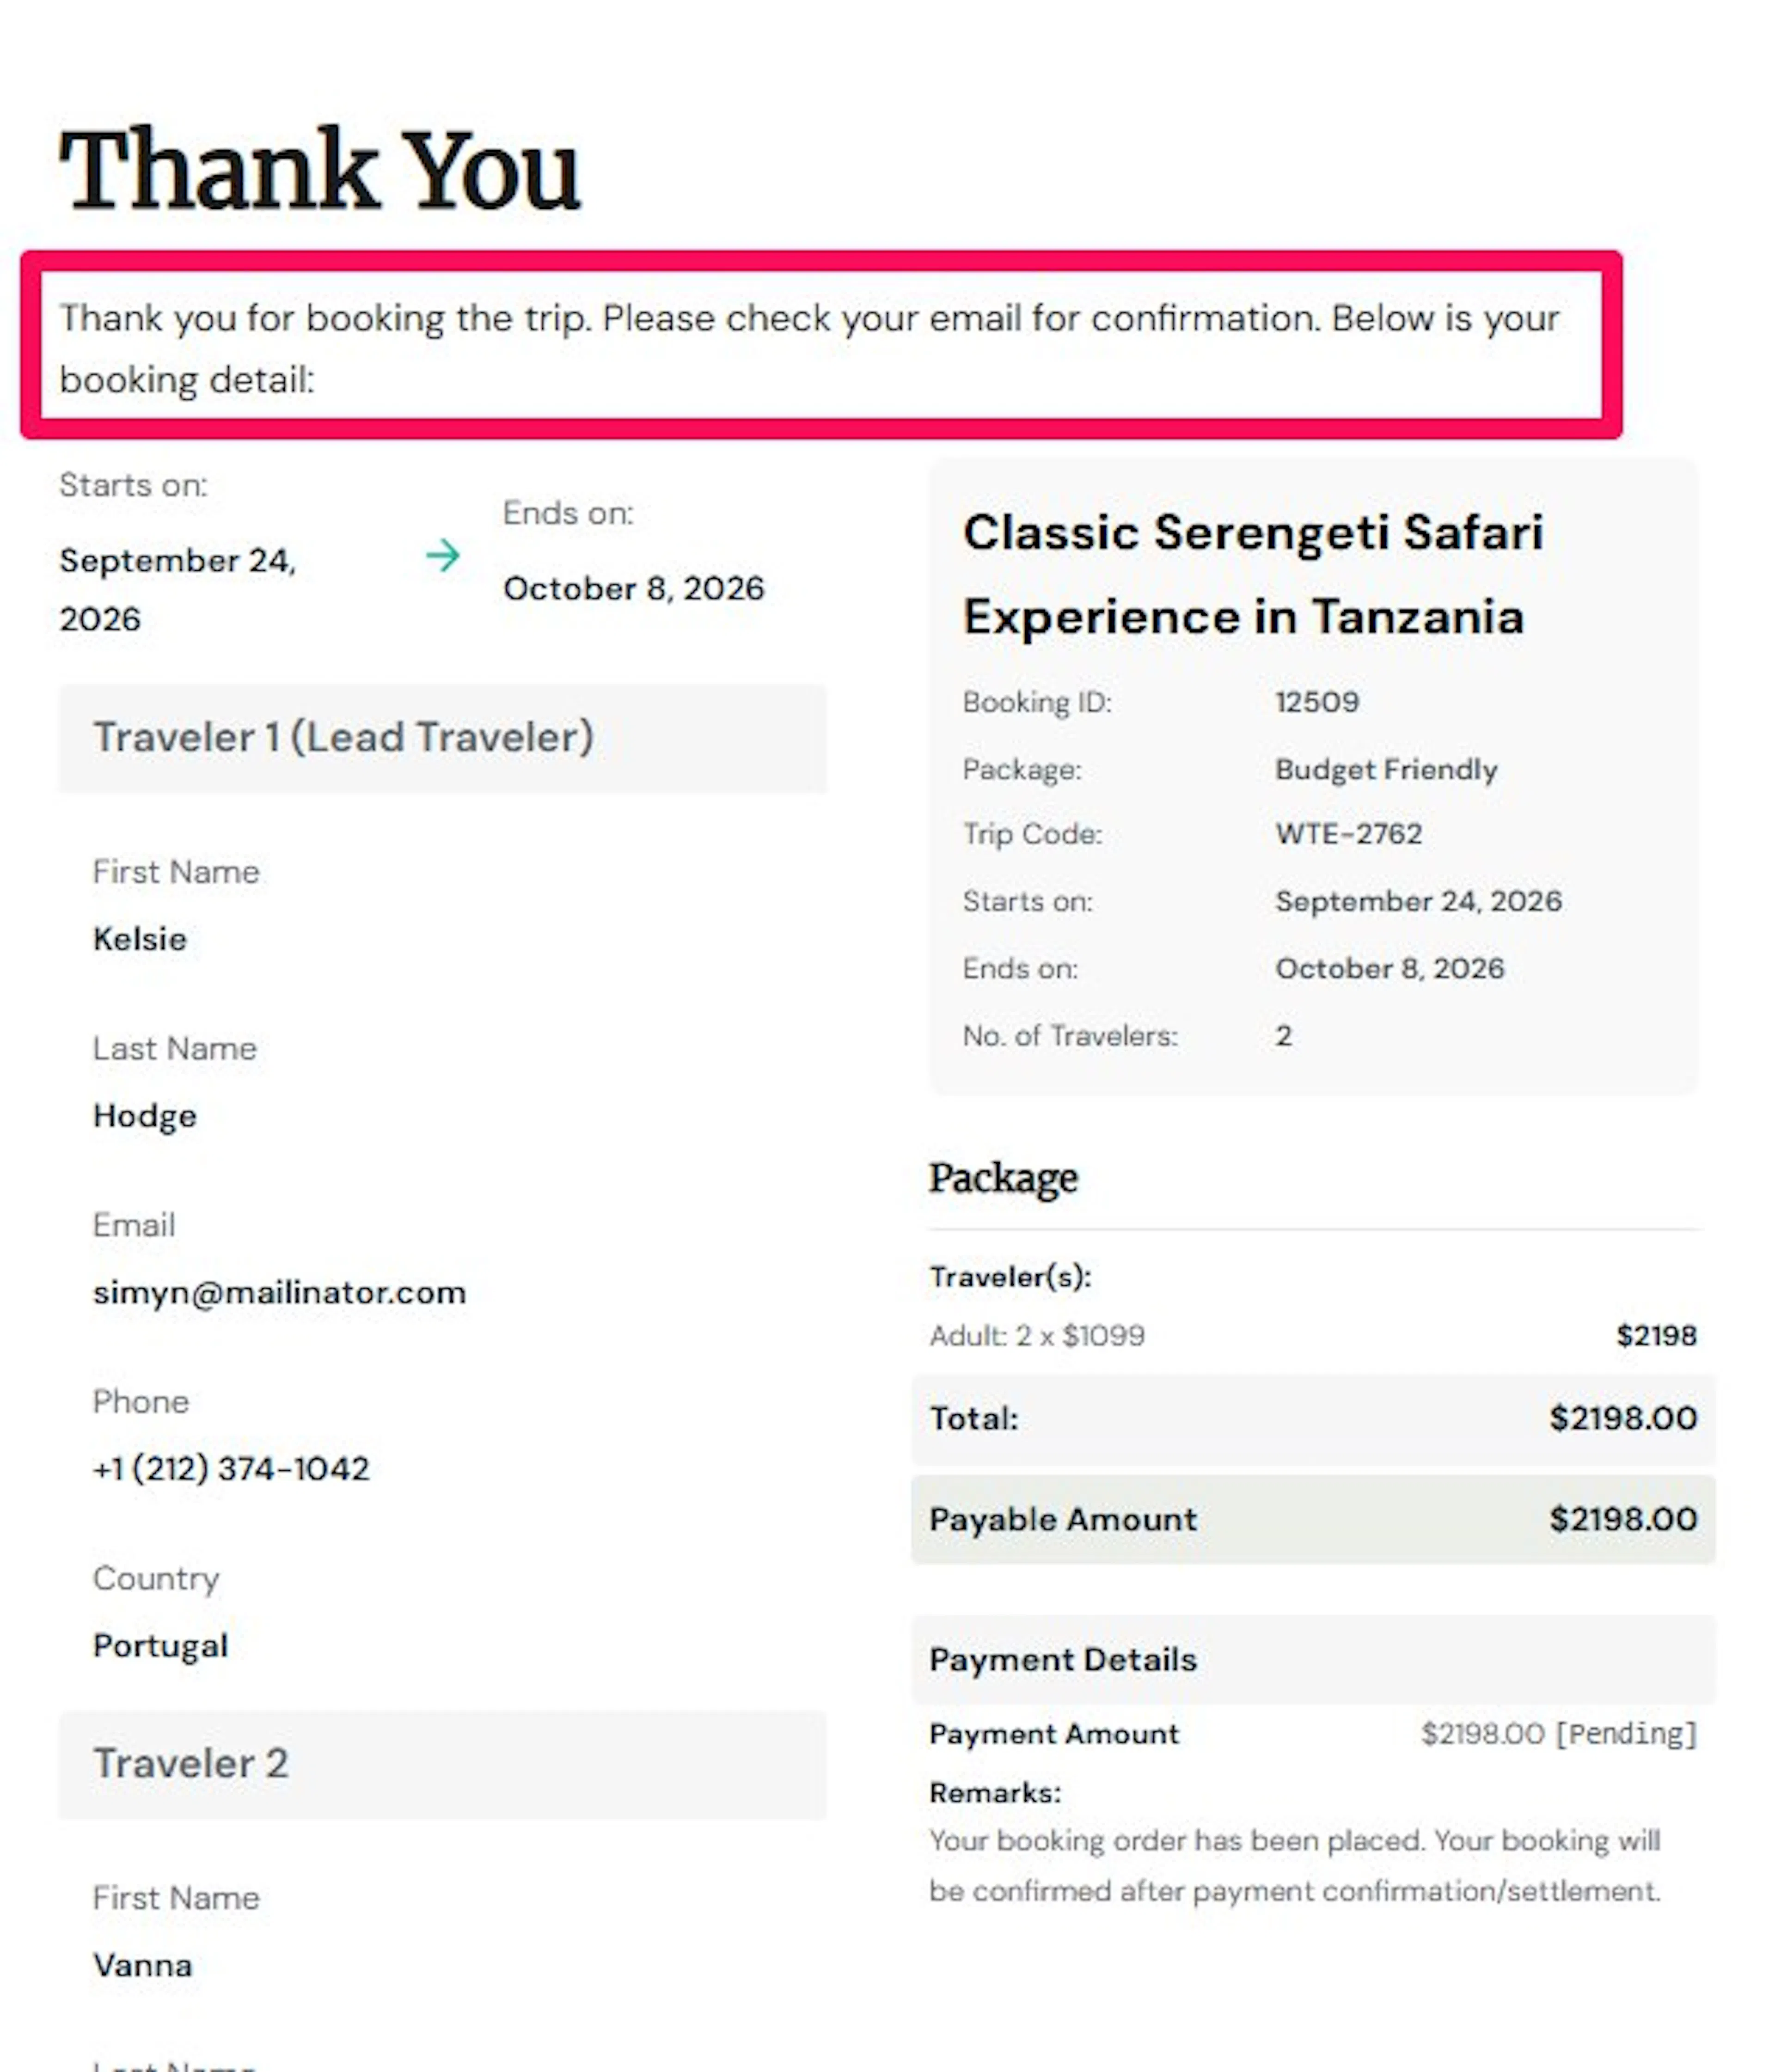
Type a message into the Booking Confirmation Message field to show travelers once they finish checking out.
Say you run adventure tours and want travelers to know what happens next. You might write something like: "You're all set! We'll email you a packing list and departure details within 24 hours. Questions? Call us at 555-1234."
This is a good spot to set expectations and make travelers feel looked after, especially if a real person doesn't confirm their booking right away.
Collecting traveler details
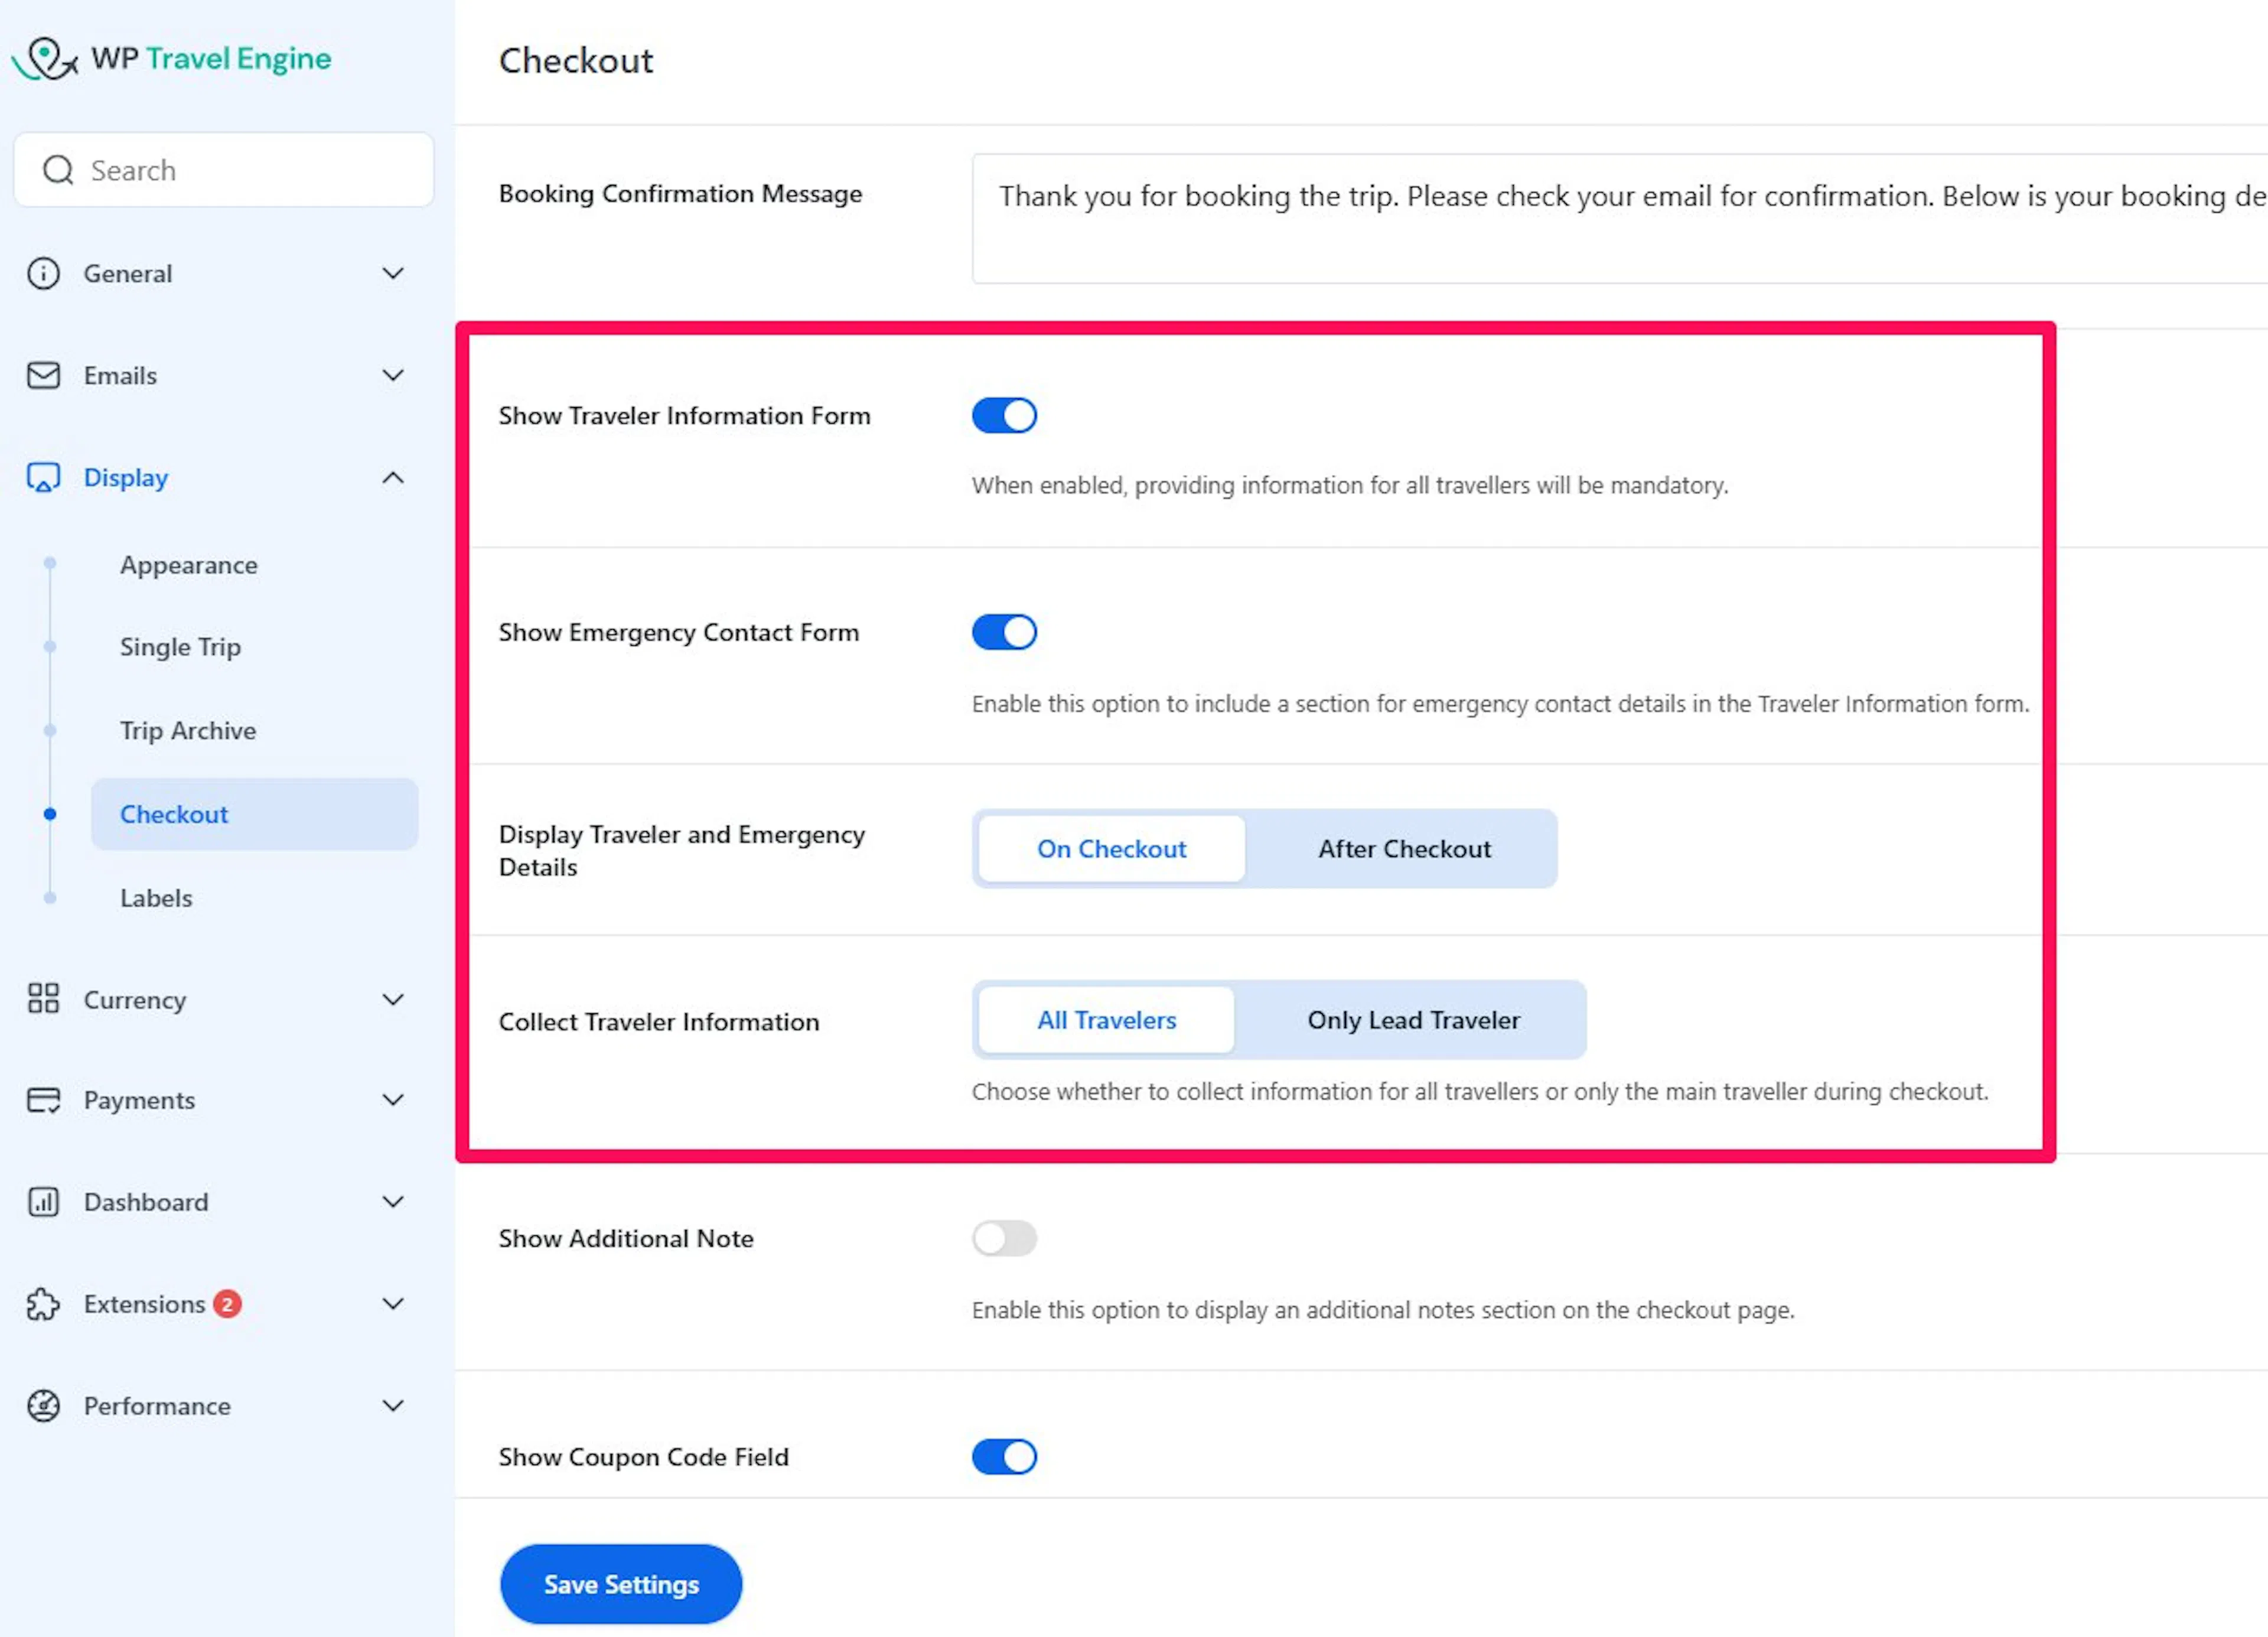
Four settings work together to control who you collect information from and when.
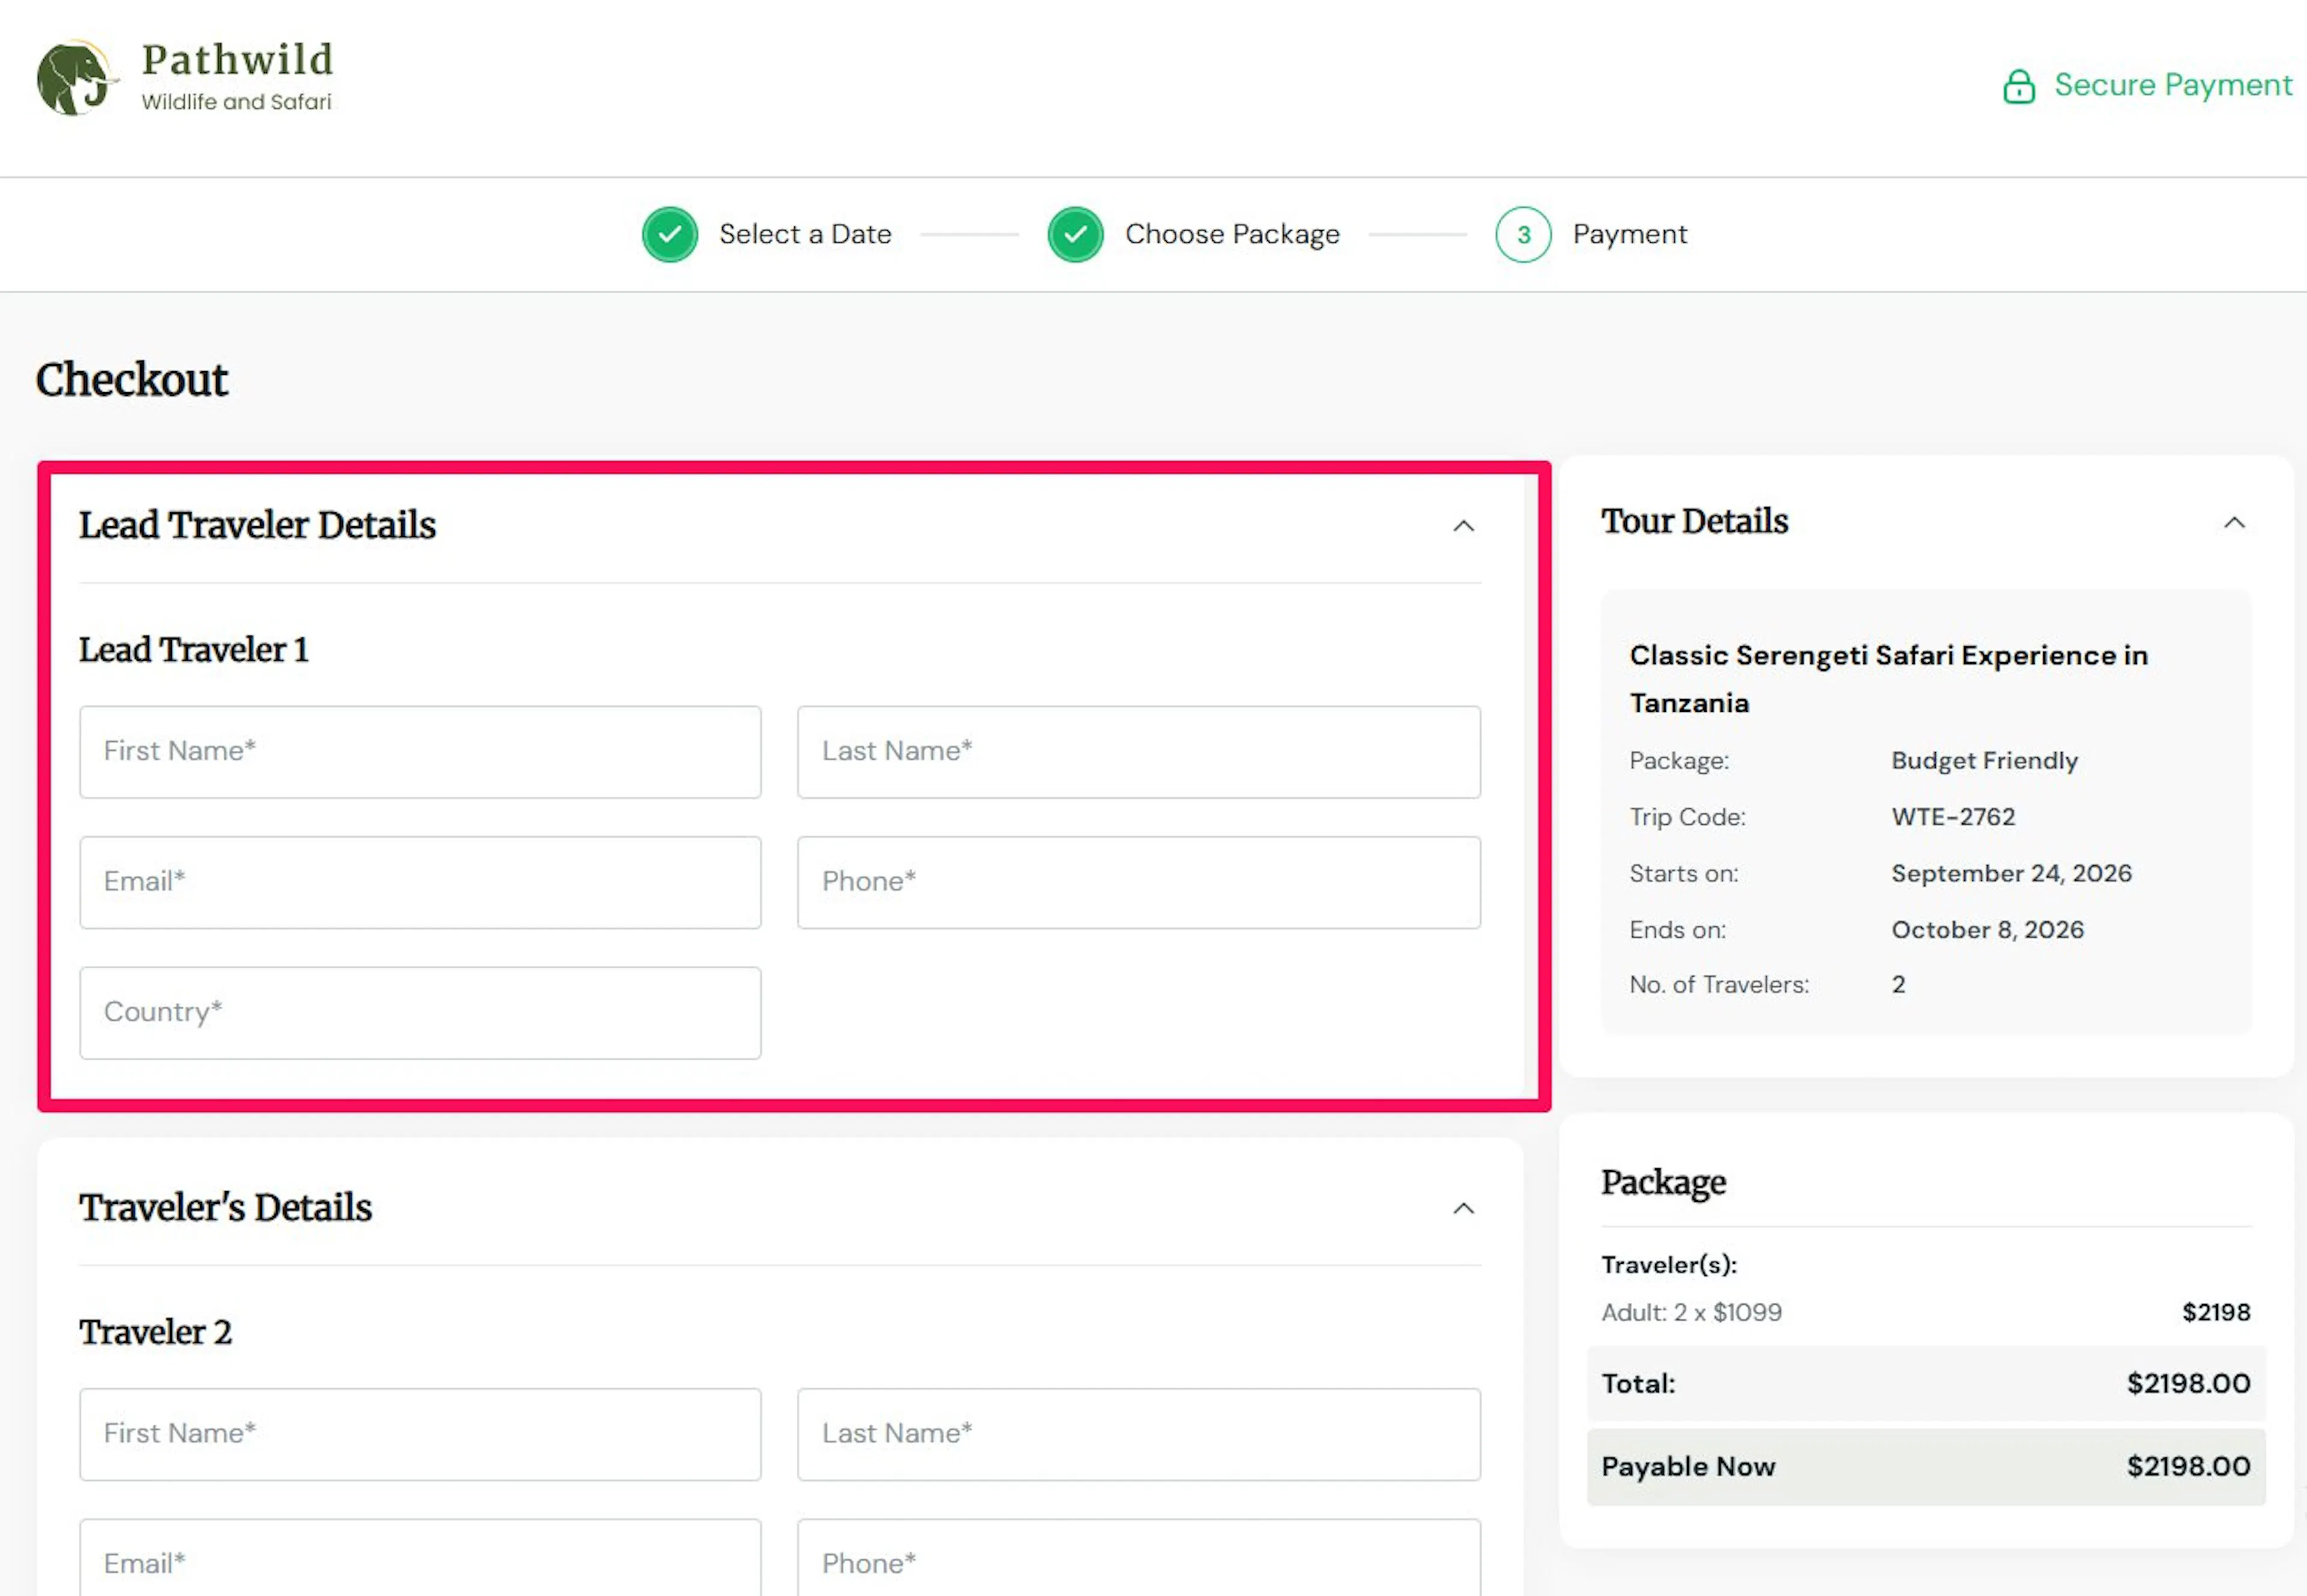
- Show Traveler Information Form: Toggle this on to collect details from your travelers. Once it's on, filling in this information becomes mandatory before a traveler can complete checkout.
- Show Emergency Contact Form: Appears once Show Traveler Information Form is on. Toggle it on to add an emergency contact section to the Traveler Information form.
- Display Traveler and Emergency Details: Choose On Checkout to collect this information on the checkout page itself, or After Checkout to move it to a separate step once payment is done. Collecting it on checkout means everything is gathered in one go; moving it after checkout gives you a faster checkout, but travelers have to come back and finish the form.
- Collect Traveler Information: Only appears when Display Traveler and Emergency Details is set to On Checkout. Choose All Travelers if you need every person's details, such as dietary restrictions on a group trek, or Only Lead Traveler if the main booker's information is enough, such as for a family day tour.
If you switch Display Traveler and Emergency Details to After Checkout, the Collect Traveler Information option disappears. Traveler details are always requested for everyone once travelers move past checkout.
Other checkout options
These settings apply no matter how you've configured traveler details above.
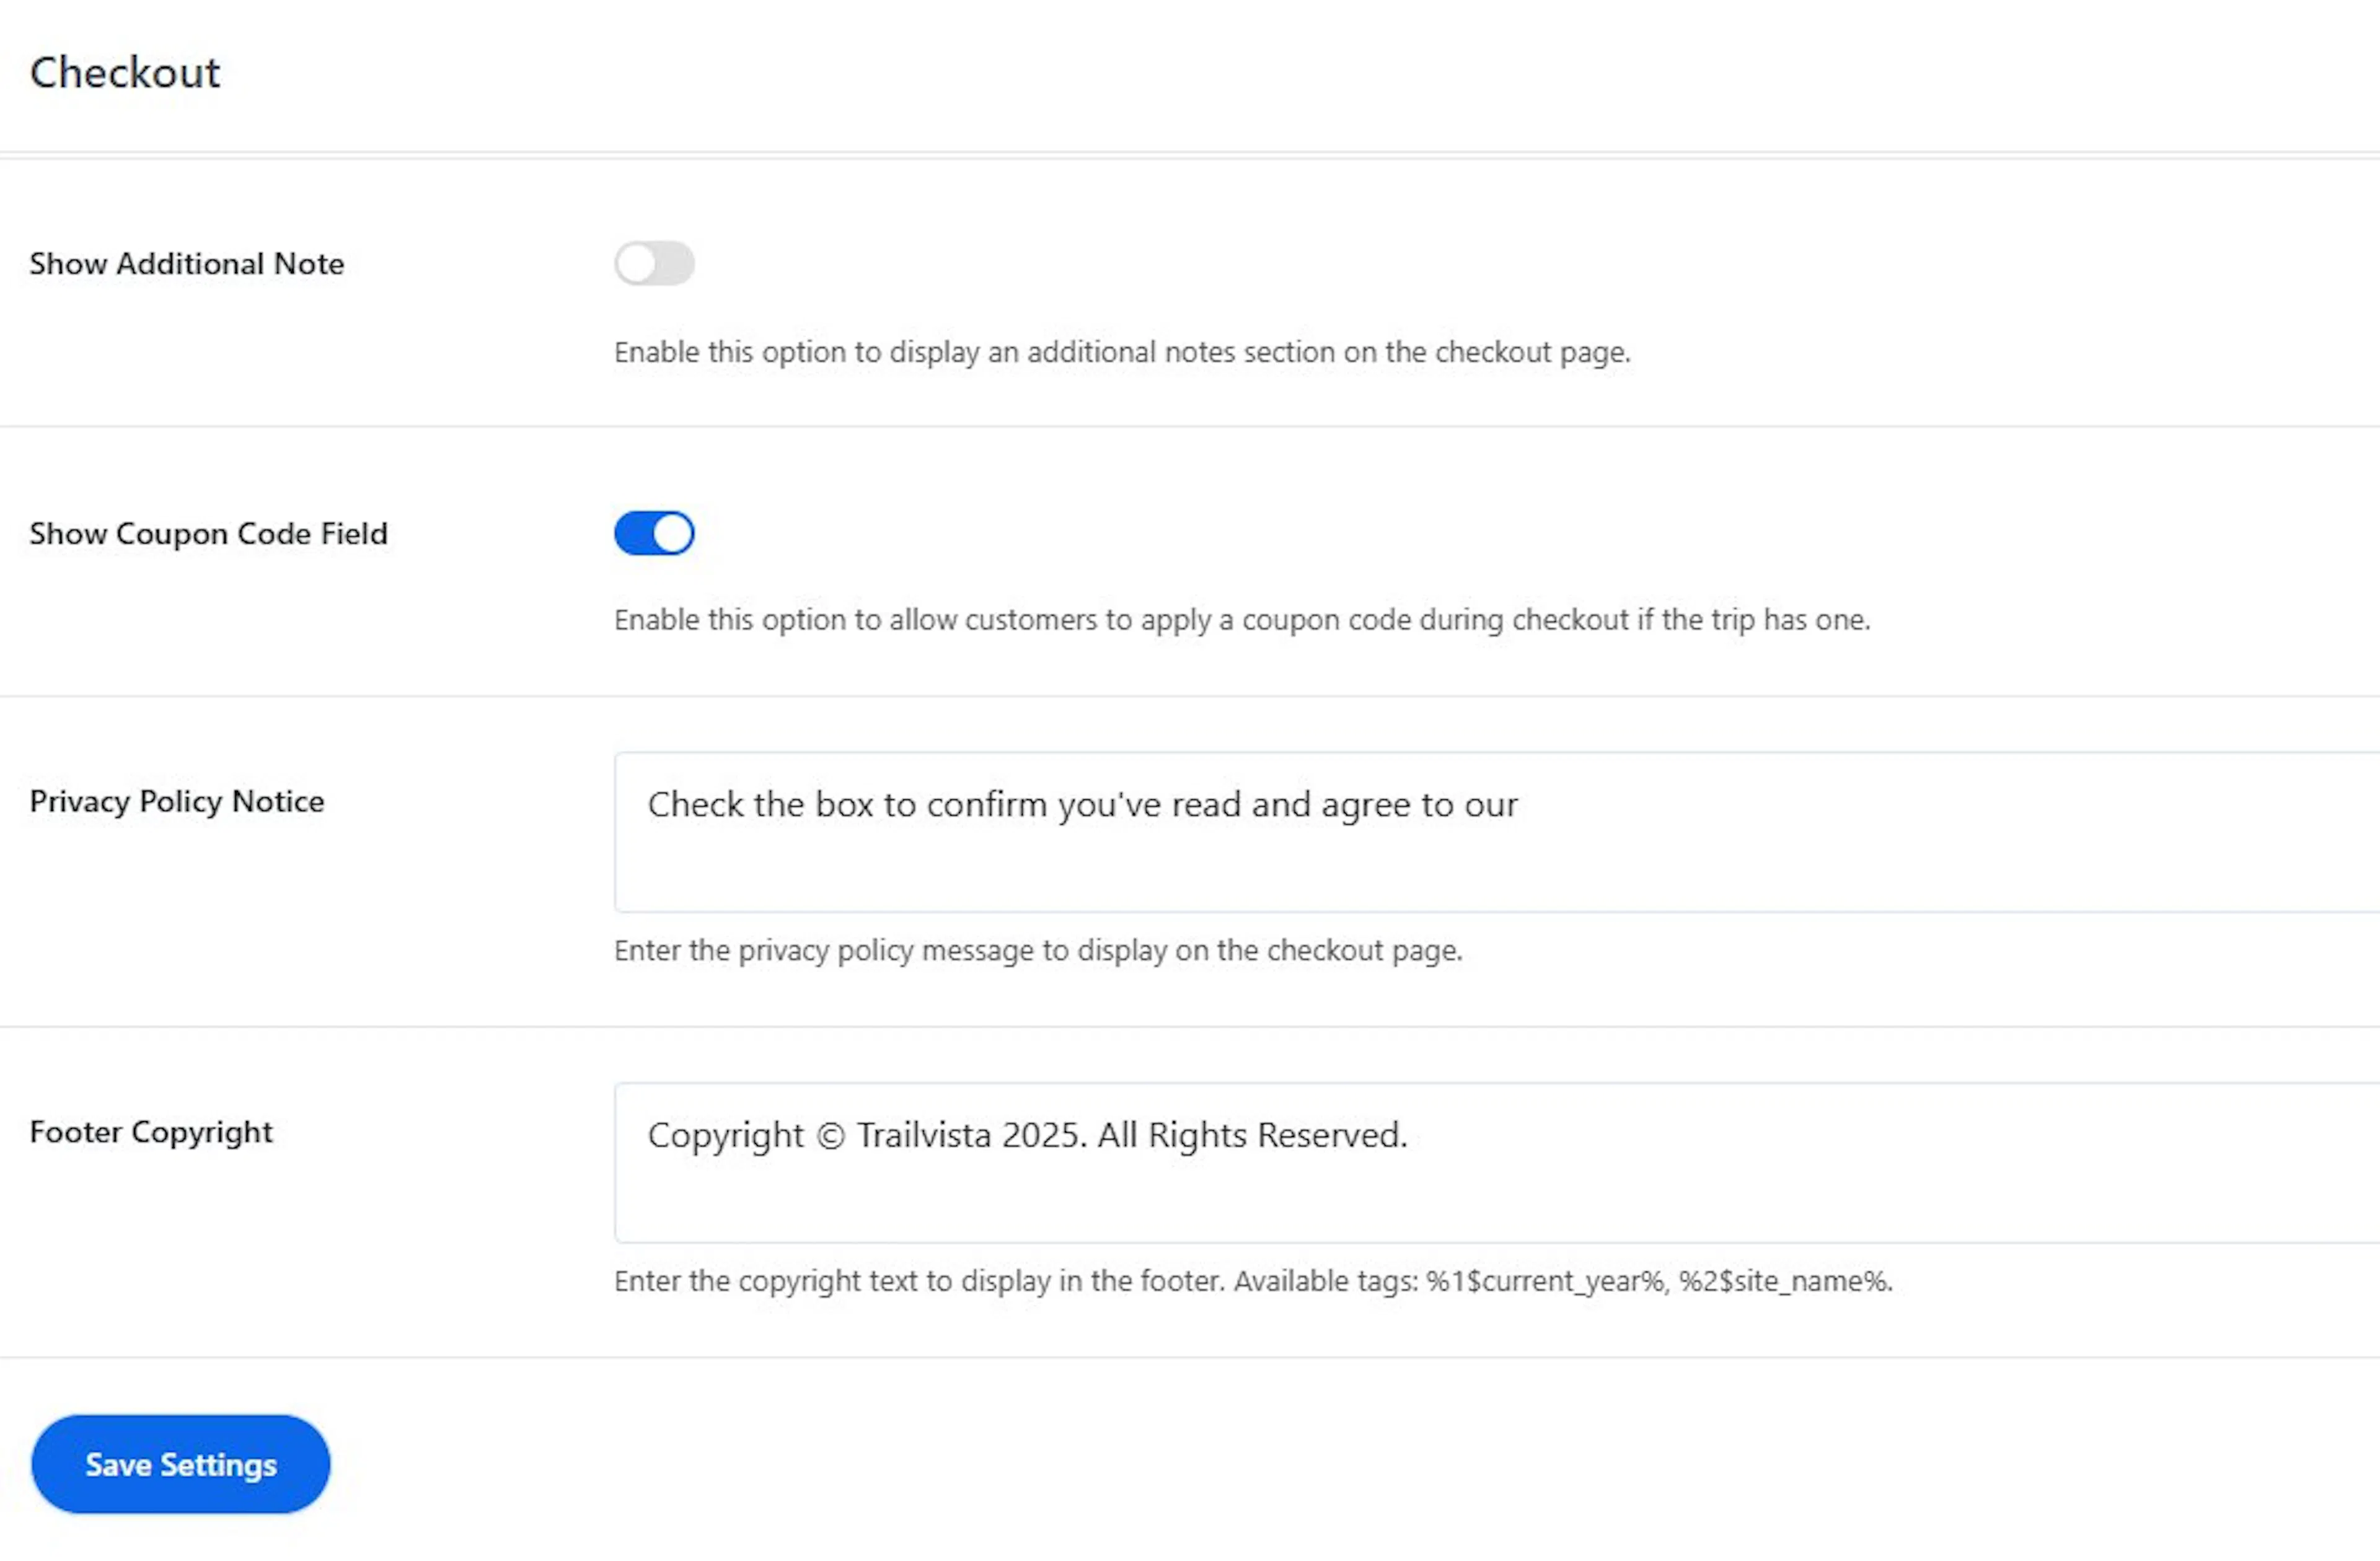
- Show Additional Note: Toggle this on to let travelers type a note while booking. Useful for trips where people often have special requests, like room preferences or gear sizes.
- Show Coupon Code Field: Toggle this on to show a discount code box on checkout. If you run promotions or seasonal discounts, travelers can enter a code here and see their price drop before paying.
- Privacy Policy Notice: Enter the text shown near the checkout form. Since you're collecting personal details from travelers, it's worth telling them how you handle that data.
- Footer Copyright: Enter the copyright line shown at the bottom of your checkout page. Use
%1$current_year%and%2$site_name%in the text, and WP Travel Engine fills in the current year and your site name for you. This line only appears if your checkout page uses the Checkout Template (covered below).
Click Save Settings at the bottom of the page when you're done.
Connecting a page to your checkout settings
WP Travel Engine needs to know which page on your site is the checkout page. That page must contain the [WP_TRAVEL_ENGINE_PLACE_ORDER] shortcode.
- If you don't already have a checkout page, go to Pages > Add New and add the
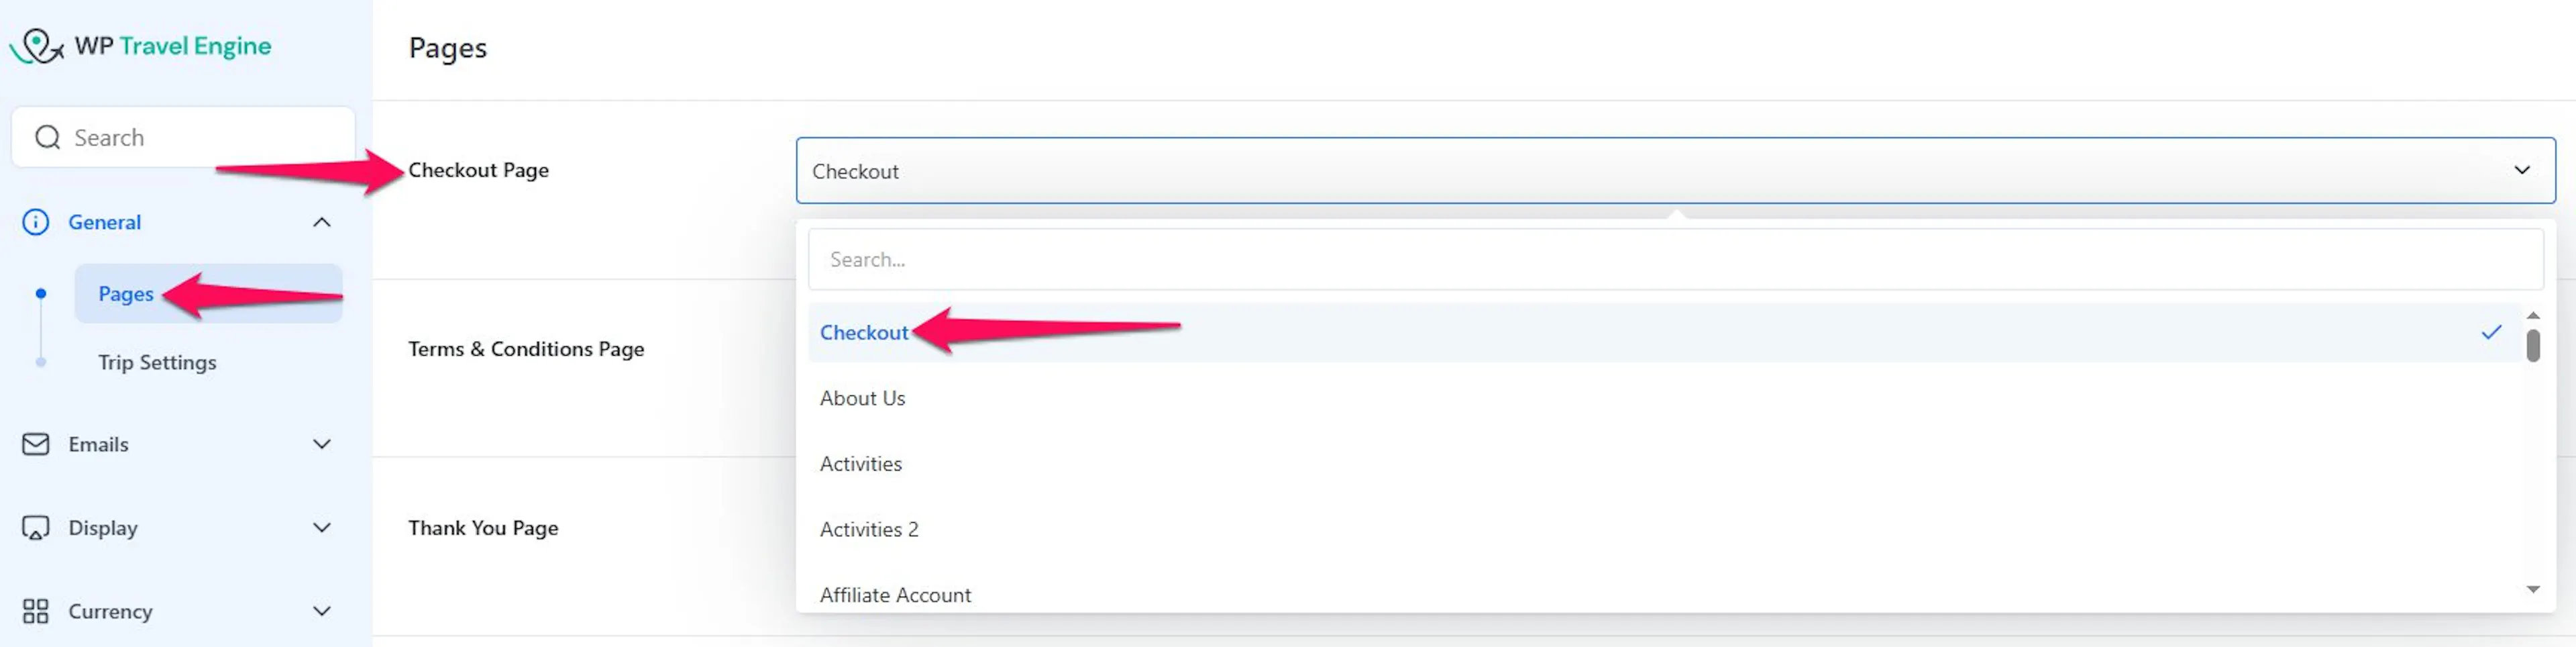
[WP_TRAVEL_ENGINE_PLACE_ORDER]shortcode to it. If you're setting this up during the plugin's onboarding wizard, WP Travel Engine creates this page for you automatically. - Go to WP Travel Engine > Settings, click the General tab, then Pages.
- Under Checkout Page, select the page that has the shortcode on it.
Tip: If a booking isn't landing on the page you expect, this is the first setting to check.
If a booking isn't landing on the page you expect, this is the first setting to check.
Using the Checkout Template
By default, your checkout page renders inside your theme's usual header and footer. If you'd rather have the checkout page take over the full screen, with its own layout and no theme header or footer, apply the Checkout Template:
- Open your checkout page for editing under Pages > All Pages.
- On the right side of the page editor, find the Template dropdown and choose Checkout Template.
Once applied, this template takes over the page completely. The Footer Copyright text you set earlier only shows up when this template is in use.
Building a custom checkout page with shortcodes
If you want more control over the page layout than the settings above give you, place these shortcodes one at a time instead of using the full-page shortcode:
| Shortcode | What it shows |
|---|---|
[WPTRAVELENGINE_CHECKOUT content='checkout-form'] | Only the booking form, without the trip summary |
[WPTRAVELENGINE_CHECKOUT content='cart-summary'] | Only the cart summary (price breakdown) |
[WPTRAVELENGINE_CHECKOUT content='tour-details'] | A summary of the tour details |
[WP_TRAVEL_ENGINE_PLACE_ORDER] | The complete checkout page, all in one shortcode |
Add a Shortcode block to a page (click + in the block editor and search for "shortcode") and paste whichever one you need.
If you're still stuck or have a question we didn't cover, our support team is happy to help. Reach out at our support page and we'll get you sorted.