

Email Customizer
Customize booking and payment email layouts, branding, and dynamic content with a drag-and-drop interface.
Make your booking and payment emails look like they came from your business, not from a generic system. The Email Customizer add-on lets you change the layout, colors, images, and text in those emails from inside your WordPress dashboard.
You can also add booking details automatically with placeholders. A placeholder is a saved tag that fills in real customer or booking information when the email is sent. For example, a trekking company can show the traveler's name, trip date, and payment method without typing those details by hand each time.
Email Customizer requires WP Travel Engine plugin v5.7.6 or later installed and activated on your website.
Key features
These are the main things you can do with the add-on:
- Change the email layout - edit the Header, Body, and Footer sections with a drag-and-drop editor. Drag-and-drop means you move sections around on the screen with your mouse.
- Match your brand - change colors and add your company logo so your emails feel like part of your tour business.
- Add personal details automatically - use placeholders for things like the customer's name, booking details, and payment method.
- Edit the most important customer emails - customize both booking confirmation emails and payment receipt emails.
- Preview before you use it - check how your email will look before you turn it on for customers.
- Turn custom emails on or off - use your custom design when you want, or switch back to the default system email at any time.
- Work from one screen in WordPress - manage everything from WP Travel Engine → Email Customizer in your WordPress dashboard. The dashboard is the main admin area you see after you log in to WordPress.
Once you know what the add-on can do, the next step is making sure you have everything ready.
Prerequisites
Before you start, make sure you have these ready:
- WP Travel Engine plugin v5.7.6 or later installed and activated - this is the main plugin that runs your travel booking features.
- Email Customizer add-on installed and activated with a valid license key - an add-on is an extra tool that adds more features to the main plugin.
- A working email setup on your website - your site needs to be able to send emails through PHP Mail, SMTP, or an email service such as SendGrid. SMTP is a common way to send website emails more reliably.
- At least one booking or test order - this helps you preview real booking details inside the email.
- Your brand files and details, if you have them - for example, your logo, brand colors, and footer text.
If you have these ready, you can move on with more confidence.
Installing the Email Customizer add-on
First, make sure the add-on is installed and your license key is active. If you have not done that yet, follow how to activate a Pro add-on license key for the full installation and activation walkthrough.
Once installation is done, you are ready to open the customizer and start editing your emails.
Using Email Customizer
What you'll need before you start: the add-on must be installed and activated, and it helps to have a test booking ready so you can preview real email content.
Open Email Customizer
You are going to the screen where these email designs are managed.
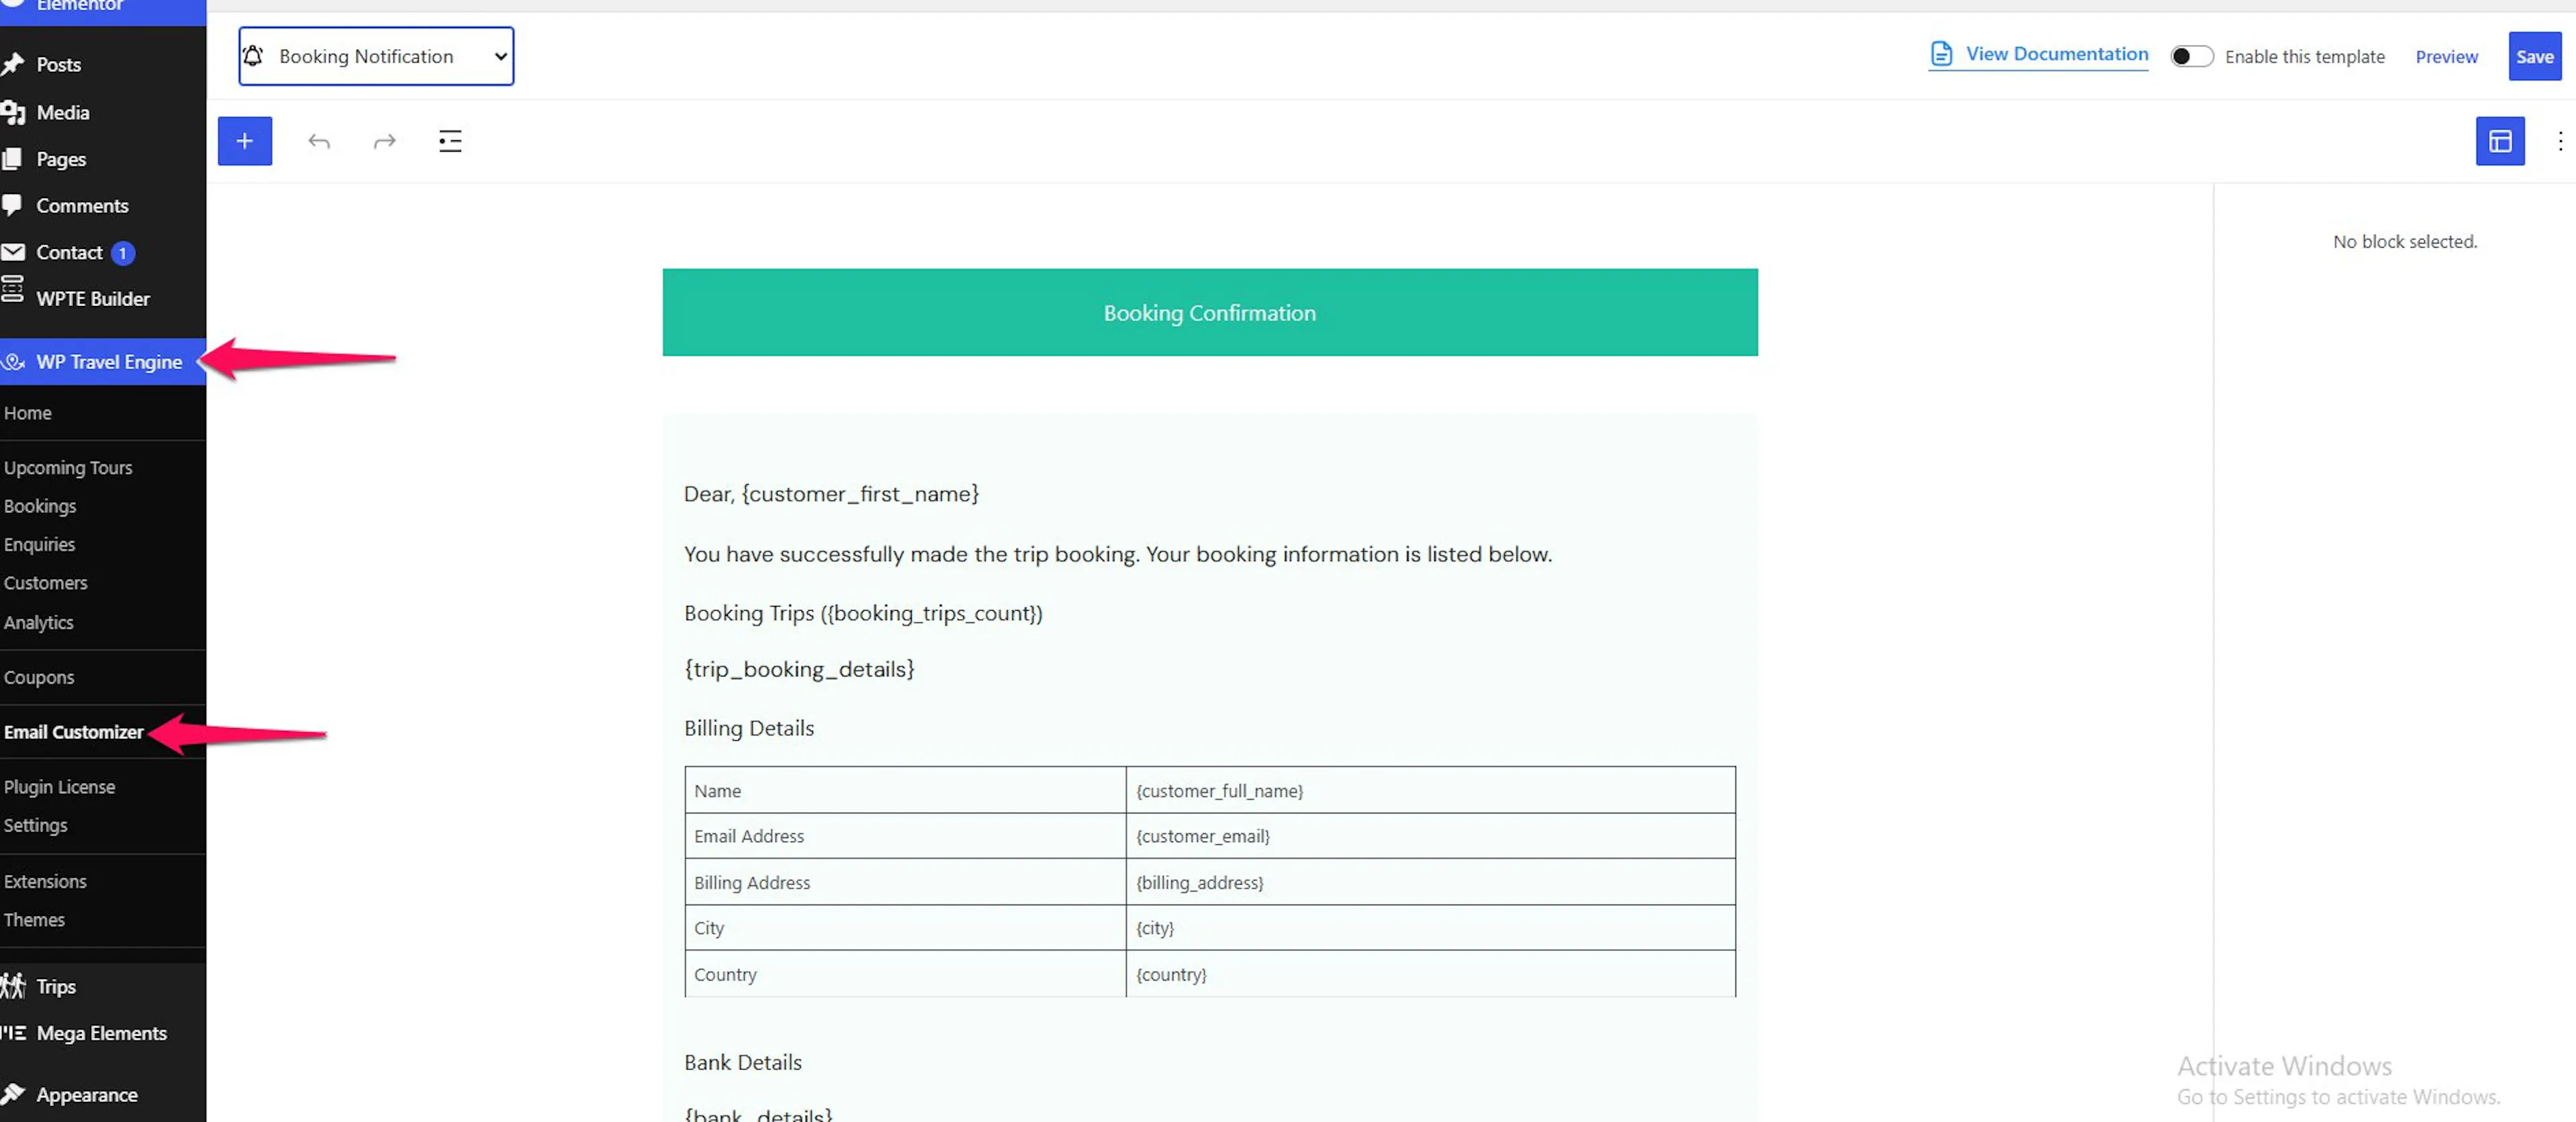
In your WordPress dashboard, go to WP Travel Engine on the left sidebar. Then click Email Customizer.
When this screen opens, you are in the right place to edit your customer email templates.
Choose the email you want to edit
Start by picking the email your customer will receive.
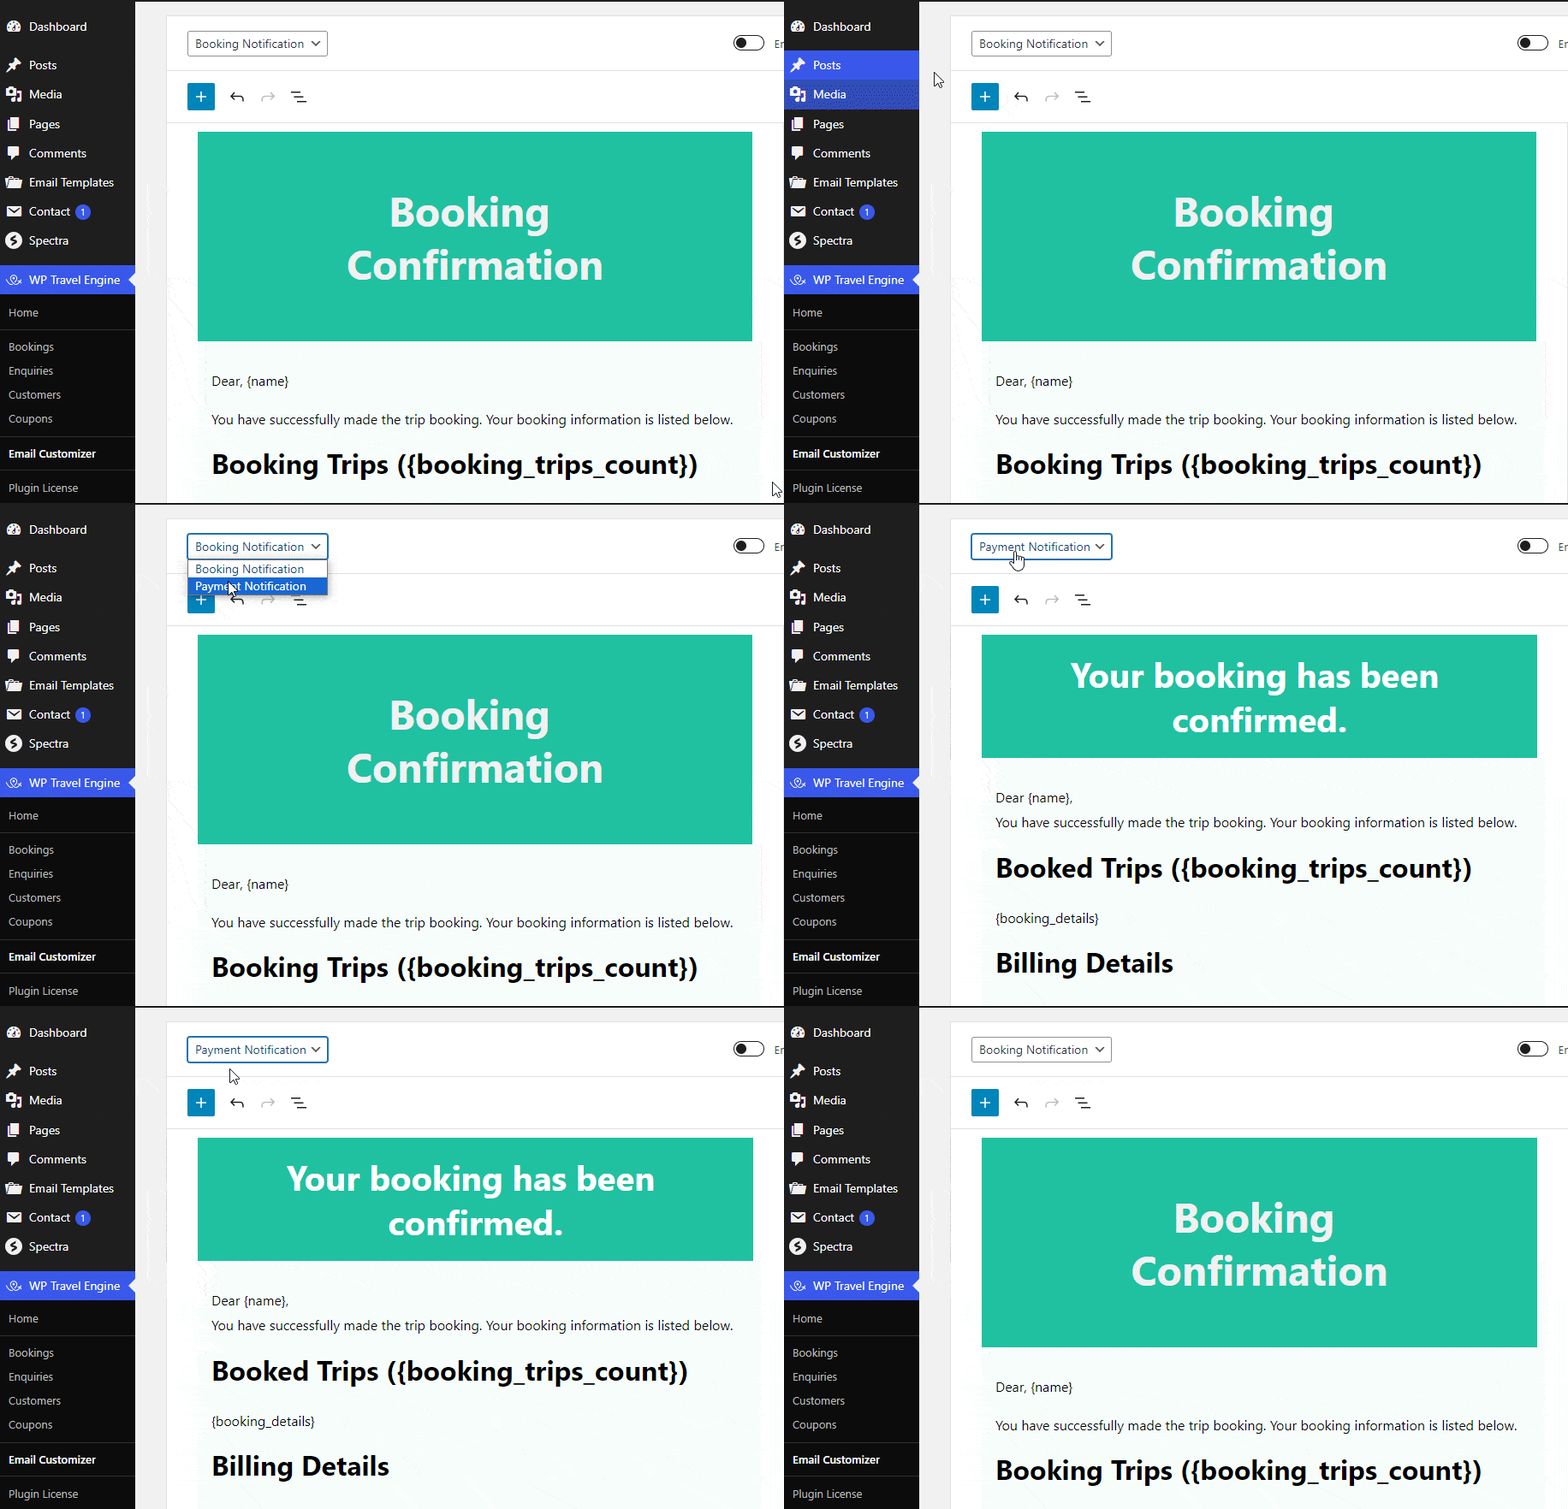
You can customize two templates here:
- Booking Notification - this email goes out when someone makes a booking.
- Payment Notification - this email goes out when someone makes a payment.
For example, you might want your Everest Base Camp booking confirmation to feel warm and welcoming. You might want your payment email to look cleaner and more receipt-like.
Change the layout and colors
This is where the email starts to look like your brand.
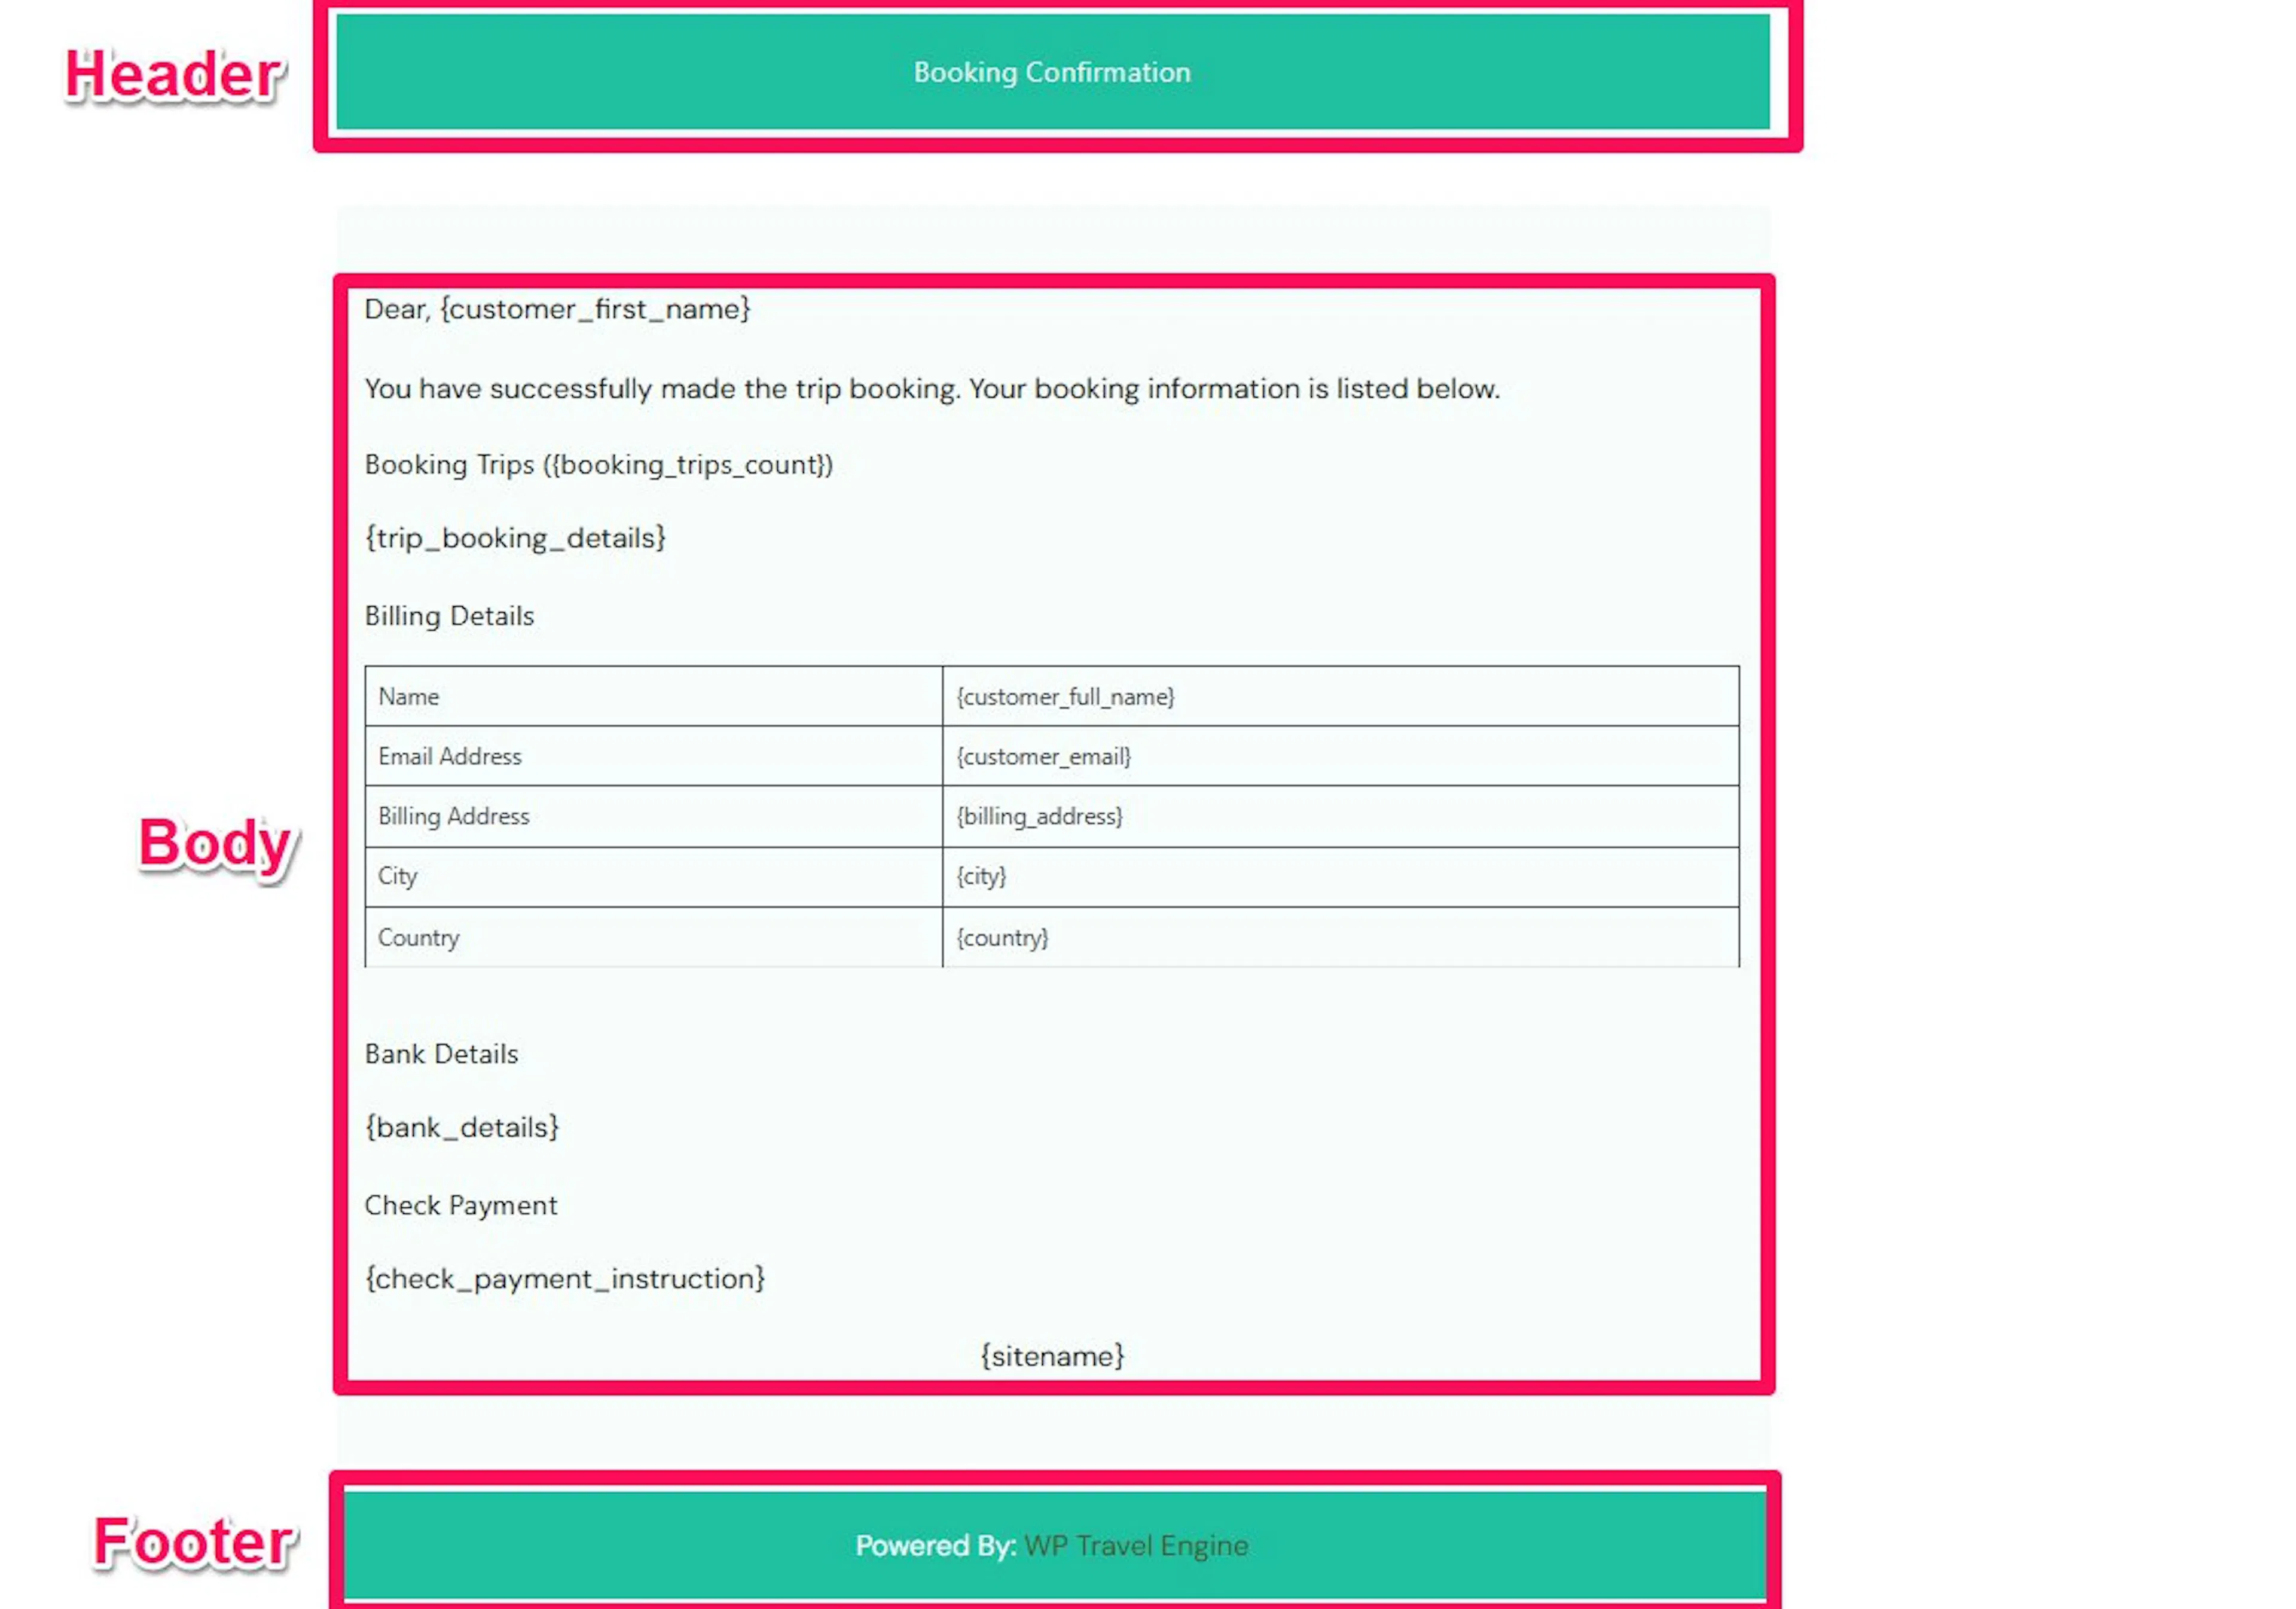
The default email is split into three sections: Header, Body, and Footer. You can move blocks around with the drag-and-drop editor to change how each section appears.
You can also change the colors of different sections and text. This helps your emails match your business. For example, a hiking company might use forest green in the header, while a city day tour business might use a brighter color from its logo.
Add images and booking details
This step makes the email feel more personal and more useful to the traveler.
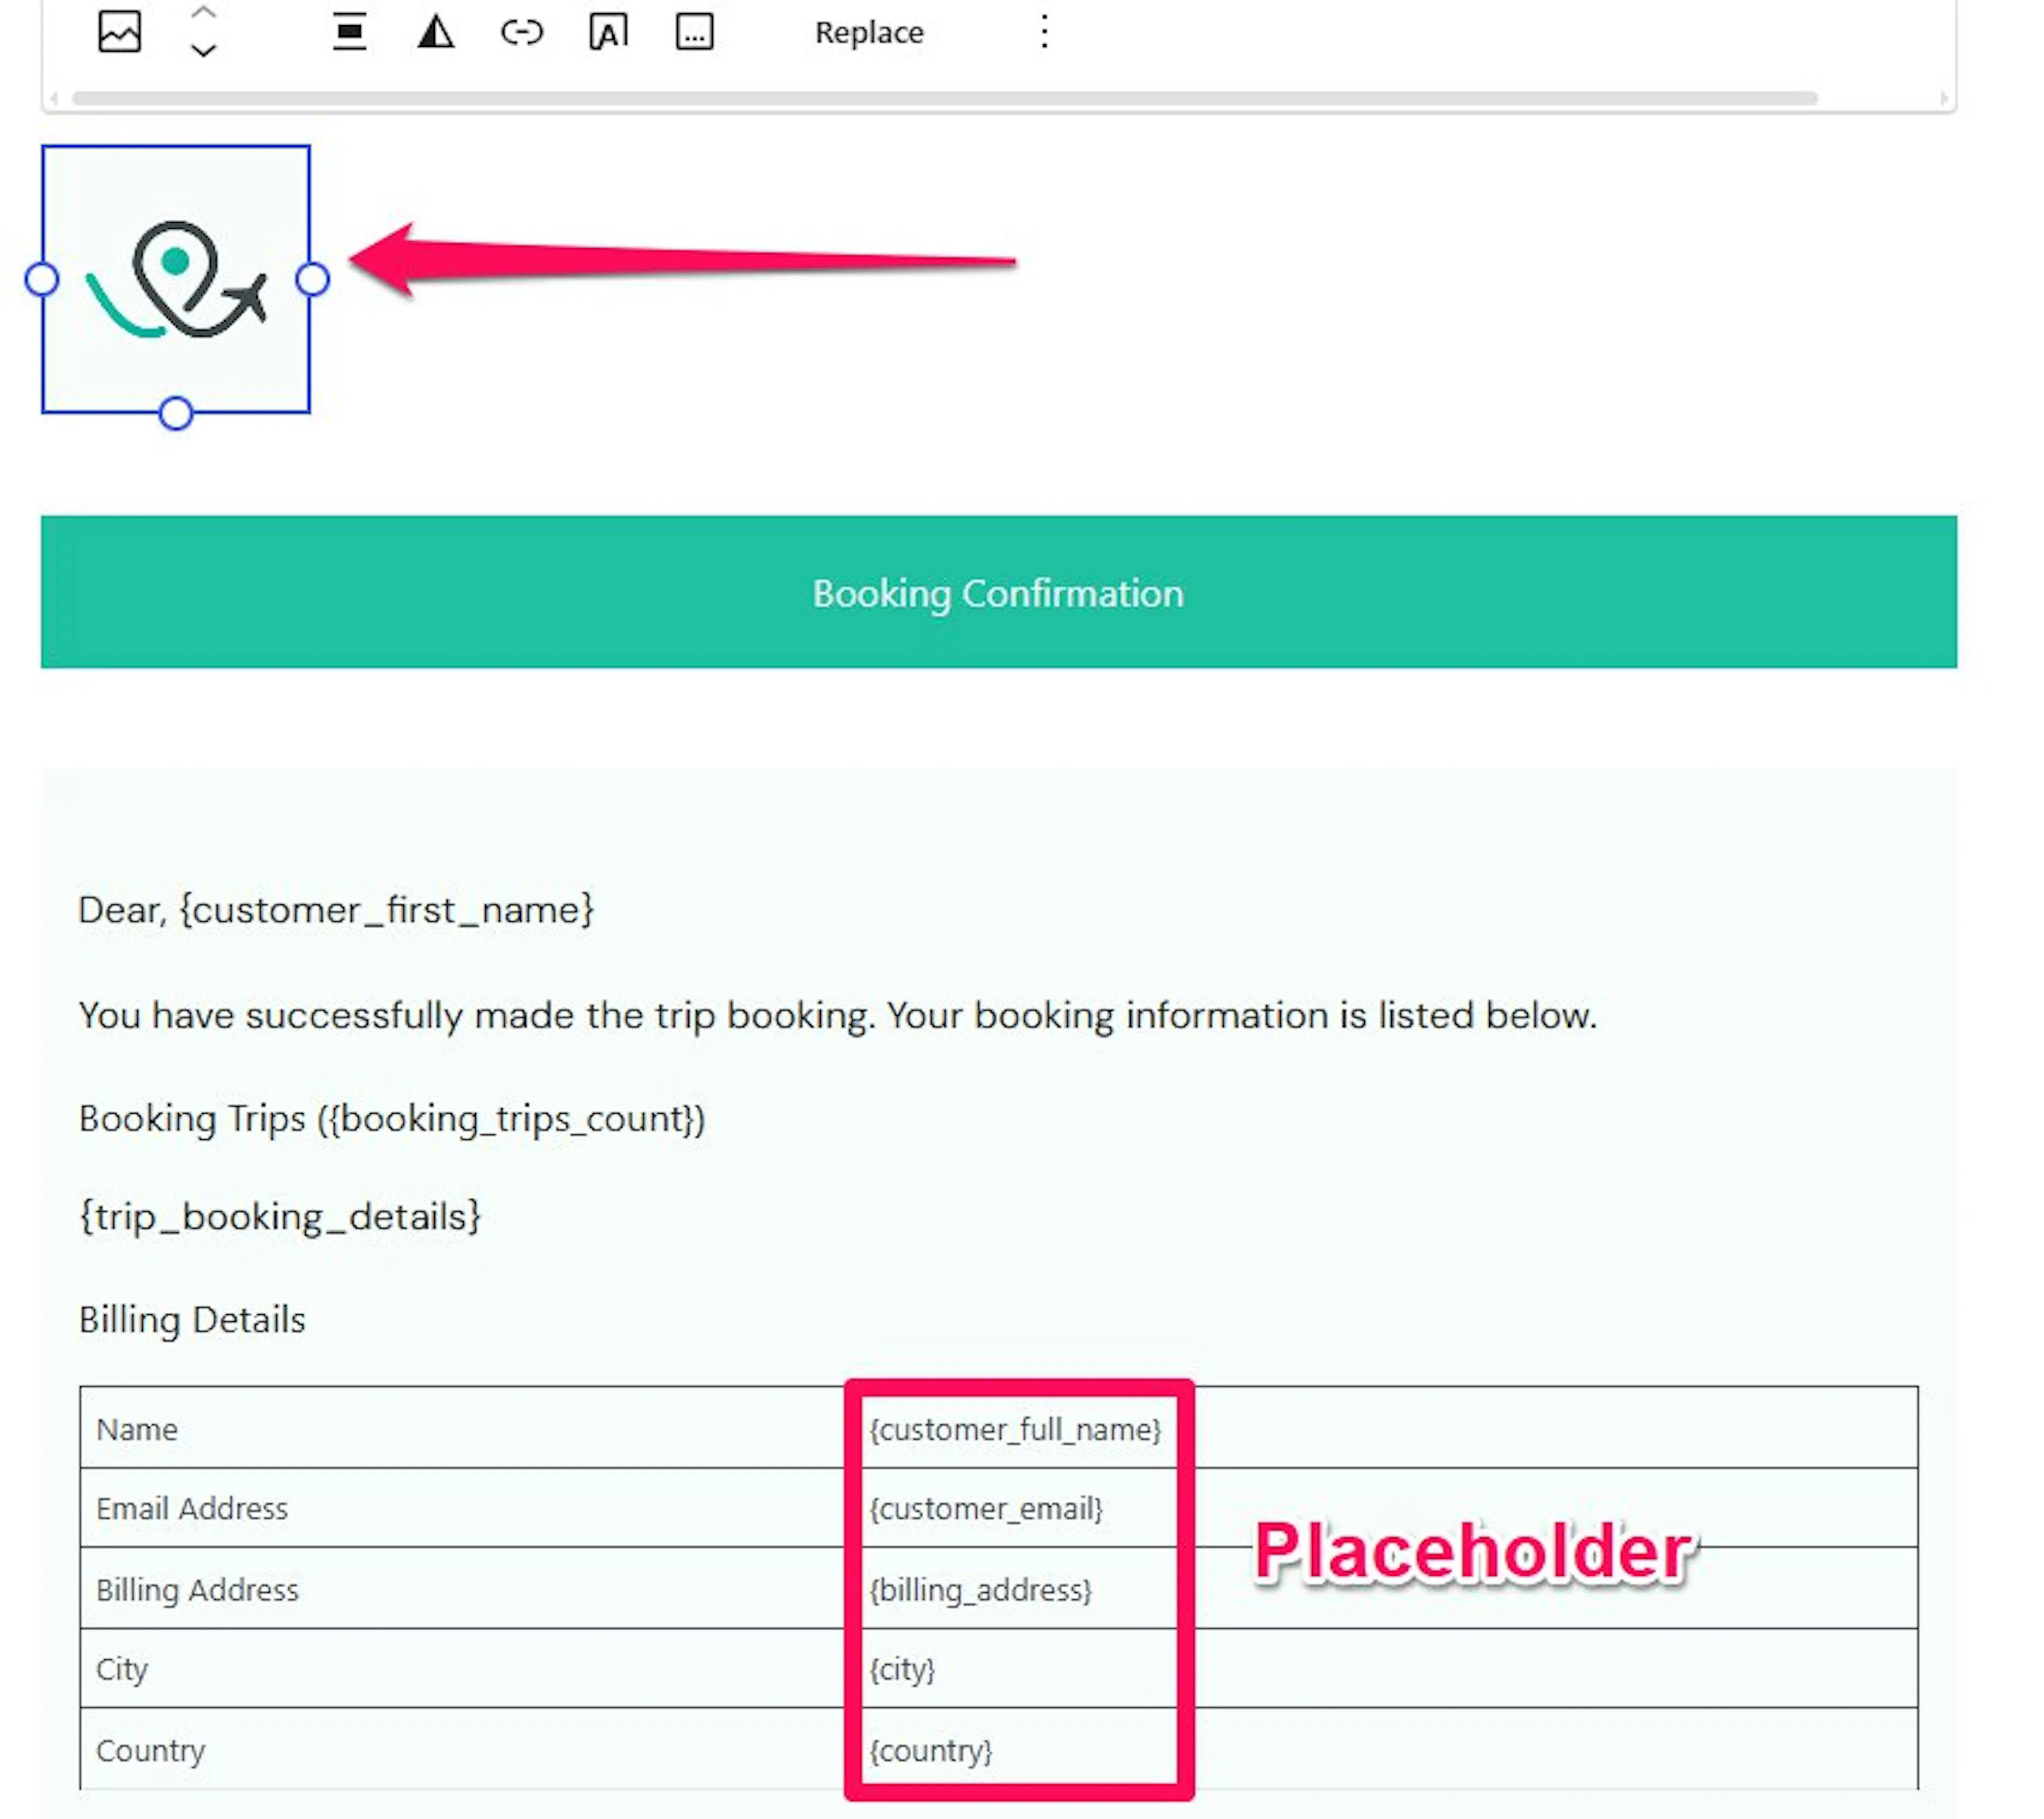
Add an image such as your company logo. You can also add placeholders. A placeholder is a piece of text such as {customer_full_name} or {booking_id} that is replaced with real booking information when the email is sent.
For example, a customer who books a spring group trek could receive an email that automatically shows their name, departure date, traveler count, and total payment.
Save and preview the email
Previewing helps you catch small problems before a customer sees them.
Save the email template to open a preview of your customized email on a new screen. This lets you check the layout, colors, images, and placeholder content before you turn the template on.
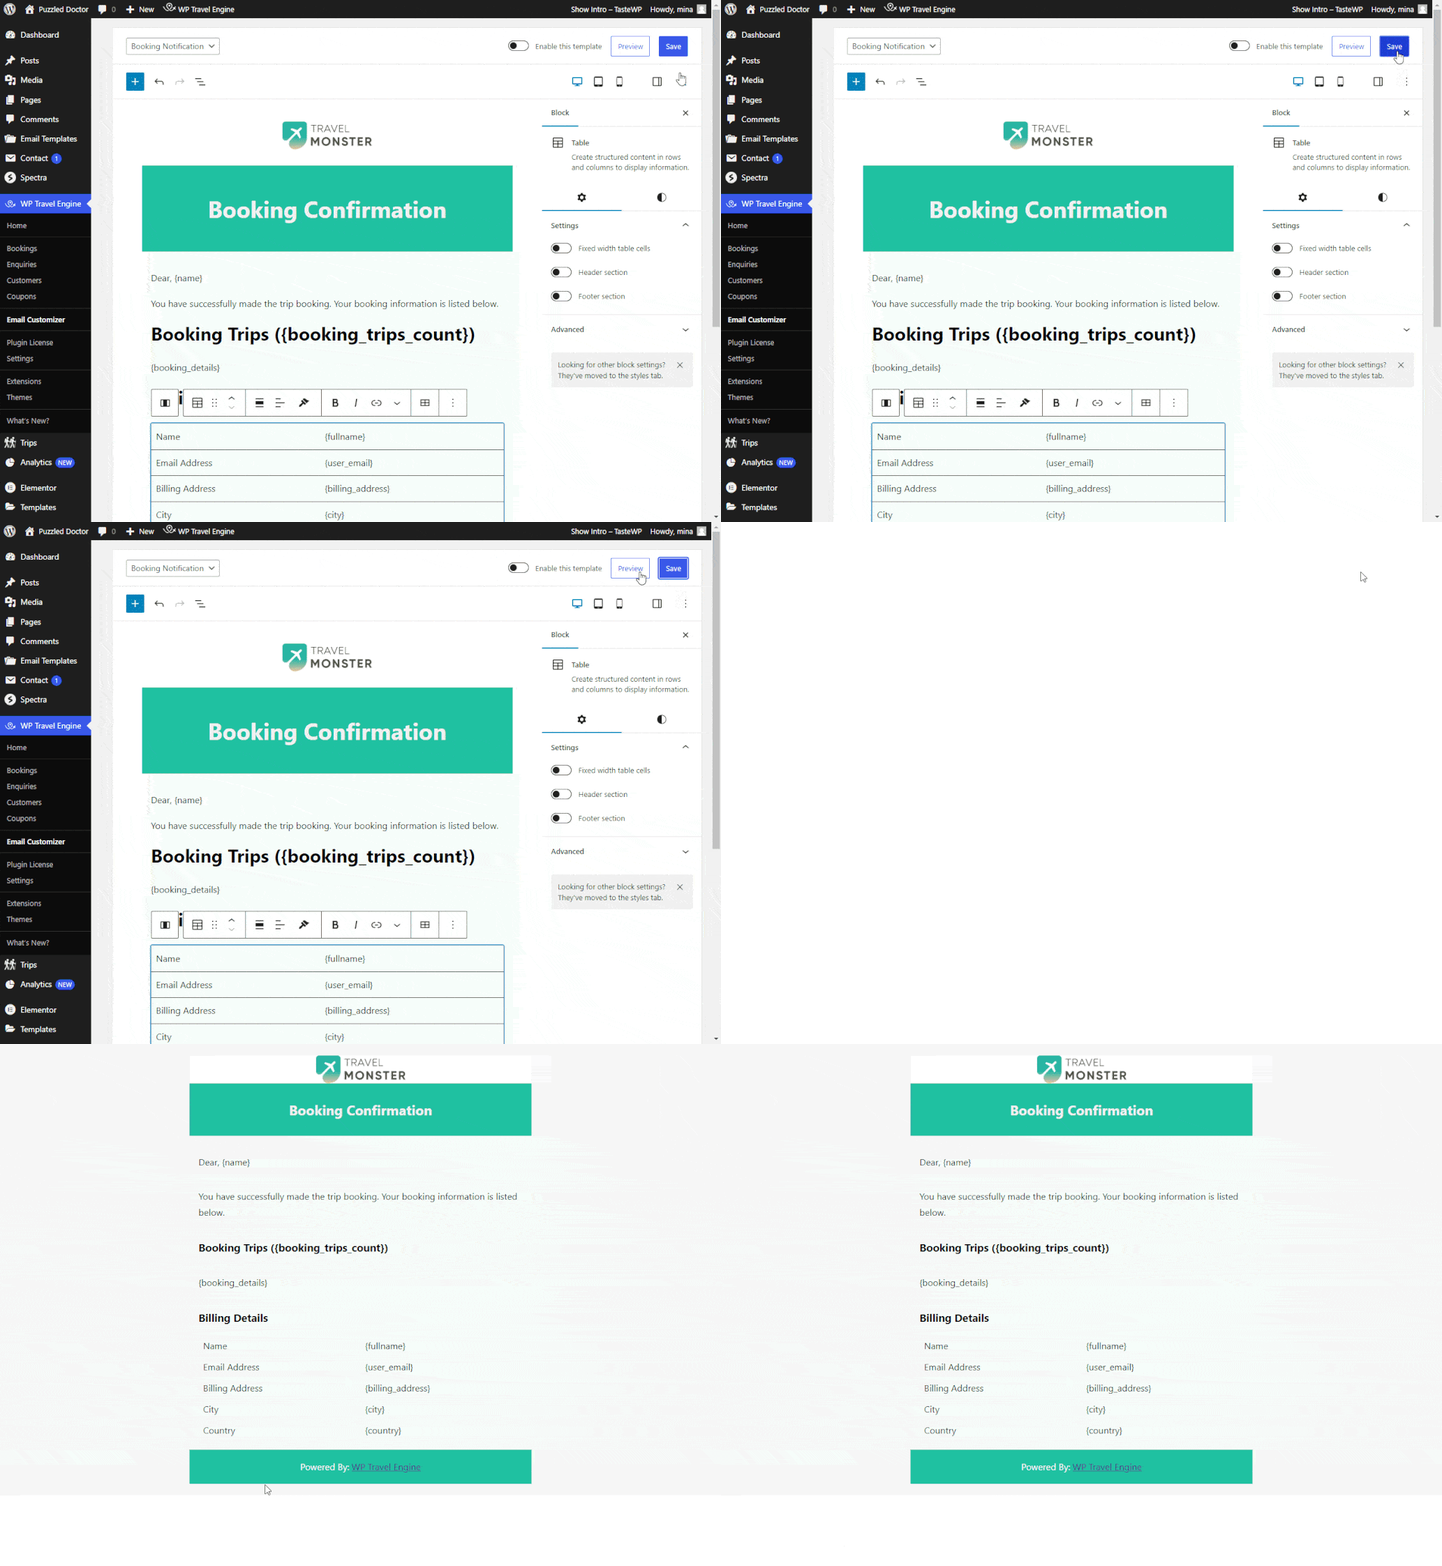
Turn the template on when you are ready
This final step decides whether customers receive your custom version or the default one.
Toggle Enable this template on to send your personalized email to customers. If you are still testing, you can leave it off until the design looks right.
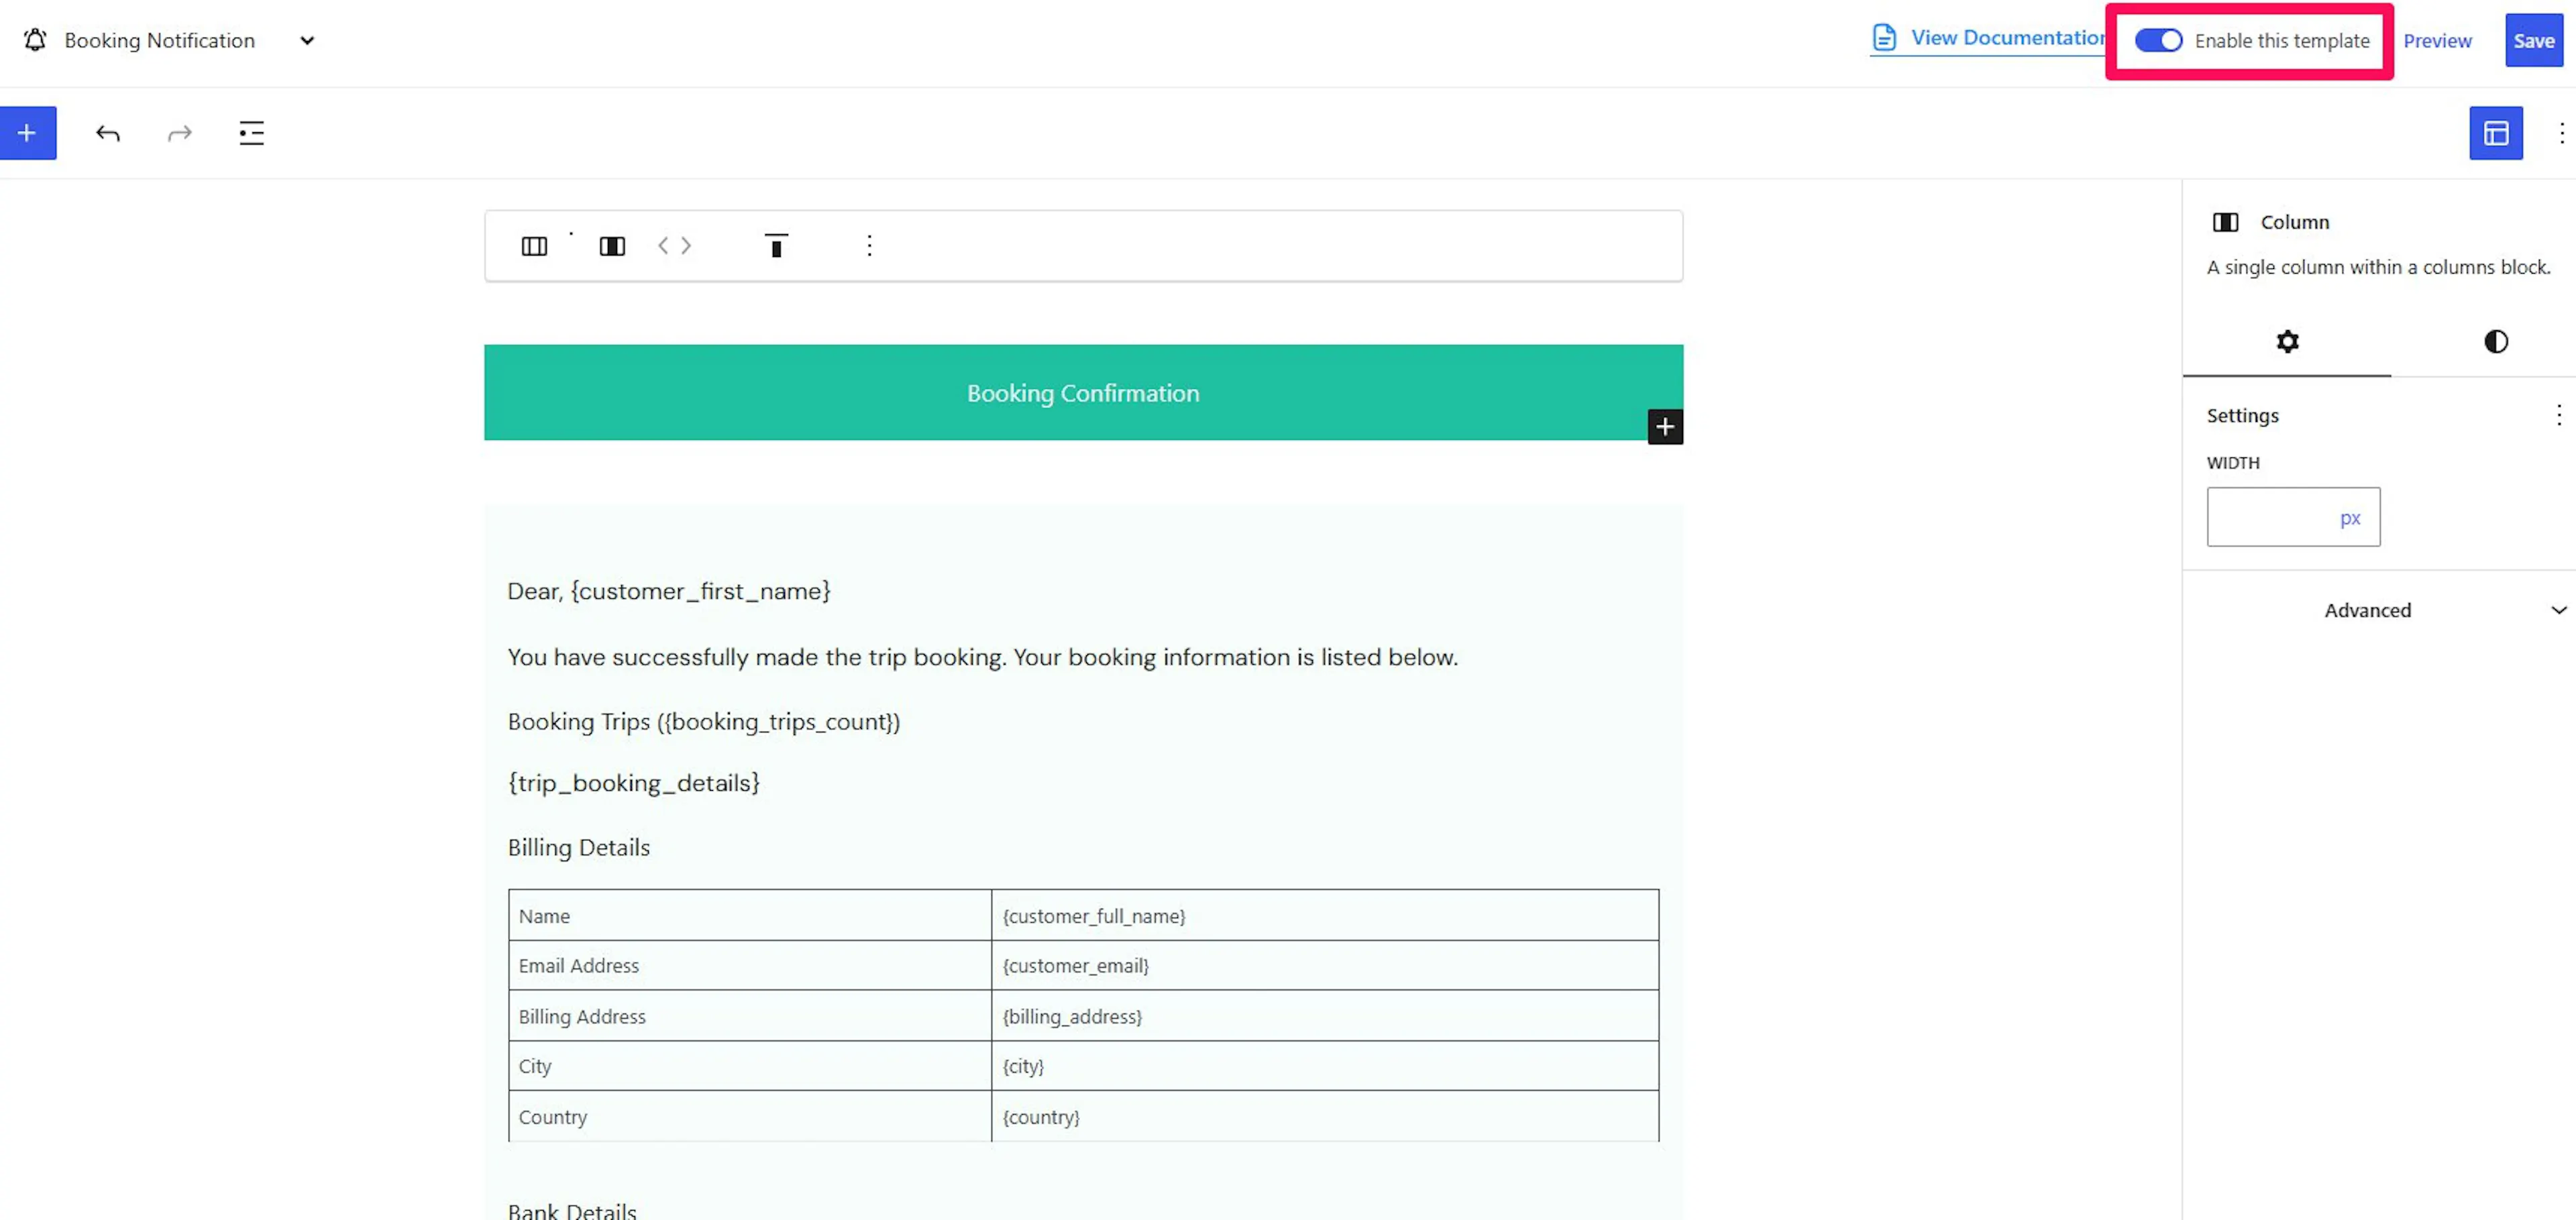
With the Email Customizer add-on, you can customize the default email templates for Booking and Payment notifications only.
If you already have your logo and brand colors ready, add those first. It is often the fastest way to make the email feel like it belongs to your business.
Dynamic placeholders
Placeholders pull booking information into the email for you. This saves time and helps each message feel more personal.
For example, a customer who books a family day tour could receive an email with their name, trip date, number of travelers, and payment amount filled in automatically. You only need to place the right tags in the template.
| Tag | Description |
|---|---|
{trip_url} | The trip URL for each booked trip. |
{name} | The buyer's first name. |
{fullname} | The buyer's full name, first and last. |
{user_email} | The buyer's email address. |
{billing_address} | The buyer's billing address. |
{city} | The buyer's city. |
{country} | The buyer's country. |
{tdate} | The starting date of the trip. |
{date} | The trip booking date. |
{traveler} | The total number of traveler(s). |
{child-traveler} | The total number of child traveler(s). |
{tprice} | The trip price. |
{price} | The total payment made on the booking. |
{total_cost} | The total price of the booking. |
{due} | The due balance. |
{sitename} | Your site name. |
{booking_url} | The trip booking link. |
{ip_address} | The buyer's IP address. |
{booking_id} | The booking order ID. |
{bank_details} | Bank account details. Replaced with the bank details and sent to the customer receipt email when the customer chose the Bank Transfer method. |
{check_payment_instruction} | Instructions to make a check payment. |
{booking_details} | The booking details: booked trips, extra services, traveler details, etc. |
{traveler_data} | The traveler details: traveler details and emergency contact details. |
{payment_method} | The payment method used to check out. |
Once you know which placeholders to use, you can build emails that answer common customer questions before they ask.
Enabling and disabling email templates
Turning the template on sends your custom version to customers. Turning it off keeps your saved design but sends the default system email instead.
Use the Enable this template toggle when you are ready to use your custom email.
If you disable the template, you can still customize and save it as you like - but your changes won't be applied to the email. Instead, the system reverts to the default email layout.
That gives you room to test changes without affecting live customer emails.
If you're still stuck or want a hand with your setup, our support team is happy to help. Reach out at our support page and we'll get you sorted.