

How to Translate Themes and Plugins Using Loco Translate
Translate the text on your travel website into any language with Loco Translate, so your international customers see everything in their own language, from buttons and menus to trip details.
What Loco Translate does
Loco Translate helps you change the English text that appears on your travel website. You can translate buttons, menus, labels, trip details, and other fixed text without editing code.
A plugin is an add-on that gives WordPress a new feature. WP Travel Engine is a plugin that adds travel booking features to your website.
Loco Translate only translates fixed text from your theme, plugins, and WordPress itself. It does not translate every piece of content on your website. A theme or plugin must support translations before Loco Translate can work with it. Before you begin, check whether your travel theme supports translation.
What you will need before you start
You will need access to your WordPress dashboard and the language you want to add. Keep a page on your website open in another browser tab so you can check your translations as you work.
Step 1: Install and activate Loco Translate
Installing Loco Translate adds the translation tool to your WordPress website. You will find it in the left sidebar of your WordPress dashboard after you activate it.
Find Loco Translate
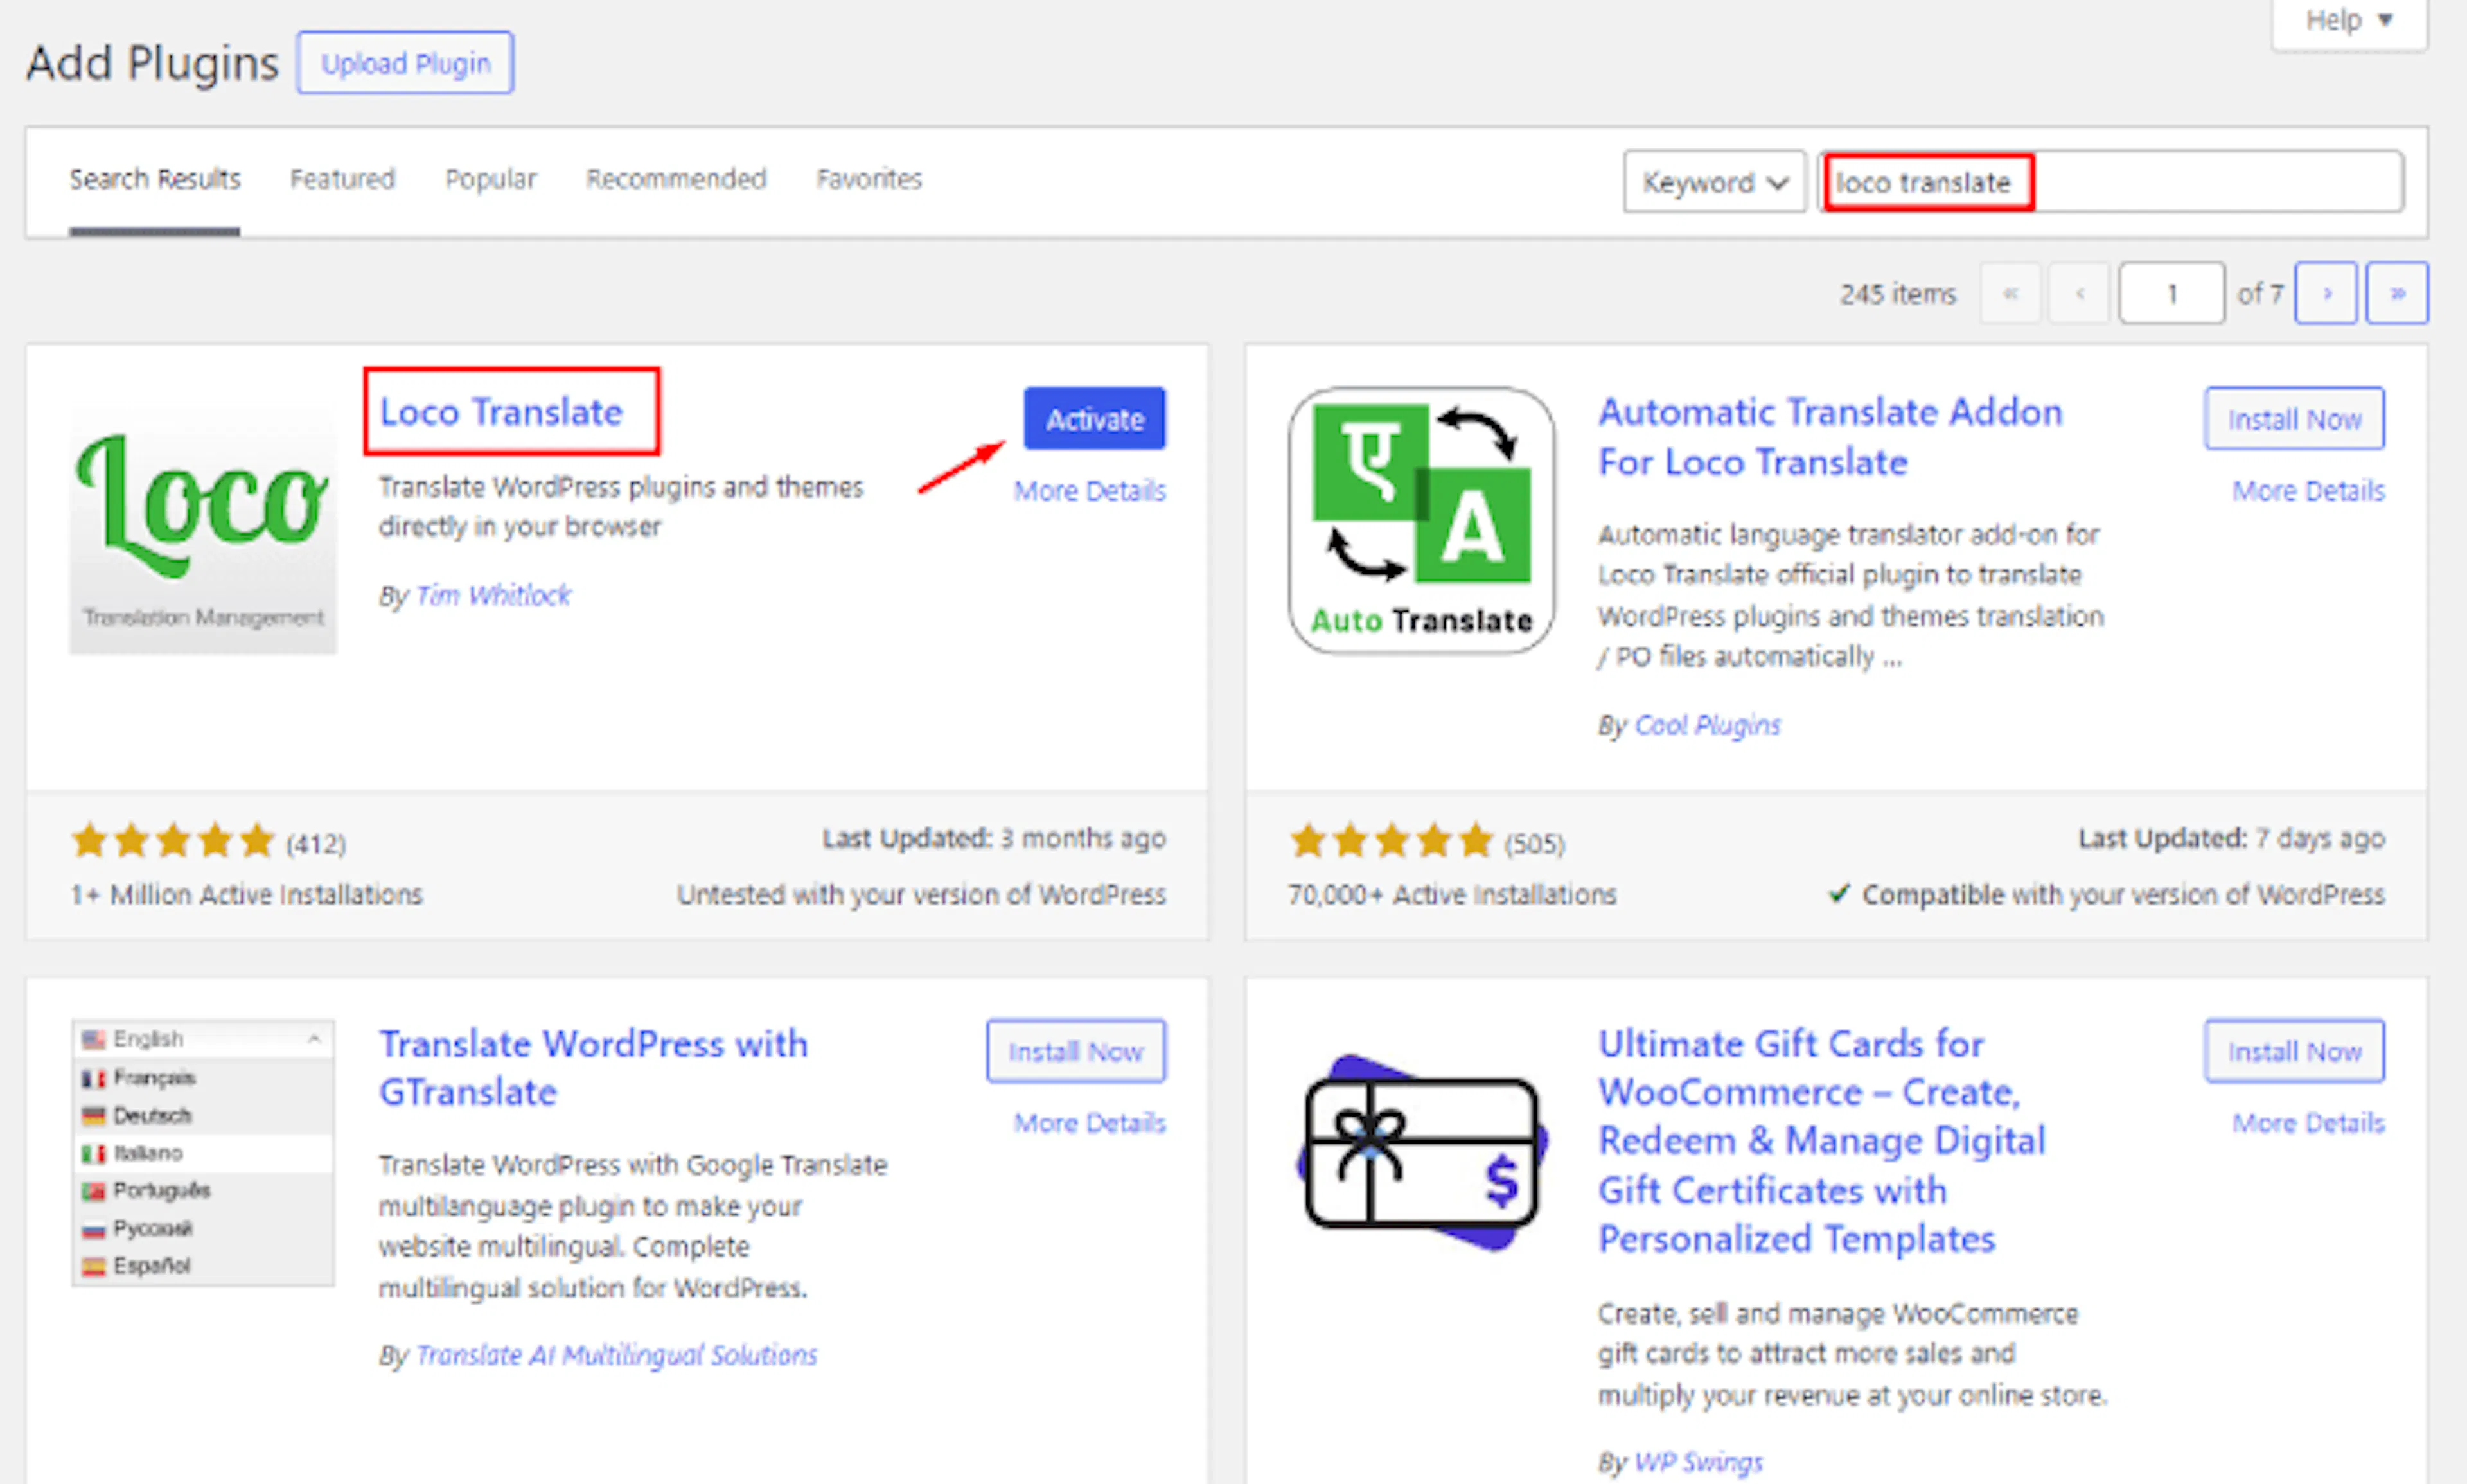
From your WordPress dashboard, open Plugins, then choose Add New Plugin. Use the search box near the top of the page to search for Loco Translate.
Install the plugin
Find Loco Translate in the search results. Click Install Now on its plugin card.
Activate the plugin
Click Activate after the installation finishes. You should now see Loco Translate in the left sidebar of your WordPress dashboard.
The translation tool is now ready. Next, choose the part of your website you want to translate.
Step 2: Choose your theme
A theme controls how your website looks. It controls things such as your page layout, footer, menus, and button styles.
For example, if you run a trekking website and want the footer and buttons to appear in Italian instead of English, start by choosing your theme in Loco Translate.
Open your installed themes
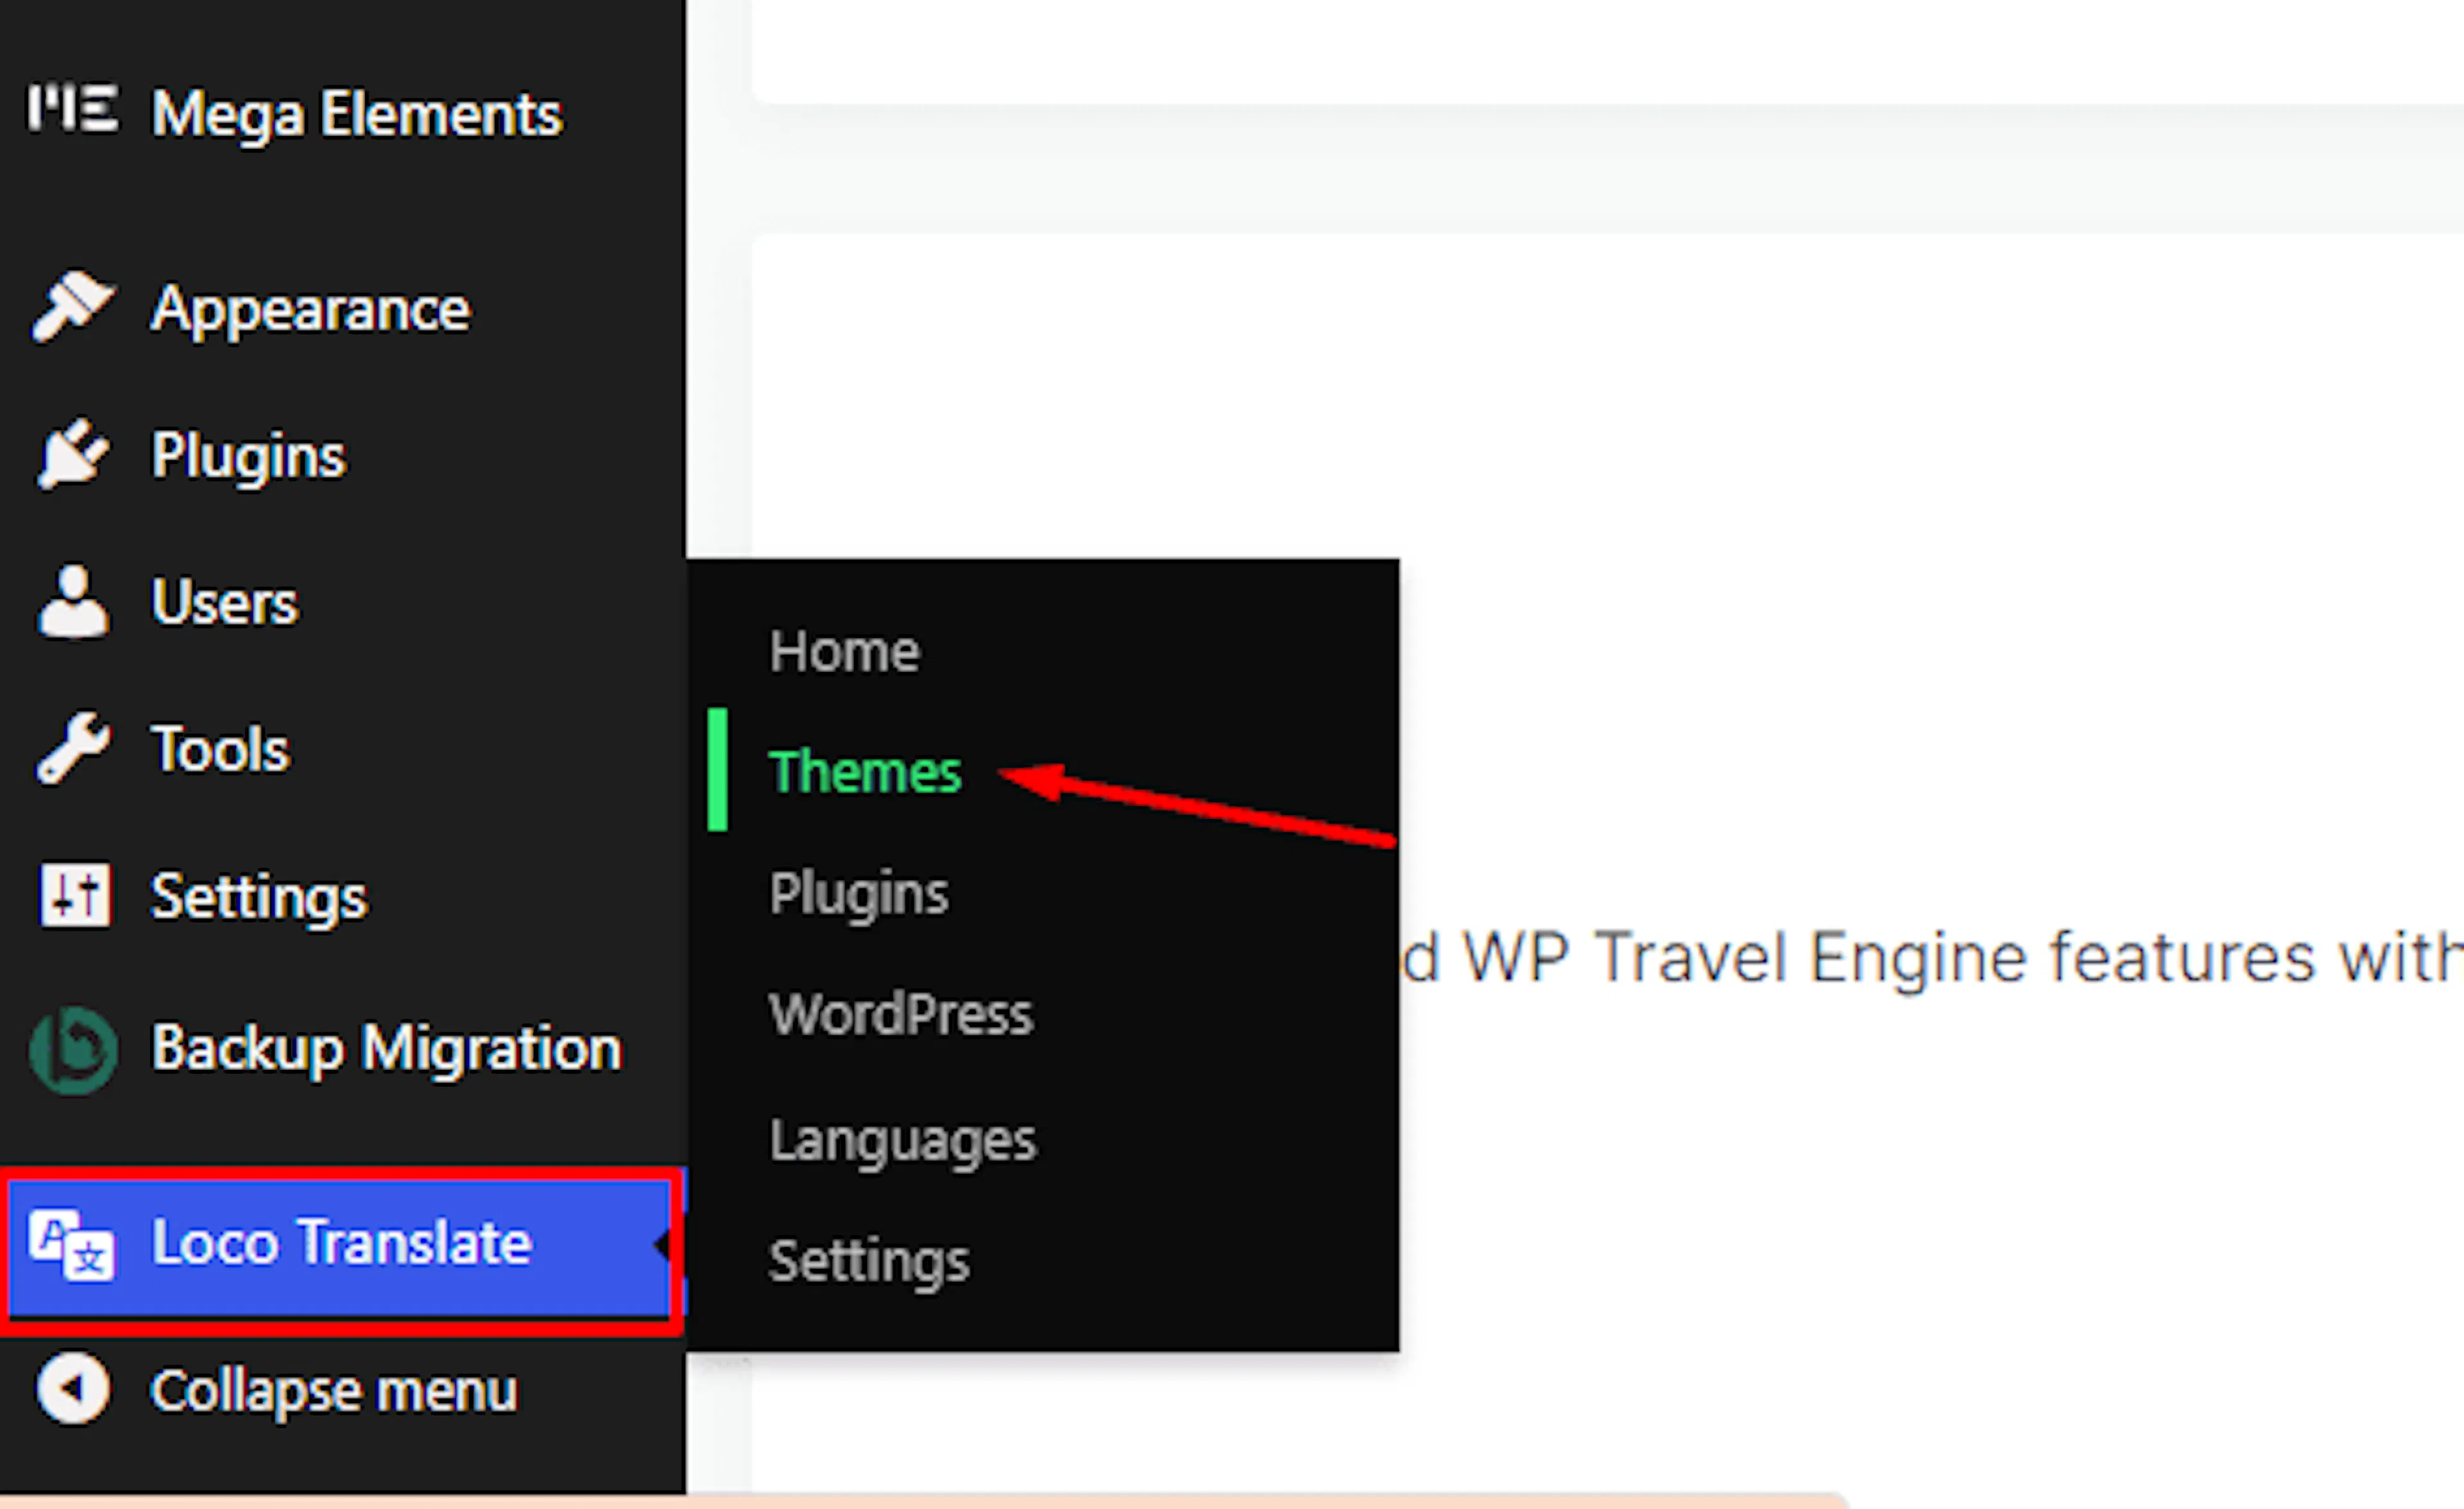
In the left sidebar of your WordPress dashboard, open Loco Translate, then choose Themes.
Choose your theme
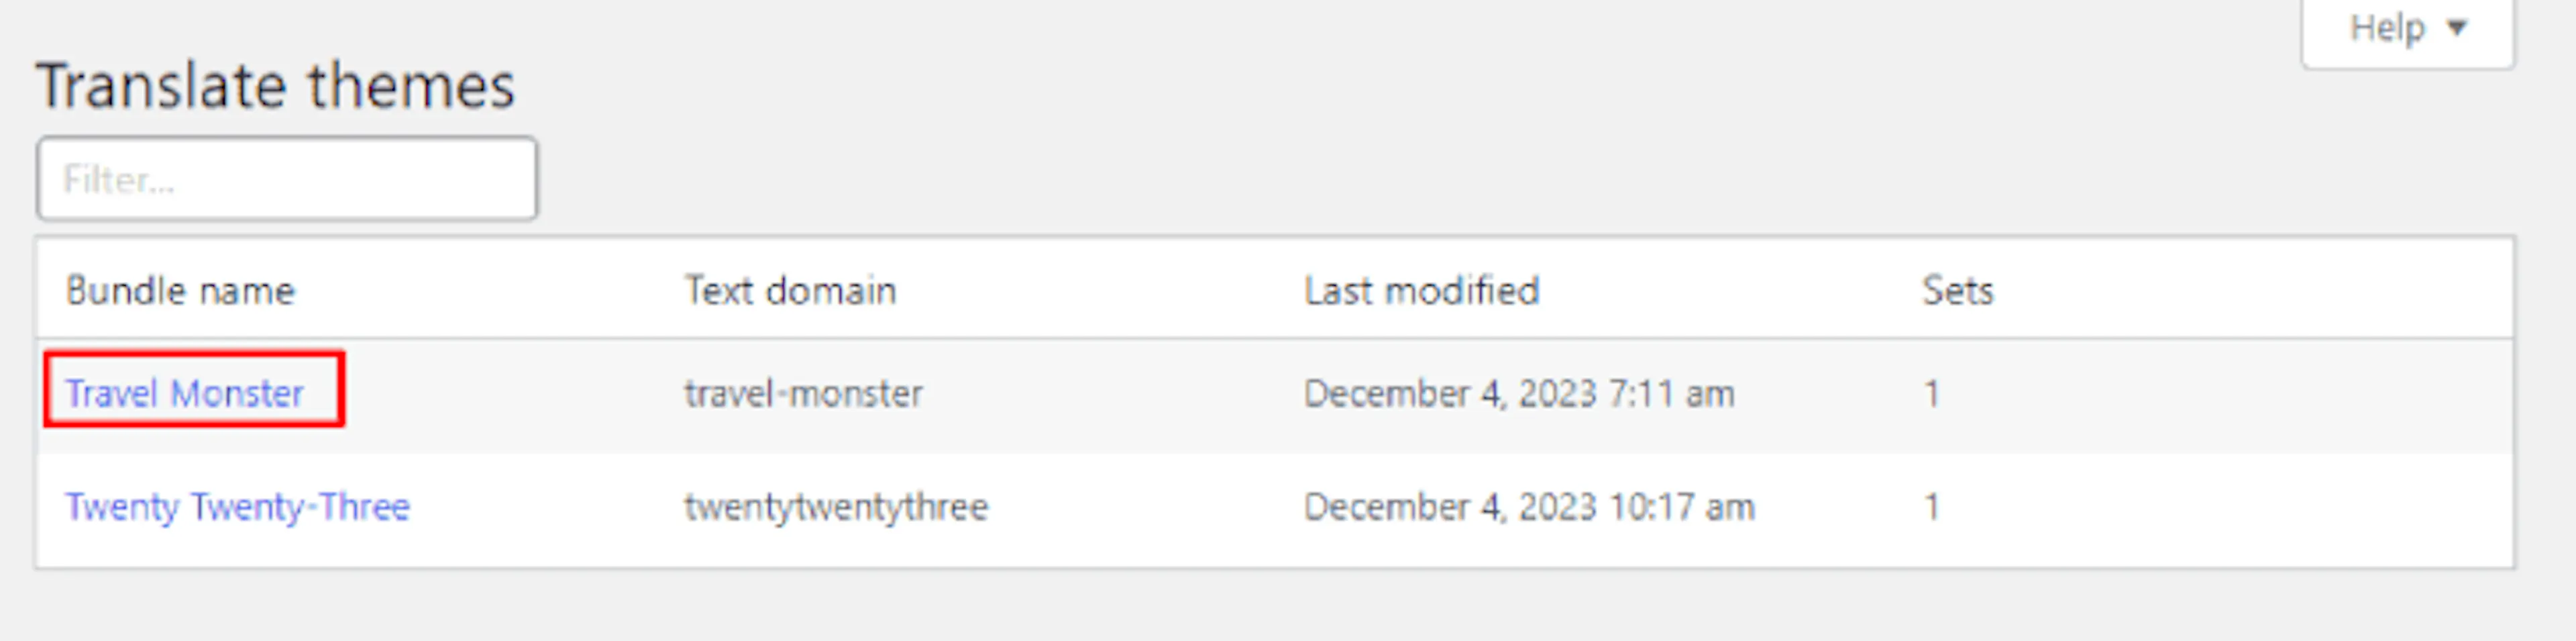
Find the theme you want to translate. Loco Translate shows your active theme and other themes installed on your website. Click the theme you want to use.
Add a language
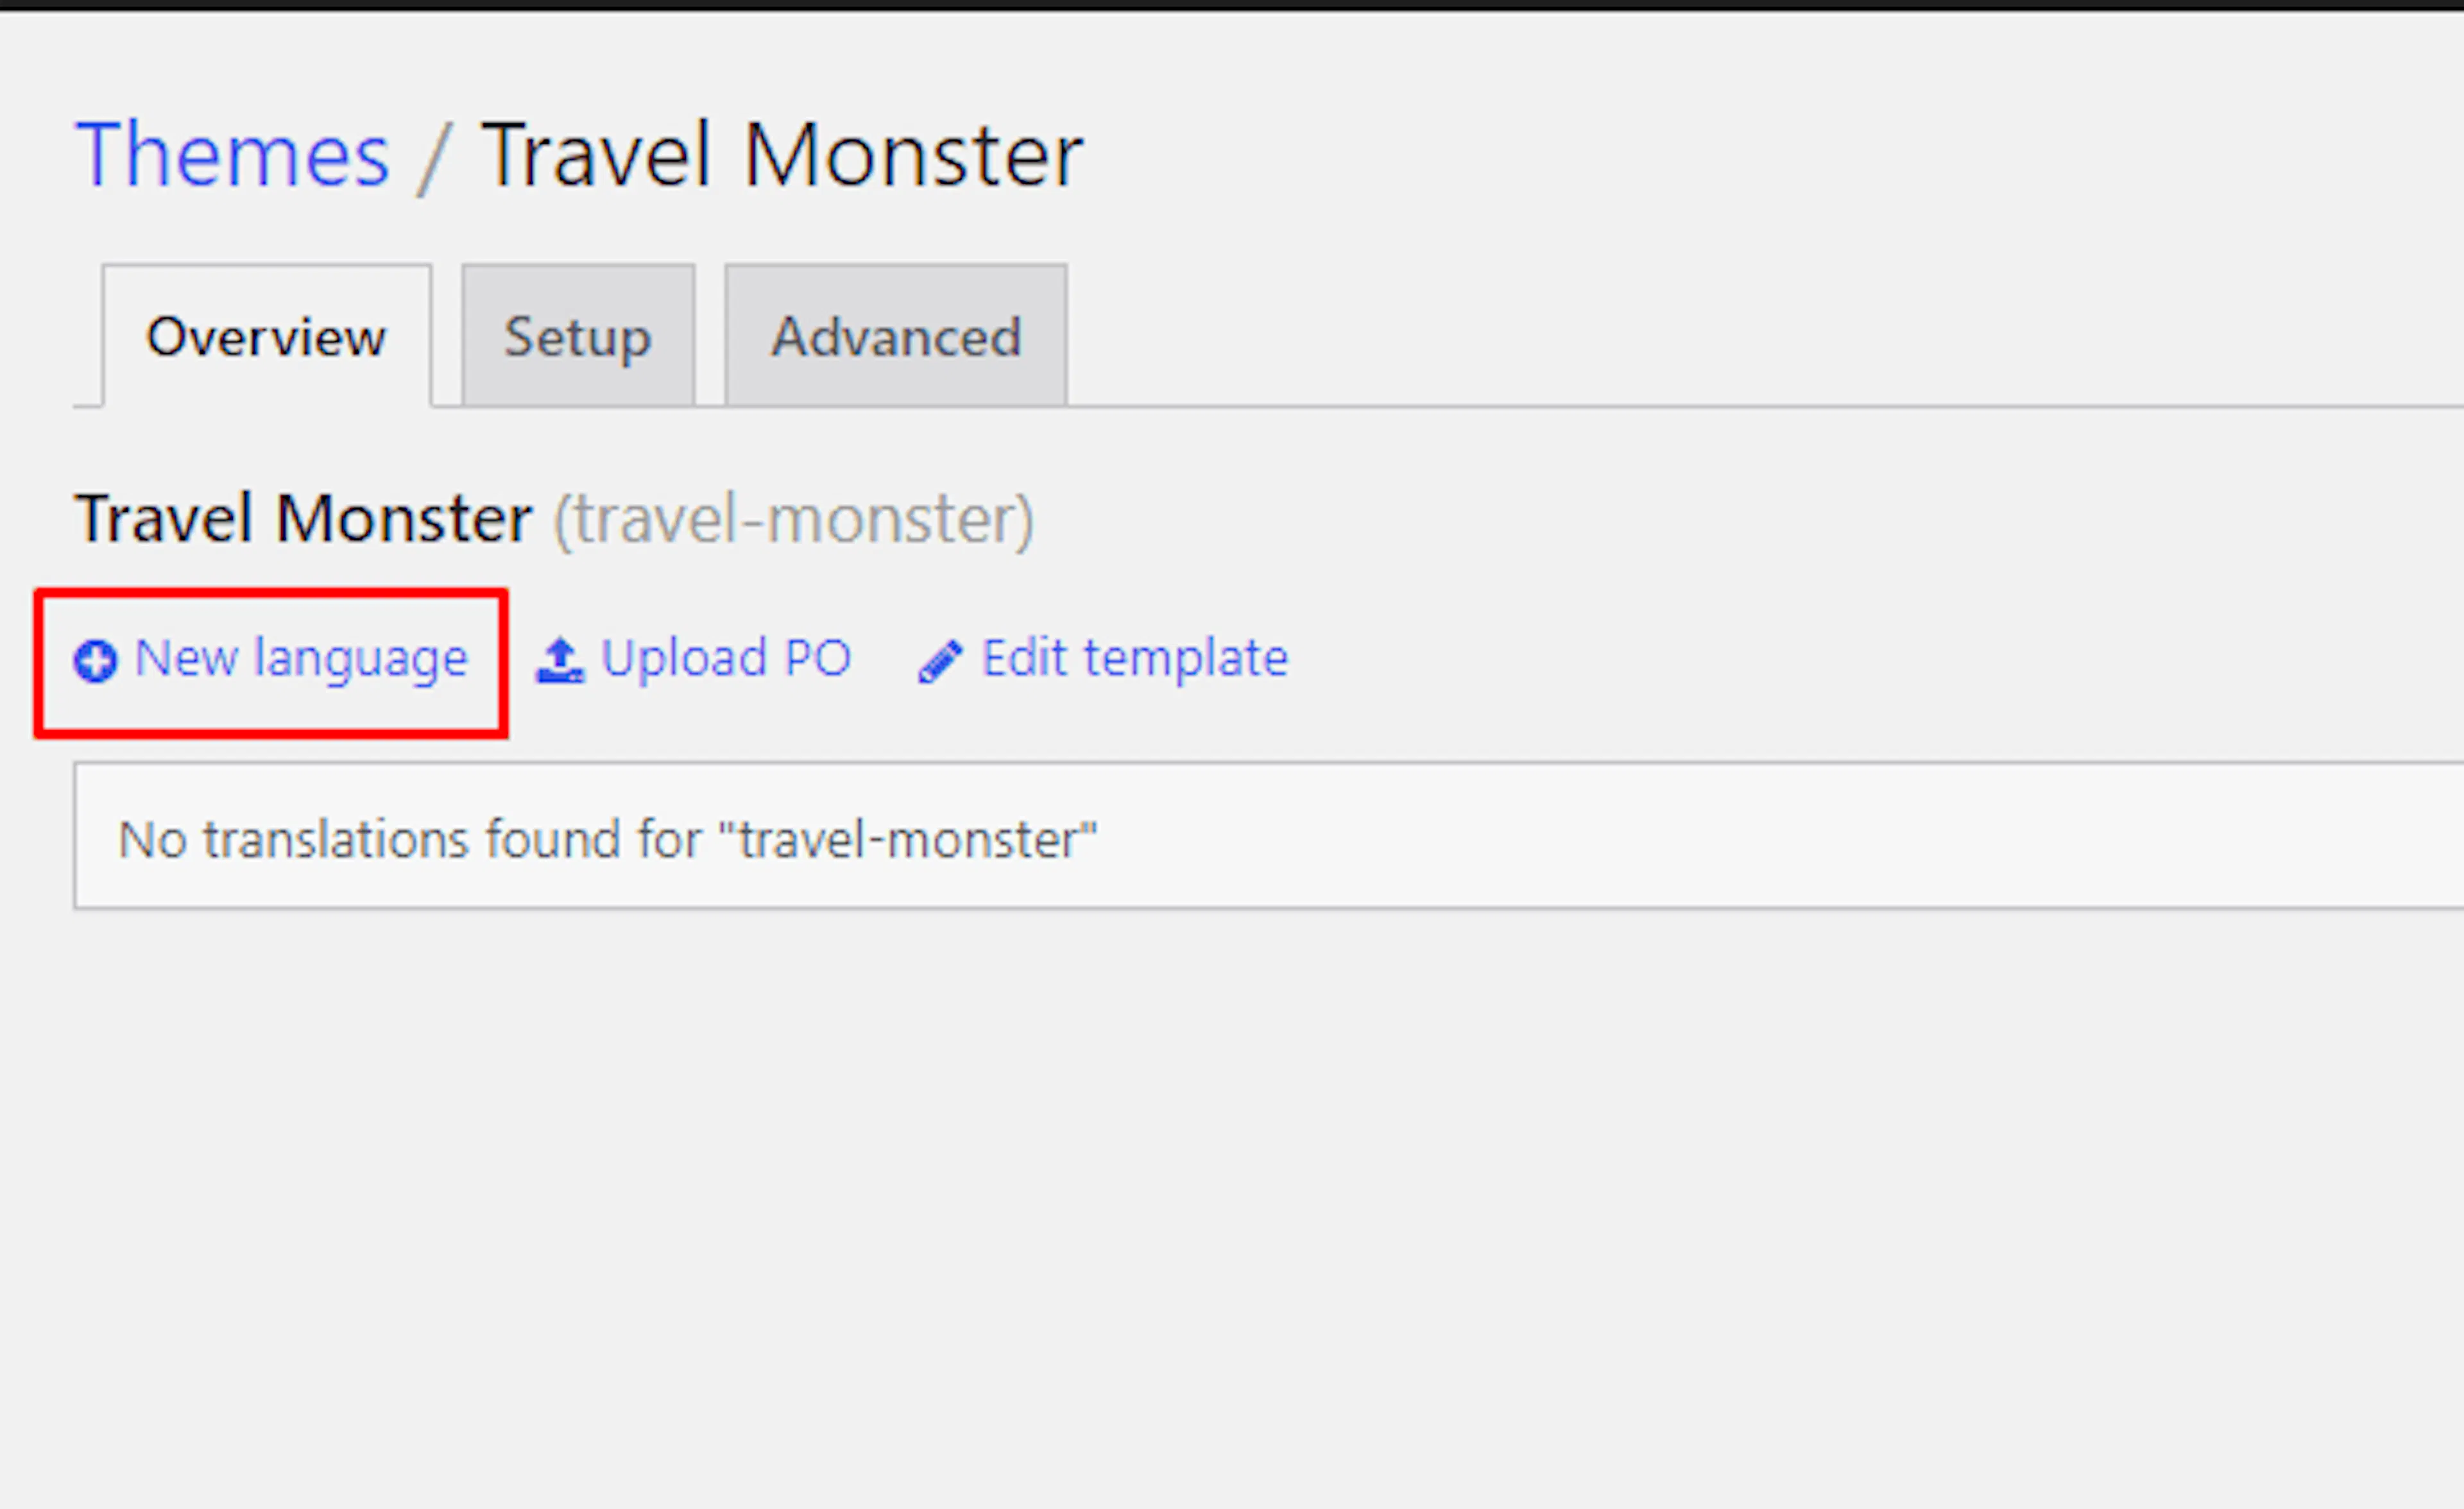
Click New Language near the top of the page.
Choose the target language
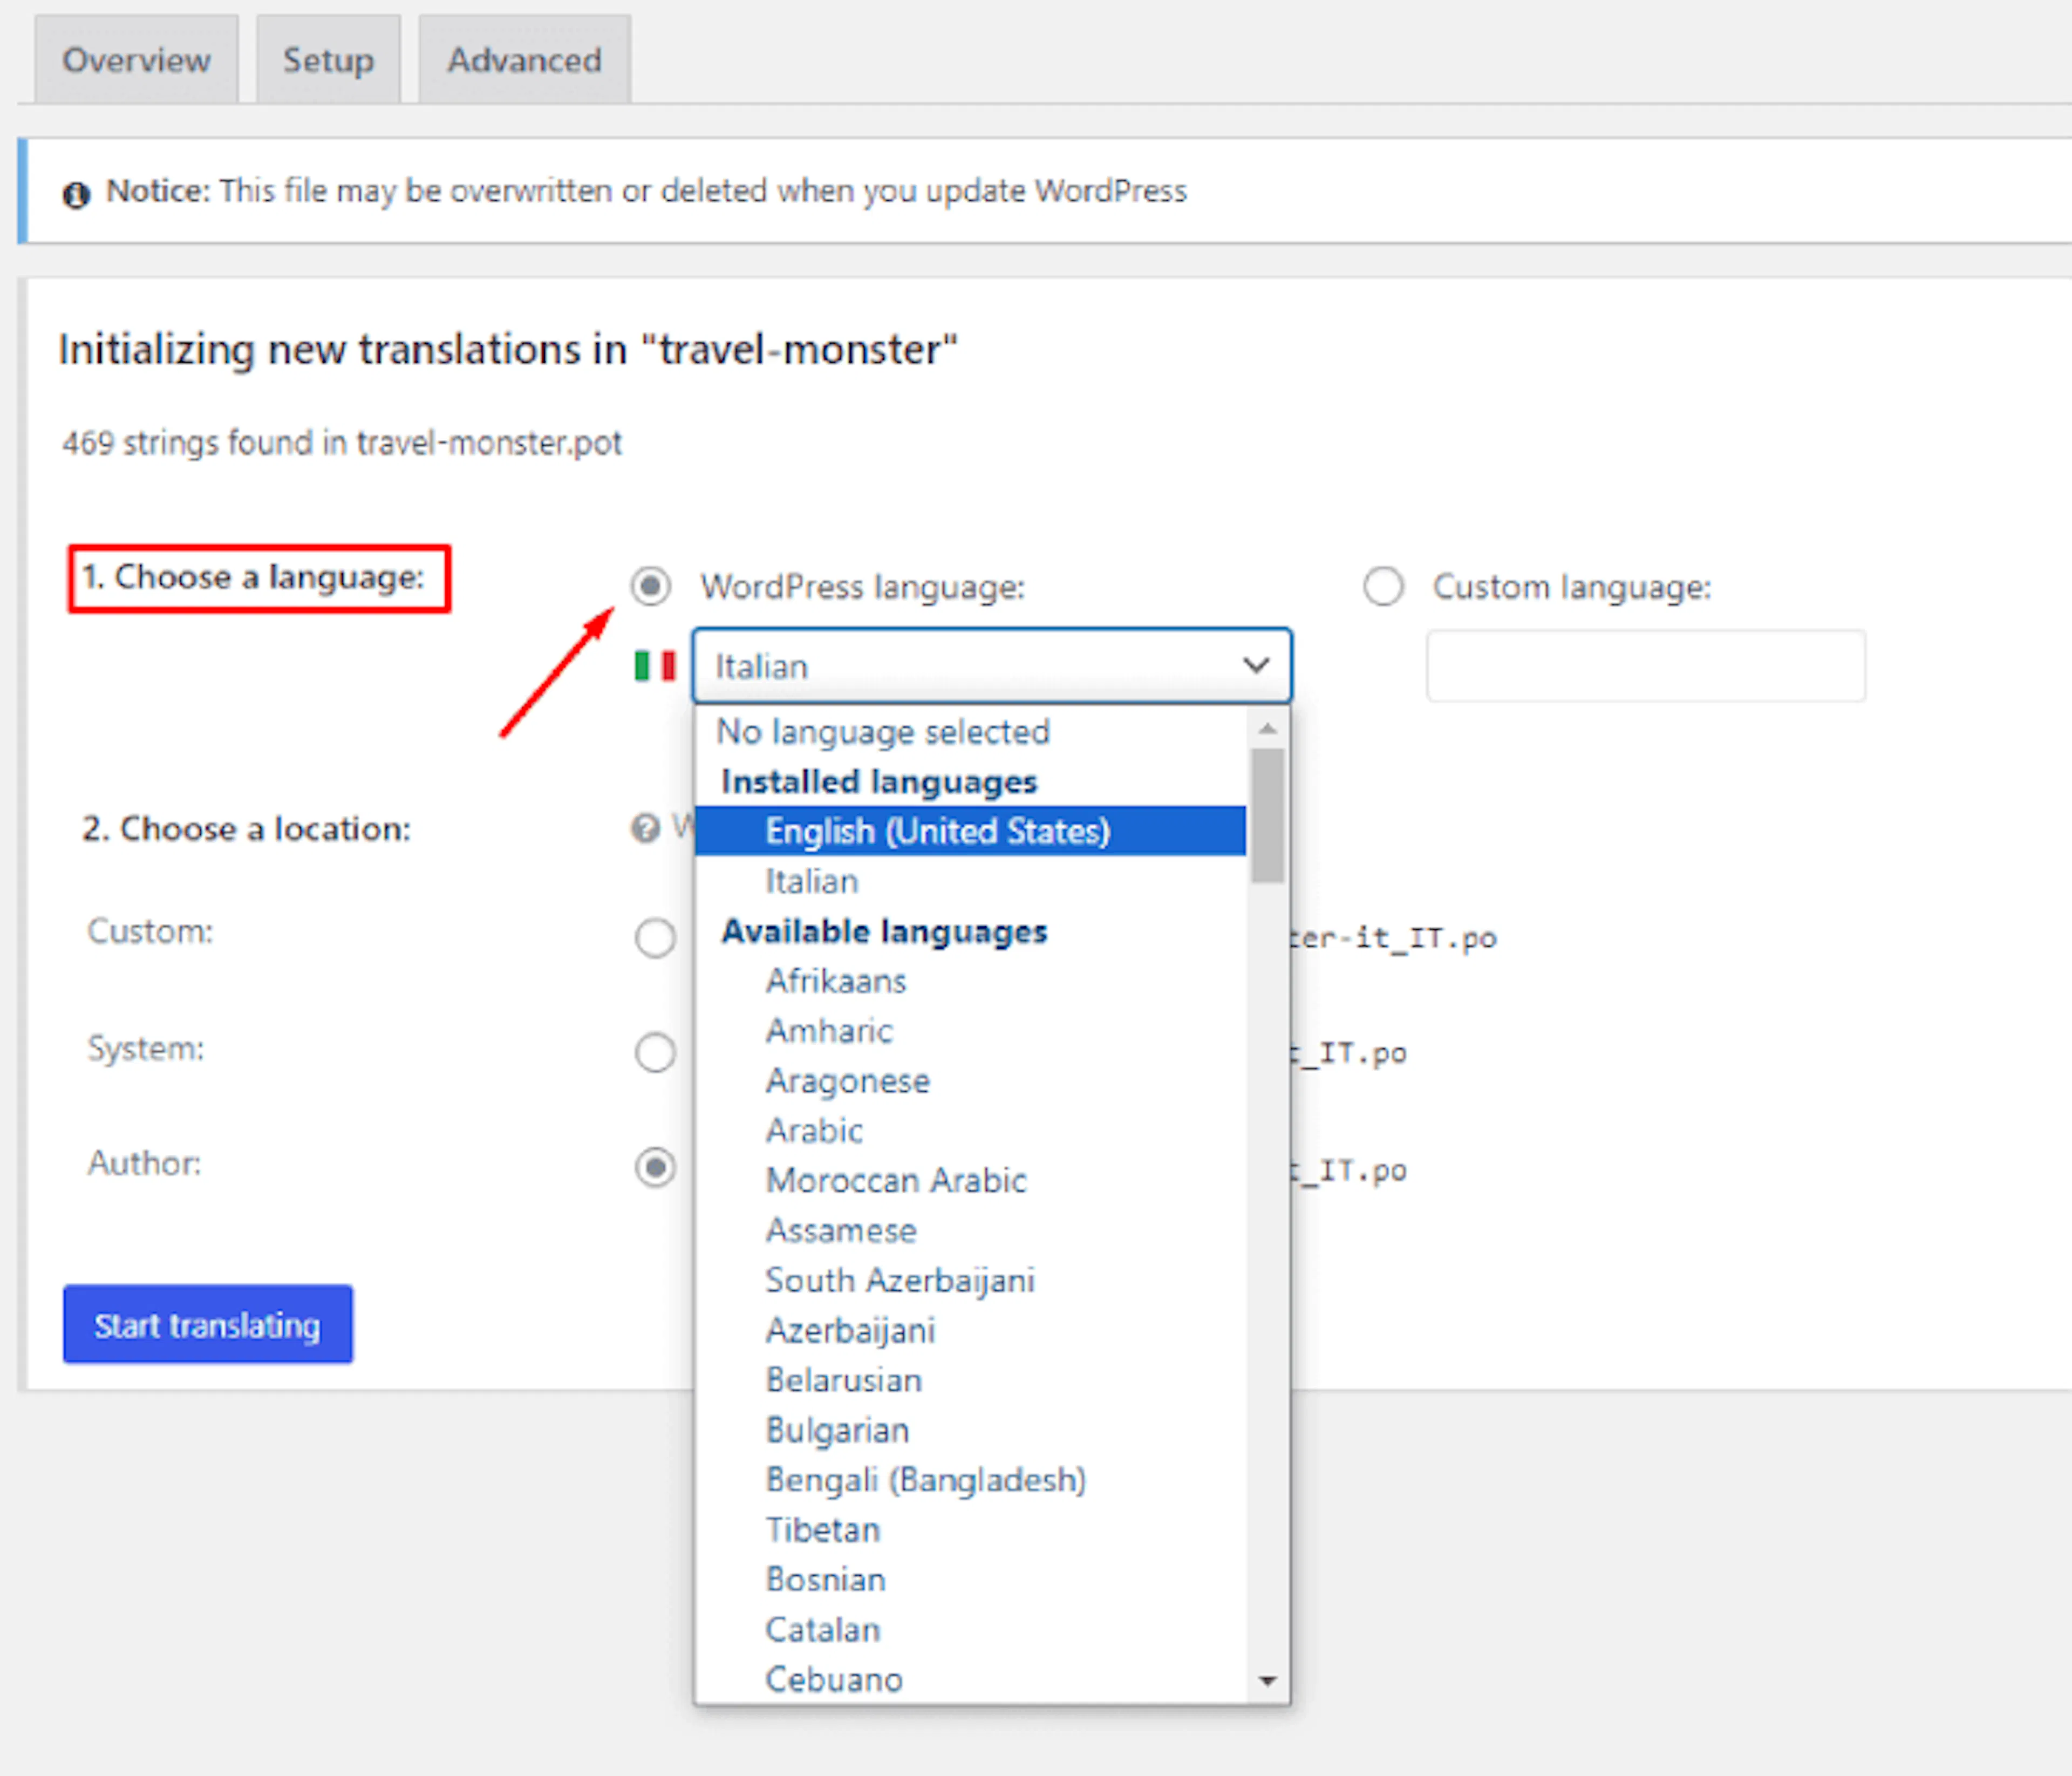
Open the Choose a language dropdown. Select the language you want your visitors to see, such as Italian.
Choose where to save the translation
Choose the location where Loco Translate will save the translation file.
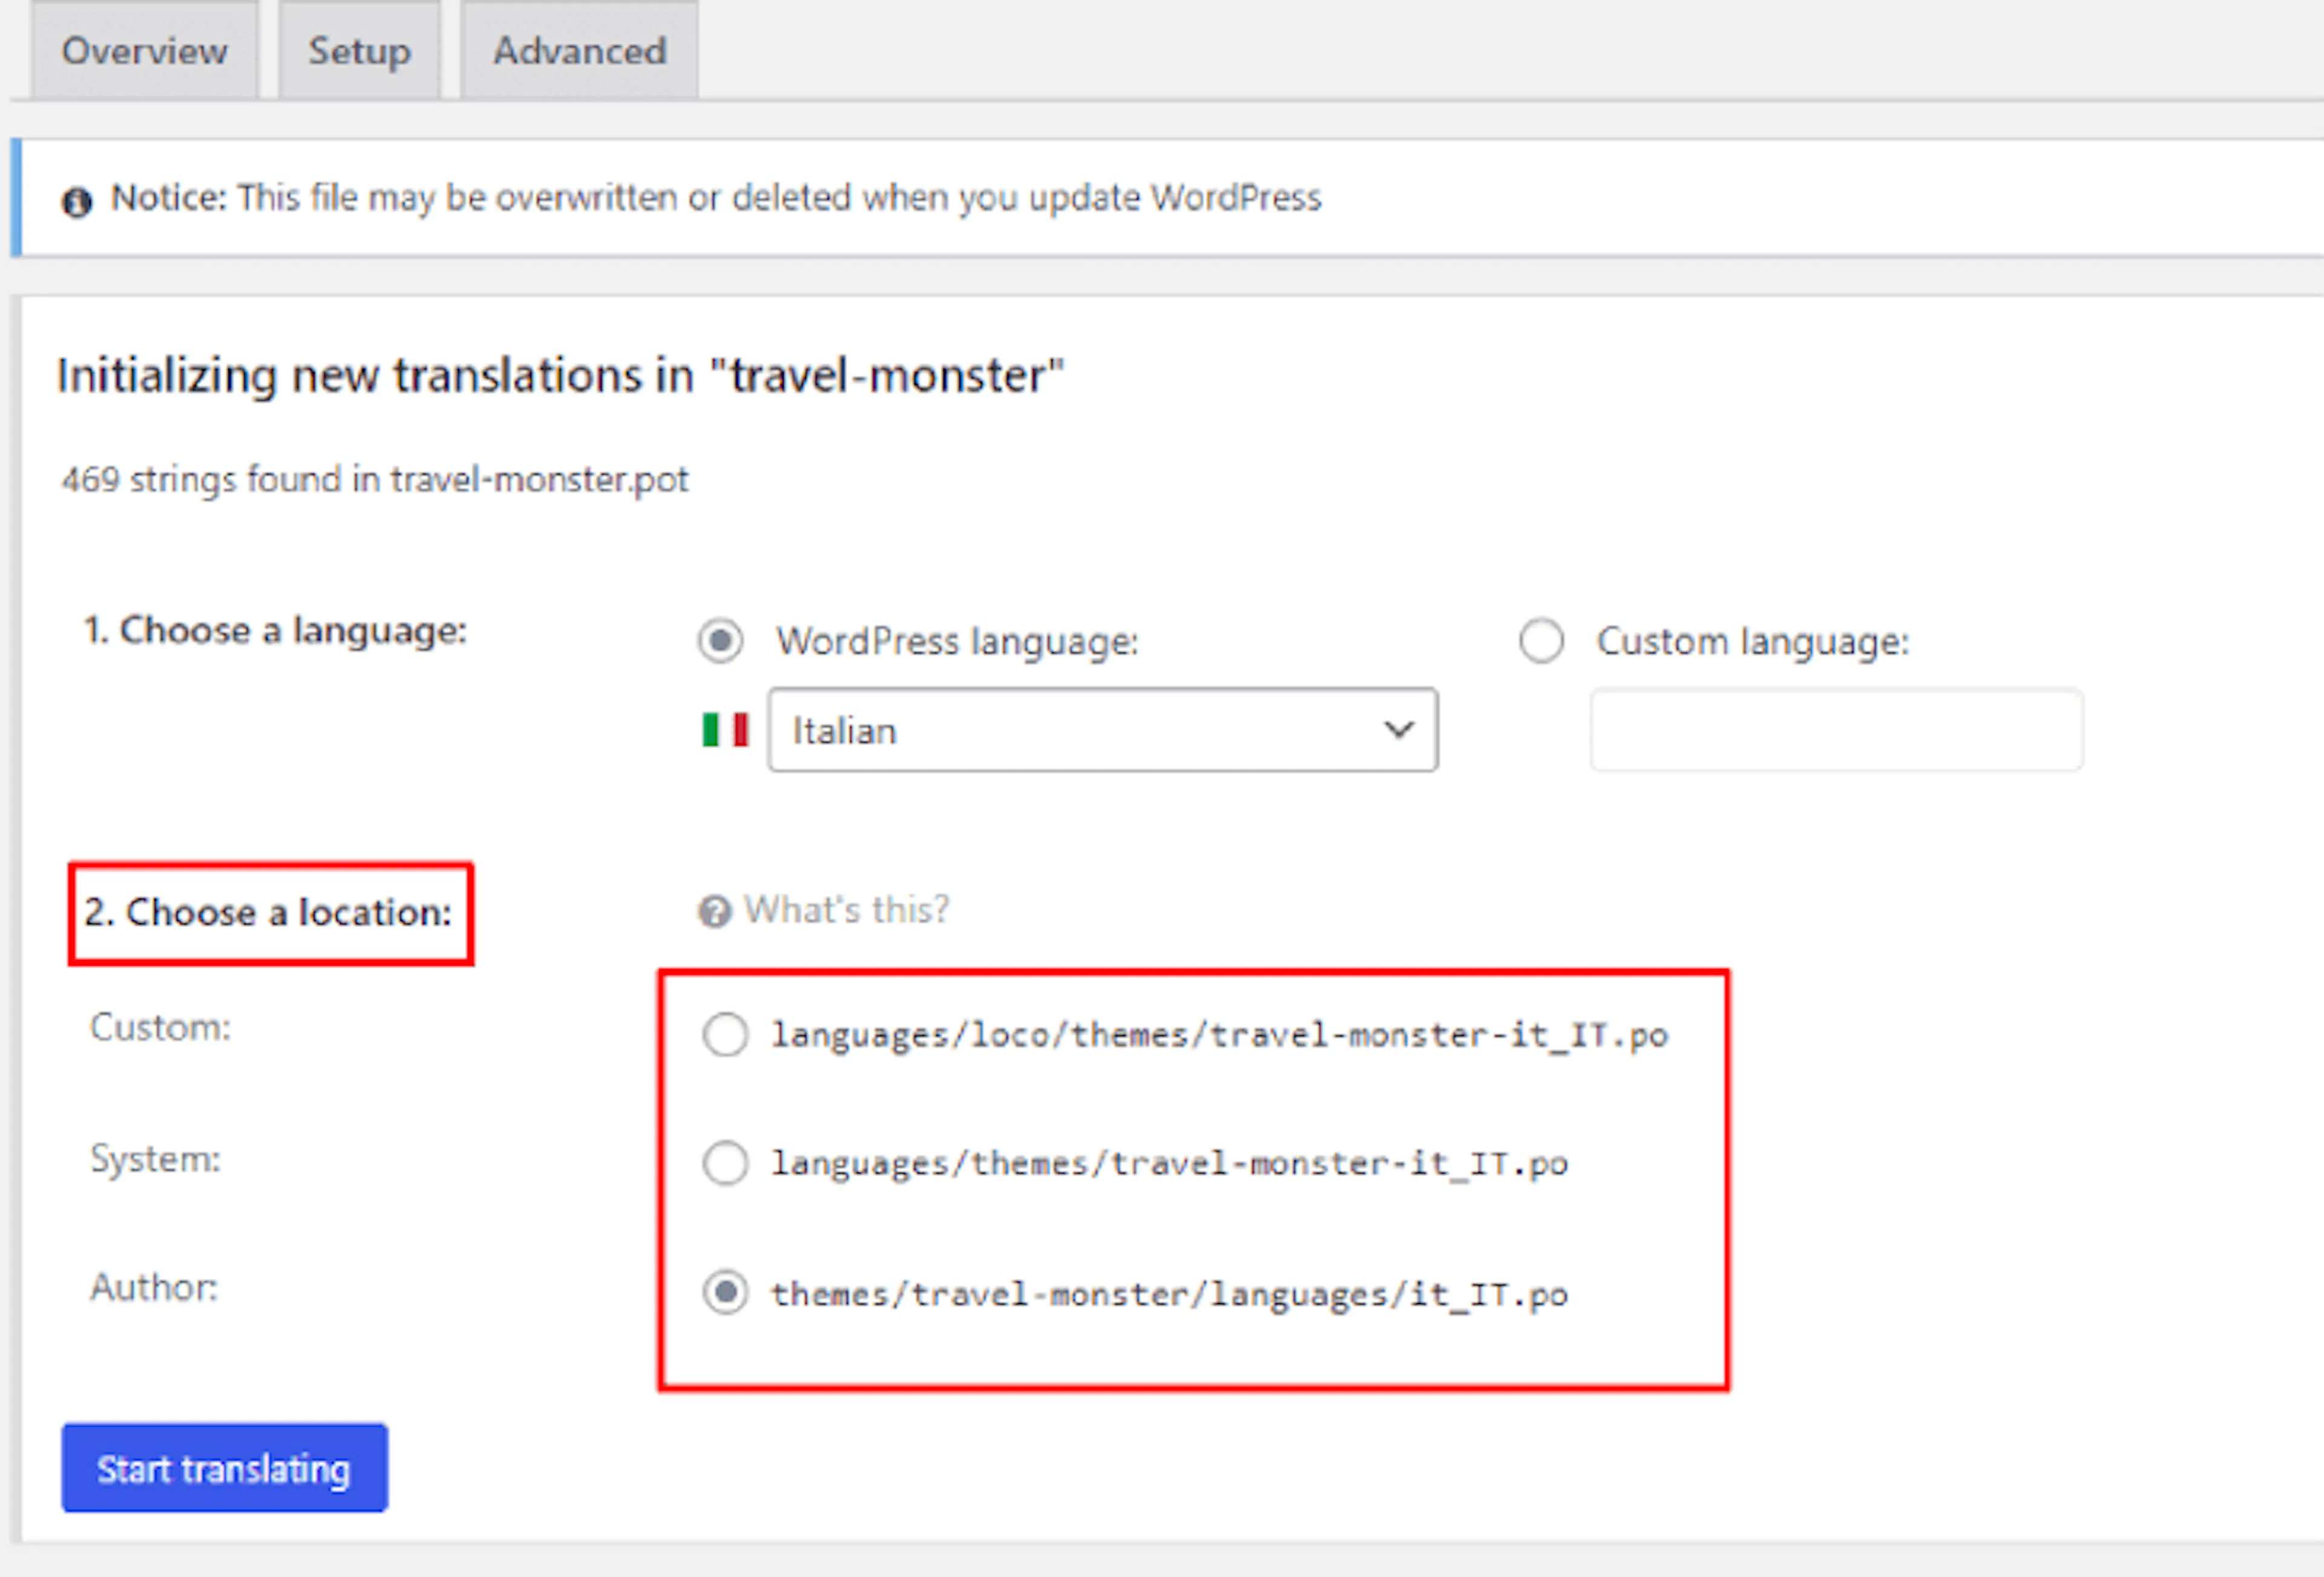
Loco Translate offers three save locations. If you are not familiar with WordPress translations, use the Custom location recommended by the theme developer. One example is wp-content/languages/loco/themes/travel-monster-it_IT.po.
Start the translation
Click Start Translating. Loco Translate will open the text from your theme.
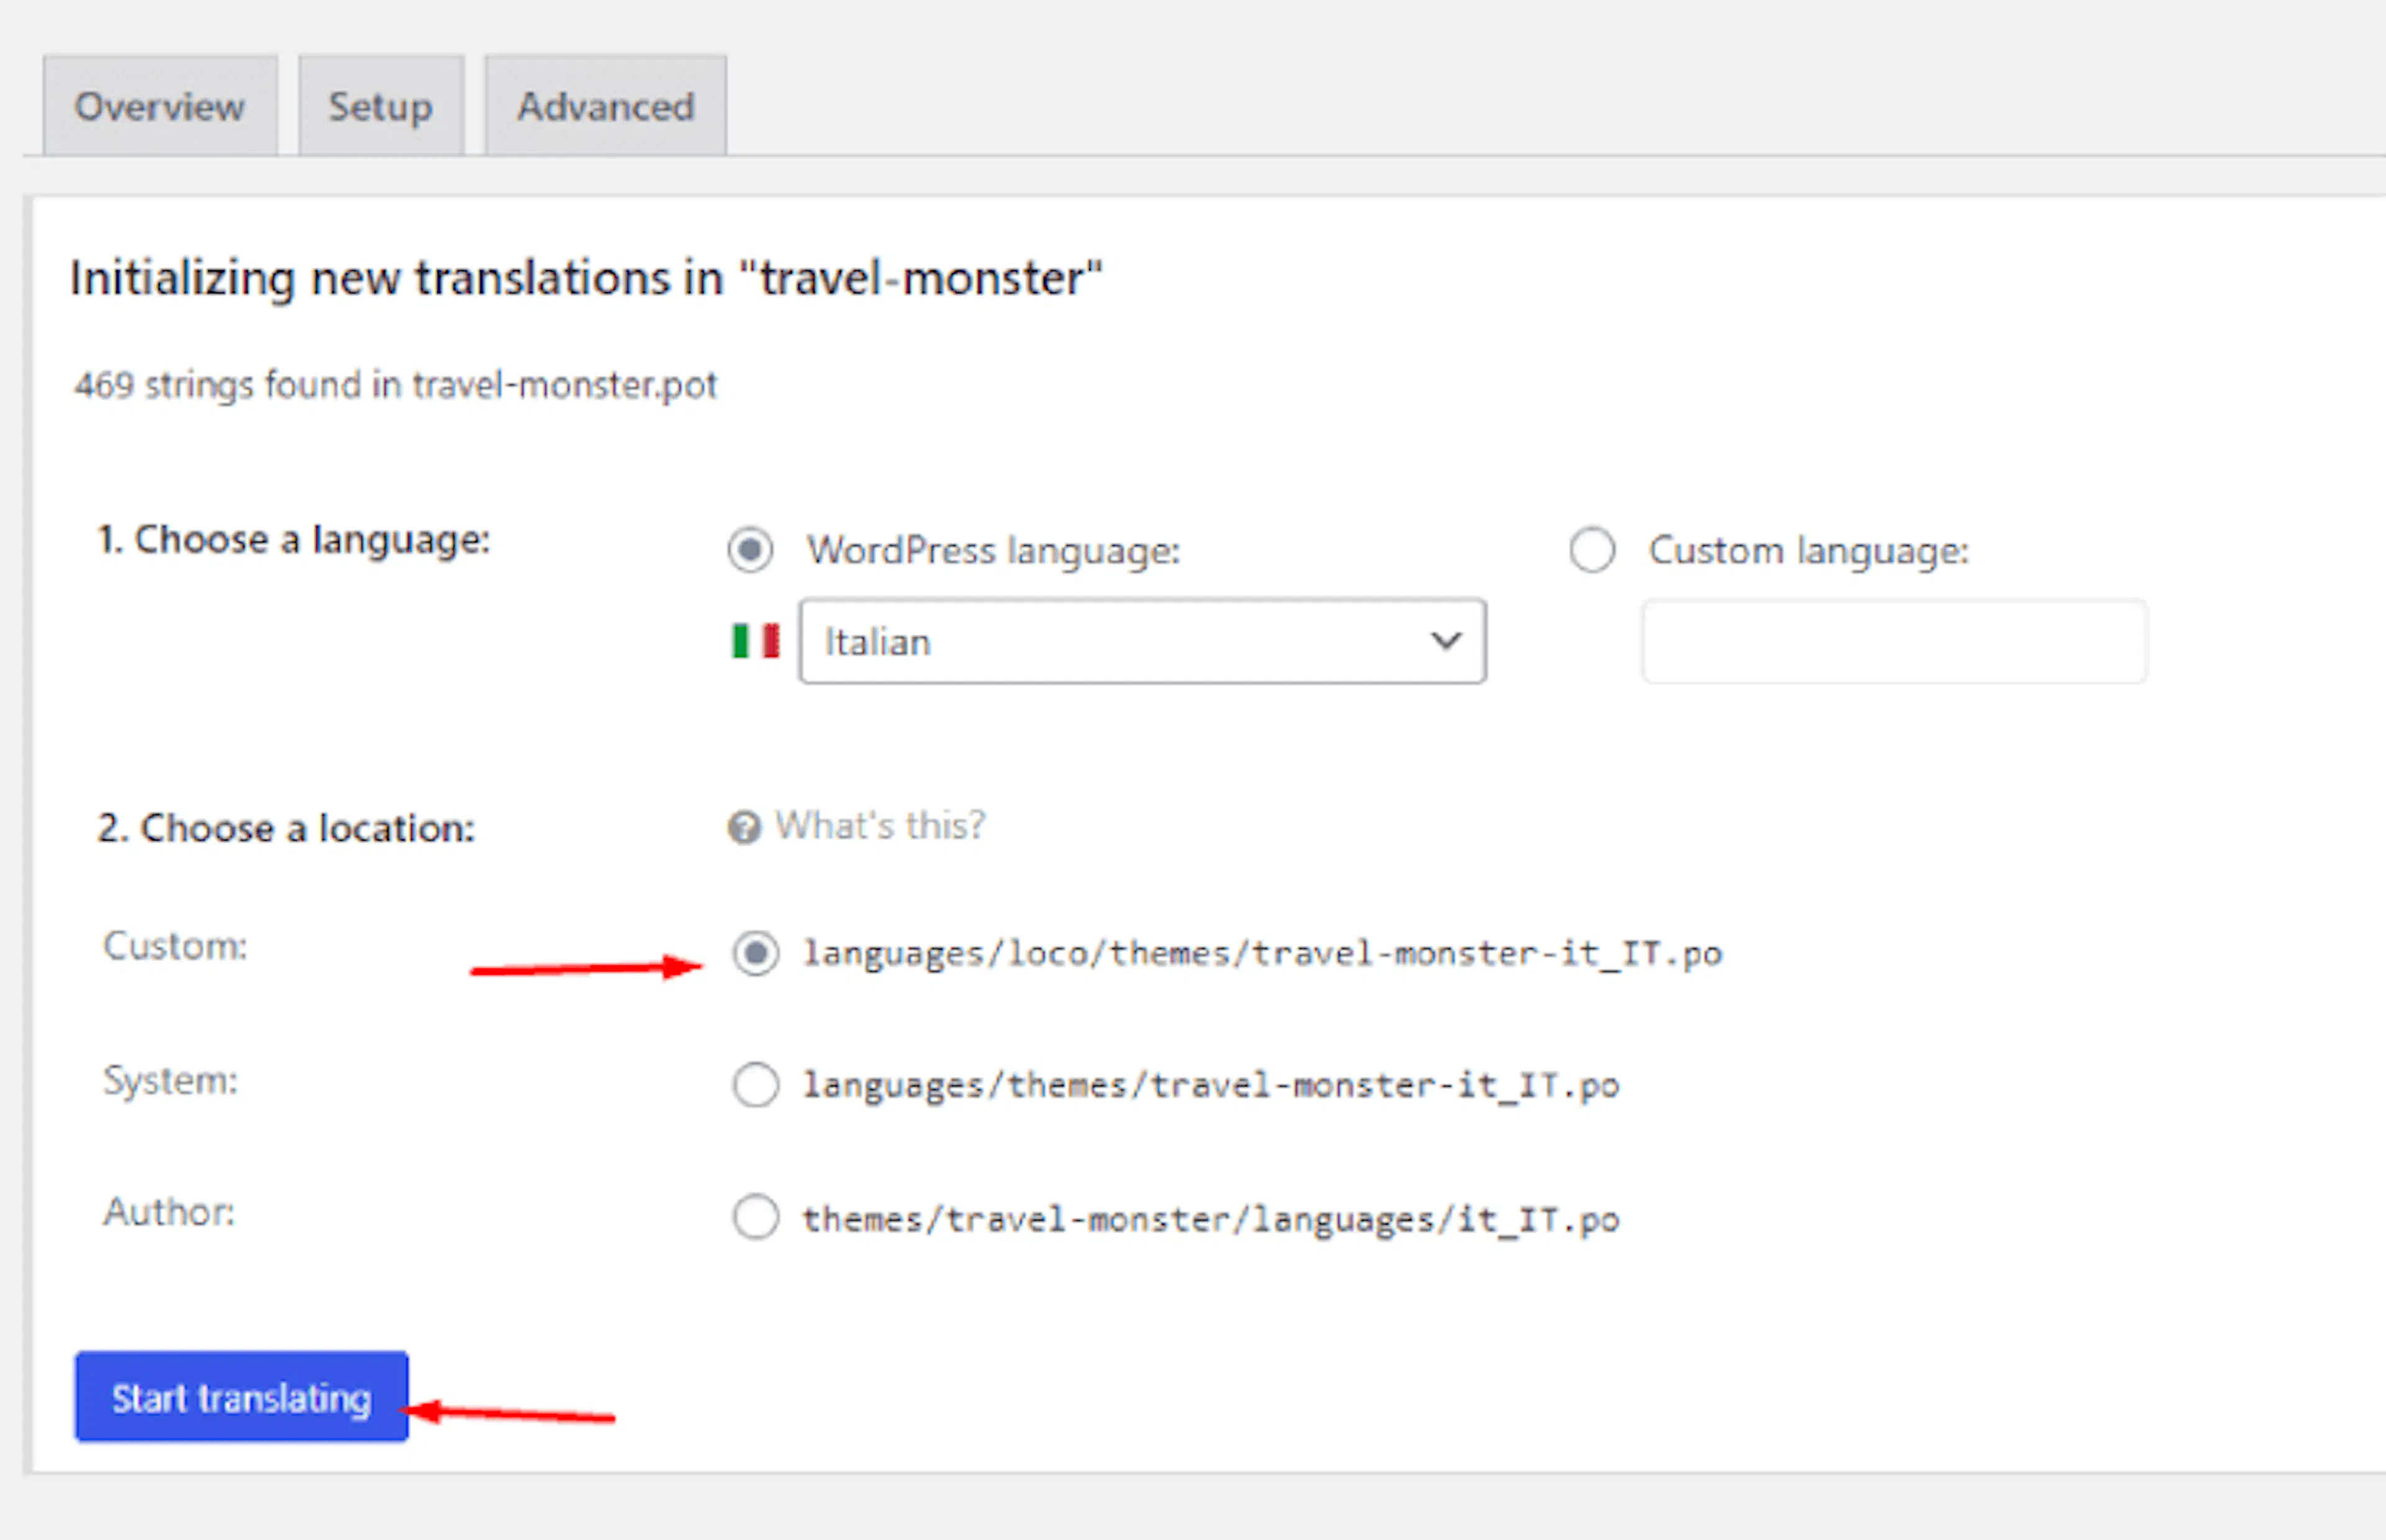
Your theme language is now set up in Loco Translate. The next screen shows the text you can translate.
Step 3: Translate text from your theme
Loco Translate shows a list of text strings from your theme files. A text string is a short piece of text, such as a button label or copyright notice.
Use the Filter Translations field to search for a specific phrase. For example, search for © Copyright to find the copyright notice. If you want to translate Check Availability on your day tour pages into Italian, search for that phrase here.
Select the original text
Click the text string you want to change in the list. The original text will appear in the source text box.
Enter your translation
Enter the translated text in the target-language translation box. For example, enter the Italian wording you want travelers to see on your day tour pages.
Save your translation
Click Save to apply the change.
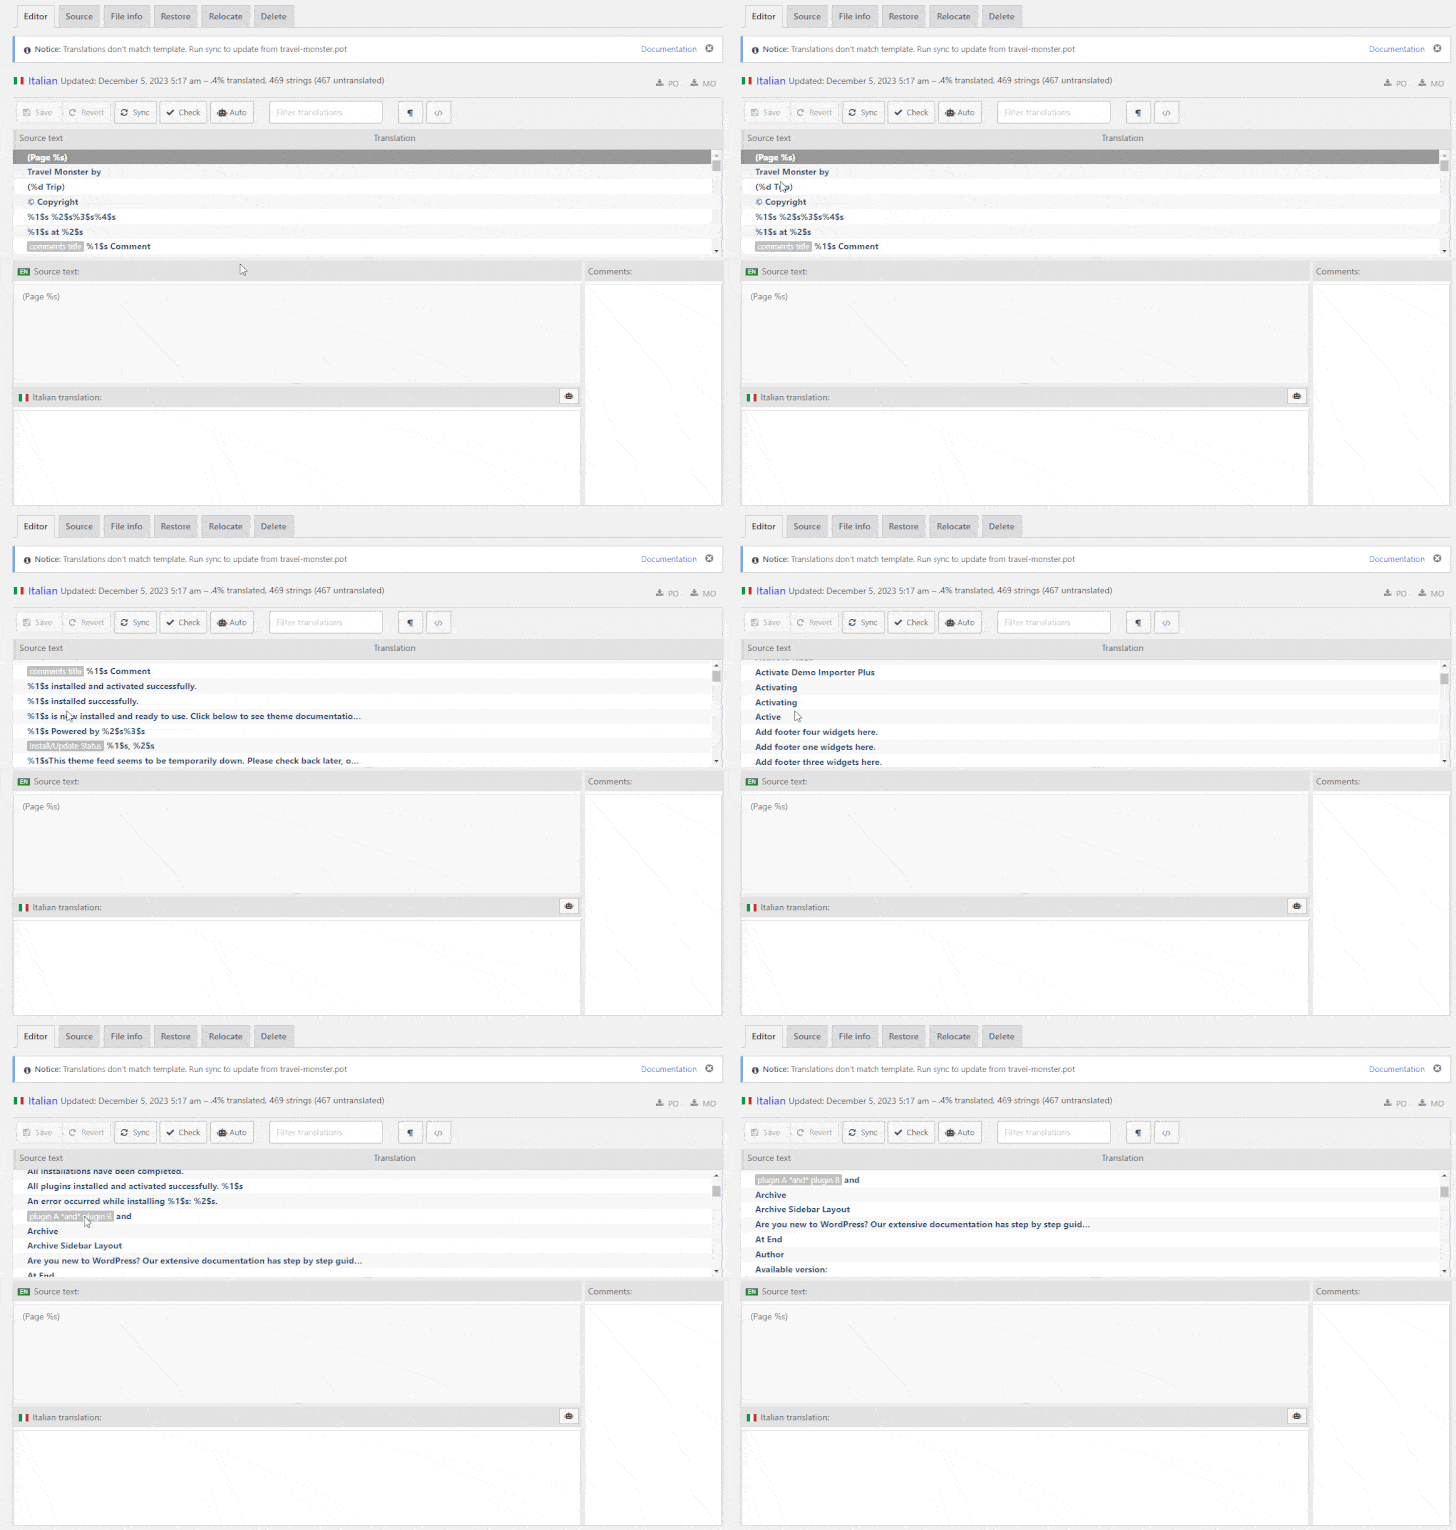
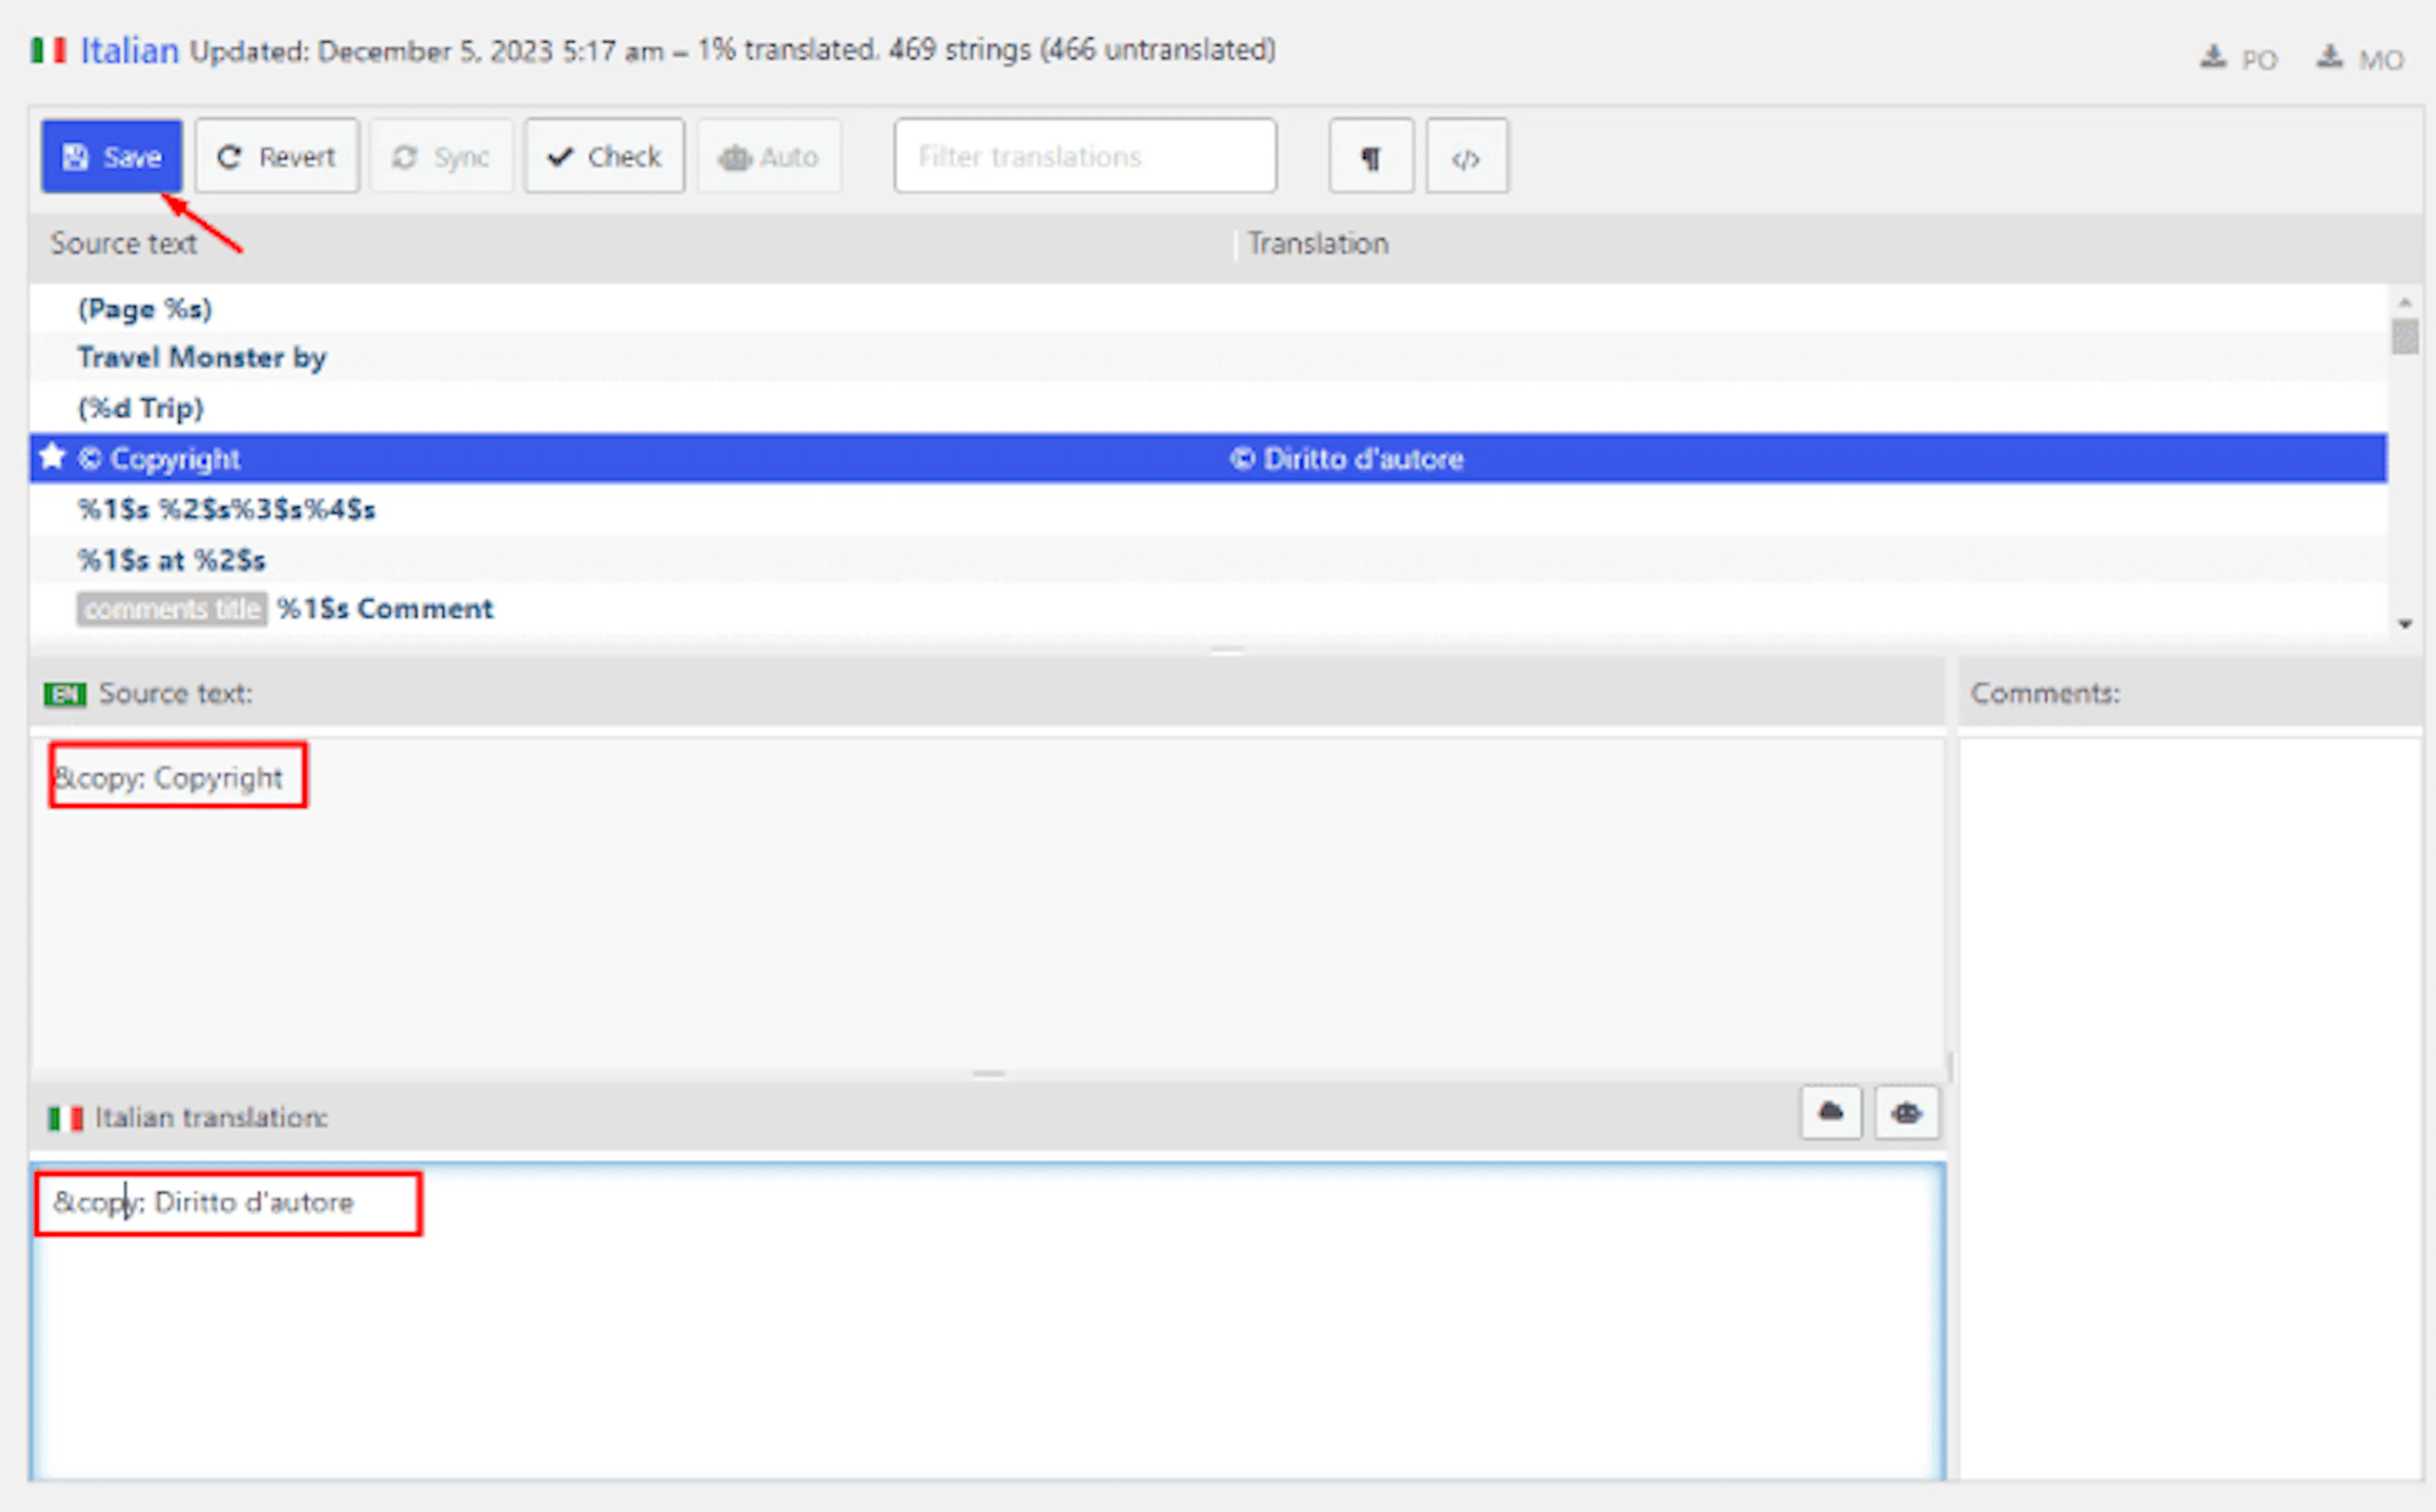
Translate each additional string you need. Search for the phrase, enter the translation, and save it. When you have saved a few translations, check them on your website before continuing.
Step 4: Check your translation on the website
Changing the site language lets WordPress use the translation you created. The front end is the part of your website that visitors see. The WordPress dashboard is the part you use to manage the website.
Open General Settings
In the left sidebar of your WordPress dashboard, open Settings, then choose General.
Change the site language
Scroll to the Site Language dropdown. Choose the language you translated into, such as Italian.
Save the language change
Scroll to the bottom of the page and click Save Changes.
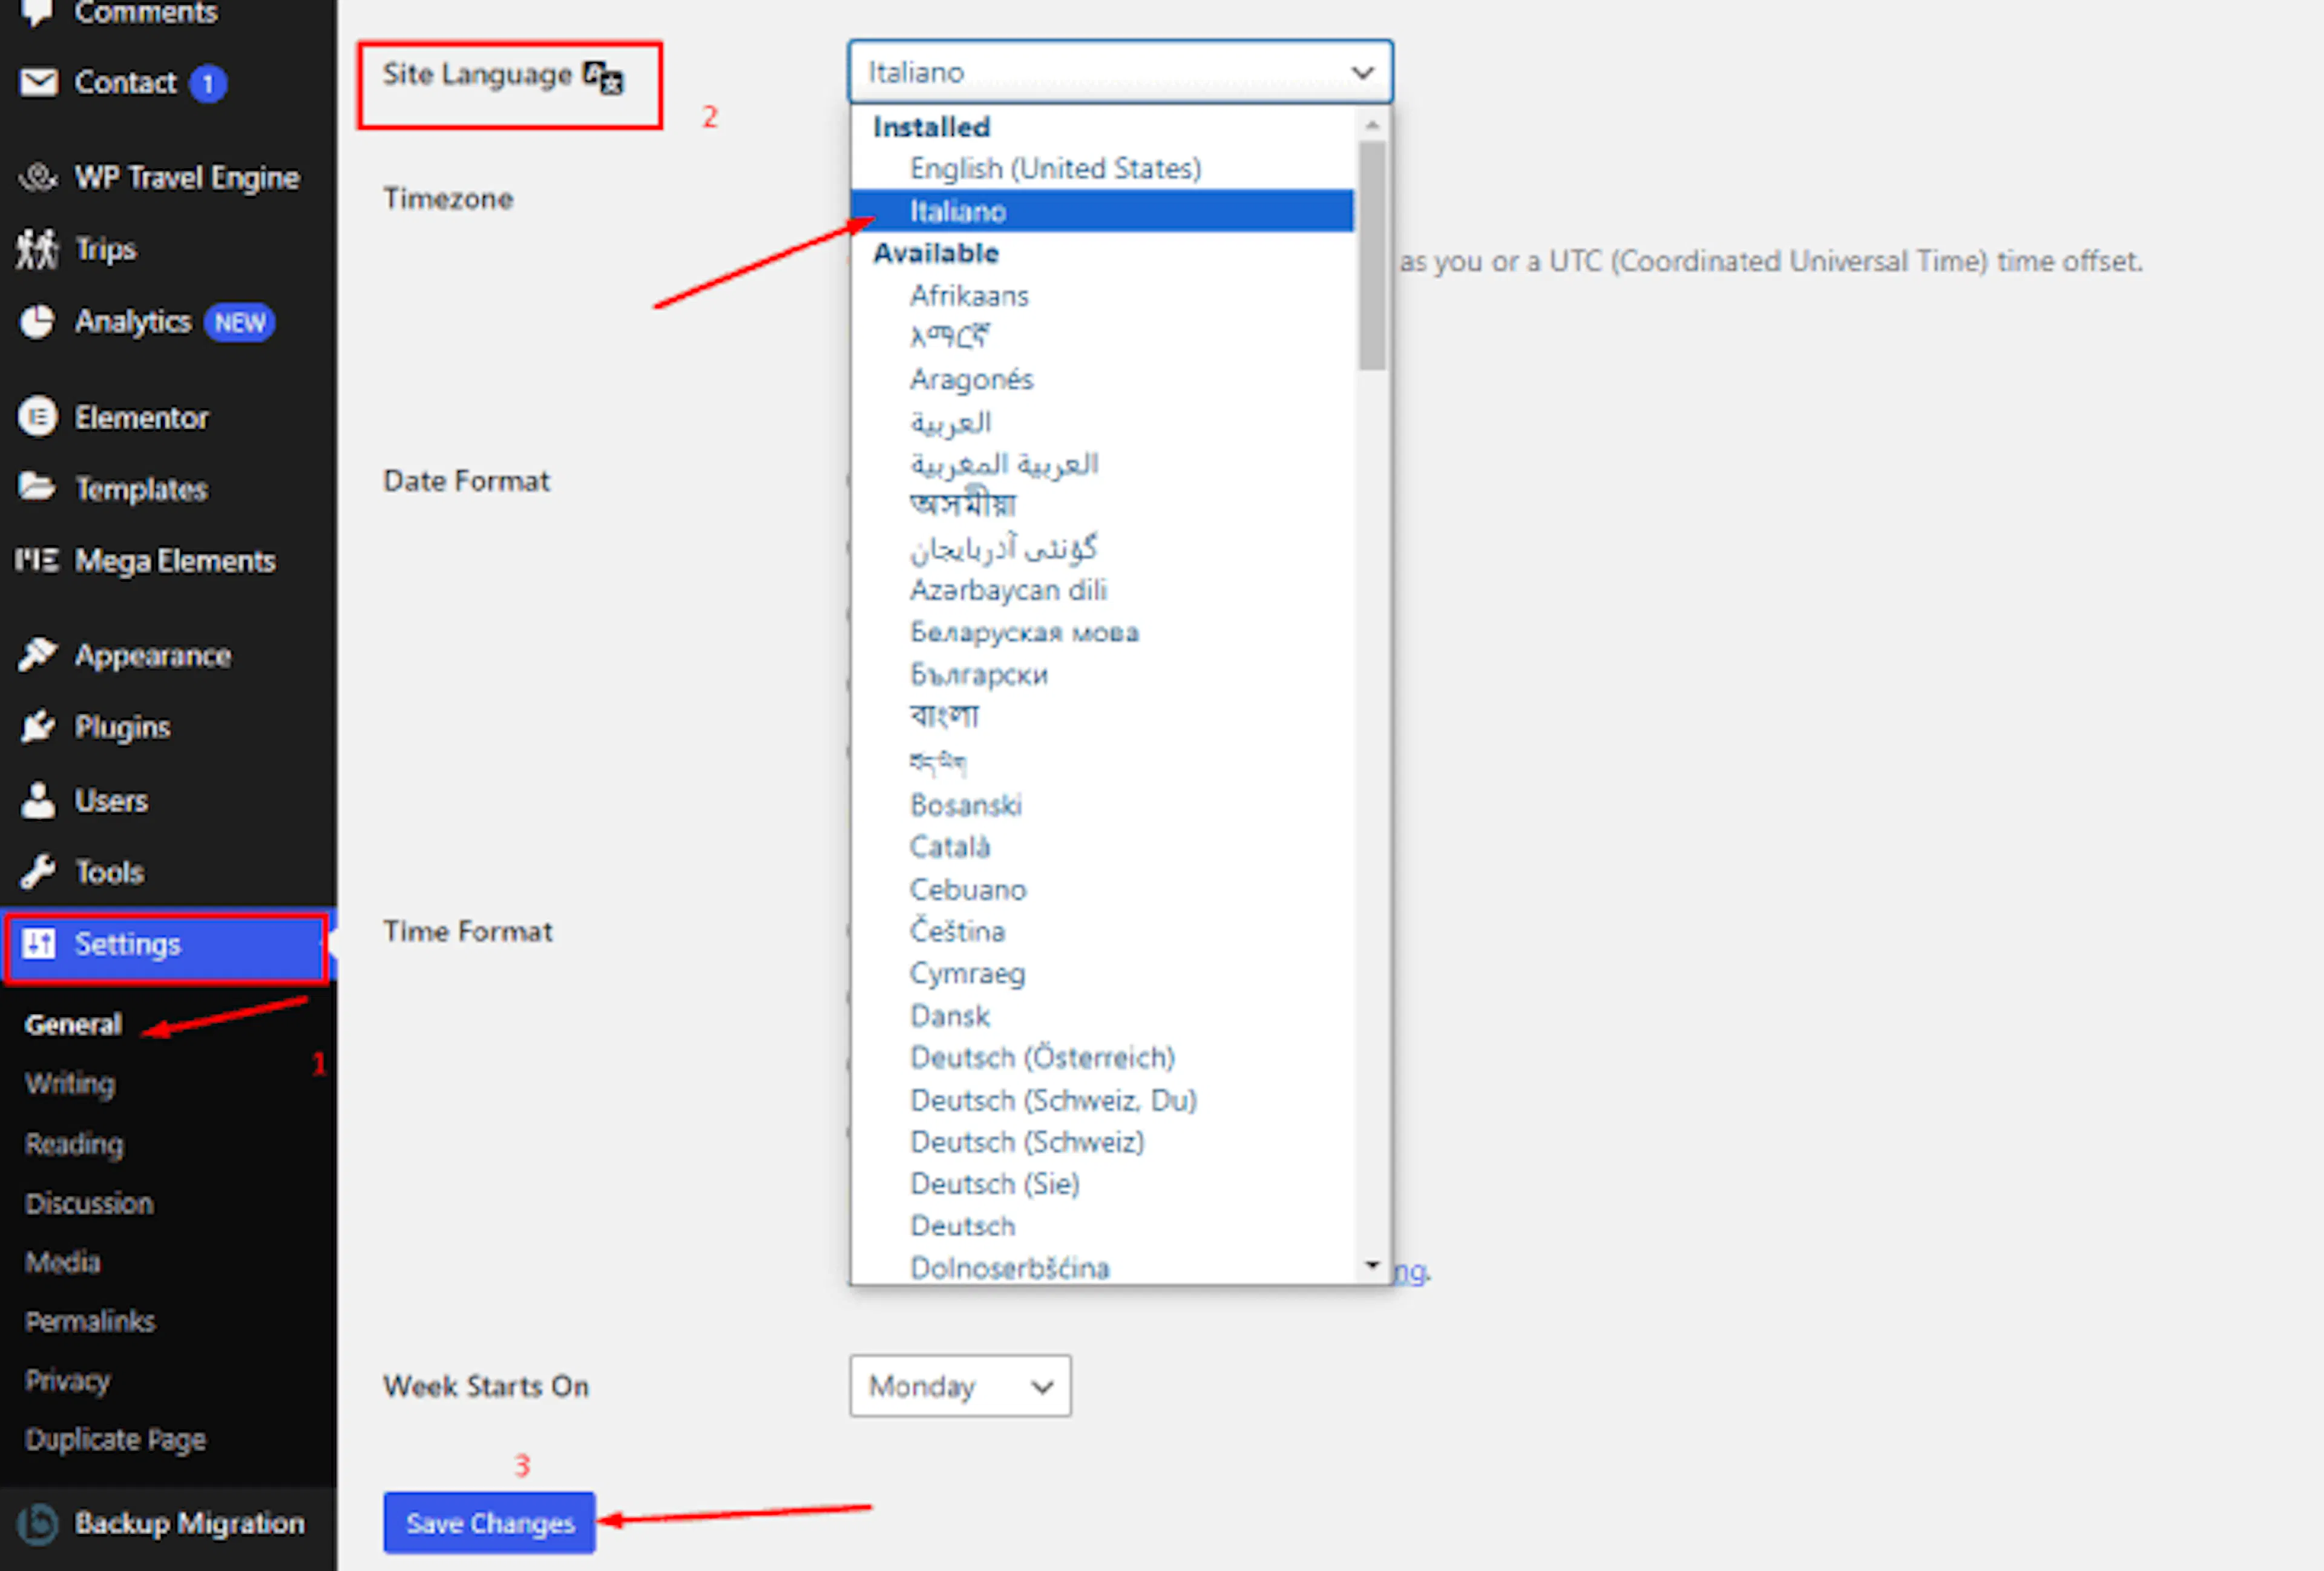
Check the front end
Open the page where your translated text appears. If you translated a copyright string, check the footer. Confirm that the text appears in the language you selected.
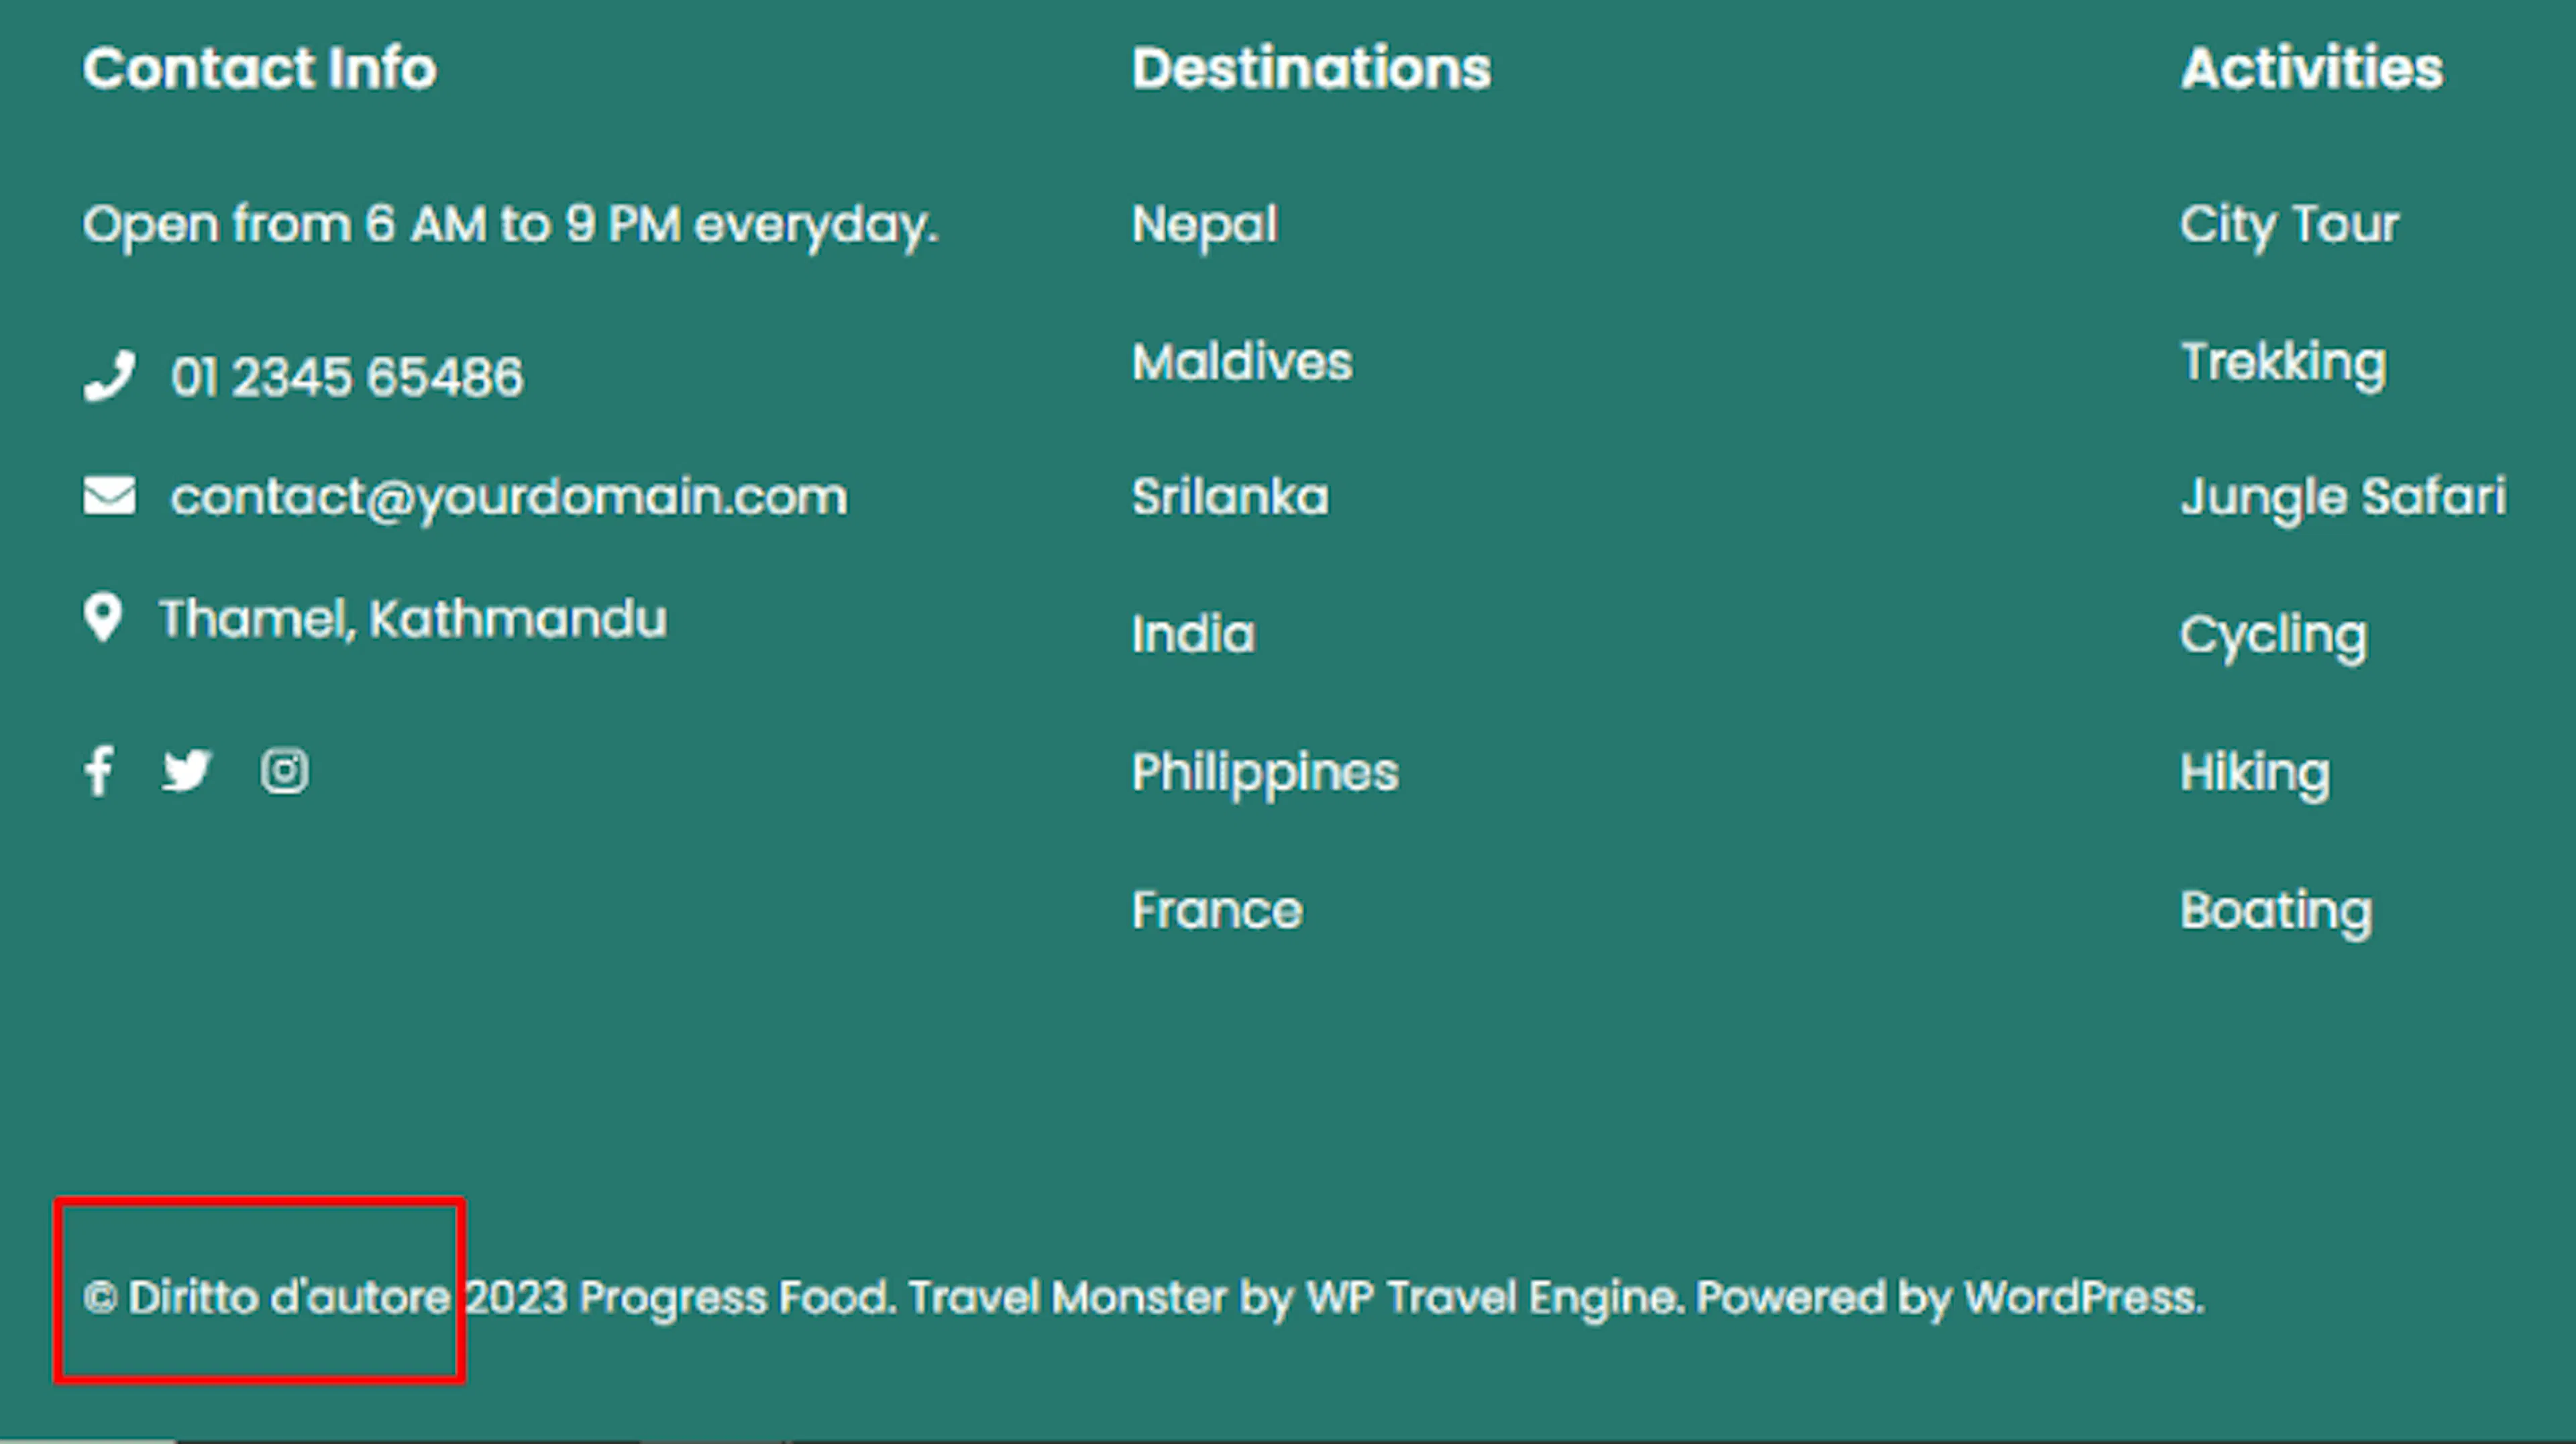
Repeat the translation and checking process for every string you want to change. Your visitors will see the saved translations when WordPress uses that language.
Step 5: Translate WP Travel Engine
WP Travel Engine is the plugin that adds travel features to WordPress. The same translation process works for this plugin.
For example, if you run multi-day package tours, you can translate your booking form labels into Spanish. Latin American customers can then understand what information each field asks them to enter.
Open your installed plugins
In the left sidebar of your WordPress dashboard, open Loco Translate, then choose Plugins.
Choose WP Travel Engine
Find WP Travel Engine in the plugin list and click it.
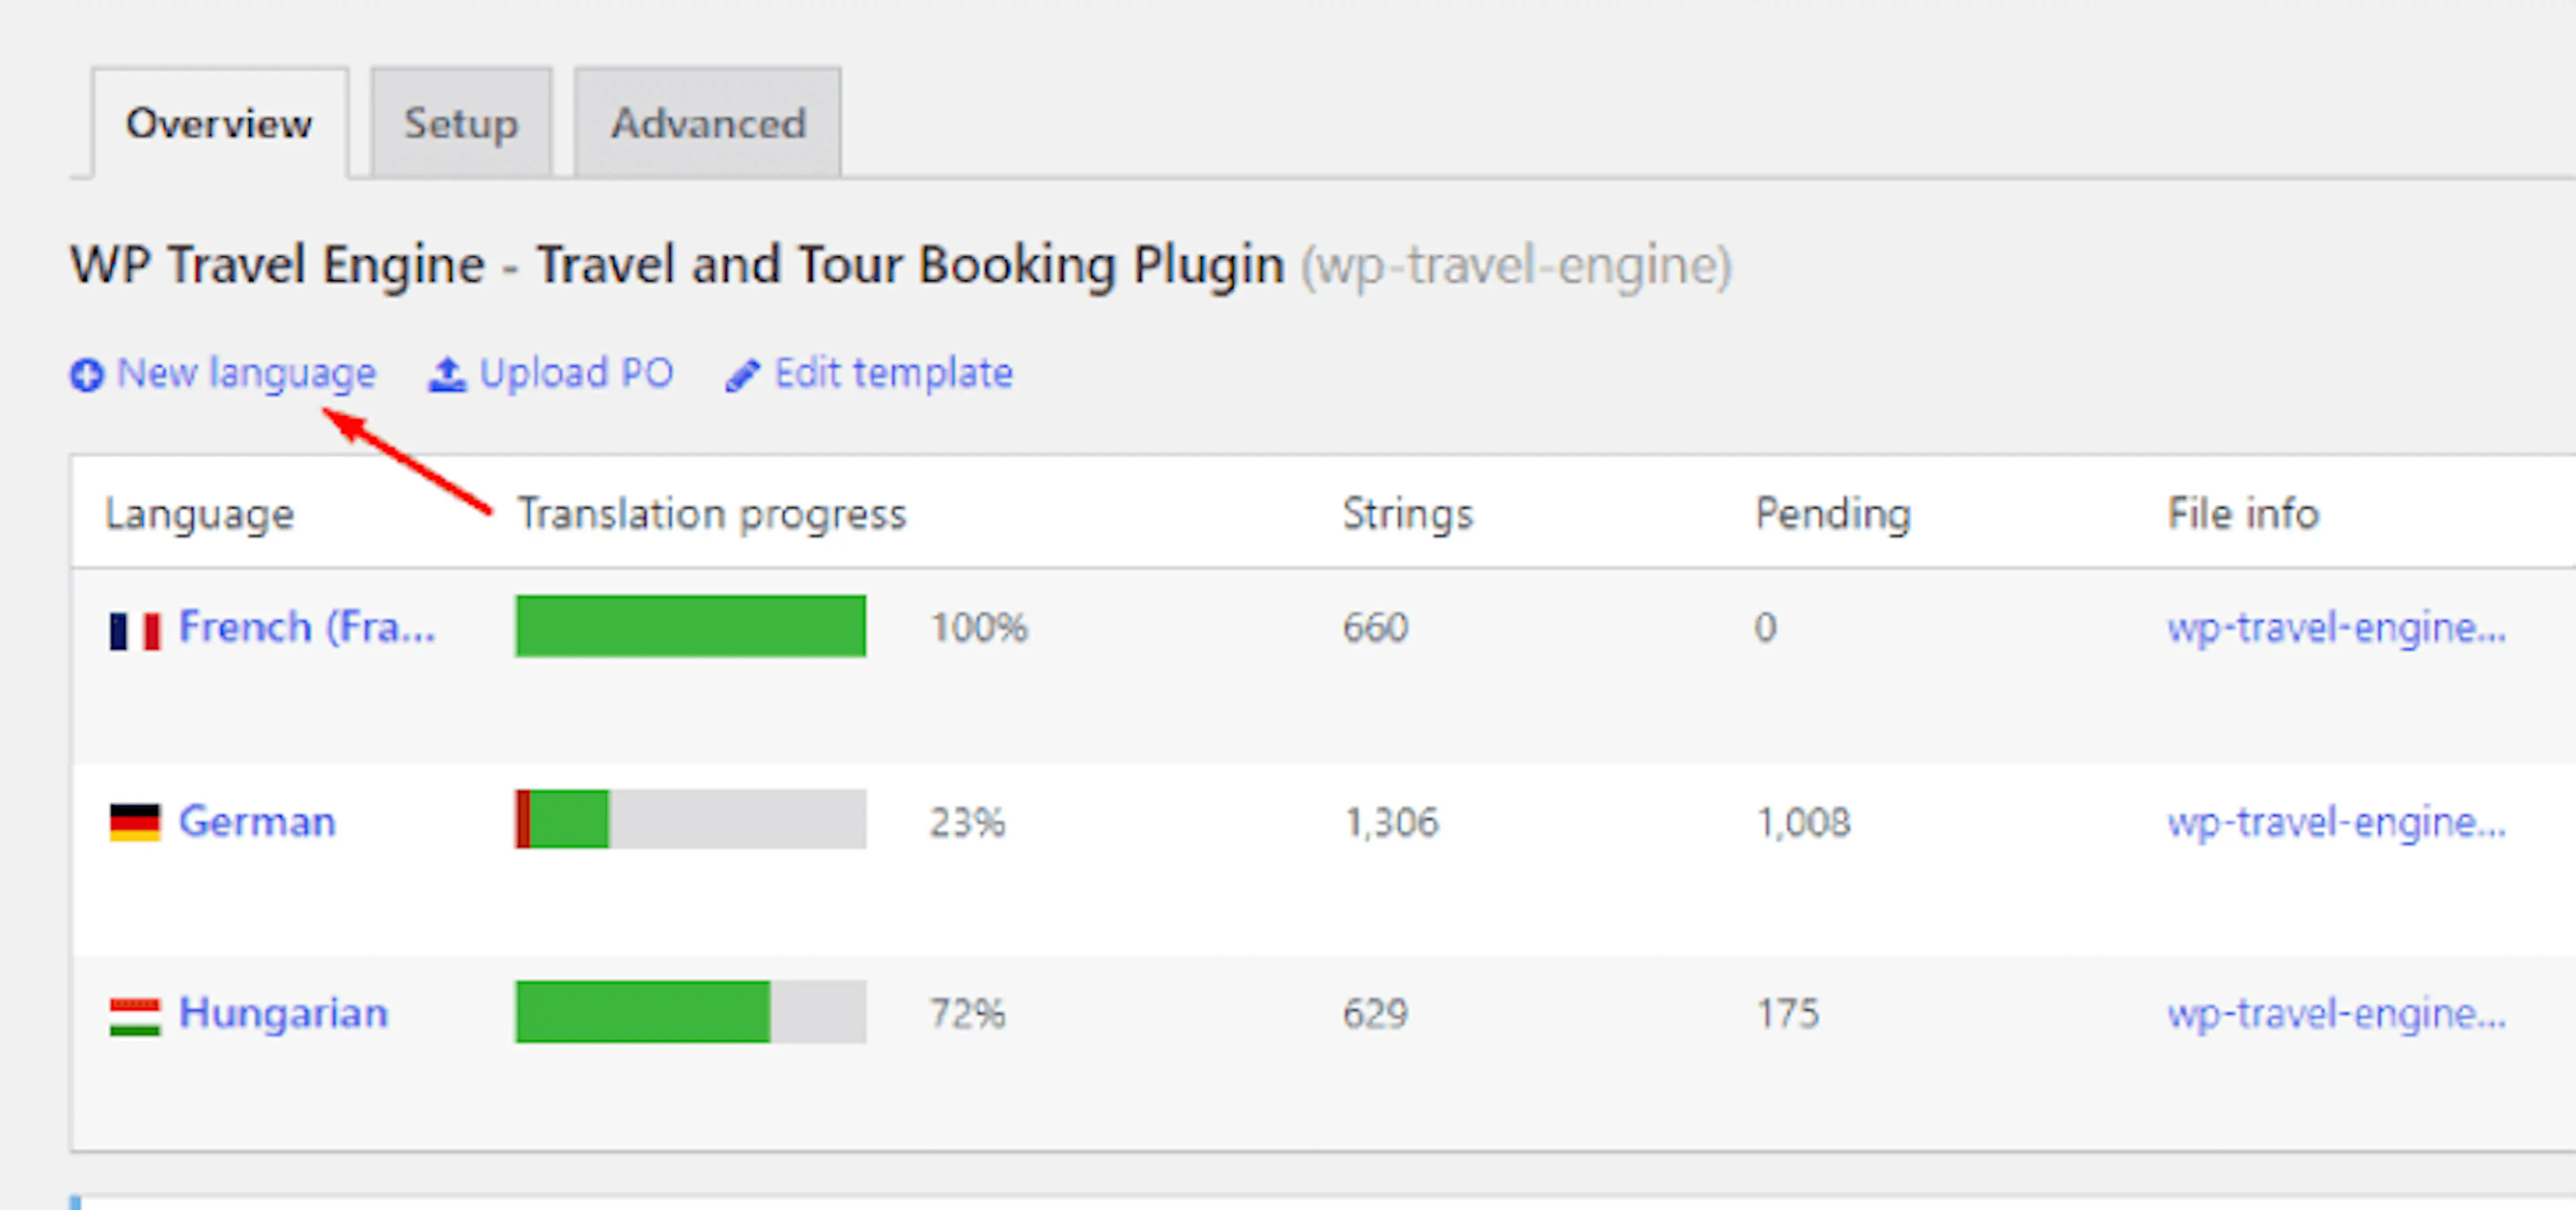
Loco Translate shows the languages that already have translations. It also shows how complete each translation is. For example, French may be 100% complete, German 23% complete, and Hungarian 72% complete.
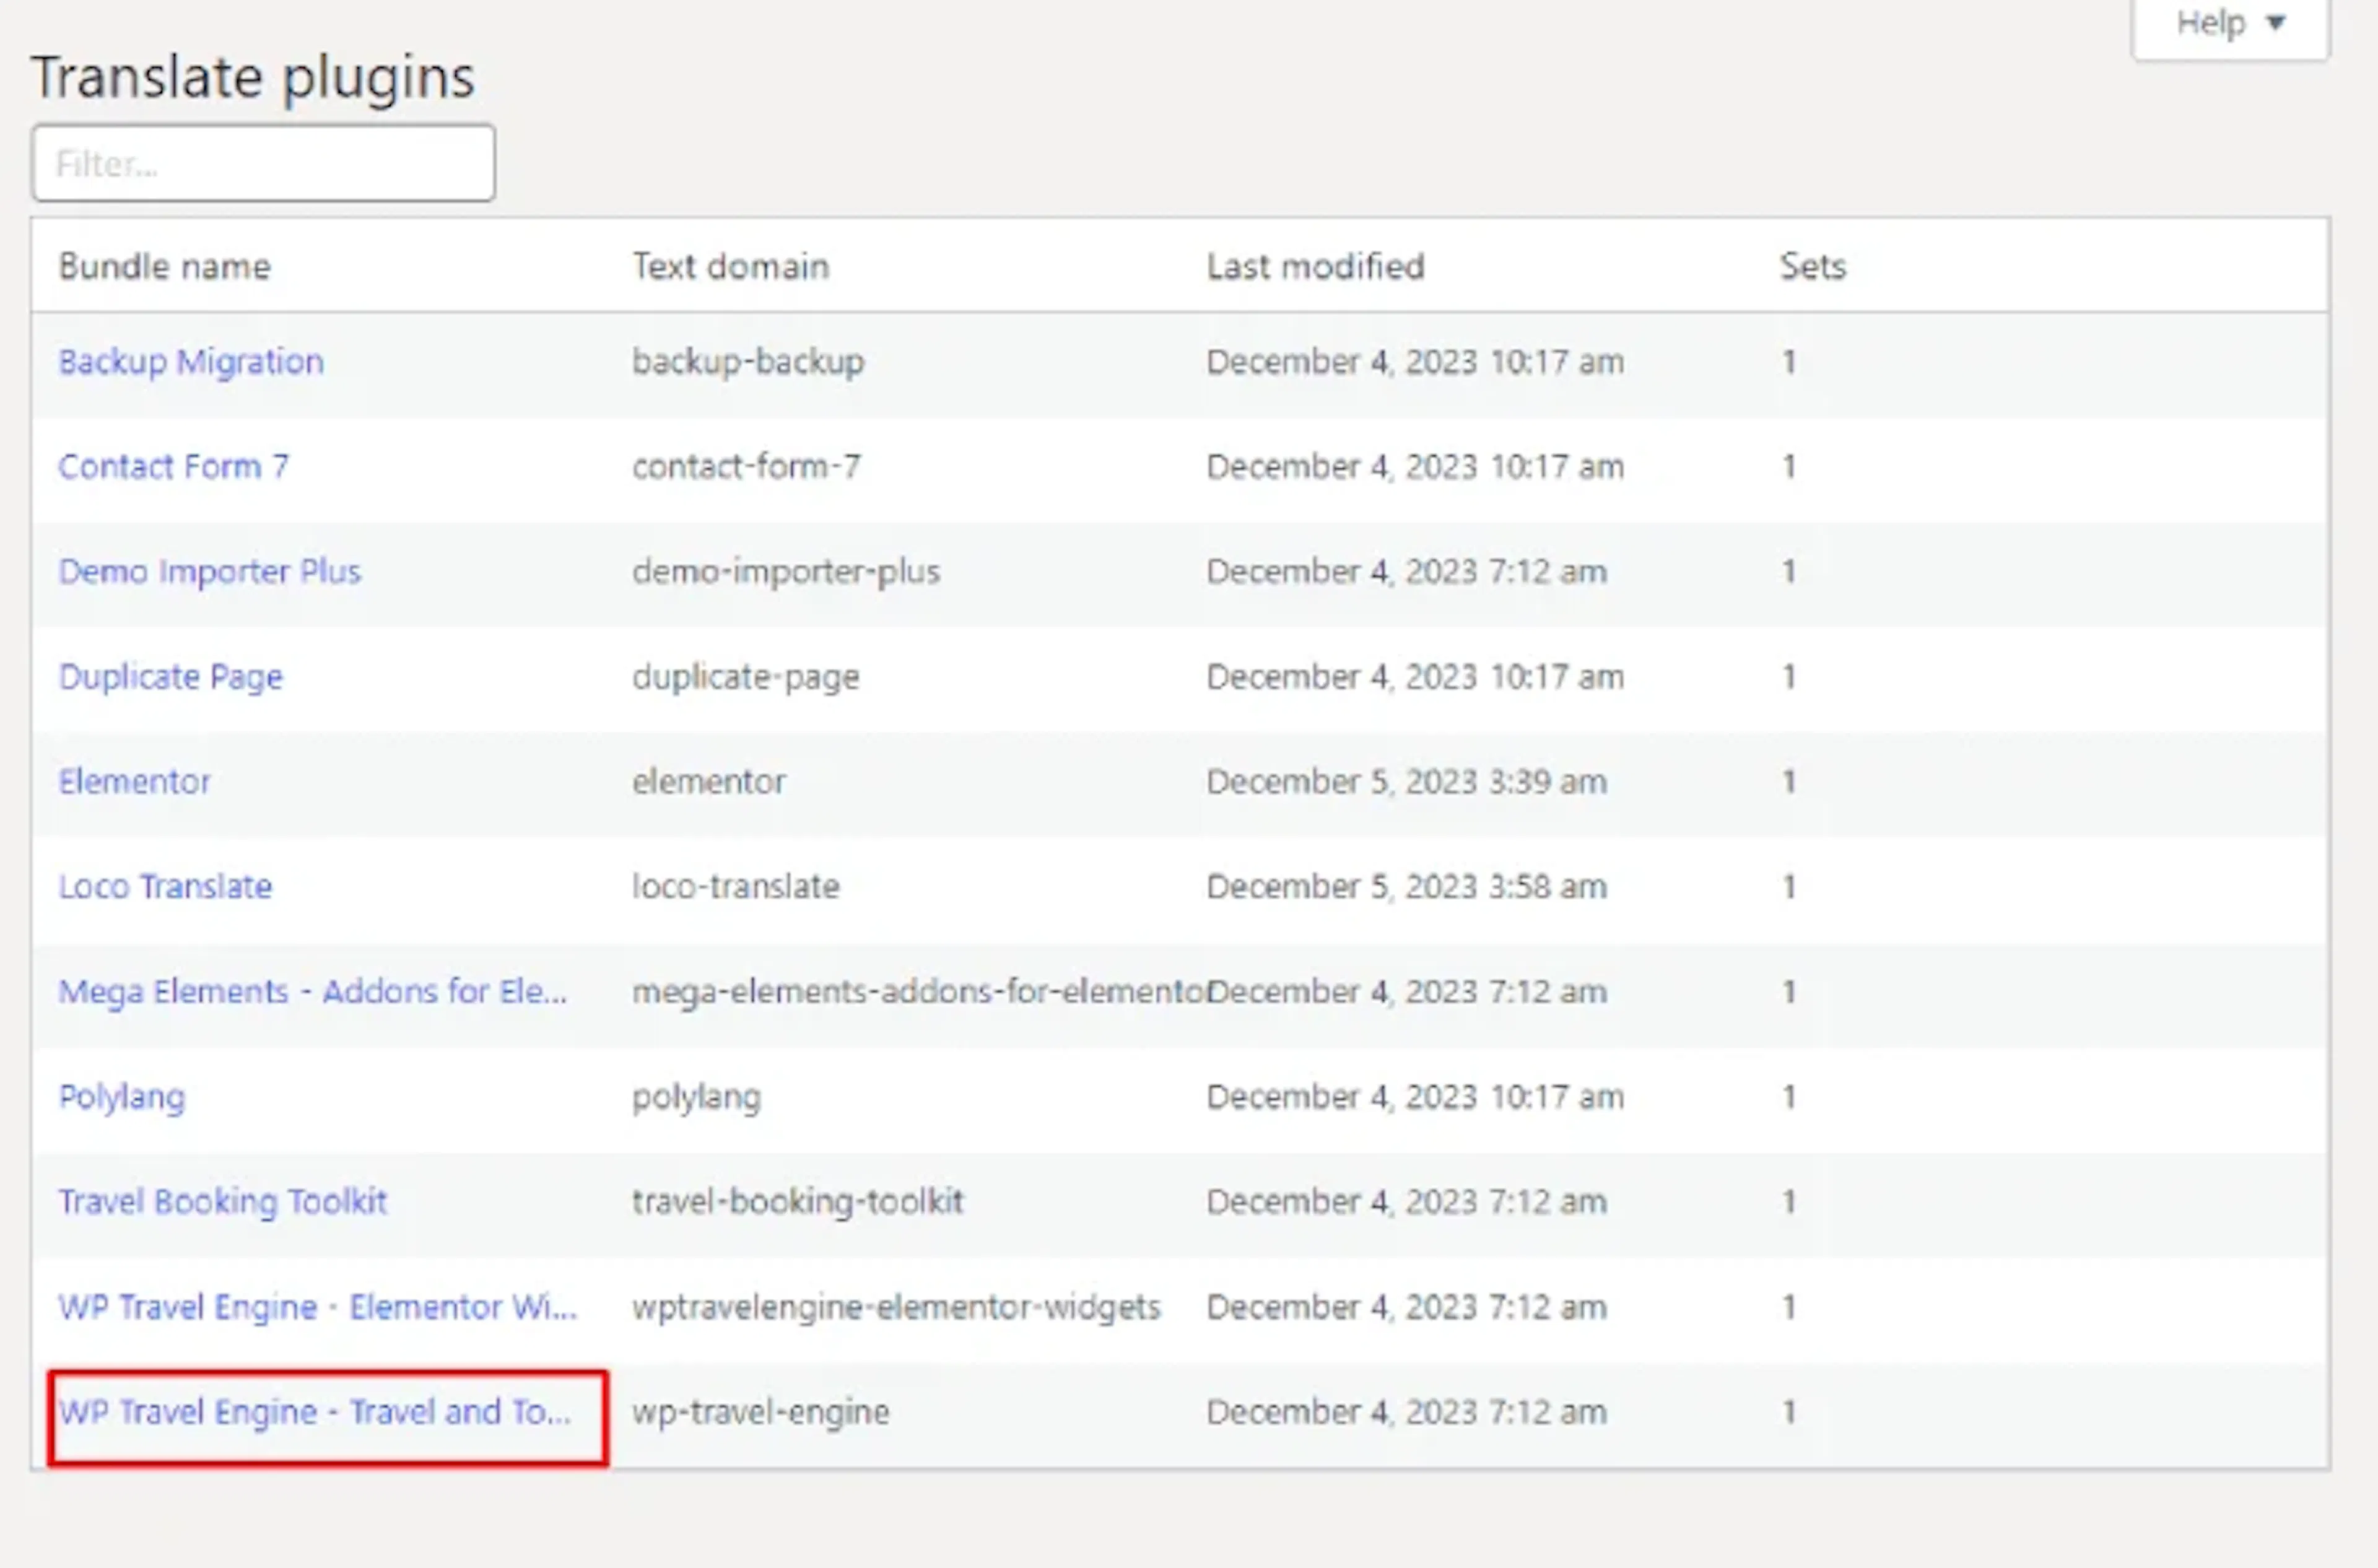
Add or continue a language
Click New Language if your language is not listed. Click Edit next to an existing language if you want to continue a translation that is in progress.
Choose the language
On the plugin editor screen, open the Language tab. Choose the language you want to translate into.
Choose where to save the translation
Choose the location where Loco Translate will save the translation file. Use the Custom location recommended by the plugin developer when you are unsure which location to choose.
Start translating
Click Start Translating to open the WP Travel Engine text.
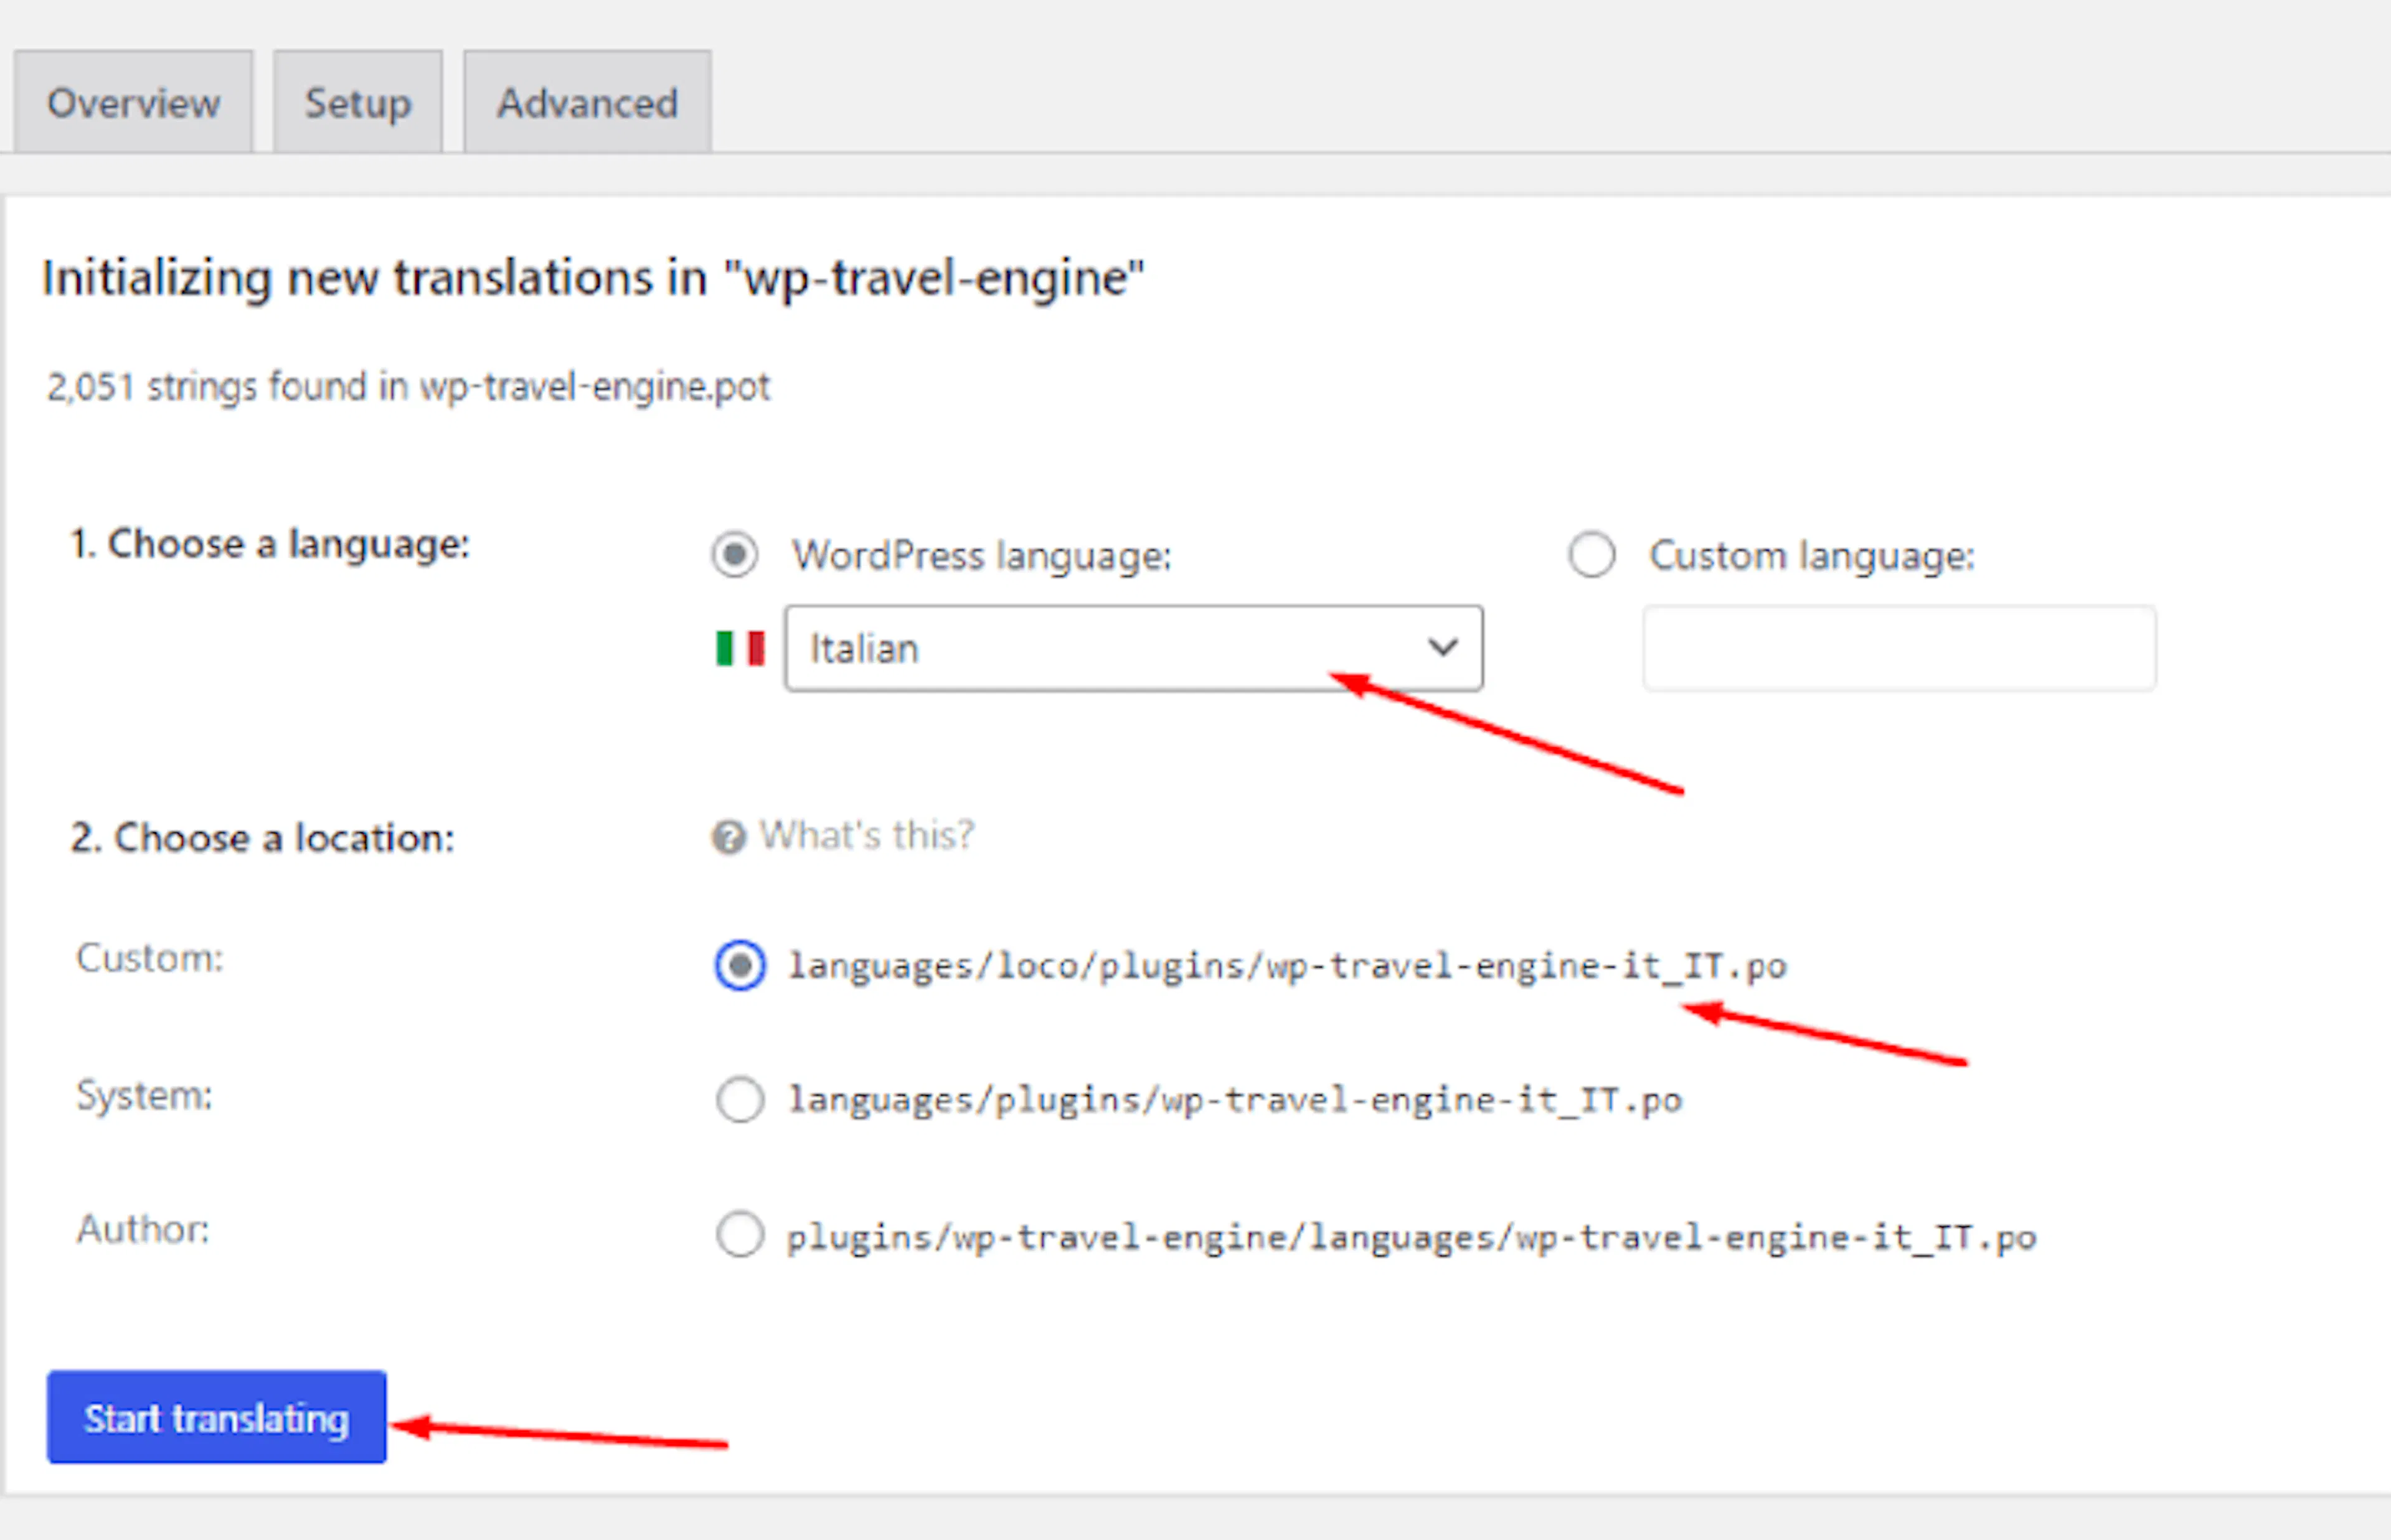
The WP Travel Engine text is now ready for translation. Use the search field to find the labels your travelers see.
Translate specific WP Travel Engine text
Find a string
Use the Filter Translations search bar to find a phrase such as Check Availability.
Select the string
Click the string in the results list. The original text will appear in the source text box.
Enter the translation
Enter the translated wording in the target-language translation box. Translate the phrase in a way that makes sense for your travelers and booking flow.
Save the change
Click Save to apply the translation.
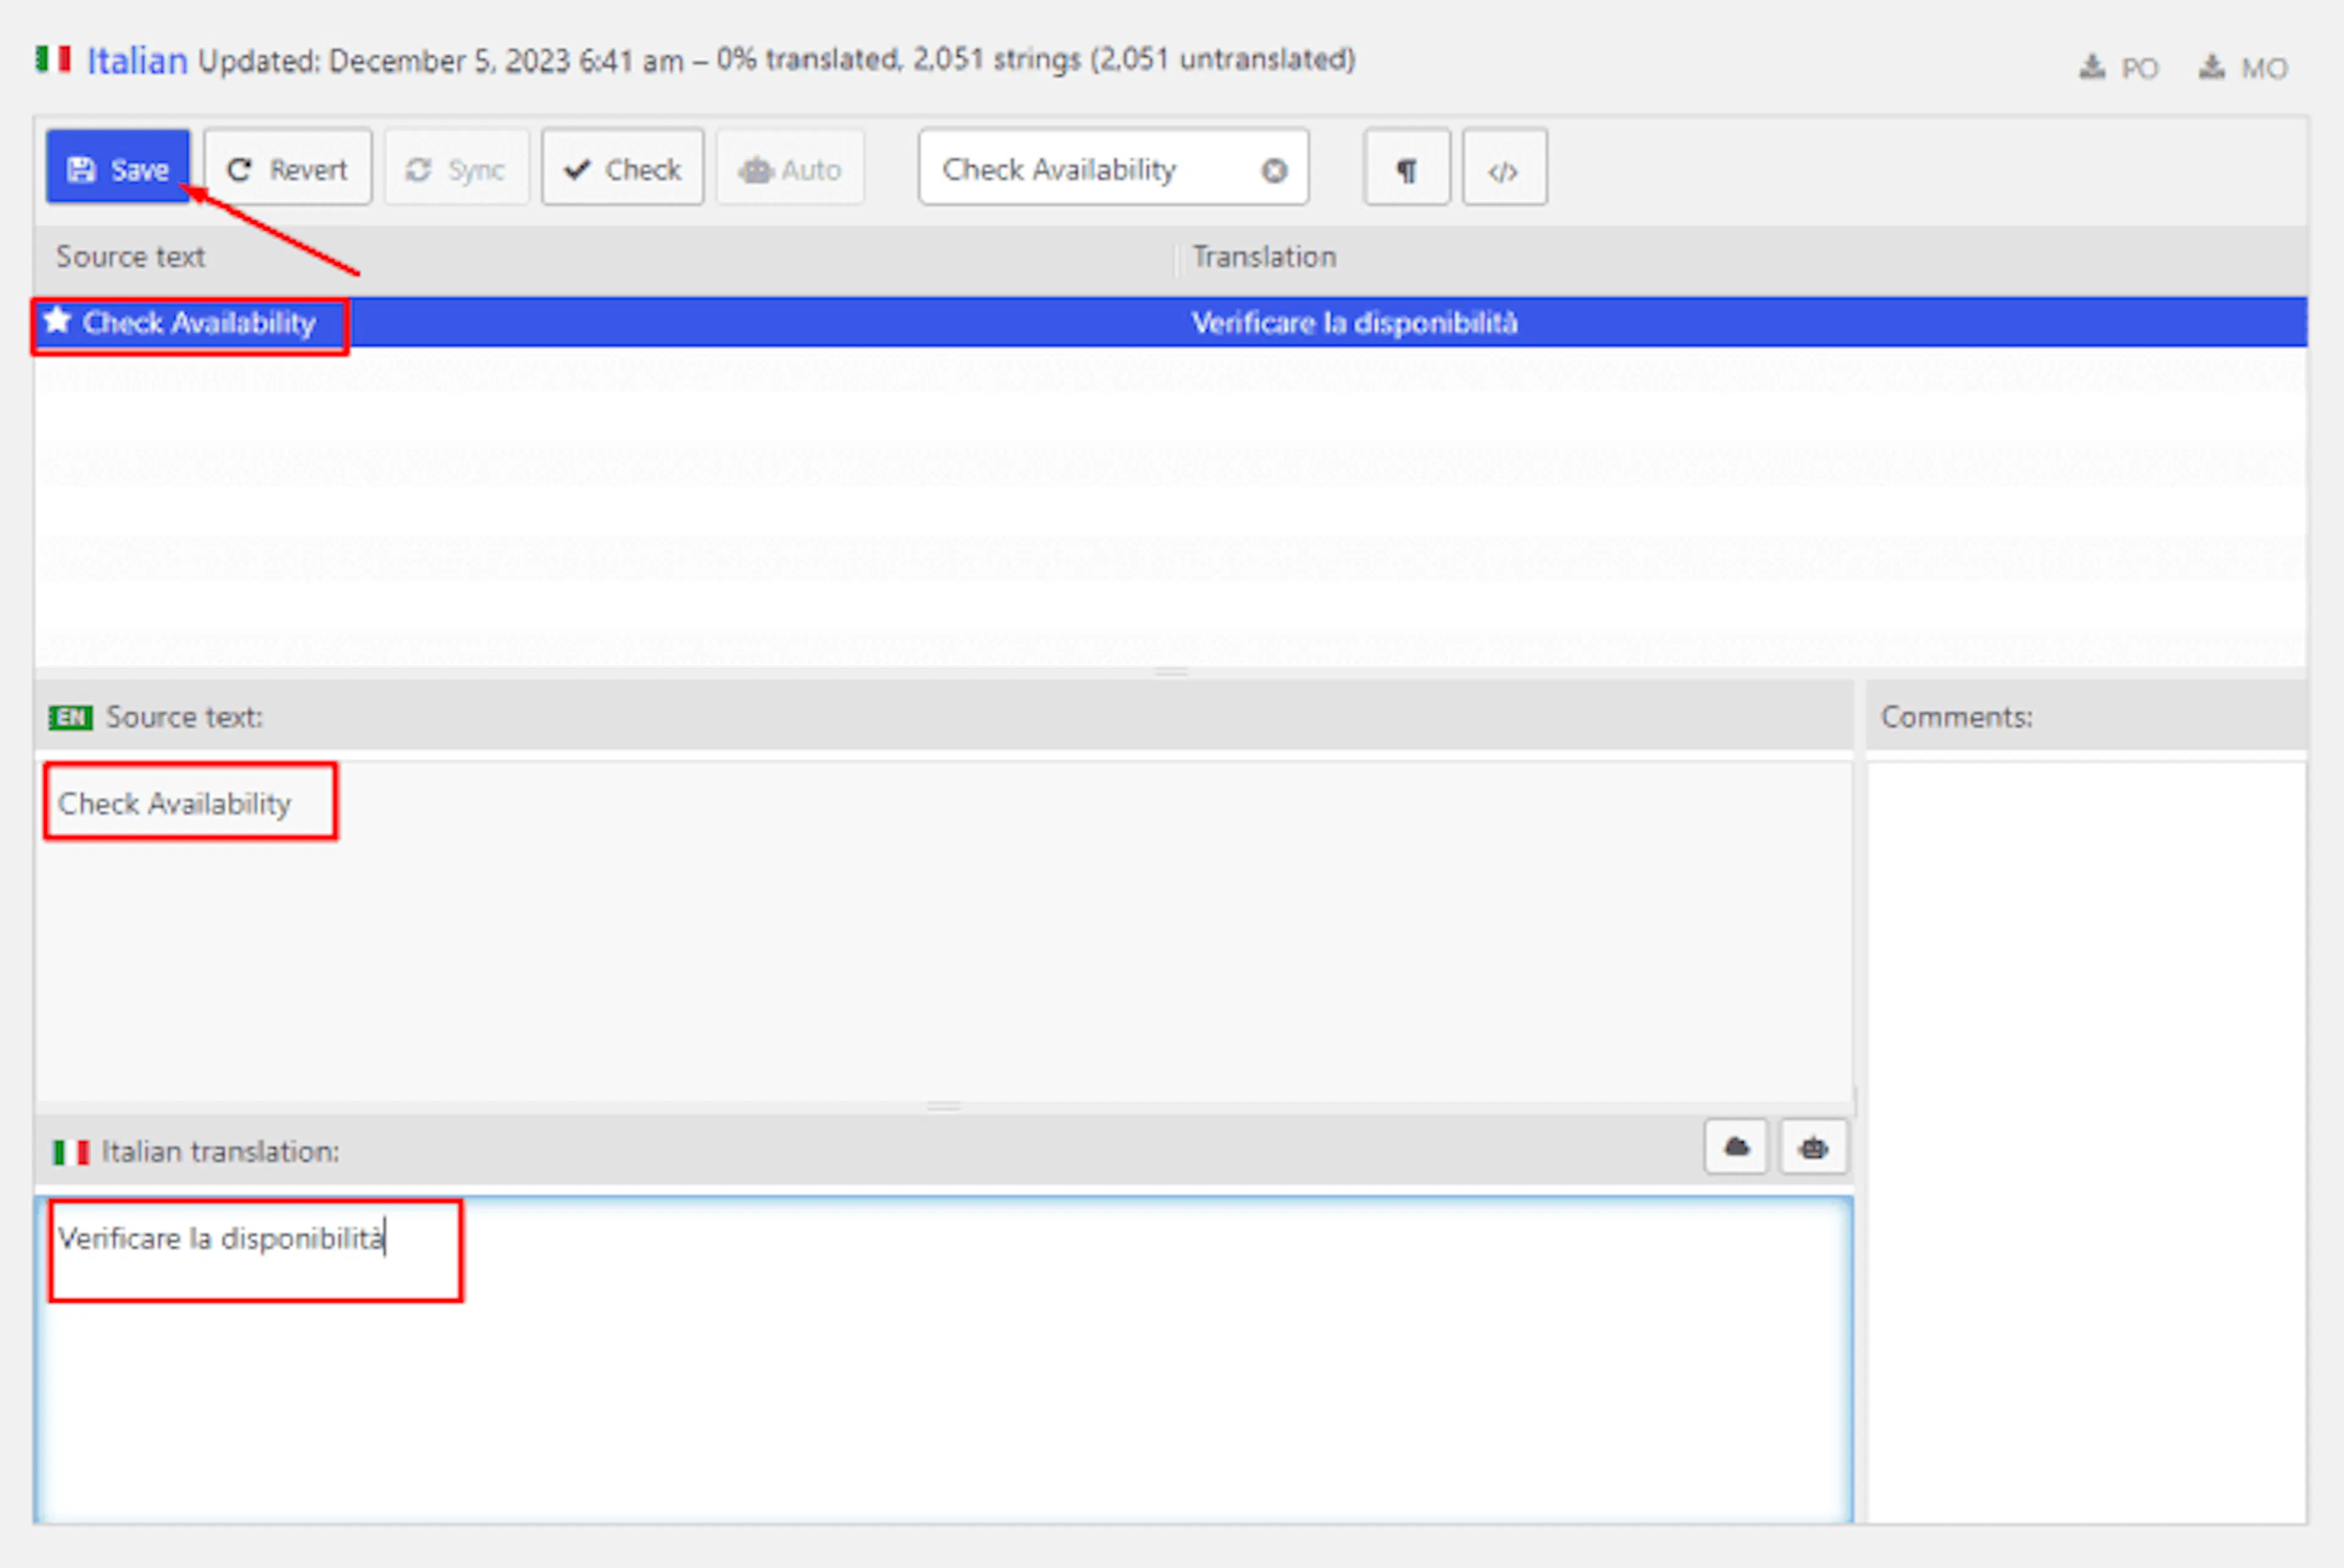
Follow the steps in Step 4 to change the site language and check the translation on the front end. Look at the booking form and confirm that the labels your customers need are translated.
Keep placeholder codes unchanged
Some text contains special codes such as %s, %d, or %1$s. The plugin replaces these codes with real information, such as a customer name, date, price, or booking number.
Leave each code exactly as it appears in the original text. Do not translate it, change its capital letters, or move it to a different format.
For example:
- Original:
Hello, %s! Your booking number is %d. - Correct translation:
Hola, %s! Su número de reserva es %d.
Never rewrite the placeholder itself. Hola, %S! Su número de reserva es %num. is incorrect because it changes %s to %S and %d to %num.
If you change these codes, the plugin may not be able to insert the customer name or booking number. The text may display incorrectly, or part of your booking process may stop working. Keeping the codes unchanged lets your translations work with the real details from each booking.
If you're still stuck or have a question we didn't cover, our support team is happy to help. Reach out at our support page and we'll get you sorted.