

Trip Weather Forecast
Show live weather forecasts on your trip pages so travelers can check conditions before they book. Pick from over 800,000 worldwide locations and customize what each trip displays.
Show weather on your trip pages
Trip Weather Forecast lets you show live weather details on each trip page. That helps travelers picture the experience before they book.
For example, you might show mountain weather on a trek page, city conditions on a day tour, or a short forecast for a multi-day package during peak season. The add-on lets you pick from more than 800,000 locations worldwide, so each trip can show weather that matches the destination.
What this add-on gives you
- 800,000+ Location Support: Choose from over 800,000 global locations to display accurate weather data for each trip.
- Real-Time Weather Updates: Weather data updates automatically every minute for accuracy.
- Customizable Widget: Add a weather widget to your trip pages with custom title and header options.
- Hourly & Daily Forecasts: Display up to 5 hours of hourly forecast and 3 days of daily forecast.
- Per-Trip Configuration: Select a specific city for each trip individually from the trip edit screen.
- Hide Option: Hide the weather widget on selected trips if needed.
- Seamless Integration: Fully integrates with WP Travel Engine trips without requiring custom coding.
This gives you one more useful detail on the trip page without extra manual updates.
Before you start, make sure you already have the add-on installed, your license activated, and access to your WordPress dashboard.
What you'll need before you start
A plugin is a small tool you add to WordPress to give your site more features. A widget is a content block you place in an area of your site, such as a sidebar.
Before you set up Trip Weather Forecast, make sure you have:
- WP Travel Engine plugin v5.7.6 or later installed and activated.
- Trip Weather Forecast add-on installed and activated with a valid license key.
- A weather API account created. An API key is a unique code that connects your site to the weather service.
- The API key saved in WP Travel Engine > Settings > Extensions > Trip Weather Forecast.
- At least one trip created, so you have somewhere to assign a weather location.
- The WP Travel Engine sidebar is active wherever you plan to place the widget.
Once those pieces are ready, you can move through the setup without guessing.
Install the Trip Weather Forecast add-on
If you have not installed or activated the add-on yet, use the full setup guide below.
See how to activate a Pro add-on license key for the full installation and activation walkthrough.
After the add-on is active, the next job is connecting it to the weather service.
Generate the API key
You need the API key so the weather widget can pull live forecast data onto your site. Without it, the location search and forecast display will not work.
Open Trip Weather Forecast settings
Start in your WordPress dashboard. Look at the left sidebar, then go to WP Travel Engine > Settings > Extensions > Trip Weather Forecast.
Start the key generation process
This opens the connection to the weather service. Click either of the text links called this source or from here.
Sign up or log in to the weather API
You will be taken to the weather API website. Log in if you already have an account, or sign up if this is your first time there.
Copy your API key
This key is the code your site needs. After you log in, you will see your unique API key. Click the copy icon to copy it to your clipboard.
Paste the key and save
Go back to your WordPress dashboard. Paste the copied API key into the box, then click Save & Continue.
Once the key is saved, you are ready to place the weather widget on your site.
Add Trip Weather Forecast to a single trip page
The add-on gives you two places to work. You will add the Trip Weather Forecast widget in the widgets area. You will also choose a location for each trip inside that trip's edit screen.
In the widget area, you can set things like unit, language, current weather conditions, and hourly and daily forecasts. Then, inside each trip, you type a city name and choose the correct location from the dropdown list.
For example, you could show Pokhara weather on an Annapurna trek page and keep Kathmandu weather on a city day tour page. That keeps each trip page matched to the destination your traveler is viewing.
The widget does not yet support locations that do not appear in the dropdown.
Add the Trip Weather Forecast widget
This part controls how the weather box appears on your trip pages. You will choose where it sits and what forecast details it shows.
Open the WP Travel Engine Sidebar widgets
A sidebar is the area on your site where widgets appear. In your WordPress dashboard, go to Appearance > Widgets > WP Travel Engine Sidebar and click the + icon.
Find and add the widget
This adds the weather block to the sidebar area used by your trip pages. Type trip weather forecast in the search box, then click the Trip Weather Forecast widget.
Set the title and header
This helps travelers understand what they are looking at. Enter a title in the Title box to show a heading above the widget, such as "Weather Forecast". Leave it blank if you do not want a heading.
You can also enter text in the Header box to show a custom label inside the widget, such as "New Delhi".
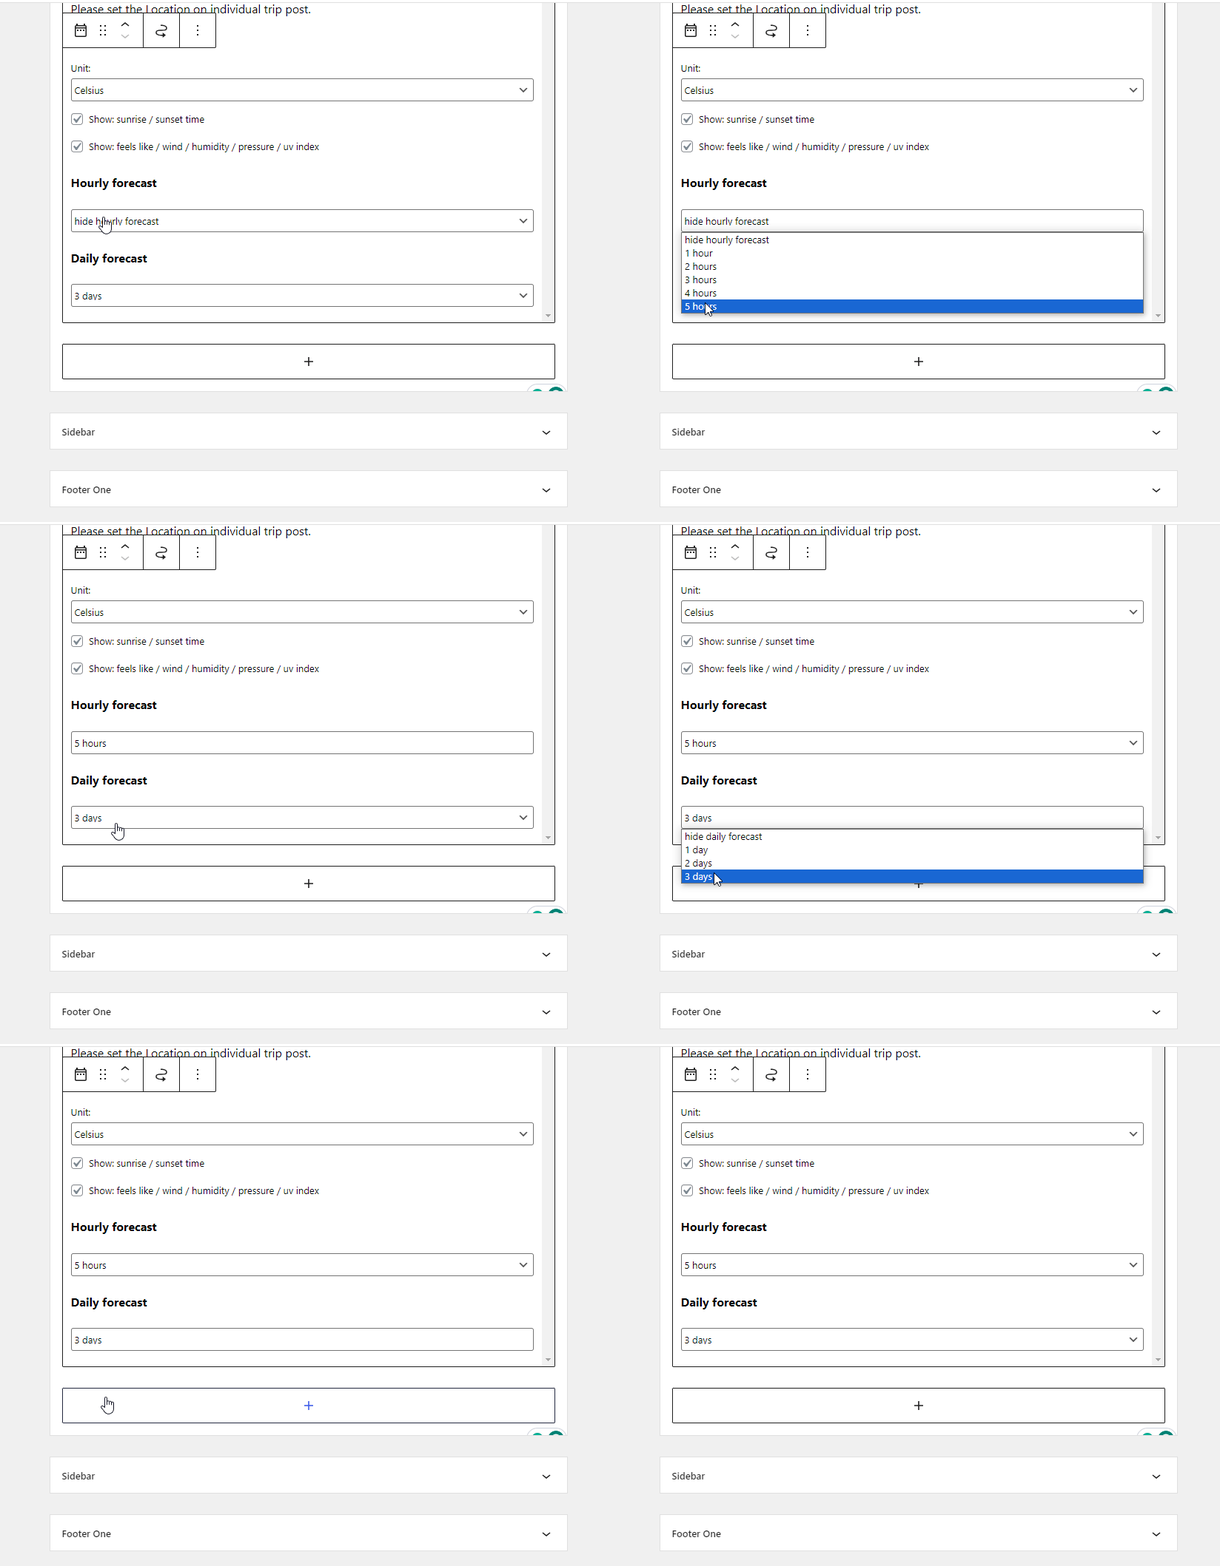
Configure forecast ranges
This controls how much forecast information your traveler sees at a glance. Use the dropdown menus in the Hourly and Daily forecast sections to show or hide forecasts for up to 5 hours and 3 days.
Save the widget
This makes your widget settings live. Click Update in the top right corner.
Now the weather widget is in place. Next, you will tell each trip which city it should use.
Configure weather for each trip
This part connects a weather location to a specific trip. This lets each trip show weather for the destination you choose.
Open the Trip Weather settings
Go to one of your trip pages and click Edit.
In the trip editor, open Advanced Settings, then select Trip Weather.
Select the city
This tells the weather widget which location to use for this trip.
Enter the city name in the location field, then select the correct location from the dropdown menu.
Choose whether to show the weather widget
If you do not want to show weather for this trip, use the Hide Weather Widget option.
Save your changes
Click Update in the top right corner to save the weather settings for this trip.
The location dropdown appears when you type a city name into the location field. Make sure your weather API key is saved before selecting a location.
At this point, the weather widget should be ready to display on your trip page.
Frontend preview
This is how the weather widget looks on the live trip page. Your visitors can check conditions before they book or before they travel.
The data is automatically updated every minute.
If you're still stuck or have a question we didn't cover, our support team is happy to help. Reach out at our support page and we'll get you sorted.