

Header Settings
Configure your Travel Monster header so travelers can find trips, contact you, and book from any page on desktop or mobile.
Overview
Your header is the top section of every page on your website. It is often the first thing travelers see. Your logo, navigation menu, contact details, and social media icons can appear there.
You need the Travel Monster theme to be active before these settings are available.
Make sure Travel Monster is your active WordPress theme before you change the header settings.
The Customizer is a live preview tool. It lets you see your changes on your website before you publish them.
Use these steps to open the header settings. The WordPress dashboard is the administration area for your website.
Log in to your WordPress dashboard
Open your website's WordPress dashboard and sign in.
Open the Customizer
On the left sidebar, click Appearance. Then click Customize.
Open the Main Header settings
In the left panel, click General Settings. Then click Main Header.
You can now adjust the header and watch the preview update as you work.
General settings
These settings control the header's overall size, position, and colors. Use them to make the header fit your brand and remain easy to use.
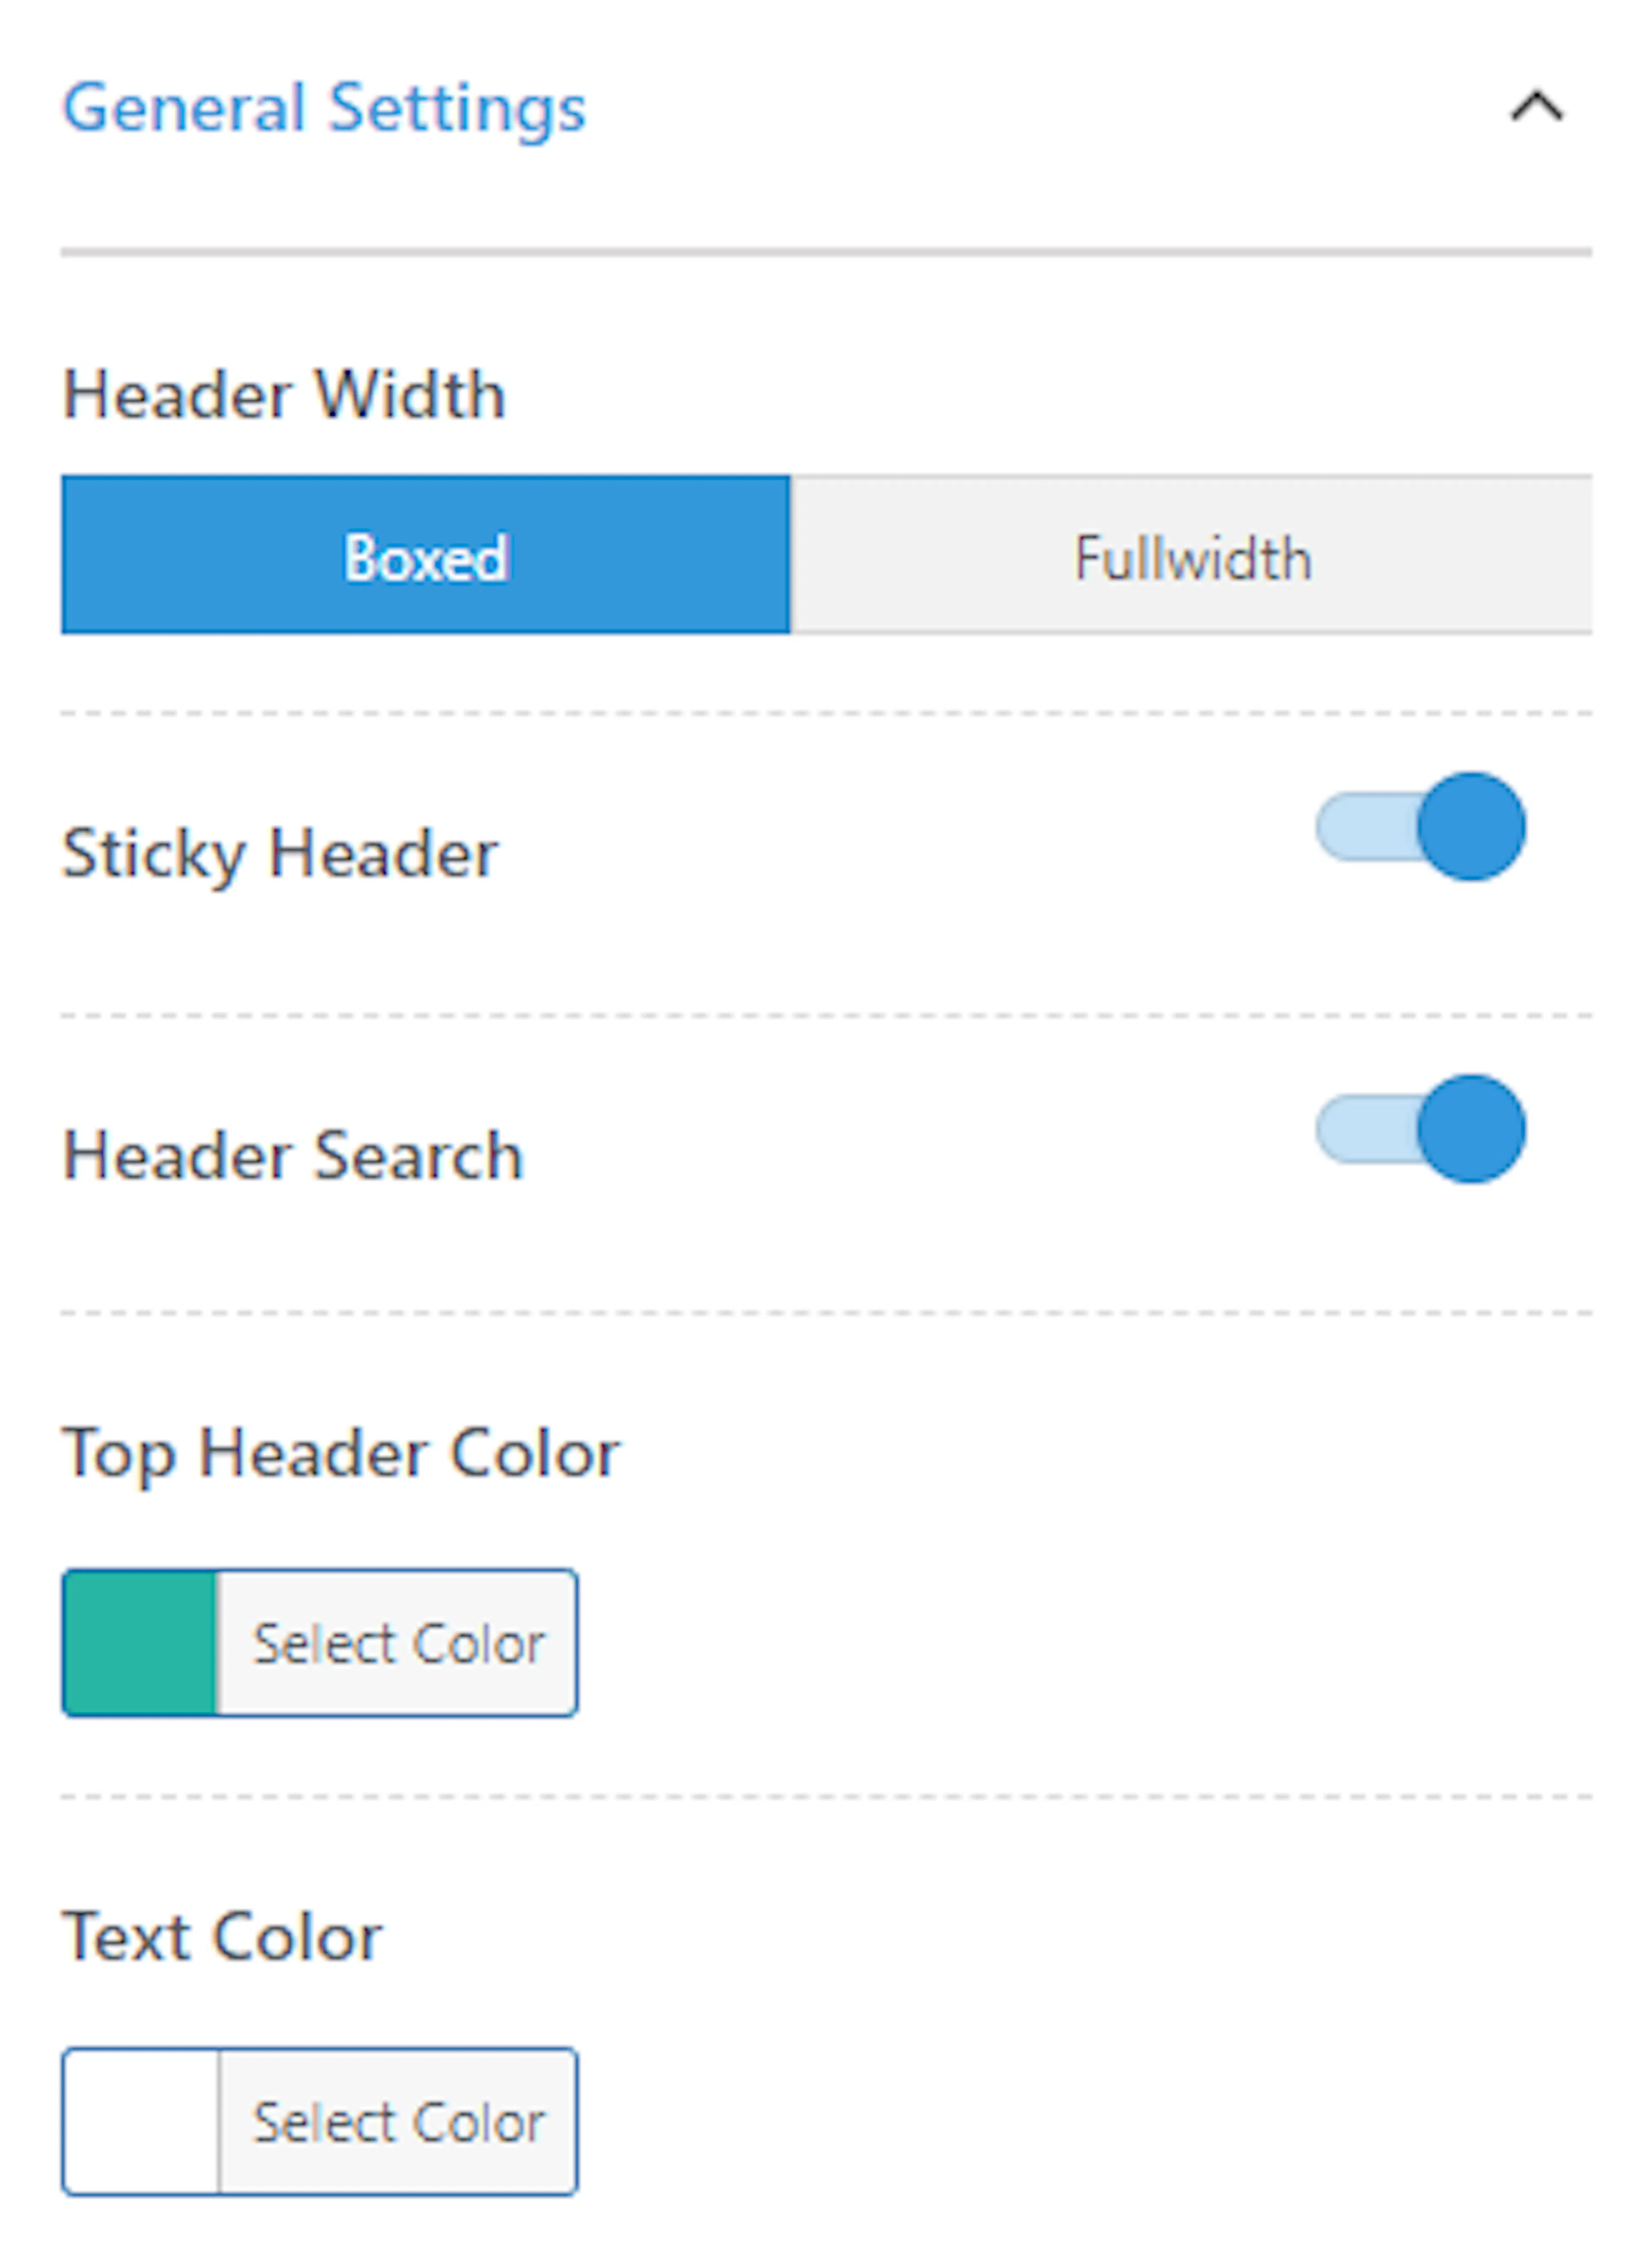
| Setting | What it does |
|---|---|
| Header Width | Sets how wide the header appears on the page. |
| Sticky Header | Keeps the header pinned to the top as visitors scroll. |
| Header Search | Adds a search icon to the header. |
| Top Header Color | Changes the background color of the top header. |
| Text Color | Changes the color of text in the top header. |
A sticky header stays pinned to the top of the screen as visitors scroll down. Your menu stays within reach. For example, a traveler reading a long 10-day itinerary can jump to another section without scrolling all the way back to the top.
Header Search helps travelers find a specific trip. If someone is looking for your Annapurna Circuit Trek, they can click the search icon and type the trip name instead of looking through the whole menu.
Your general header settings are ready for the rest of the header content. Next, you can arrange the navigation menu.
Navigation menu
These settings control the spacing and width of your main menu. A clear menu helps travelers find destinations and tour packages without confusion.
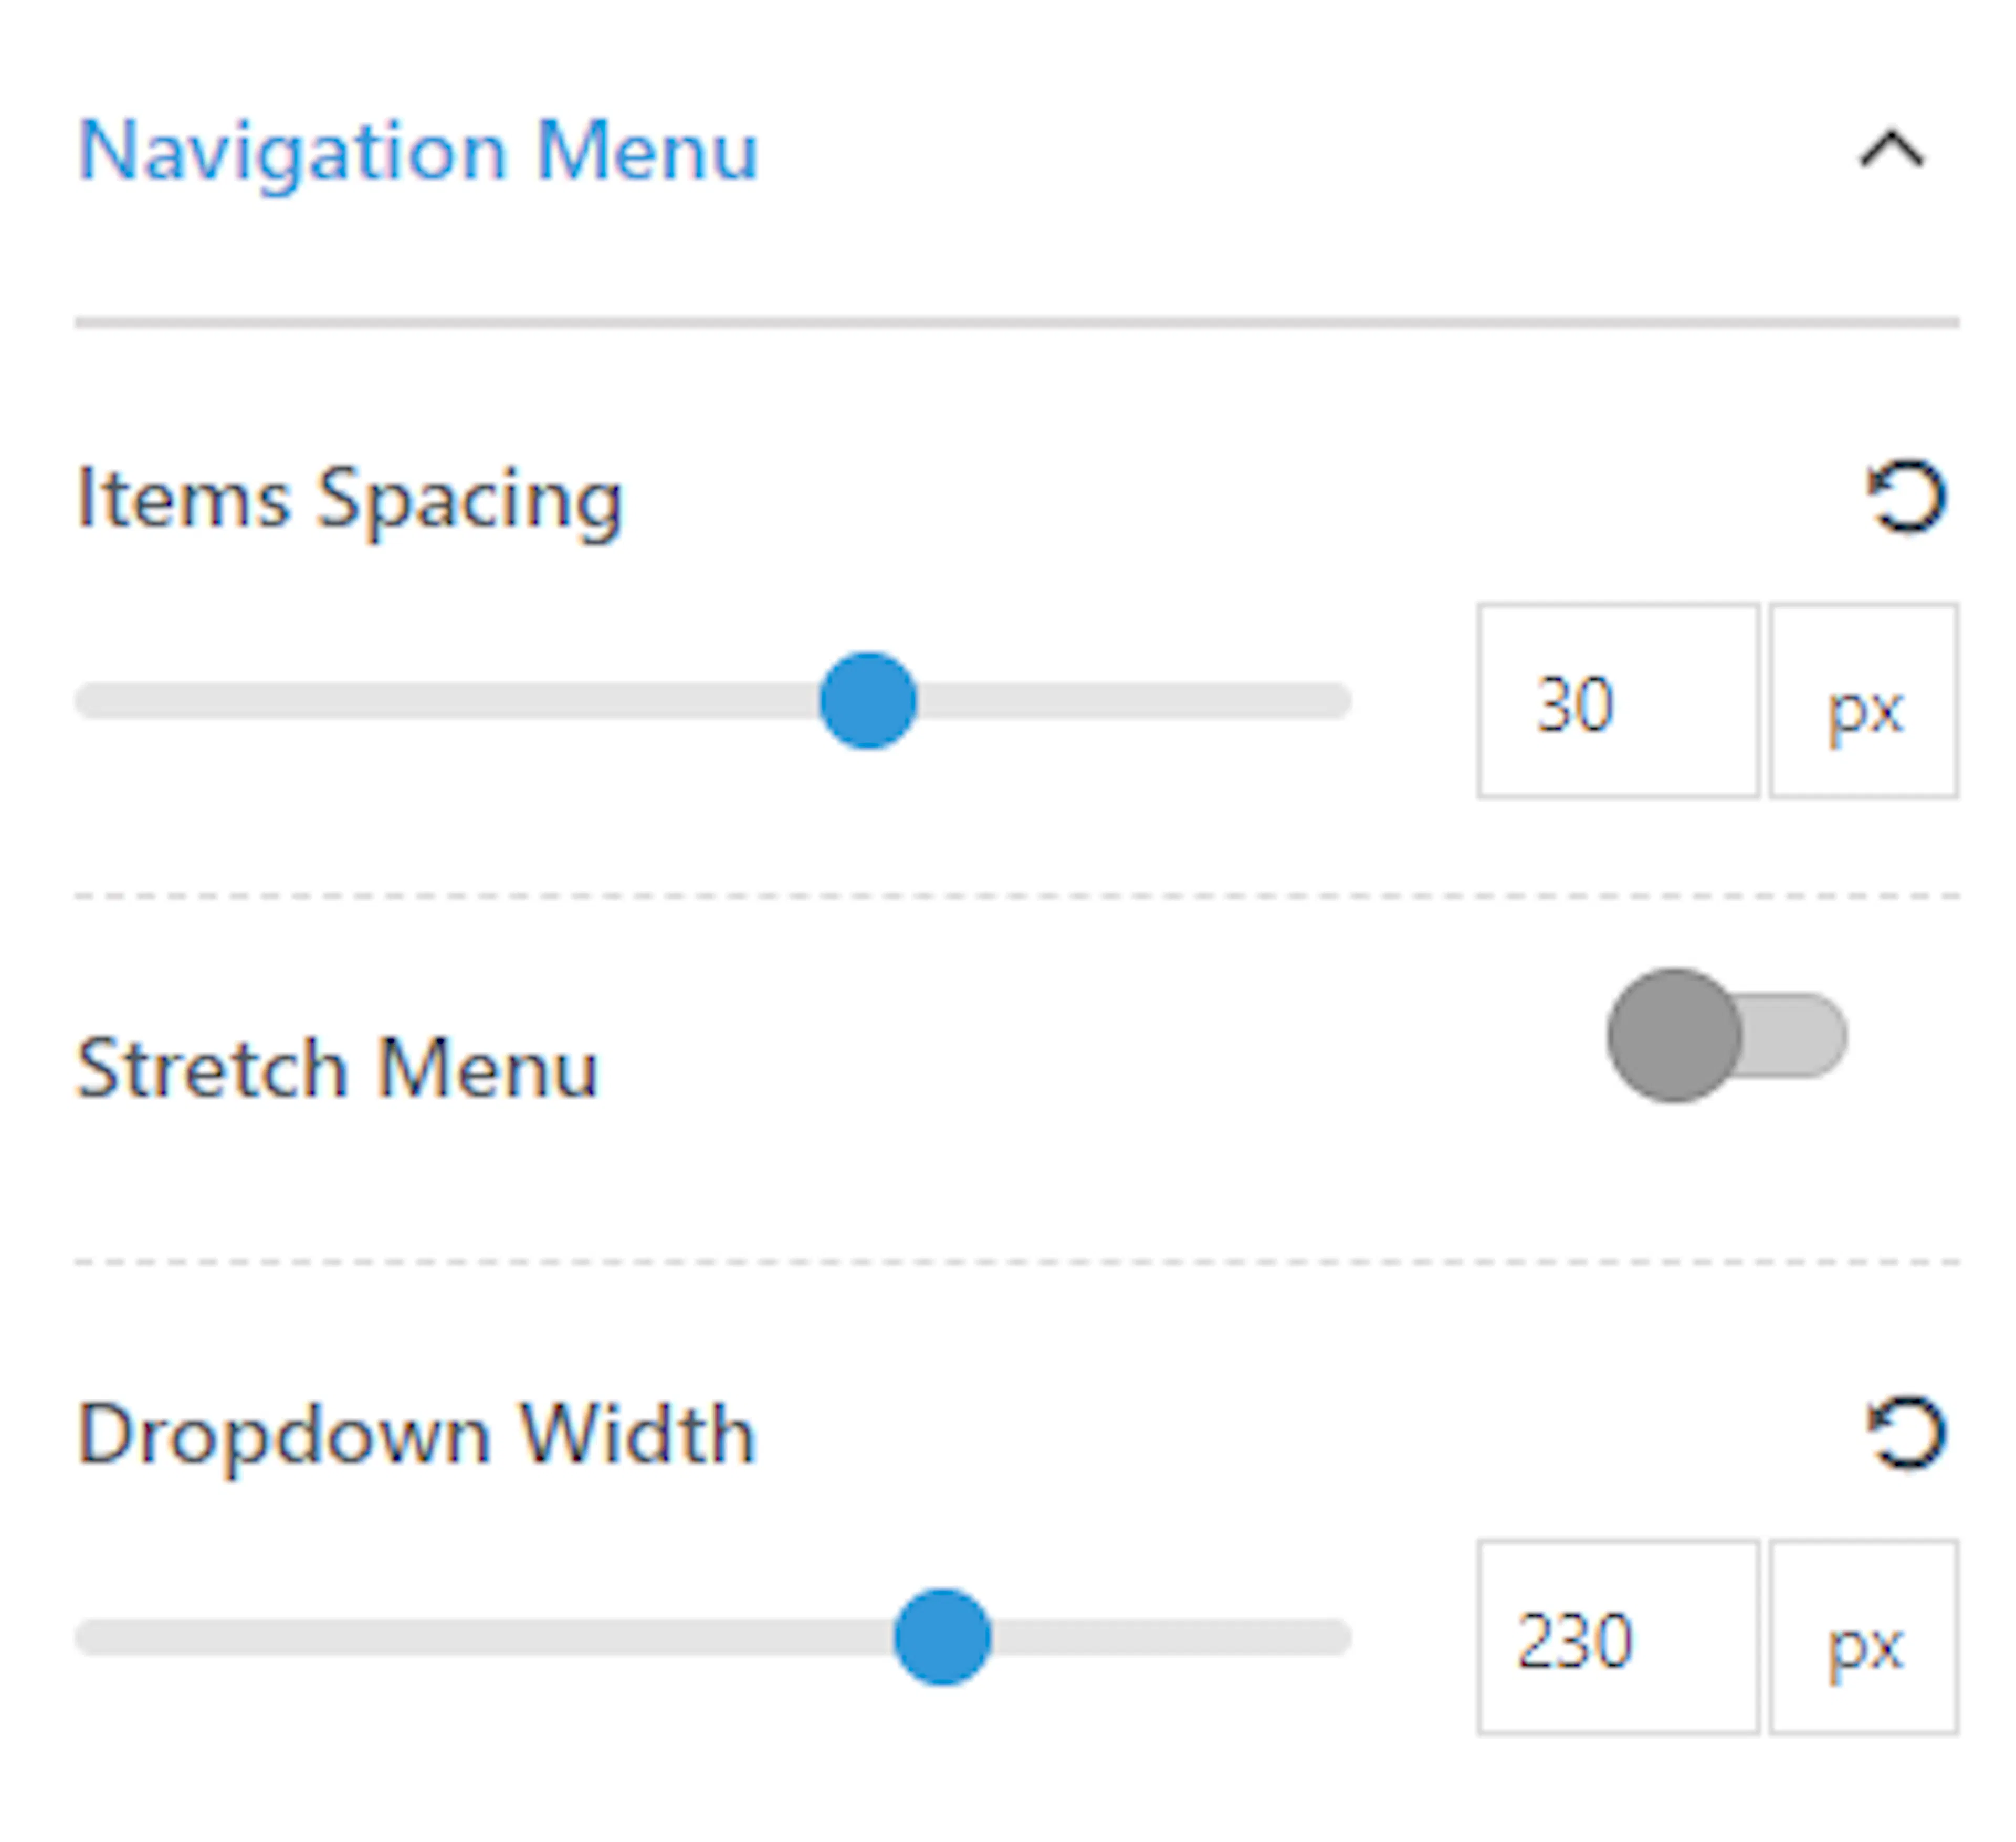
| Setting | What it does |
|---|---|
| Items Spacing | Sets the space between menu items. |
| Stretch Menu | Spreads menu items across the full menu area when enabled. |
| Dropdown Width | Sets the width of the submenu that opens from a menu item. |
A dropdown menu is the submenu that appears when a visitor hovers over or clicks a main menu item. For example, a main menu item named Destinations could open a dropdown listing Nepal, Bhutan, and Tibet.
Adjust the spacing and dropdown width until your menu looks balanced in the preview. Your visitors can then move from destinations to tours more naturally.
Contact information
Add the contact details travelers need when they have questions before booking. These details appear directly in the header, so travelers do not need to search for your contact page.
| Setting | What it does |
|---|---|
| Phone | Shows your contact phone number in the header. |
| Shows your contact email address in the header. |
For example, a traveler interested in group discounts for your 5-day jungle safari can see your phone number in the header and contact you right away.
Keep these details accurate. Travelers may use them to ask about availability, group sizes, seasonal pricing, or gear rental add-ons.
Header button
The header button is a clickable button for your most important action. Most tour operators label it Book Now and link it to their booking page. Travelers can start booking from any page on your site.
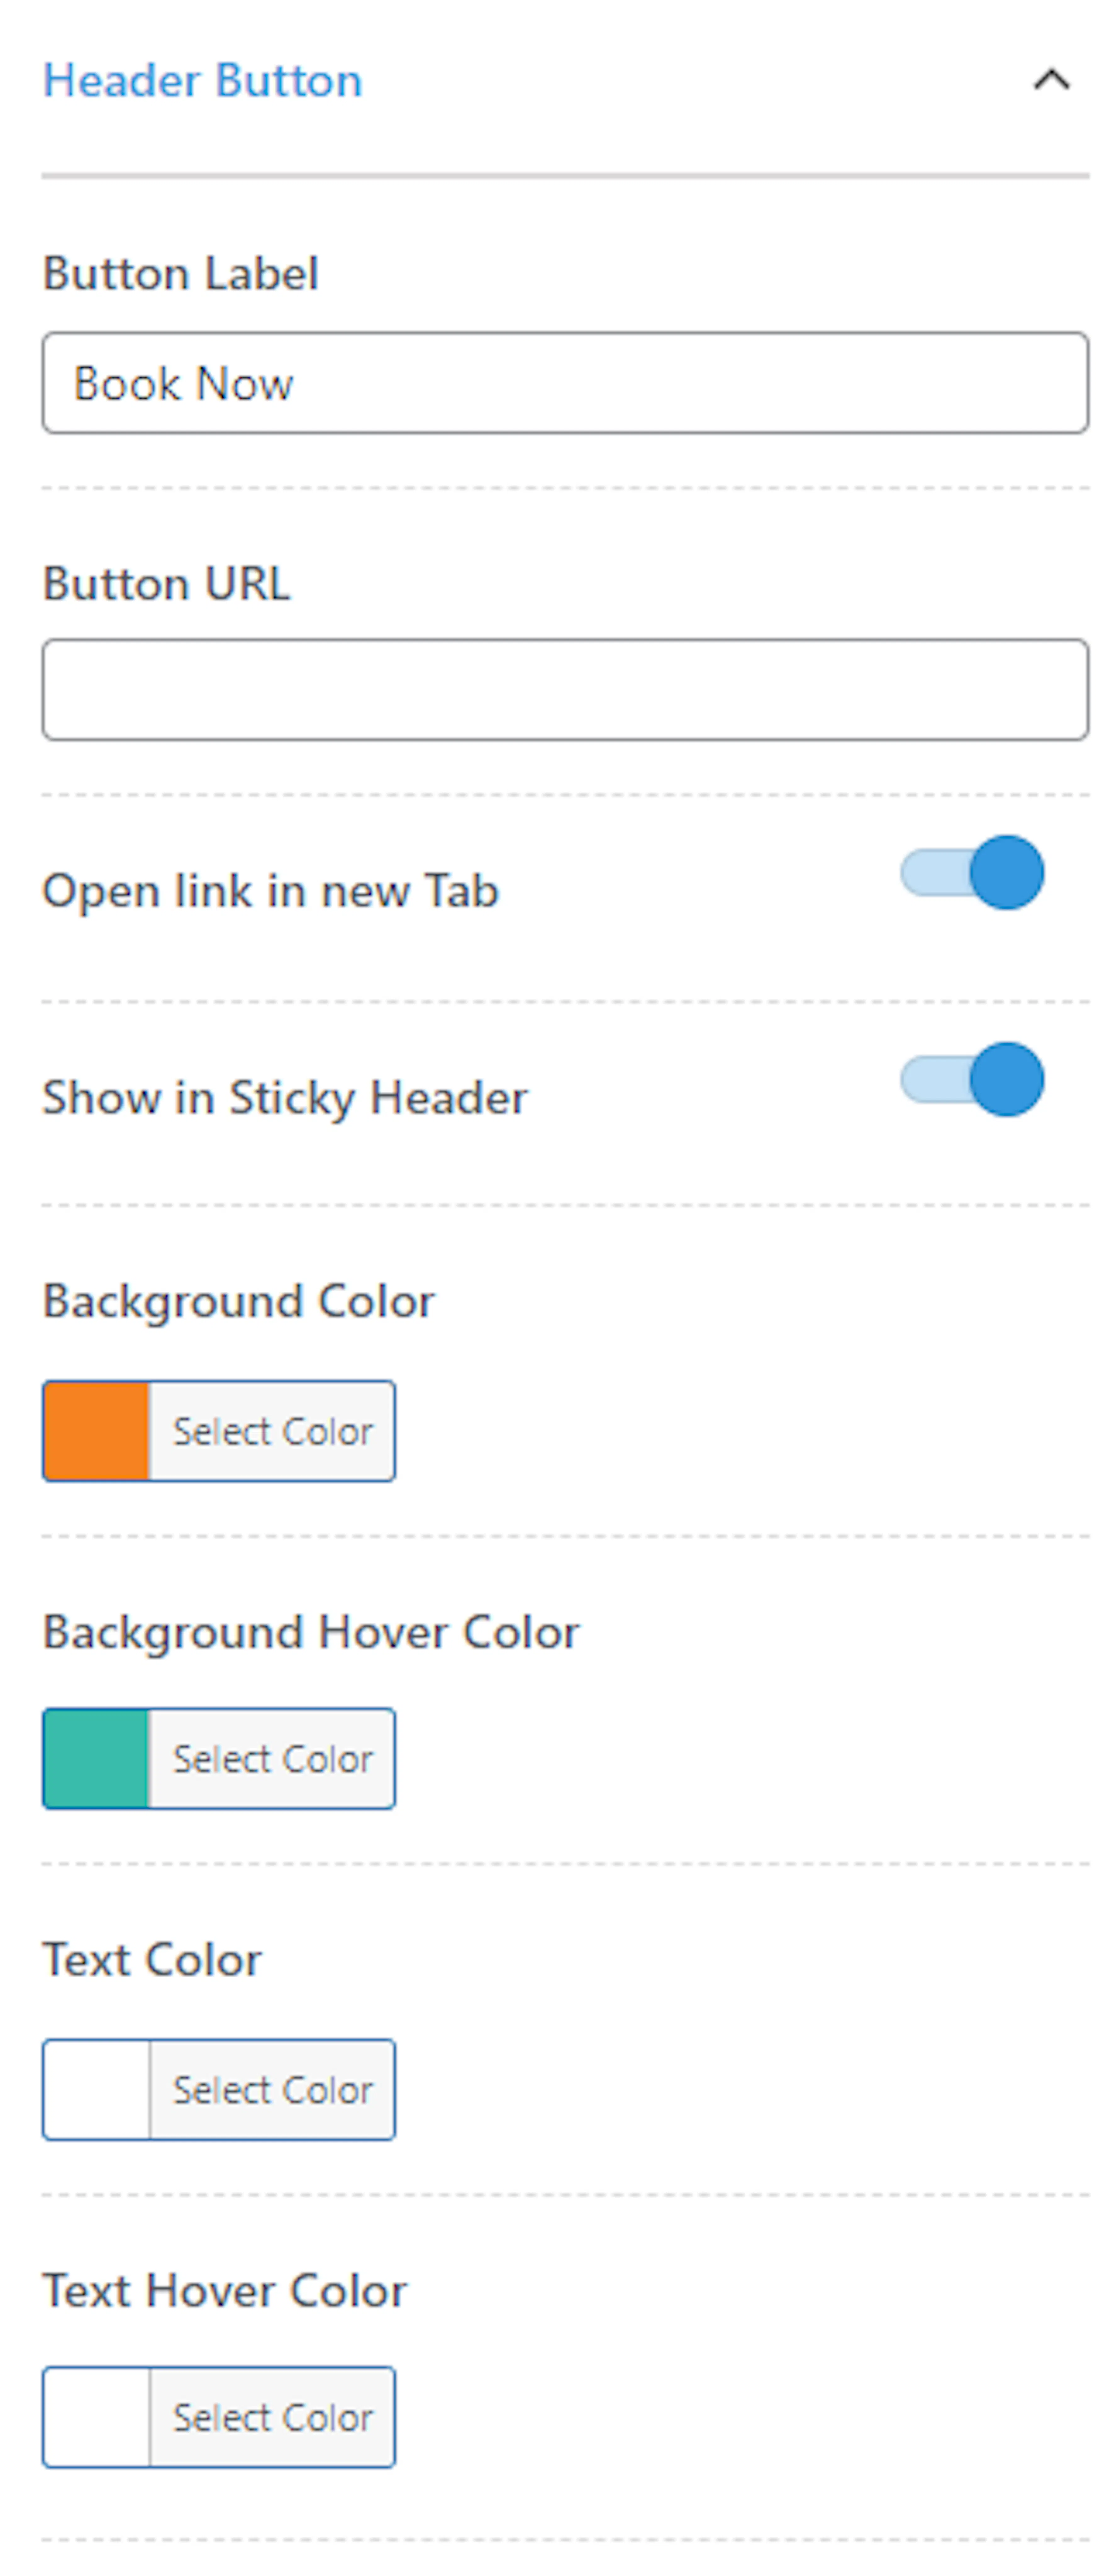
| Setting | What it does |
|---|---|
| Button Label | Sets the words shown on the header button. |
| Button URL | Sets the page that opens when a visitor clicks the button. |
| Open link in new Tab | Opens the linked page in a separate browser tab when enabled. |
| Show in Sticky Header | Shows the button in the sticky header when enabled. |
| Background Color | Sets the button's normal background color. |
| Background Hover Color | Sets the button's background color when a visitor points to it. |
| Text Color | Sets the button's normal text color. |
| Text Hover Color | Sets the button's text color when a visitor points to it. |
Hover means moving a mouse pointer over the button without clicking. The hover color is the color the button changes to at that moment. A different hover color helps travelers recognize that the button is clickable.
Open link in new Tab sends travelers to the linked page in a separate browser tab. The current page stays open, so they do not lose their place while checking your booking page.
Choose a short action for the label, such as Book Now, View Treks, or Plan Your Trip. Link it to the page where travelers can take that action.
Social media settings
Social media icons give travelers another way to find your business and follow updates about your trips.
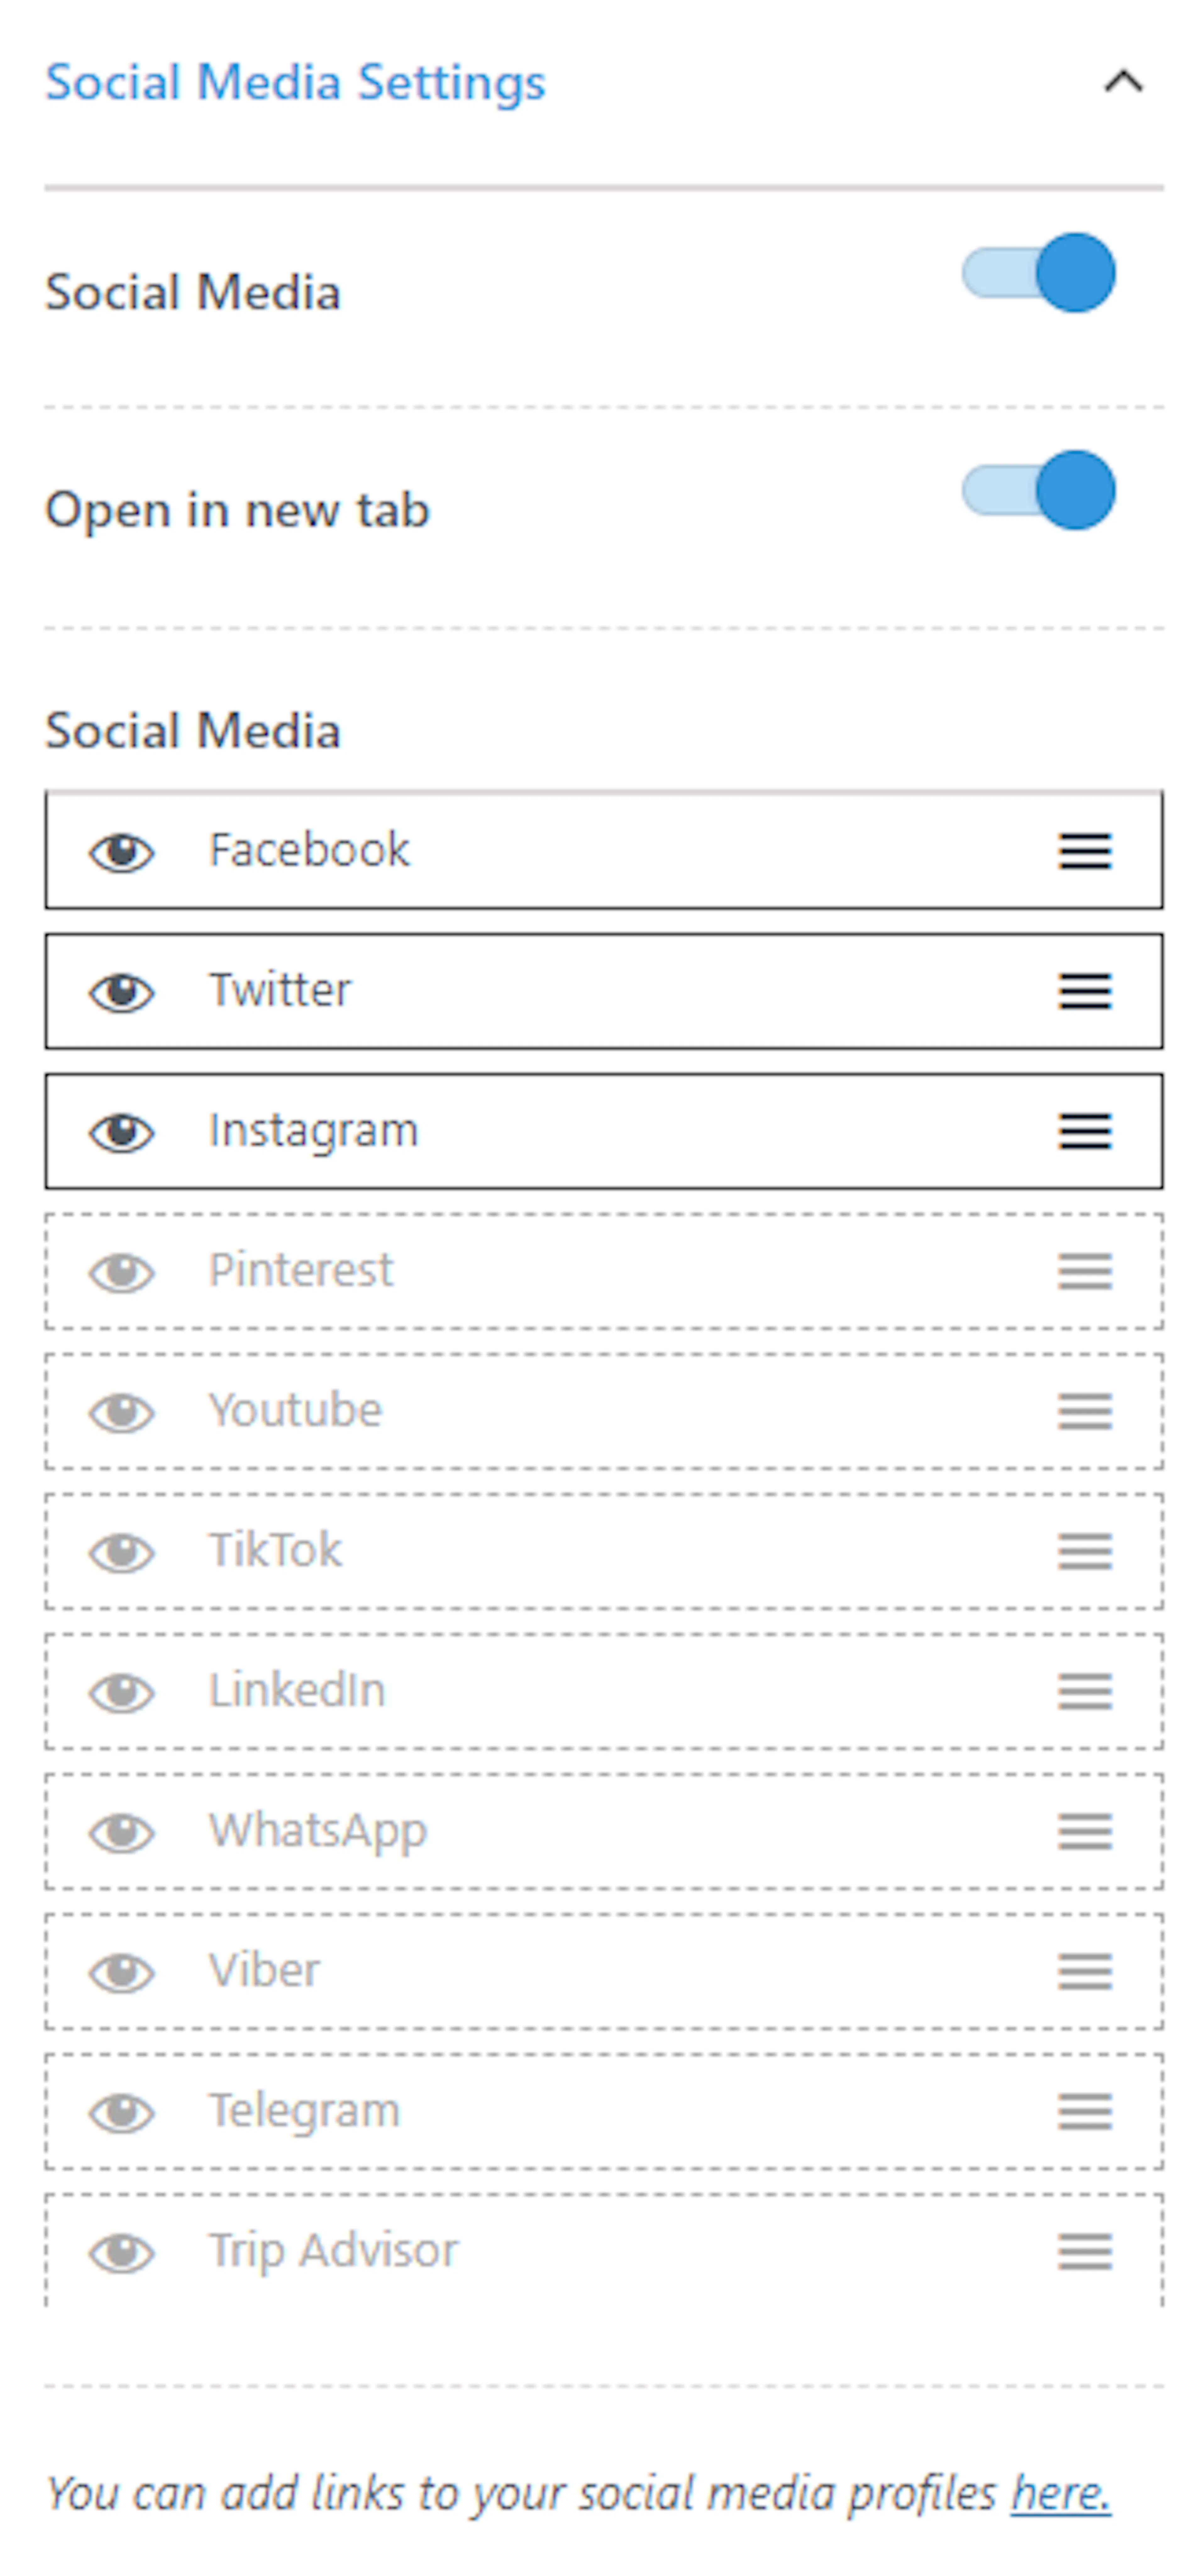
| Setting | What it does |
|---|---|
| Social Media | Shows social media icons in the header when enabled. |
| Open in new tab | Opens a social media page in a separate browser tab when enabled. |
| Social Media Icons | Shows or hides each social media icon when you click its eye icon. |
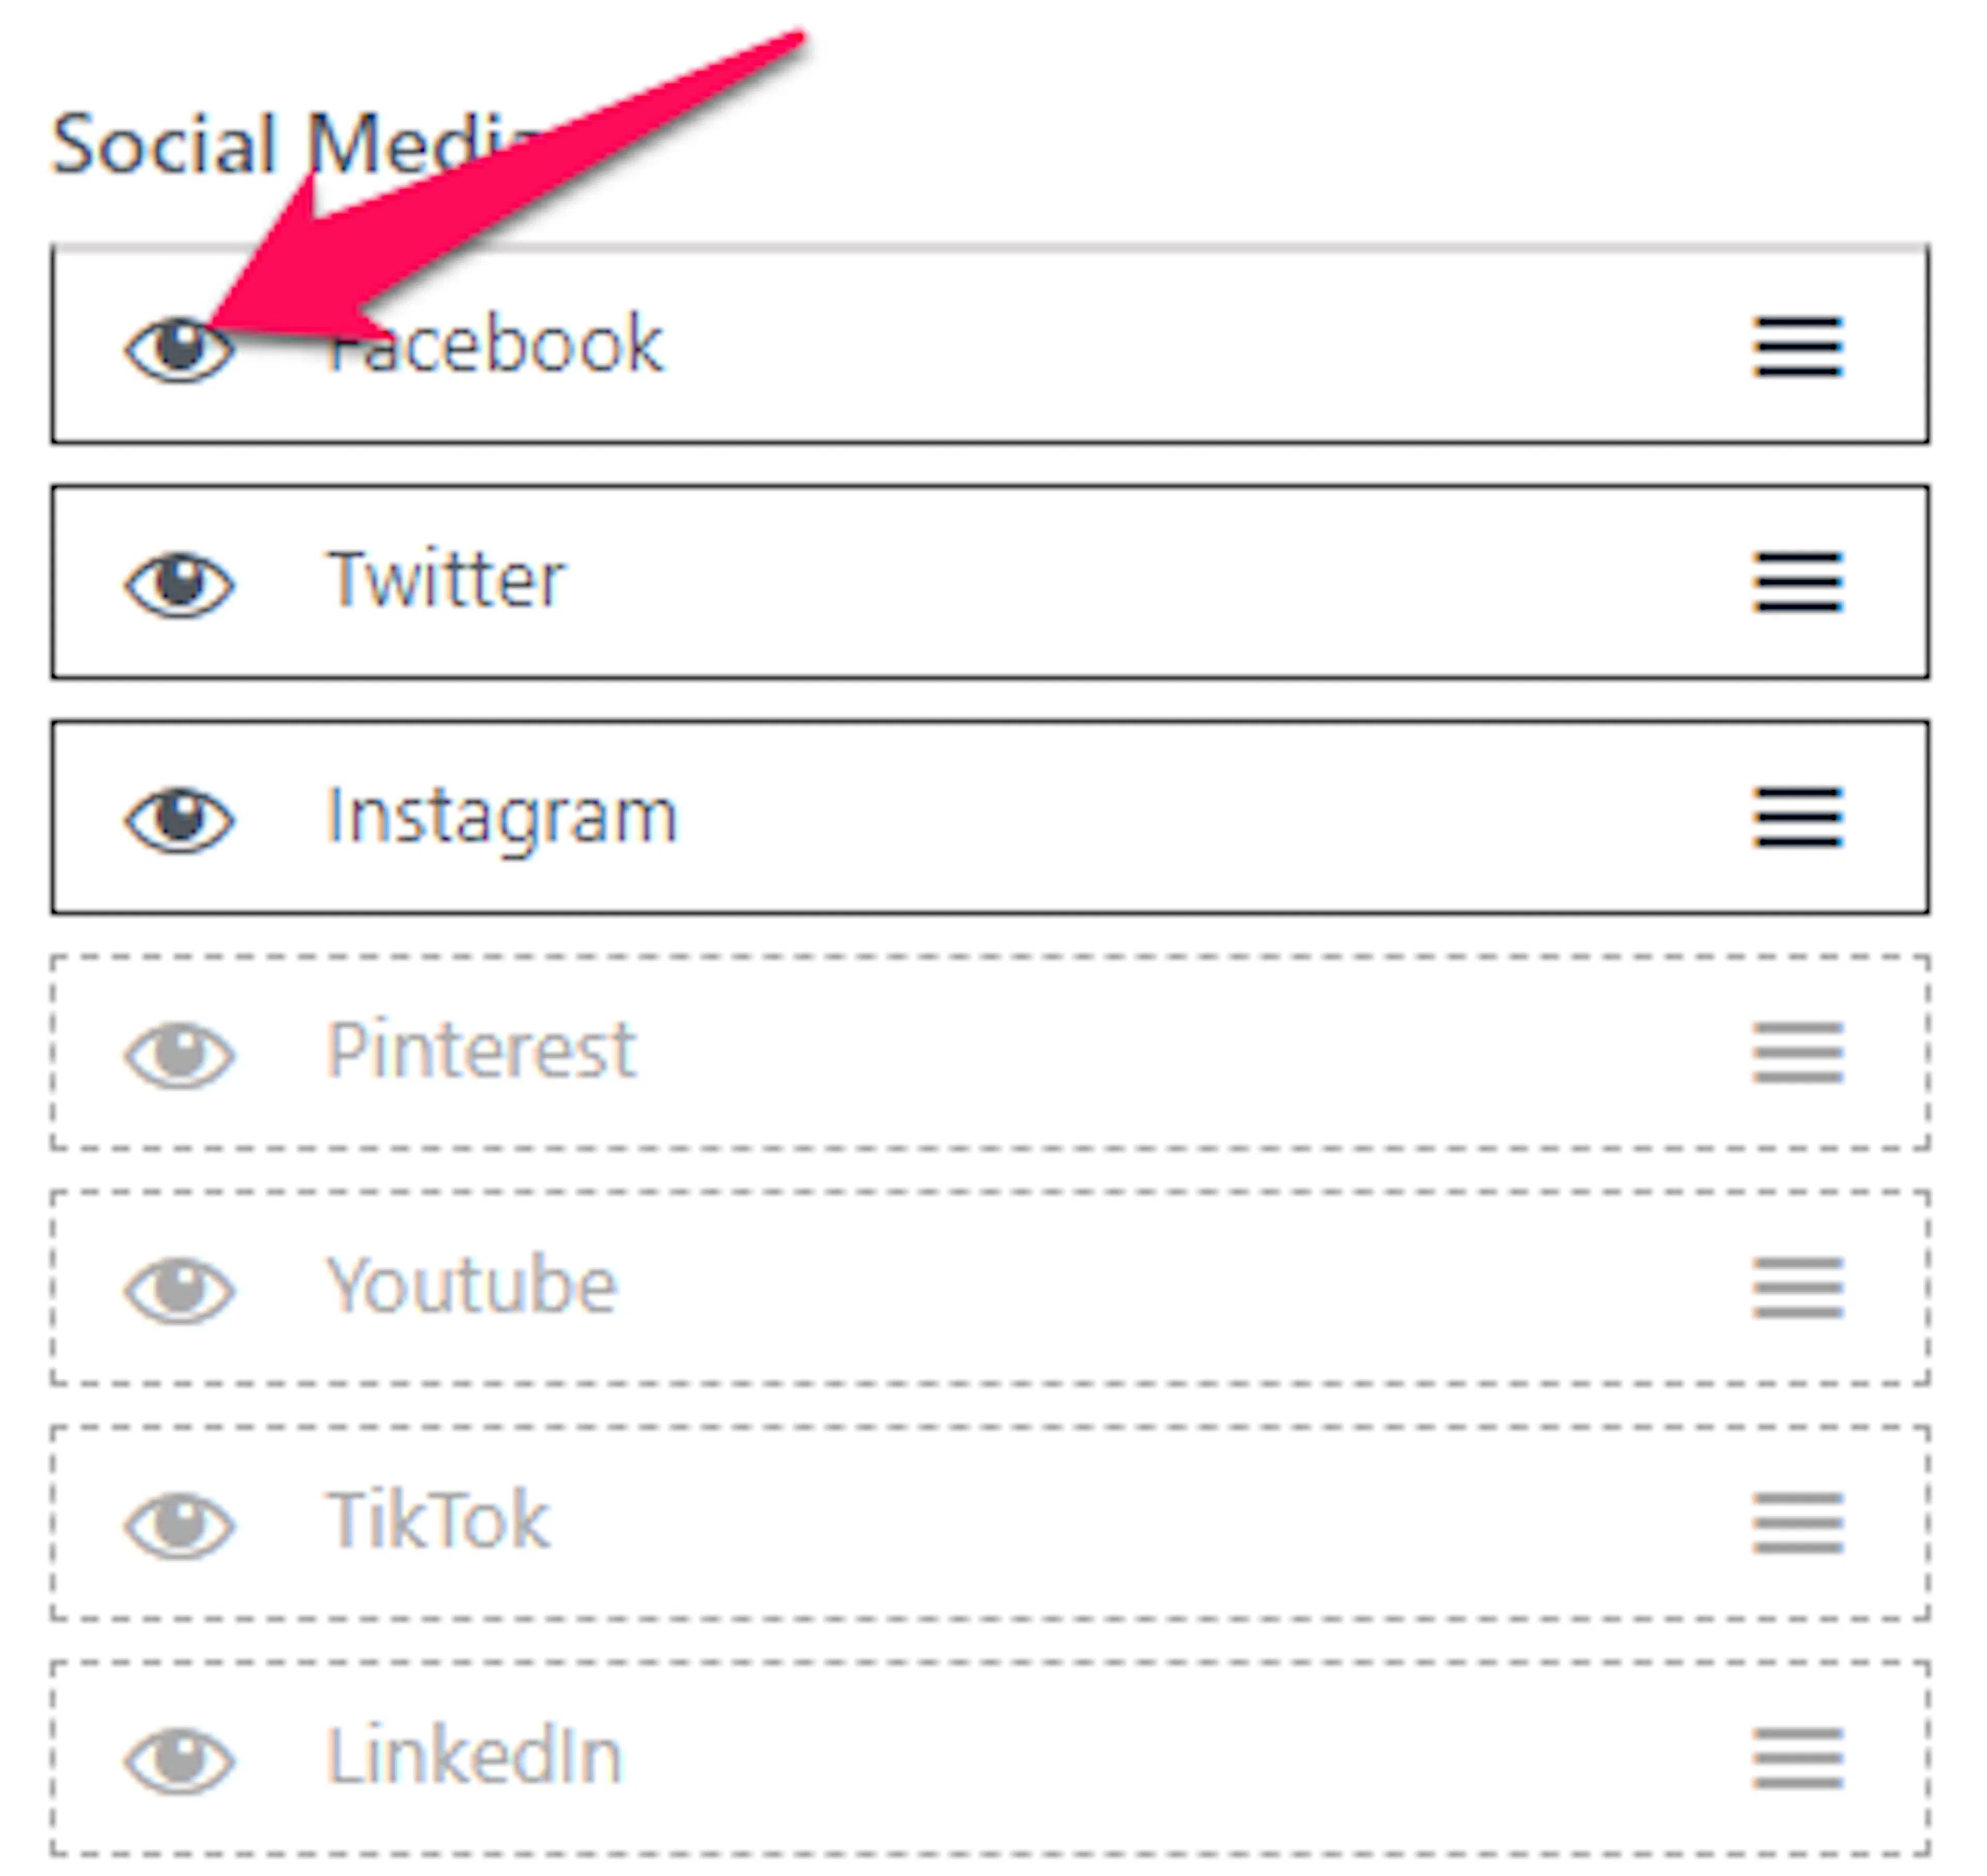
Social media icons link automatically to the accounts you entered under the Social Networks setting in General Settings. You do not need to enter the URLs again here.
Click the eye icon beside a social network to show or hide that icon in the header. For example, you can show Instagram for trek photos and hide networks where your business does not have an active account.
Your social links are now controlled from one place. Next, check how the header works for travelers using phones and tablets.
Mobile header settings
These settings control what travelers see in the header on phones and tablets. Many travelers browse trips from their phones, so a clear mobile menu helps them find information quickly.
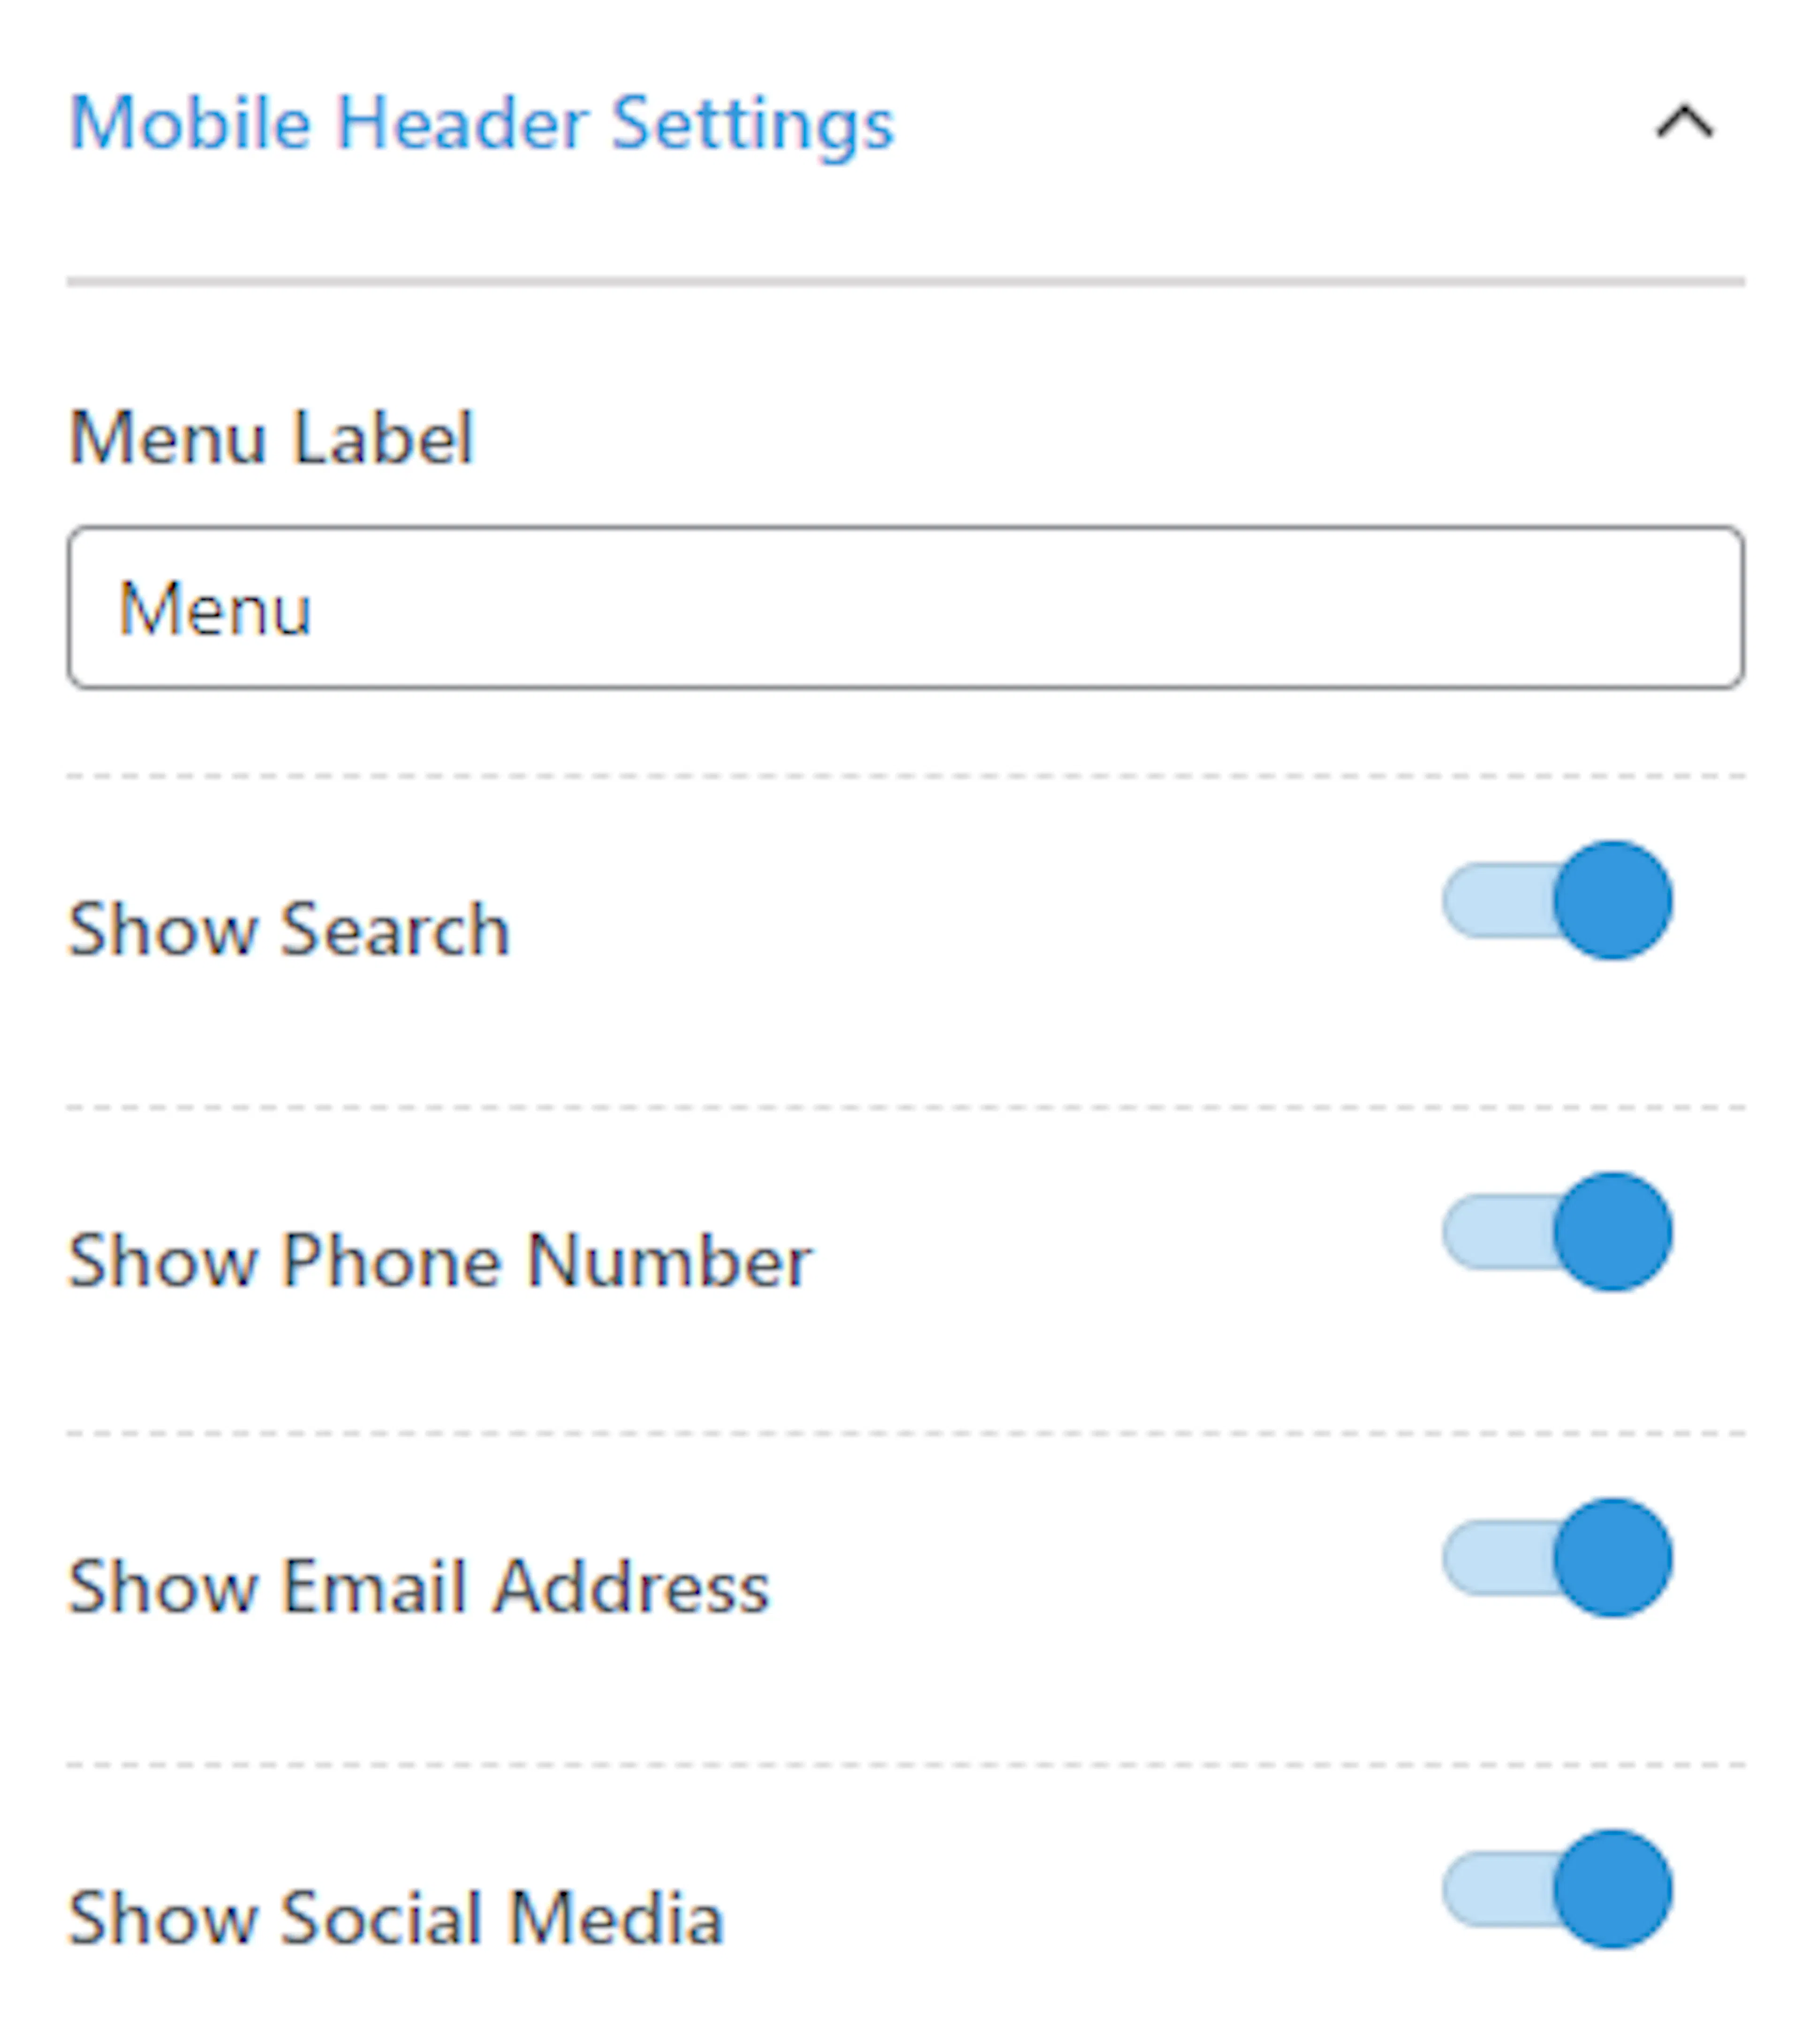
| Setting | What it does |
|---|---|
| Menu Label | Sets the text on the button that opens the mobile navigation menu. |
| Show Search | Shows the search form in the mobile view when enabled. |
| Show Phone Number | Shows your phone number inside the mobile menu when enabled. |
| Show Email Address | Shows your email address inside the mobile menu when enabled. |
| Show Social Media | Shows social media icons inside the mobile menu when enabled. |
The mobile menu collapses into a button that travelers tap to open. For example, a traveler checking your day tours during a lunch break can tap that button to browse your destinations. The Menu Label setting controls the words shown on the button.
Review the mobile preview before you finish. When your header looks right on both desktop and mobile, click Publish at the top of the Customizer to save your changes. You can return to these settings anytime to make adjustments.
If you're still stuck or have a question we didn't cover, our support team is happy to help. Reach out at our support page and we'll get you sorted.
\
Next step
Footer Settings
Configure your site's footer layout, widgets, and copyright text.