

General Settings
Set up your Travel Monster site's layout, colors, fonts, buttons, and other core look-and-feel options so your tour website matches your brand.
What General Settings controls
General Settings is where you shape the overall look and feel of your Travel Monster site. It covers the big-picture stuff: how wide your pages are, what colors appear across your site, which fonts your text uses, and how buttons look.
Think of it as the foundation. Once these are set, the more specific pages (like Header Settings and Footer Settings) build on top of them. So it's worth spending a little time here first.
Getting to General Settings
You'll need the Travel Monster theme active on your WordPress site before these settings are available. If you haven't installed it yet, start with the Install Travel Monster Theme guide.
All of the settings on this page live in the WordPress Customizer. The Customizer is a live preview tool. It lets you see changes on your site before you publish them.
Open your WordPress dashboard
Log in to your WordPress dashboard. This is the admin area of your site. You can usually reach it by adding /wp-admin to your website address.
Open the Customizer
On the left sidebar of your dashboard, click Appearance, then click Customize. This opens the Customizer screen with your site visible on the right and settings on the left.
Open General Settings
In the left panel, click General Settings. You may need to scroll down to find it. This opens the settings panel shown below.
Once you're in, you'll see a list of sections. Each one is described below. Work through them in any order you like. You can always come back and adjust things later.
Container settings
A container is the box that holds all the content on your pages. It determines how wide your text, images, and trip listings stretch across the screen.
Say you have a page showing your 7-day Everest Base Camp trek. A narrower container keeps the text focused in the center. A wider container spreads it out to fill more of the screen. This setting controls that.
You'll find these options under General Settings > General > Container.
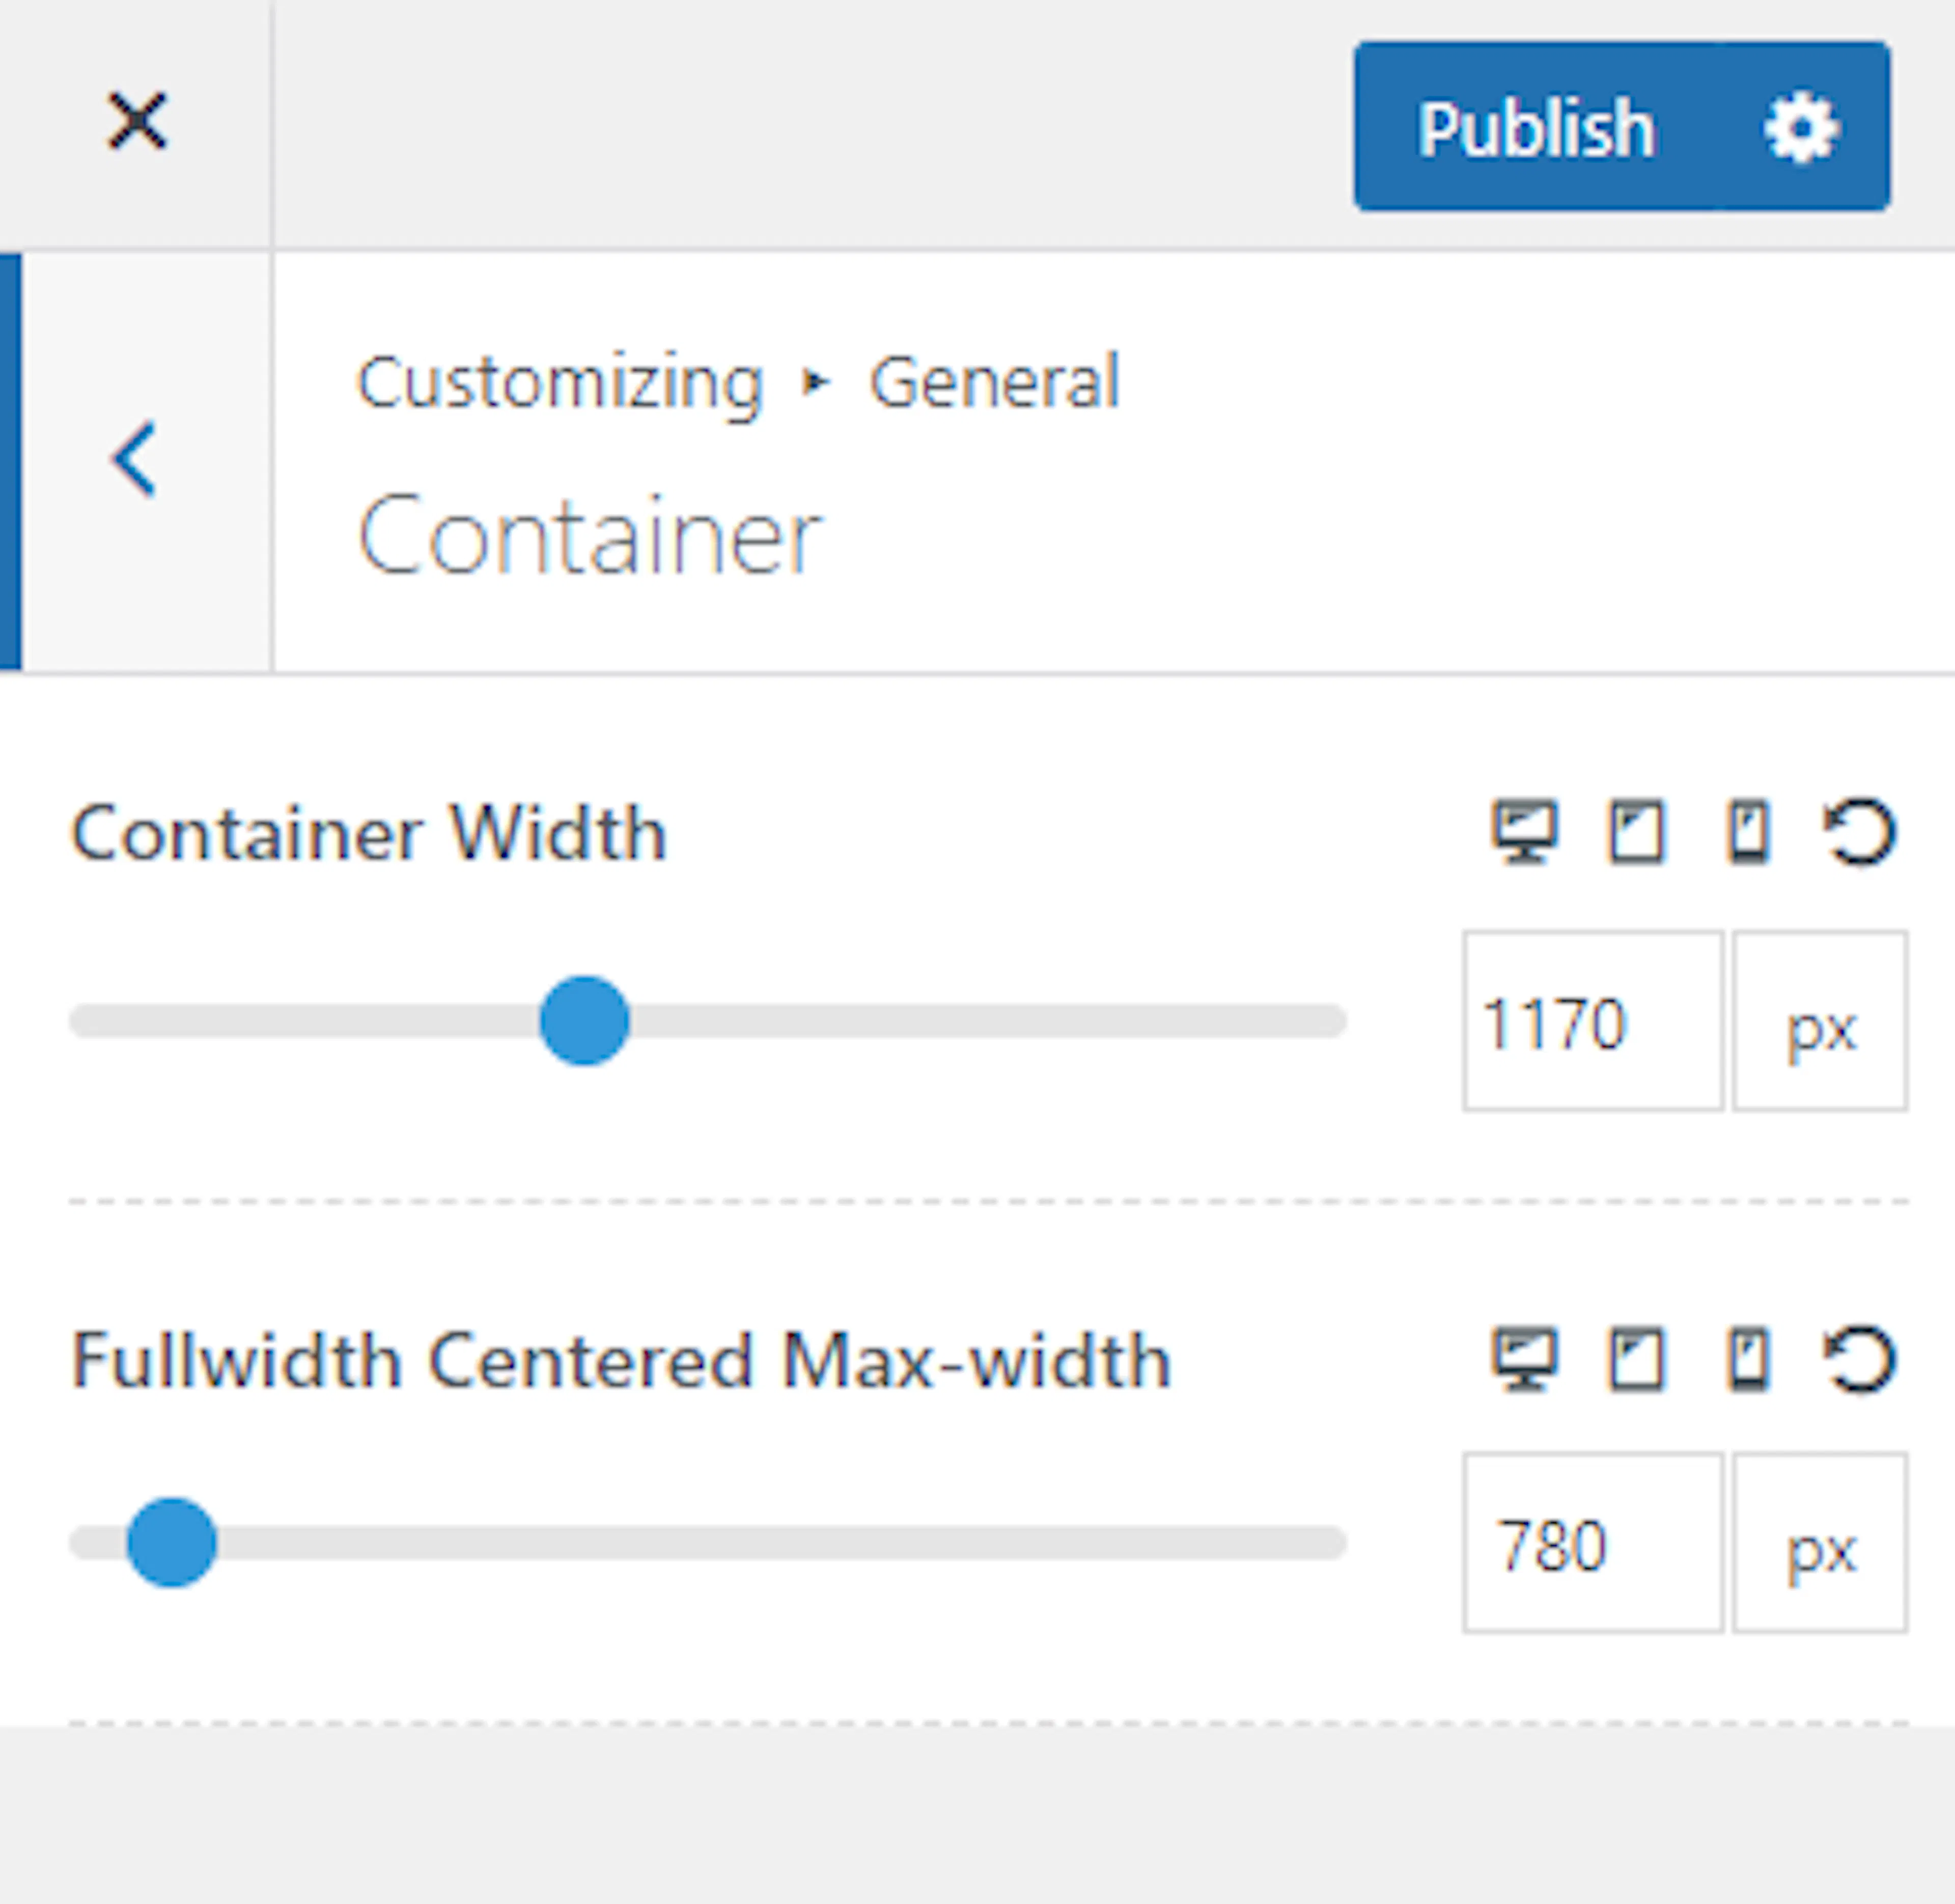
| Setting | What it does |
|---|---|
| Container Width | Sets the site container's width for different devices. |
| Fullwidth Centered Max-width | Sets the container width used for a full-width centered layout. |
If you're not sure what width to pick, the default settings look good on most tour websites. You can always adjust later.
Sidebar settings
A sidebar is the narrow column that appears alongside your main content. It's a place where you can add things like a search box, a list of popular trips, or contact details. These small pieces of content are called widgets. Widgets are blocks you can add to your sidebar to show different information.
You'll find these options under General Settings > General > Sidebar.
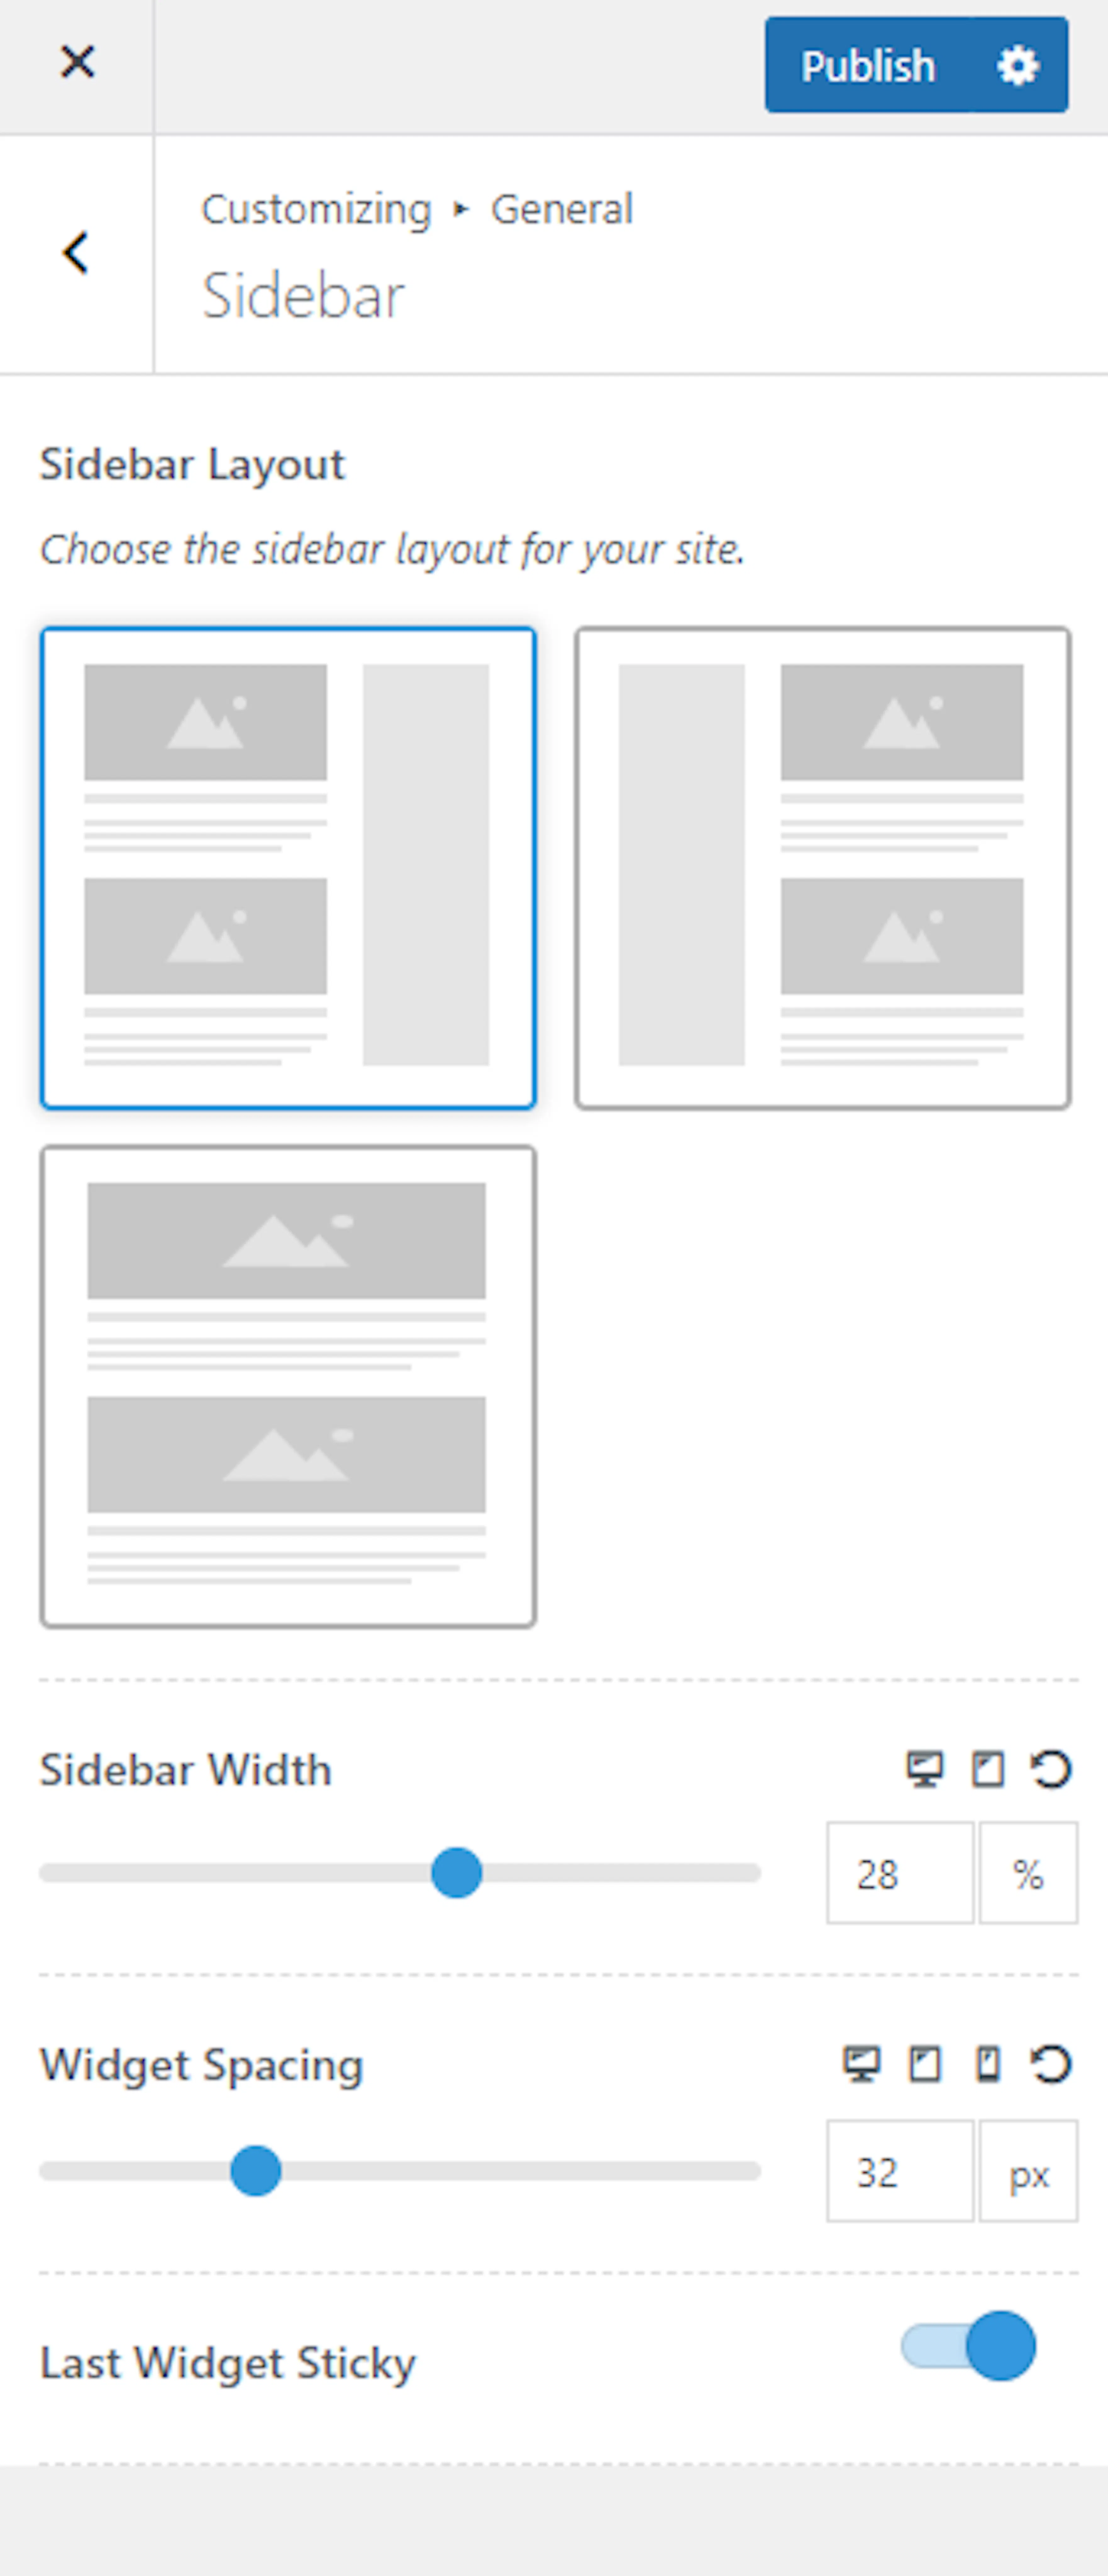
| Setting | What it does |
|---|---|
| Sidebar Layout | Chooses whether your site layout includes a sidebar. |
| Sidebar Width | Sets the sidebar's width. |
| Widget Spacing | Sets the spacing between sidebar widgets. |
| Last Widget Sticky | Makes the last widget in the sidebar stick in place as visitors scroll, when enabled. |
The Last Widget Sticky option is handy if you have an important widget at the bottom of your sidebar. For example, if you put a "Book Now" button widget last, it stays visible even as travelers scroll down a long trip page.
Button settings
Buttons are the clickable elements on your site. Things like "Book Now," "Check Availability," or "Enquire" are all buttons. These settings control how every button on your site looks.
You'll find these options under General Settings > General > Button.
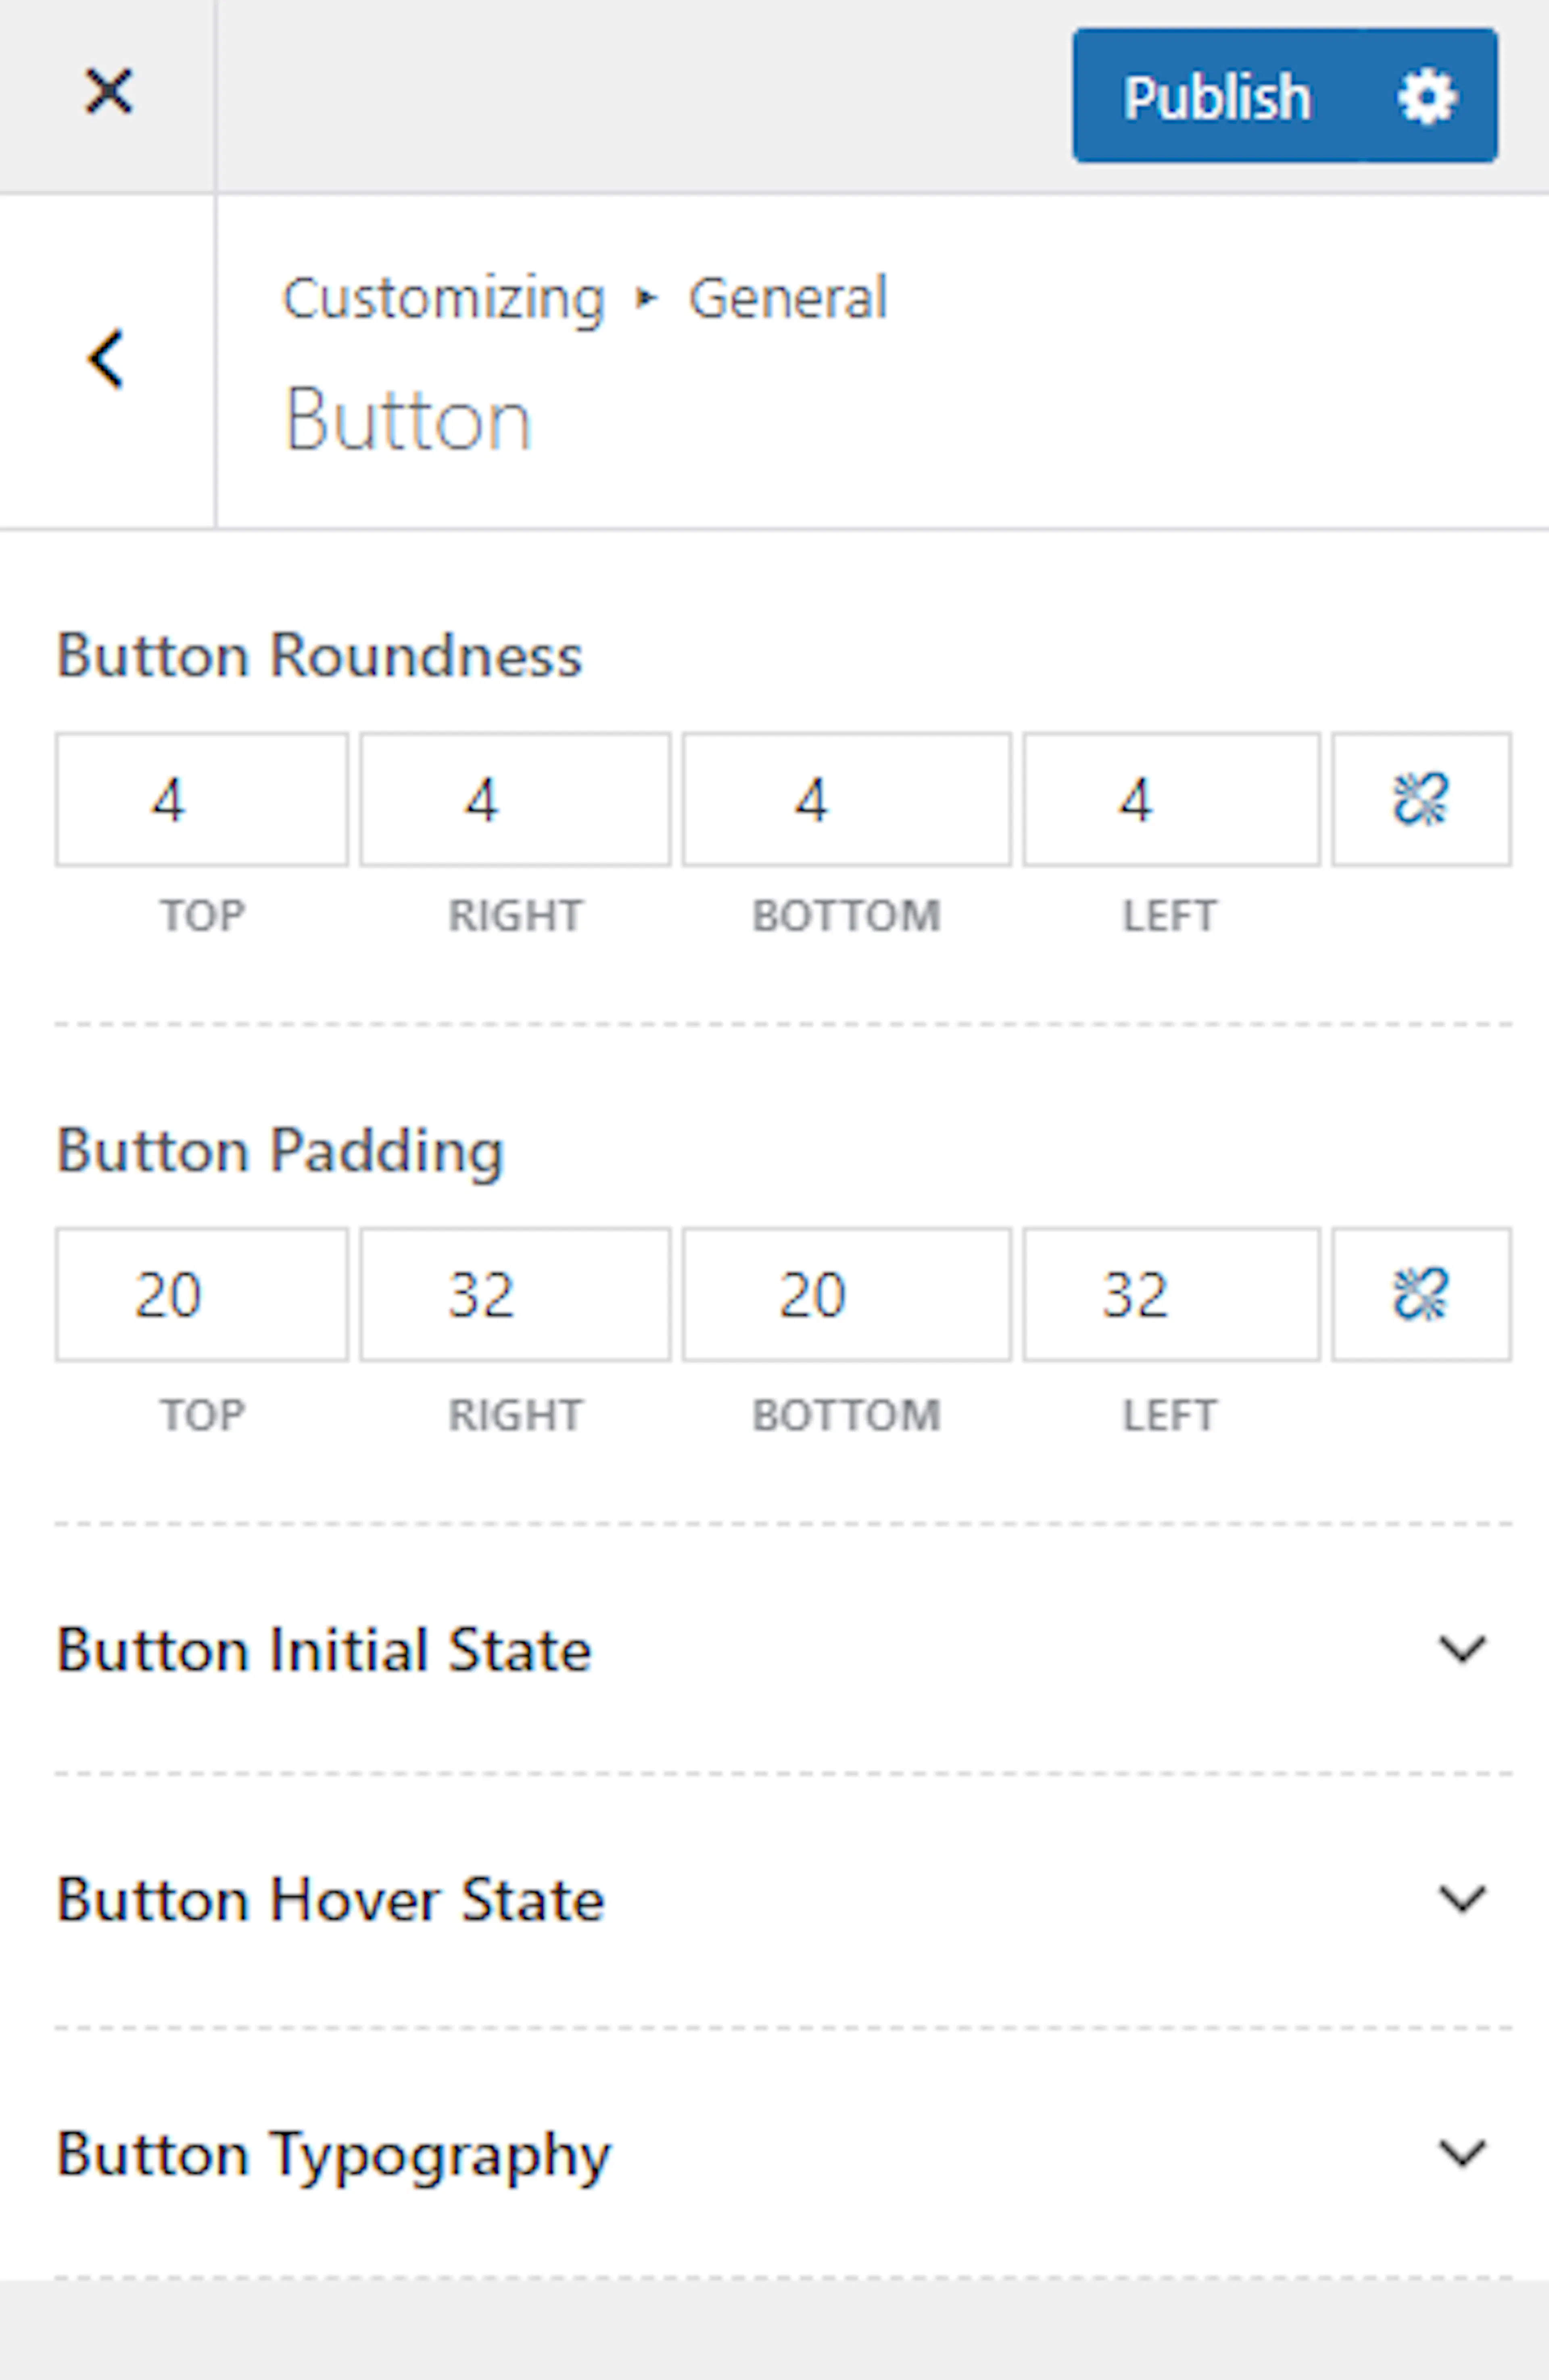
| Setting | What it does |
|---|---|
| Button Roundness | Sets the button corner radius. |
| Button Padding | Sets the button's internal padding. |
| Button Initial State | Sets the text, background, and border color for a button before it's interacted with. |
| Button Hover State | Sets the text, background, and border color for a button when hovered. |
| Button Typography | Sets the typography used for button text. |
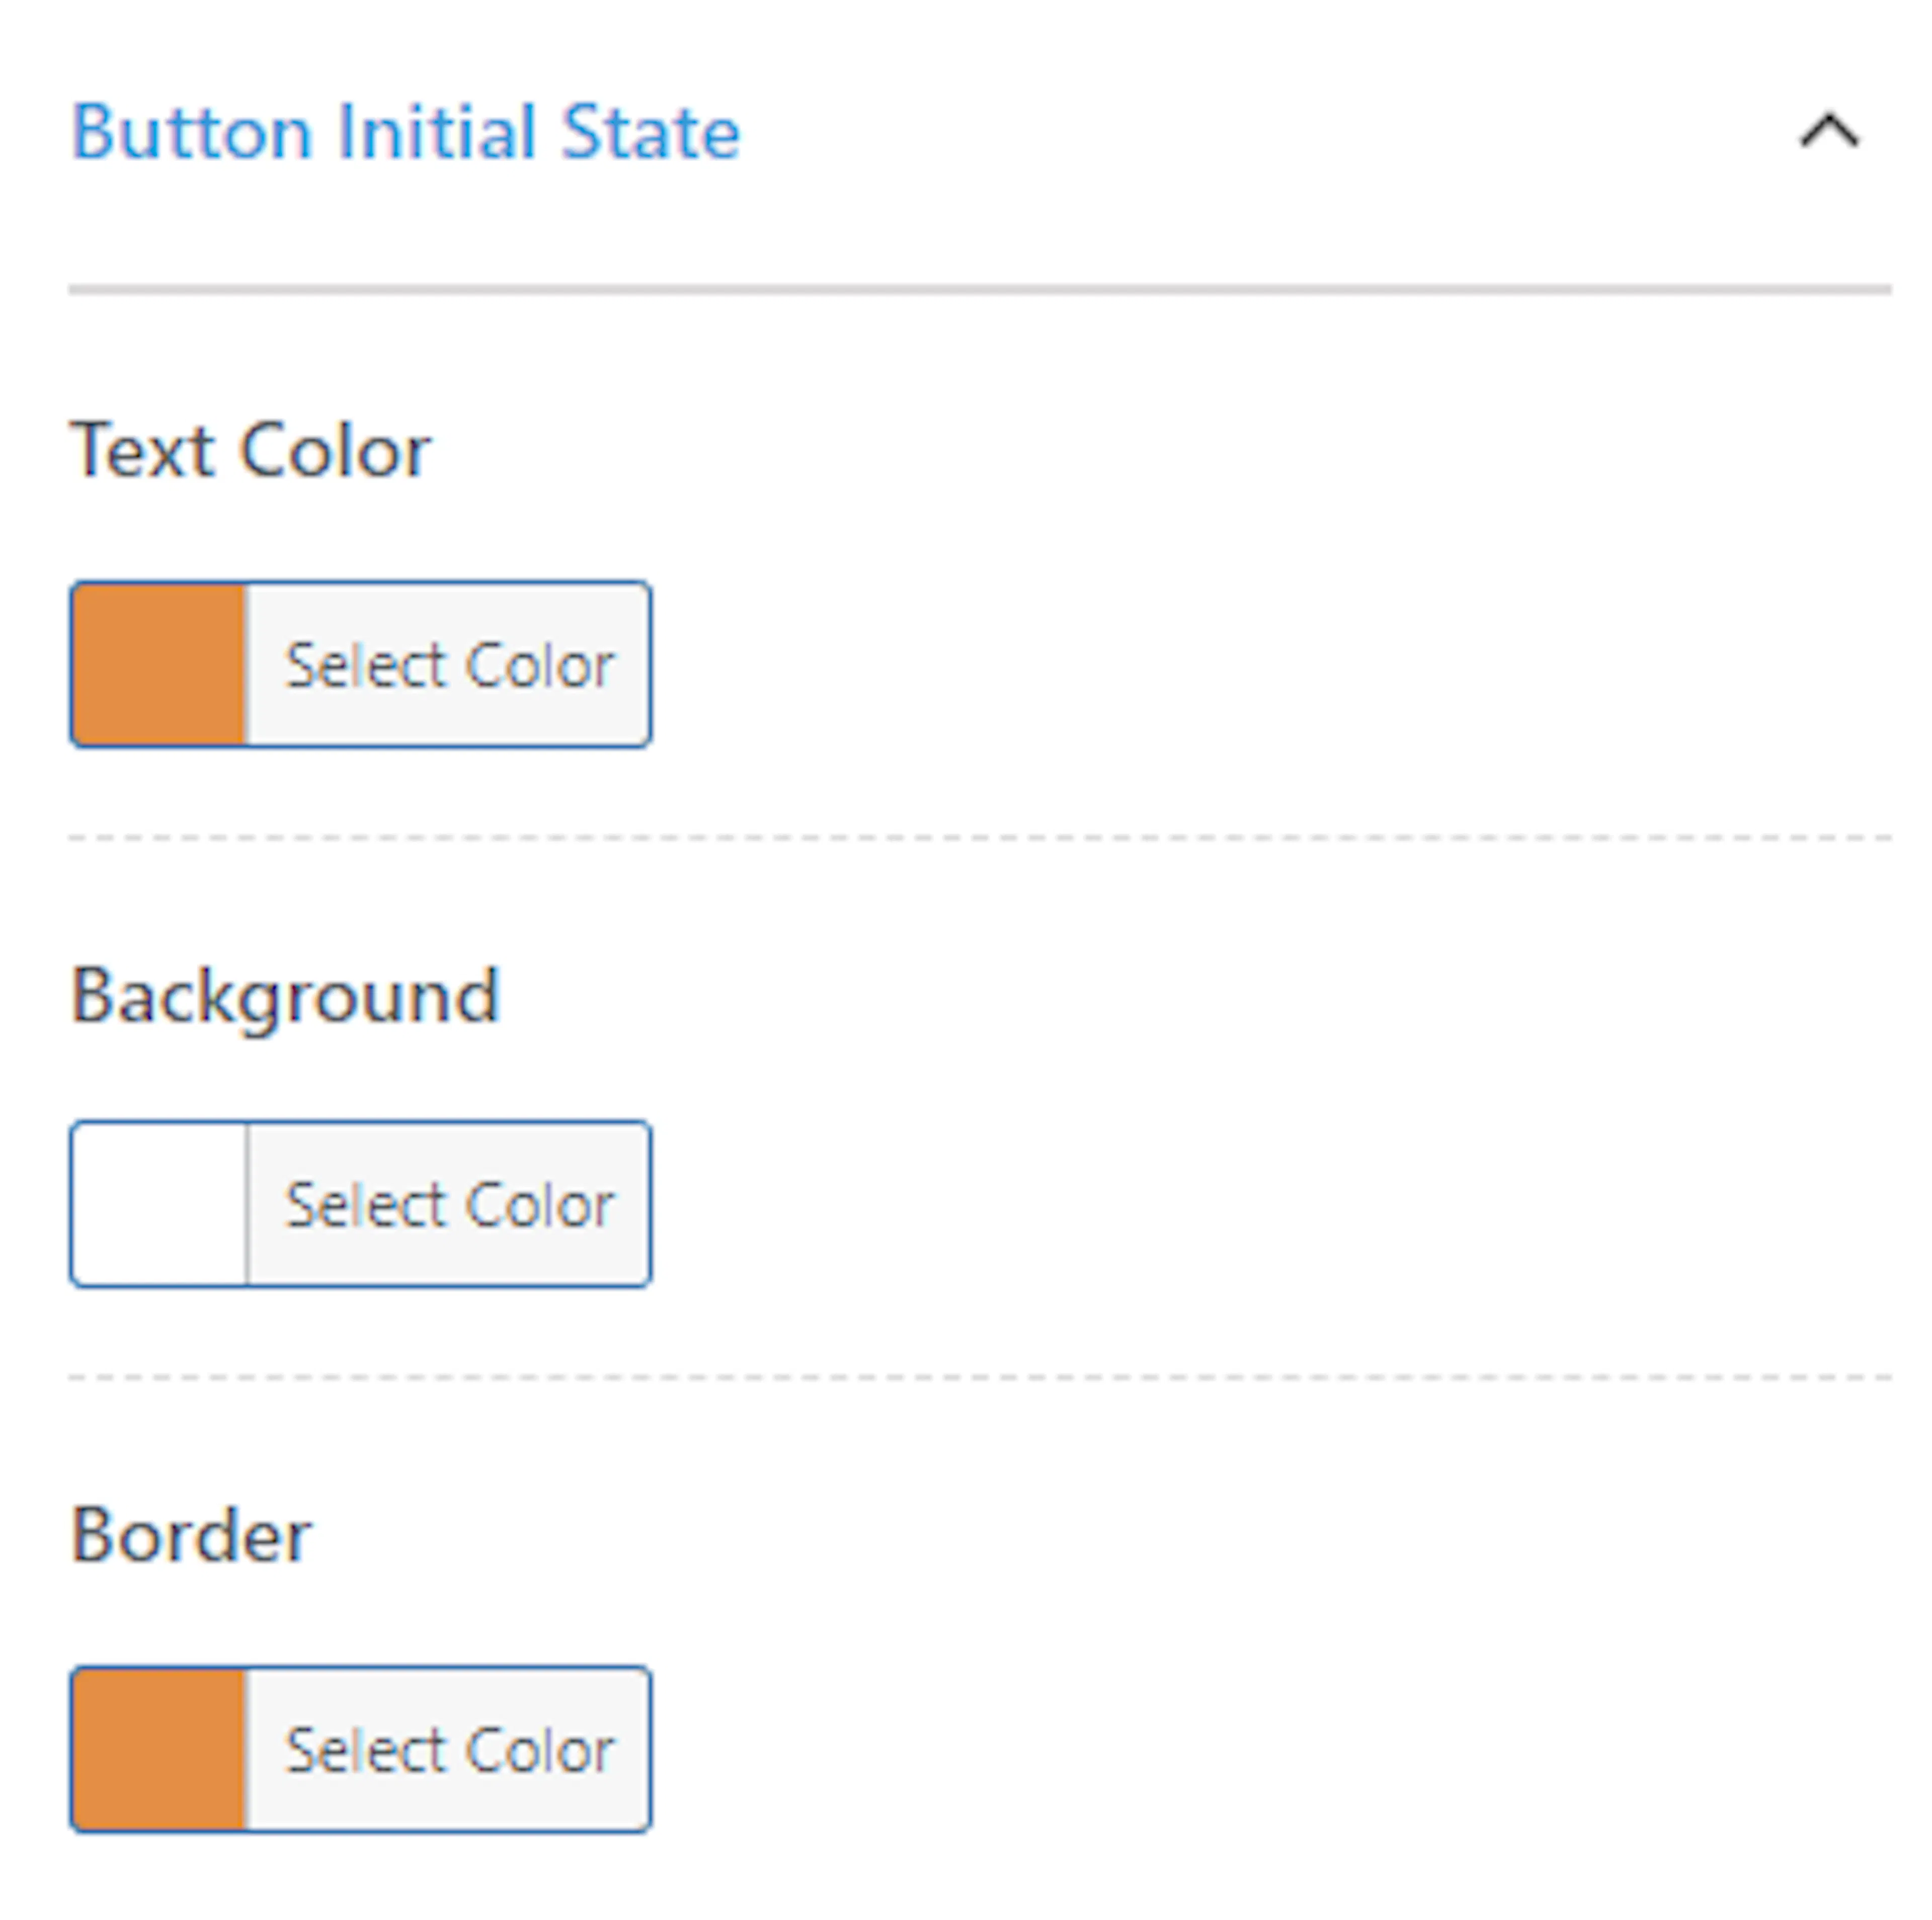
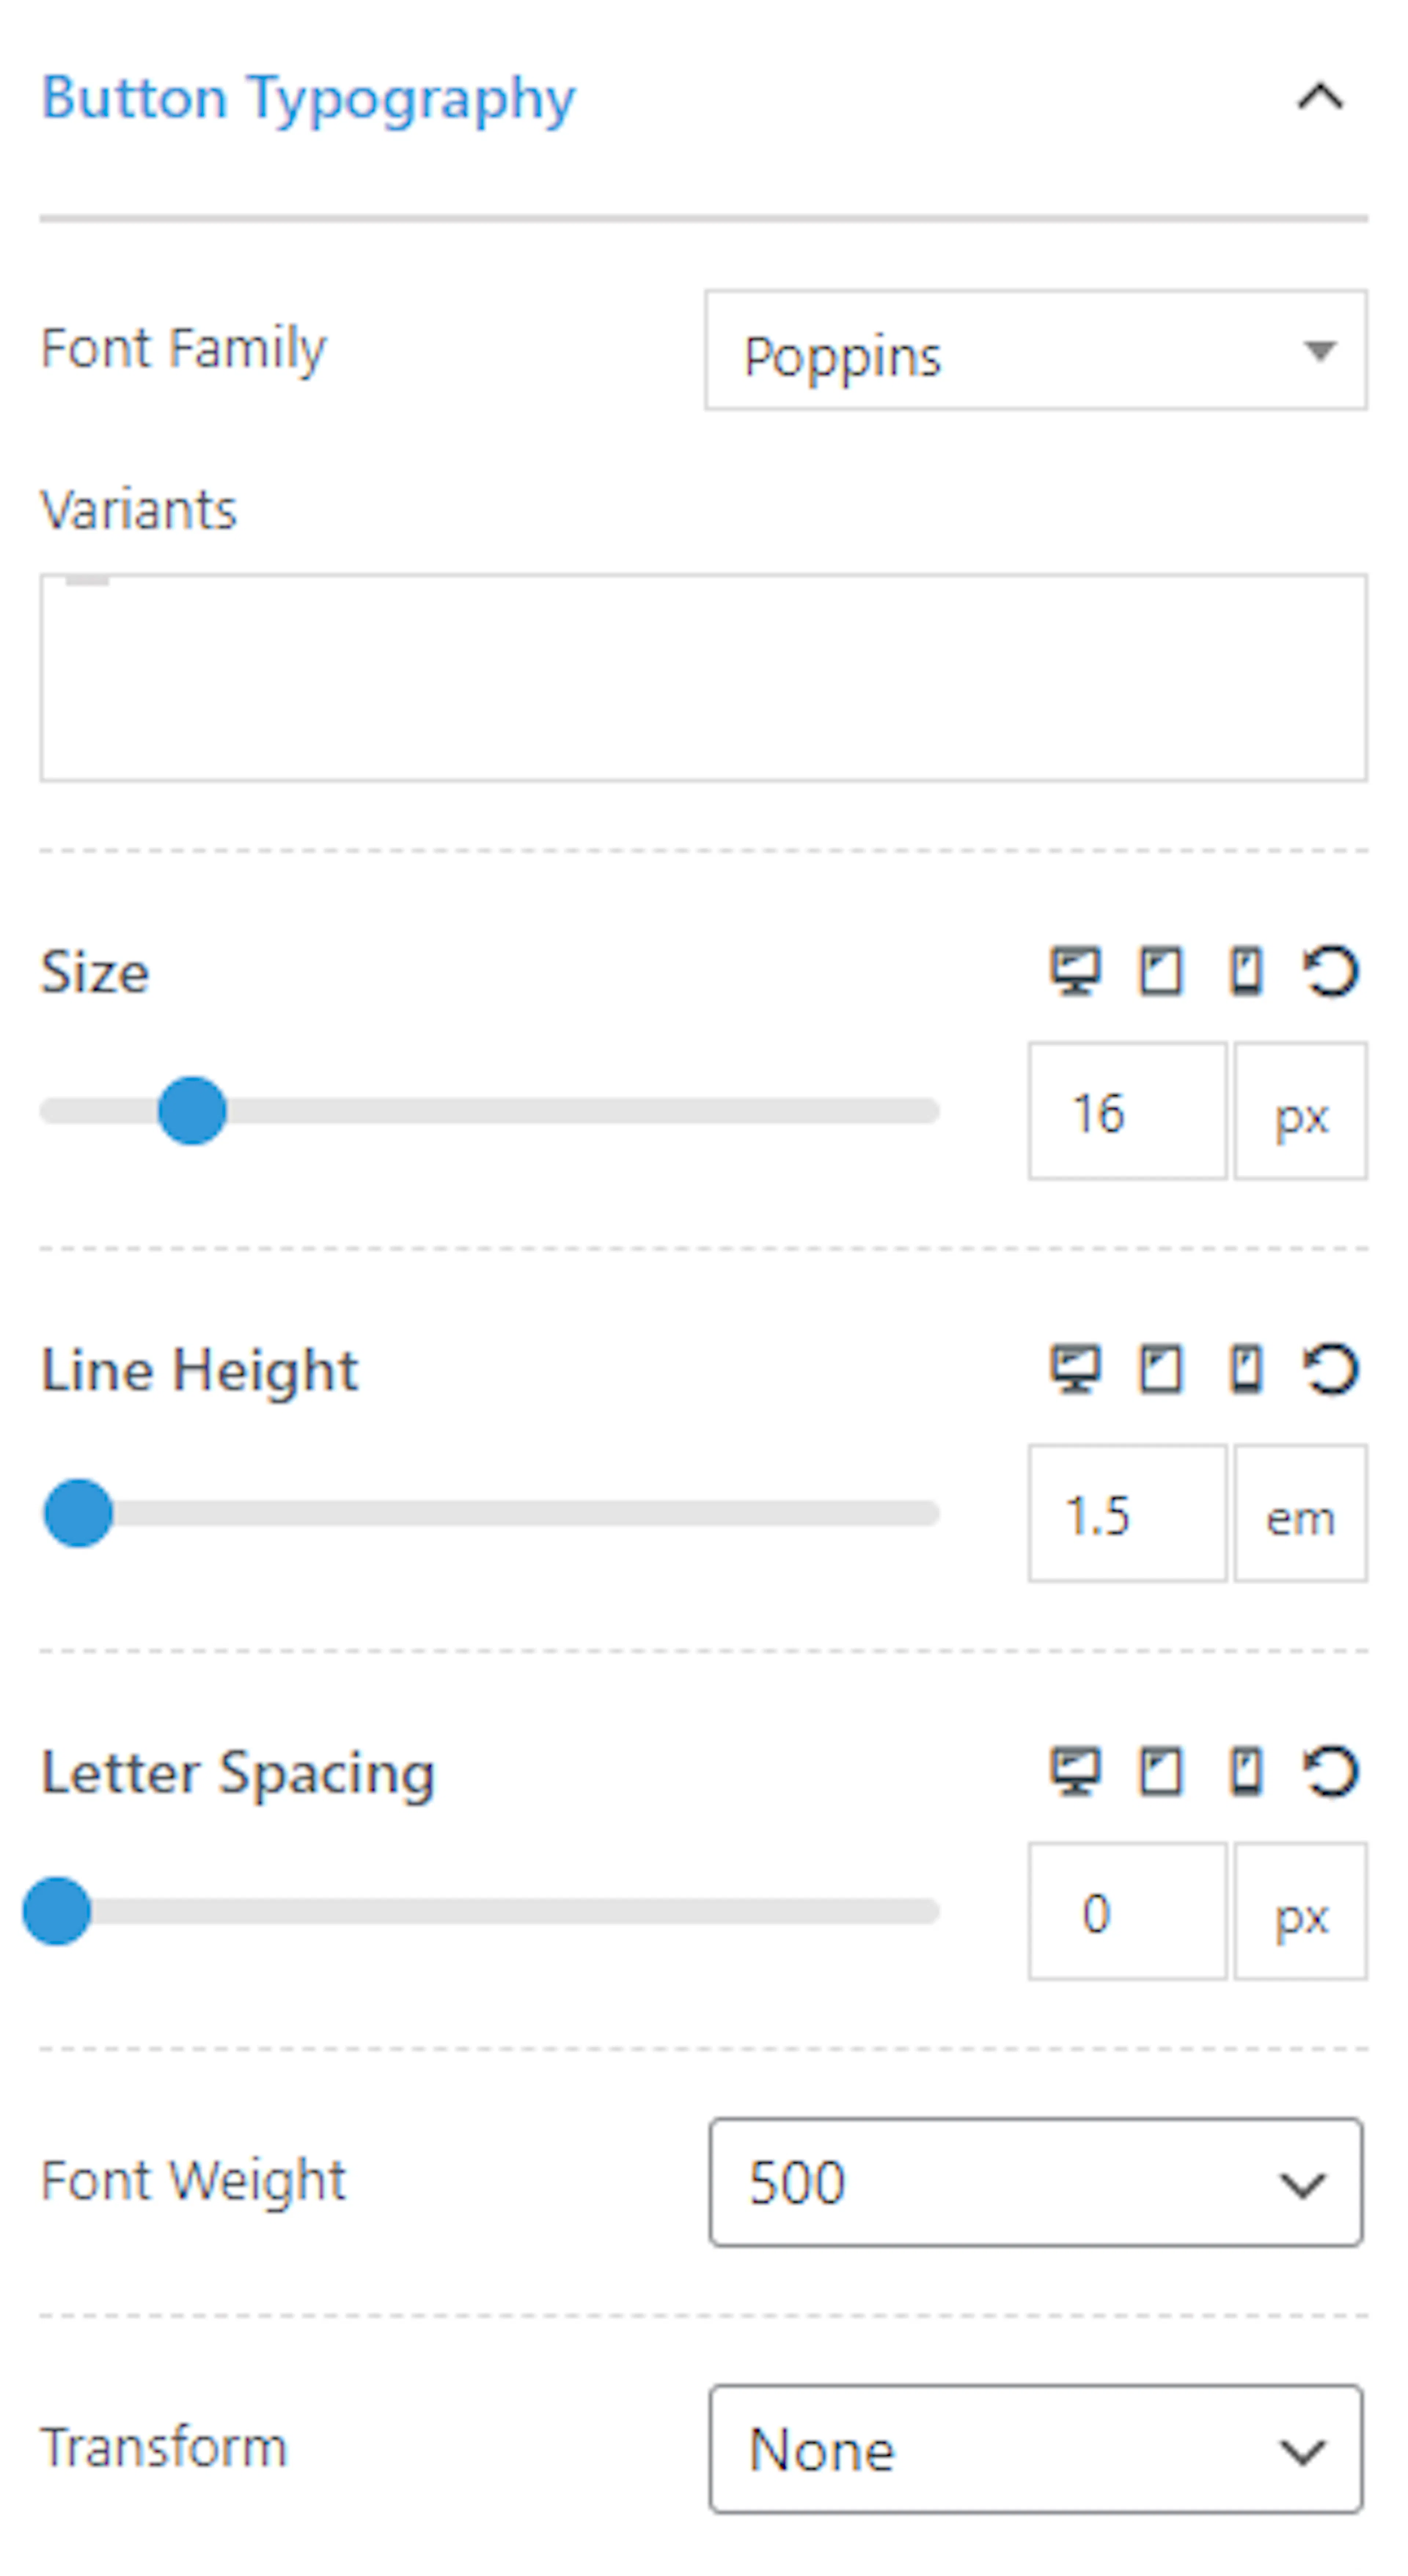
The Initial State is how the button looks when a visitor first sees it. The Hover State is how it changes when they move their mouse over it. A slight color change on hover is a nice touch. It tells travelers the button is clickable.
Scroll to top settings
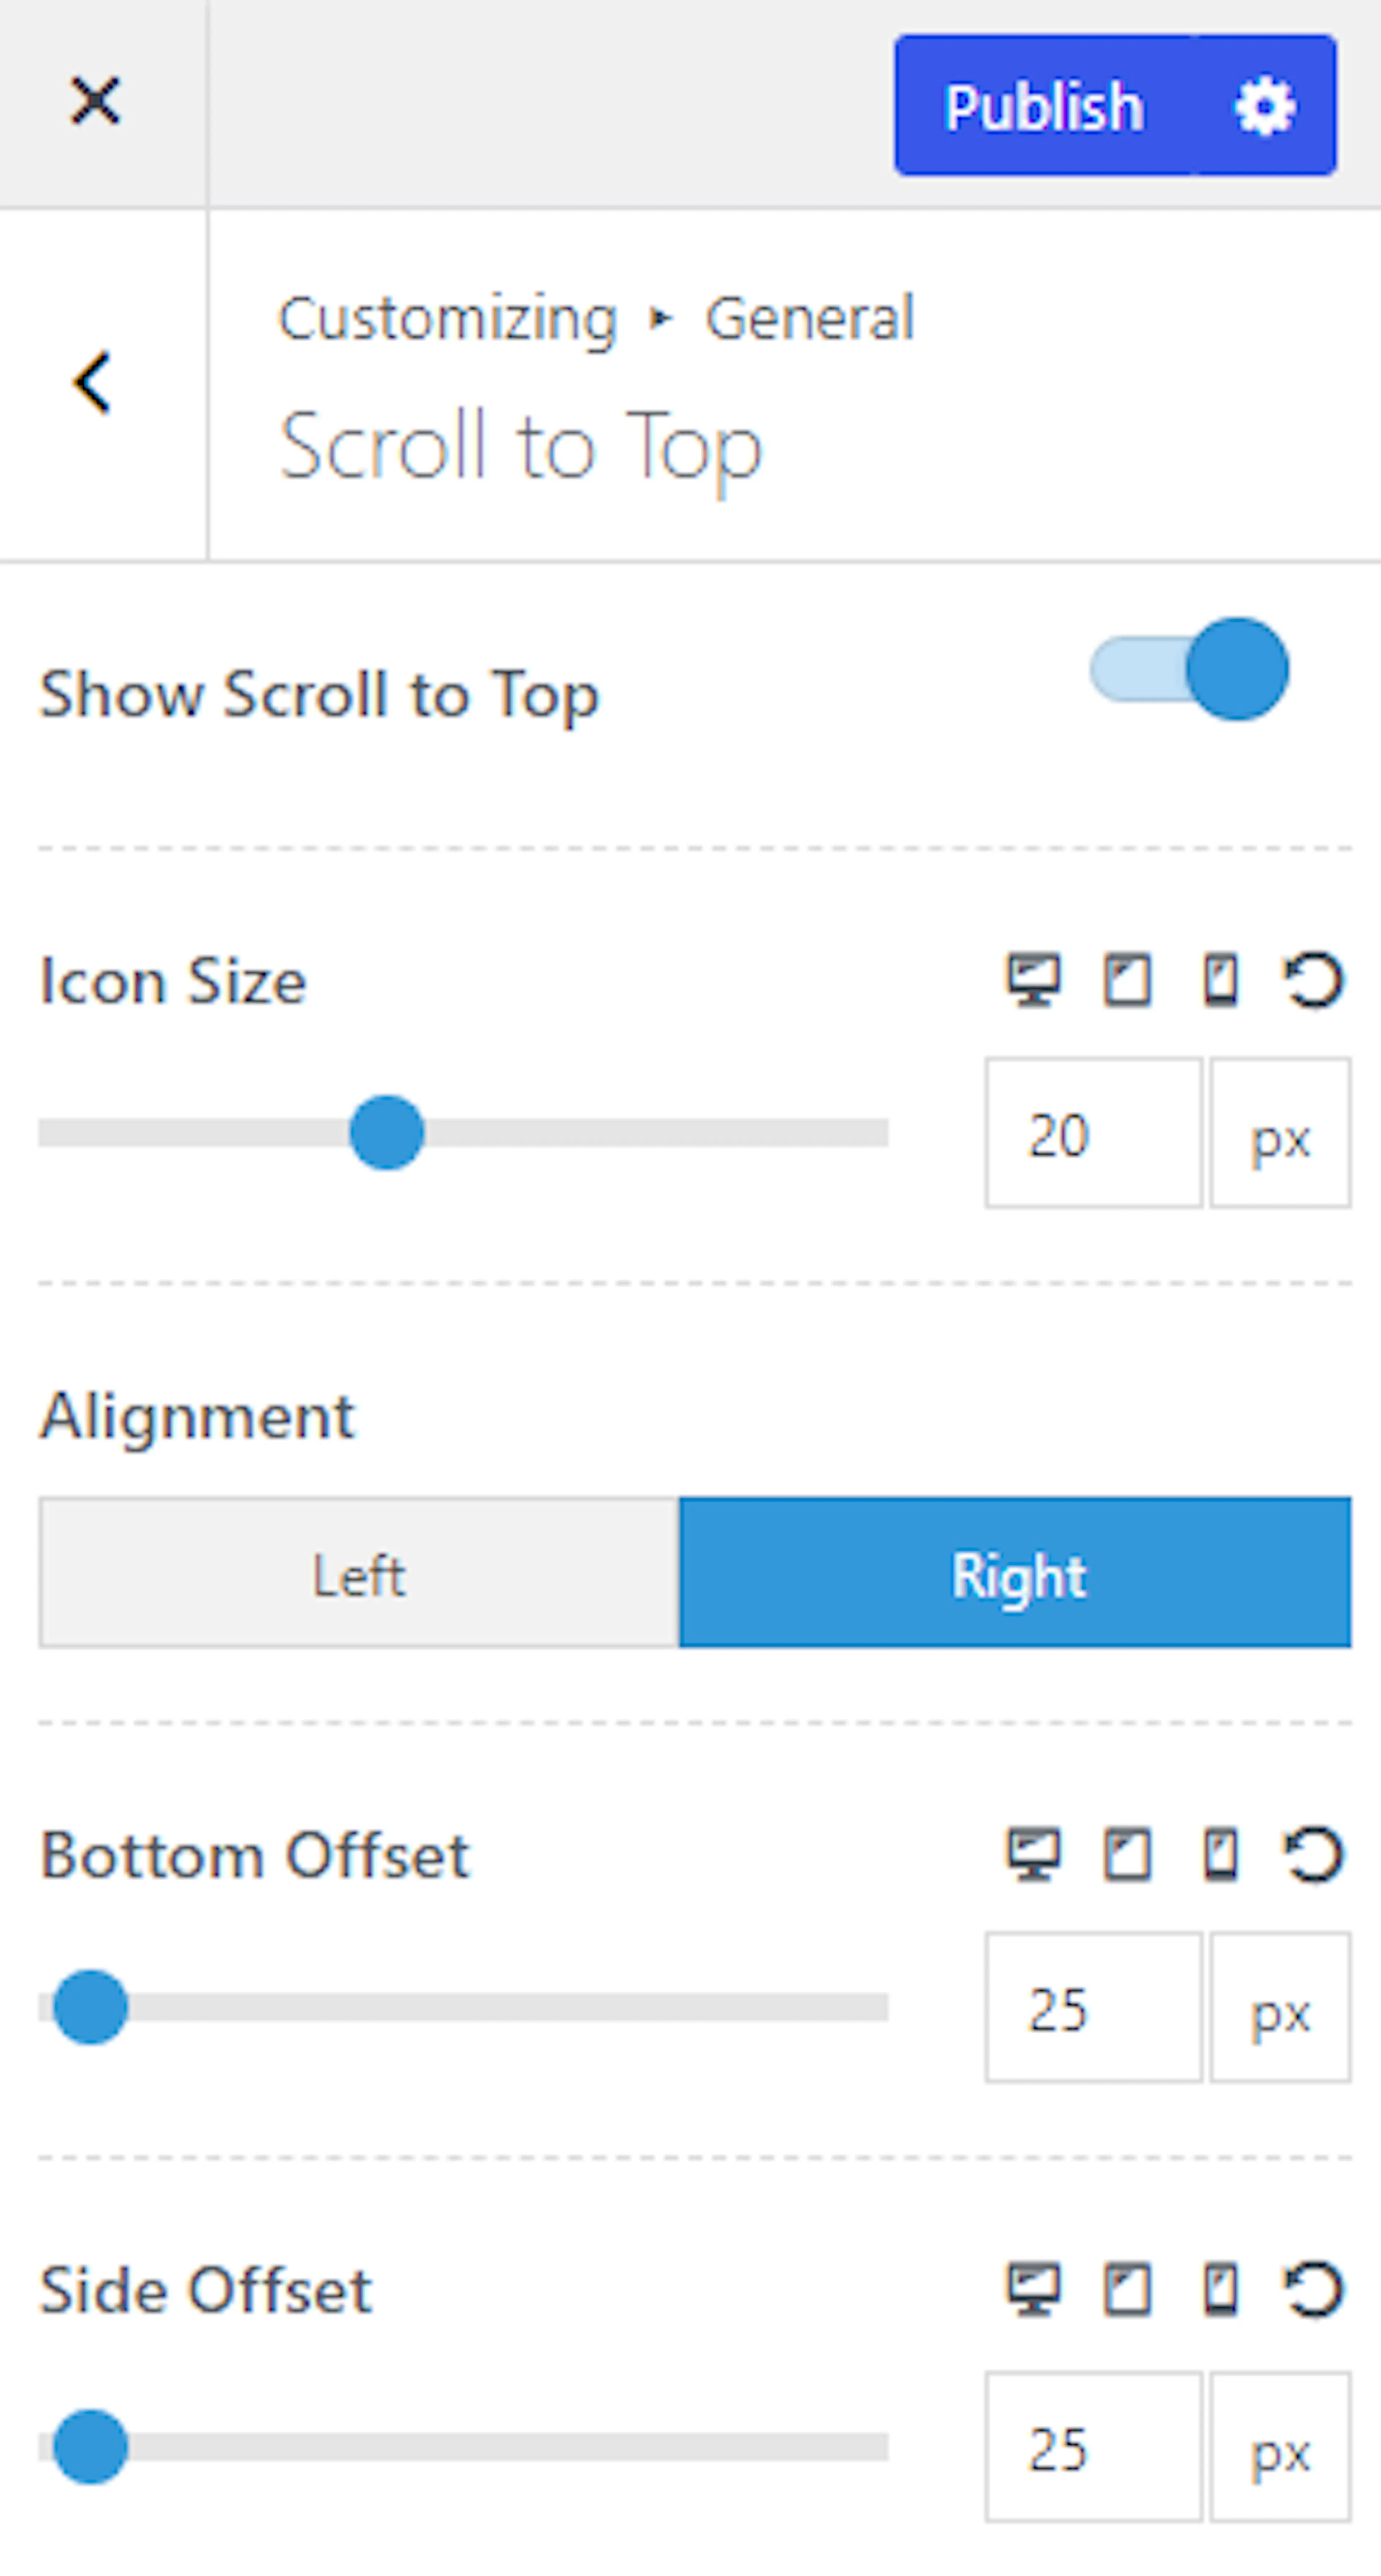
The scroll-to-top button is a small arrow that appears at the bottom corner of your site. When visitors click it, the page jumps back to the top. This is helpful on long pages, like a detailed trip itinerary with many days.
You'll find these options under General Settings > General > Scroll To Top.
| Setting | What it does |
|---|---|
| Show Scroll to Top | Displays the scroll-to-top button when enabled. |
| Icon Size | Sets the icon size for the scroll-to-top button. Only visible when Show Scroll to Top is enabled. |
| Alignment | Positions the scroll-to-top button on the right or left of the screen. |
| Bottom Offset | Sets the distance between the button and the bottom of the screen. |
| Side Offset | Sets the distance between the button and the side of the screen. |
Most tour websites keep this enabled. Travelers browsing through long trip descriptions appreciate being able to jump back to the top.
Pagination settings
Pagination is how visitors move between pages when there are too many trips to show on one screen. For example, if you offer 30 trips and your page shows 9 at a time, pagination splits them across several pages with "Next" and "Previous" links or numbered buttons at the bottom.
You'll find these options under General Settings > General > Pagination.
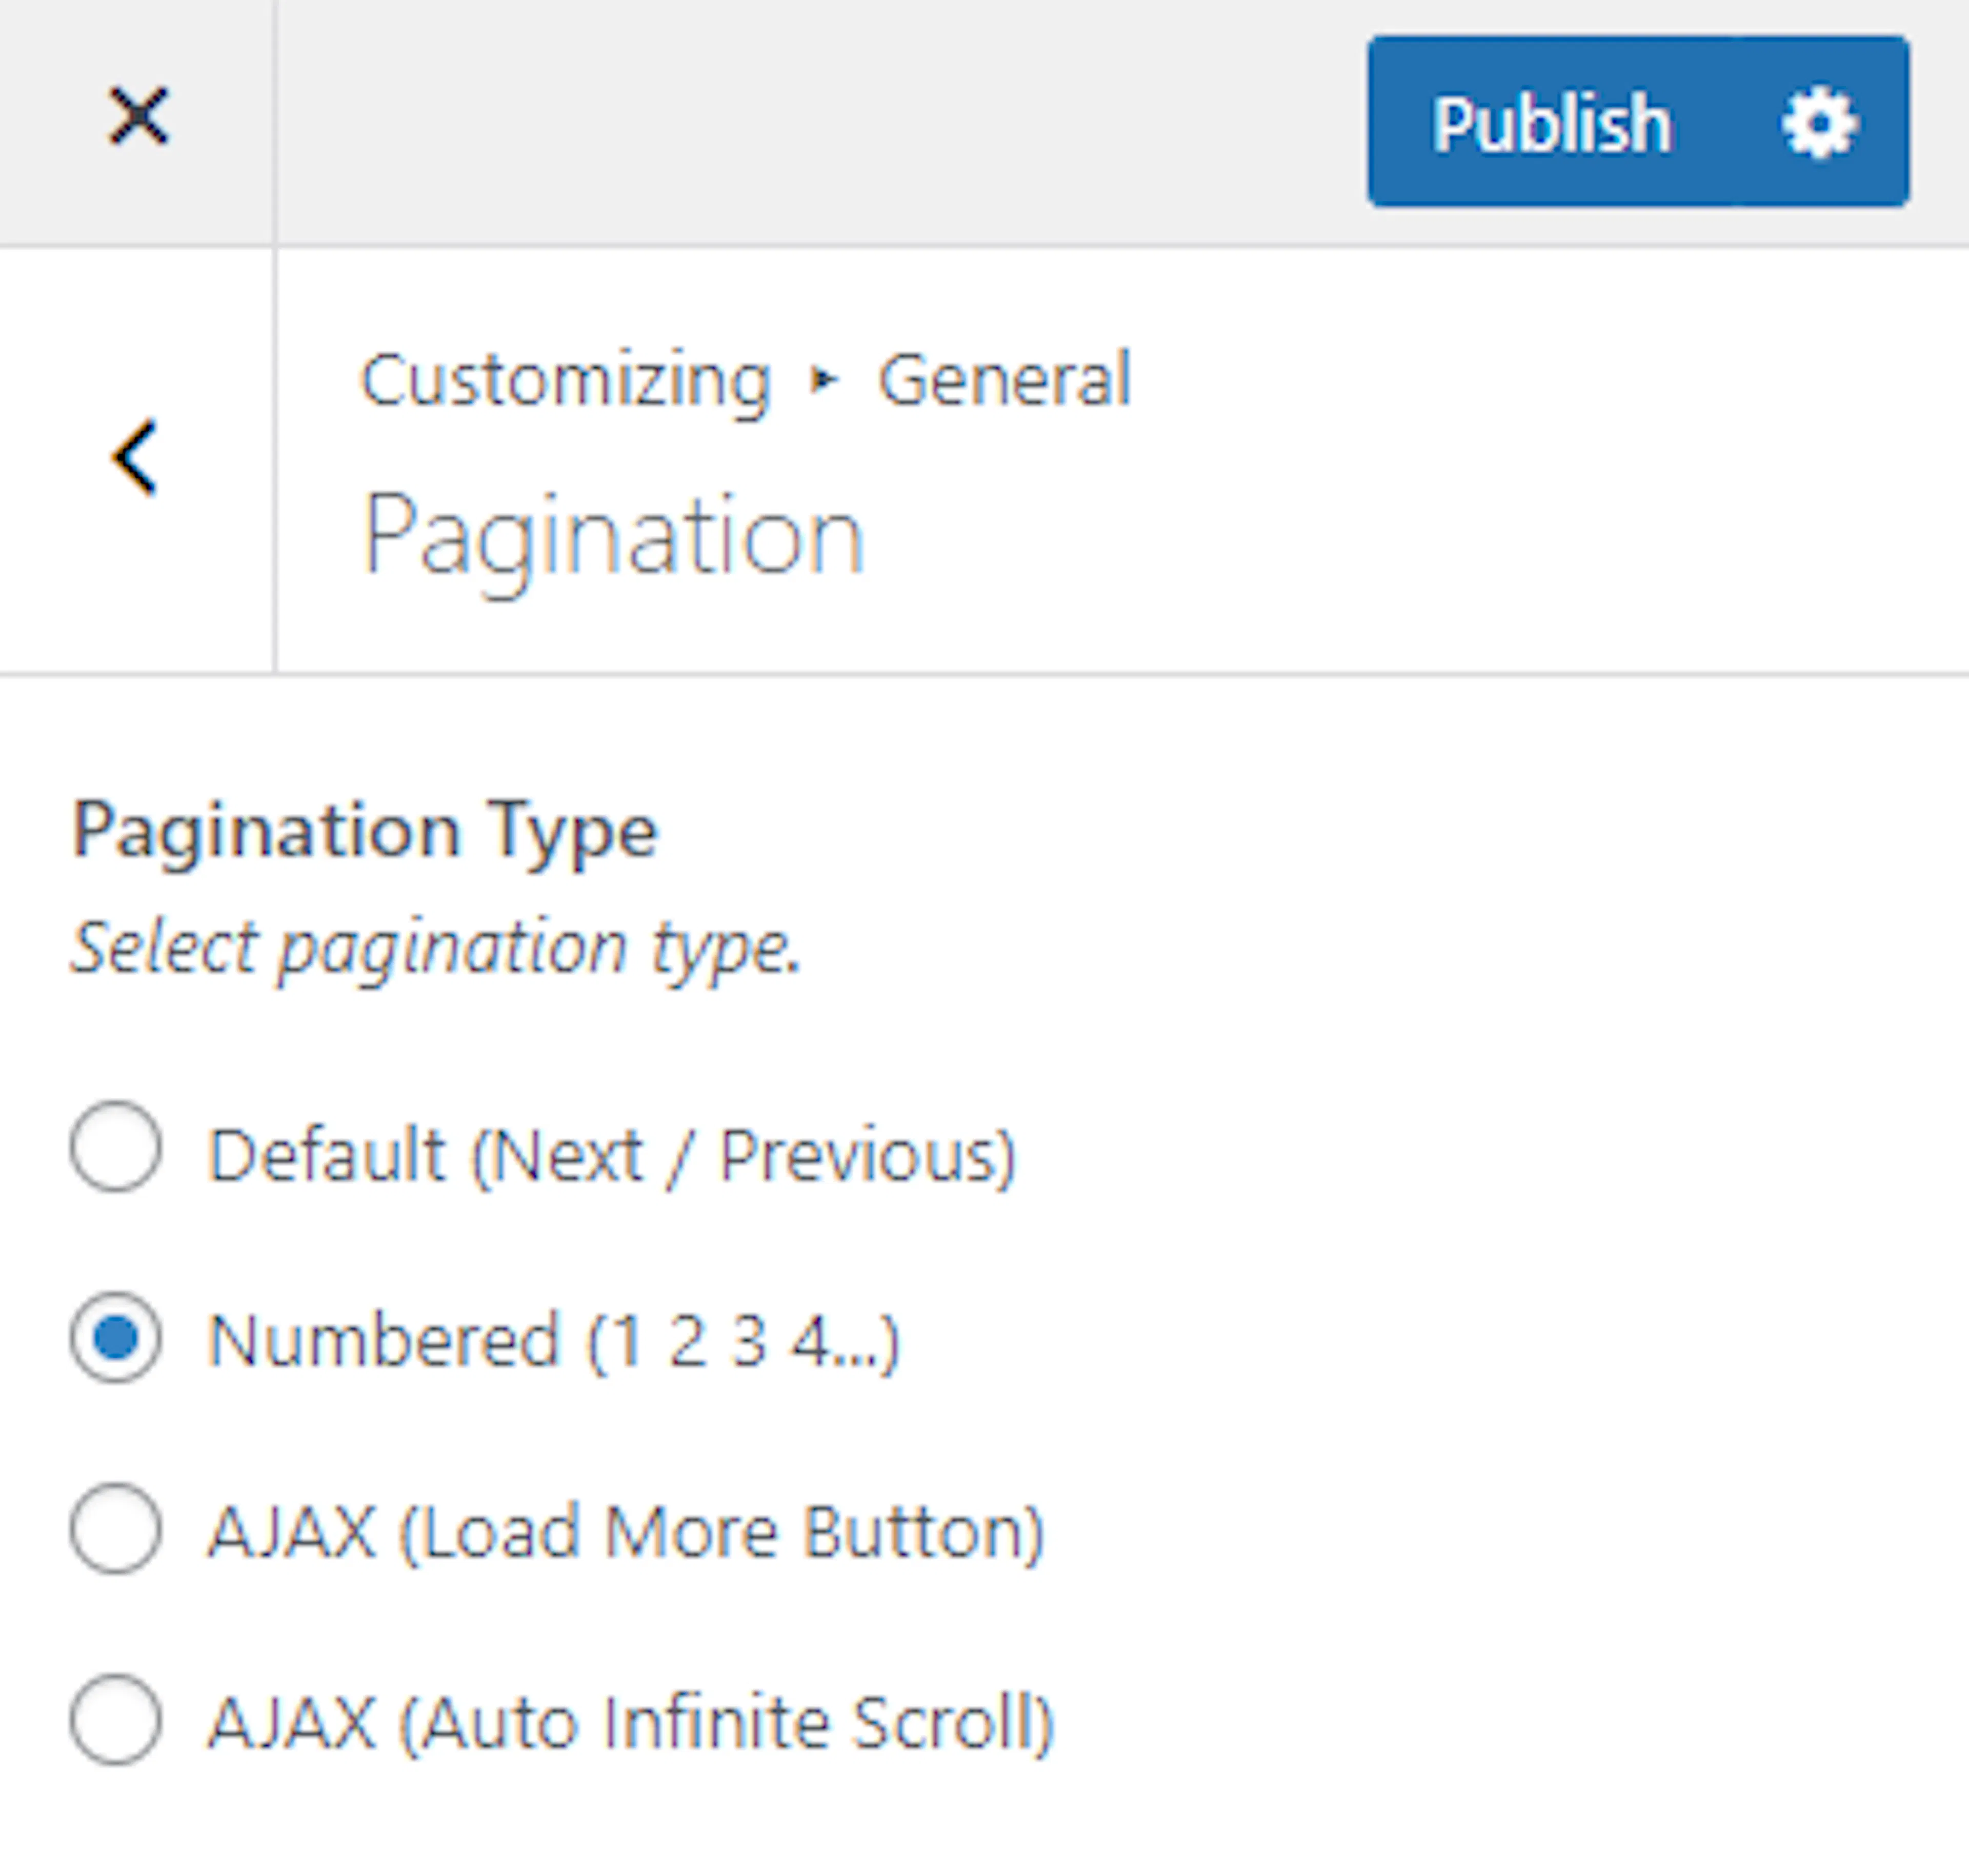
Here you can select the pagination type that displays across your website's pages.
404 page settings
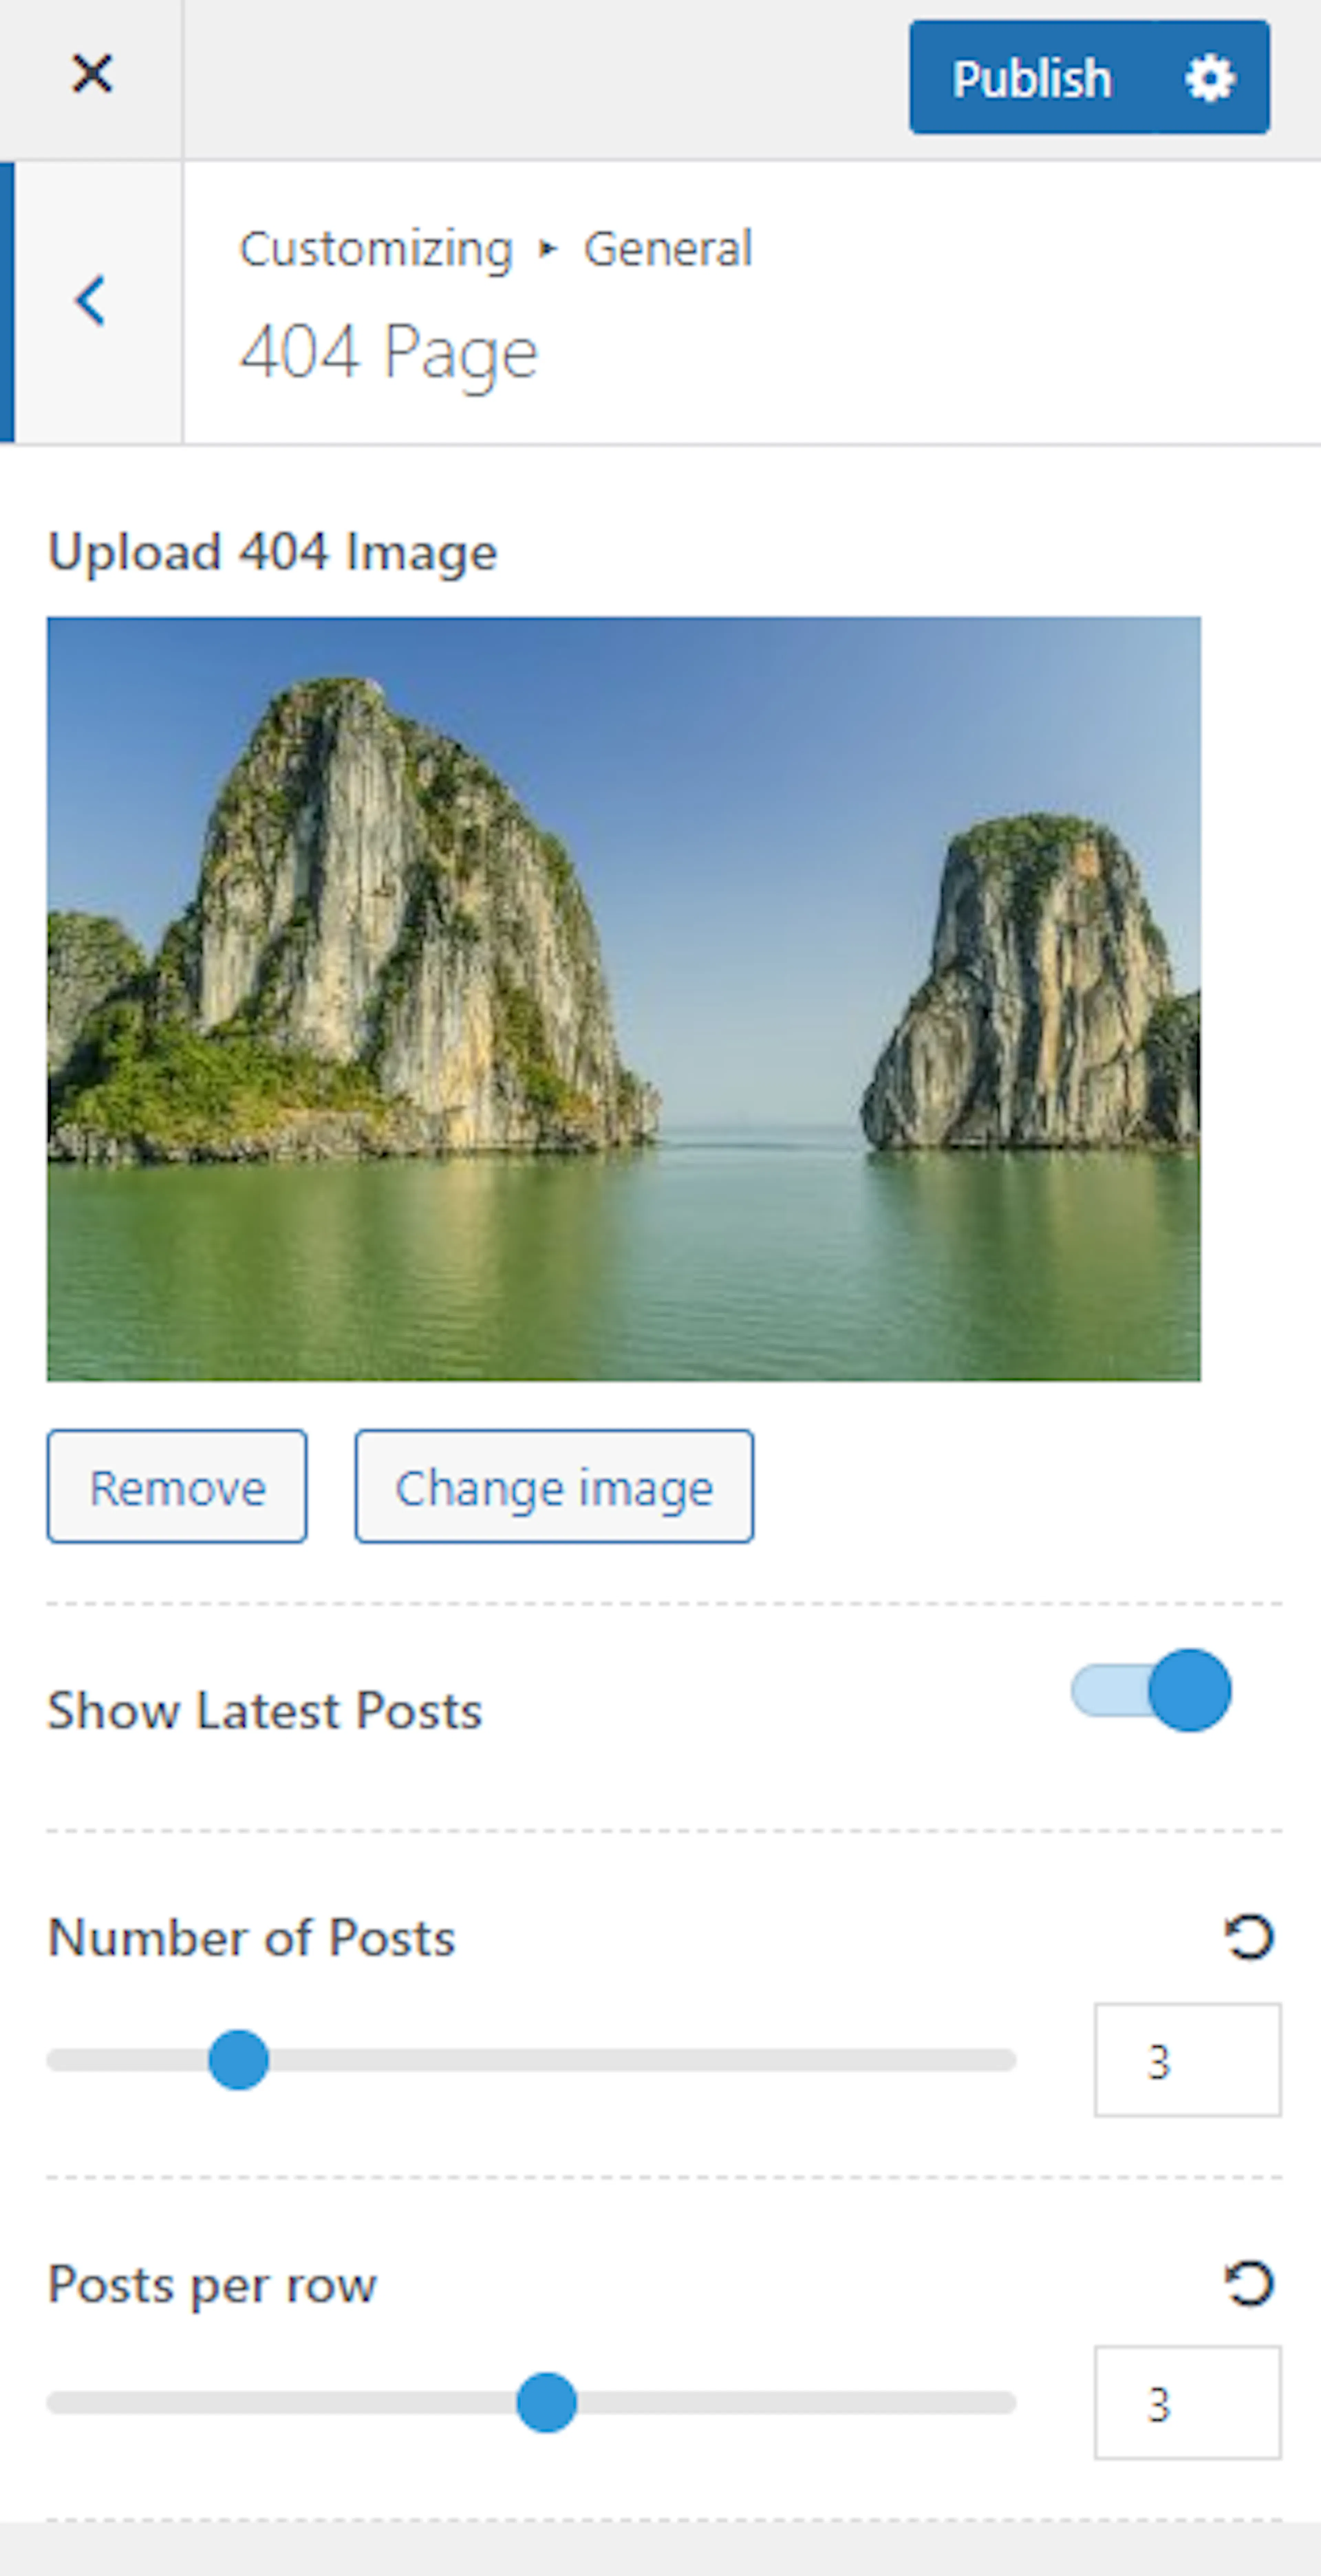
A 404 page is what visitors see when they land on a page that doesn't exist. This can happen if they follow a broken link or type a web address incorrectly. Instead of showing a plain error, you can make this page more helpful.
You'll find these options under General Settings > General > 404 Page.
| Setting | What it does |
|---|---|
| Upload 404 Image | Sets an image to display on the 404 page. |
| Show Latest Posts | Displays your latest posts on the 404 page when enabled. |
| Number of Posts | Sets how many posts appear in the Latest Posts section. |
| Posts per Row | Sets how many posts display per row in the Latest Posts section. |
Showing your latest trips on the 404 page gives lost visitors something useful to look at. Instead of leaving your site, they might spot a trip that catches their eye.
Colors settings
These settings control the main colors used across your entire site. Your primary and secondary colors appear in buttons, links, headers, and other key elements throughout your pages.
Say your tour brand uses green and gold. You'd set green as your primary color and gold as your secondary. Those colors then show up consistently across your whole site.
You'll find these options under General Settings > Colors.
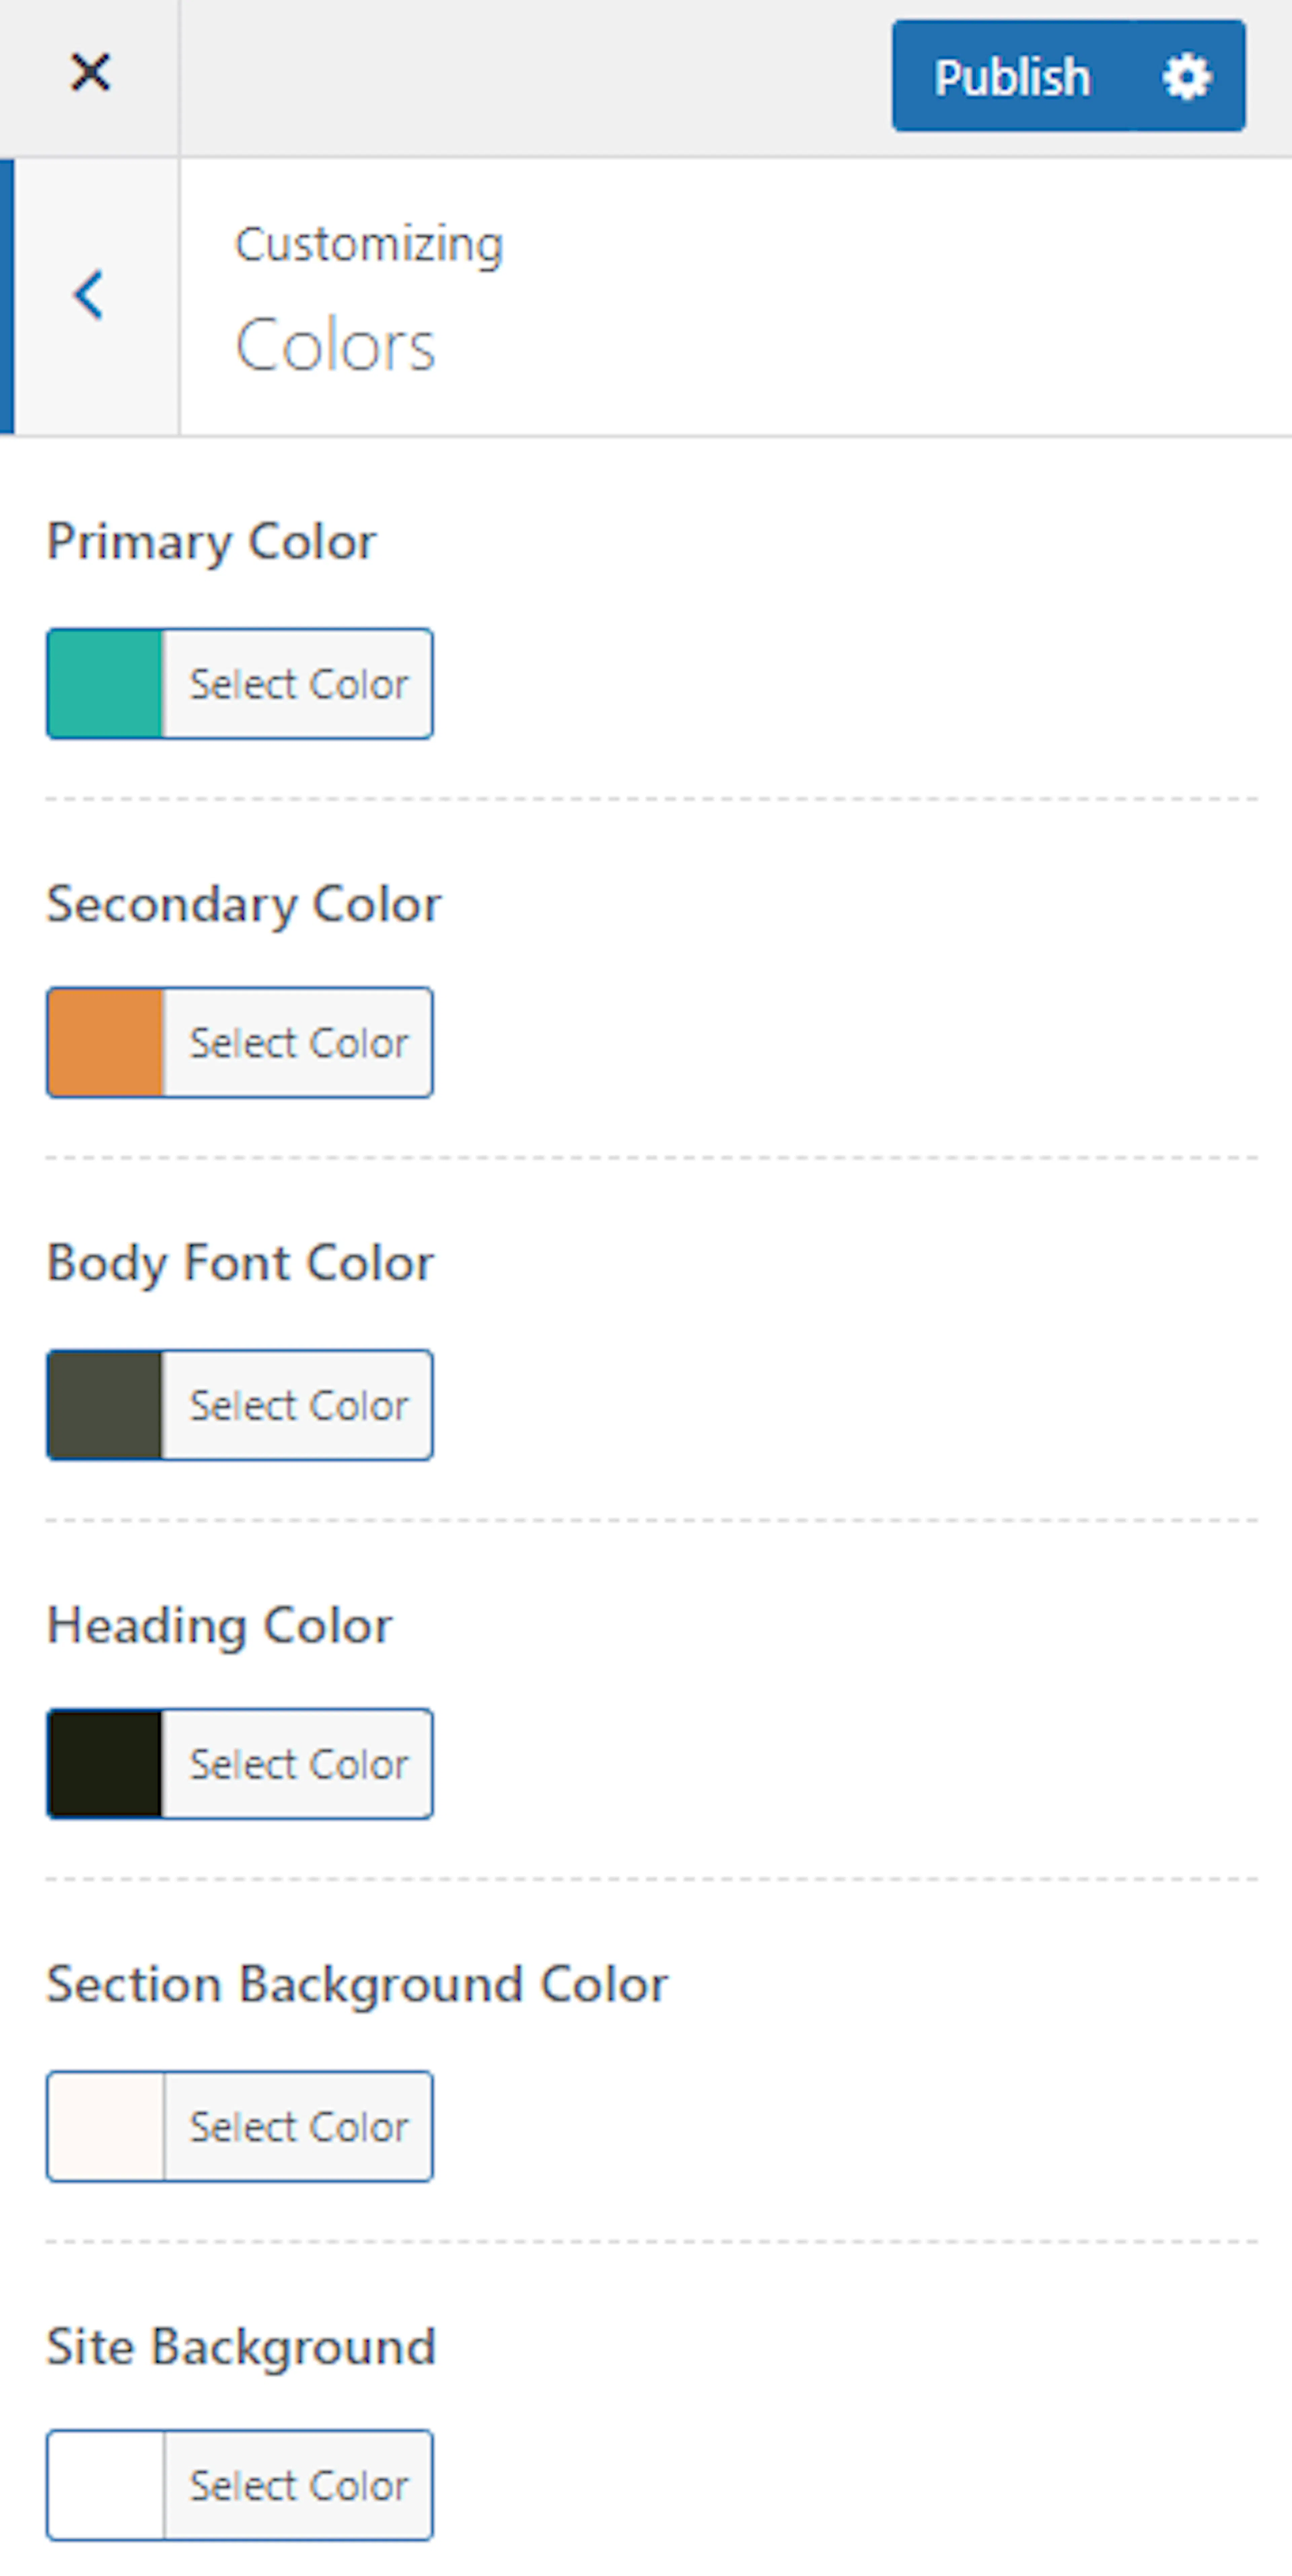
| Setting | What it does |
|---|---|
| Primary Color | Sets your website's primary color. |
| Secondary Color | Sets your website's secondary color. |
| Body Font Color | Sets the color for general site text. |
| Heading Color | Sets the color for site headings. |
| Section Background Color | Sets a background color used in specific theme sections. |
| Site Background | Sets the background color for the entire website. |
Pick colors that match your logo or brand. If you're not sure where to start, try two colors that look good together. One bold color for the primary, and one softer color for the secondary.
Typography settings
Typography is the style of the text on your site. It covers the font (what the letters look like), the size, the spacing between lines, and the weight (how thick or thin the letters are).
You'll find these options under General Settings > Typography.
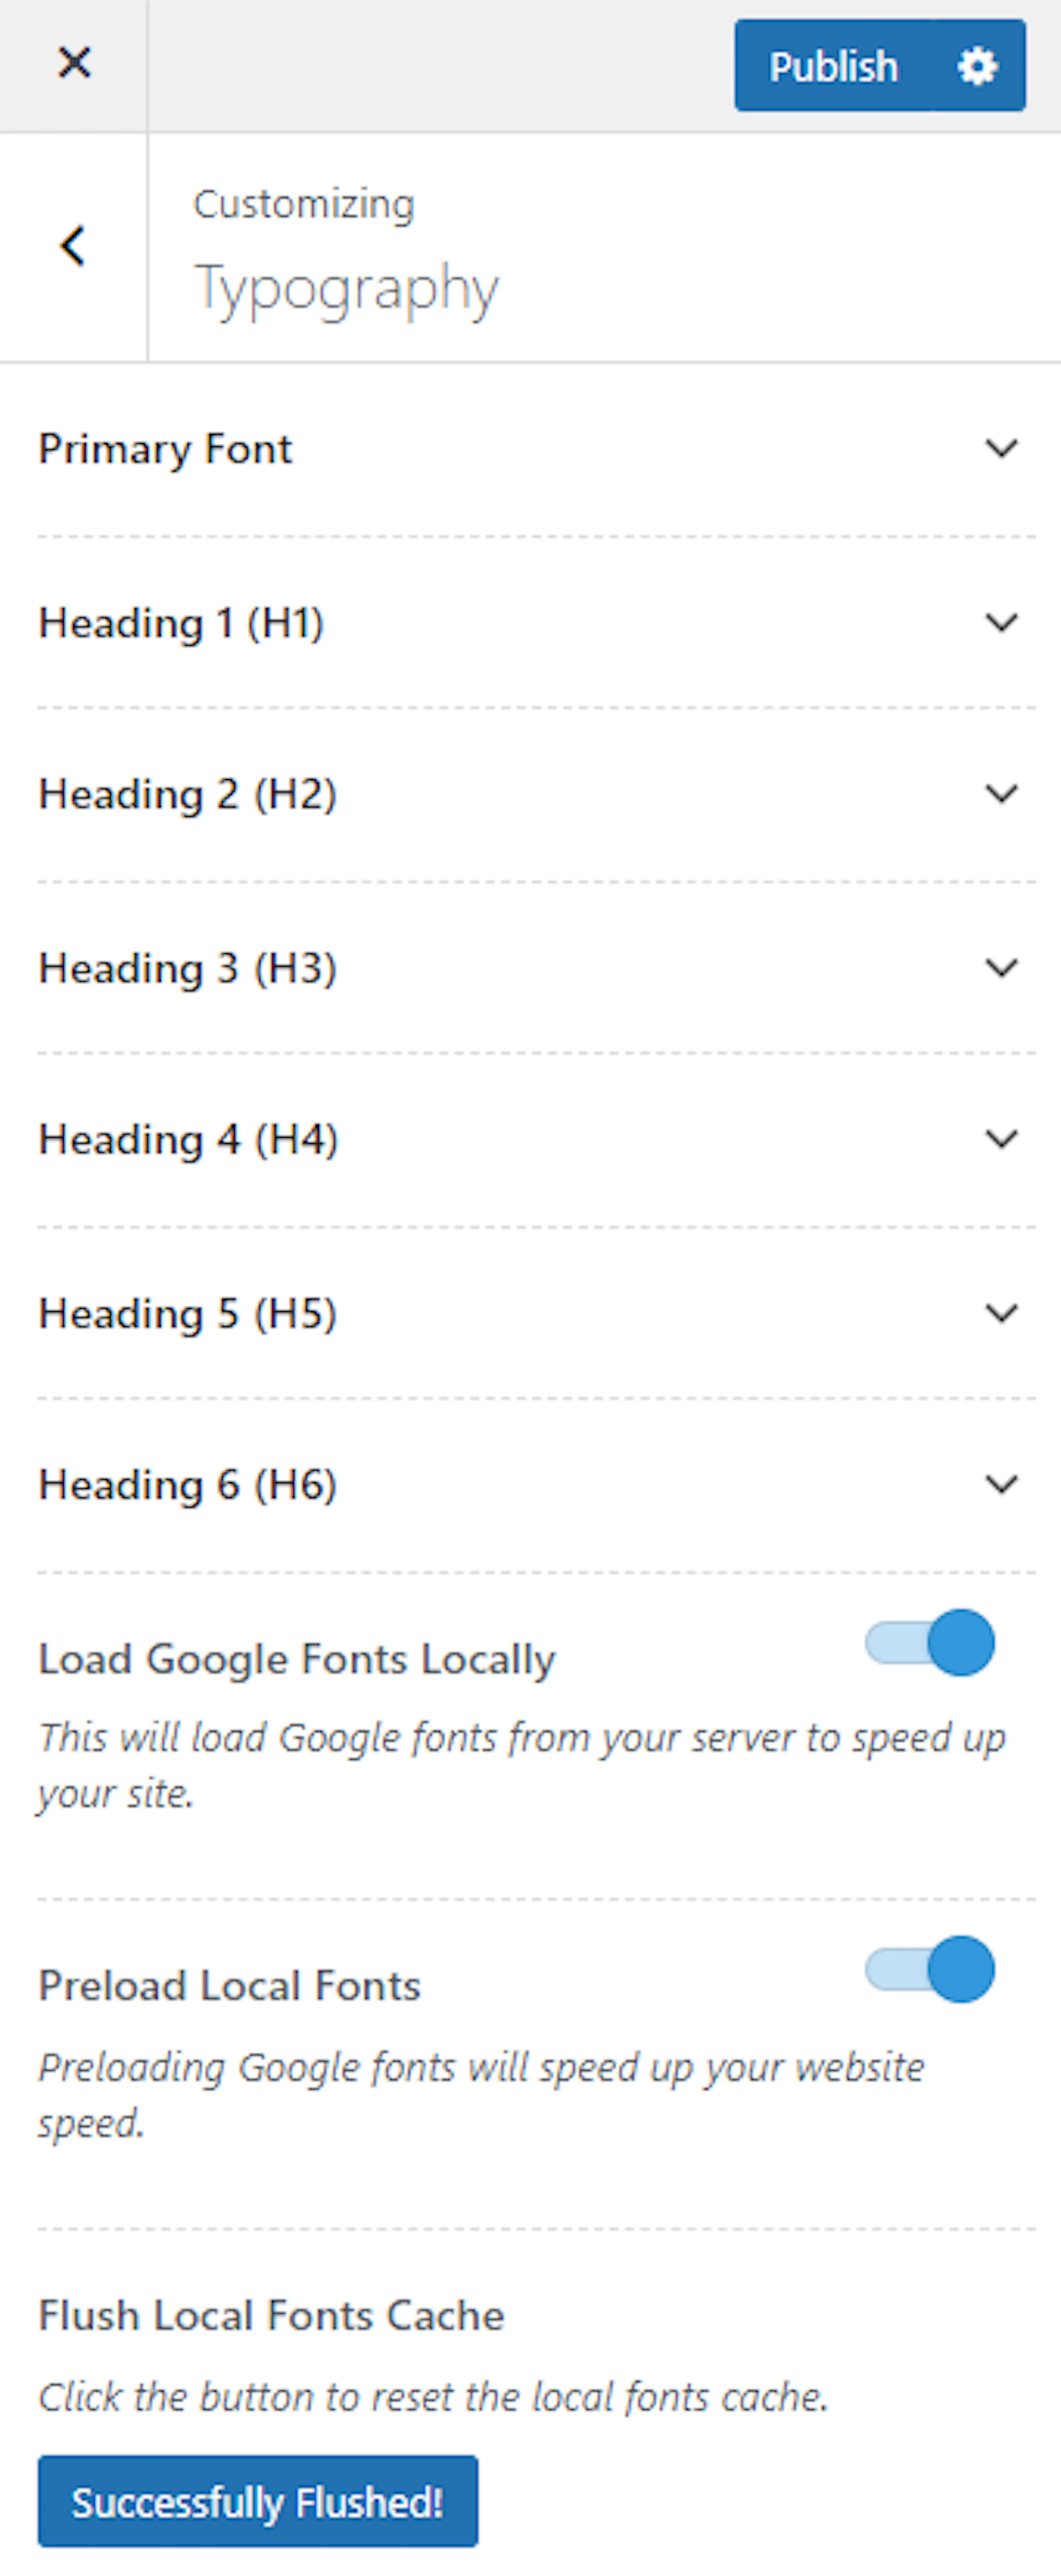
| Setting | What it does |
|---|---|
| Primary Font | Sets the primary font and its styling options for your website. |
| Headings | Sets the typography applied to site headings. |
| Load Google Fonts Locally | Loads Google Fonts from your own server rather than Google's, which helps speed up your website. |
| Preload Local Fonts | Activates preloading for locally hosted Google Fonts. |
| Flush Local Fonts Cache | Clears the local fonts cache when you click Successfully Flushed!. |
Google Fonts is a free library of fonts that many websites use. When you load them locally, your site fetches the fonts from your own server instead of Google's. This can make your site load faster for visitors.
The Flush Local Fonts Cache option clears the stored copy of your fonts. A cache is a temporary storage that helps things load faster. If you've changed your fonts and they're not updating, clearing the cache fixes that.
SEO settings
SEO (Search Engine Optimization) is about helping your site show up when people search for trips on Google or other search engines. These settings cover two things: breadcrumbs and post dates.
Breadcrumbs are the trail of links at the top of a page that shows visitors where they are. For example, on a trek page they might see: Home > Treks > Everest Base Camp Trek. This helps travelers navigate and also helps search engines understand your site structure.
You'll find these options under General Settings > SEO.
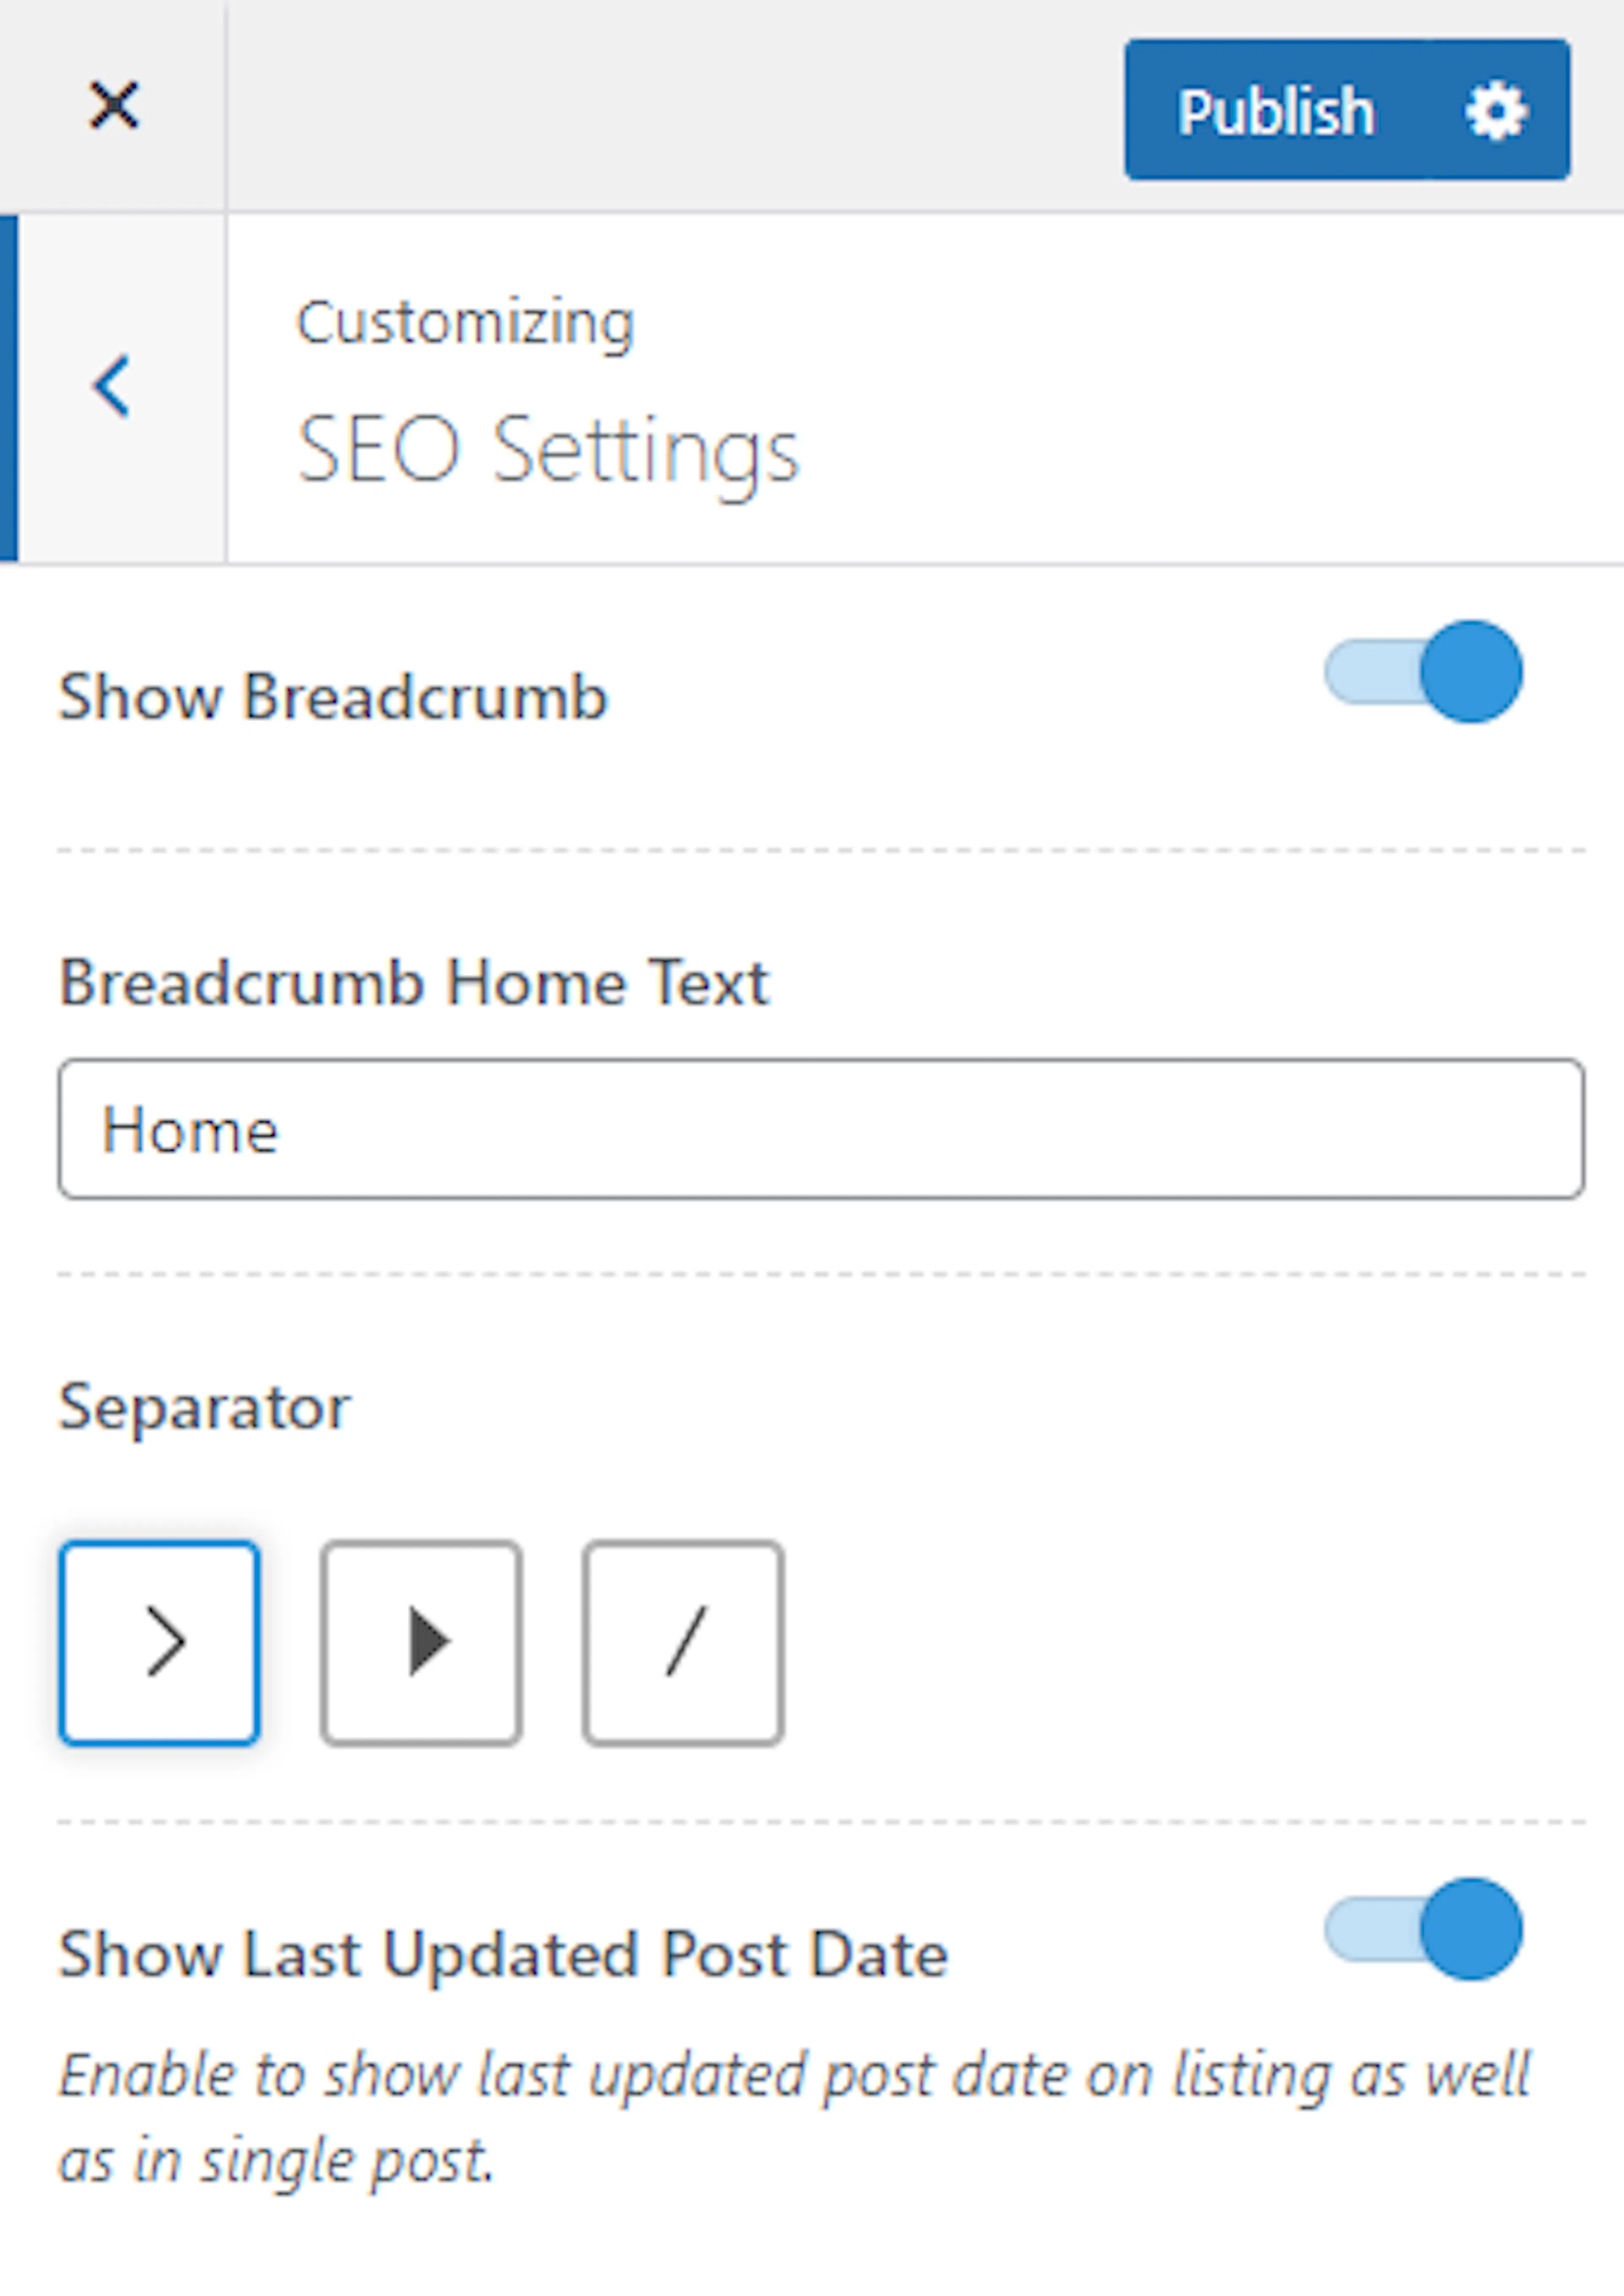
| Setting | What it does |
|---|---|
| Show Breadcrumb | Displays a breadcrumb trail on your website when enabled. |
| Breadcrumb Home Text | Sets the text used to represent the homepage in the breadcrumb trail. |
| Separator | Sets the separator style used between breadcrumb items. |
| Show Last Updated Post Date | Displays the date a post was last updated. Enabling this lets Google read the updated date and index your latest content. |
Showing the last updated date helps Google know your content is current. If you update a trip's itinerary or pricing, Google can see the new date and may show it in search results. This signals to potential travelers that your information is up to date.
Social networks settings
This is where you add links to your social media accounts, like Facebook, Instagram, or Twitter. These links don't show up on your site on their own. But once you add them here, other parts of your site can pull them in and display social media icons that link to your accounts.
You'll find these options under General Settings > Social Networks.
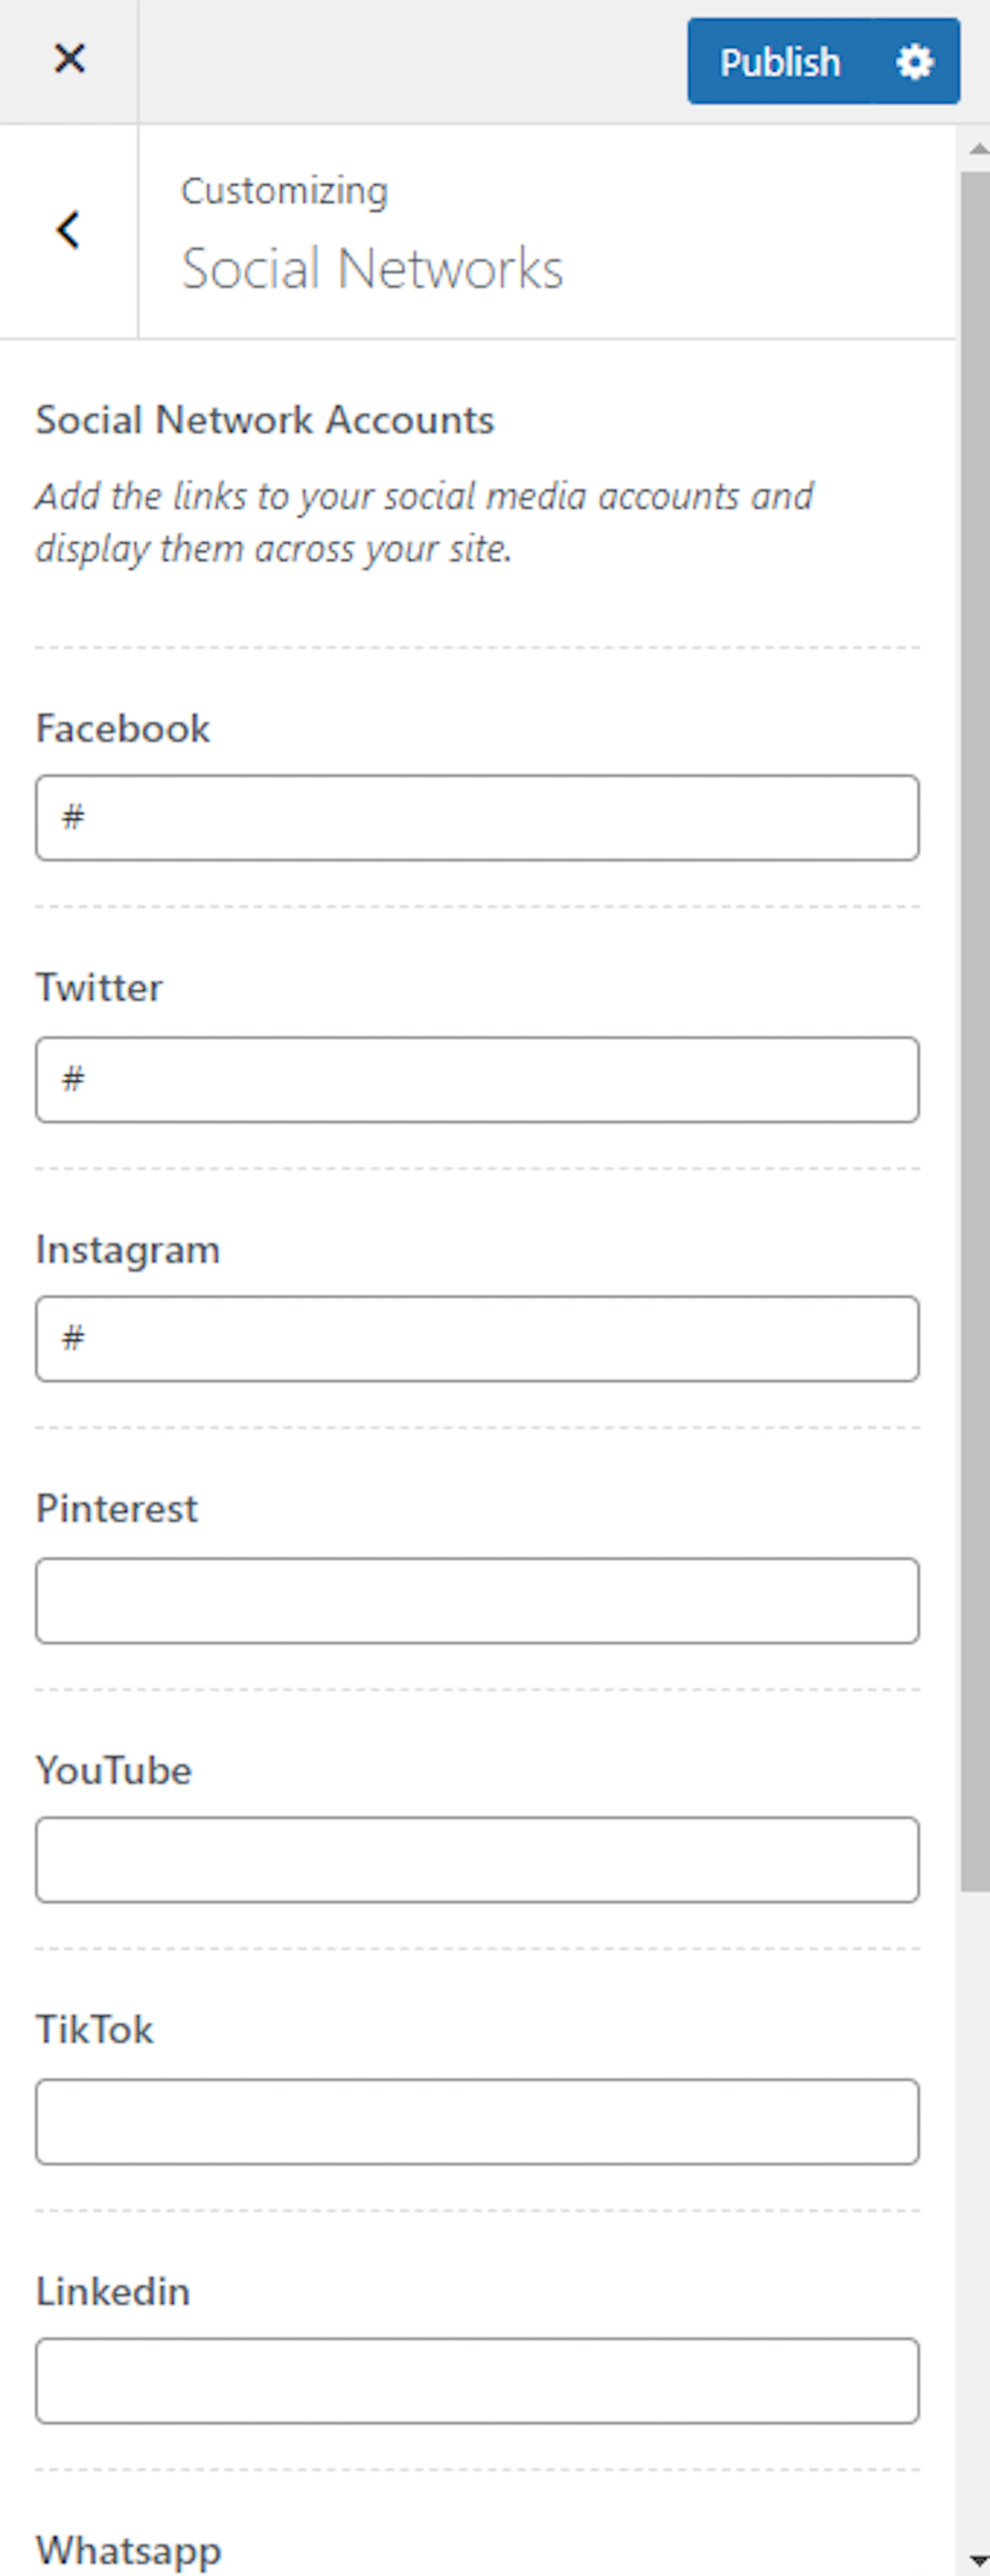
Adding your accounts here doesn't display anything on its own. Enable and add social media icons to the site header through the Social Media setting under Header Settings. Once added, those icons automatically link to the accounts you enter here.
Think of it as filling in your contact details in one place. Other sections of your site will use what you enter here.
Wrapping up
When you're happy with your changes, click Publish at the top of the Customizer to make them live. Until you do, everything stays as a preview.
Don't worry about getting everything perfect on the first pass. You can come back to these settings anytime and adjust them as your business grows.
If you're still stuck or have a question we didn't cover, our support team is happy to help. Reach out at our support page and we'll get you sorted.
Next step
Header Settings
Configure your site's header layout, logo placement, and social media icons.