

How to Configure Tax Settings
Add tax to every booking automatically, choose how prices appear to travelers, and show a clear tax label during checkout.
Overview
Add a tax percentage to every booking automatically from your WordPress dashboard, which is the main admin area where you manage your website. You can also choose whether tax is already included in the trip price or added later at checkout, and change the label travelers see.
How to enable tax settings
Before you start, make sure you can log in to your WordPress dashboard. You will need access to the admin area of your website to change payment settings.
Navigate to Tax Settings
This is where all tax-related options are stored.
In the left sidebar of your WordPress dashboard, go to WP Travel Engine > Settings > Payments > Tax Settings.
Enable Apply Tax
This turns on tax for your trip bookings.
Find the Apply Tax toggle and switch it on. Once enabled, WP Travel Engine will start using your tax settings for bookings.
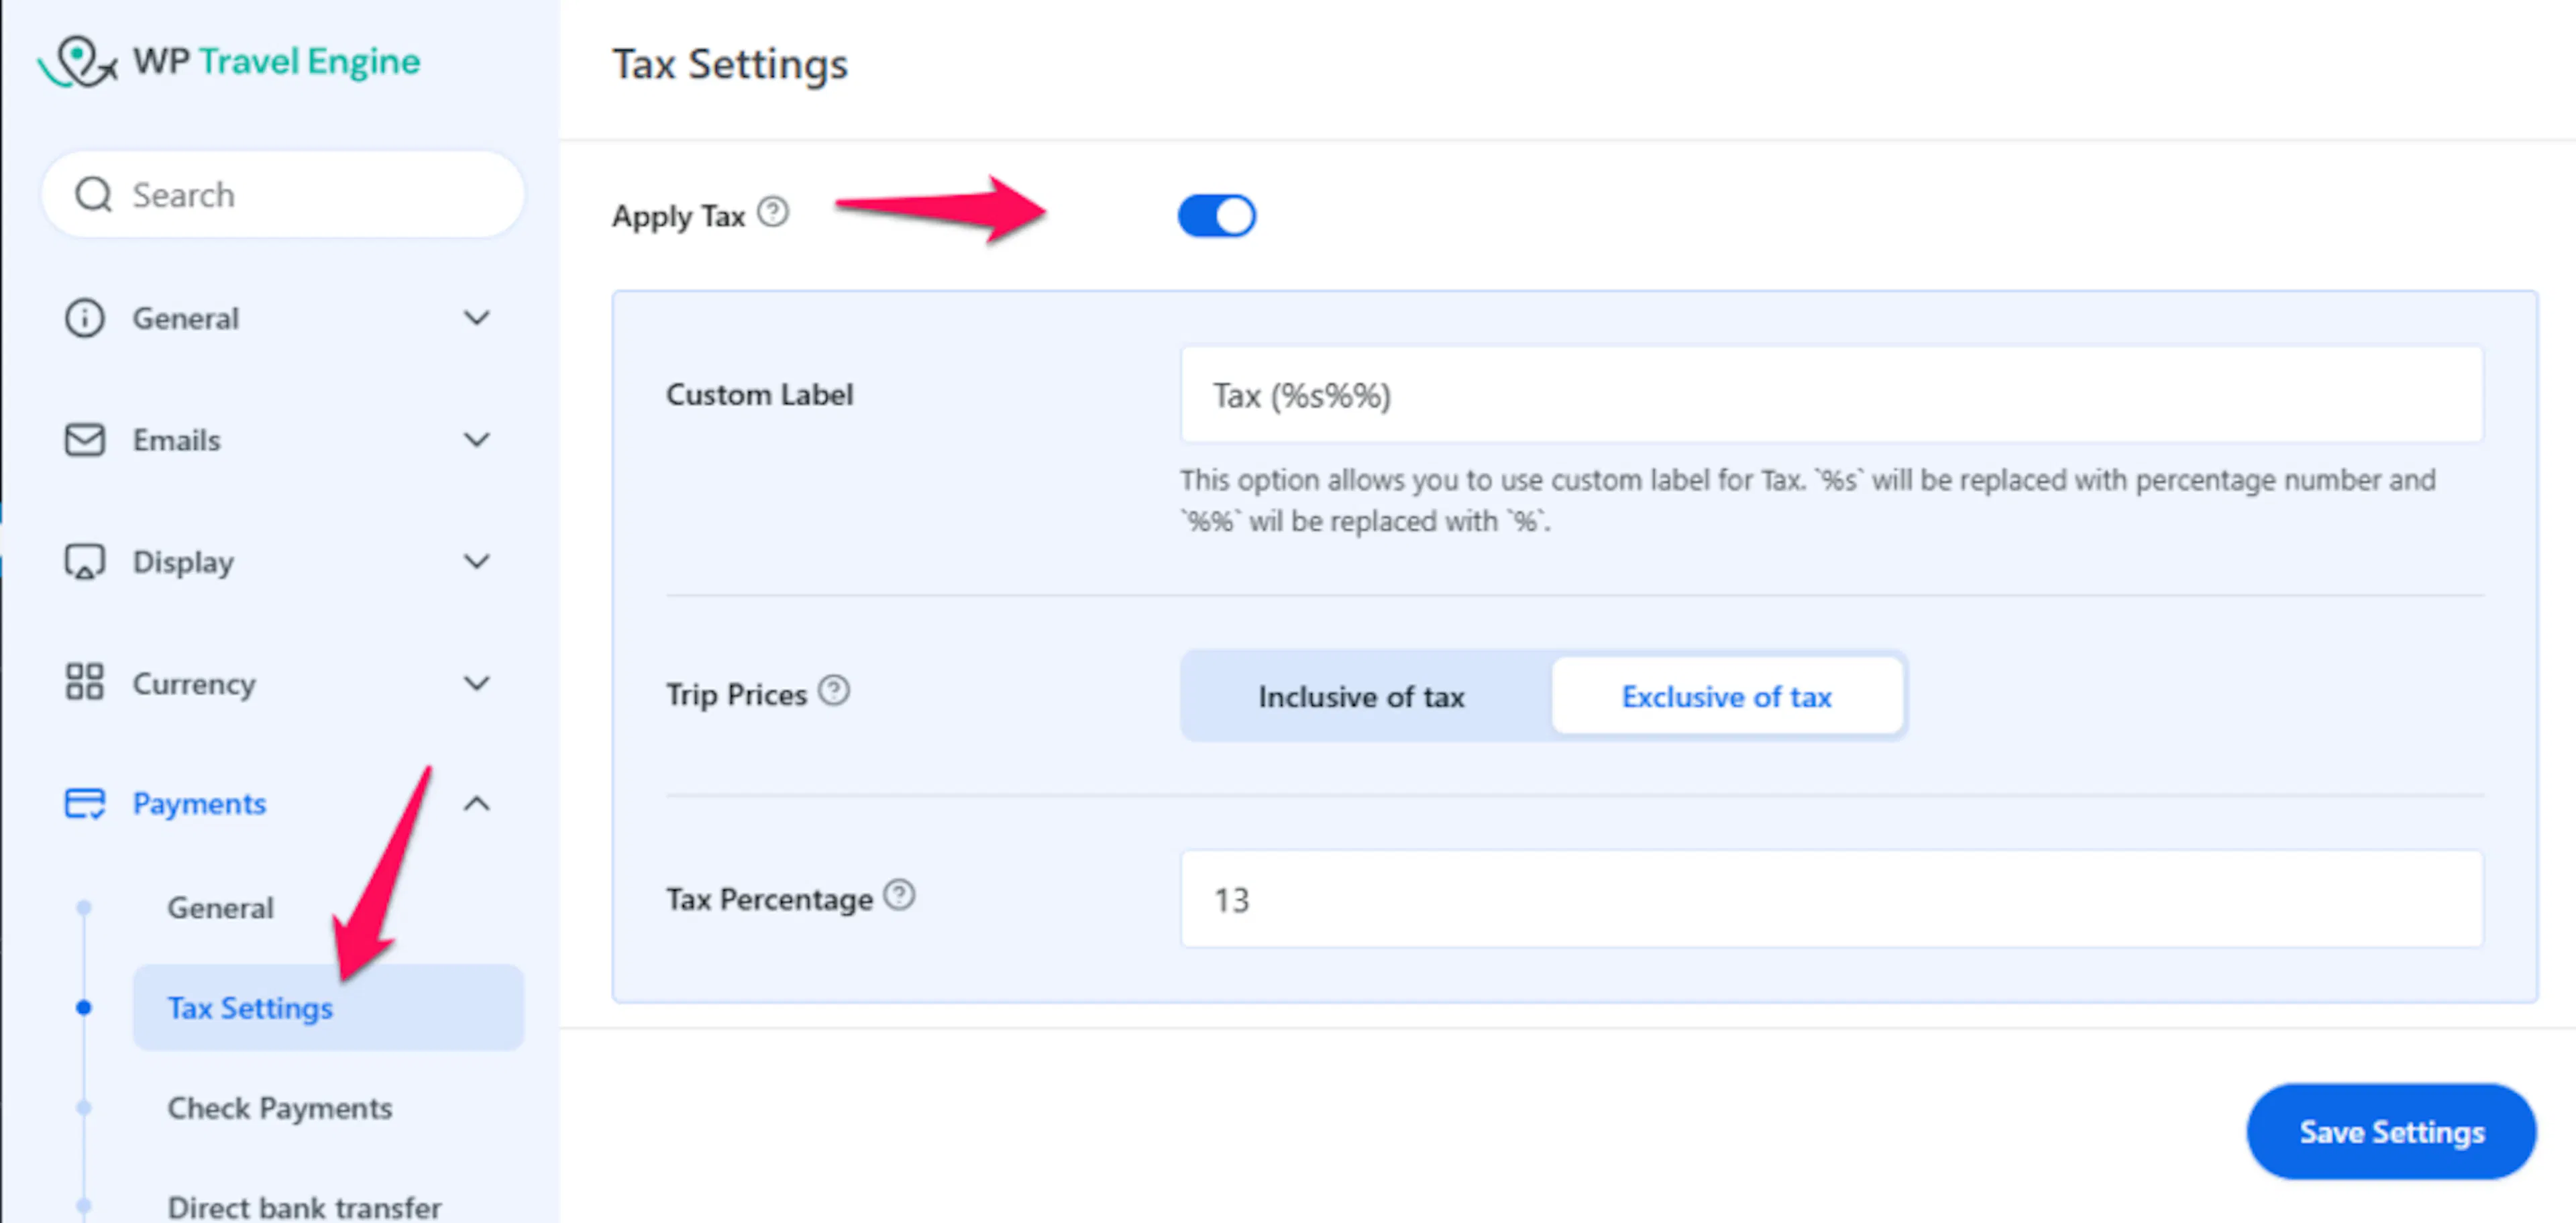
Specify the tax value
This number controls how much tax gets added to each booking.
Enter the tax value you want to apply. For example, if your local tax rate is 10%, every booking will use that percentage. If you sell a guided day tour, a multi-day trek, or a package with gear rental add-ons, the tax value will be applied automatically based on your setup.
Once you save the setting, you are ready to choose how tax appears to your travelers.
Available tax options
After you enable tax, you can adjust a few settings to match how you want prices shown on your site.
| Setting | Description |
|---|---|
| Custom Label | Change the tax label to match your business or local rules. You can use %s to show the tax number and %% to show the percent sign. For example, VAT %s%% would appear as VAT 10% if your tax rate is 10. |
| Trip Prices | Choose whether the trip price your traveler sees already includes tax, or whether tax is added as a separate amount during checkout. |
| Tax Percentage | Set the tax percentage that applies to every booking. This is the number WP Travel Engine uses when calculating tax for your trips. |
Trip Prices modes
Tax included in price
Use this option if you want the displayed trip price to already contain tax.
Say you run a 3-day trek for $500 and tax is 10%. The traveler sees $500 and pays $500. The tax is already included in that amount. This works well if you want pricing to feel straightforward on trip pages, especially for fixed-price packages or seasonal offers.
Tax added at checkout
Use this option if you want to show the base trip price first and add tax later as a separate line item.
Say you run a day tour for $100 and tax is 10%. The traveler sees $100 on the trip page. At checkout, they see $100 plus $10 tax for a total of $110. This option can be useful if you want travelers to see the tax amount clearly before they complete the booking.
If you're stuck or have a question we didn't cover, our support team is happy to help. Reach out at our support page and we'll get you sorted.