

Himalayan Bank Payment Gateway
Accept online card payments from travelers booking your trips in Nepal using Himalayan Bank, with support for Visa, MasterCard, American Express, and Union Pay.
Overview
The Himalayan Bank Payment Gateway is an add-on (a small extension that adds a specific feature) for WP Travel Engine. It lets you collect trip payments through Himalayan Bank, one of the leading banks in Nepal.
This gateway works in Nepal and supports Nepali Rupees (NPR) and US Dollars (USD). Travelers can pay using Visa, MasterCard, American Express, or Union Pay cards.
Say you run a 5-day Annapurna trek and a traveler from the US wants to book online. With this gateway, they can pay with their Visa or MasterCard in USD, and the booking gets confirmed on your site automatically.
This add-on requires WordPress and the WP Travel Engine plugin to be installed and active.
How to install the Himalayan Bank Payment Gateway add-on
Before you can configure the gateway, you need to install and activate the add-on. See how to activate a Pro add-on license key for step-by-step instructions.
Once the add-on is active, you're ready to connect it to your Himalayan Bank account.
How does it work?
To use this gateway, you need a Himalayan Bank account and the credentials the bank gives you. Tour operators and travel agencies in Nepal can set this up by contacting Himalayan Bank and requesting a merchant account.
When a traveler books a trip on your website and chooses Himalayan Bank as their payment method, here's what happens:
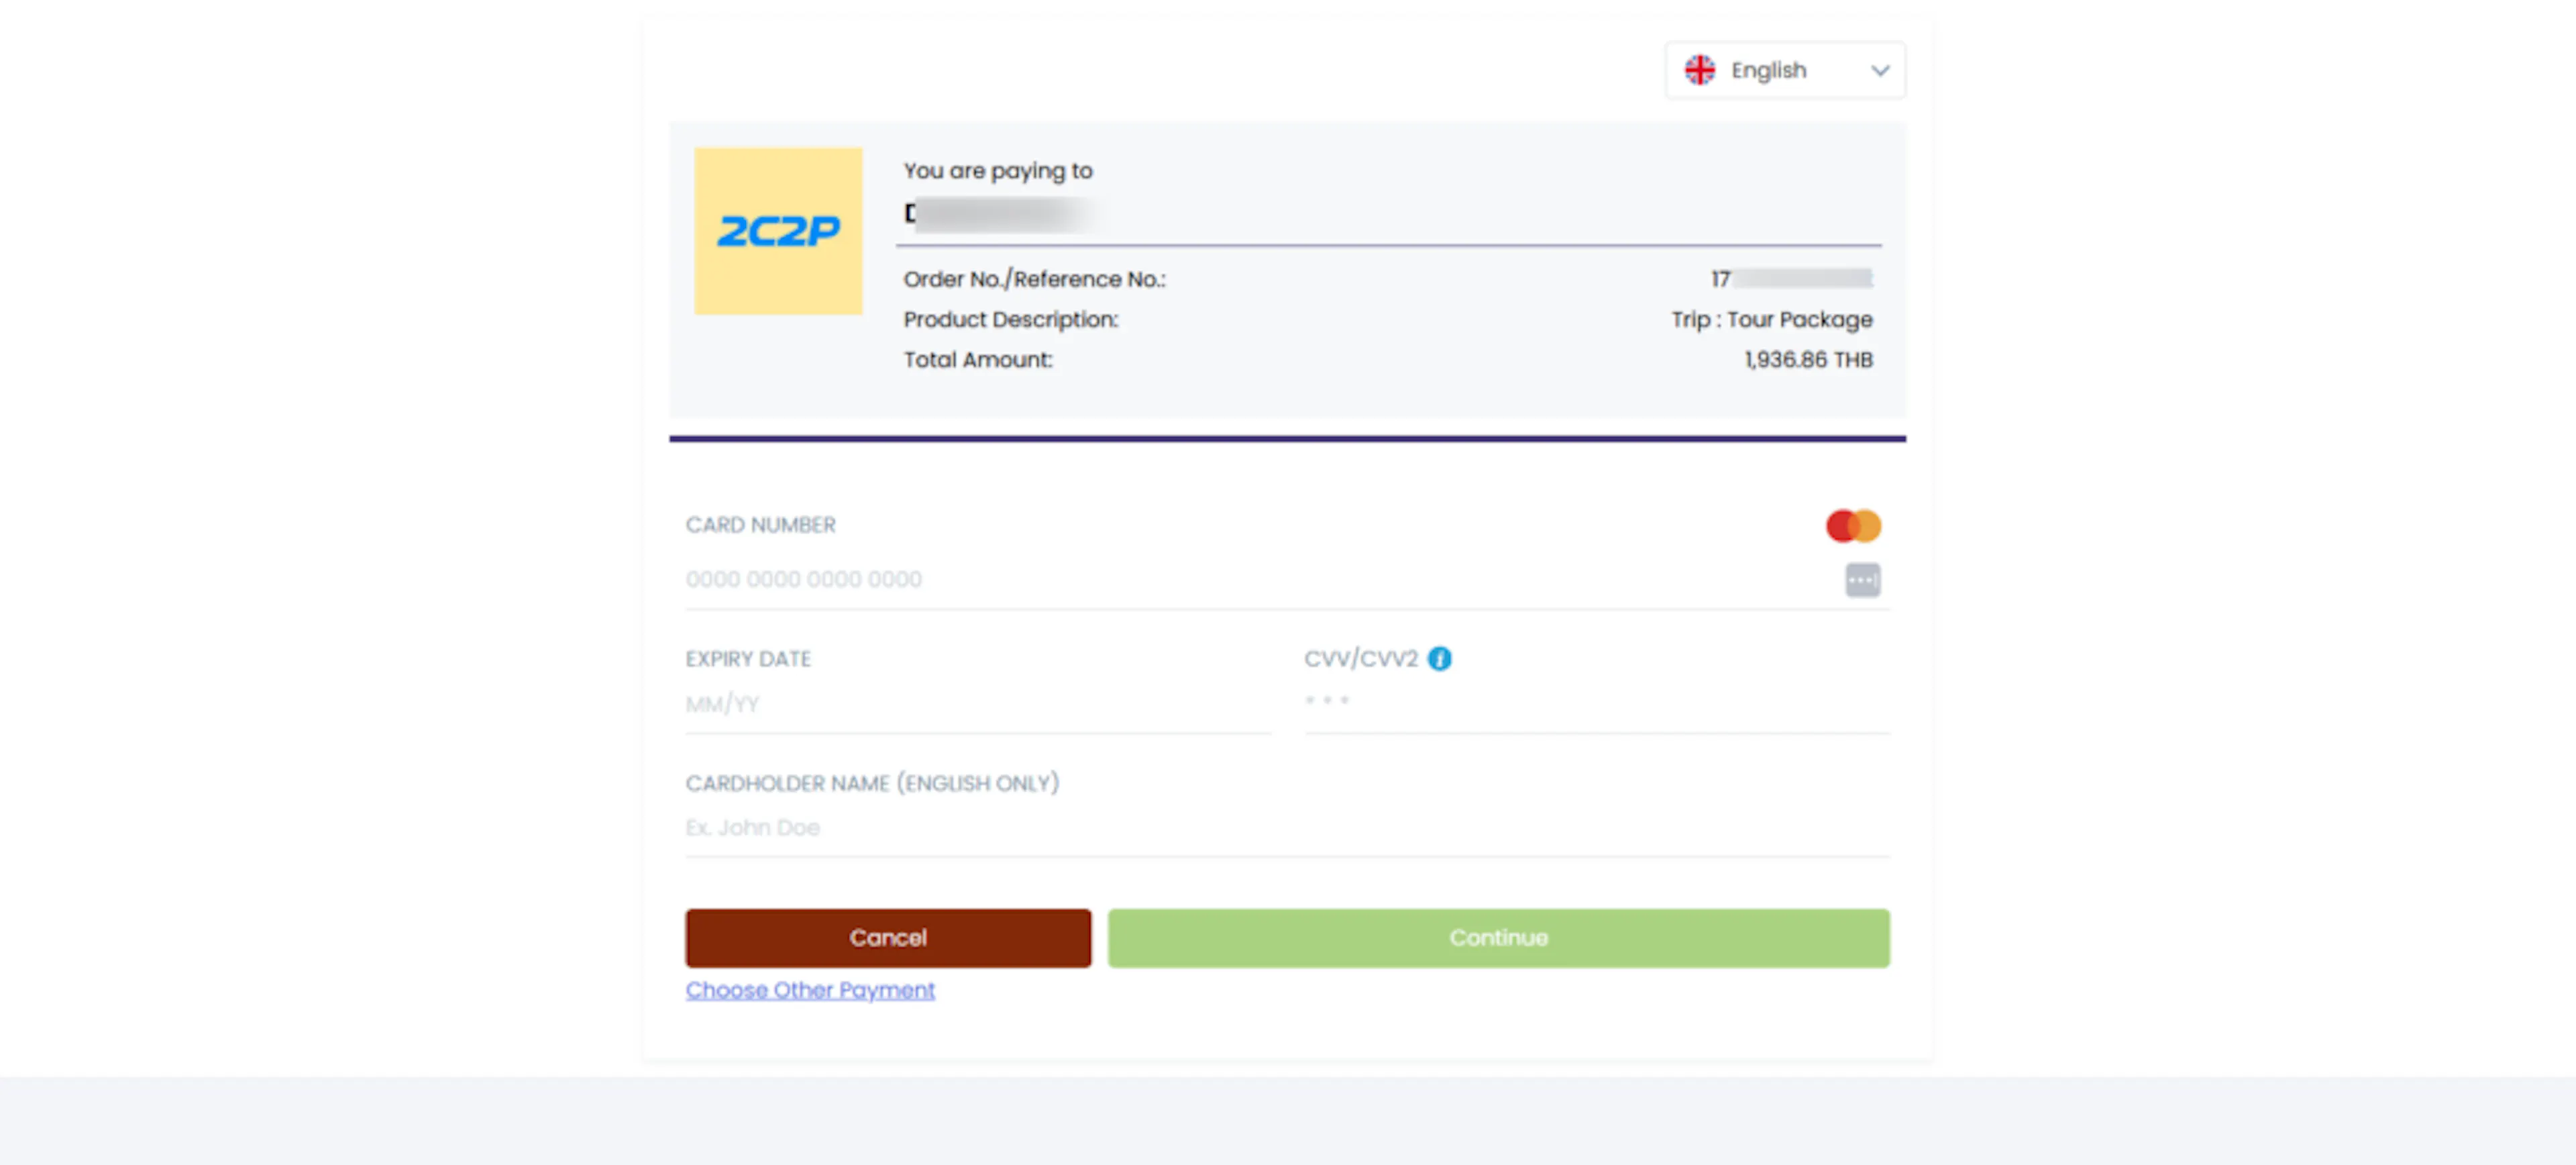
- They enter their card details on Himalayan Bank's secure payment page (not on your website).
- Himalayan Bank processes the payment.
- The booking is confirmed on your site.
- The traveler is sent back to your website.
For the redirect to work, you need to ask Himalayan Bank to set two URLs on their server:
- The Backend URL is where your website receives the payment confirmation from the bank.
- The Frontend URL is where the traveler lands after paying successfully.
A shortcode is a small piece of text in square brackets that WordPress replaces with actual content when someone views the page. You'll need these for the redirect to work correctly.
WP Travel Engine recommends setting the Frontend URL to your Travelers Information page and adding the [WTE_HBL_PAYMENT_RESPONSE] shortcode to that page. If you'd rather use a different page, add both the [WTE_HBL_PAYMENT_RESPONSE] and [WP_TRAVEL_ENGINE_BOOK_CONFIRMATION] shortcodes to it, then assign that page under Confirmation Page Settings.
Configuration
What you'll need before you start: your Himalayan Bank account details (Office ID, API Key, Encryption Key ID, and the bank's public keys) and two RSA key pairs that you'll generate yourself. Contact Himalayan Bank for the account details if you don't have them yet.
Open HBL Payment settings
On the left sidebar of your WordPress dashboard, go to WP Travel Engine > Settings > Payments > HBL Payment.
This is the page where you'll enter all the connection details between your site and Himalayan Bank.
Enter your bank-issued credentials
These three details tell Himalayan Bank that the payments coming from your site belong to your business.
Enter the Office ID, API Key, and Encryption Key ID. You'll need to contact Himalayan Bank to get these.
Generate and enter your merchant keys
These keys are like a digital signature for your payments. They prove to the bank that the payment request came from you.
Enter your Merchant Signing Private Key and Merchant Decryption Private Key. Don't have these yet? You'll create them in the steps below.
Enter the bank's public keys
These keys come from Himalayan Bank and let your site verify that payment responses really came from the bank.
Enter the PACO Signing Public Key and PACO Encryption Public Key. Contact Himalayan Bank to obtain these.
Leave the notification URLs at their defaults
These URLs tell the bank where to send payment confirmations. The default values already point to the right place on your site.
Keep the Notification URLs at their default values. No changes needed here.
Save your settings
This stores all the details you entered so the gateway can start working.
Click Save Settings.
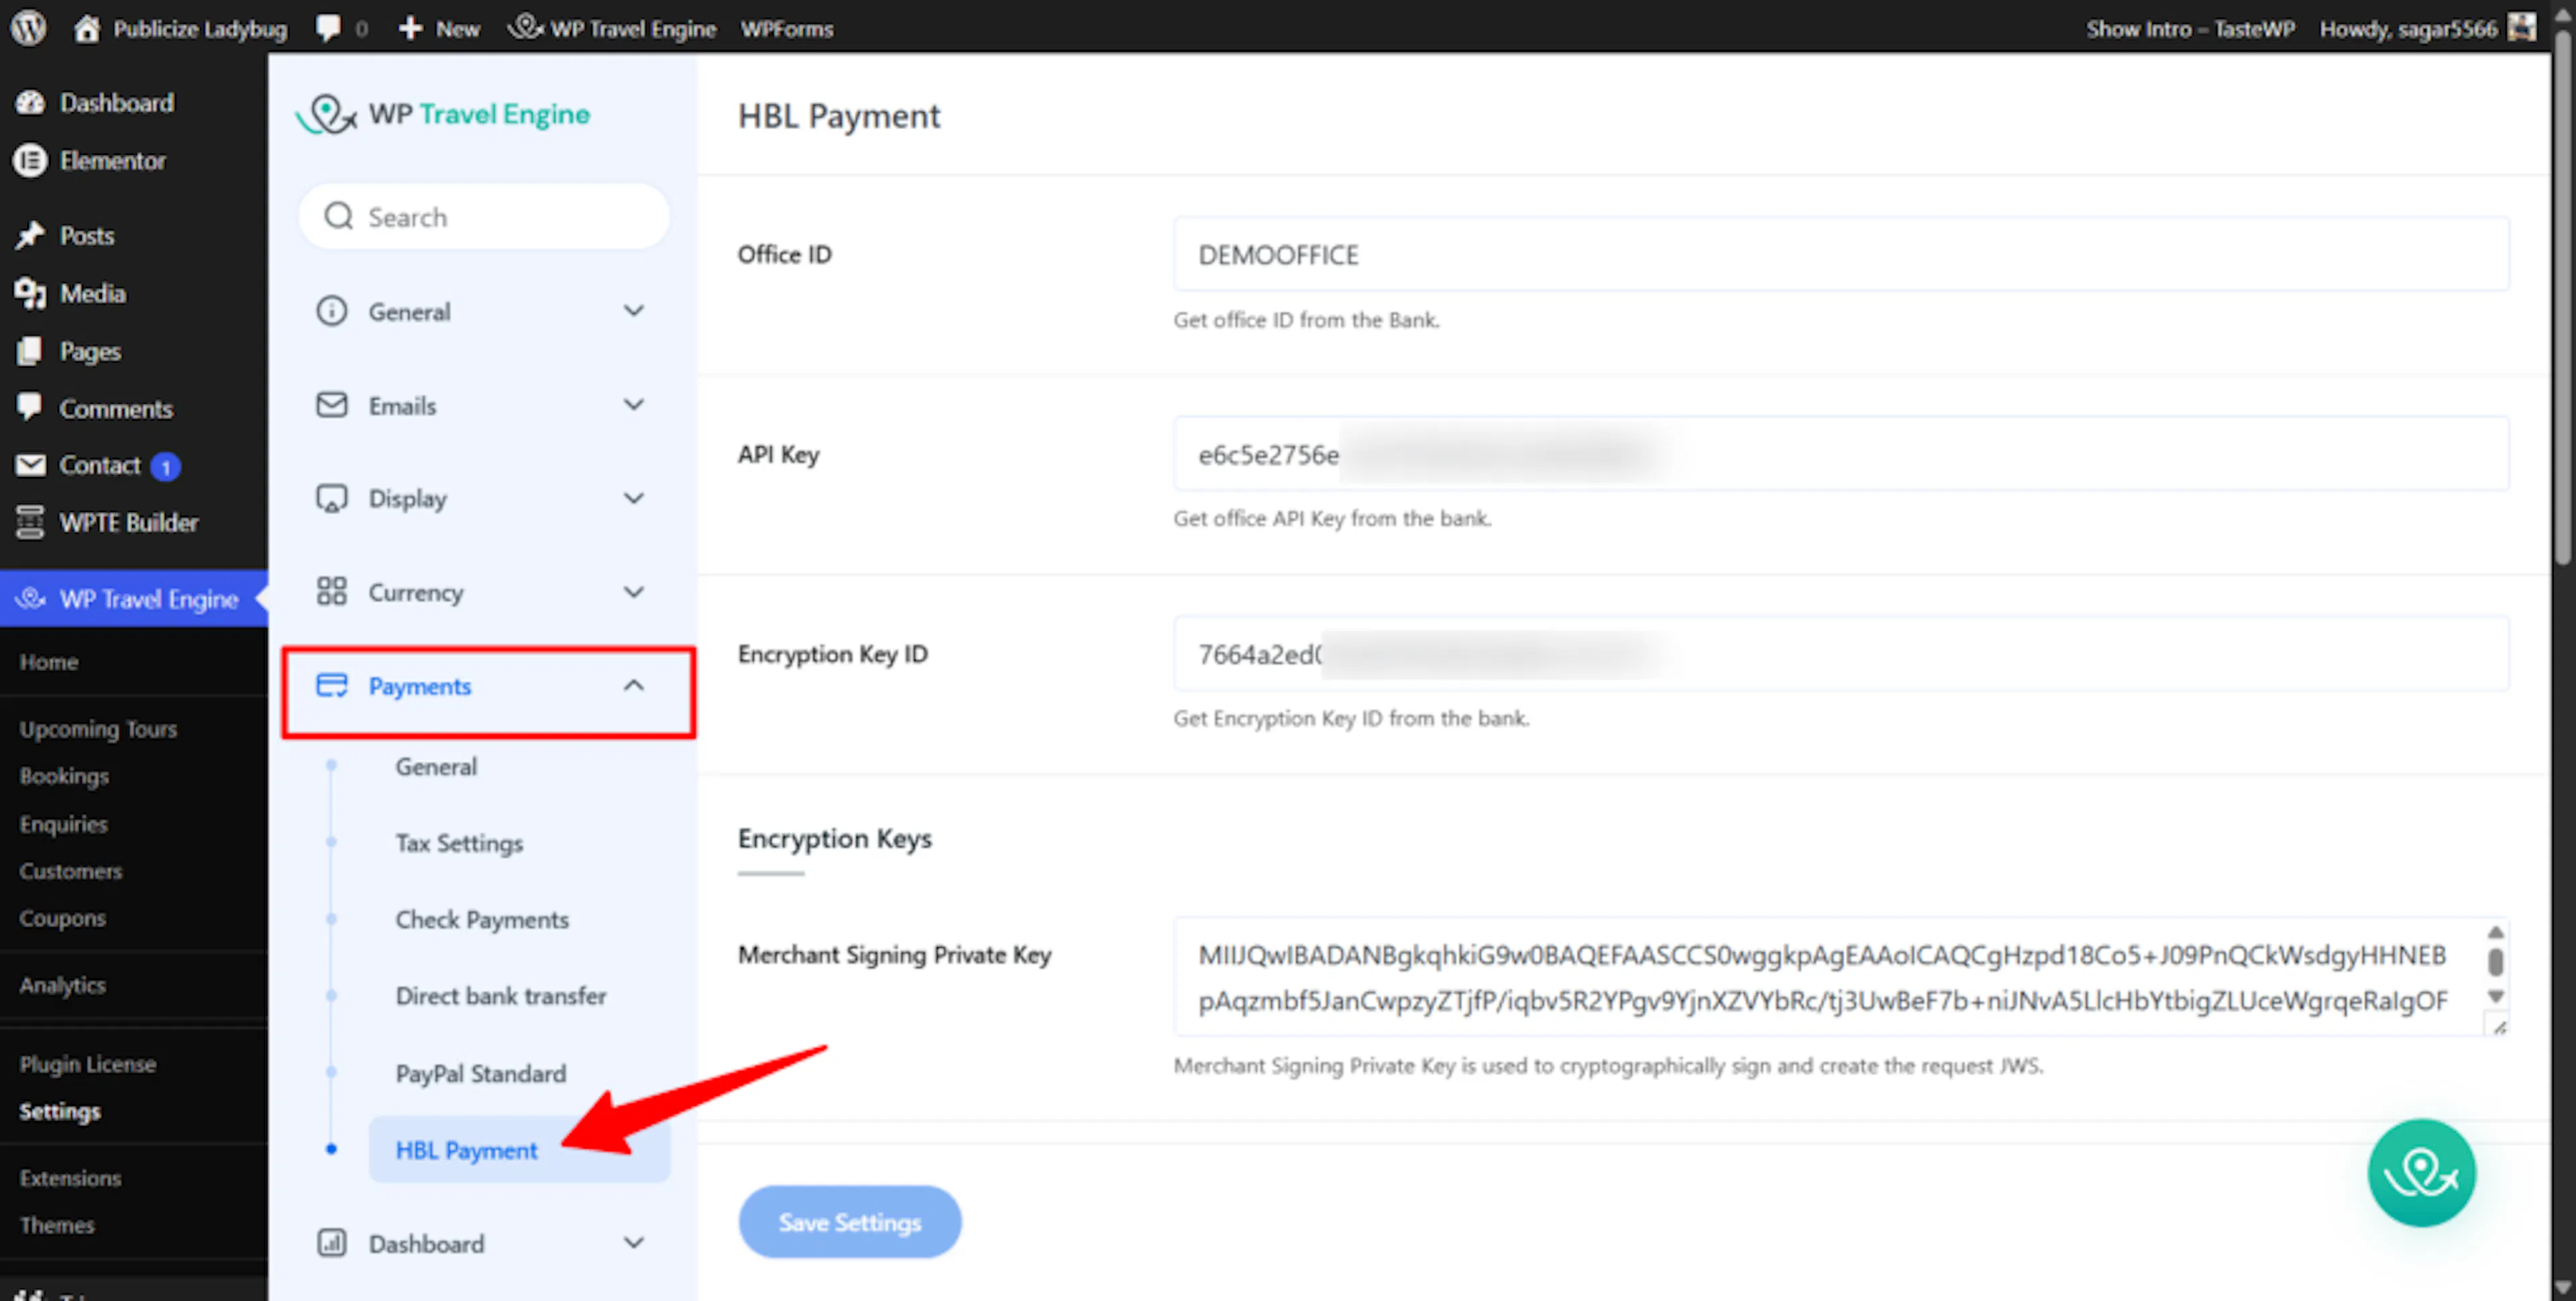
You've entered all the bank-issued details. Now you need to generate the two merchant keys if you haven't already.
How to generate your merchant keys
RSA keys are a pair of digital codes used to keep online payments secure. One key is public (you share it with the bank) and one is private (you keep it secret on your site). You need two pairs: one for signing payment requests and one for encrypting payment data.
Generate two RSA key pairs
You need two separate key pairs, each with a public key and a private key. The key size must be 4096 bit.
You can use any RSA key generation tool. For example, devglan's RSA encryption/decryption tool produces ready-to-use RSA key pairs.
Generate the first pair. This will be your signing key pair. Then generate a second pair. This will be your encryption key pair.
Provide the public keys to the bank
From each pair, there's a public key and a private key. You'll share the public keys with Himalayan Bank.
Send the two public keys to Himalayan Bank. Tell them one is for signing and one is for encryption.
Save the private keys in WP Travel Engine
The private keys stay with you. These are the ones that go into your payment settings.
Go back to WP Travel Engine > Settings > Payments > HBL Payment and paste the first private key into the Merchant Signing Private Key field. Paste the second private key into the Merchant Decryption Private Key field.
Configuration field reference
The list below shows every field in the HBL Payment settings and where it comes from.
Provided by Himalayan Bank.
Provided by Himalayan Bank.
Provided by Himalayan Bank.
Your generated RSA private key used for signing.
Your generated RSA private key used for decryption.
Provided by Himalayan Bank.
Provided by Himalayan Bank.
Enable HBL Payment at checkout
All the connection details are saved. The last step is to turn the gateway on so travelers can actually choose it when booking.
Open Payment General settings
This is where you choose which payment methods appear on your booking page.
In your WordPress dashboard, go to WP Travel Engine > Settings > Payments > General.
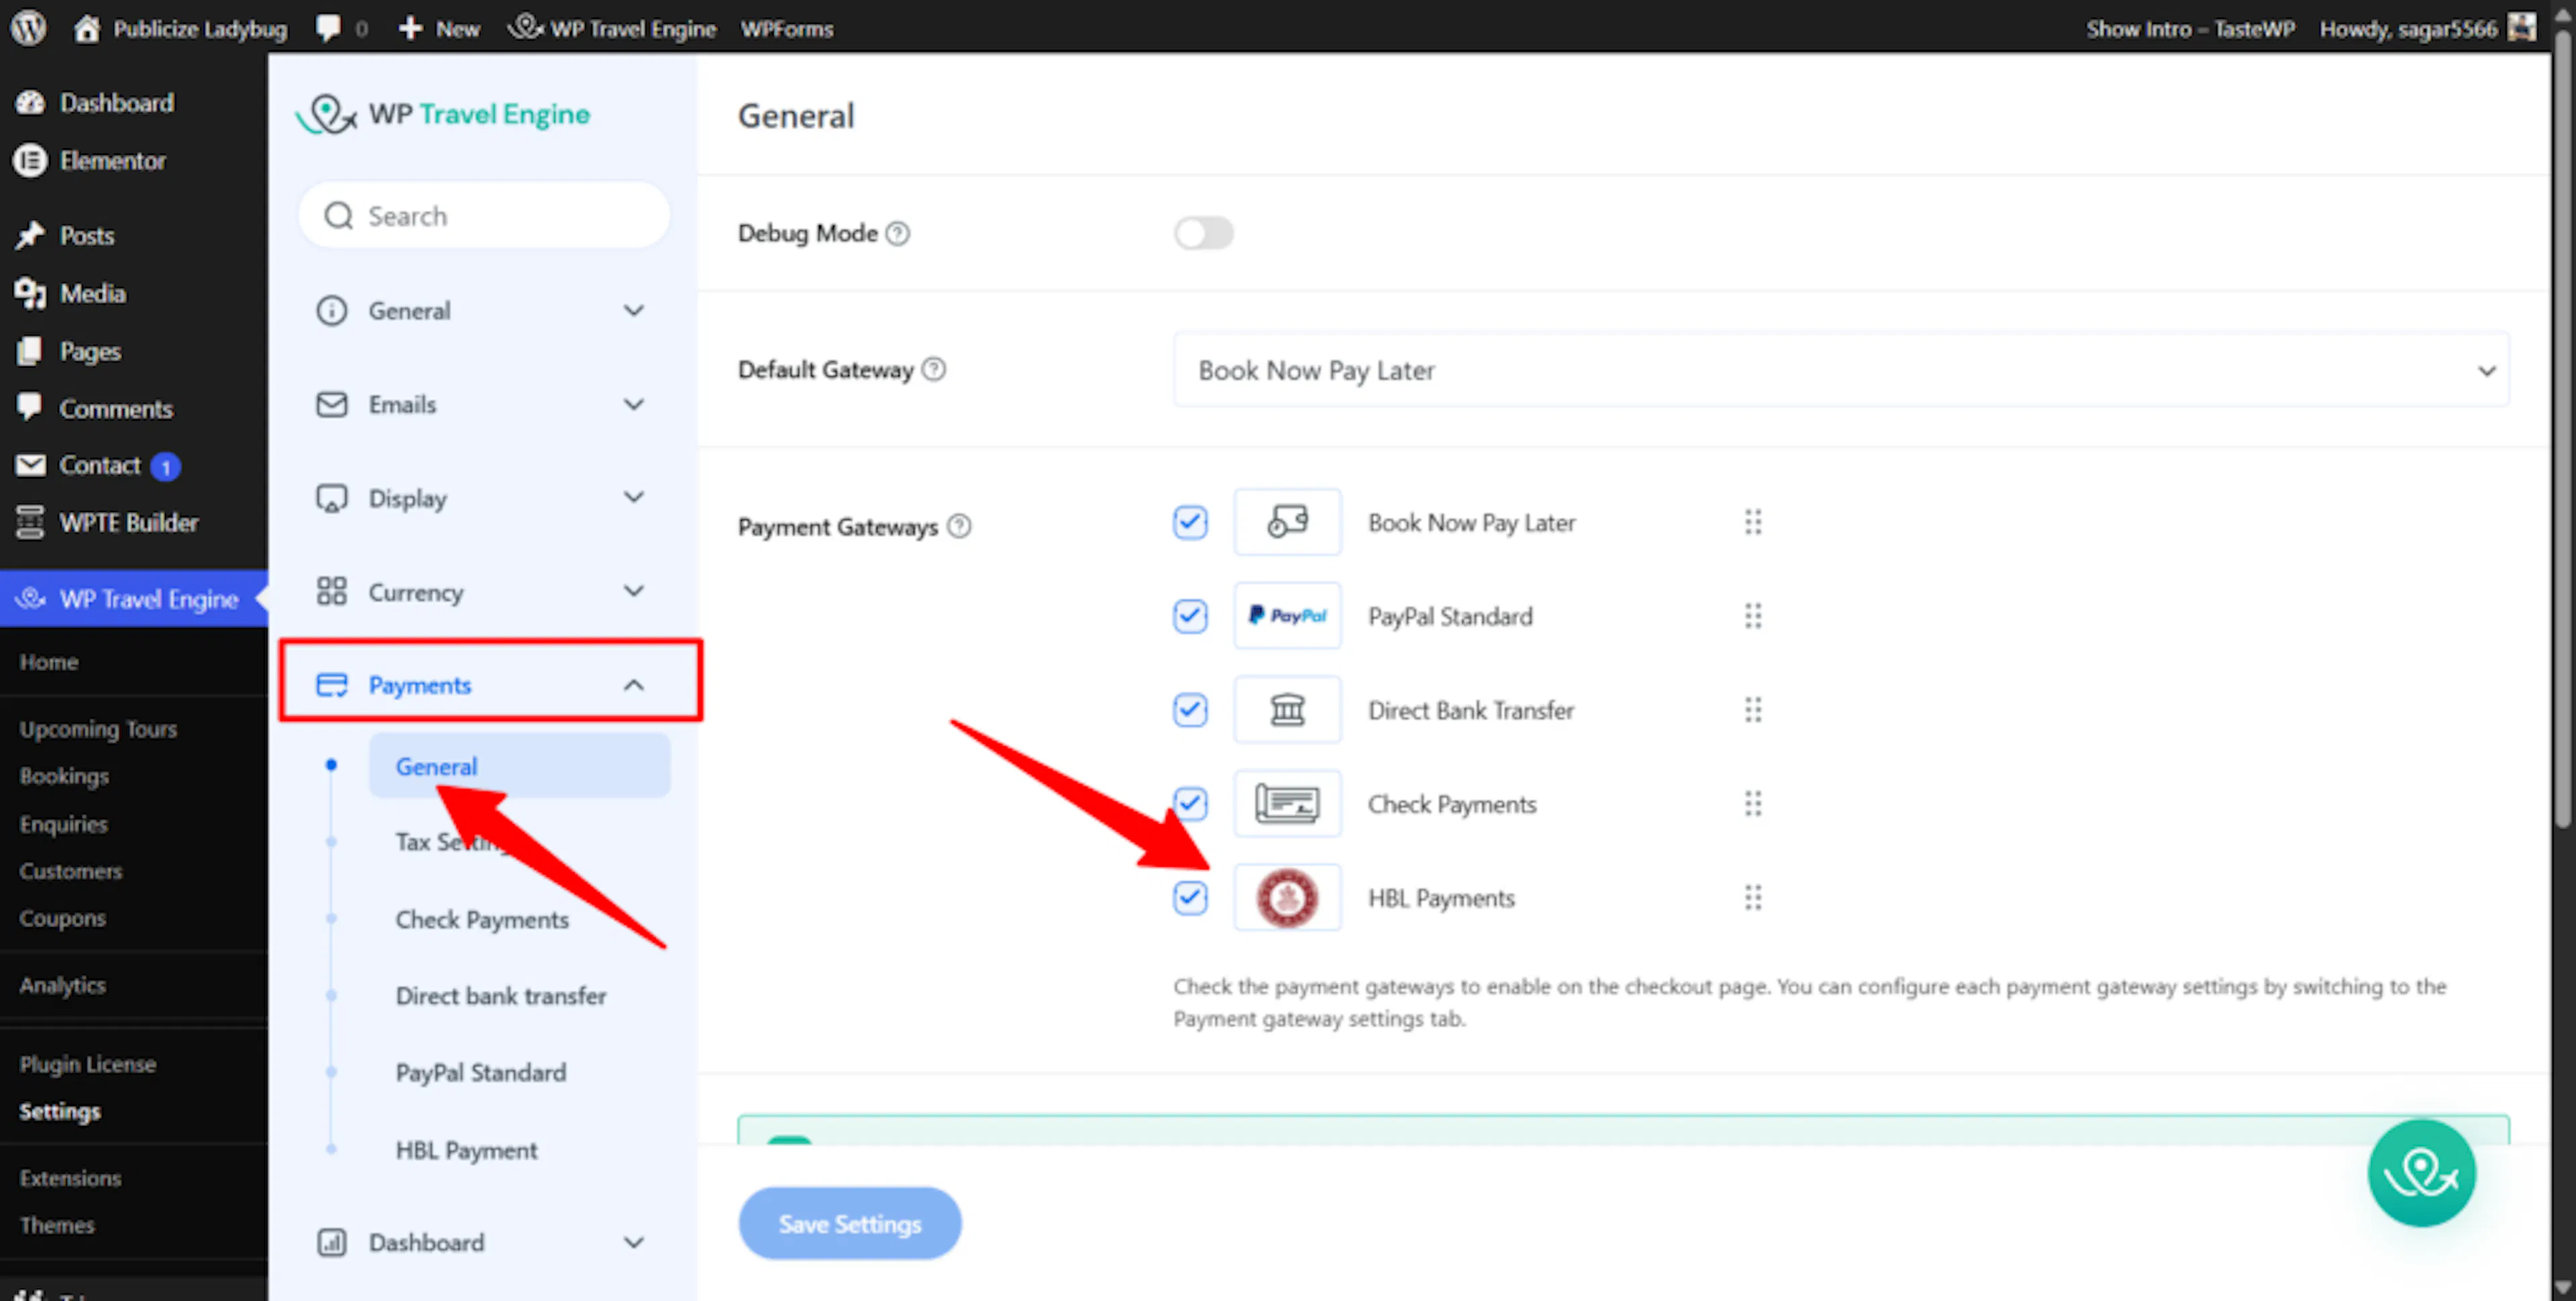
Enable HBL Payment
This makes the Himalayan Bank option visible to travelers during checkout.
Turn on the HBL Payment option.
Save your changes
This puts your new payment method live.
Click Save Settings.
Once that's done, travelers booking a trip on your site will see Himalayan Bank as a payment option. When they choose it, they'll be taken to Himalayan Bank's secure page to enter their card details. After paying, they'll come back to your site with their booking confirmed.
If you're still stuck or have a question we didn't cover, our support team is happy to help. Reach out at our support page and we'll get you sorted.