

PayU Money Payment Gateway
Install and configure the PayU Money Payment Gateway addon to accept credit card and debit card payments in Indian Rupees for your WP Travel Engine trips.
Overview
PayU Money Payment Gateway adds PayU Money to WP Travel Engine so you can take trip and tour payments on your website.
Your travelers can pay with credit cards and debit cards. PayU Money only works with Indian Rupee or INR currency.
If you run tours in India and charge in INR, this lets a traveler book a trek, day tour, or holiday package and pay online during checkout. Once you have it set up, the payment step happens on your booking screen.
PayU Money Payment Gateway requires WP Travel Engine v3.0.5 or later.
Requirements
Before you start, make sure your PayU Money merchant account is active. A merchant account is the business account you use with PayU Money to receive customer payments.
You will need:
- A PayU Money Merchant Key
- A PayU Money Merchant Salt
Once you have these ready, you can install the extension.
Installation
Before you start, keep your extension download ready and sign in to your WordPress dashboard. Your dashboard is the main admin area where you manage your website.
Download the extension
This gives you the plugin file you need to add PayU Money to your site.
Download the extension from your dashboard.
Upload the plugin folder
This adds the extension to your WordPress site so WordPress can use it.
Upload the folder to your /wp-content/plugins/ directory.
Activate the plugin
Activation turns the plugin on so the payment option appears in your WP Travel Engine settings.
Activate WP Travel Engine – PayU Money Payment Gateway from the Plugins menu within WordPress. You can find the Plugins menu on the left sidebar of your WordPress dashboard.
After the plugin is active, you are ready to add your PayU Money details.
Configure the gateway
Before you start, keep your PayU Money Merchant Key and Merchant Salt nearby. You will enter them in the next steps.
Open PayU Money Bolt settings
This is where you connect your website to your PayU Money account.
Go to WP Travel Engine > Settings > Payments > PayU Money Bolt. You can find these menus in the left sidebar of your WordPress dashboard.
Enter your merchant credentials
These details tell PayU Money that payments from your booking form should go to your business account.
Click PayU Money Bolt to configure the settings.
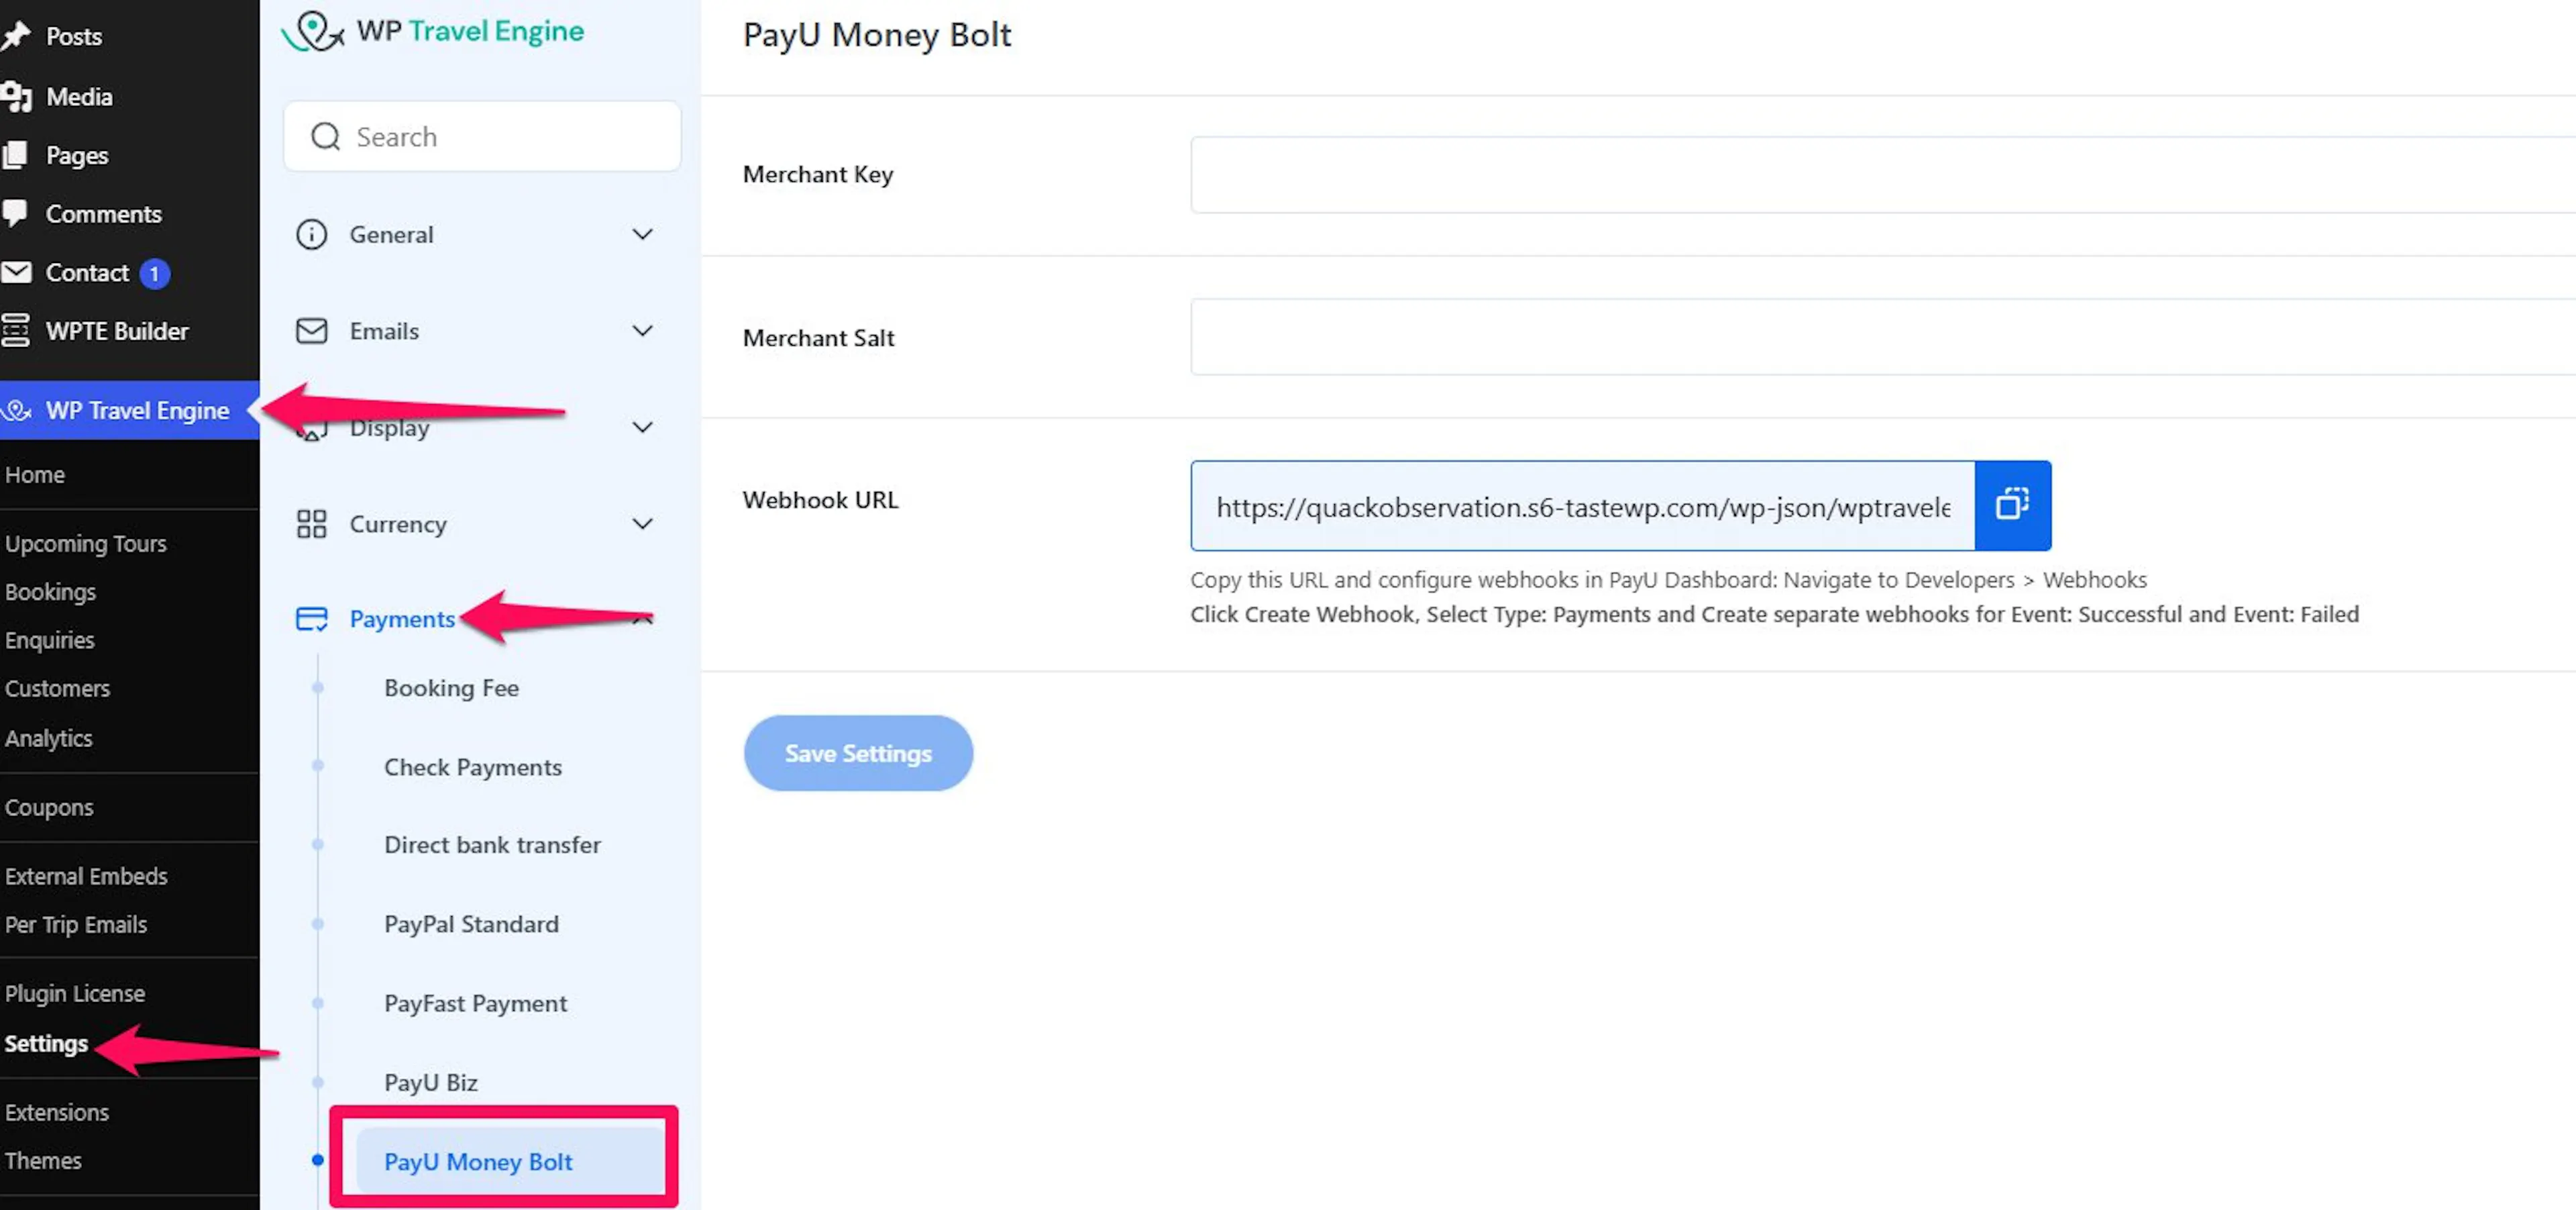
Webhook URL
This allows PayU to send payment status updates to WP Travel Engine.
Copy the Webhook URL below and add it to your PayU Dashboard under Developers > Webhooks. Click Create Webhook, select Payments as the type, and create separate webhooks for the Successful and Failed events.
Set your currency to INR
This step matters because PayU Money only accepts Indian Rupee payments.
Go to WP Travel Engine Dashboard > Settings > Currency > General > Payment Currency and choose Indian Rupee as the currency code. For example, if you sell a weekend wildlife tour or a multi-day Himalayan trek, the trip price must be set in INR for PayU Money to accept the payment.
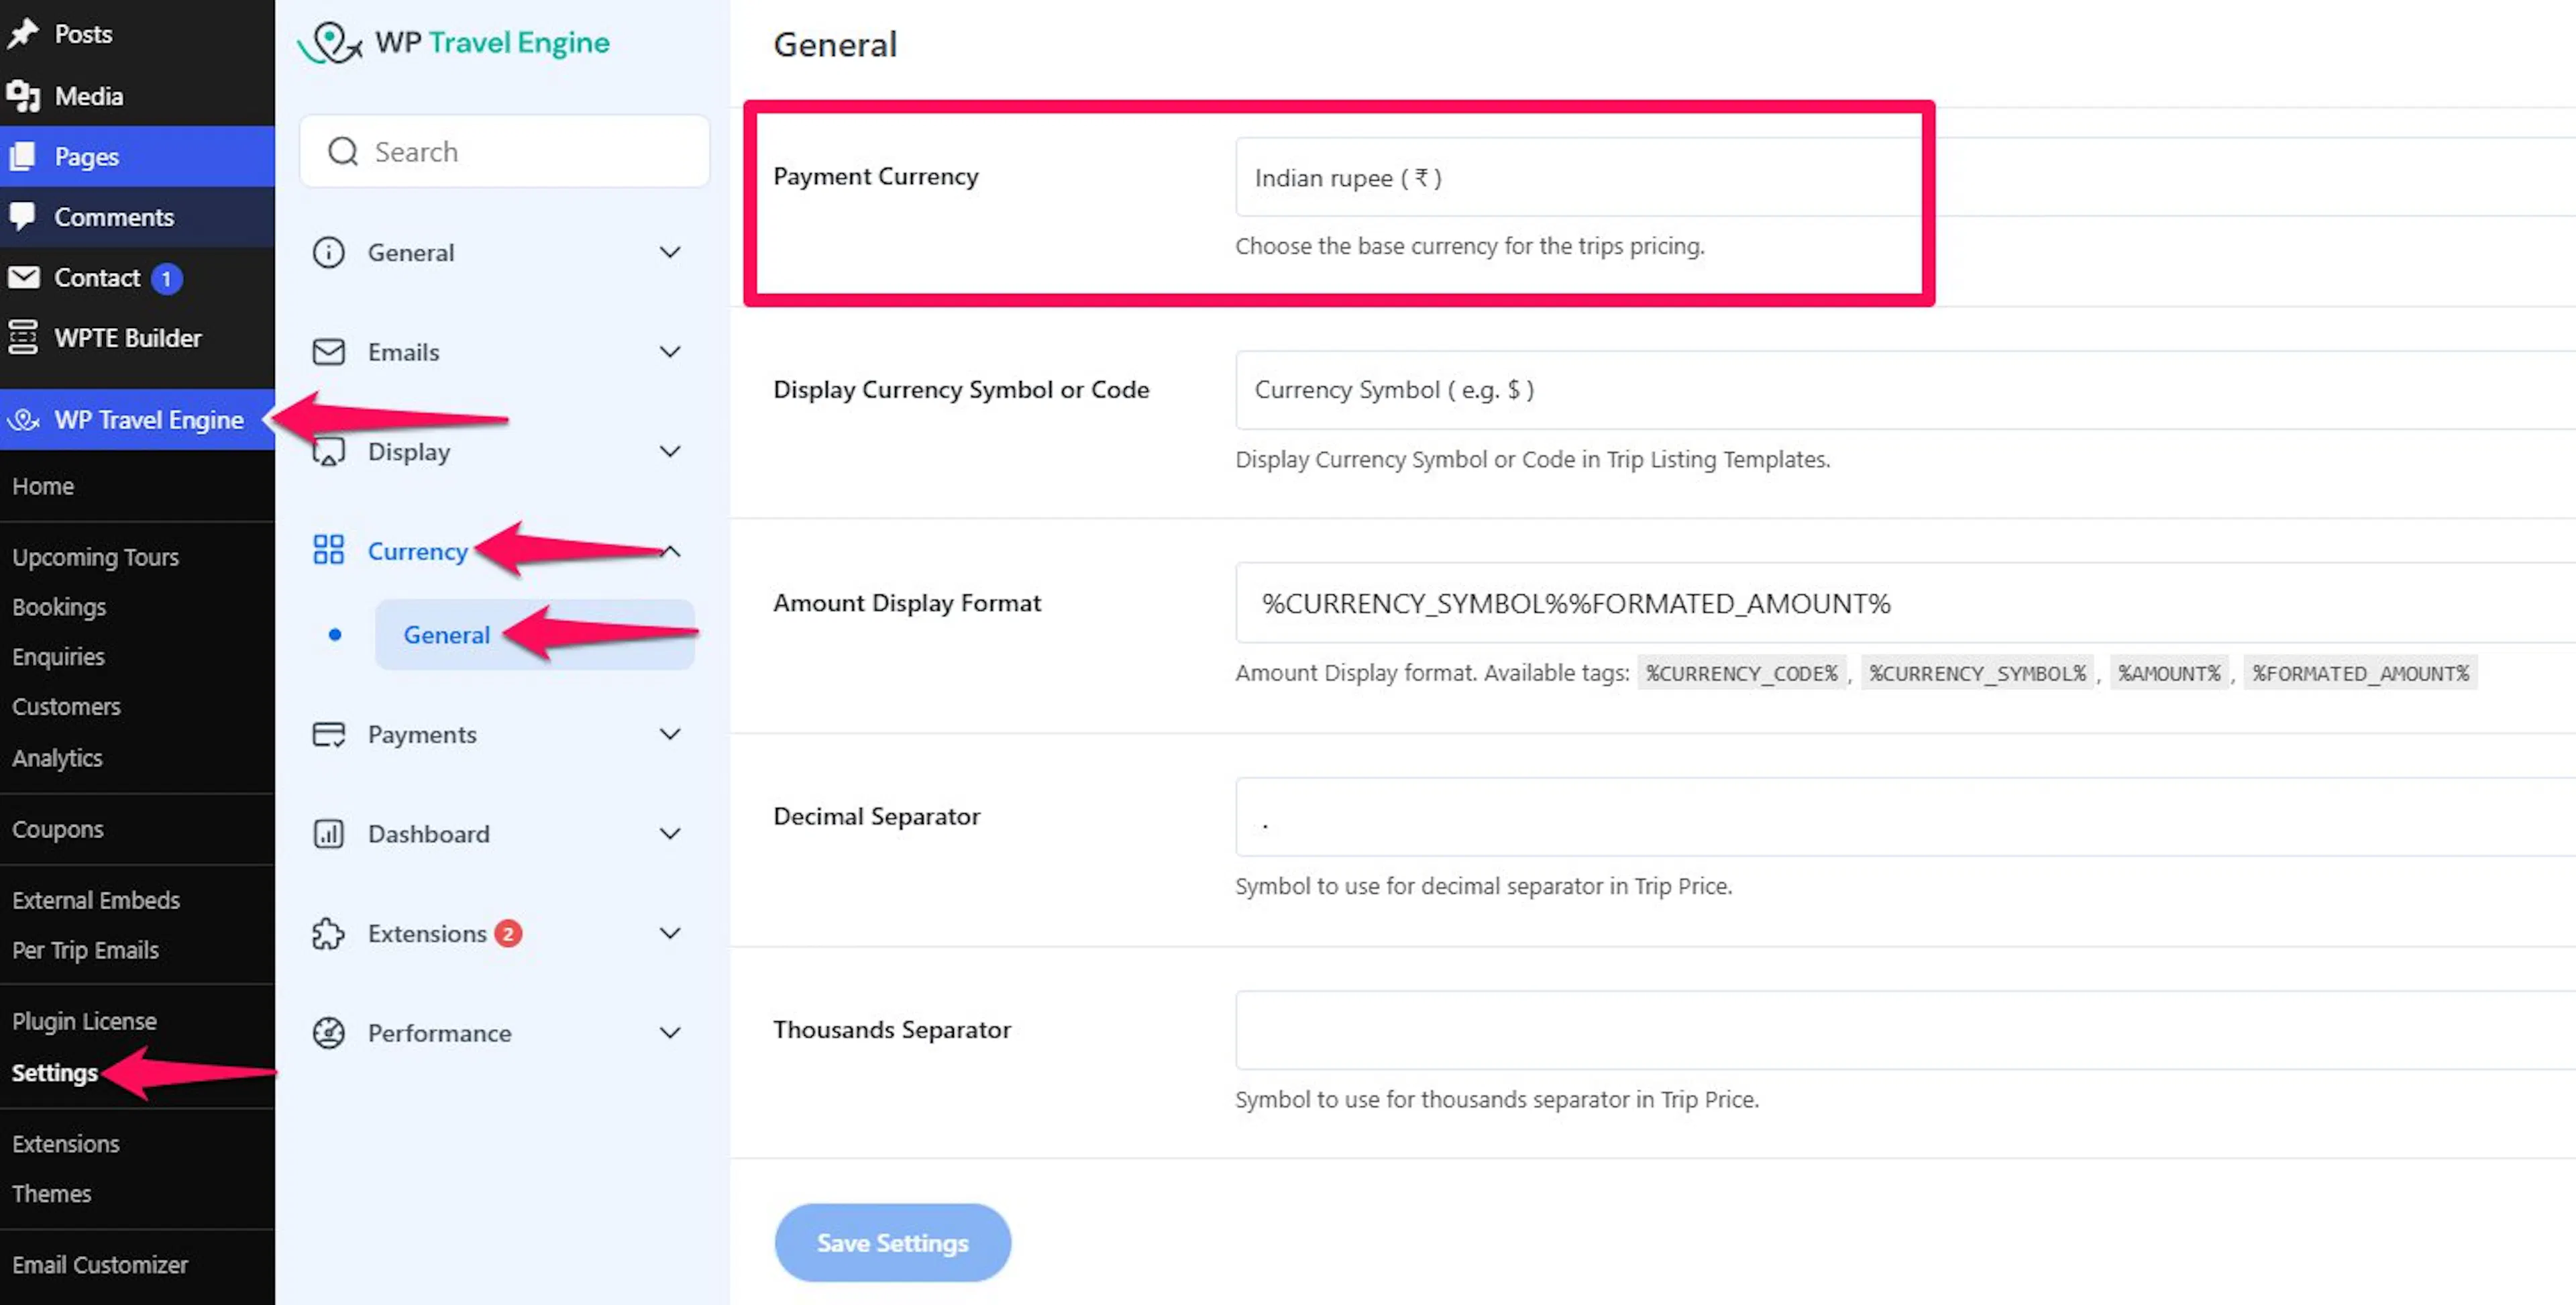
Your main setup is now in place. The last thing to check is the two account details below.
The gateway uses these two details to connect your website with your PayU Money account.
Your PayU Money Merchant Key.
Your PayU Money Merchant Salt.
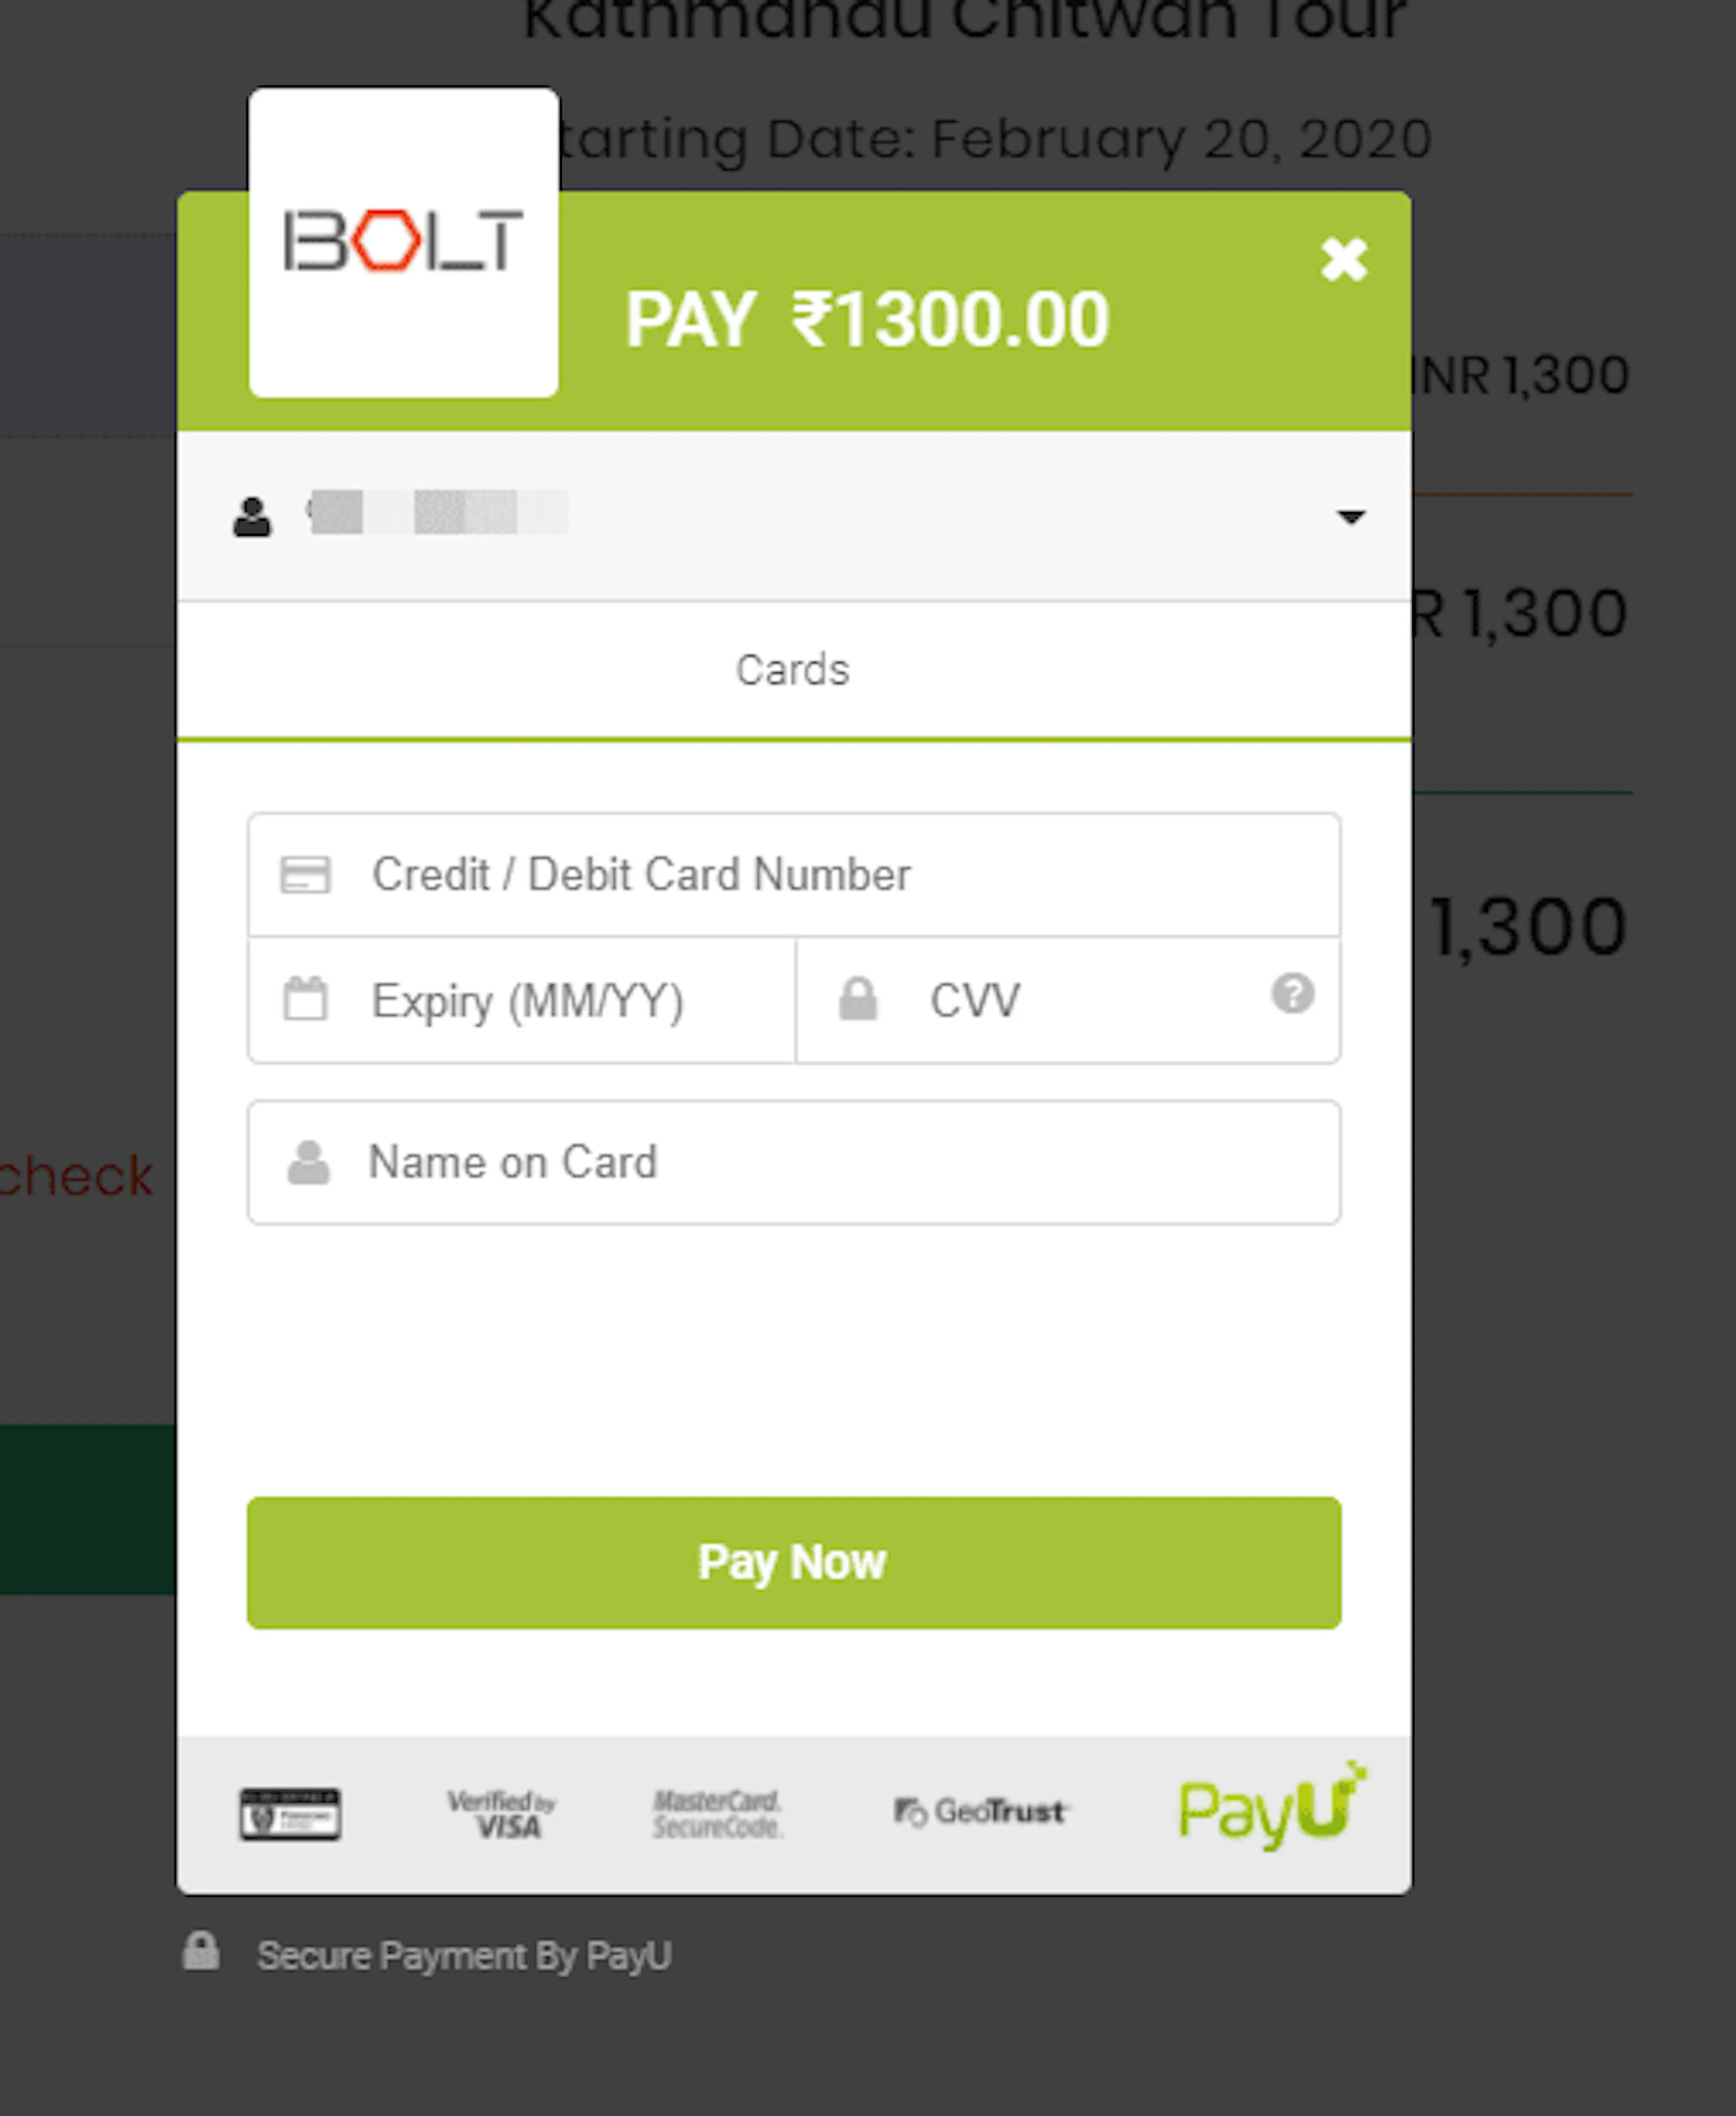
Once configured, when a traveler books a trip through the PayU Money Payment Gateway, they see a payment popup on the same screen to complete a secure payment.
If you're still stuck or have a question we didn't cover, our support team is happy to help. Reach out at our support page and we'll get you sorted.