

Elementor Widgets
Build and customize your trip pages visually with drag-and-drop widgets and ready-made templates, without touching code.
Build your trip pages by arranging content visually instead of editing code. Elementor is a visual page builder. You drag pieces onto the page and place them where you want them.
With the Elementor Widgets plugin, you can design a single trip page that fits how you sell your tours. A widget is a building block you drag onto the page, like placing furniture in a room. For example, if you run a 3-day Himalayan trek, you can build a page where travelers see the itinerary, price, and photos before they reach the booking section.
The Elementor Widgets plugin requires WP Travel Engine plugin v5.0.0 or later installed and activated on your website.
Installing the plugin
You will upload the plugin file into WordPress and turn it on for your site.
Before you start, make sure WP Travel Engine v5.0.0 or later is already installed and activated on your website.
This plugin is not added from the usual WordPress plugin search. You upload the file directly from your computer instead.
Download the plugin
Download the plugin from wordpress.org.
Open the plugin uploader
From your dashboard, navigate to Plugins → Add New, then click Upload Plugin.
Select the file
Select the downloaded file, wp-travel-engine-elementor-widgets.zip, from your computer.
Install the plugin
Click Install Now.
Activate the plugin
Once the file is installed, click Activate.
Once the plugin is active, you are ready to allow Elementor to work on your trip pages.
Enabling Elementor for trip pages
Elementor needs permission to edit your trip pages. By default, it usually works with regular pages and blog posts first.
WordPress calls different kinds of content "post types." Trips are their own post type, the same way blog posts and pages are different types of content inside your dashboard.
Before you start, open your WordPress dashboard. You will use the left sidebar to reach the Elementor settings.
Enable Trips as a post type
Go to Elementor > Settings > General. In your WordPress dashboard, this is in the left sidebar. Under General, check Trips on Post Types, then click Save Changes.
Enable the Flexbox Container feature
Elementor uses Flexbox Container as a newer layout system. The default pre-made template depends on it because it gives you more flexible control over how sections line up on the page.
Navigate to the Features tab within Elementor settings, choose Active on Flexbox Container, and click Save Changes.
Enabling the Flexbox Container feature is essential to import the default template. However, you can still use widgets without enabling this option.
With that done, Elementor is ready to edit your trip pages.
Designing trip pages with Elementor widgets
You can now open a trip page and arrange the parts the way you want. For example, if you want the booking form to appear right after your trip photos instead of at the bottom of the page, you would drag the Trip Booking widget into that spot.
Before you start, make sure you already have at least one trip created in WP Travel Engine. If not, you can create a new one here.
To design a new trip page in the Elementor page builder, navigate to Trips → Add New in the left sidebar of your WordPress dashboard, then launch the Elementor editor by clicking Edit with Elementor.
If you want to give a fresh look to your existing trip page, follow these steps:
Open the trip
Go to the Trips section of your WordPress dashboard and select the trip you want to edit.
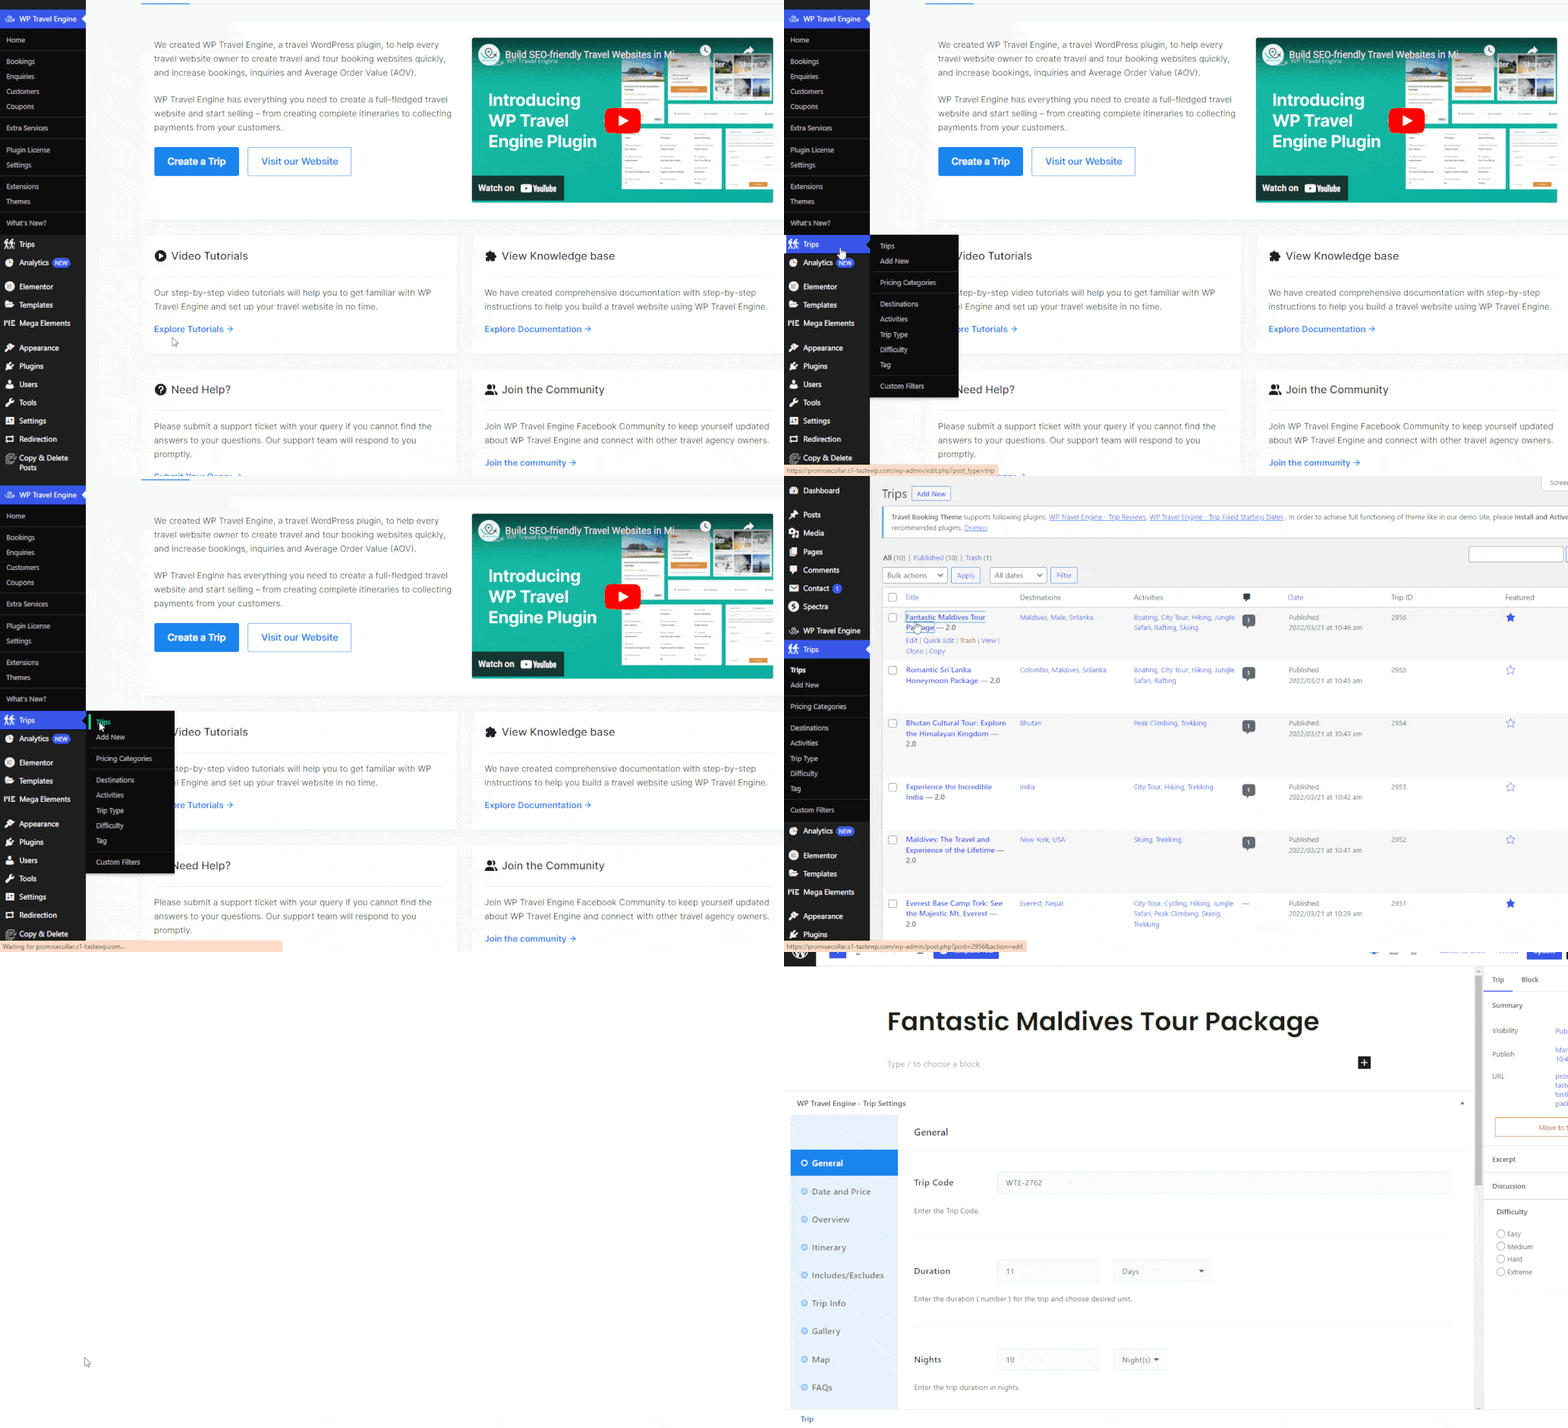
Launch Elementor
Click Edit with Elementor, then click the Settings icon at the bottom of the panel.
Set full-width layout
This layout matters because a full-width page gives your trip content room to breathe. Without it, the trip page can get squeezed into a narrow column with empty space on both sides.
Find the Page Layout option and choose Elementor Full Width.
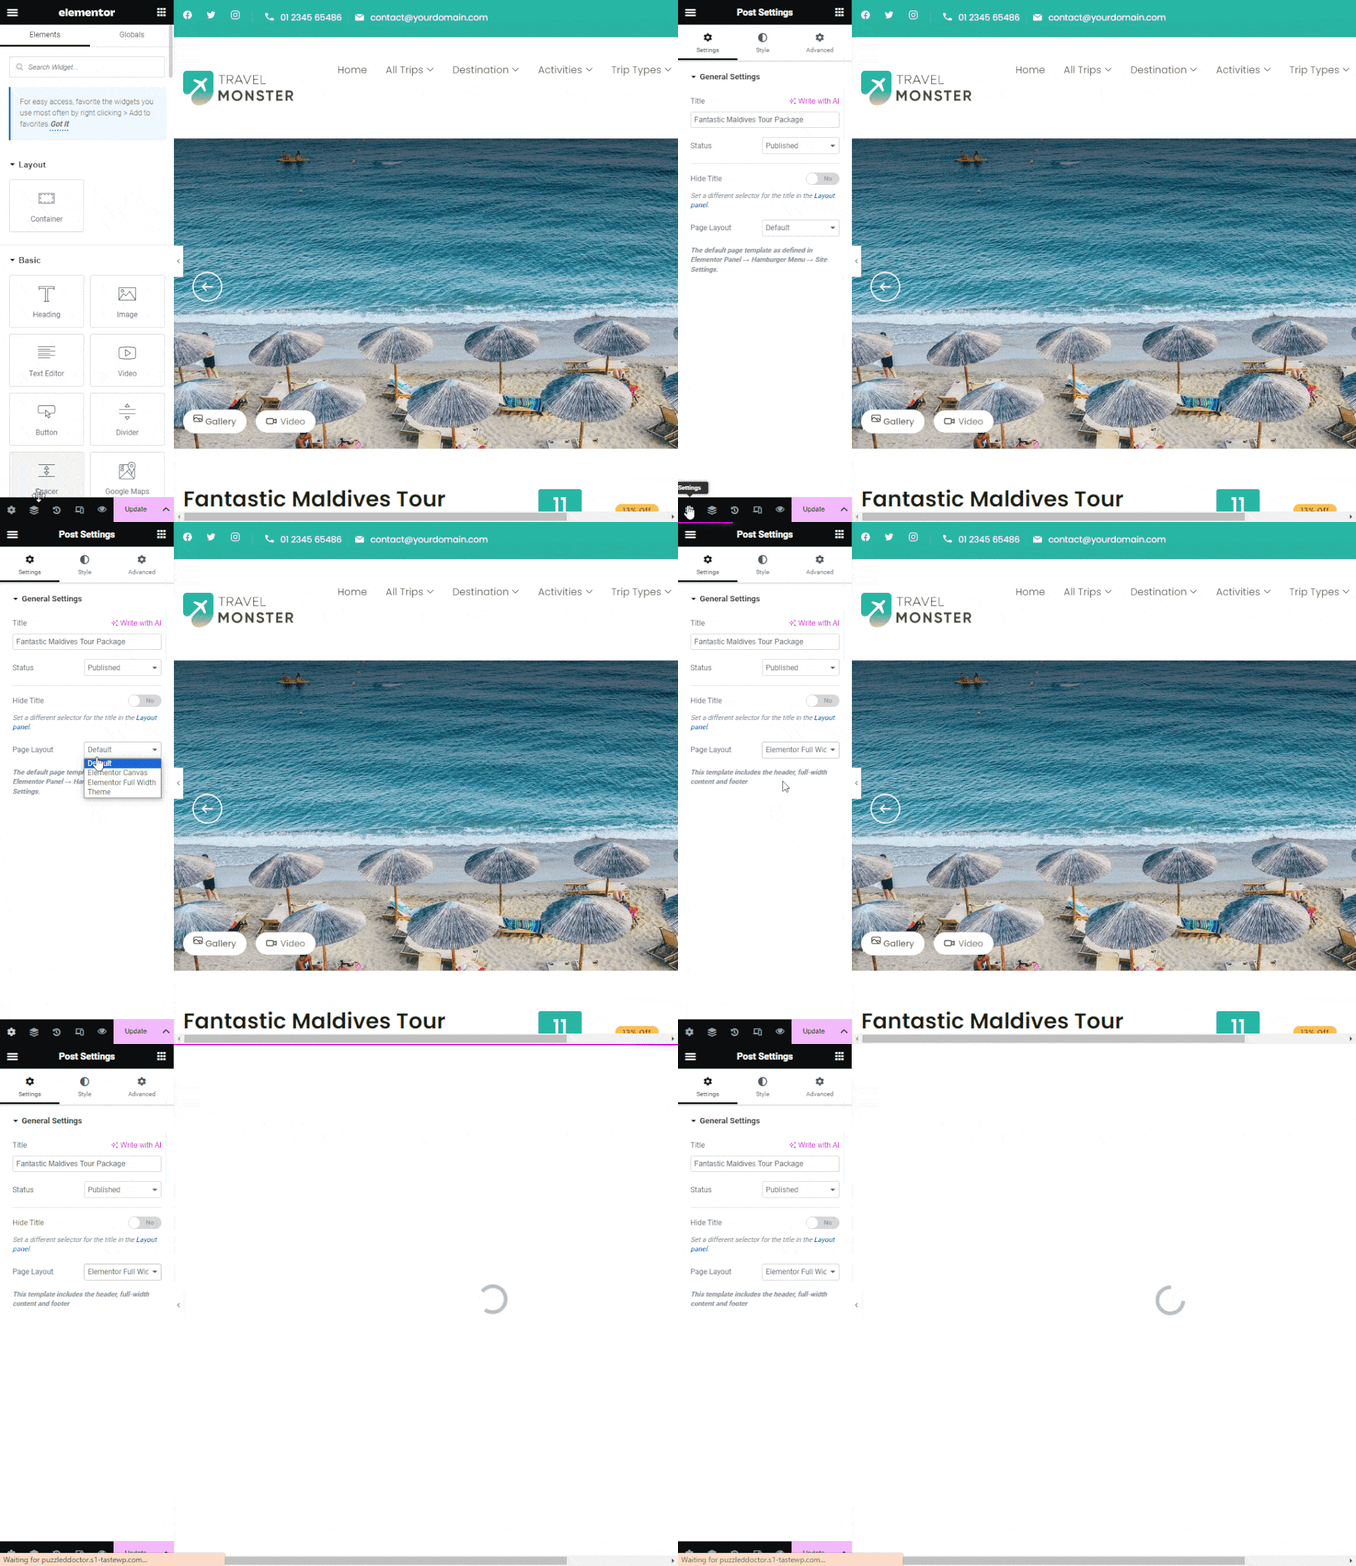
Explore the WP Travel Engine widgets
On the left side of the screen, in the Elementor sidebar, scroll down to find widgets provided by WP Travel Engine.
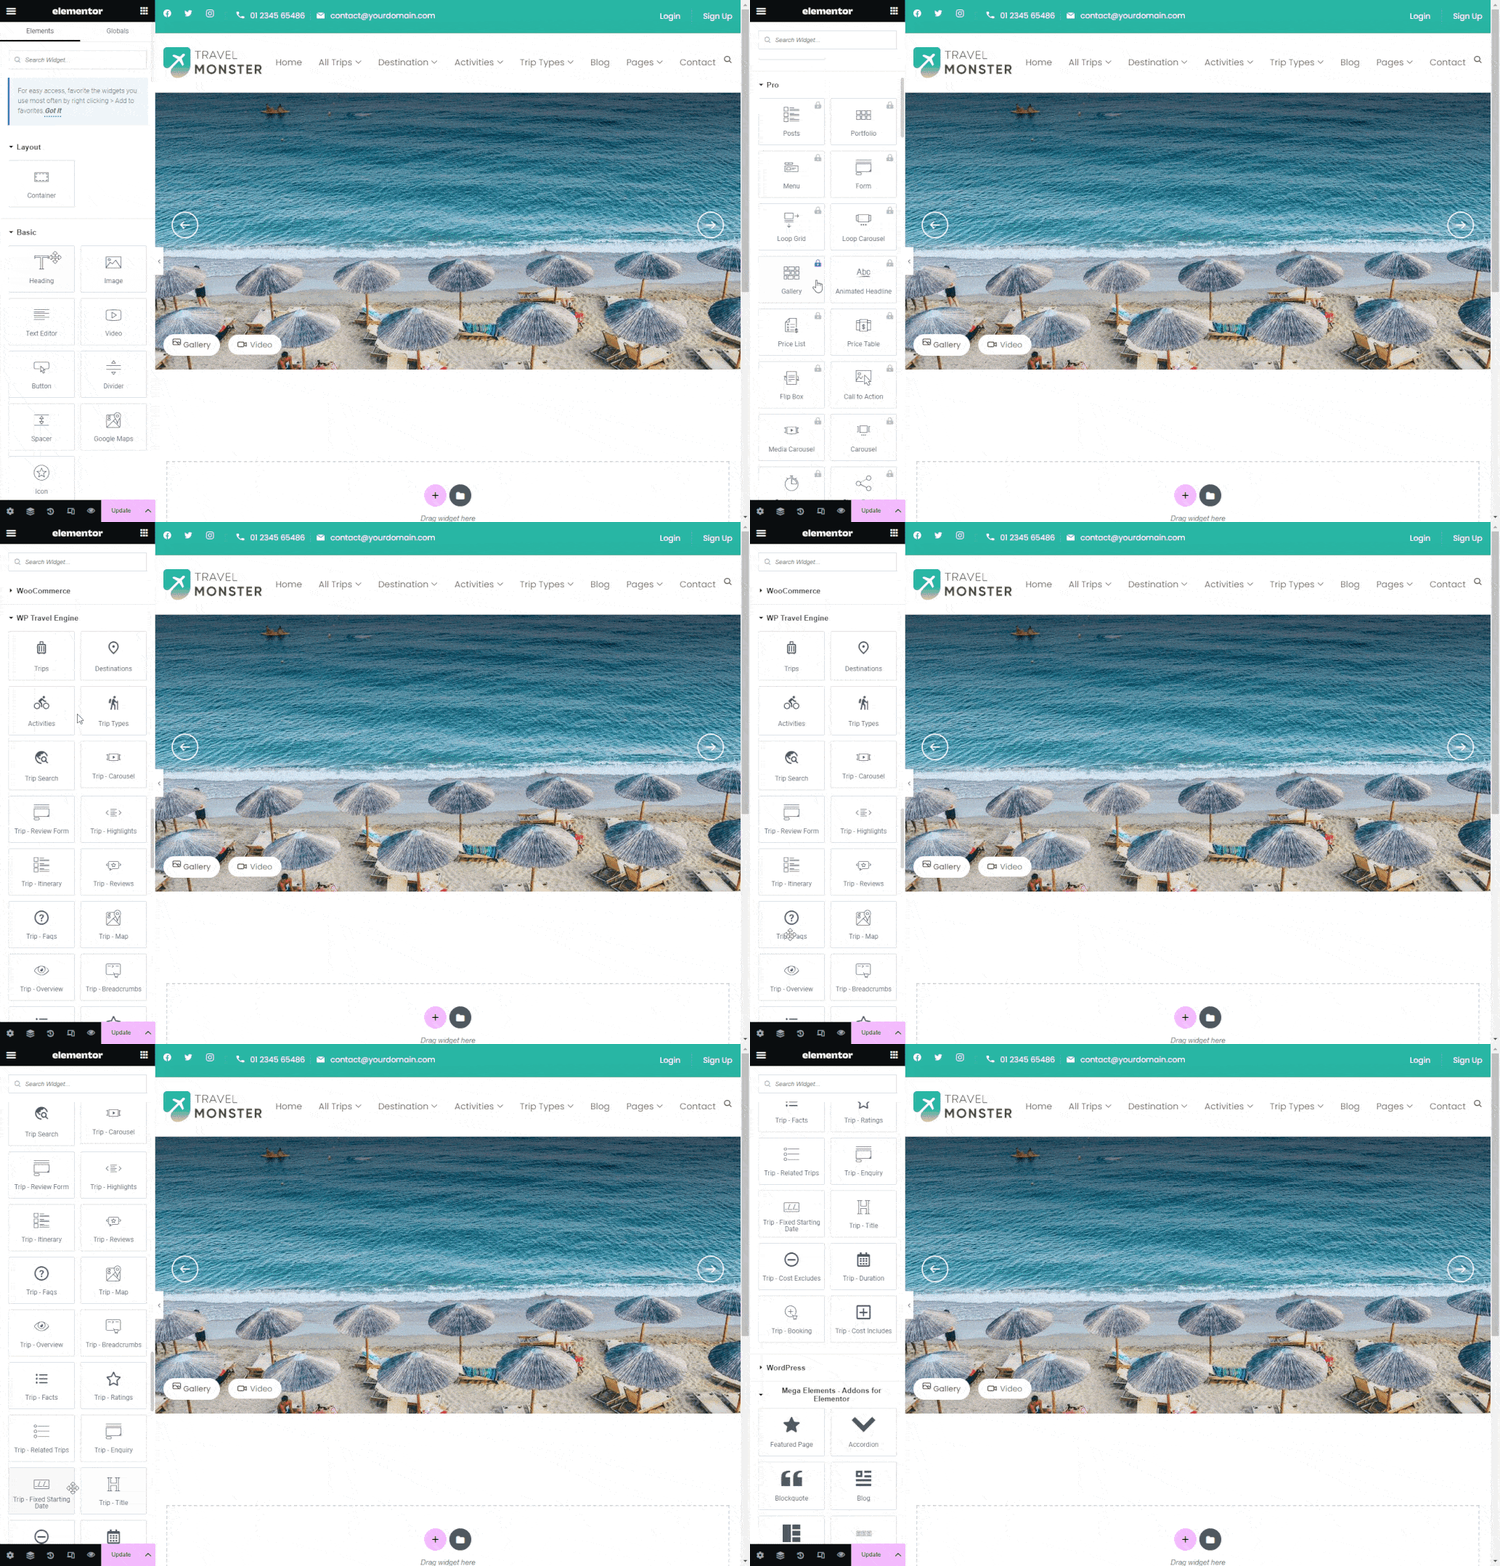
You will see several widgets under the WP Travel Engine section, such as Trip Booking, Trip FAQs, and Trip Overview. Pick the ones that fit the way you want travelers to move through the page.
The previous set of five widgets, Trips, Destinations, Activities, Trip Types, and Trip Search, also works for customizing single trip pages.
Once your widgets are in place, your trip page will start to feel like your own sales page instead of a default layout.
Using pre-made Elementor templates
If you want a faster starting point, use the ready-made template instead of placing every widget one by one. Think of it like a starter kit. You begin with a full layout, then adjust it to match your brand, trips, and booking flow.
Before you start, make sure the Flexbox Container feature is enabled from the previous section. The default template needs it.
Open the trip page in Elementor
Navigate to the desired trip page and click Edit with Elementor to launch the editor.
Open the template library
Click the Add Template icon to explore and apply available templates to your design.
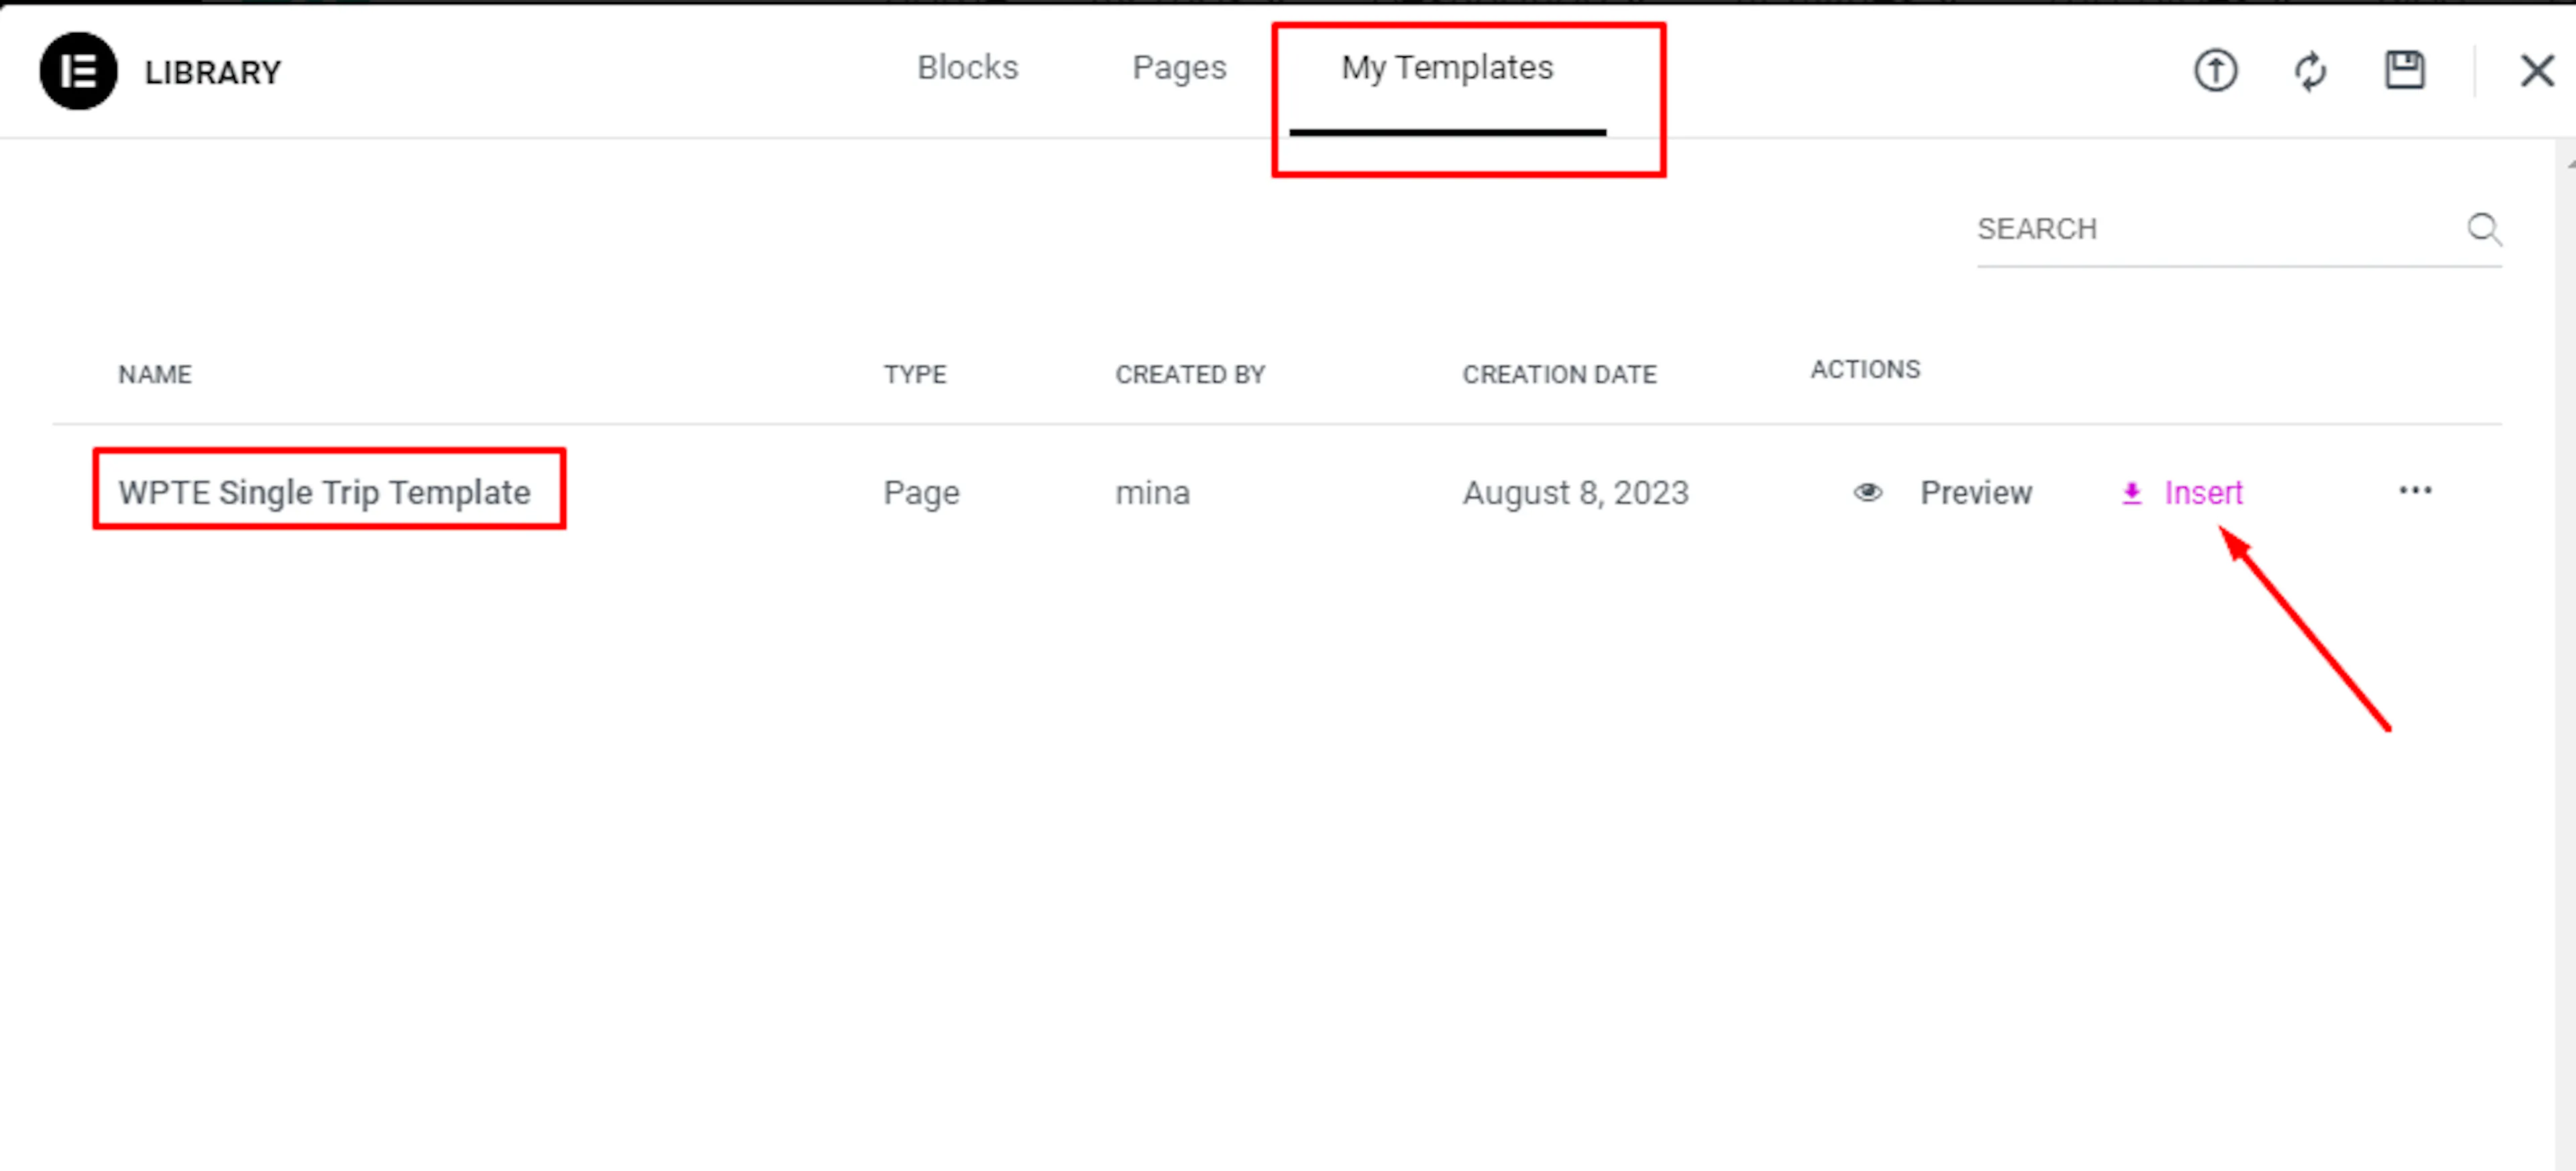
Find the WPTE Single Trip template
In the template library, you will find Block and Page templates you can use on your trip page. Hover over a template to preview how it looks before you add it.
Go to the My Templates tab, find WPTE Single Trip Template, then click Insert.
After you choose your template, Elementor places it into your trip page. From there, you can remove anything you do not need and add the widgets that matter for your tours.
If you're still stuck or have a question we didn't cover, our support team is happy to help. Reach out at our support page and we'll get you sorted.