

How to Add an Image Gallery
Add photos and videos to your trip page so travelers can see what they'll experience before they book.
Why your gallery matters
Photos and videos help sell a trip. Travelers want to see where they are going before they book. The Image Gallery settings let you showcase images and videos of the destination or other activities that can attract potential customers. Used well, they help you capture interest and draw attention to the trip.
Say you run a 3-day trek in the Annapurna region. You could add photos of the mountain views, the teahouses you stay in, and the trail itself. A short video of the sunrise from the summit could be the thing that makes someone hit the book button.
Now that you know what the gallery is for, you can add your own images and videos.
Setting up your gallery
You'll need a trip already created before you start. If you haven't made one yet, open one first.
Open your trip for editing
First, get to the trip you want to work on.
In the left-hand menu of your WordPress dashboard, click Trips, then All Trips. The WordPress dashboard is the admin area you see when you log in to your website.
Hover over the trip name and click Edit.
This opens the trip editor where you manage the details for that trip.
Find the Gallery tab
Next, go to the area where your trip photos and videos are added.
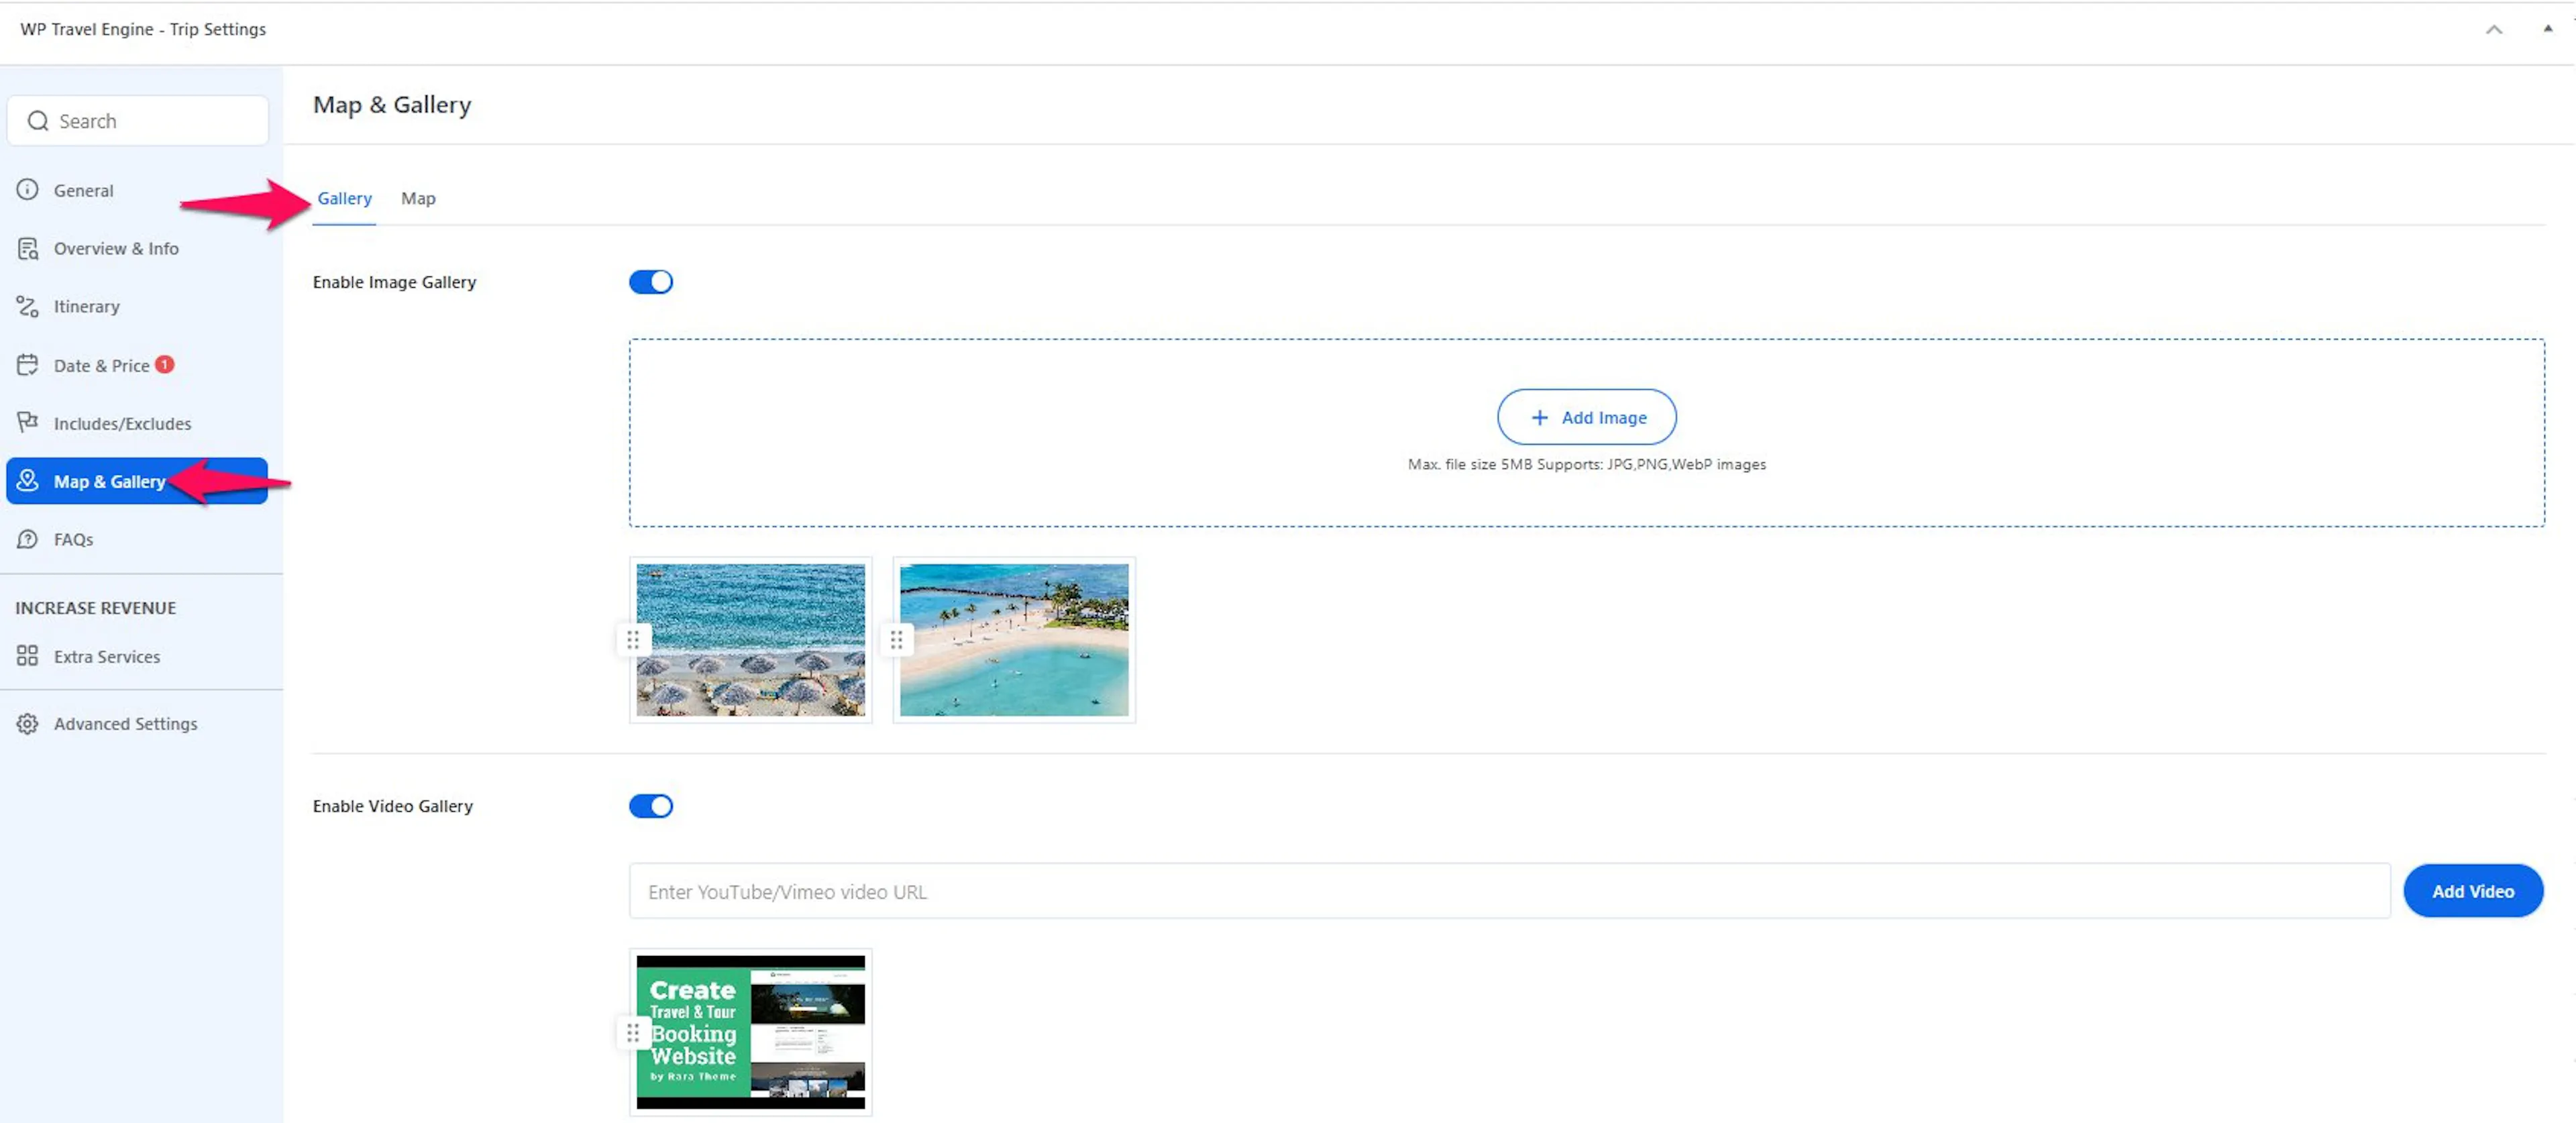
Scroll down past the main text editor until you see a box called Trip Settings. Inside that box, click the Gallery tab.
This is where you'll add your photos and videos.
Upload your trip photos
This is the part travelers will notice first, so it is worth choosing your best images.
In the image gallery section, click the upload area or button. Then select the photos you want to use from your computer.
You can add as many photos as you like.
Photos are often the first thing a traveler looks at. Pick clear, bright images that show what the trip is really like.
Add a video (optional)
A short video can help people picture the experience before they book.
In the video gallery section, paste the link to your video. This can be a YouTube or Vimeo URL for a video you have already uploaded.
A URL is the web address at the top of your browser when you're watching a video. It usually starts with something like youtube.com.
Adding a video is optional, but it is worth doing when you have one.
Save your changes
This is the final step that makes your gallery live on the trip page.
When you're happy with your gallery, click Publish if this is a new trip. If you're updating an existing trip, click Update at the top right of the page.
Your photos and videos are now live on your trip page.
That's your gallery set up. When travelers visit your trip page, they'll see your photos and videos right away.
Related settings
Trip Gallery
An overview of enabling the image and video gallery from the Gallery tab.
Unable to Upload Images on the Gallery
Fix thumbnail generation issues that block gallery uploads.
If you're still stuck or have a question we didn't cover, our support team is happy to help. Reach out at our support page and we'll get you sorted.