

Itinerary Downloader
Let travelers download polished trip PDFs, capture more inquiry emails, and keep your tour brand front and center after they leave your site.
Let travelers take your trip details with them
The Itinerary Downloader is an add-on, which means it is a small extension that adds more features to WP Travel Engine. It creates a downloadable PDF brochure for each trip on your site.
Your travelers can download trip details from the trip page, save them for offline reading, and share them with friends or family. You can also ask for an email address before the download, which helps you collect leads, and you can connect those leads to Mailchimp.
Why tour operators use this
This add-on helps you turn trip pages into something travelers can keep.
- Give travelers a PDF from the trip page - Visitors can download the trip details right away without needing to bookmark the page.
- Make the PDF look like your business - Add your logo, company description, and brand colors so the brochure feels like it came from your company.
- Collect emails from interested travelers - Ask for an email before the download and send those contacts to your Mailchimp list if you use one.
- Help travelers read later without internet - Once the PDF is saved, they can open it again on a phone or laptop even when they are offline.
That means your trip details stay with the traveler after they leave your site. Next, make sure you have everything in place before you start.
What you'll need before you start
A plugin is a tool you install in WordPress to add features to your site. Before you set this one up, make sure these basics are ready.
- You have the WP Travel Engine Core Plugin installed and activated.
- You have purchased and installed the Itinerary Downloader add-on.
- Your WP Travel Engine plugin is updated to version 6.5.0 or later.
See how to activate a Pro add-on license key for the full installation and activation walkthrough.
Once those pieces are in place, you can set up the main settings for your whole site.
Setting up the general settings
These are site-wide settings. That means they affect all trips, not only one trip.
If you are new to WordPress, your dashboard is the main admin area with the menu on the left side of your screen. You will open the Itinerary Downloader settings from there.
Open your WordPress dashboard
Start in the main admin area of your site. Look at the menu on the left side of your screen.
Go to WP Travel Engine
In the left menu, click WP Travel Engine.
Open the settings area
Click Settings. Then open Extensions.
Choose Itinerary Downloader
Click Itinerary Downloader to open the settings page for this add-on.
Now you are in the right place. The sections below explain what each setting does and when you would use it.
Enable Itinerary Downloader
This is the main on and off switch for the whole feature. Turn it on if you want travelers to download PDF brochures from your trip pages.
If this setting is off, the rest of the download feature will not appear on the front end of your site. Turn this on first, then move through the rest of the settings.
Button Label
This controls the text on the download button that travelers click. The default label is Download PDF.
Change it if you want wording that matches how you talk to your customers. For example, you might use Get Your Itinerary for a guided trek or Download Tour Info for a day tour.
Section Title
This is the heading shown above the download button. The default title is Want to read it later?
Use this space to make the benefit clear. A title like Download Your Tour Details works well because it tells travelers exactly what they will get.
Description
This is the short text under the heading and near the button. The default description is Download this tour's PDF brochure and start your planning offline.
Use language that fits your brand. Say you run a 3-day trek and want travelers to keep the full route, packing notes, and day-by-day plan. This description is a good place to tell them the PDF will help with that.
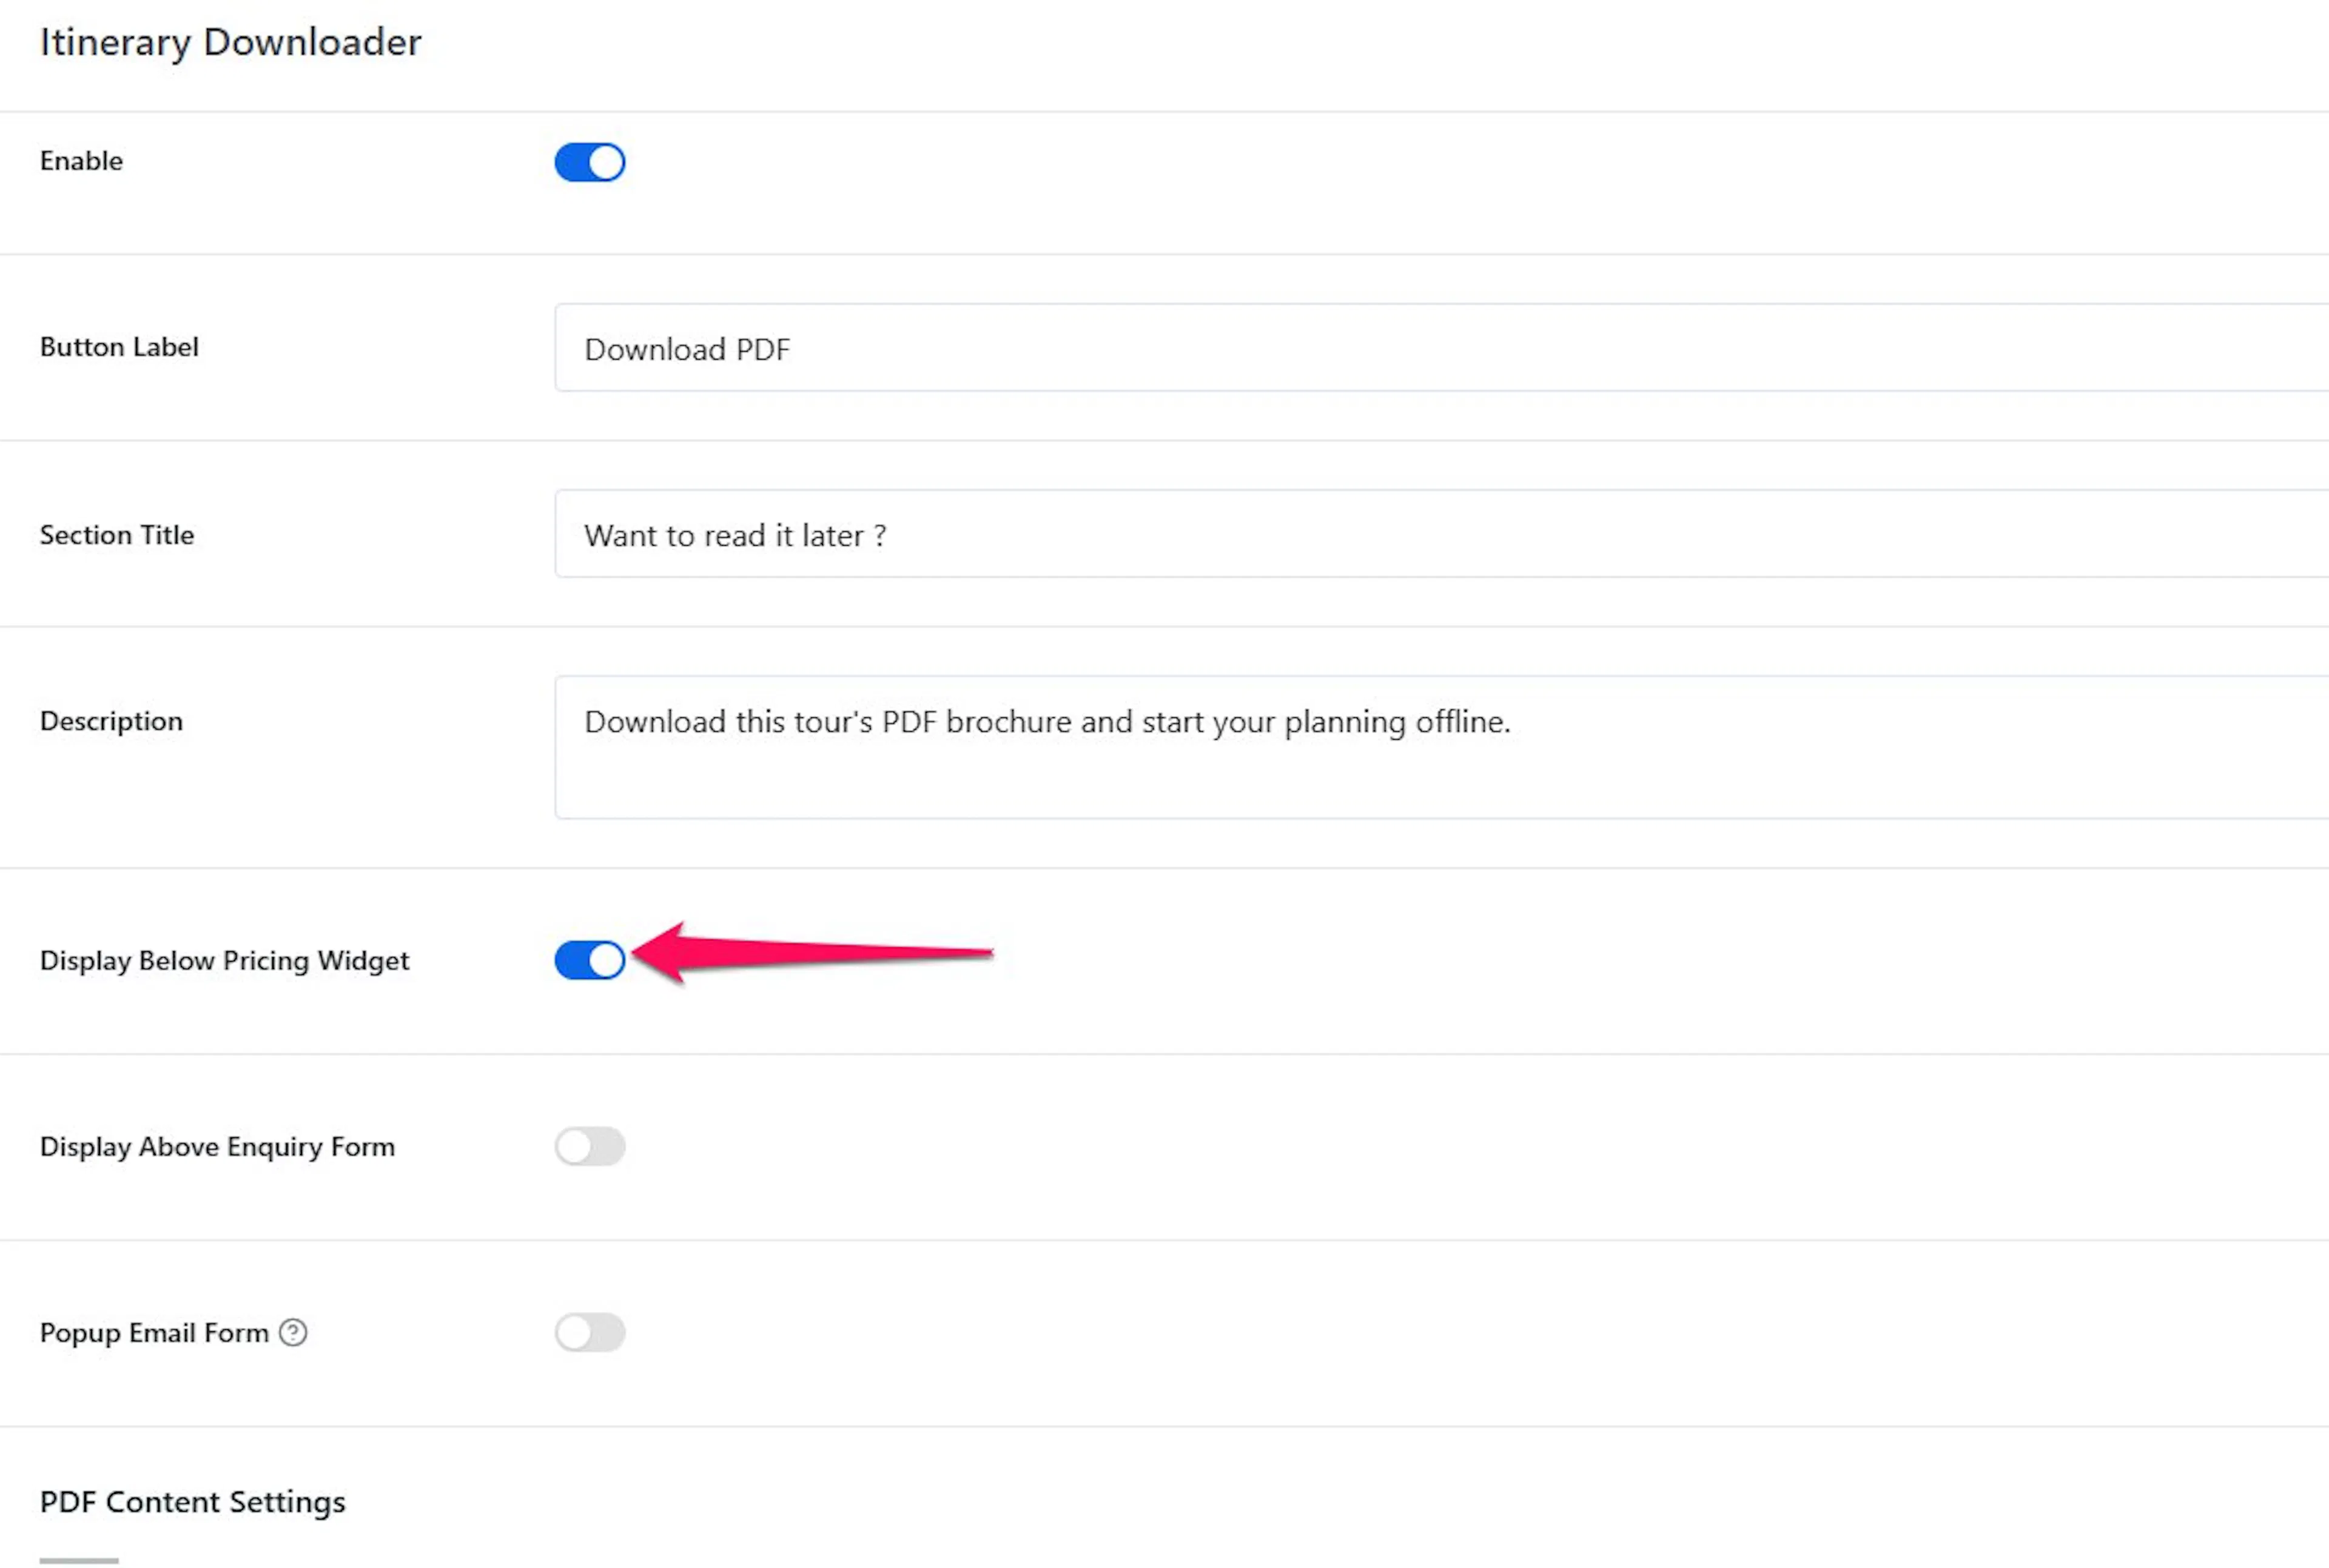
Display Below Pricing Widget
Turn this on to place the download button below the pricing section in the sidebar of the trip page. The sidebar is the column on the side of your trip page where pricing and booking details appear.
This placement works well when travelers look at price first and then want more details before they decide. It keeps the PDF option close to the information people often check before booking.
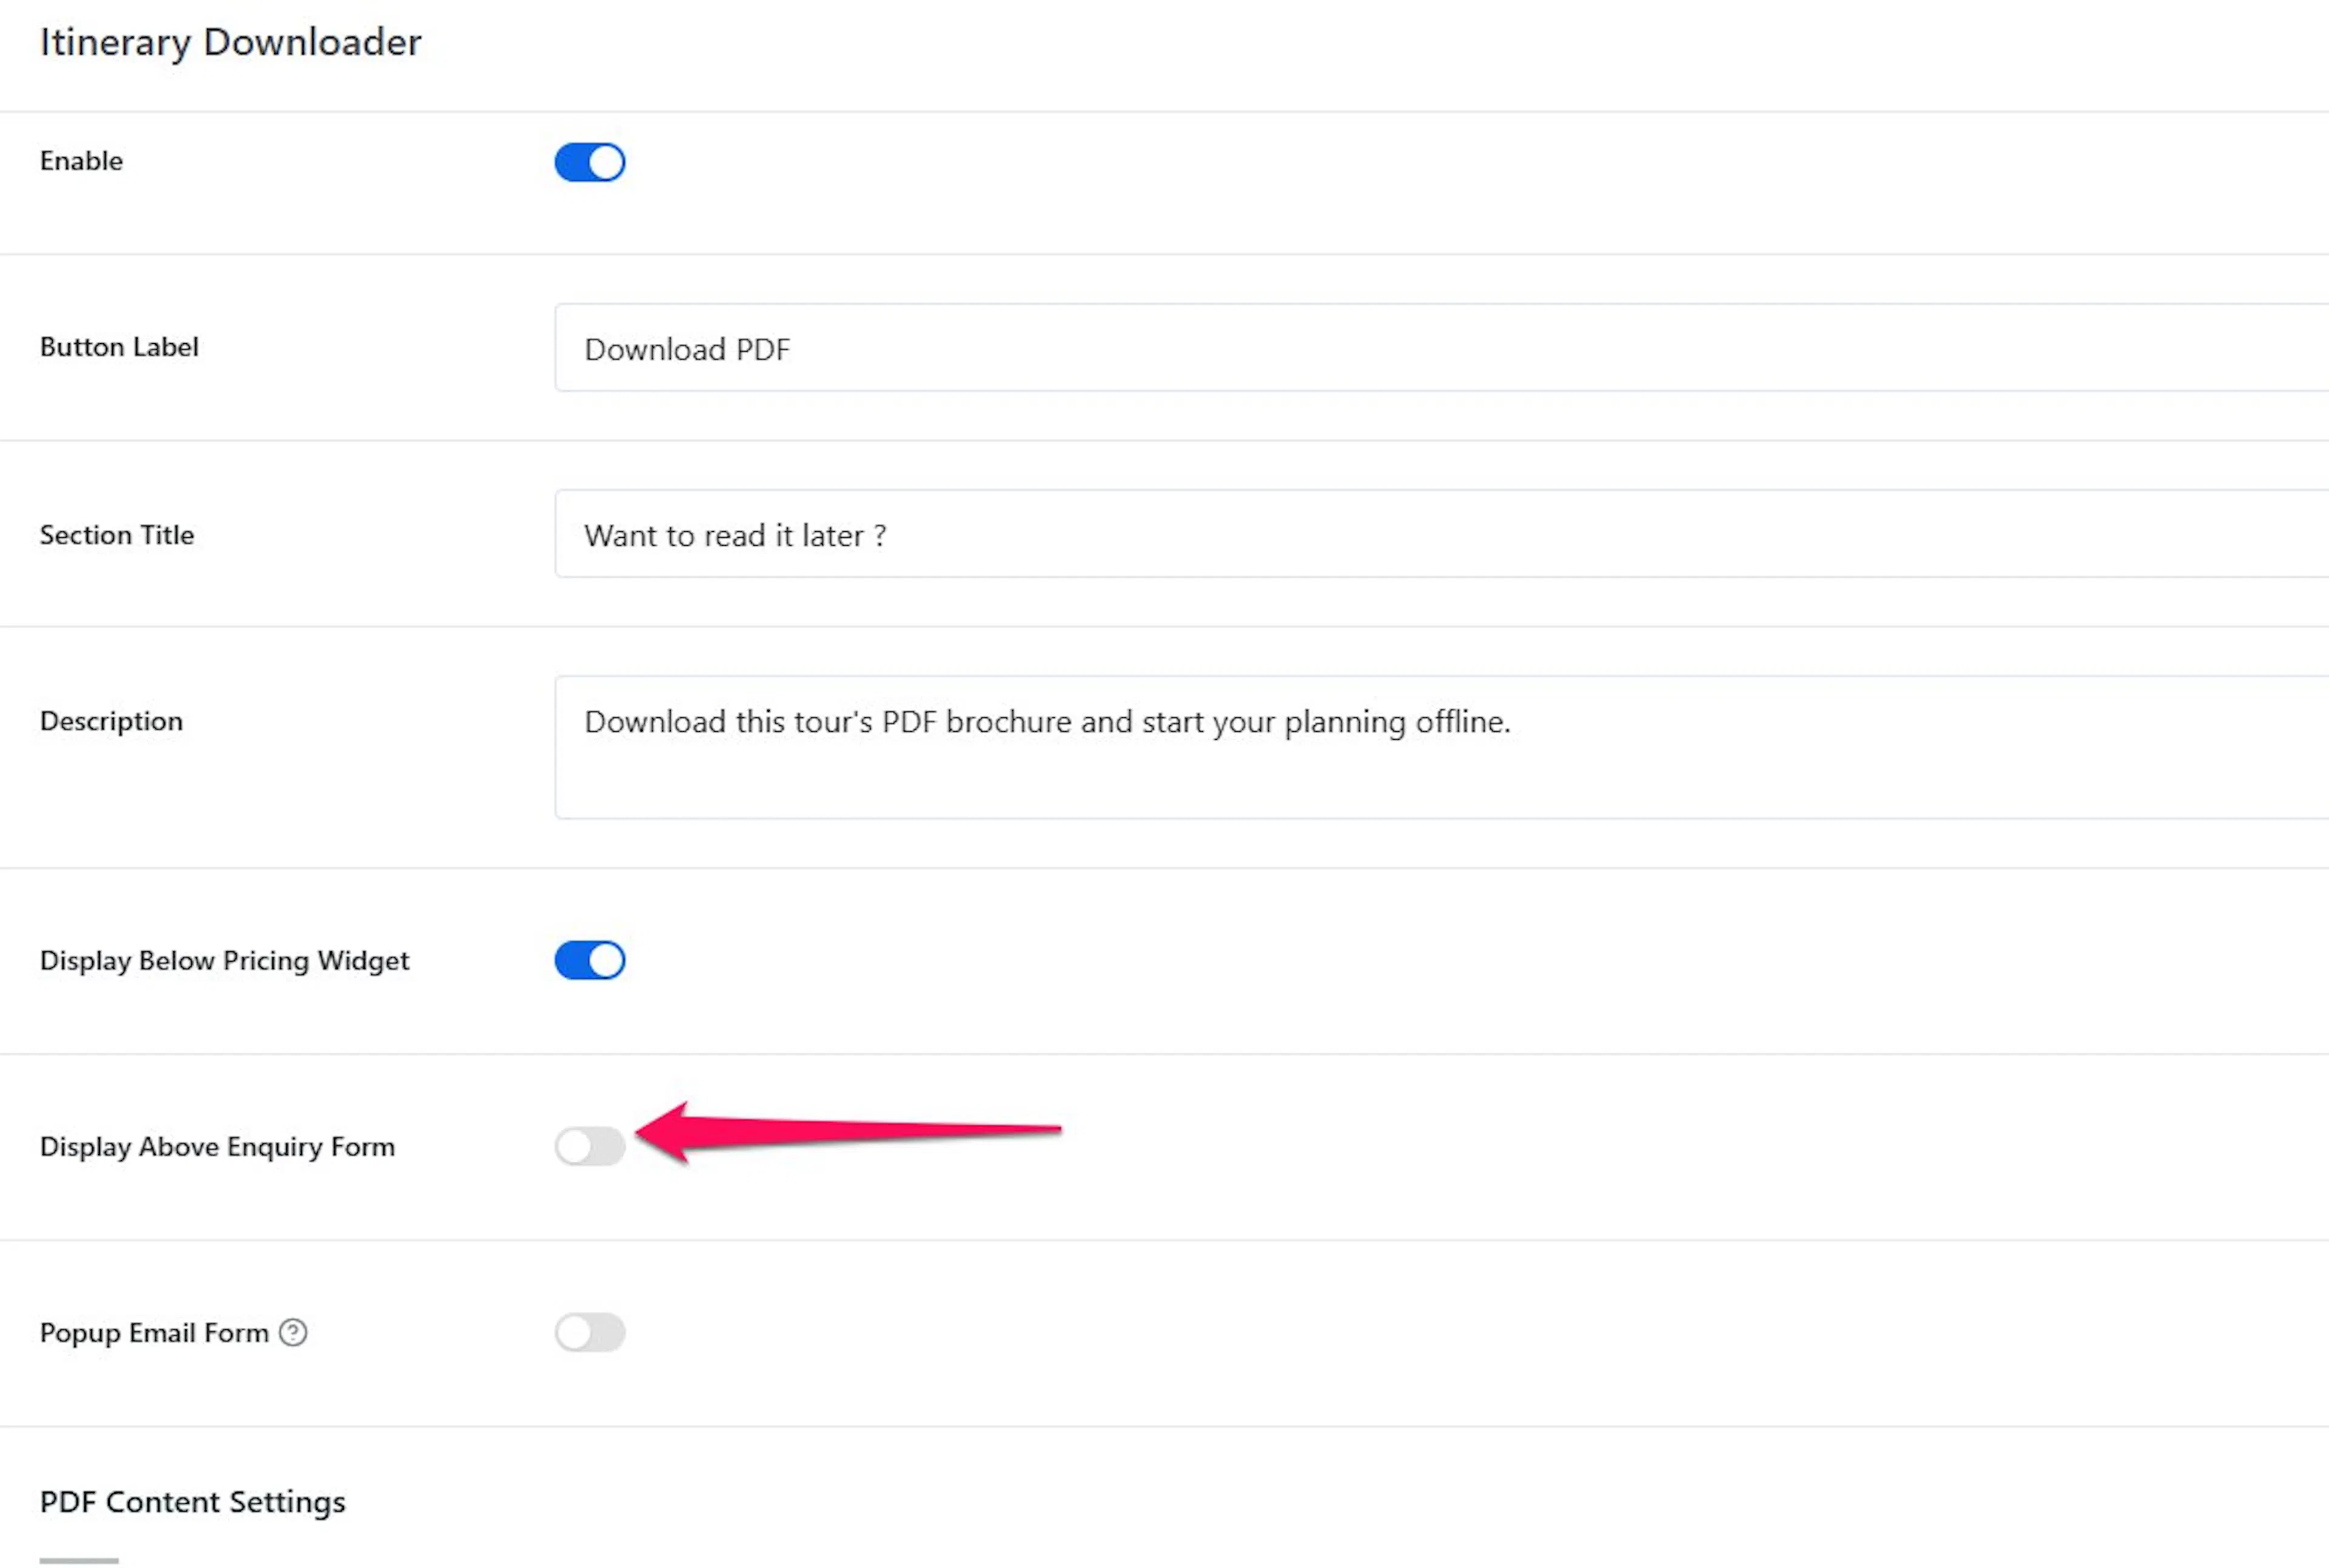
Display Above Enquiry Form
Turn this on to place the button above the enquiry form in the sidebar. This is helpful for travelers who want to read the trip details before they ask a question.
Say you sell a private city tour with optional add-ons like museum tickets or airport pickup. A traveler may want to download the full details first, then send an enquiry after reading them.
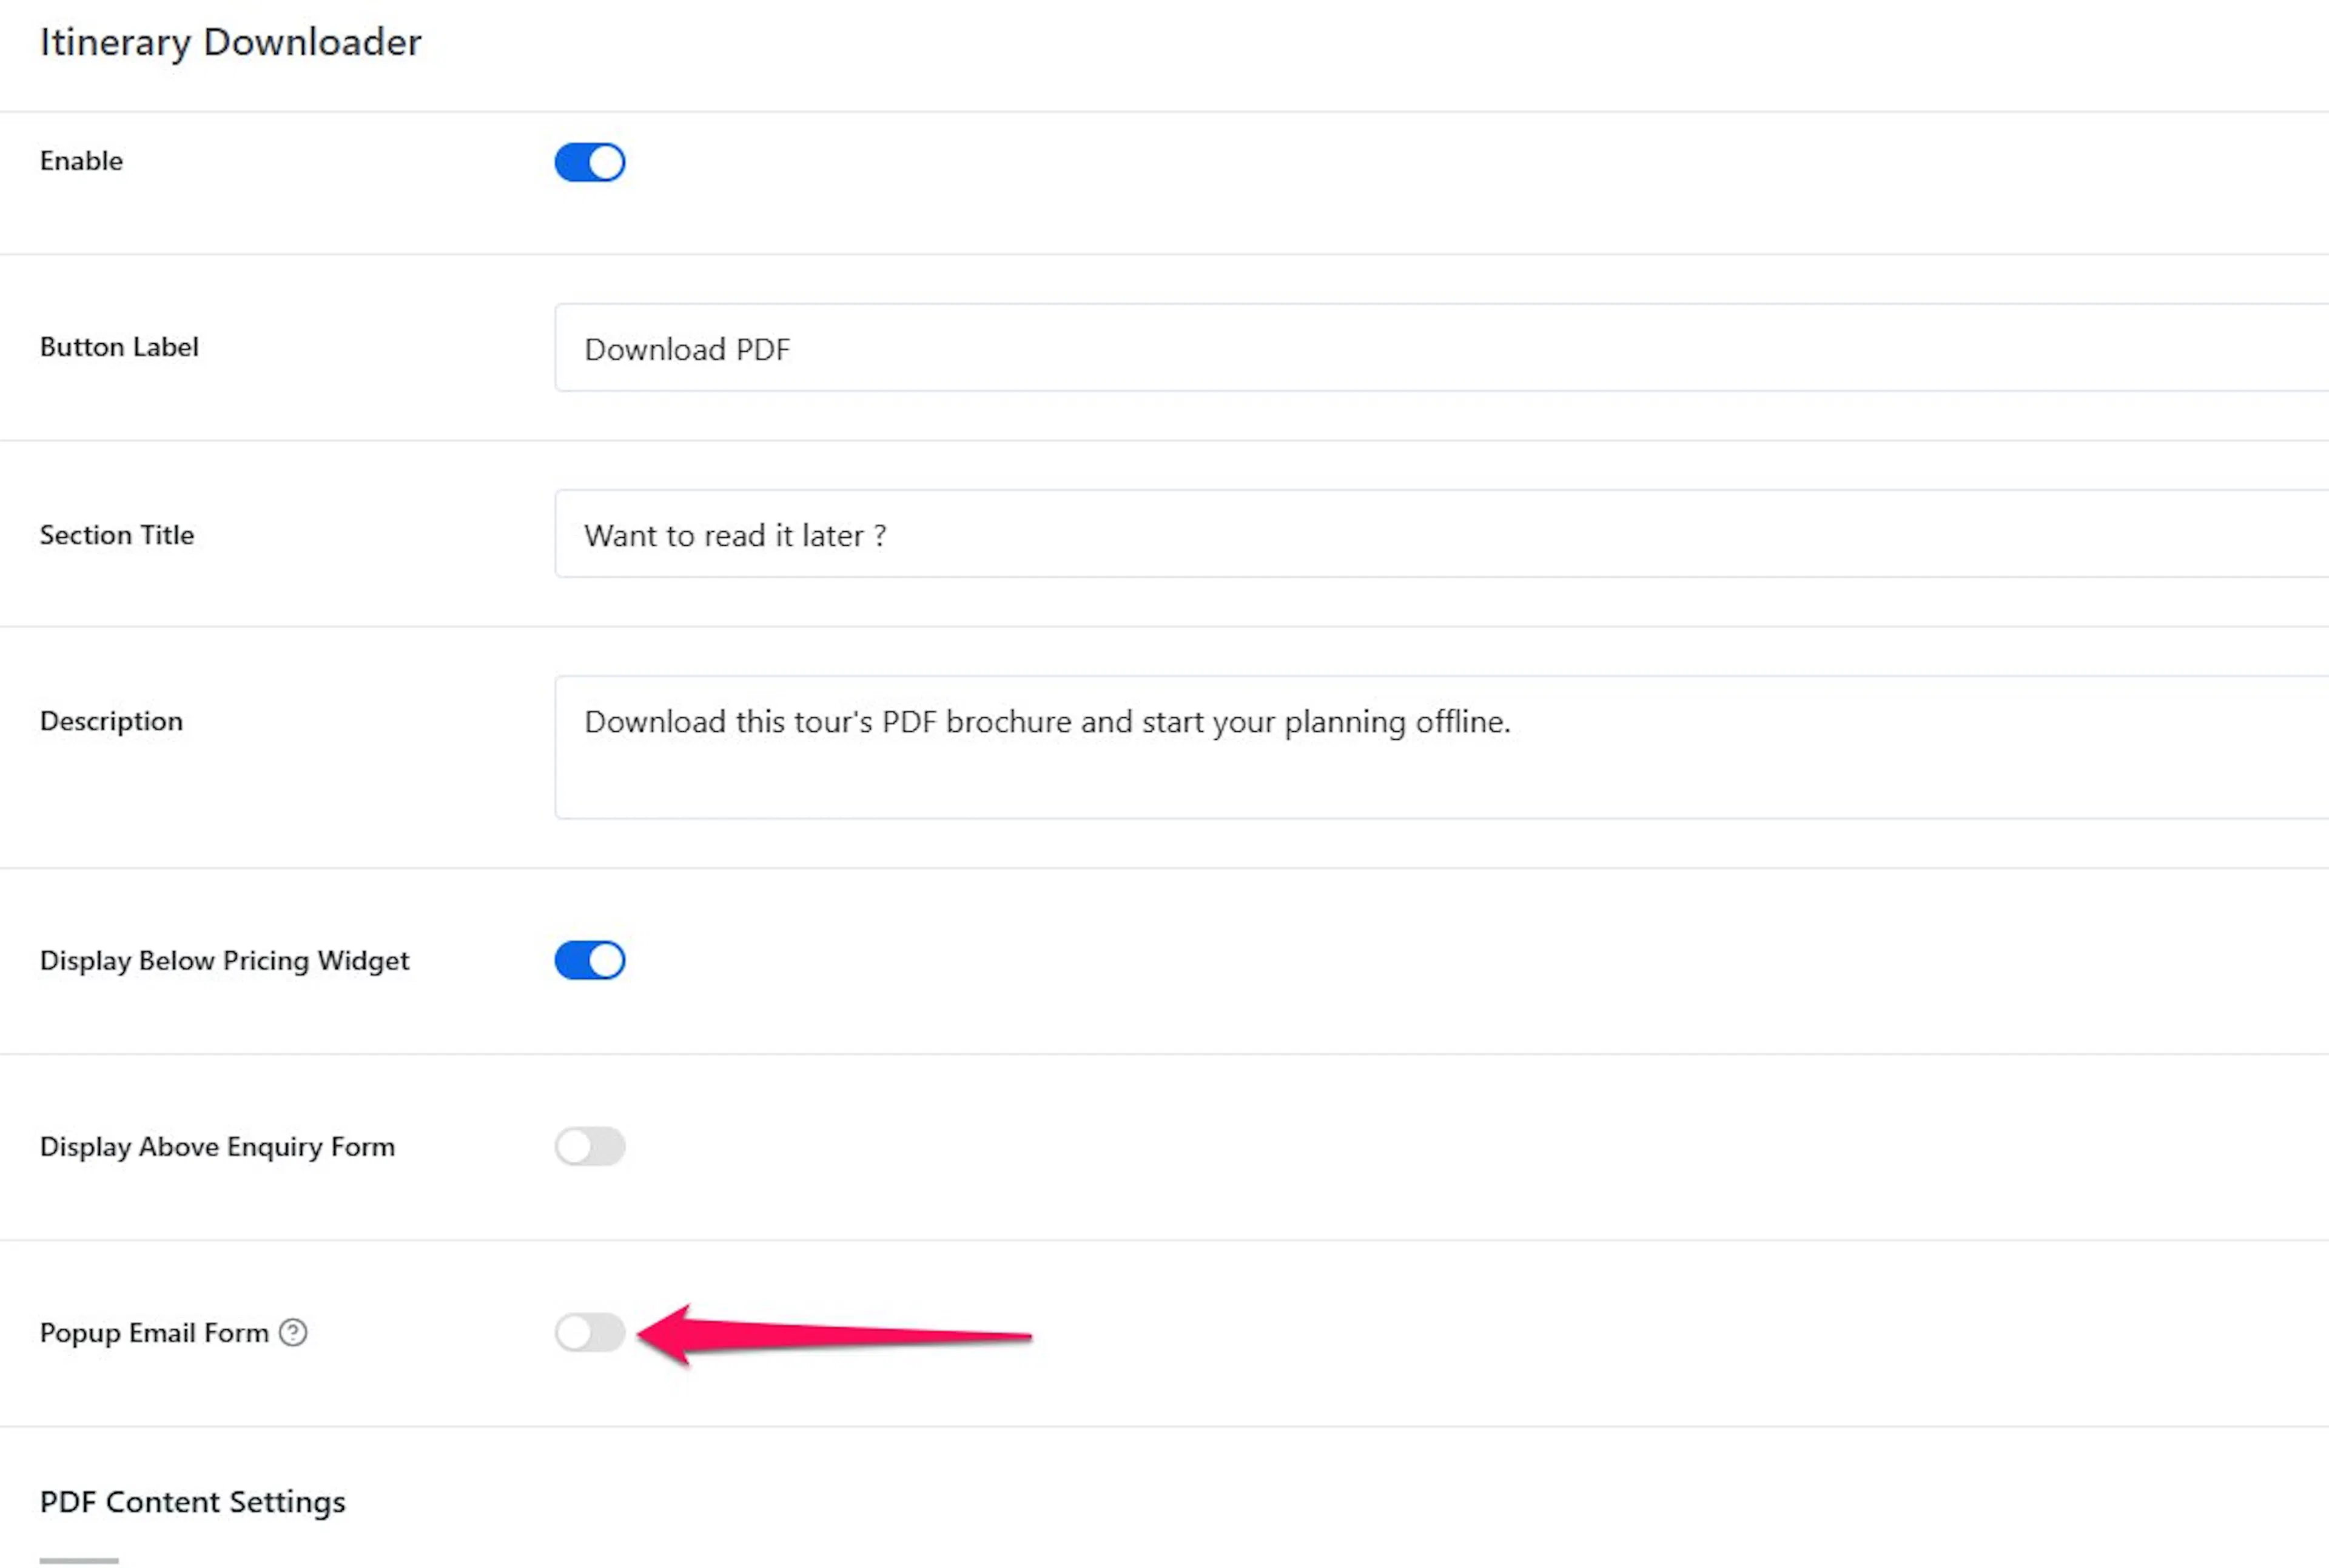
Display Popup Email Form
Turn this on if you want travelers to enter their email before they download the PDF. This is how you collect contact details from people who are already interested in a trip.
When this option is enabled, the download does not start right away. The traveler first sees a small form asking for their email address.
Say you run a 7-day Everest Base Camp trek. A traveler who downloads the itinerary PDF is clearly interested. Collecting their email lets you follow up with booking tips, gear lists, or a limited-time discount.
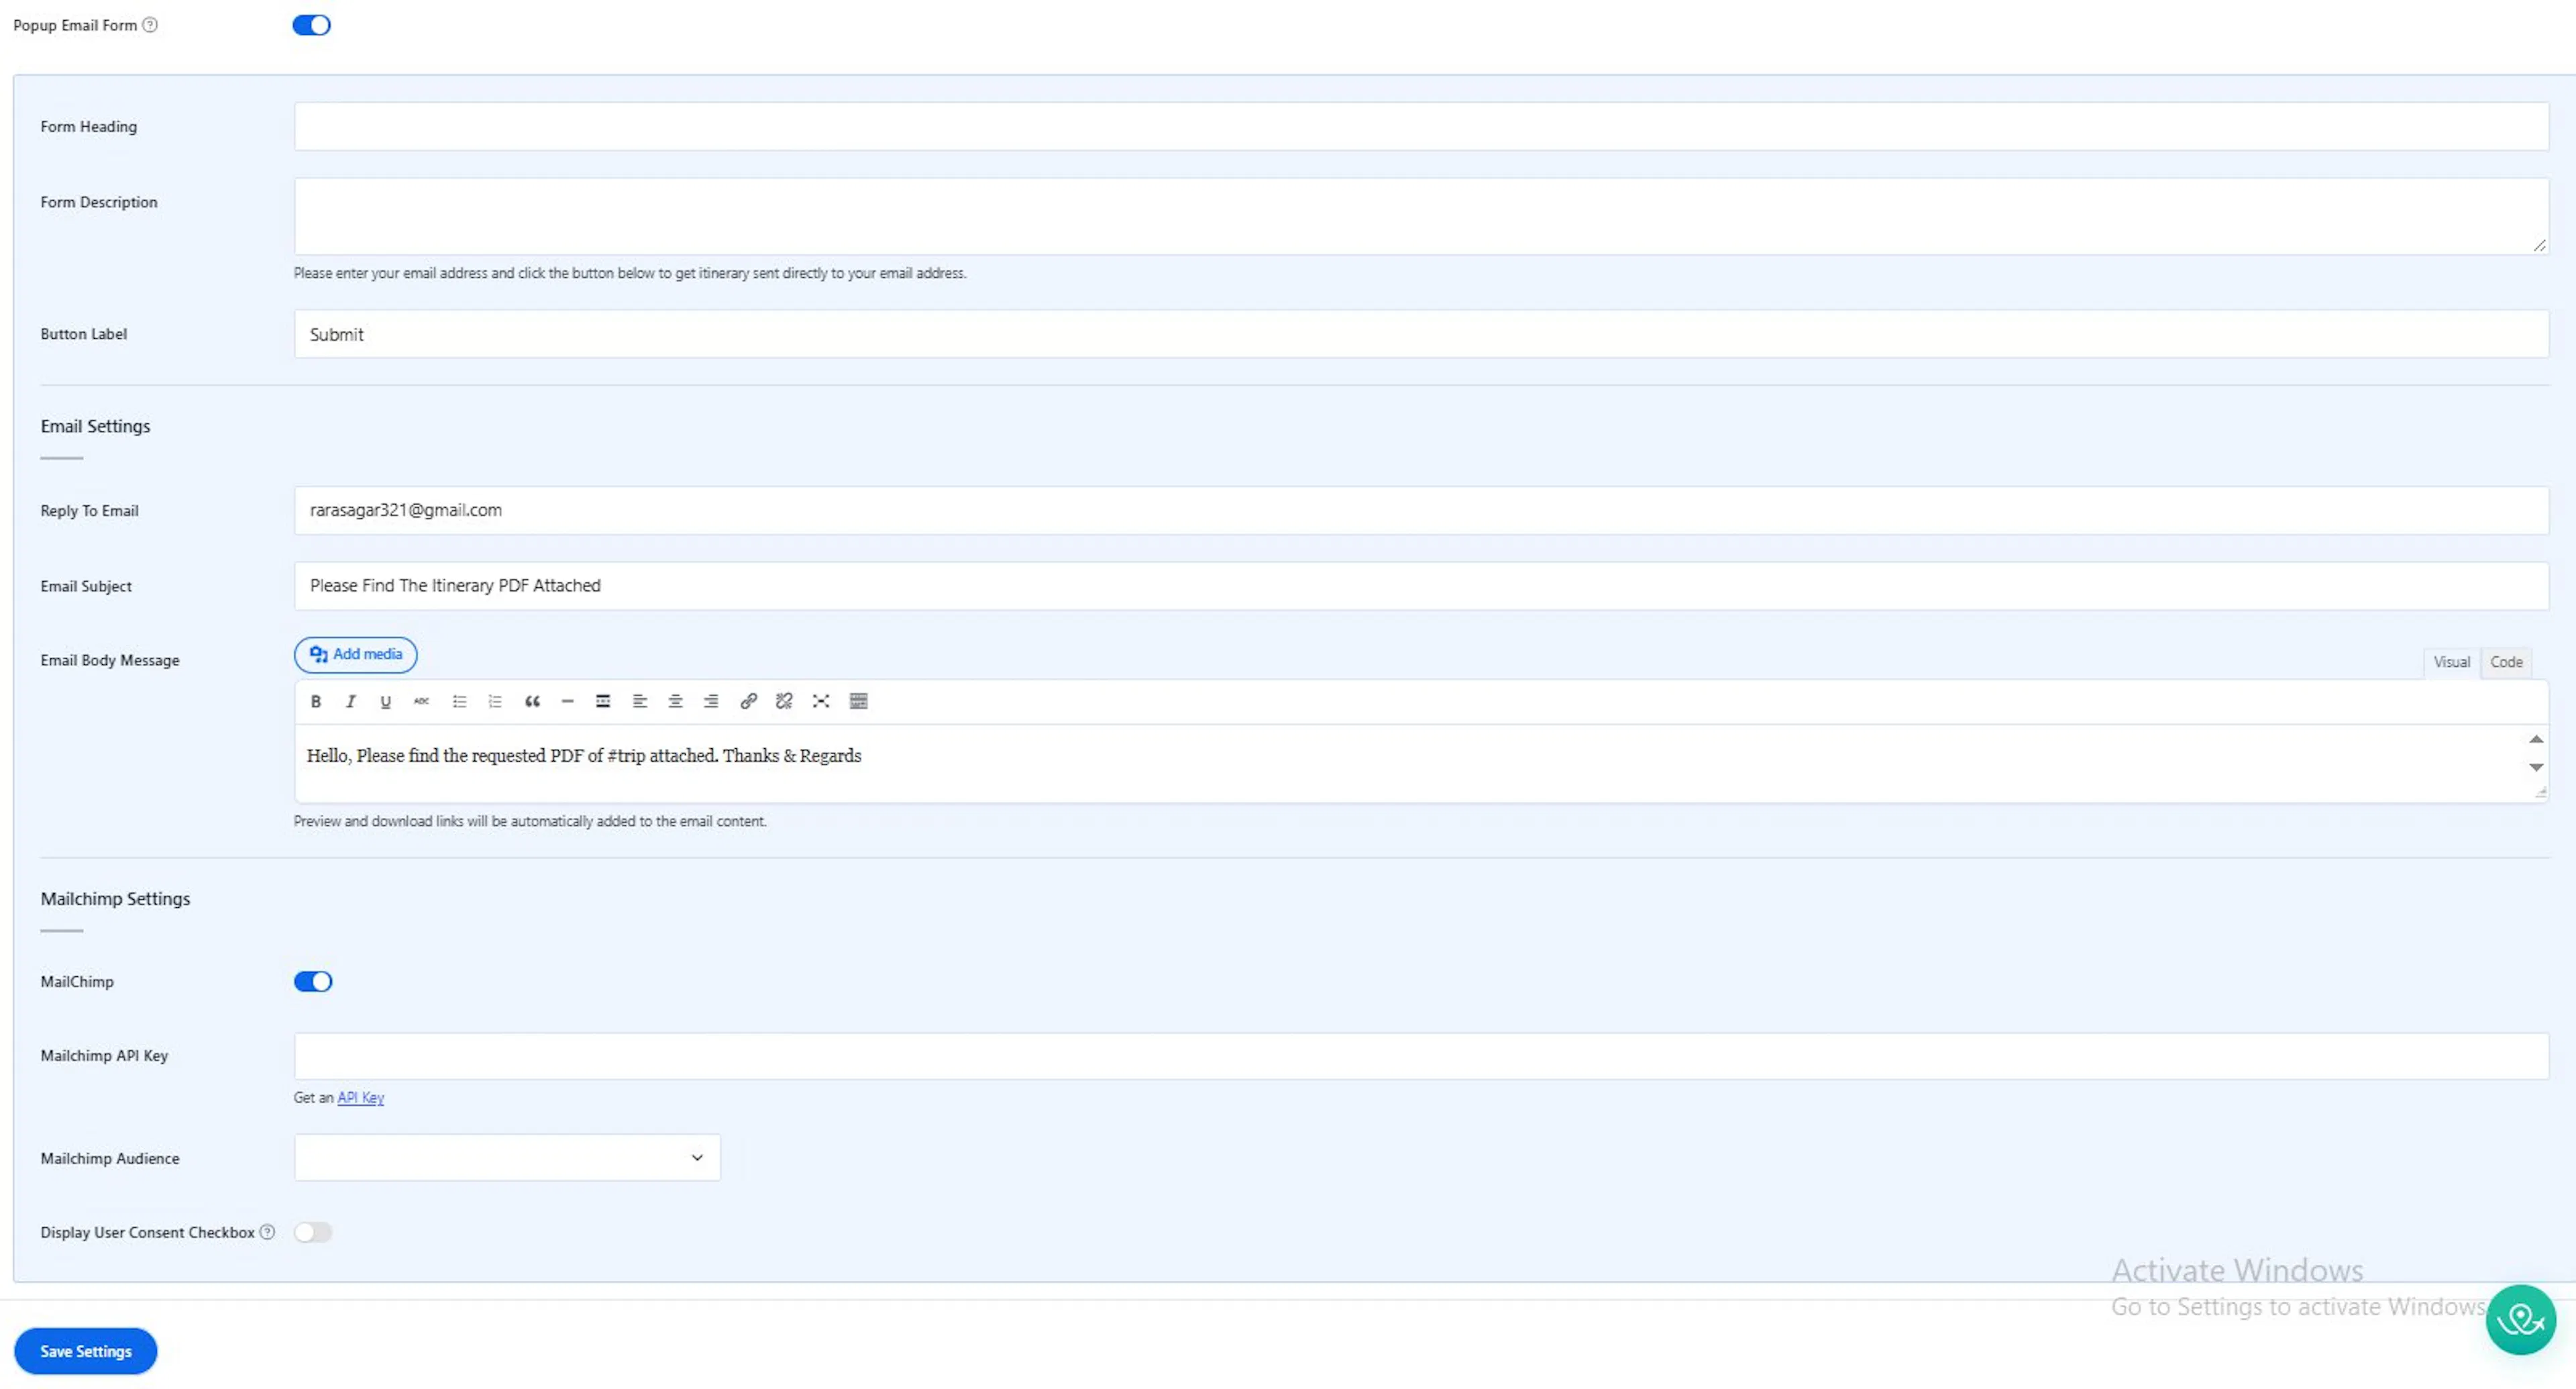
Settings for the popup email form
These fields control what the traveler sees and what email they receive after the download request.
- Form Heading - The title shown at the top of the email form. Example: Get this itinerary in your inbox.
- Form Description - A short message explaining what the traveler should do. Example: Please enter your email to get the itinerary sent to you directly.
- Button Label - The text on the form button, such as Submit or Get PDF.
- Reply To Email - The email address used to send the PDF. Use your business email here.
- Email Subject - The subject line of the email the traveler receives. Example: Your Requested Itinerary PDF.
- Email Body Message - The message sent with the PDF attached. Example: Hello, Please find the requested PDF of #trip attached. Thanks & Regards.
#trip is replaced with the actual trip name. If your trip is called Annapurna Base Camp Trek, the email will use that trip name in place of #trip.
Mailchimp settings (optional)
Mailchimp is a popular email marketing tool. If you use it, you can send new downloader emails into your Mailchimp audience automatically.
An API key is a password-like code that lets two services talk to each other. In this case, it lets your website send contact details to Mailchimp.
- Mailchimp API Key - Enter your Mailchimp key so people who download the PDF can be added to your Mailchimp audience automatically.
- Mailchimp Audience - Choose which audience, also called a list, should receive the new email addresses.
- User Consent Checkbox - Turn this on if you want travelers to agree before being added to your mailing list. Example: I agree to receive emails and updates from [Your Company].
If you do not use Mailchimp, you can still use the popup email form on its own. The next section covers how the PDF itself looks.
PDF content settings
These settings control how the PDF looks and what content appears inside it. This is where you make the brochure feel like part of your business.
- PDF Base Color Theme - Choose the main color used in the PDF. Match it to your brand colors if you want the brochure to feel consistent with your site.
- Company Custom Logo - Upload your logo here. If you leave this blank, the add-on uses the logo from your WordPress theme.
- Company Short Description - Add a short introduction about your company that appears in the PDF.
- Availability Section - Turn this on if you want available trip dates included in the PDF. By default, all trip content appears in the PDF.
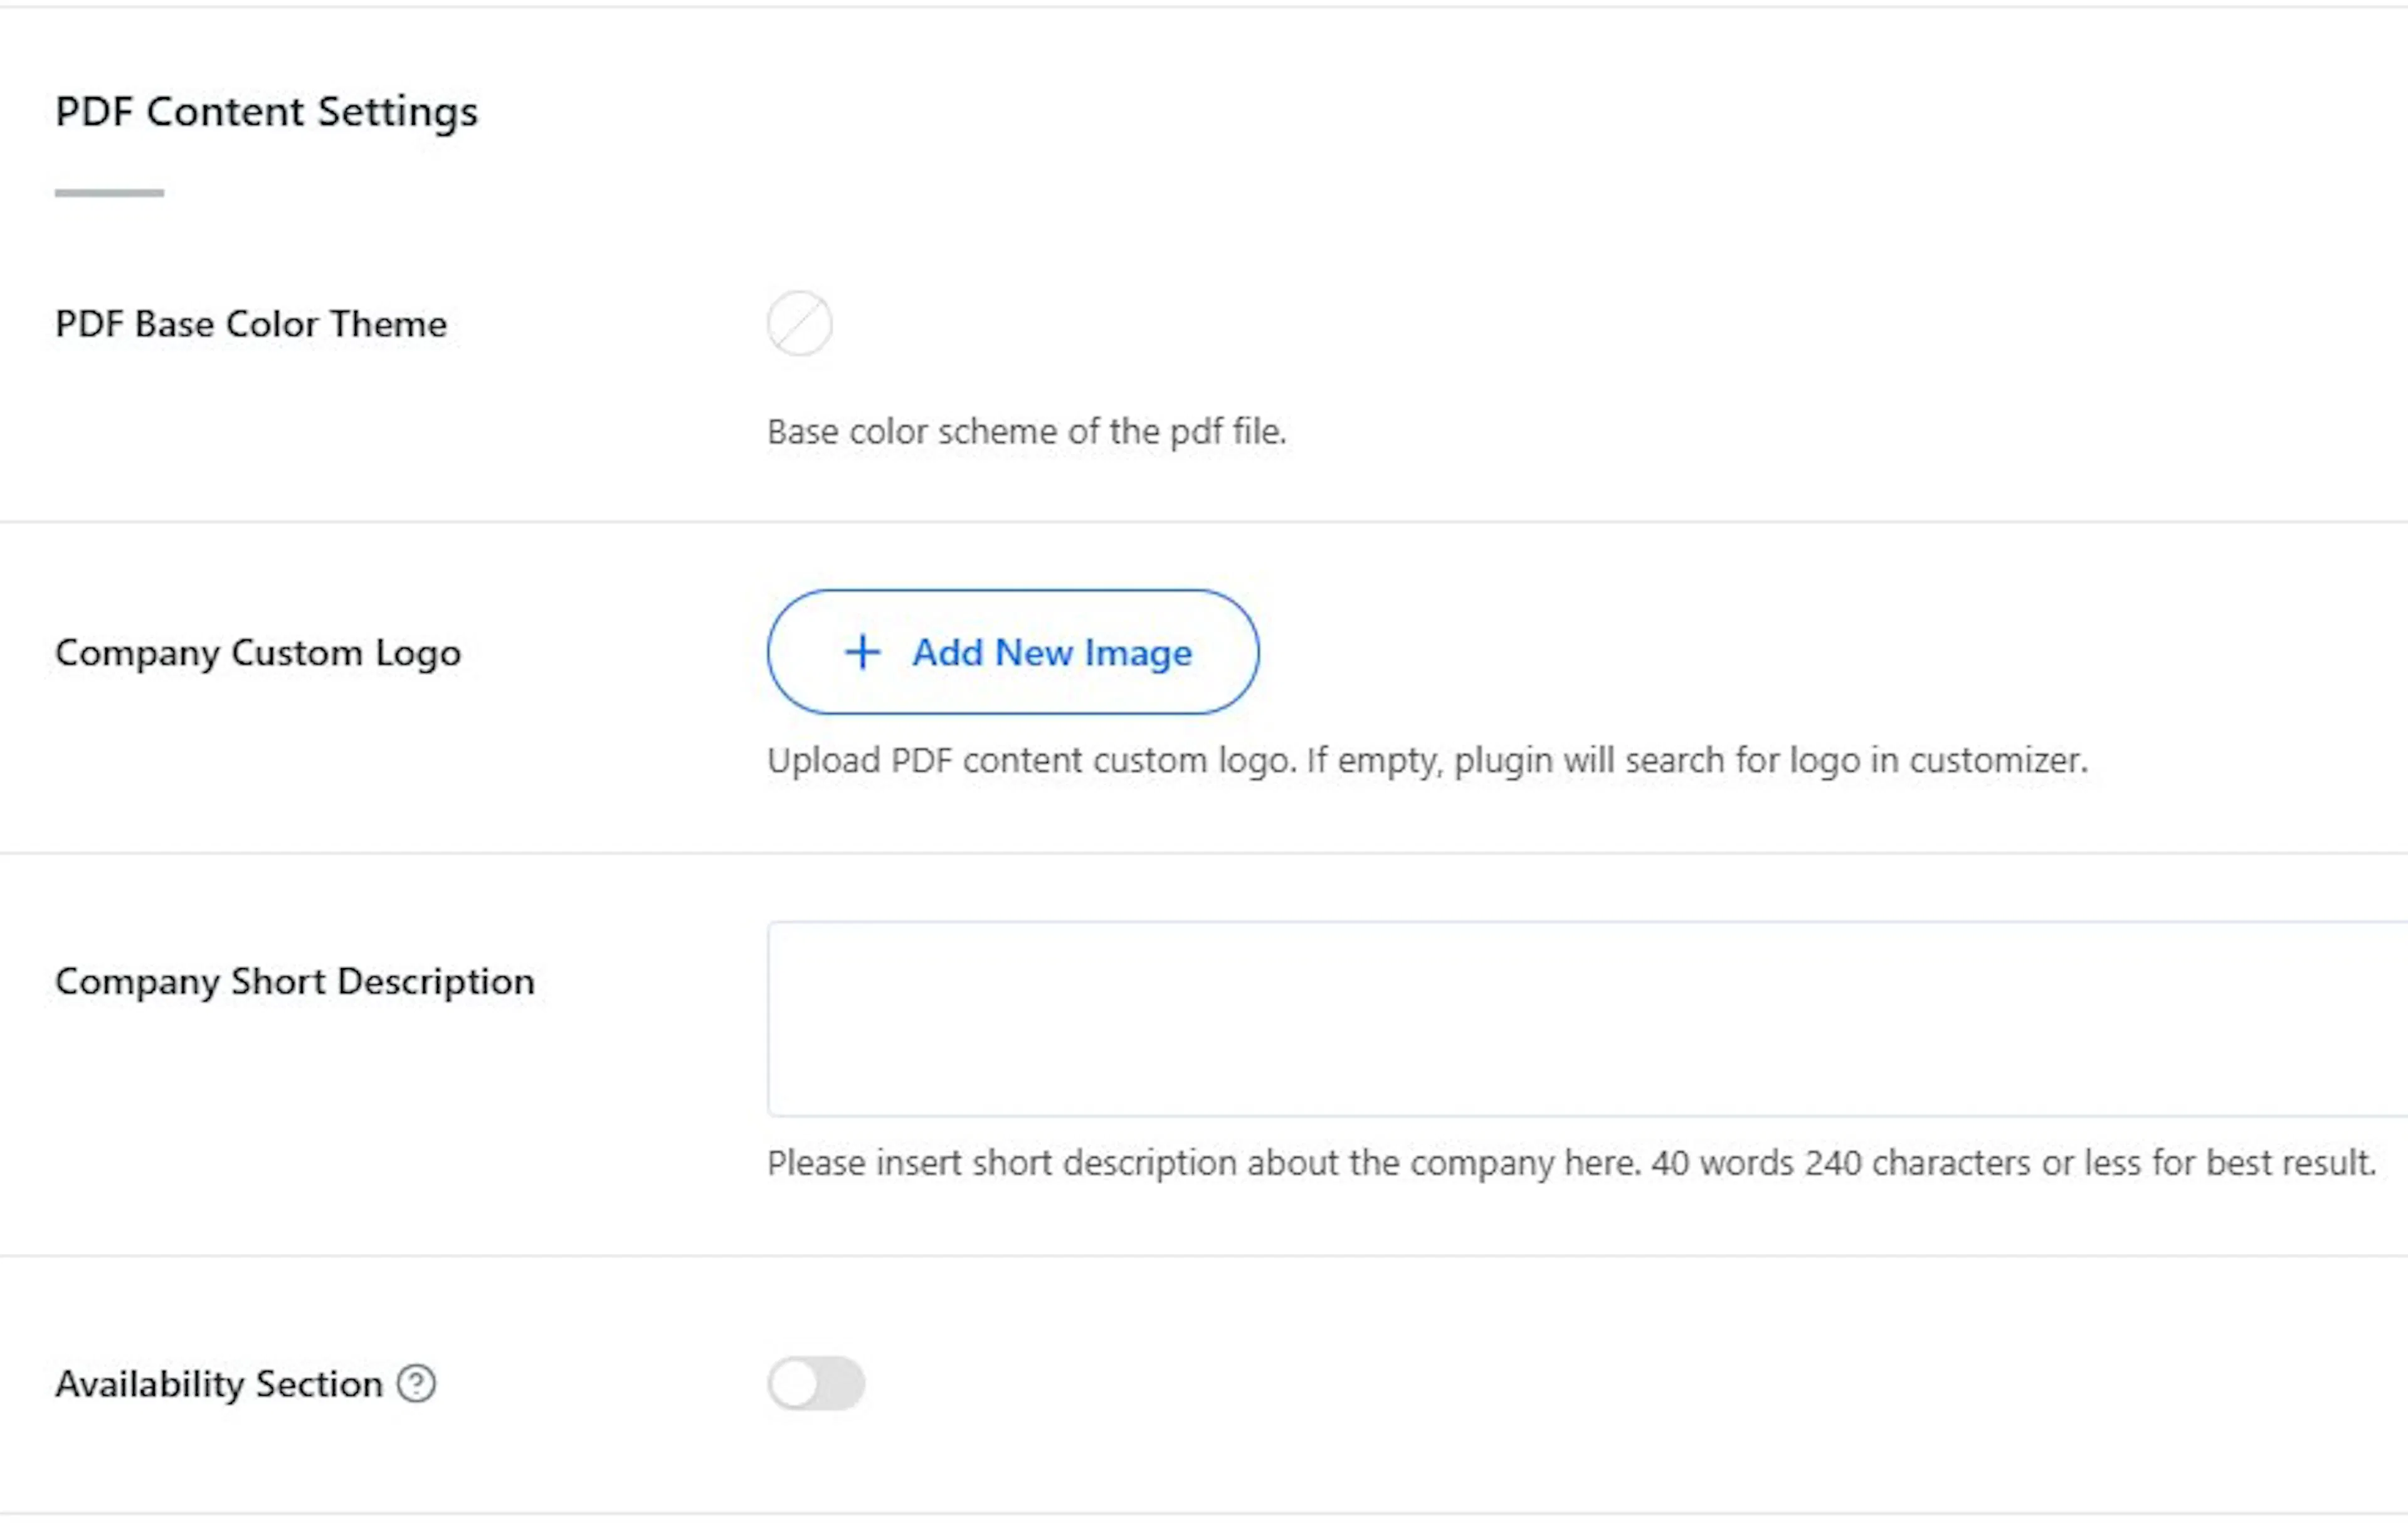
Say your brand color is deep blue. Set the PDF Base Color Theme to that same blue so every downloaded brochure feels like it came from your company, not a generic template.
Company Info settings
Turn on the Company Info toggle if you want your contact details to appear inside the PDF. This helps travelers know how to reach you after they download the brochure.
That matters most when someone saves the PDF and comes back to it days later. If your contact details are already inside the file, they do not need to return to your site to find you.
- Company Location Address Label - A label such as Address.
- Company Location - Your office or business location.
- Company Telephone Number - Your phone number.
- Email Us Label - A label such as Quick Questions? Email Us.
- Company Email Address - Your business email address, shown in the PDF.
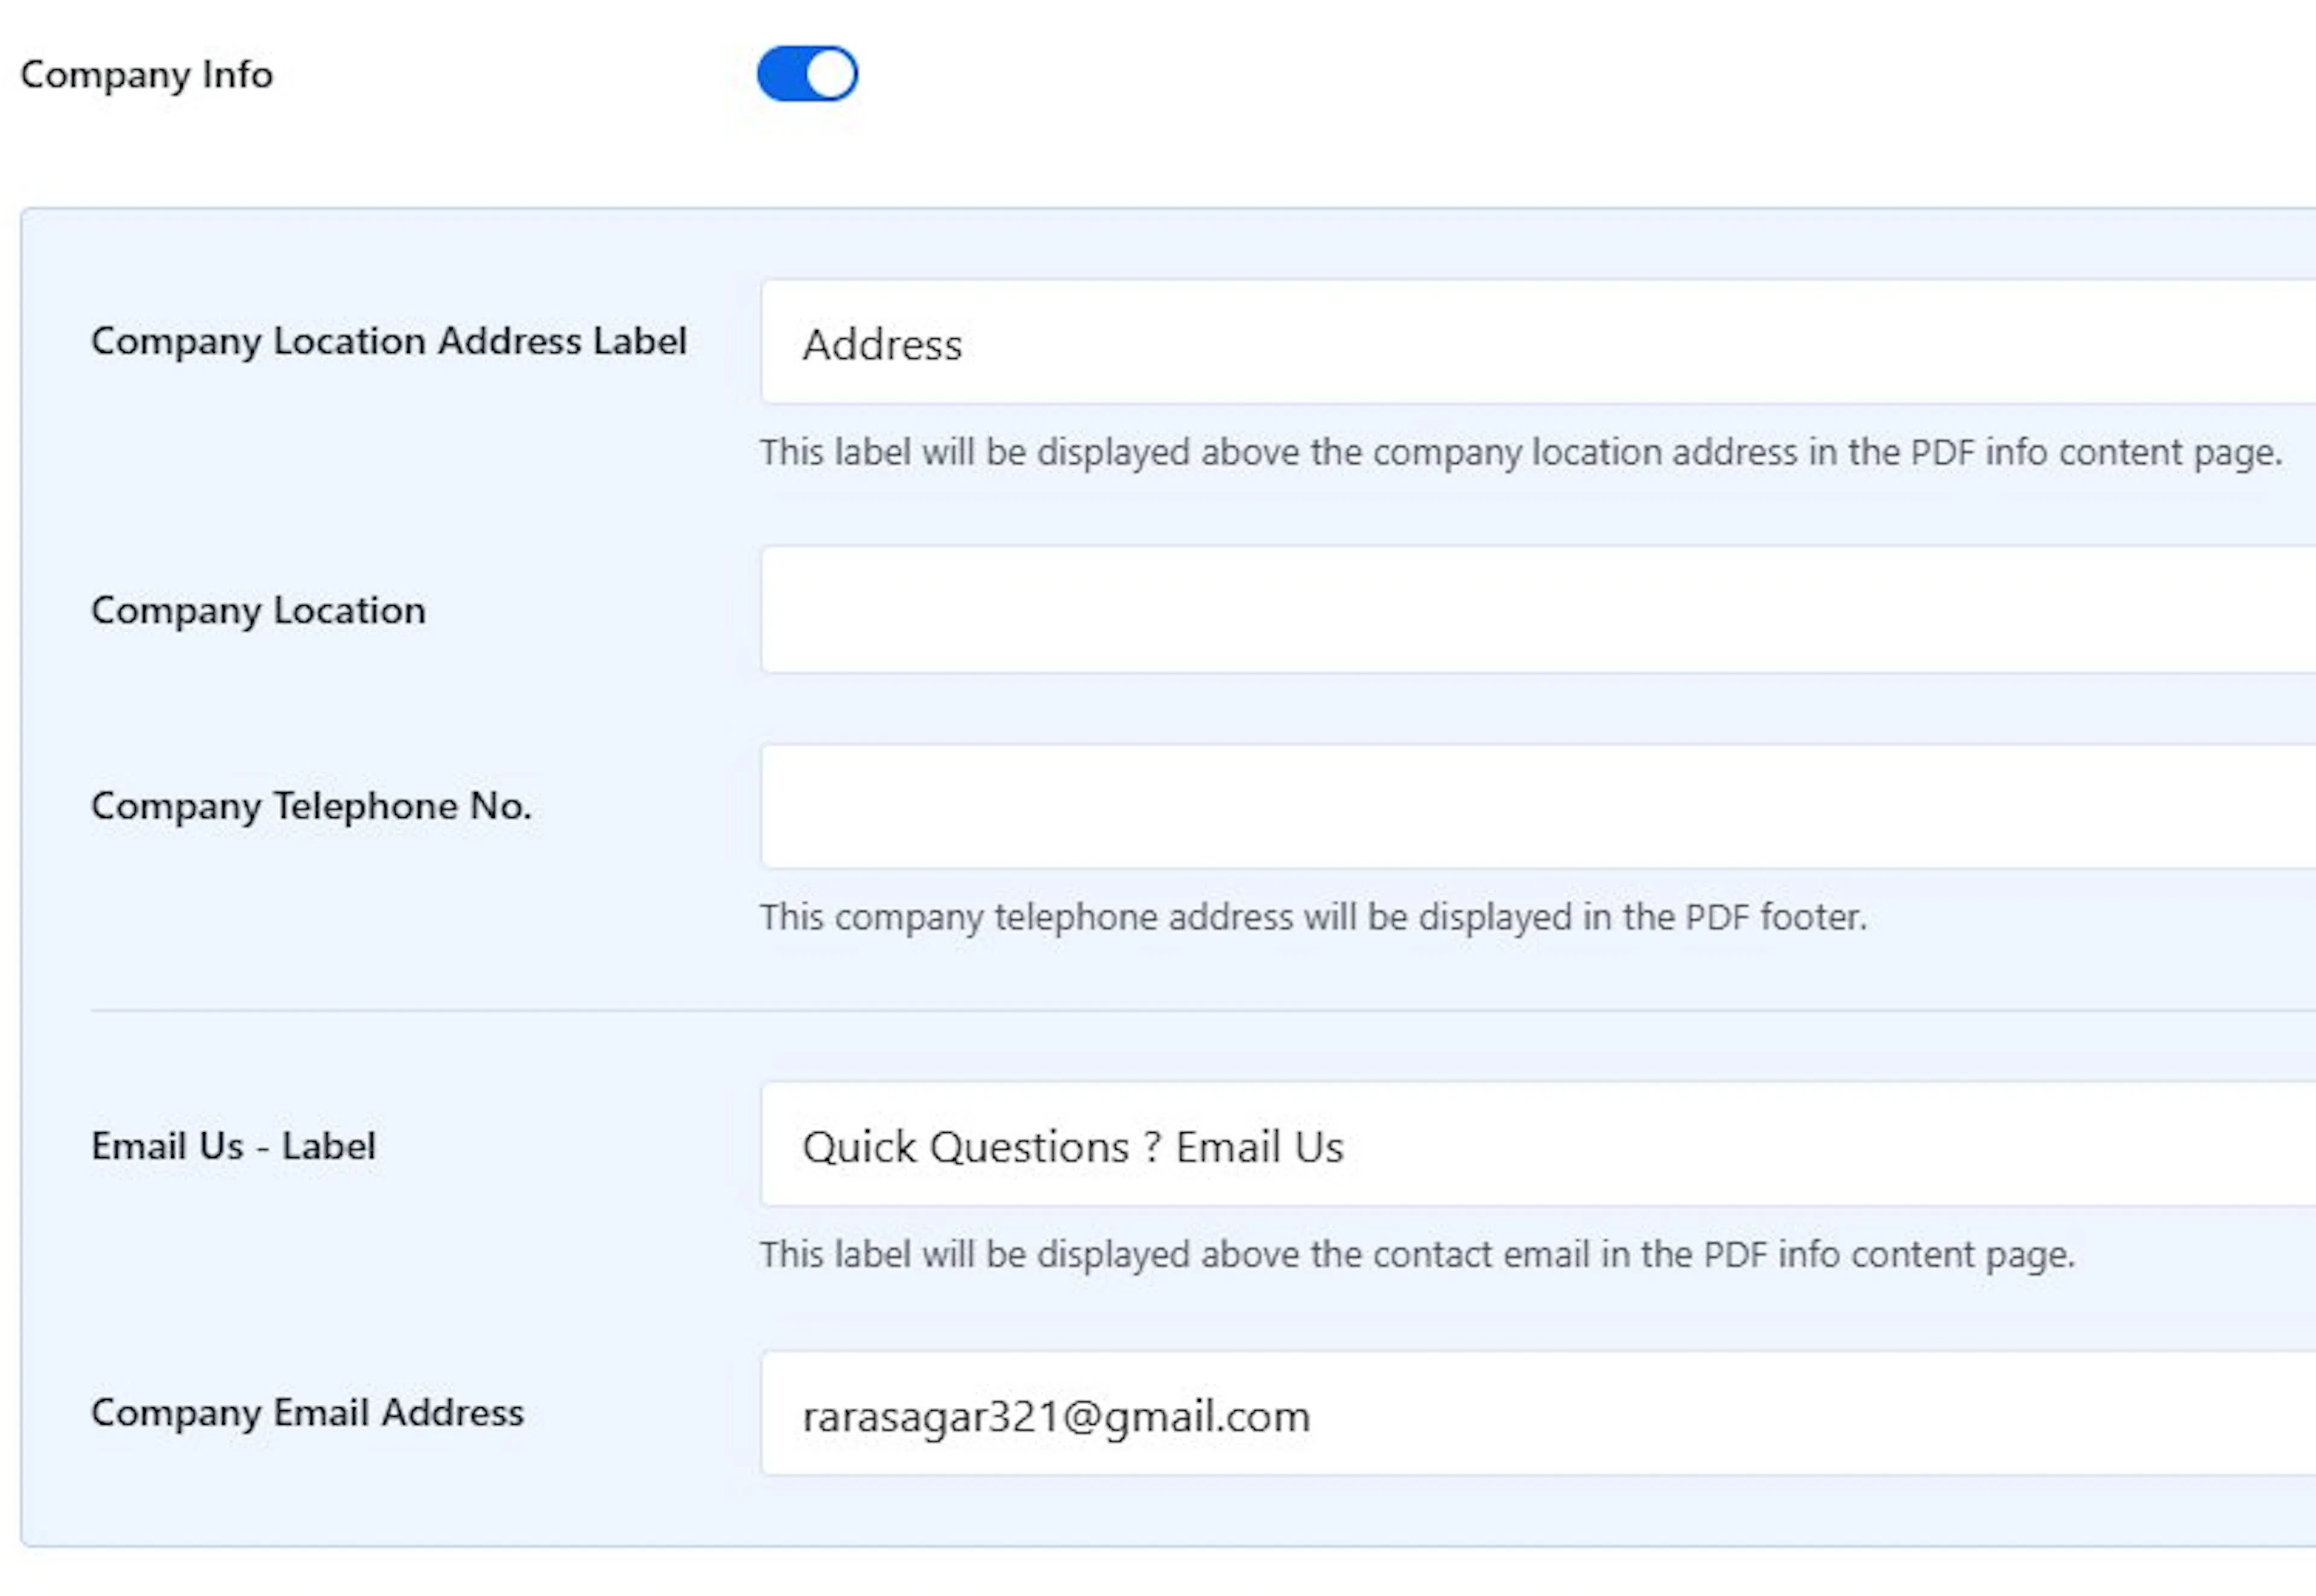
If you offer group departures, custom dates, or gear rental, this section gives travelers a direct way to ask about those details after they download the file.
Talk to an Expert section
Turn on the Talk to Expert toggle if you want the PDF to include a direct contact block for one person. This builds trust because the traveler sees a real name and a clear next step.
Use these fields to fill out that contact block:
- Expert Avatar Image - Upload a photo of your representative.
- Expert Label - Add a heading such as Talk to an Expert.
- Expert Email - The expert's email address.
- Expert Telephone - The expert's direct phone number.
- Viber / WhatsApp Contact Available - Turn this on if you want to show Viber or WhatsApp details for quick chat support.
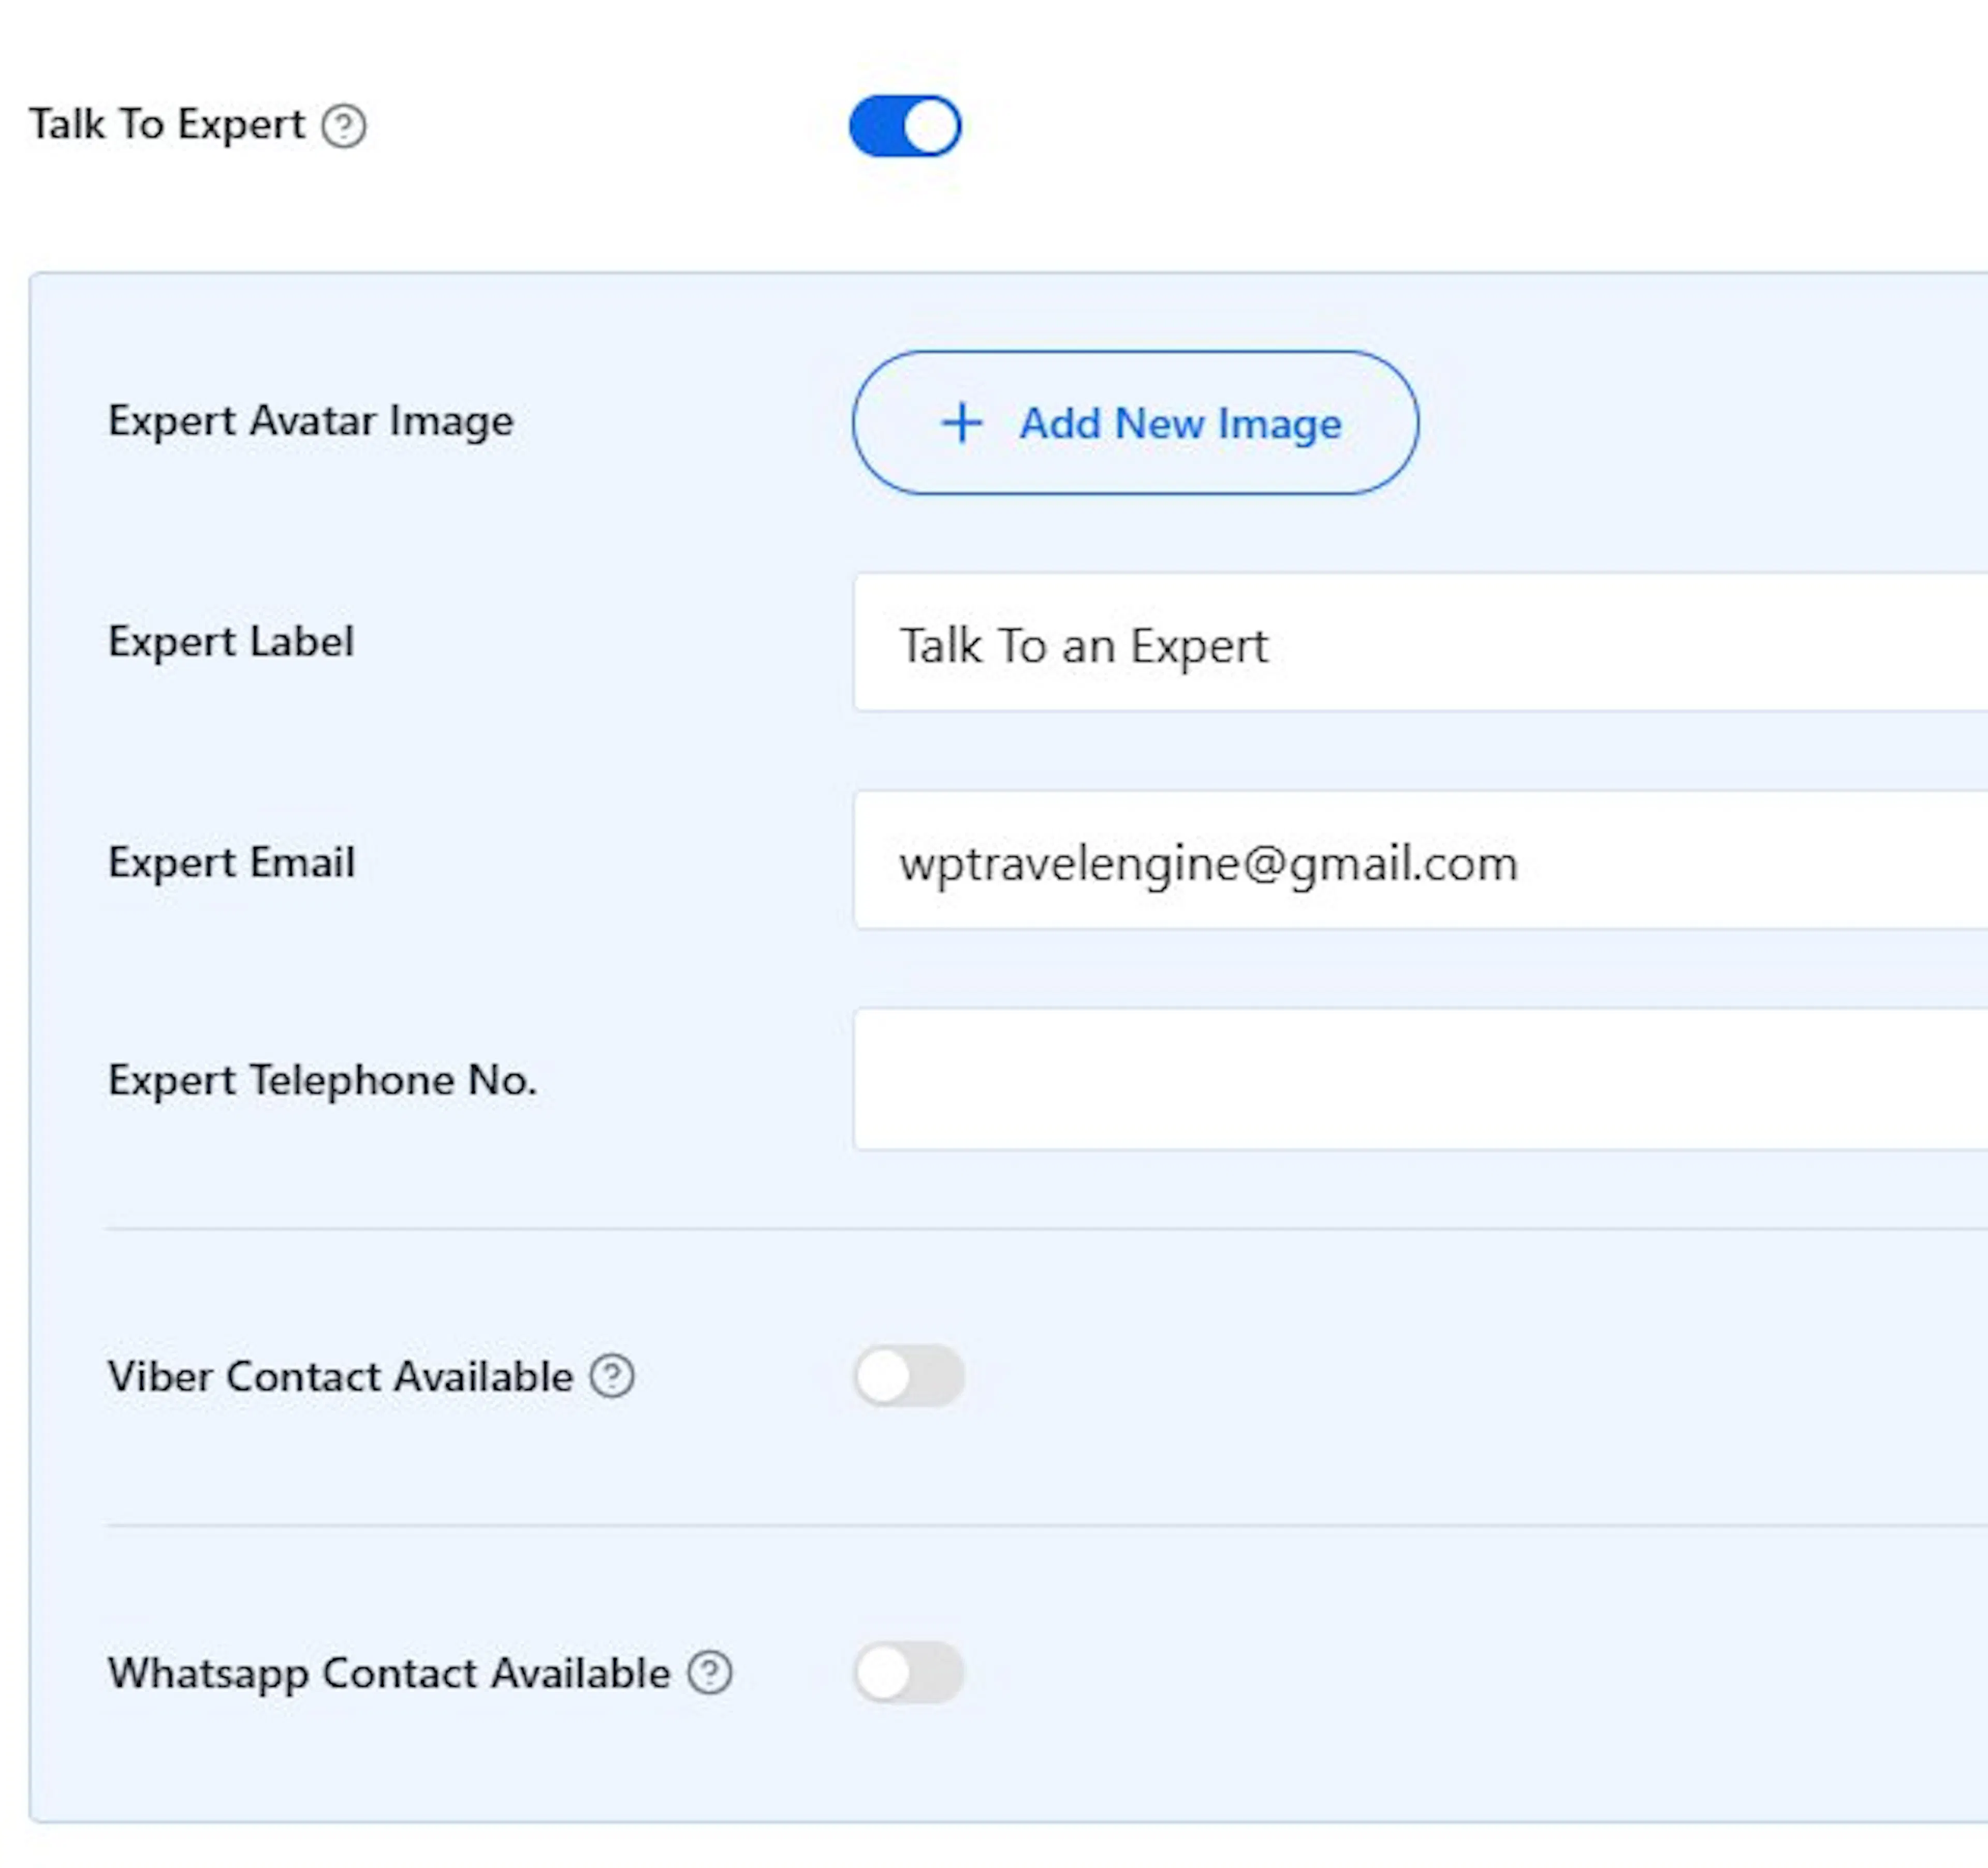
Say you have a senior guide named Raj who handles Everest treks. Add his photo, email, and WhatsApp number here. When a traveler downloads the PDF, they see Raj's face and know exactly who to contact.
That covers the site-wide settings. Next, turn the feature on for each trip where you want the button to appear.
Turning on the download button for a specific trip
These settings are for one trip at a time. You add them when you edit a trip.
Open the trip
Go to Trips on the left sidebar of your WordPress dashboard. Then click the trip you want to edit.
Find the Itinerary Downloader section
Open the Itinerary tab and scroll until you see the Itinerary Downloader section.
Add a PDF title
Type a title for the PDF, such as Trip Itinerary PDF. This title appears on the downloaded file.
Save your changes
Click the Save or Update button. You will usually find it at the top right of the page.
After you save, travelers will see the Download PDF button on that trip page.
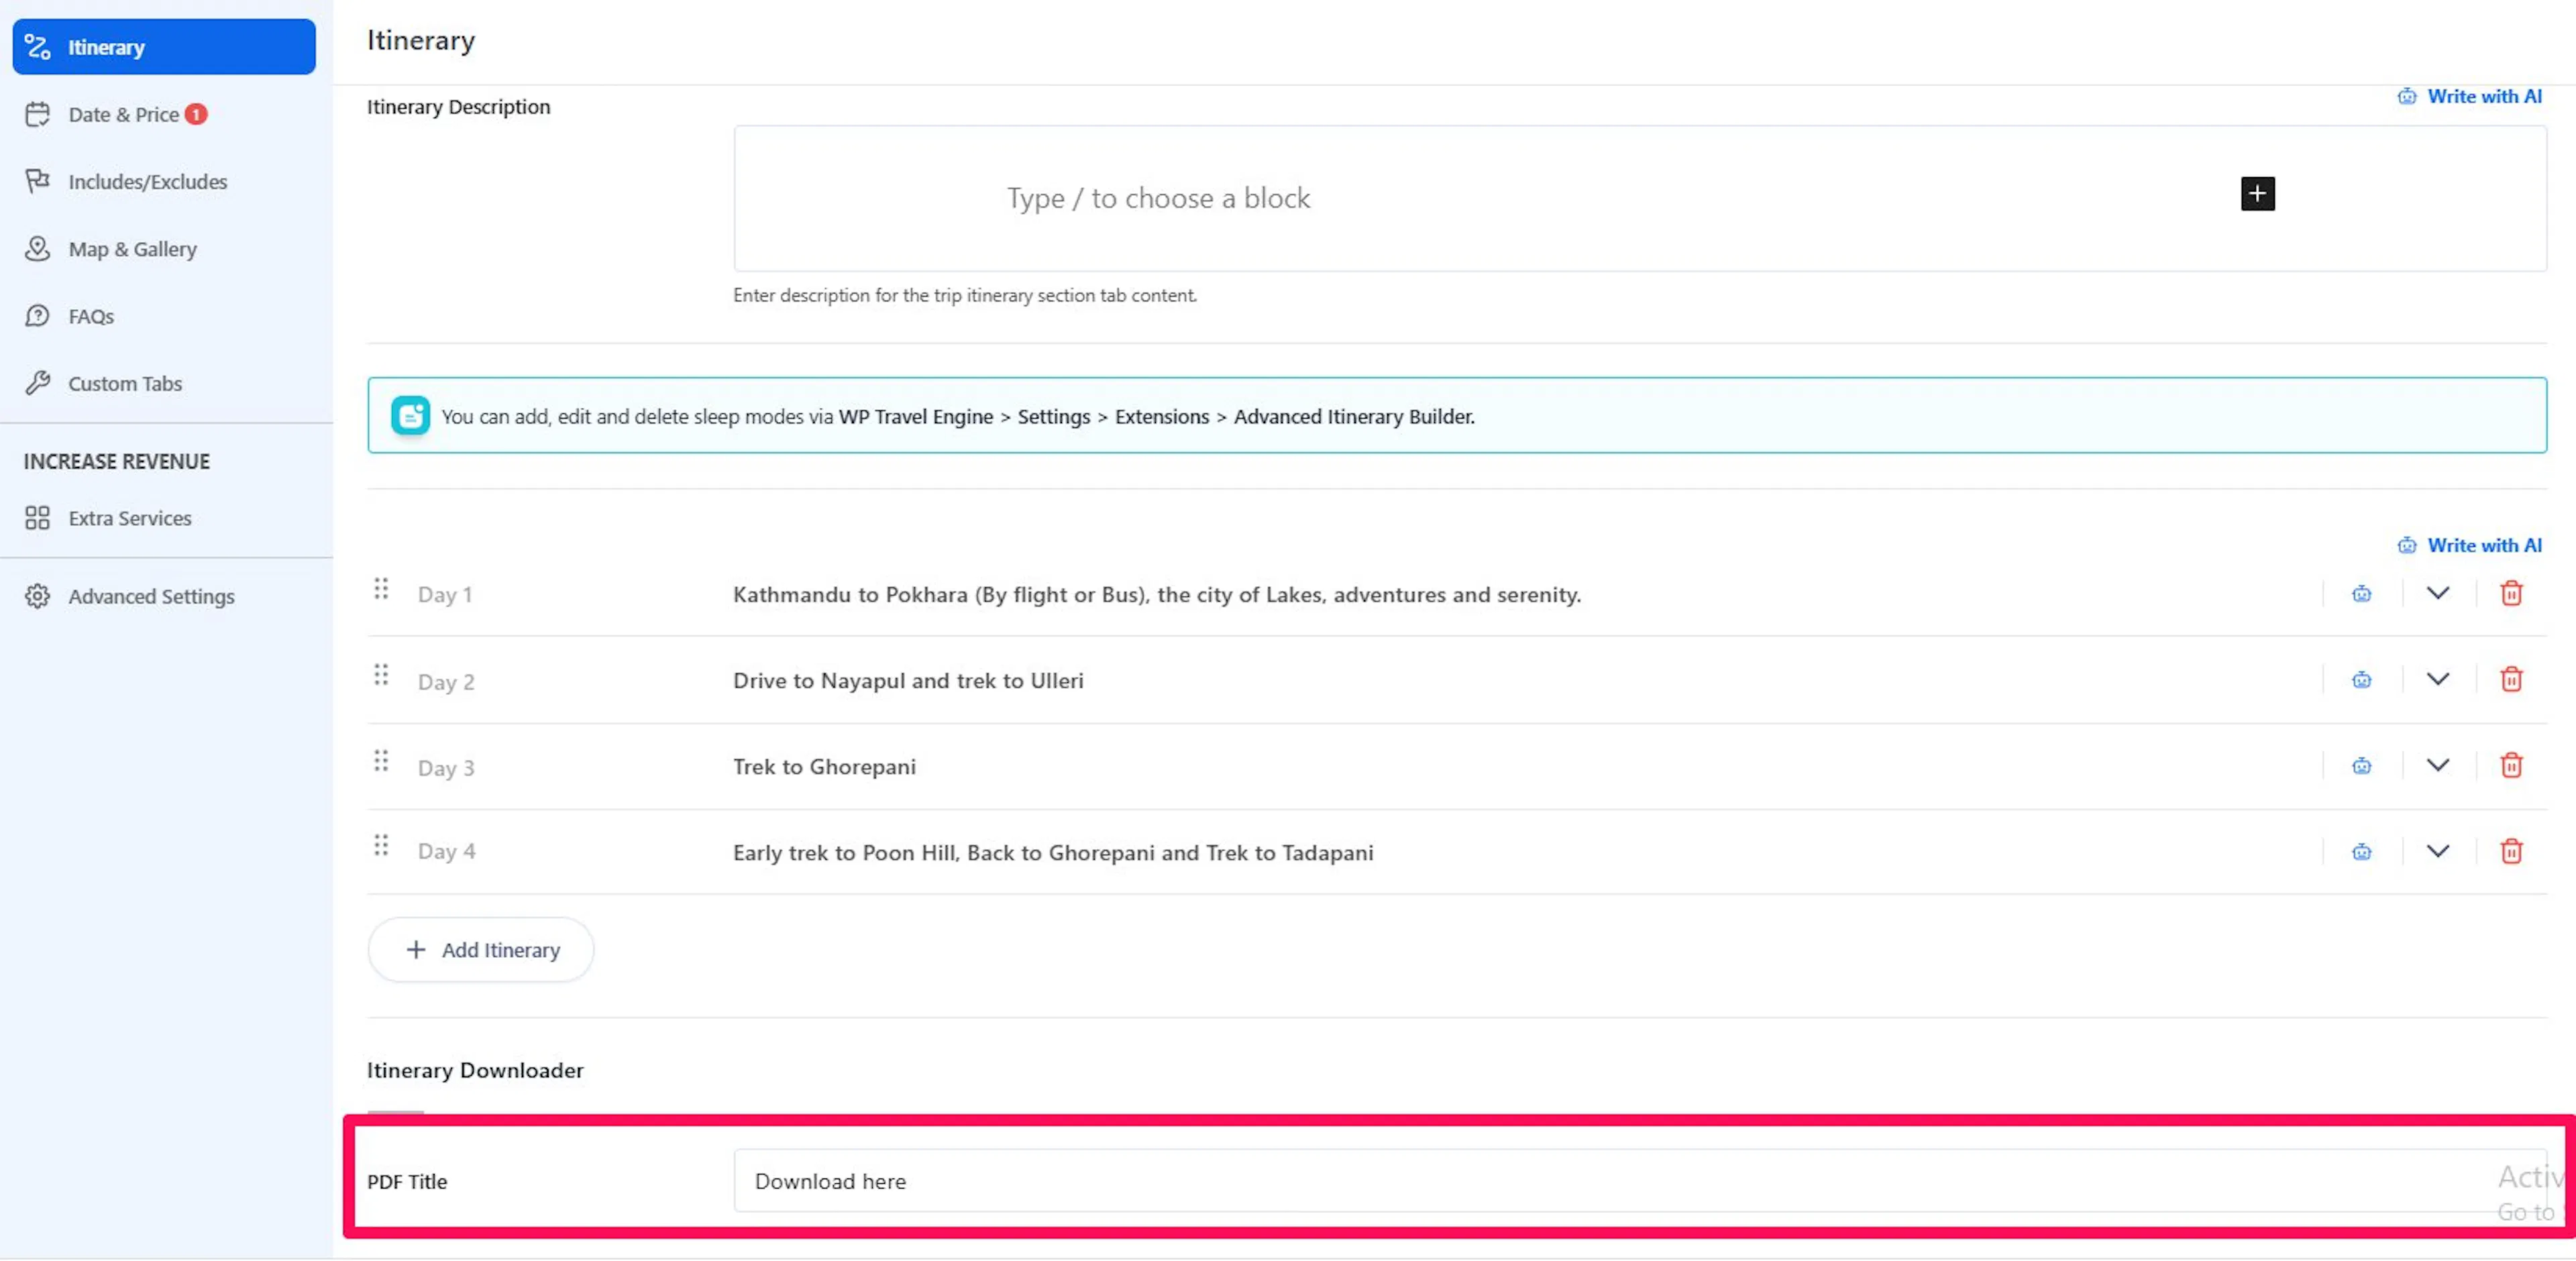
If the button is now showing on the trip page, the main setup is done. You can also place the button with a shortcode if needed.
Showing the download button on other pages
A shortcode is a small piece of text in brackets that tells WordPress to display something on a page. The Itinerary Downloader includes this shortcode:
[wte_itinerary_downloader]
This shortcode only works on single-trip pages. It will not show anything on your homepage or other pages.
If you are placing the shortcode, make sure you are adding it to a single trip page. If something still is not working, check the troubleshooting section below.
Showing the download button on trip archive pages
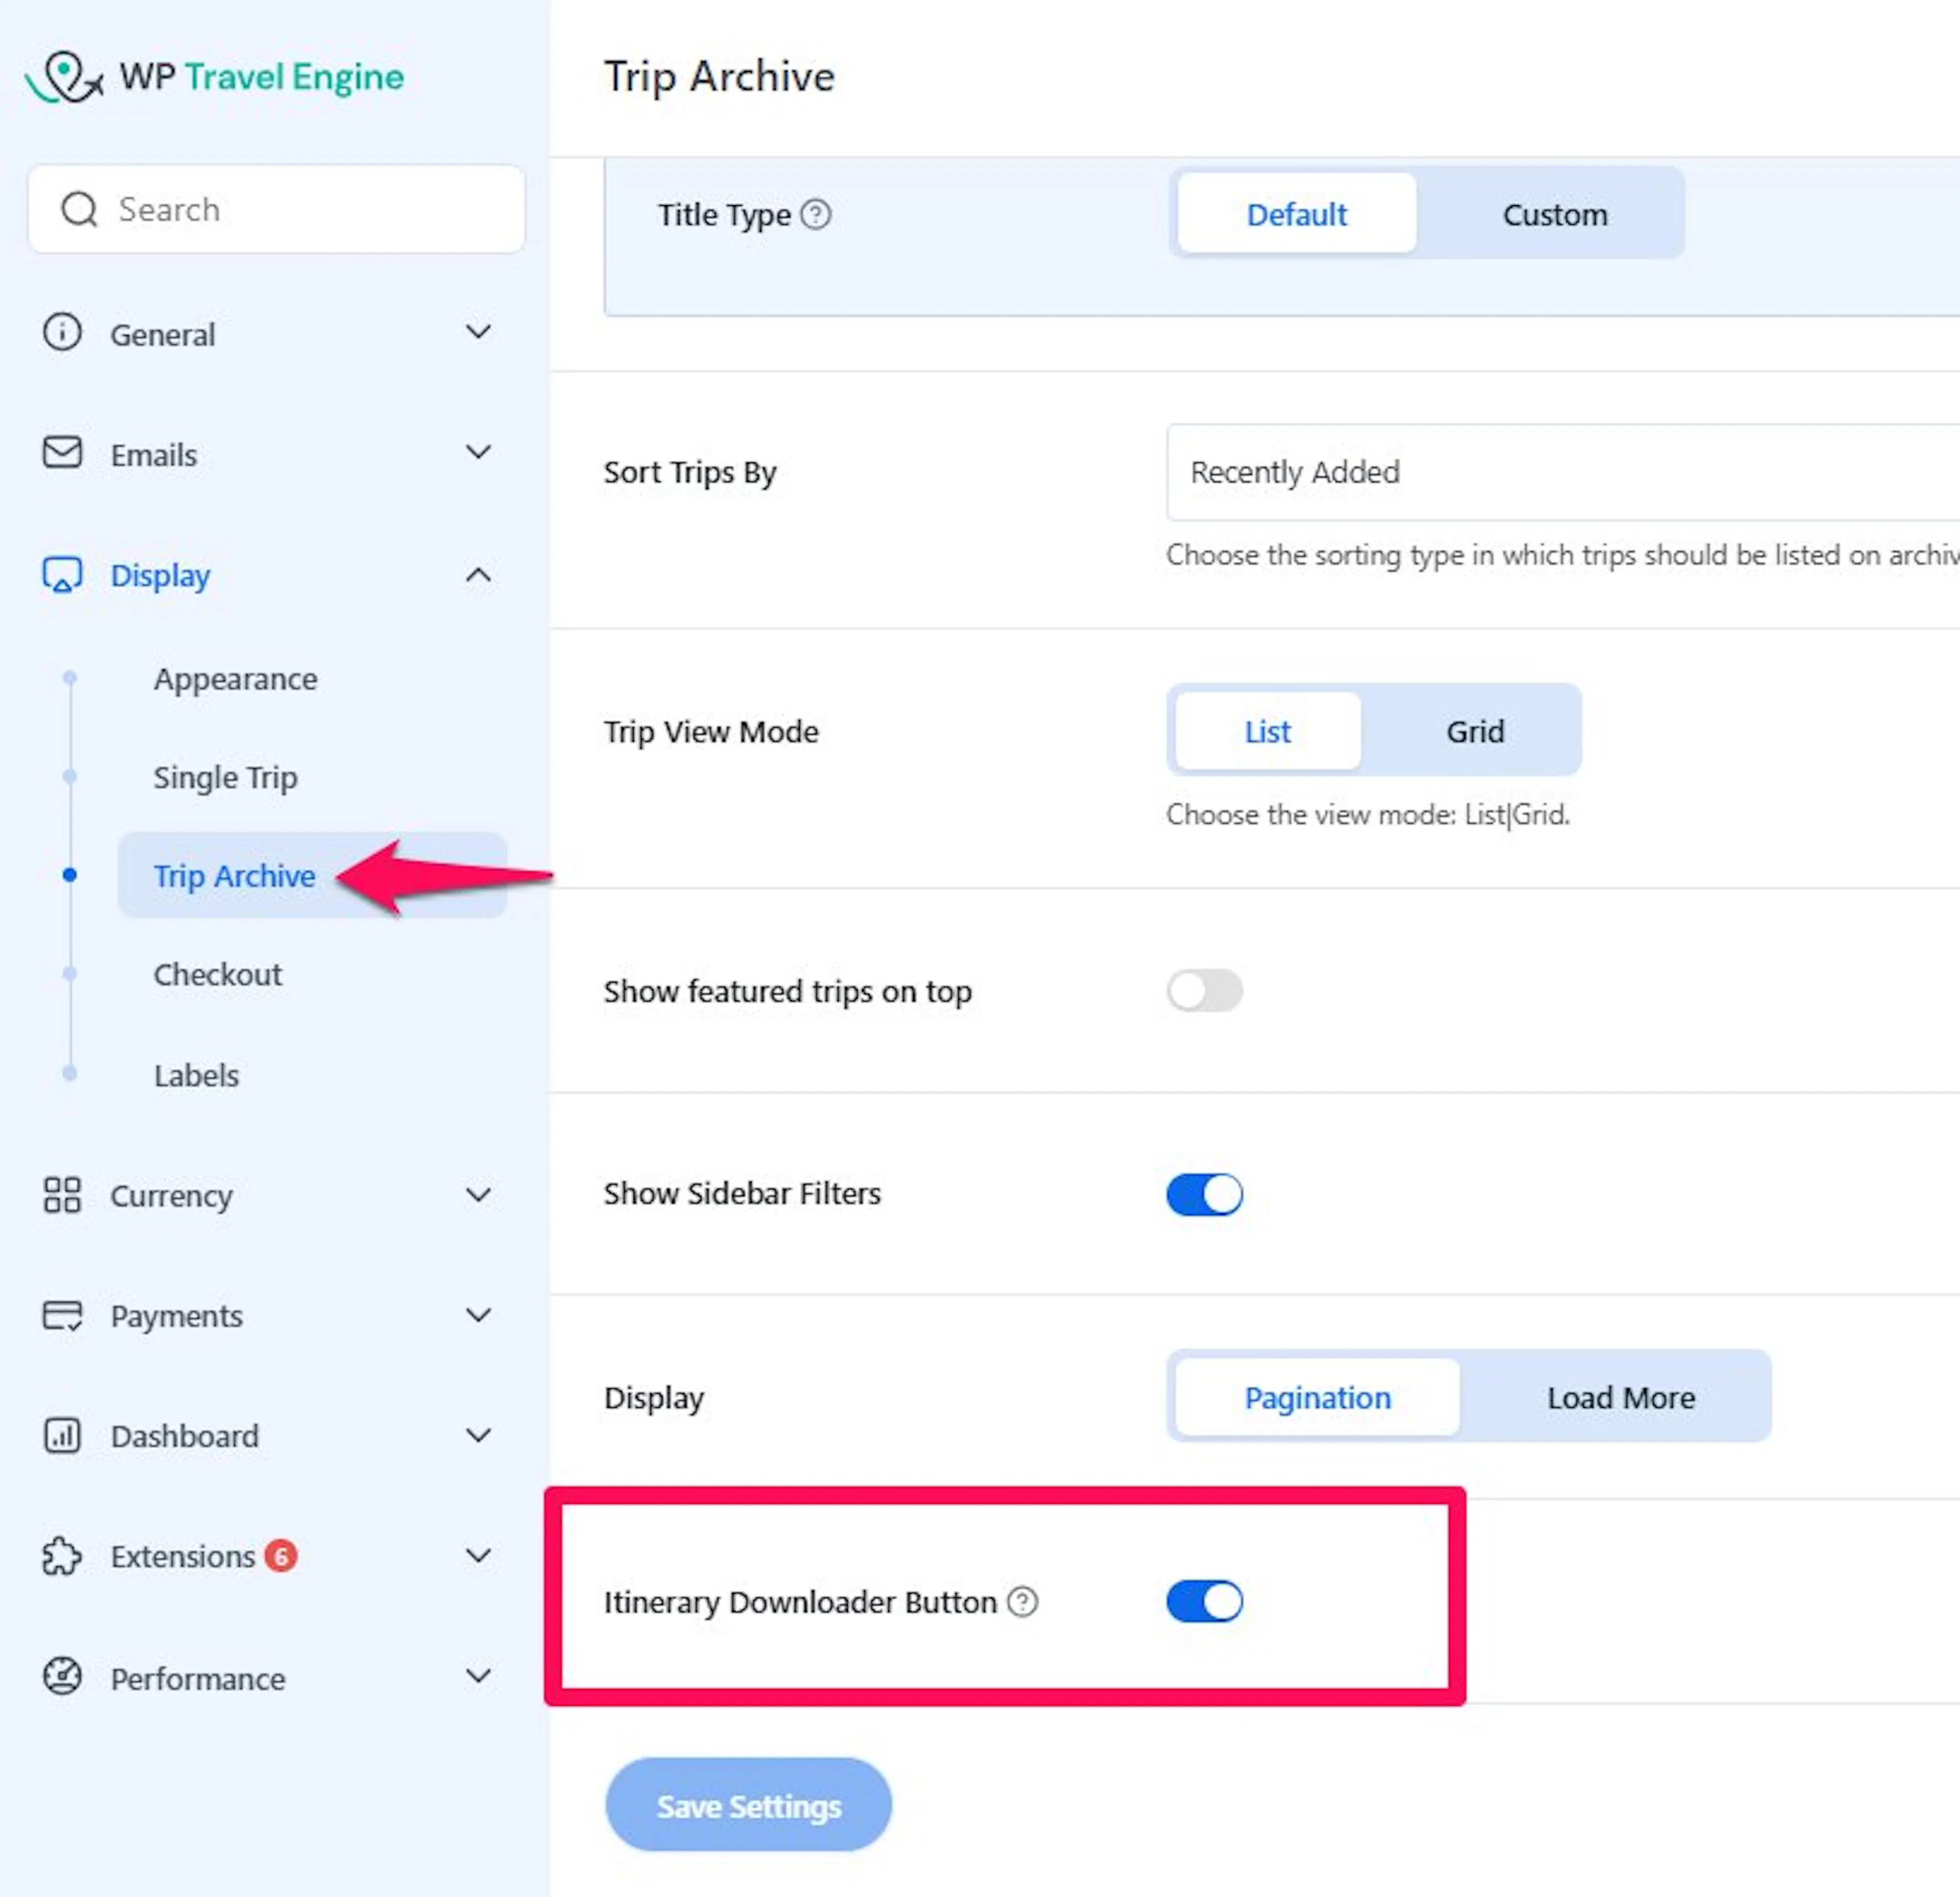
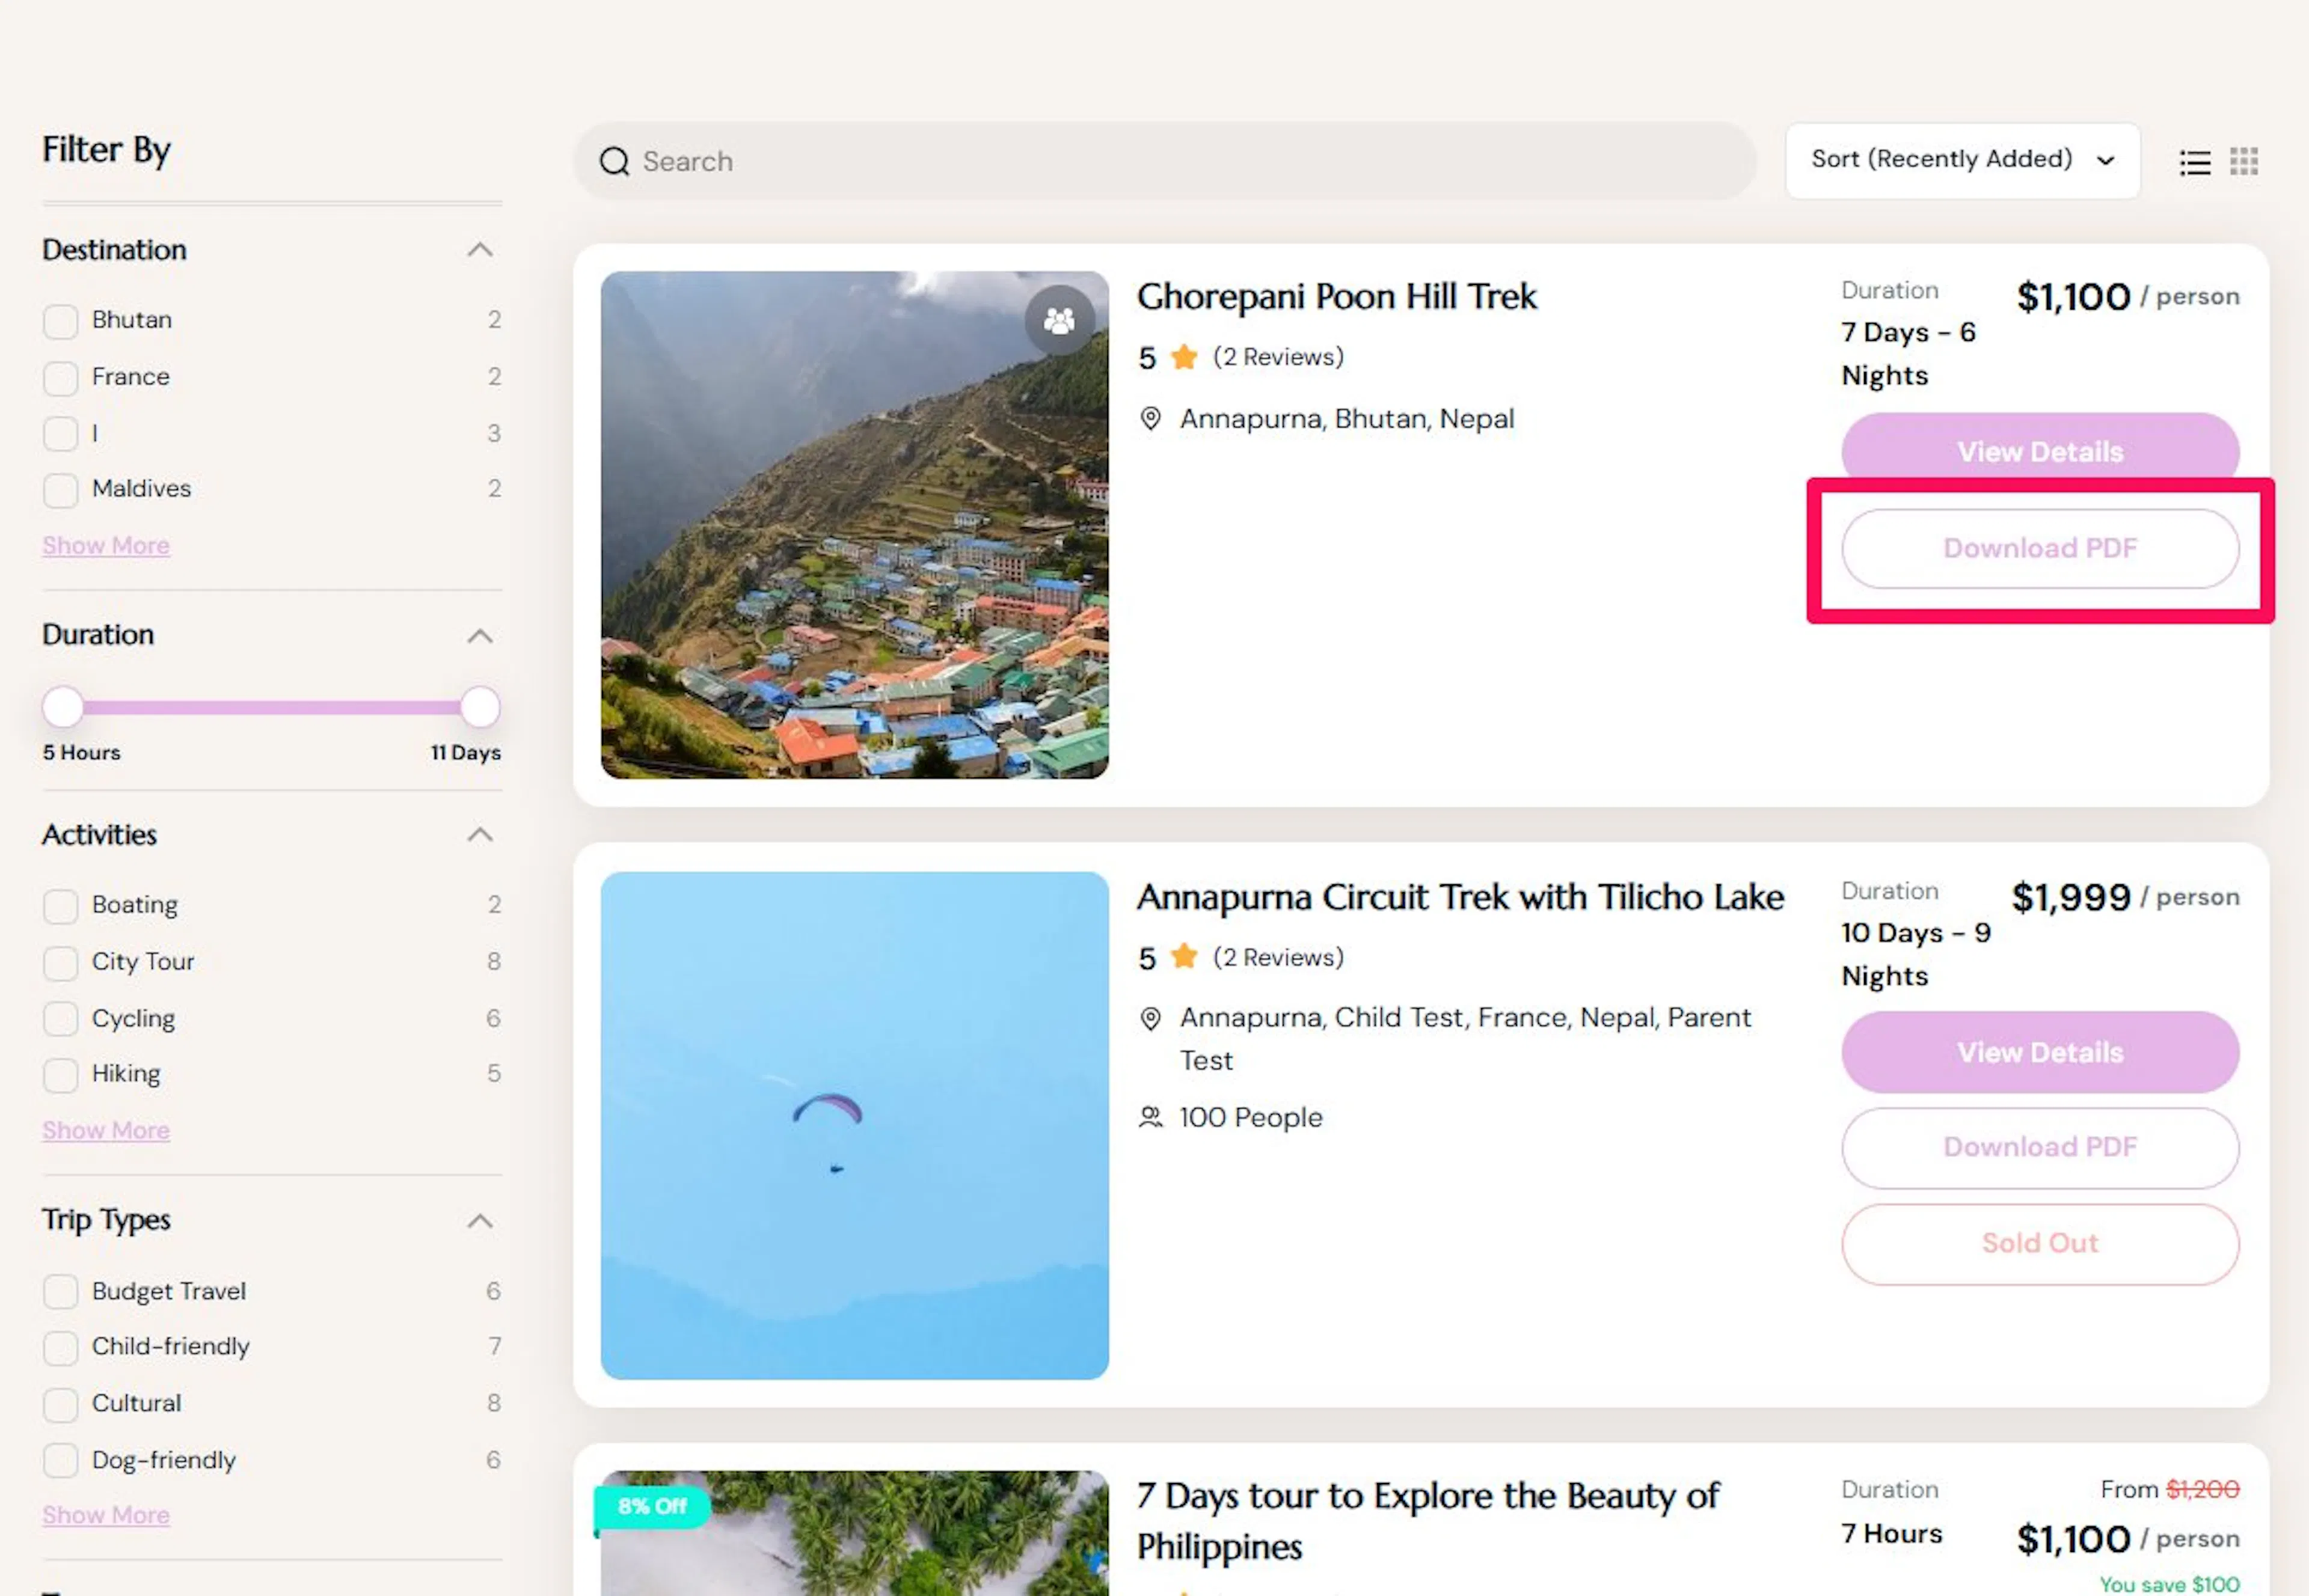
The shortcode cannot add the button to your trip archive pages, which are the listing pages where travelers browse all your trips. Use the trip archive setting instead. It is only available once the Itinerary Downloader is enabled.
Open the Display settings
In your WordPress dashboard, go to WP Travel Engine > Settings. Then open the Display tab.
Open Trip Archive
Open the Trip Archive settings and find the Itinerary Downloader Button option.
Turn on the option
Switch on the Itinerary Downloader Button, then click Save.
After you save, a Download button appears on the trip archive page, so travelers can get a trip's PDF without opening the trip first.
If you don't see the Itinerary Downloader Button option, make sure Enable Itinerary Downloader is turned on under WP Travel Engine > Settings > Extensions > Itinerary Downloader.
Troubleshooting
The download button isn't showing up on my trip page
Check the main switch first. Go to WP Travel Engine > Settings > Extensions > Itinerary Downloader in your WordPress dashboard and make sure the add-on is turned on.
Then open the trip itself and make sure you added a PDF title and clicked Save or Update. If either of those steps is missing, the button may not appear.
The PDF looks wrong or has the wrong logo
Check two places. First, go to WP Travel Engine > Settings > Extensions > Itinerary Downloader and upload a logo in the PDF content settings area.
If that field is empty, the PDF uses your theme's logo instead. You can manage that logo in Appearance > Customize in your WordPress dashboard.
Travelers aren't getting the PDF email
If you turned on the popup email form, check the Reply To Email field and make sure your business email is entered correctly. A small typing mistake here can cause email problems.
Ask the traveler to check their spam or junk folder too. PDF attachments sometimes get filtered there.
The shortcode isn't working
The shortcode only works on single-trip pages. If you added it to your homepage, a standard page, or a blog post, it will not display anything.
Move the shortcode to a single trip page instead. That is the only place where this shortcode works.
The Mailchimp integration isn't adding subscribers
Start by checking your Mailchimp API Key. This key is a password-like code from your Mailchimp account, so it must be entered correctly.
You can find it in Mailchimp under Account > Extras > API Keys. Also make sure you selected the correct Mailchimp Audience from the dropdown.
My company info isn't showing in the PDF
Make sure the Company Info toggle is turned on in the Itinerary Downloader settings. If the toggle is off, your address, phone number, and email will not show in the PDF.
Then check that you filled in the fields themselves. Empty fields will not appear in the final brochure.
Frequently asked questions
If you're still stuck or have a question we didn't cover, our support team is happy to help. Reach out at our support page and we'll get you sorted.