

How to Add Trip Includes and Excludes
List what your trip price covers and what it doesn't, so travelers know exactly what they're paying for before they book.
Why includes and excludes matter
Clear includes and excludes help travelers understand your trip price before they book. That builds trust and cuts down on last-minute questions.
This is especially helpful when a traveler is comparing several trips. If your page clearly says what is covered and what is not, they can make a decision with confidence.
For example, a traveler might book a 5-day trek thinking meals are included. If meals were not listed anywhere, that can lead to confusion and frustration later. A clear includes and excludes section helps prevent that kind of misunderstanding.
Once you know where this setting lives, it only takes a few minutes to fill in.
Before you start
You need to have a trip created or already in progress before you add includes and excludes. If you have not created the trip yet, start with the trip's General Info first, then come back to this section.
Configure the Includes/Excludes tab
You will add this information in the Single Trip Editor. This is the screen where you create or edit one trip in WordPress.
Open your WordPress dashboard and go to Trips
This gets you to the part of your website where your tours are managed.
Log in to your WordPress website. From the left-hand menu, open Dashboard and click Trips.
If you already have trips added, you will see them in a list. If you are adding a brand new trip, you can start from here.
Open an existing trip or create a new one
This takes you into the trip editing screen where the Includes/Excludes setting lives.
To edit a trip you already made, click the trip title from your trips list. To create a new trip, click Add New.
You are now in the Single Trip Editor. This is the page where you enter all the details for one trip.
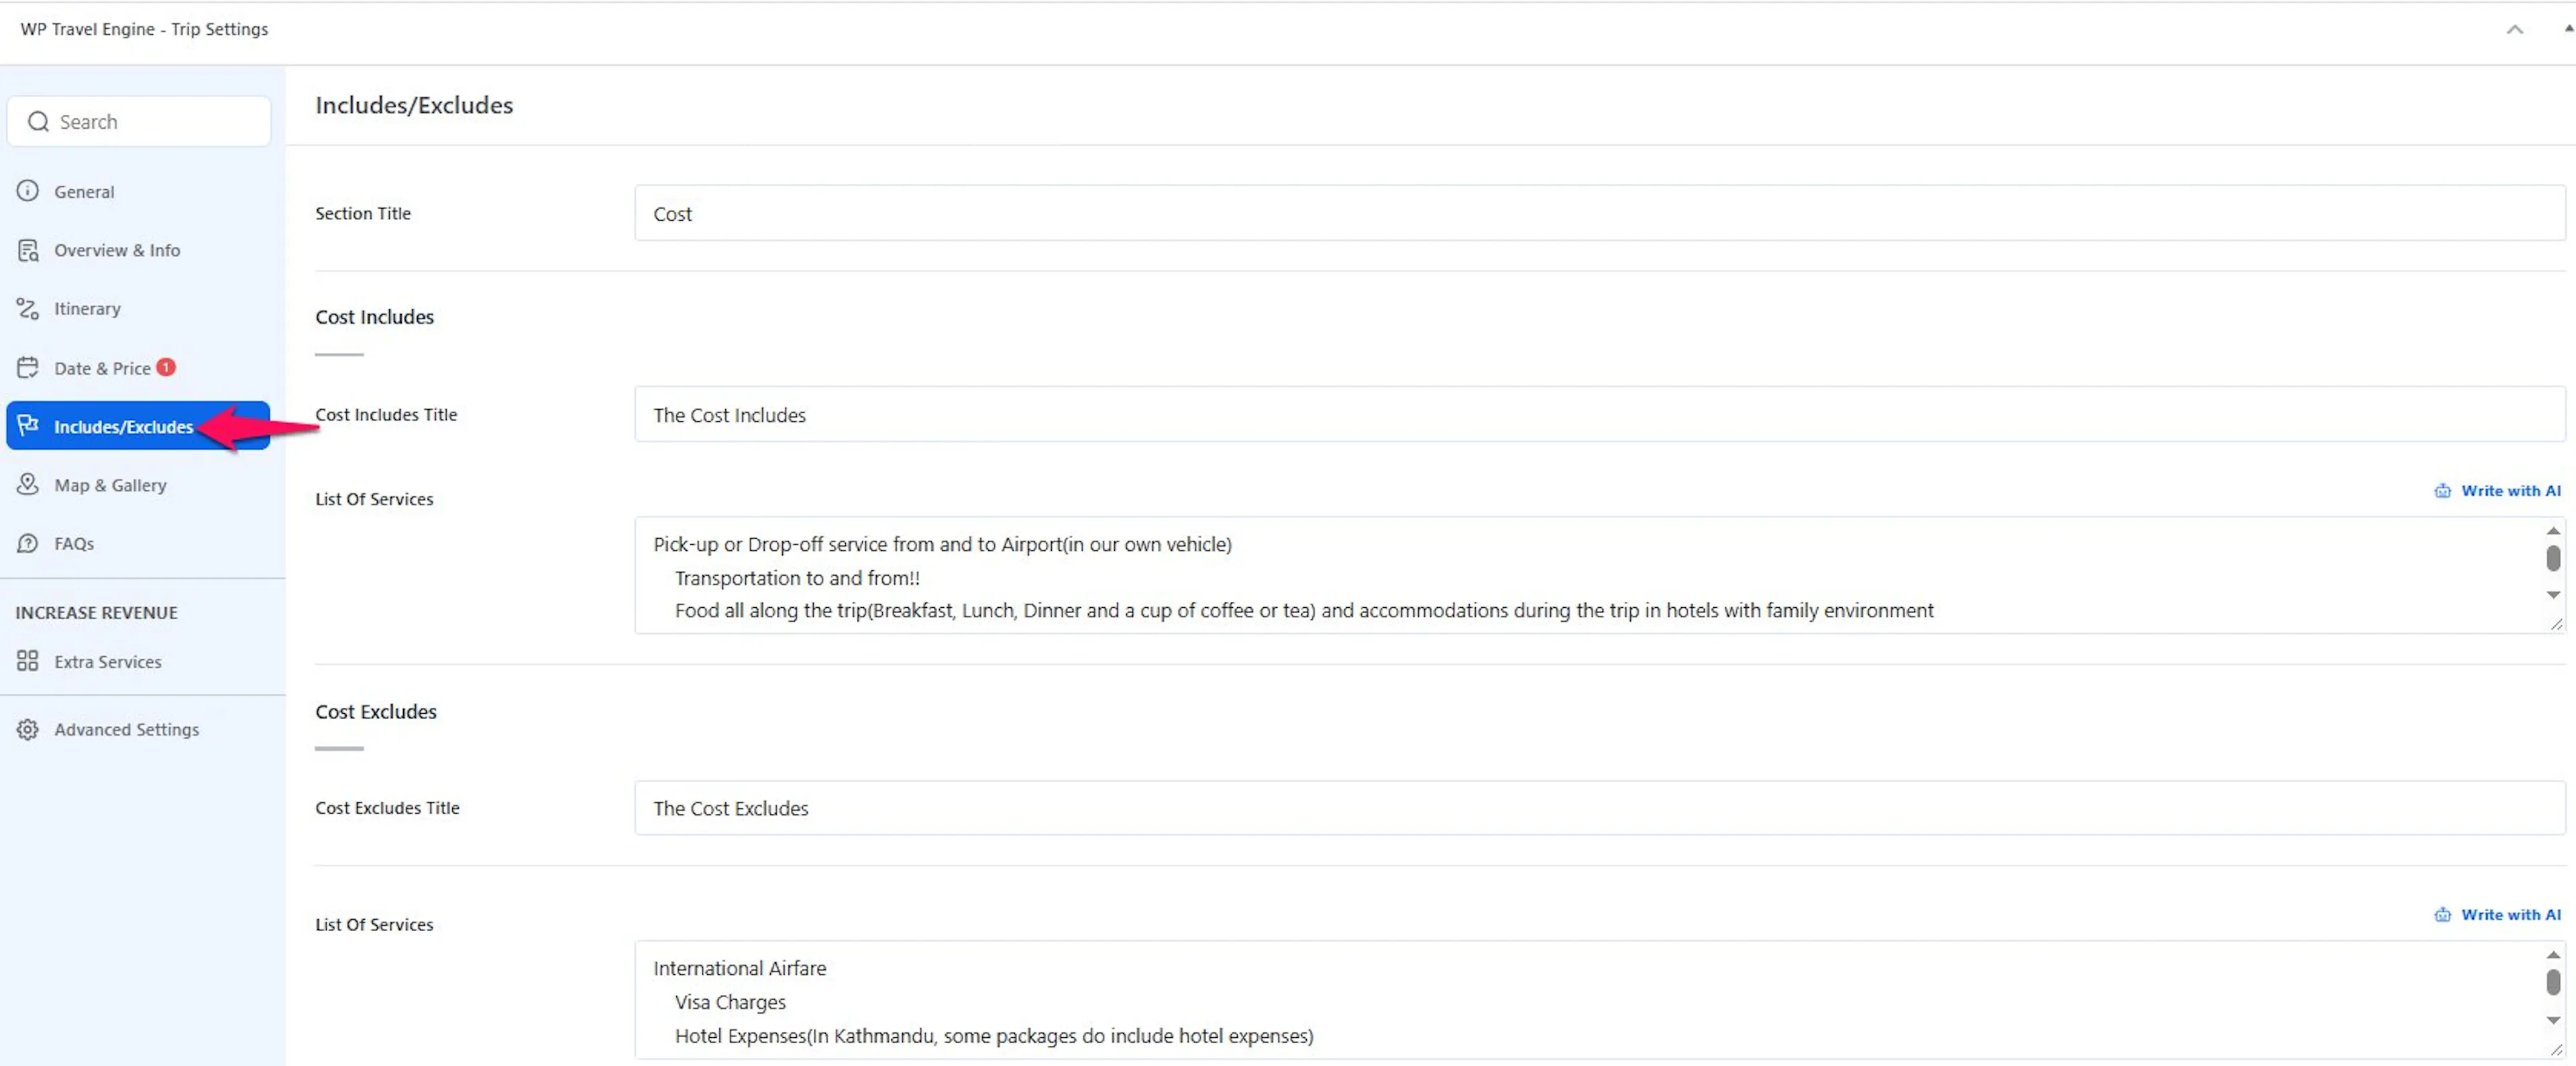
Find the Includes/Excludes section in Trip Settings
This is where you tell travelers what the trip price covers and what they will need to pay for separately.
Inside the trip editor, look for Trip Settings. You will find the trip setting sections running down the right side of the page.
Click Includes/Excludes to open that section.
Add items to the Cost Includes list
Use this list to show everything that is covered by the trip price.
In Cost Includes, enter the items that are included in the package. Good examples are All meals, Guide and porter, and Park entrance fees.
Think about the things a traveler would expect to know before booking. For a day tour, that might be transport, lunch, and entry tickets. For a multi-day package, that might include accommodation, local transfers, permits, and guiding services.
When this list is clear, travelers spend less time guessing what they are paying for.
Add items to the Cost Excludes list
Use this list to show what travelers need to arrange or pay for on their own.
In Cost Excludes, enter anything not covered by the trip price. Common examples are International flights, Travel insurance, and Personal gear.
You can also list optional extras here if travelers pay separately for them. For example, gear rental, tips, premium room upgrades, or extra snacks on a trek.
A clear excludes list helps avoid uncomfortable conversations after booking.
Save your changes
This makes sure your trip page keeps the information you added.
When you are done, click Update or Publish in the top right corner of the page.
After saving, your trip will keep the new includes and excludes information. You can come back and adjust the list any time.
Being specific here can save you a lot of follow-up questions later. Clear includes and excludes also help reduce booking disputes.
Common things worth listing are meals, accommodation, transport, gear, permits, and insurance.
What travelers see
On the live trip page, travelers will see two separate lists. One shows what is included in the trip price. The other shows what is not included.
These lists are usually shown with checkmark and X icons. That makes the information quick to scan when someone is deciding whether to book.
If your trip has several moving parts, this section can be one of the most useful parts of the page. It gives travelers a clear picture of what to expect before they pay.
Related settings
Trip Overview Info
Add the trip description and highlights.
Trip Info
Add accommodation, transportation, and destination facts.
If you're still stuck or have a question we didn't cover, our support team is happy to help. Reach out at our support page and we'll get you sorted.