

File Downloads
Attach downloadable documents like packing lists, permits, or maps to your trips so travelers can get the information they need before they go.
File Downloads helps you attach files to individual trip pages so travelers can download them directly from your site.
You can use it to share pre-trip and on-trip documents in one clear place. For example, you might upload a packing list for a trek, a waiver for an adventure tour, a permit checklist, or a trail map for a multi-day route.
This add-on works with the WP Travel Engine plugin and adds downloadable files to individual trip posts. It helps you show important trip documents clearly, which gives travelers more confidence and helps you share the details they need before or during the trip.
What you'll need before you start:
- WordPress version 6.0 or higher
- WP Travel Engine plugin v3.0.8 or later installed and activated
- WP Travel Engine Pro plugin installed and activated
- Partial Payment add-on installed and activated
Key features
These are the main ways File Downloads can help you organize trip documents for your travelers.
- Add downloadable files to individual trips so each trip can have its own documents.
- Show files in a clear layout on the trip page so travelers can find what they need.
- Share important pre-trip or on-trip files such as packing lists, permits, waivers, or route notes.
- Attach files only to specific trips when the document should not appear across your whole site.
- Give travelers better trip information up front, which adds clarity and helps build trust.
Installing the File Downloads add-on
The installation part is quick. If you have not activated a Pro add-on before, use the guide below.
See how to activate a Pro add-on license key for the full installation and activation walkthrough.
Feature configuration
Once the add-on is active, you can choose which files to offer and where they should appear.
Configuring the File Downloads module
Start with the main settings area. This is where you upload files and decide how global files should work across your site.
In your WordPress dashboard, look at the left sidebar and open WP Travel Engine. Then go to Settings → Extensions → File Downloads.
From this screen, you can upload files and manage global files. Global files are files you want to reuse across multiple trips. This is a good place to set up documents like a general packing list or standard terms for all travelers.
General settings
These settings control the heading text and how your files behave on the trip page.
Along with the Header Text and Header Description fields, you will also see display options for global files, browser behavior, and direct downloads. Once these are set, you can move on to uploading the actual files.
- File Download Header Text: Enter the heading travelers will see above the downloads section on the trip page.
- File Download Header Description: Add a short line below the heading. You can use this to explain what the files are. For example, you might write "Download your trek packing list, route notes, and waiver before departure."
- List Global or Trip Specific Files: Turn this on if you want the plugin to show global files when a trip does not have its own files yet. For example, if a trip has no custom documents, travelers could still see your general packing list.
- Always List Global File: Turn this on if you want global files to appear on every trip all the time. Global files show first, then trip-specific files. If the same file appears in both places, it only shows once. For example, if you want every trip to include your terms and conditions, use this setting.
- View File in New Tab: Turn this on if you want files to open in a new browser tab. This lets travelers keep the trip page open while they read the file.
- One-Click Download: Turn this on if you want the file to download as soon as someone clicks it. This overrides View File in New Tab. For example, if you want travelers to grab their packing list right away instead of opening it first, use this option.
File uploader
Use the file uploader to add the documents you want travelers to download.
Click Add New File to upload a file. The uploader shows file types that work with the plugin, including PDF, DOC, DOCX, images, and text files. After upload, each file appears in the list with its filename.
- Rename Files: Change the filename inside the uploader if the name needs to be clearer.
- Replace Files: Swap out a file if you uploaded the wrong version.
- Delete Files: Remove a file you no longer want to offer.
- Preview: Open a quick preview for file types that browsers can display, such as images, text files, and PDFs. DOC and DOCX files cannot be previewed this way.
Add Global File is featured on the add/edit page and lets you manually add specific global files to an individual trip.
Setting trip-specific files
Global files are useful for documents you reuse often. Trip-specific files are better when one trip needs its own map, permit form, or briefing sheet.
For example, if you run several treks in the same region, a general packing list could be a global file. A trail map for your Annapurna trek would make more sense as a trip-specific file. Now you can add those files to the trip itself.
Open the trip
Go to Trips → All Trips in the left sidebar of your WordPress dashboard.
Open the trip you want to edit. This takes you to that trip's edit screen, where you can manage its own downloadable files.
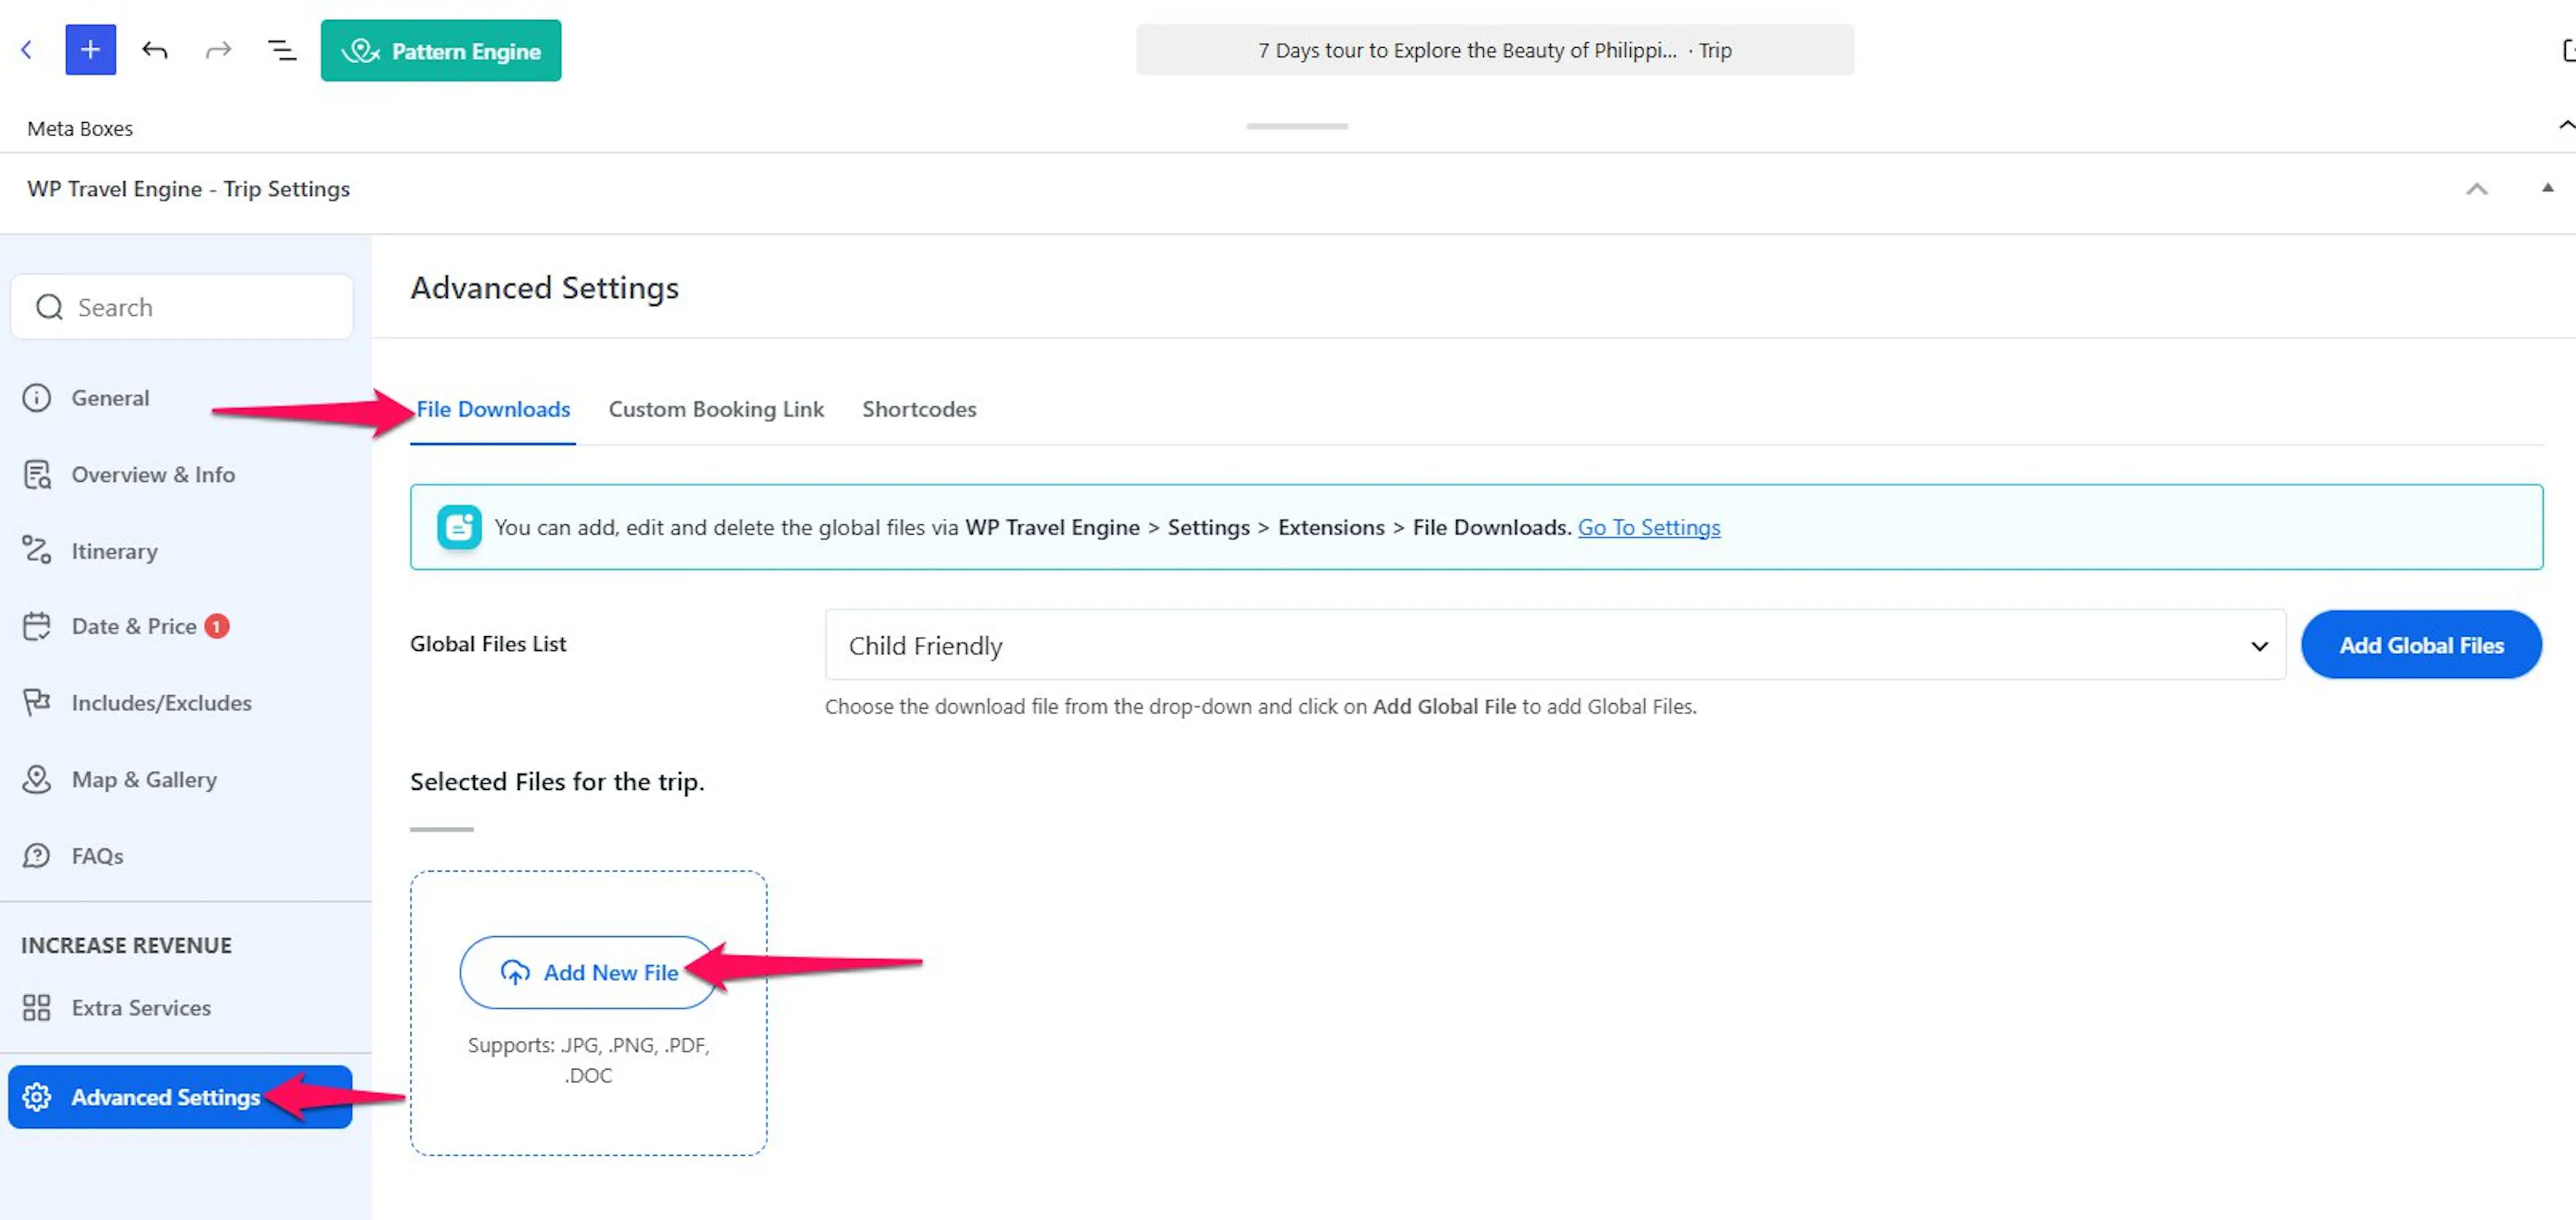
Open the Advanced Settings tab
Go to the File Downloads tab to manage the files for this trip.
- Global Files List: Choose files from the global file library that you already added in the File Downloads settings. Selecting them here attaches those global files to this trip.
- Selected Files for the Trip: Shows all files currently assigned to this trip. These are the files travelers will see based on your global and trip-level settings.
- Add New File: Upload files that belong only to this trip and are not part of your global file list. This is useful when one trip needs its own special document.
- Supported File Types: You can upload files in the following formats:
.JPG,.PNG,.PDF,.DOC.
Save your changes
When the file list looks right, click Update.
You will find the Update button near the top right of the page. Once you save, the trip keeps those file settings.
Displaying files on the front end
Your files need one more thing before travelers can see them on the site.
A shortcode is a short piece of text in square brackets that tells WordPress to show something specific on a page. You paste it into a page or post, and WordPress replaces it with the actual content.
Add this shortcode where you want the file download section to appear:
[trip_file_downloads]
The files you've uploaded will only appear on the trip page if you add this shortcode. Without it, uploaded files won't be displayed.

Once the shortcode is in place, travelers will see the files on the trip page and can open or download them from there. At that point, your setup is ready to use.
If you're still stuck or have a question we didn't cover, our support team is happy to help. Reach out at our support page and we'll get you sorted.