

Playground
Test your assistant's AI provider and model, tone, identity, and appearance with a live chat preview before saving any change to your live site.
Introduction
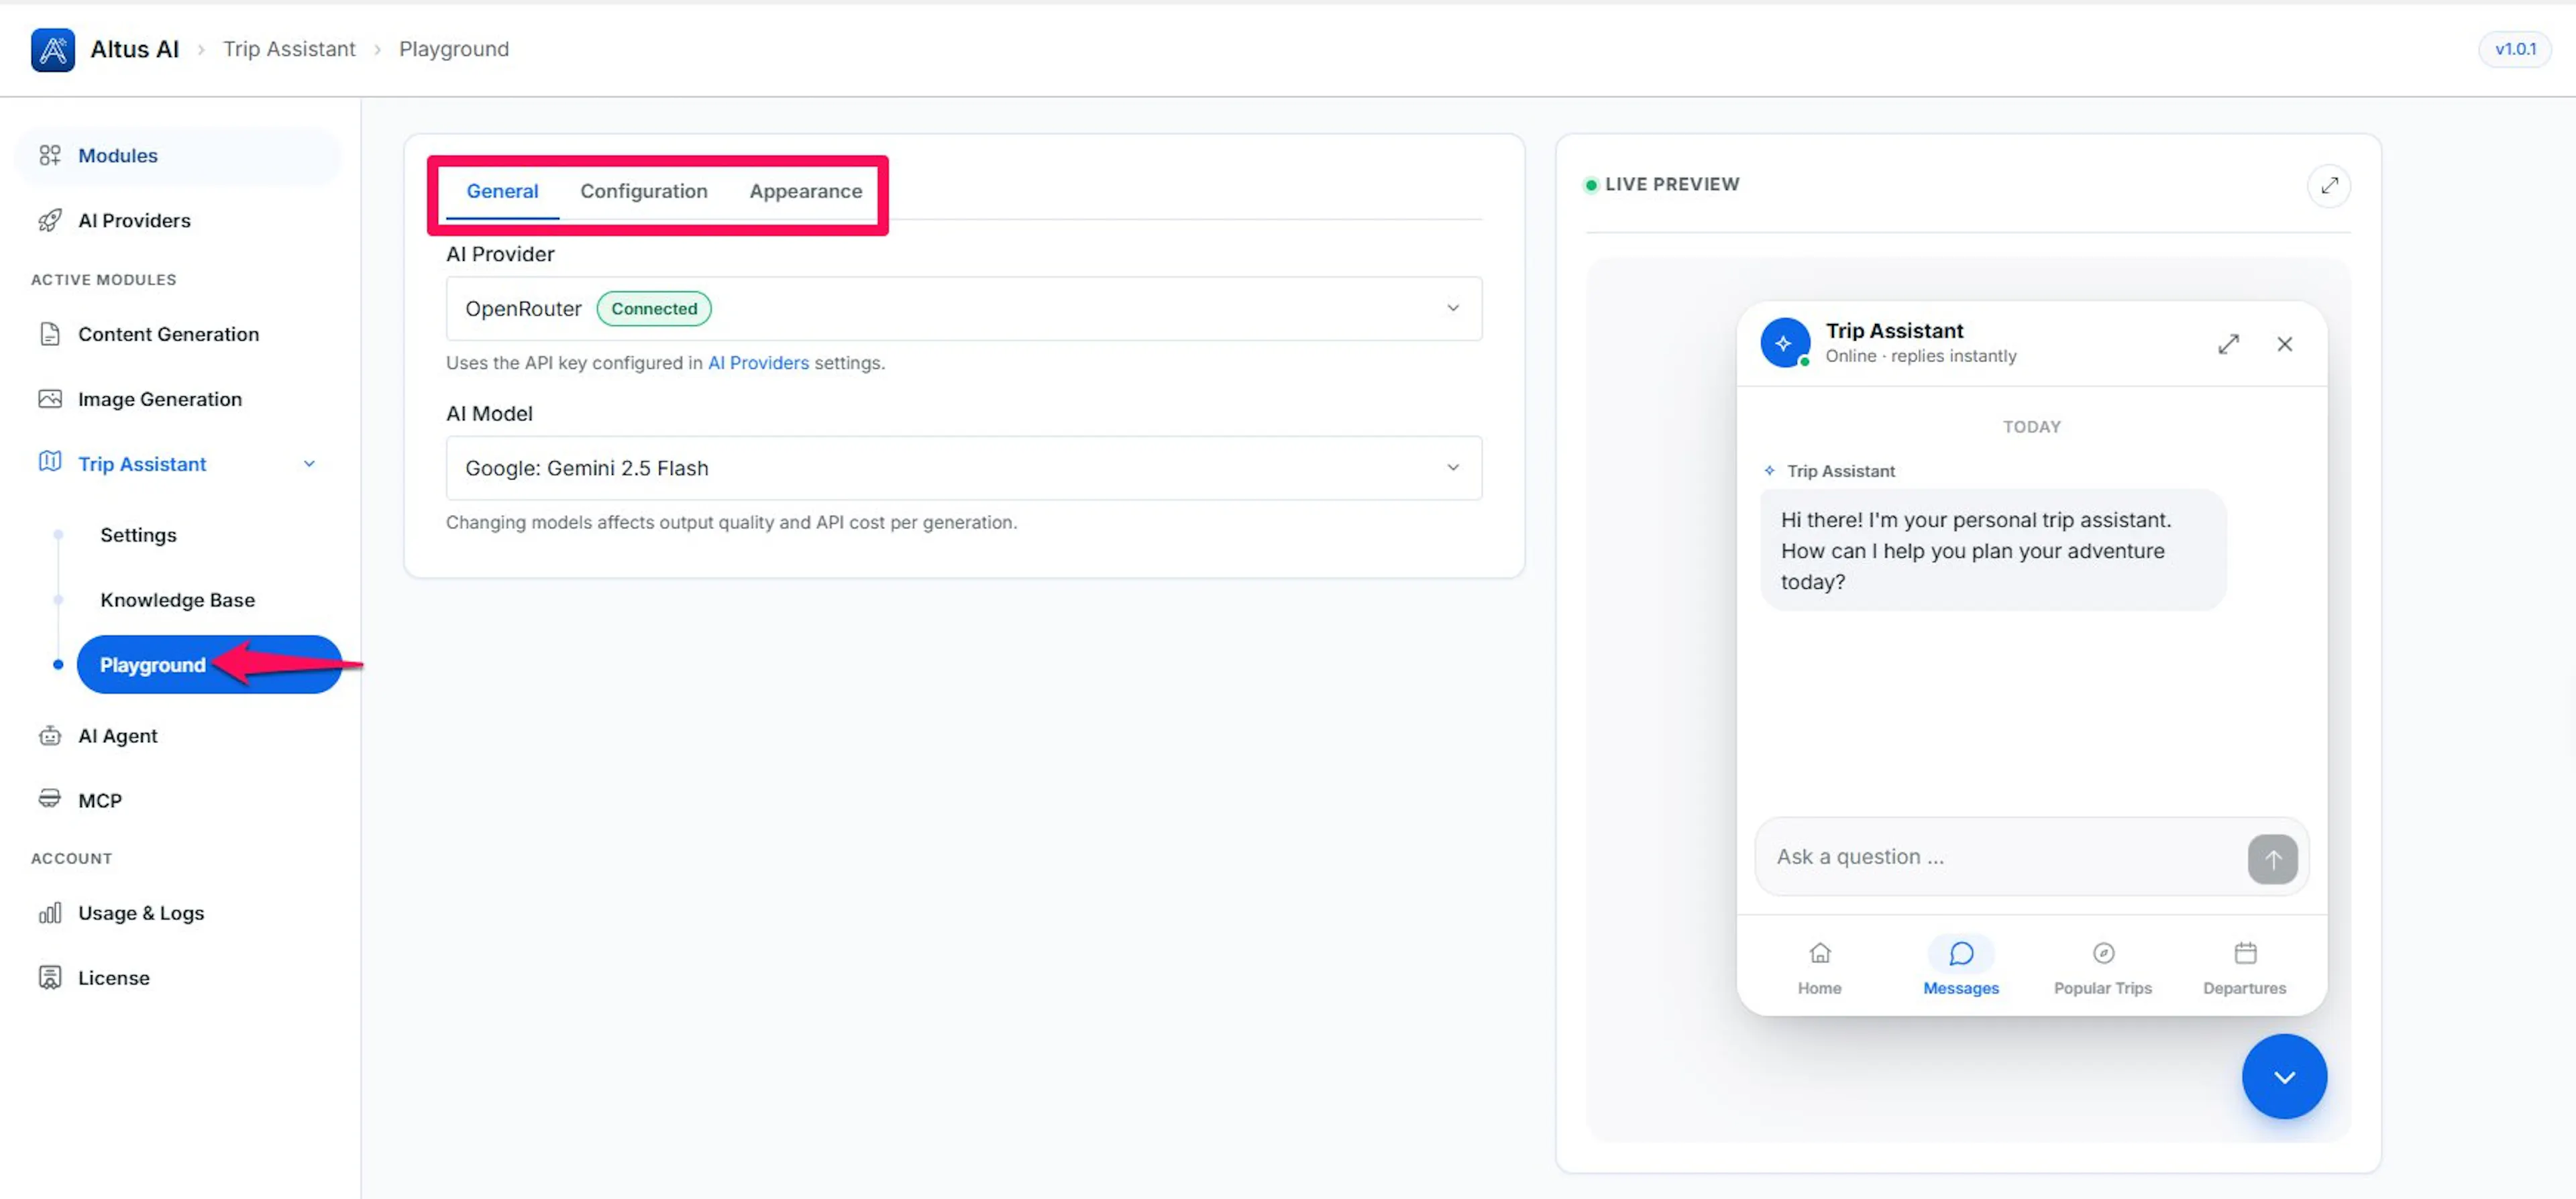
The Playground pairs a settings rail with a live chat preview, so you can test a change before you commit to it. The rail has three tabs, General, Configuration, and Appearance, each holding a subset of the same fields as their matching tab under Settings, edited from the same form. Type a message on the right and the assistant replies using whatever is currently selected in the rail, saved or not.
The Live Preview
This pane sits alongside every rail tab.
- Type a message to get a real AI reply generated from your current settings, including anything you haven't saved yet.
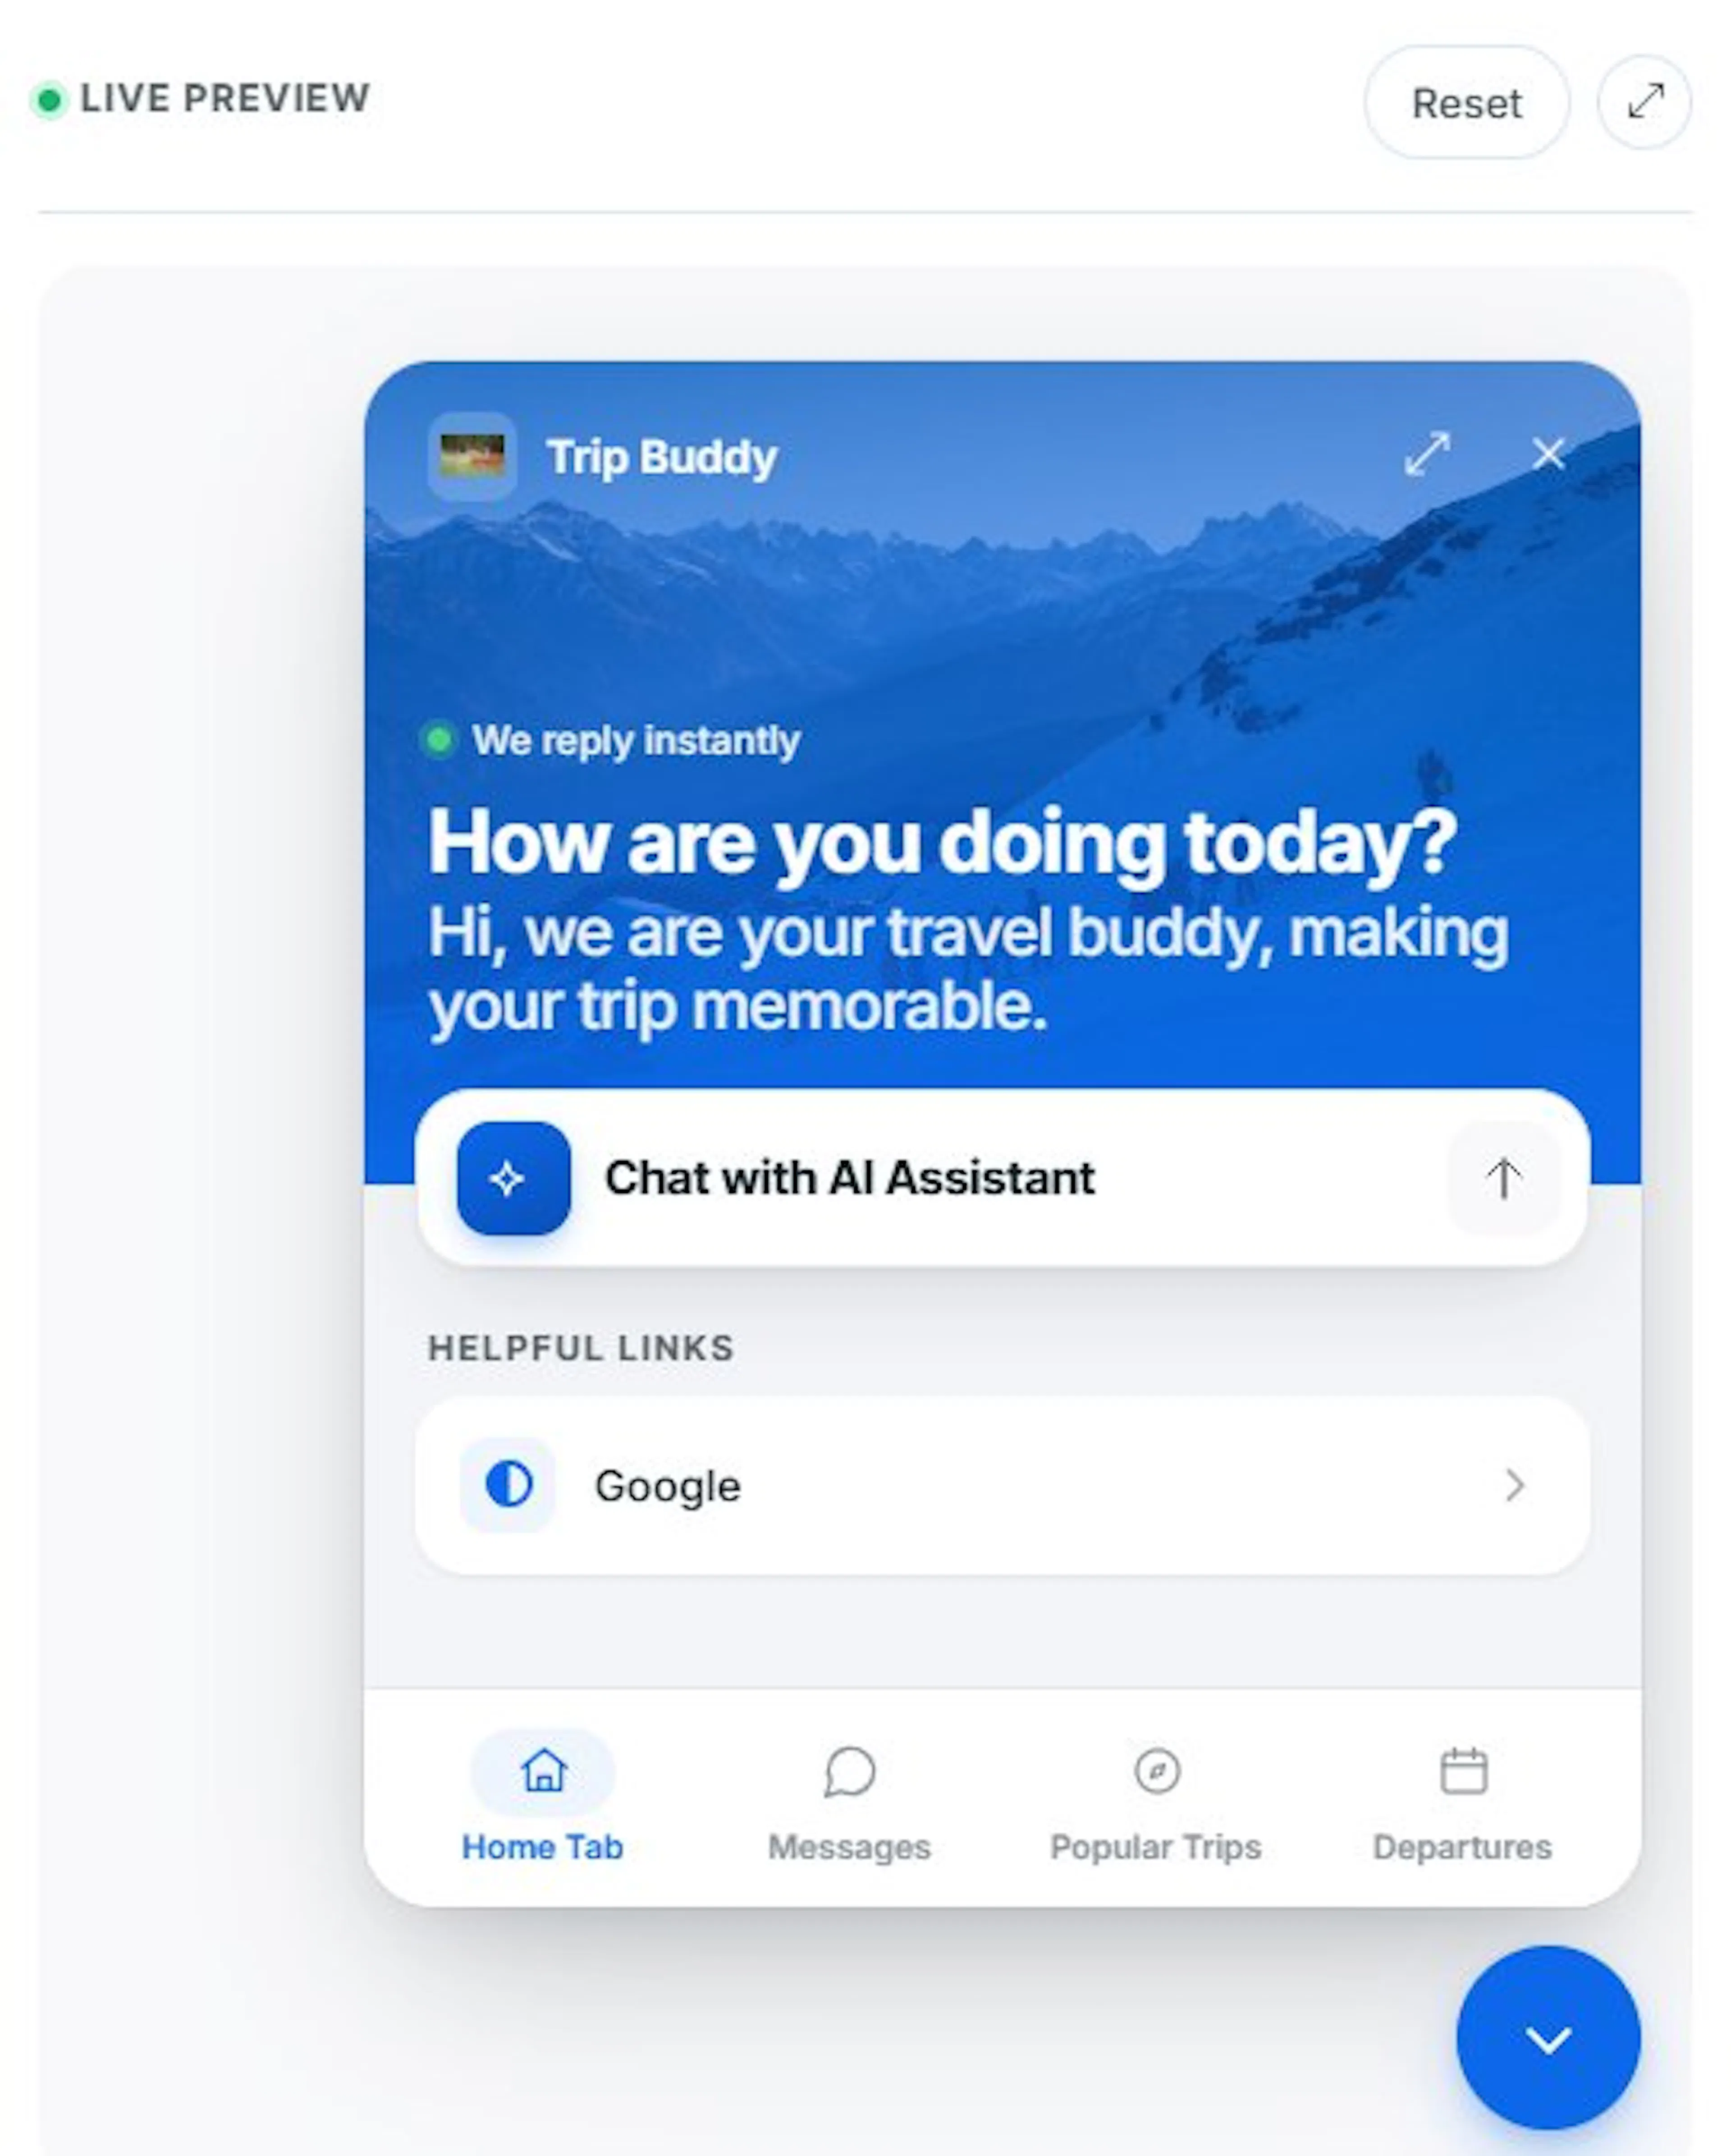
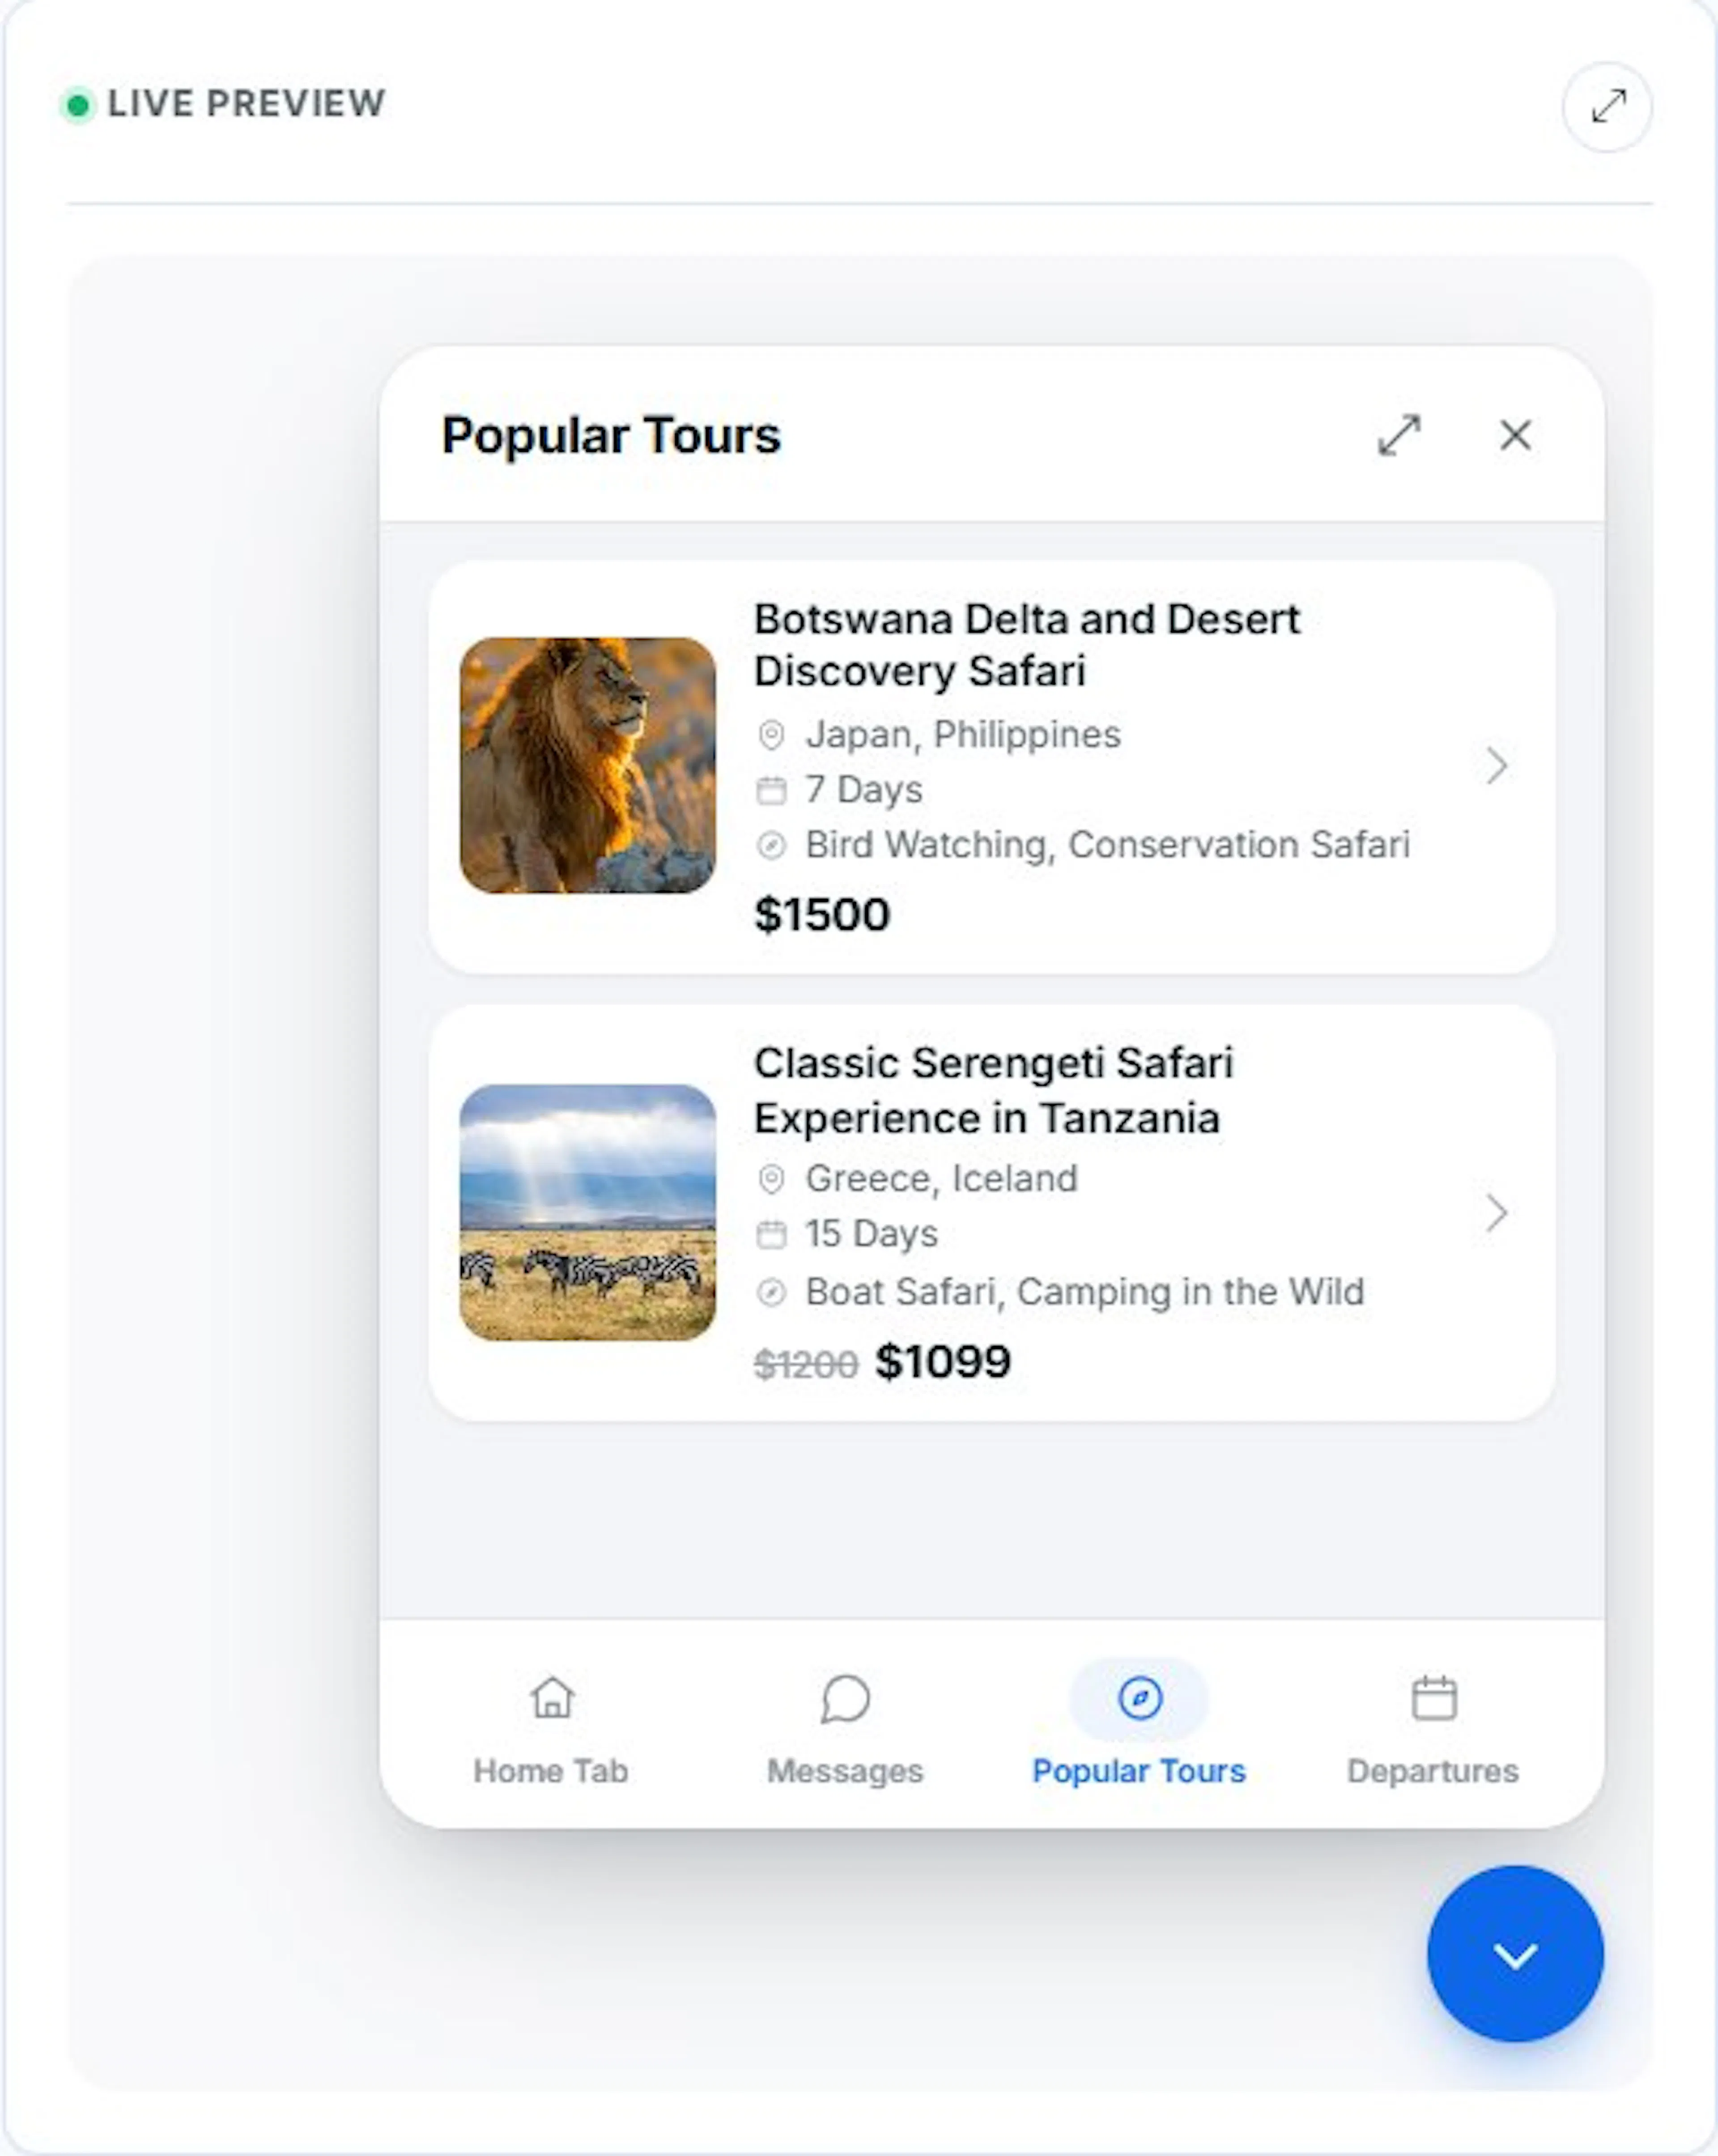
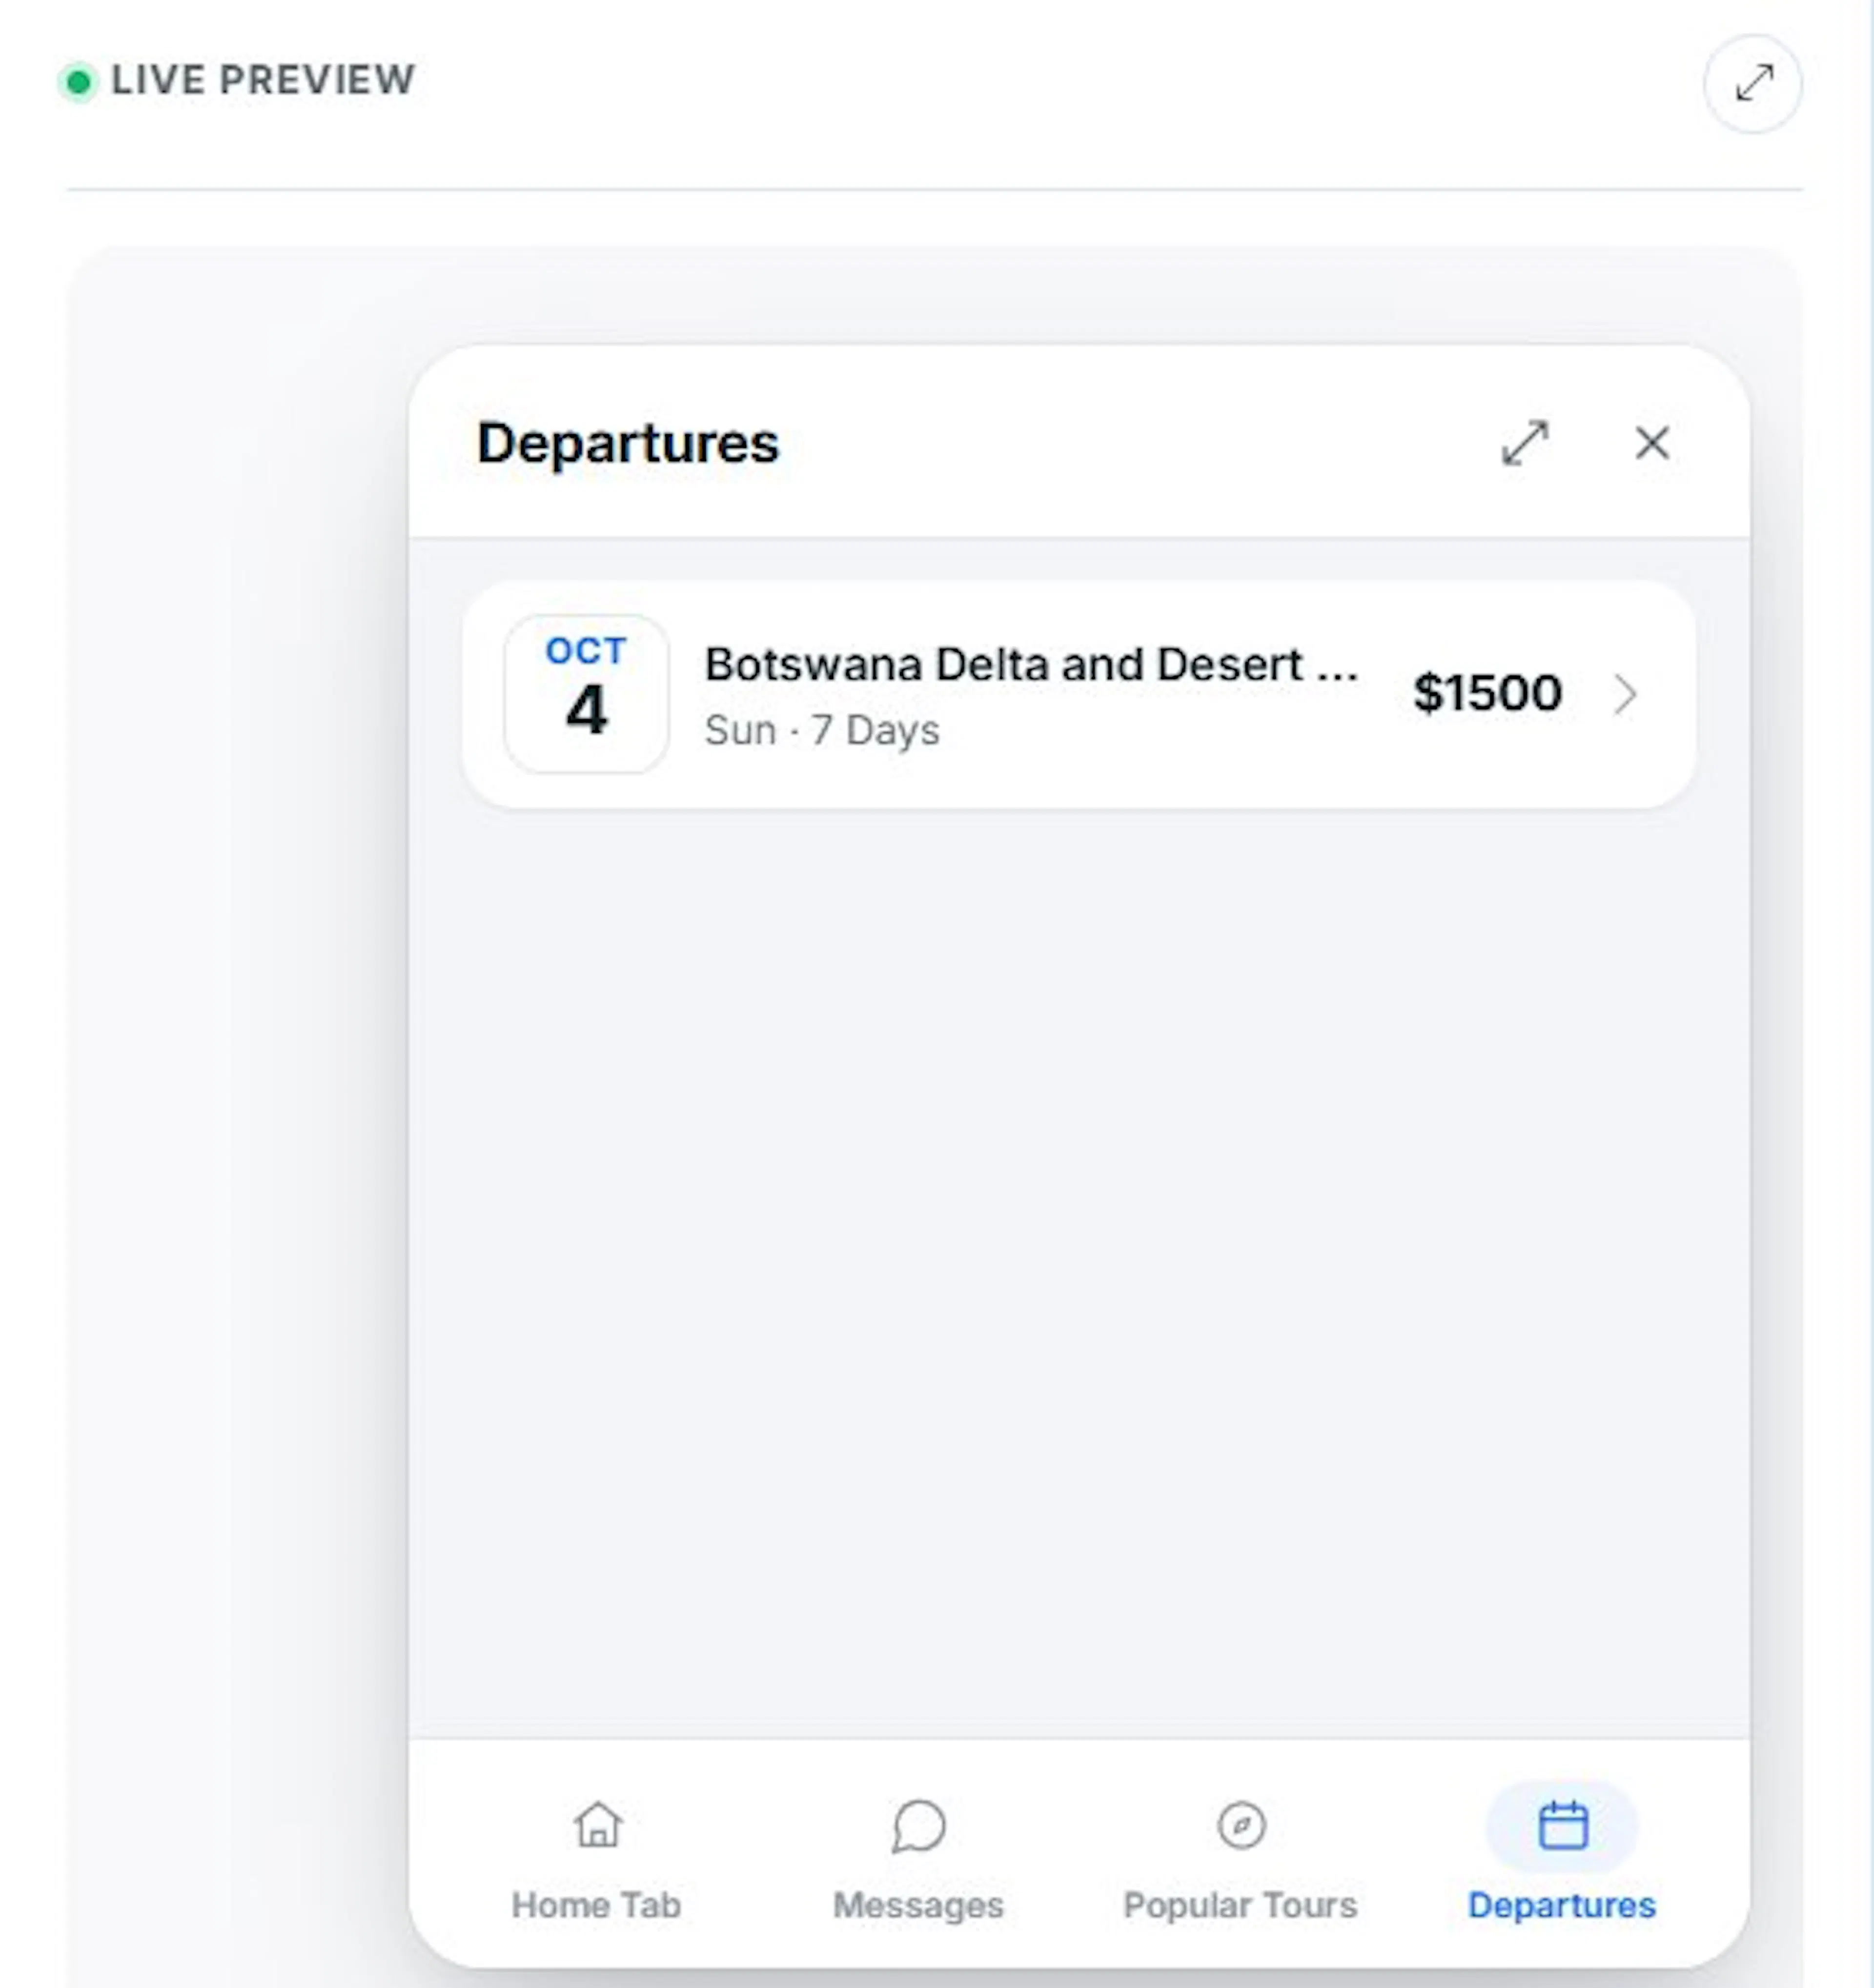
- Browse the Home, Popular Trips, and Departures tabs in the preview to see them exactly as a traveler would.
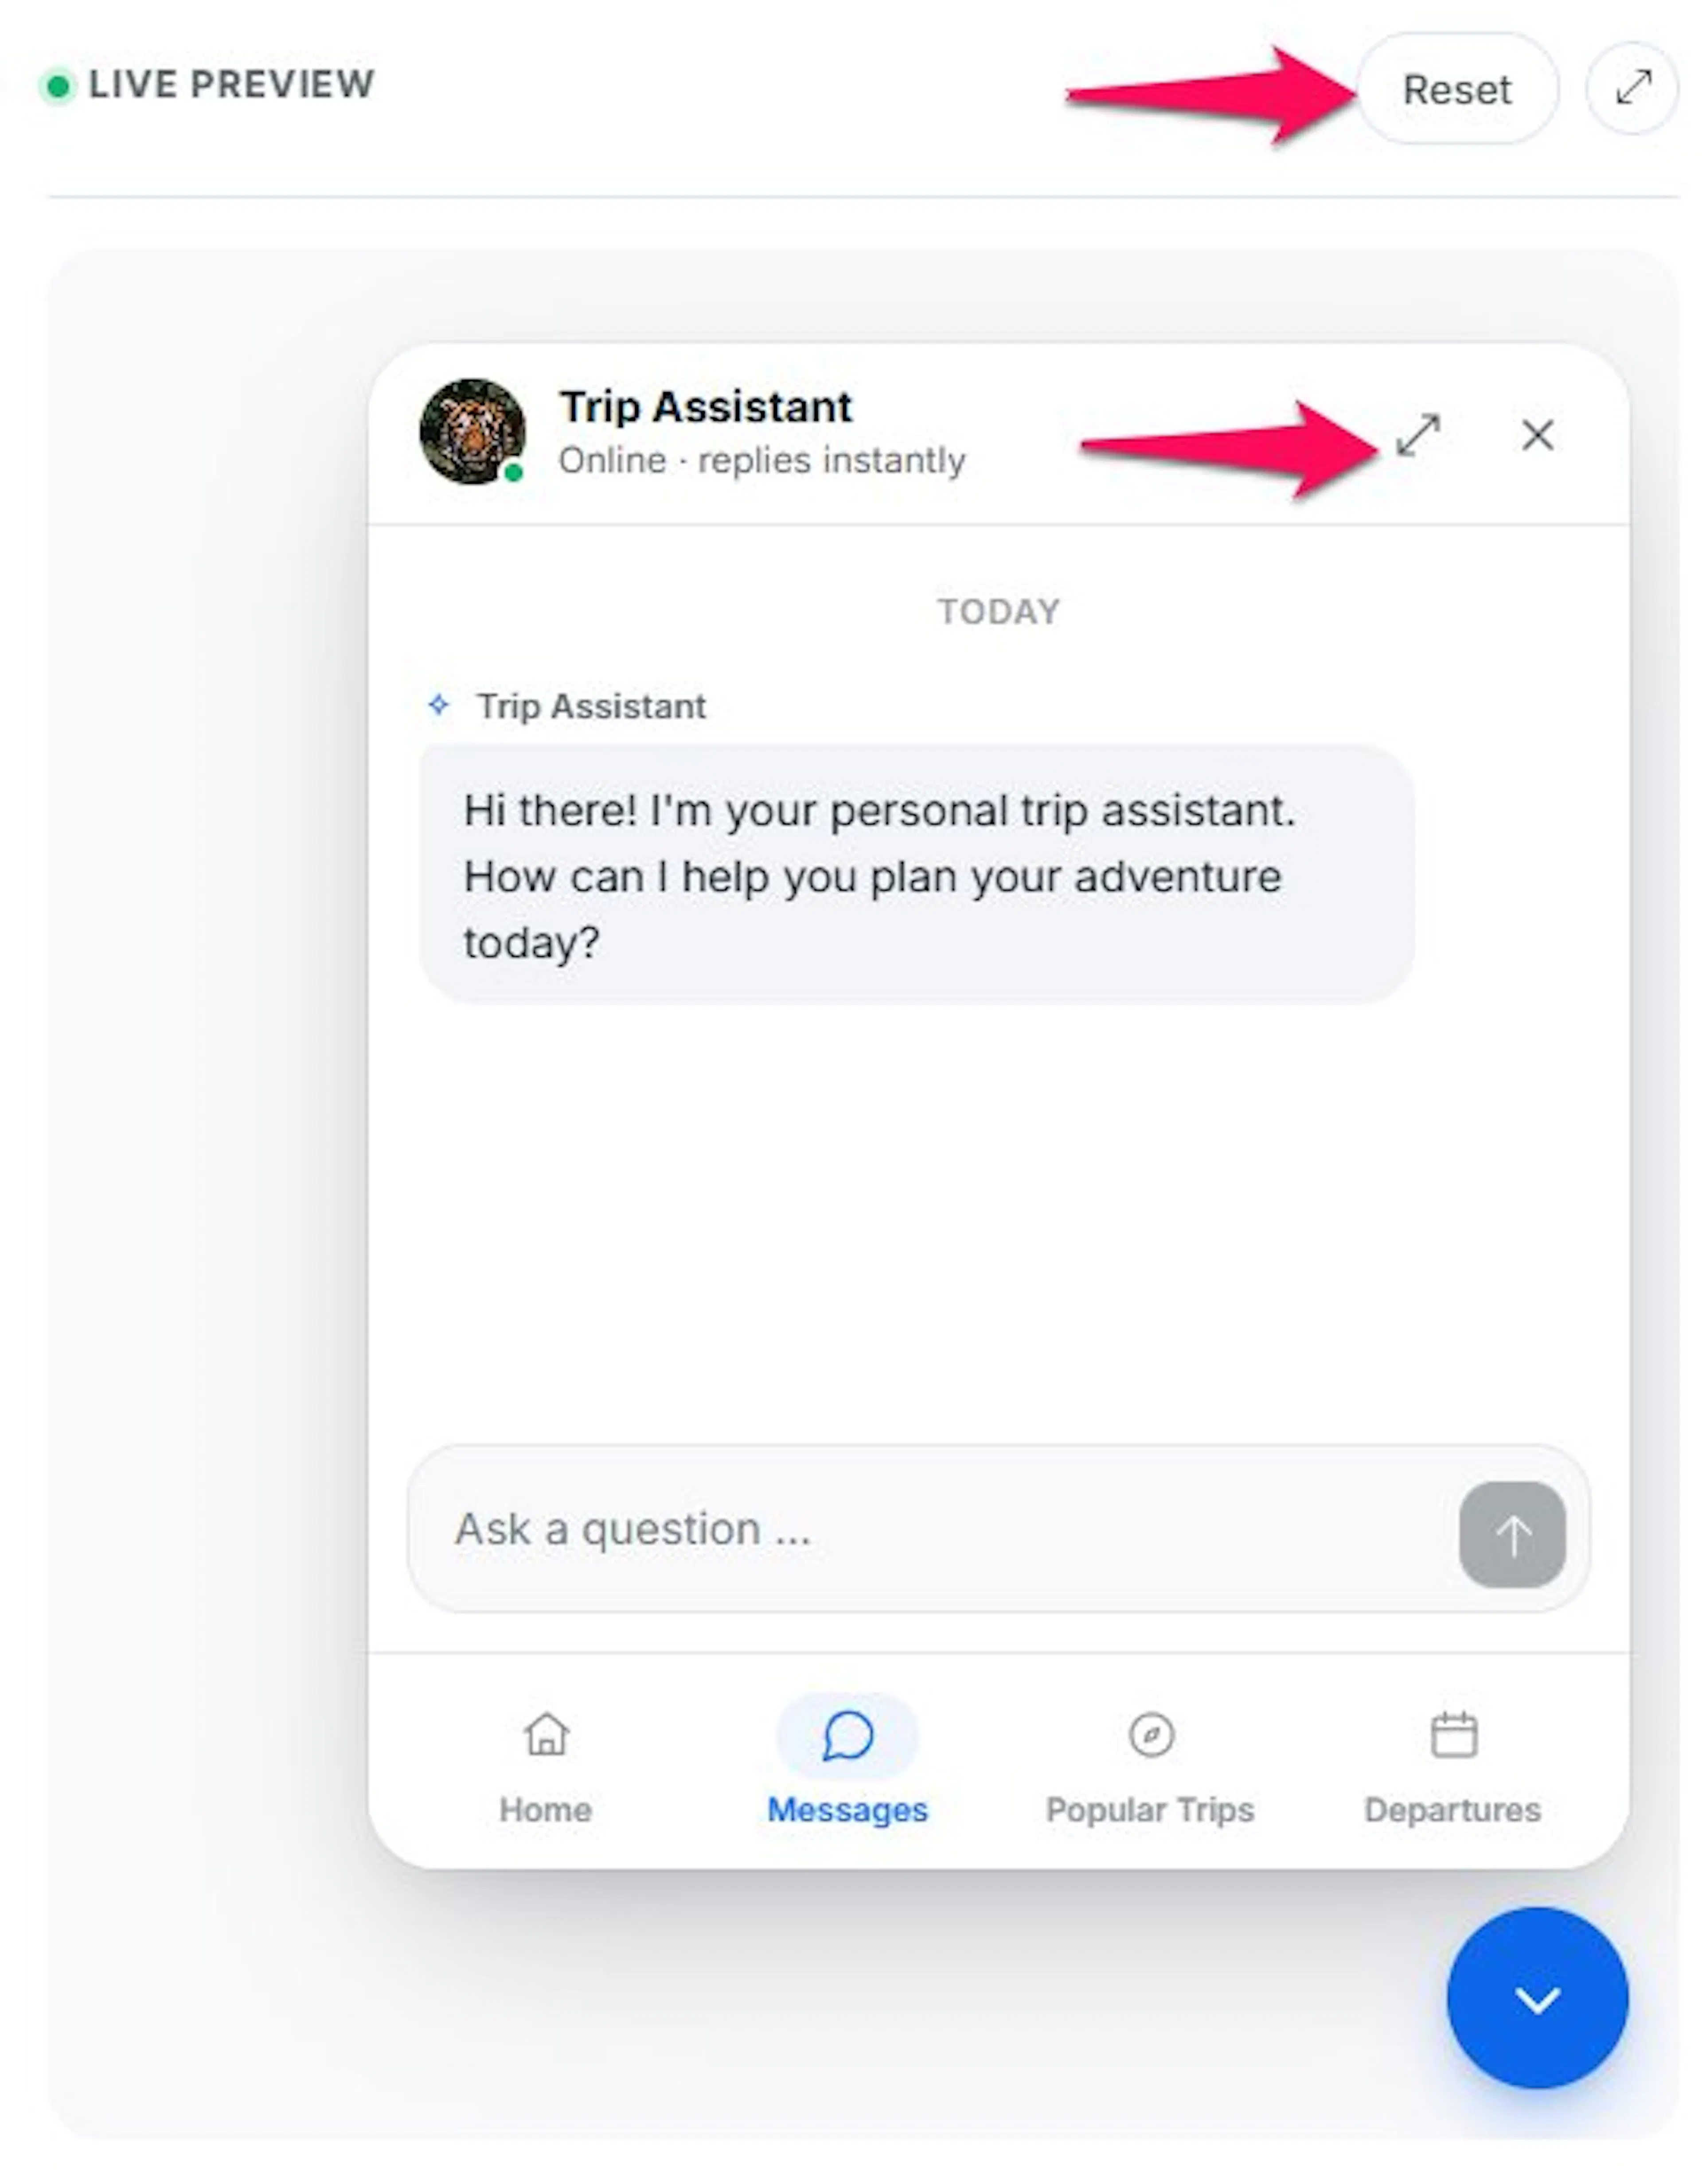
- Reset: Appears once you've changed something. Select it to discard every unsaved change on the page and restore your last saved settings.
- Expand / Collapse (circular icon): Select to grow the preview to full width, or shrink it back beside the rail.
Note: Messages, ratings, and any name or email entered in this preview are never stored in your Conversations or People lists. It's a sandbox, not a real visitor session.
General
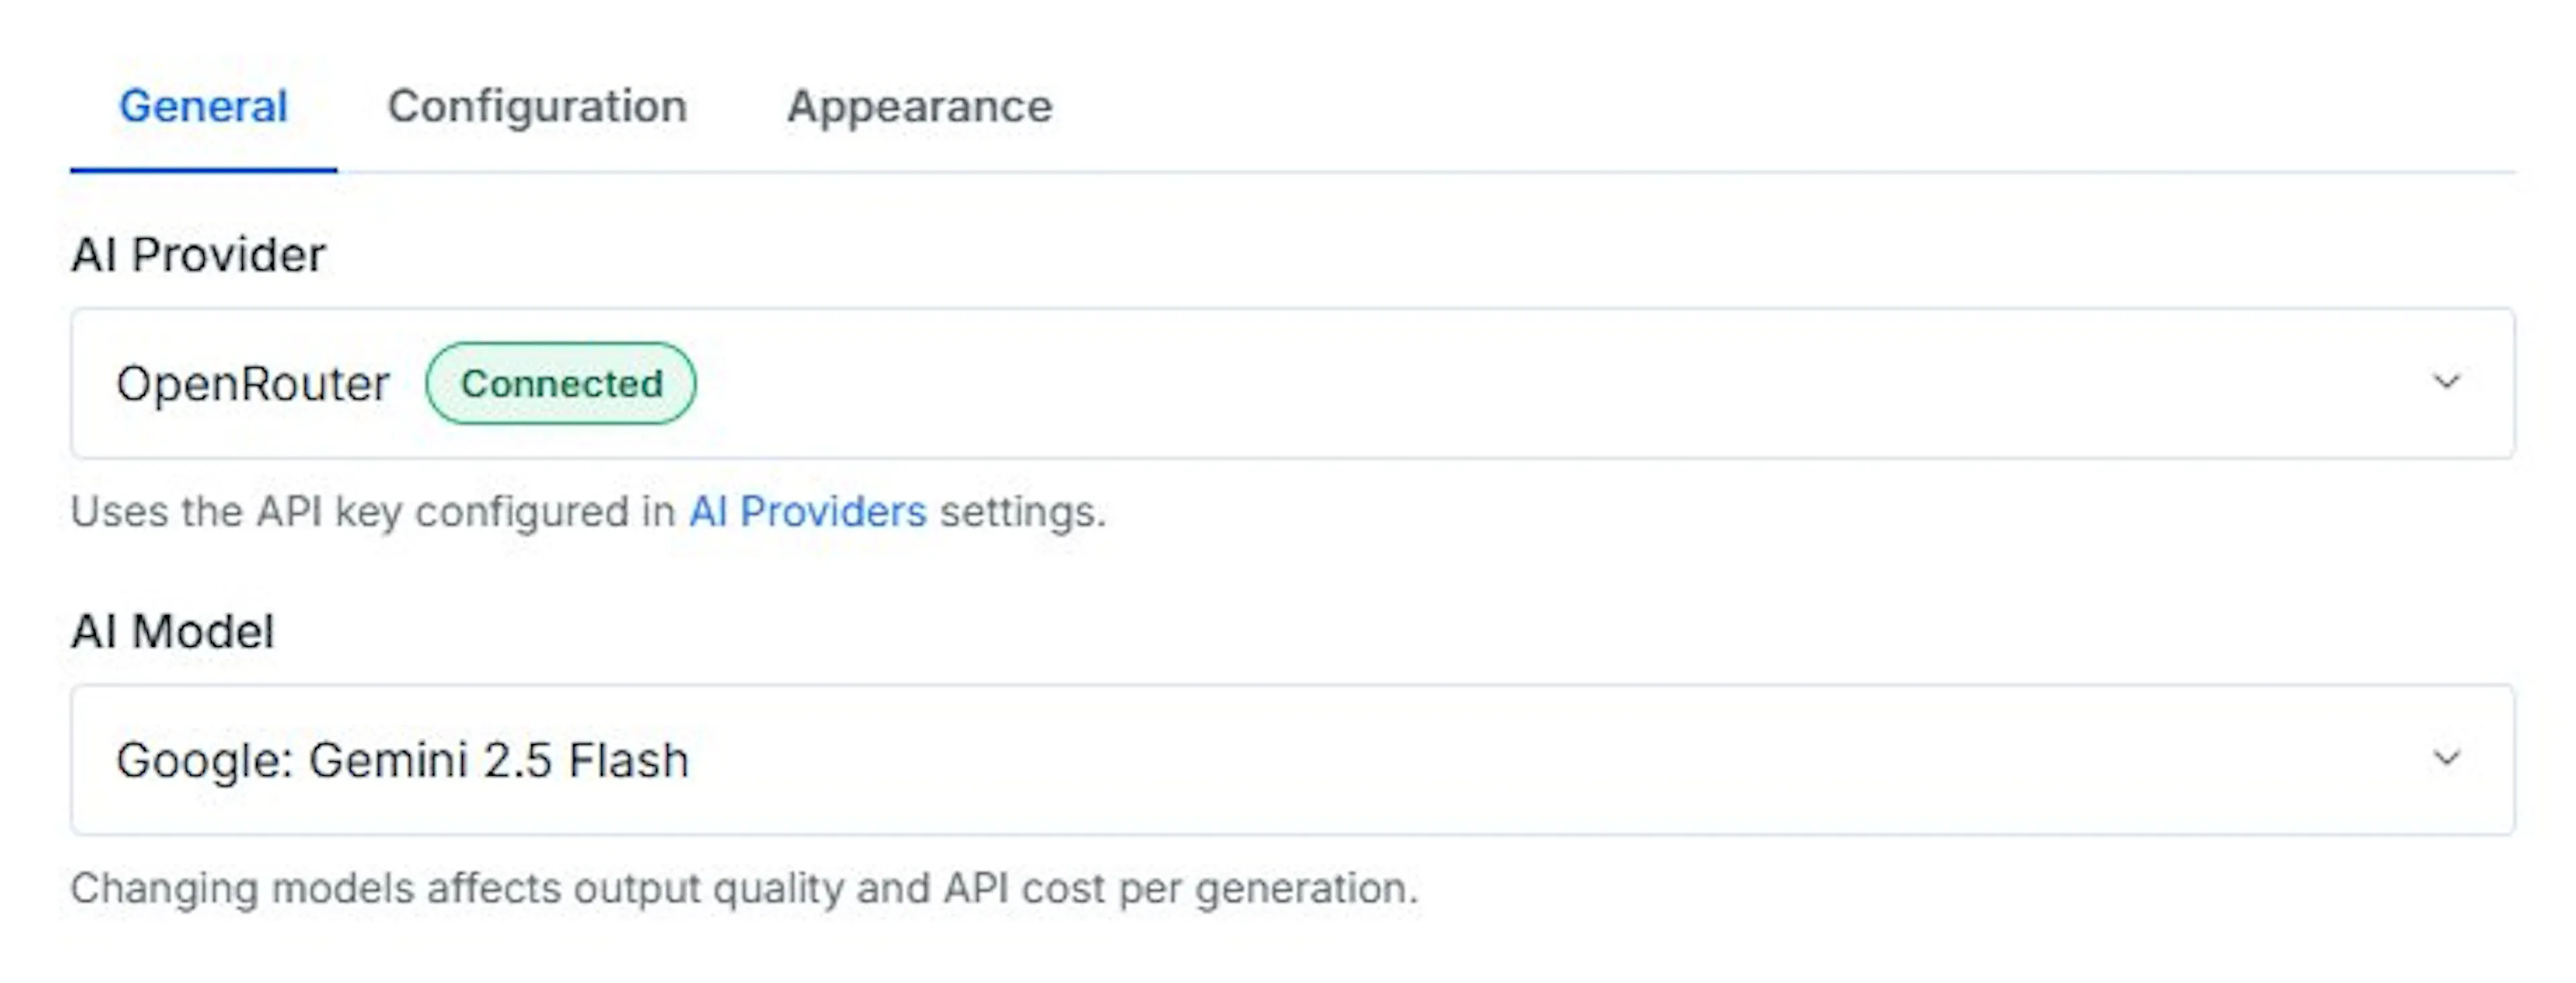
Holds the same AI provider and model choice as Settings > General.
AI Configuration
- AI Provider: Select the AI service to preview responses from. Pulls from the same connected providers as Settings > General.
- AI Model: Choose the model to preview. Switch models here to compare answer quality before changing your live setting.
Note: Embedding Configuration isn't available in the Playground, since it affects Knowledge Base indexing rather than a single reply. Change it under Settings > General.
Configuration
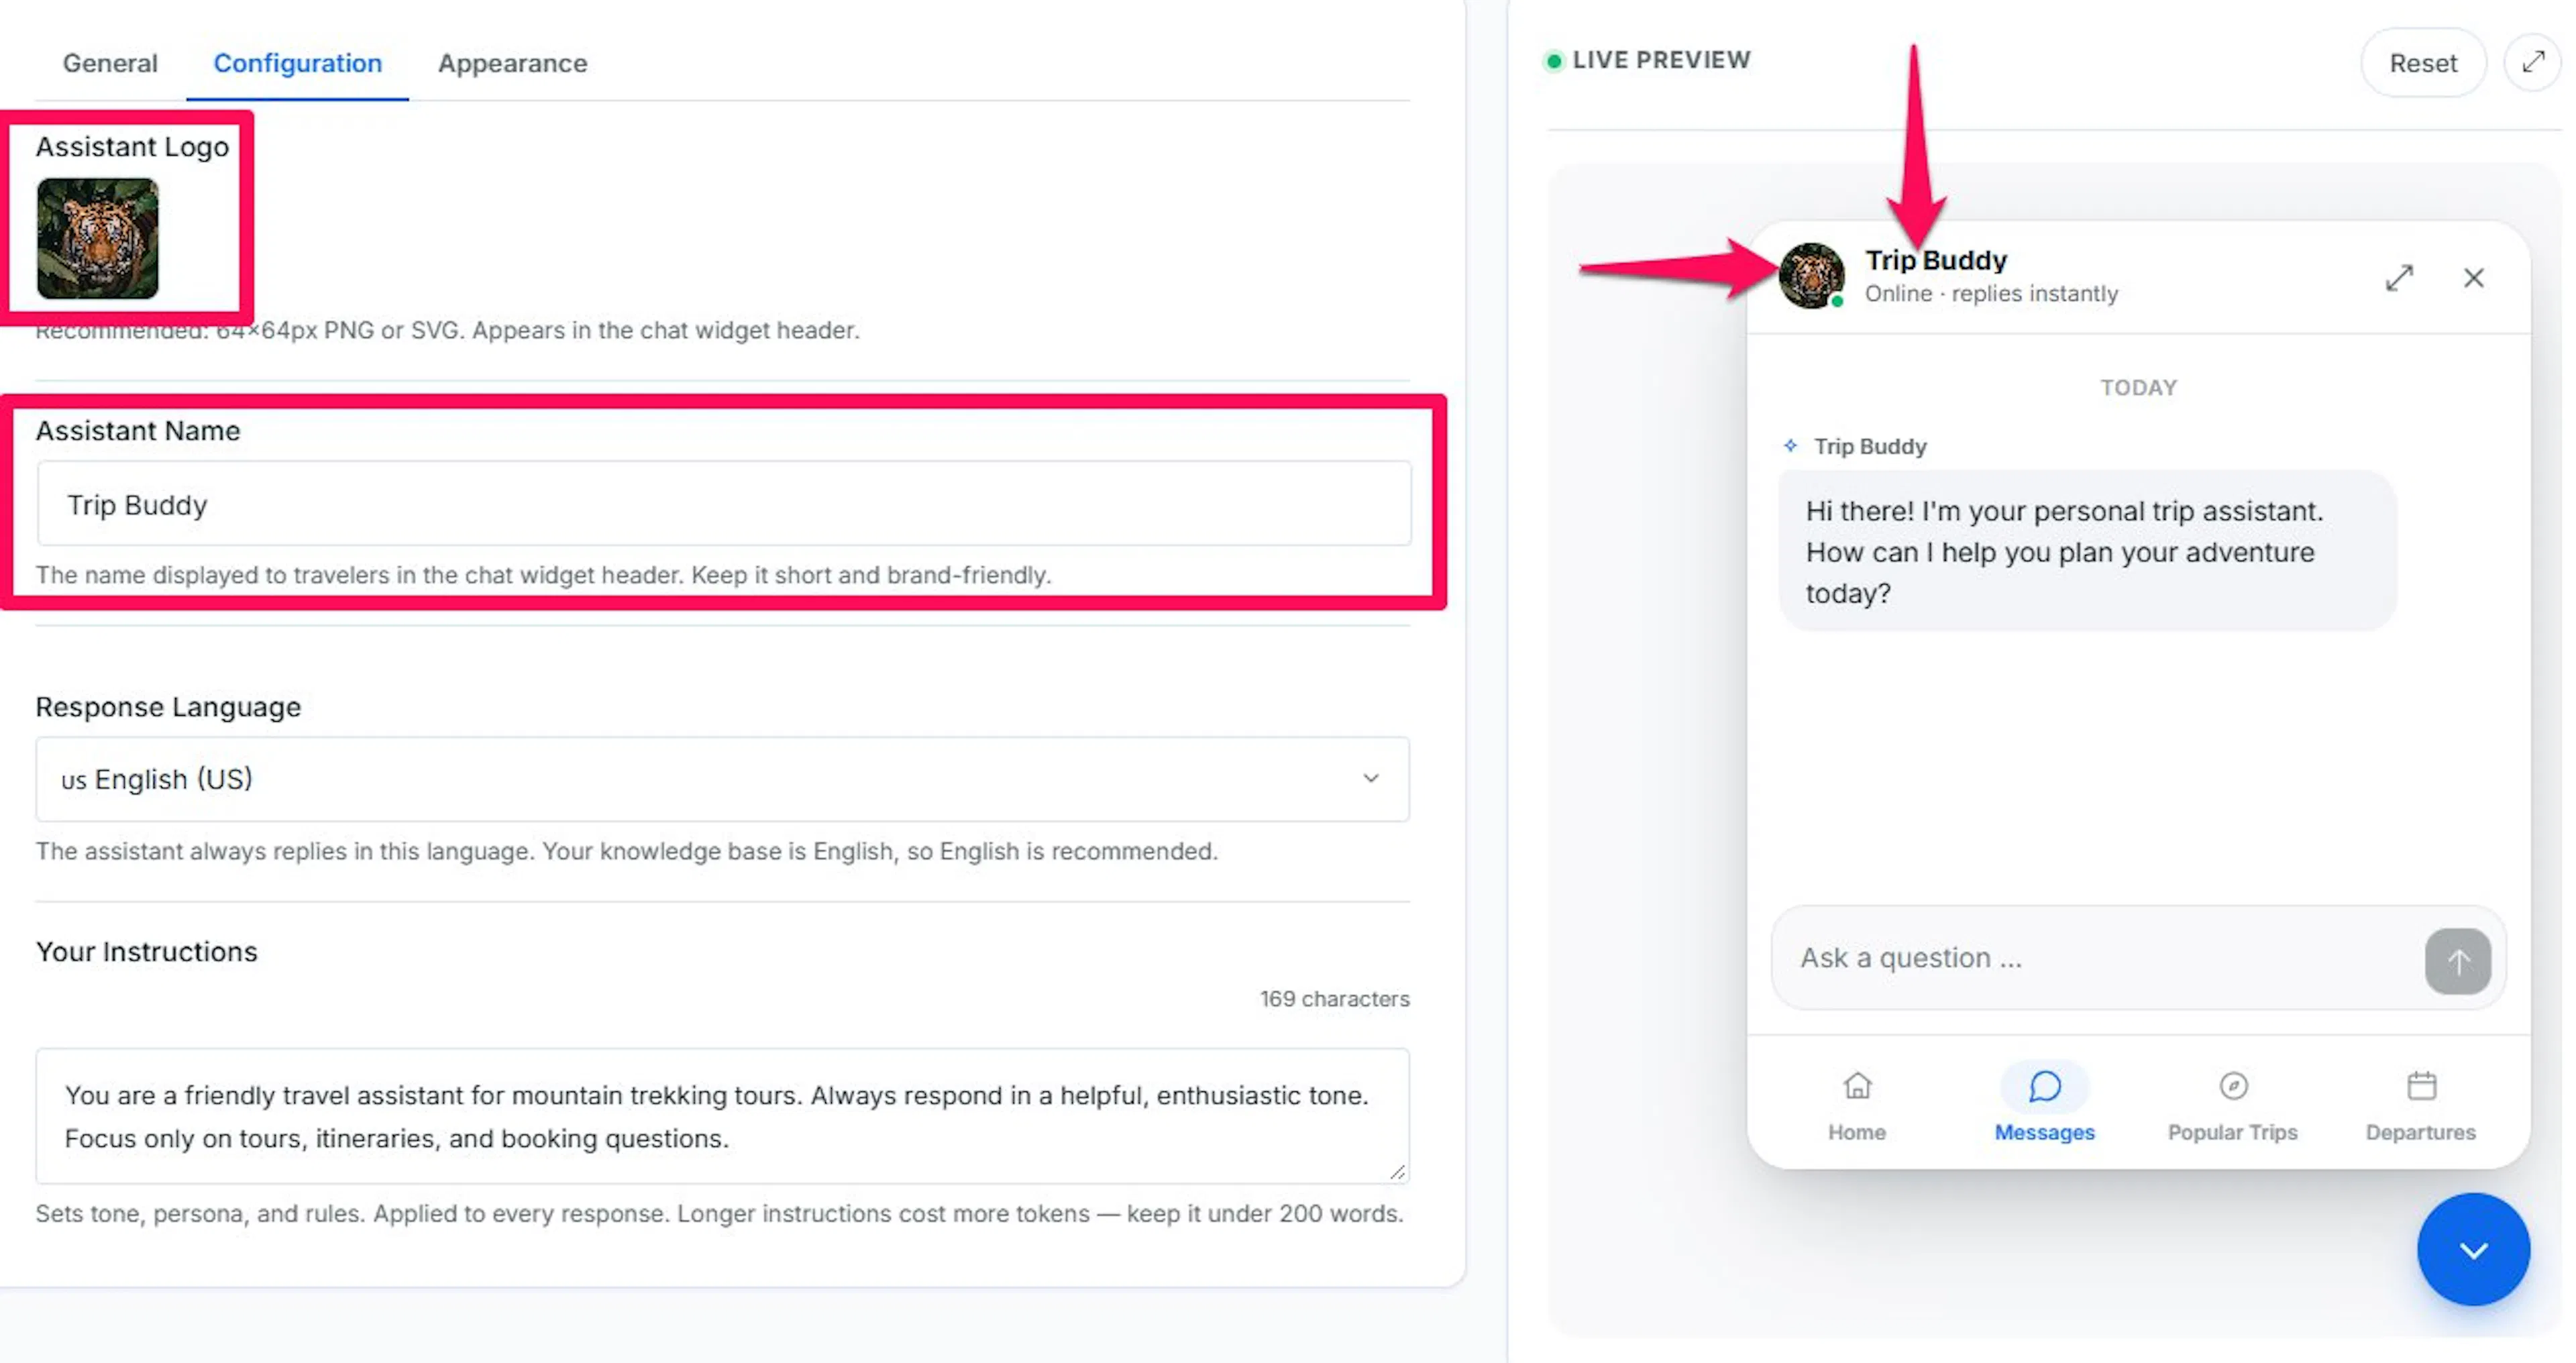
Holds the assistant's identity and tone, the same fields as Settings > Configuration. Change the instructions on the left and send a message on the right to see how the assistant's tone actually shifts before you save it.
Assistant Identity
- Assistant Logo: Upload a 64×64px PNG or SVG to preview it in the chat widget header.
- Assistant Name: Enter the name to preview in the widget header.
- Response Language: Select the language to preview replies in.
- Your Instructions: Enter the tone, persona, and rules to test. Keep it under 200 words; send a message afterward to hear how it actually reads.
Human Handoff isn't editable in the Playground; it's settings-only. The preview still shows your current saved handoff card at the end of a chat, but to test a change to the photo, title, or message, edit it under Settings > Configuration and save first.
Appearance
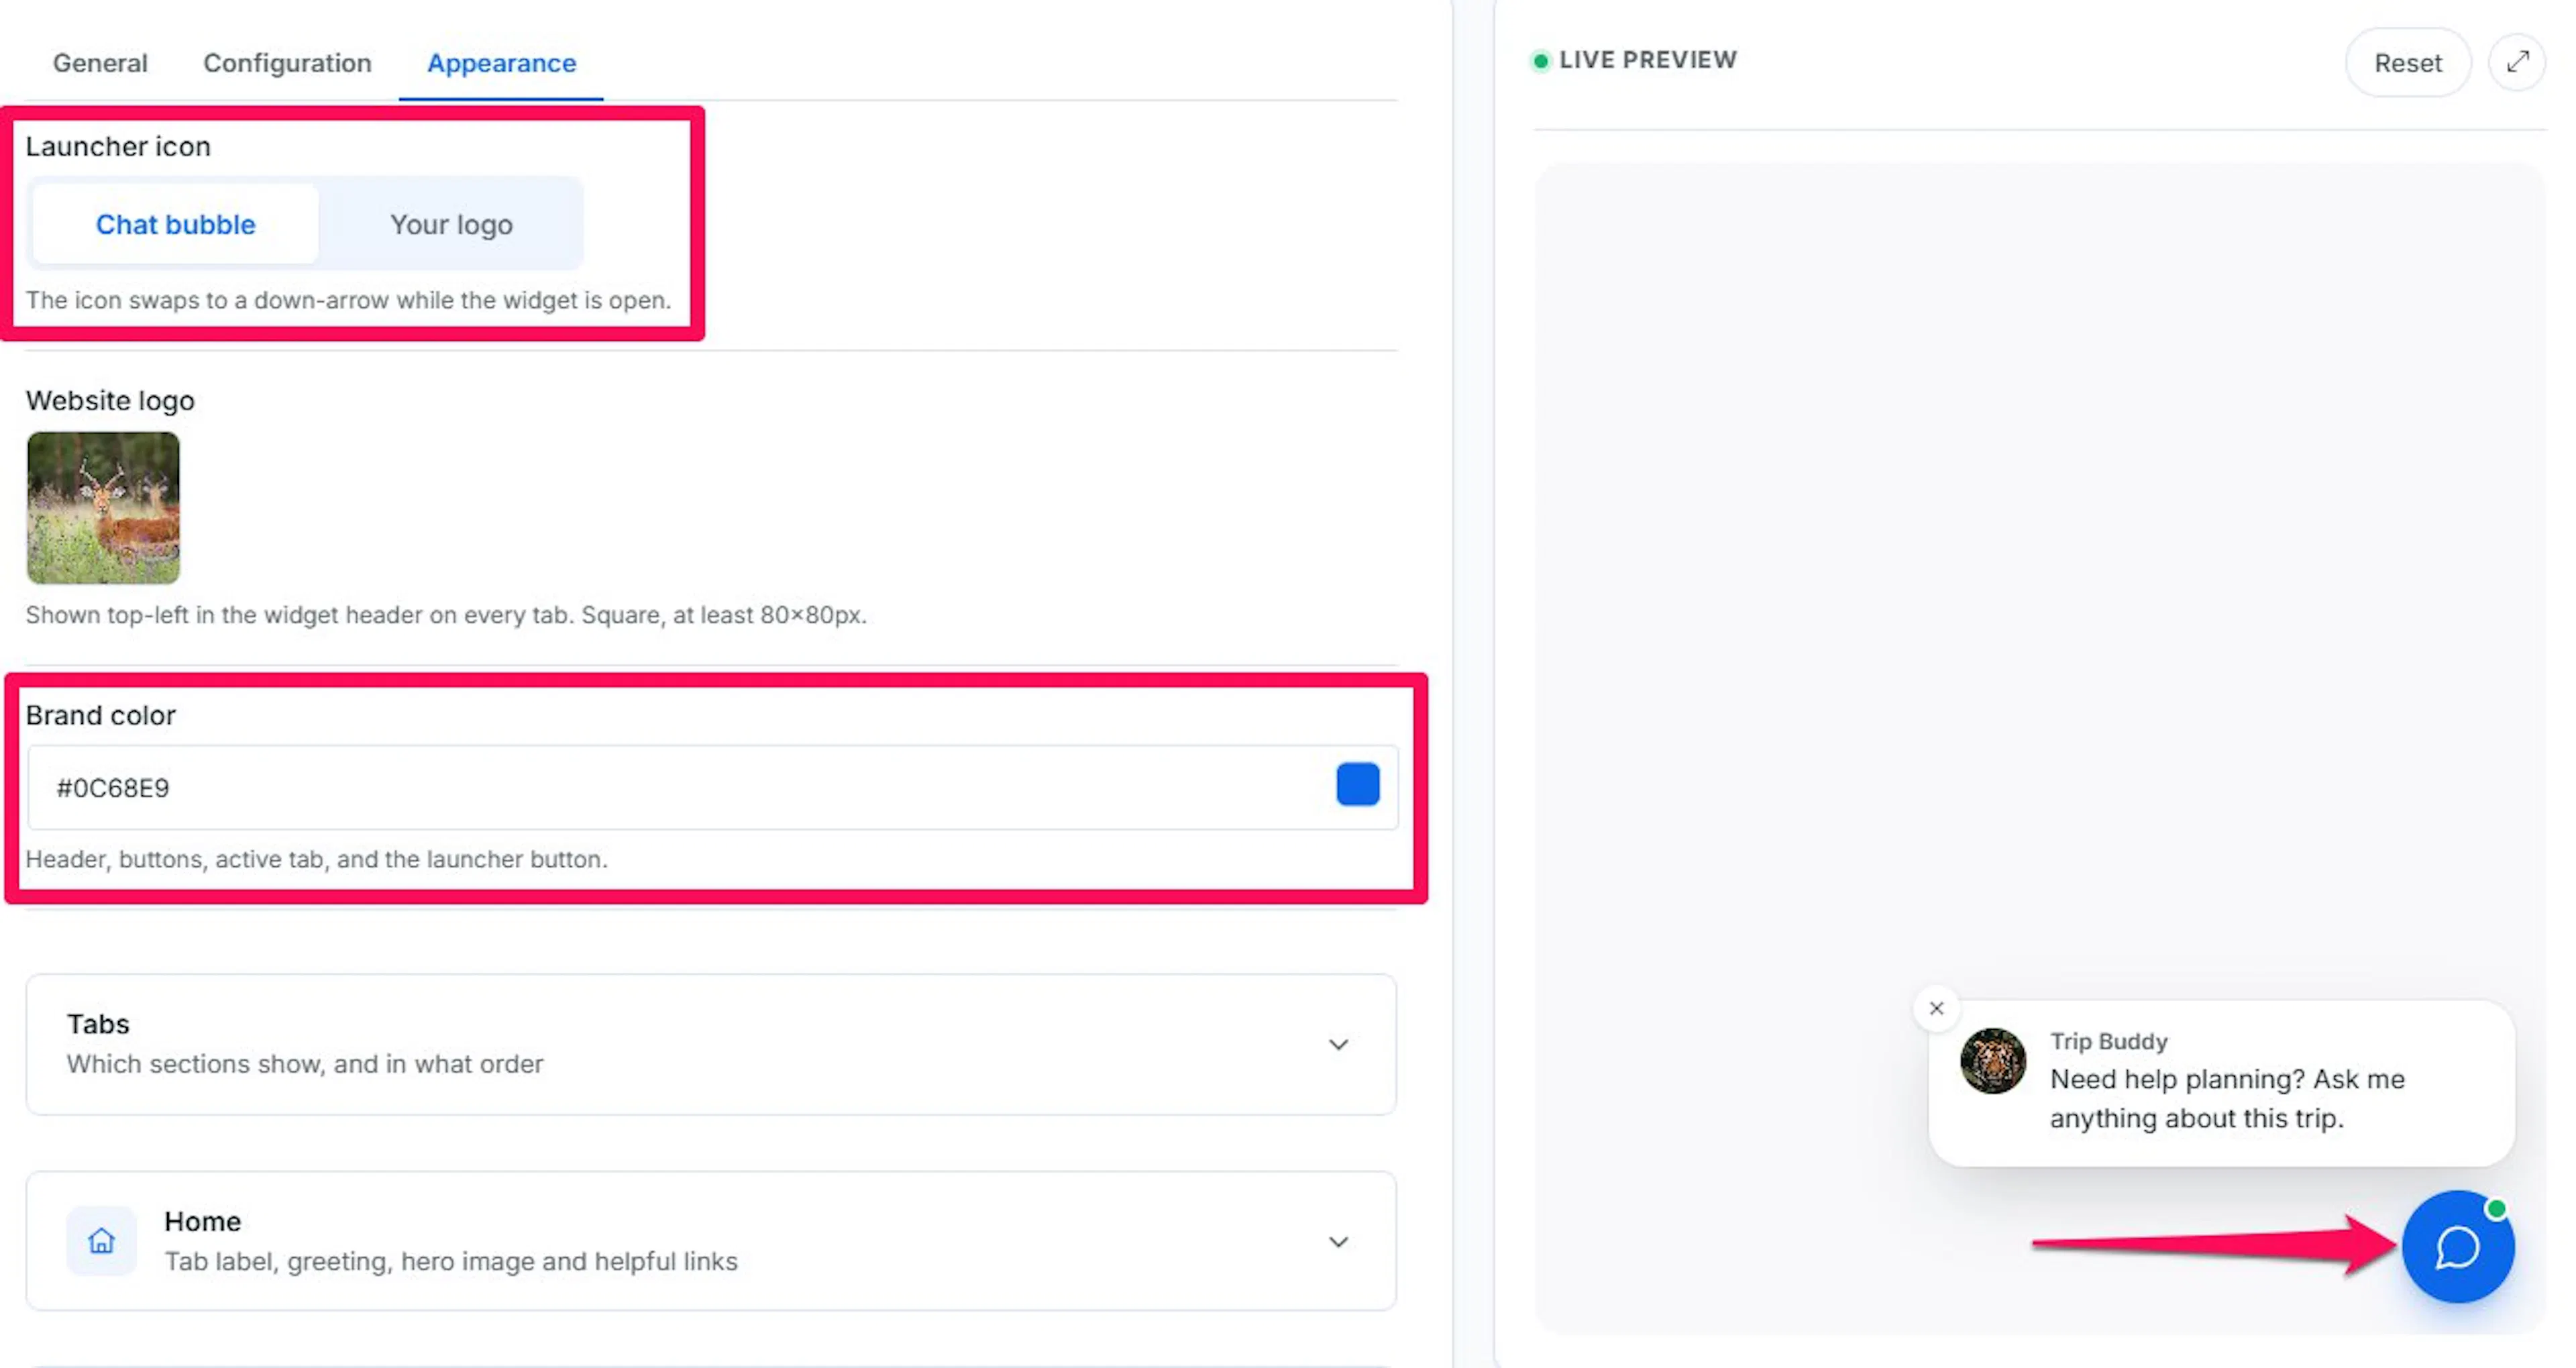
Holds the widget's branding plus everything in Settings > Configuration > Tab Content. Change a field on the left and the preview on the right updates immediately, so you can see how the Home screen, Messages, Popular Trips, and Departures actually look before saving.
Layout, Launcher position, and the Proactive teaser aren't editable in the Playground; they're settings-only. The preview still renders using your current saved values for these, but to test a change, edit them under Settings > Configuration > Style and Appearance and save first.
Appearance
- Website logo: Upload a square logo, at least 80×80px, to preview top-left in the widget header.
- Brand color: Pick a color to preview on the header, buttons, active tab, and launcher button.
Tab Content
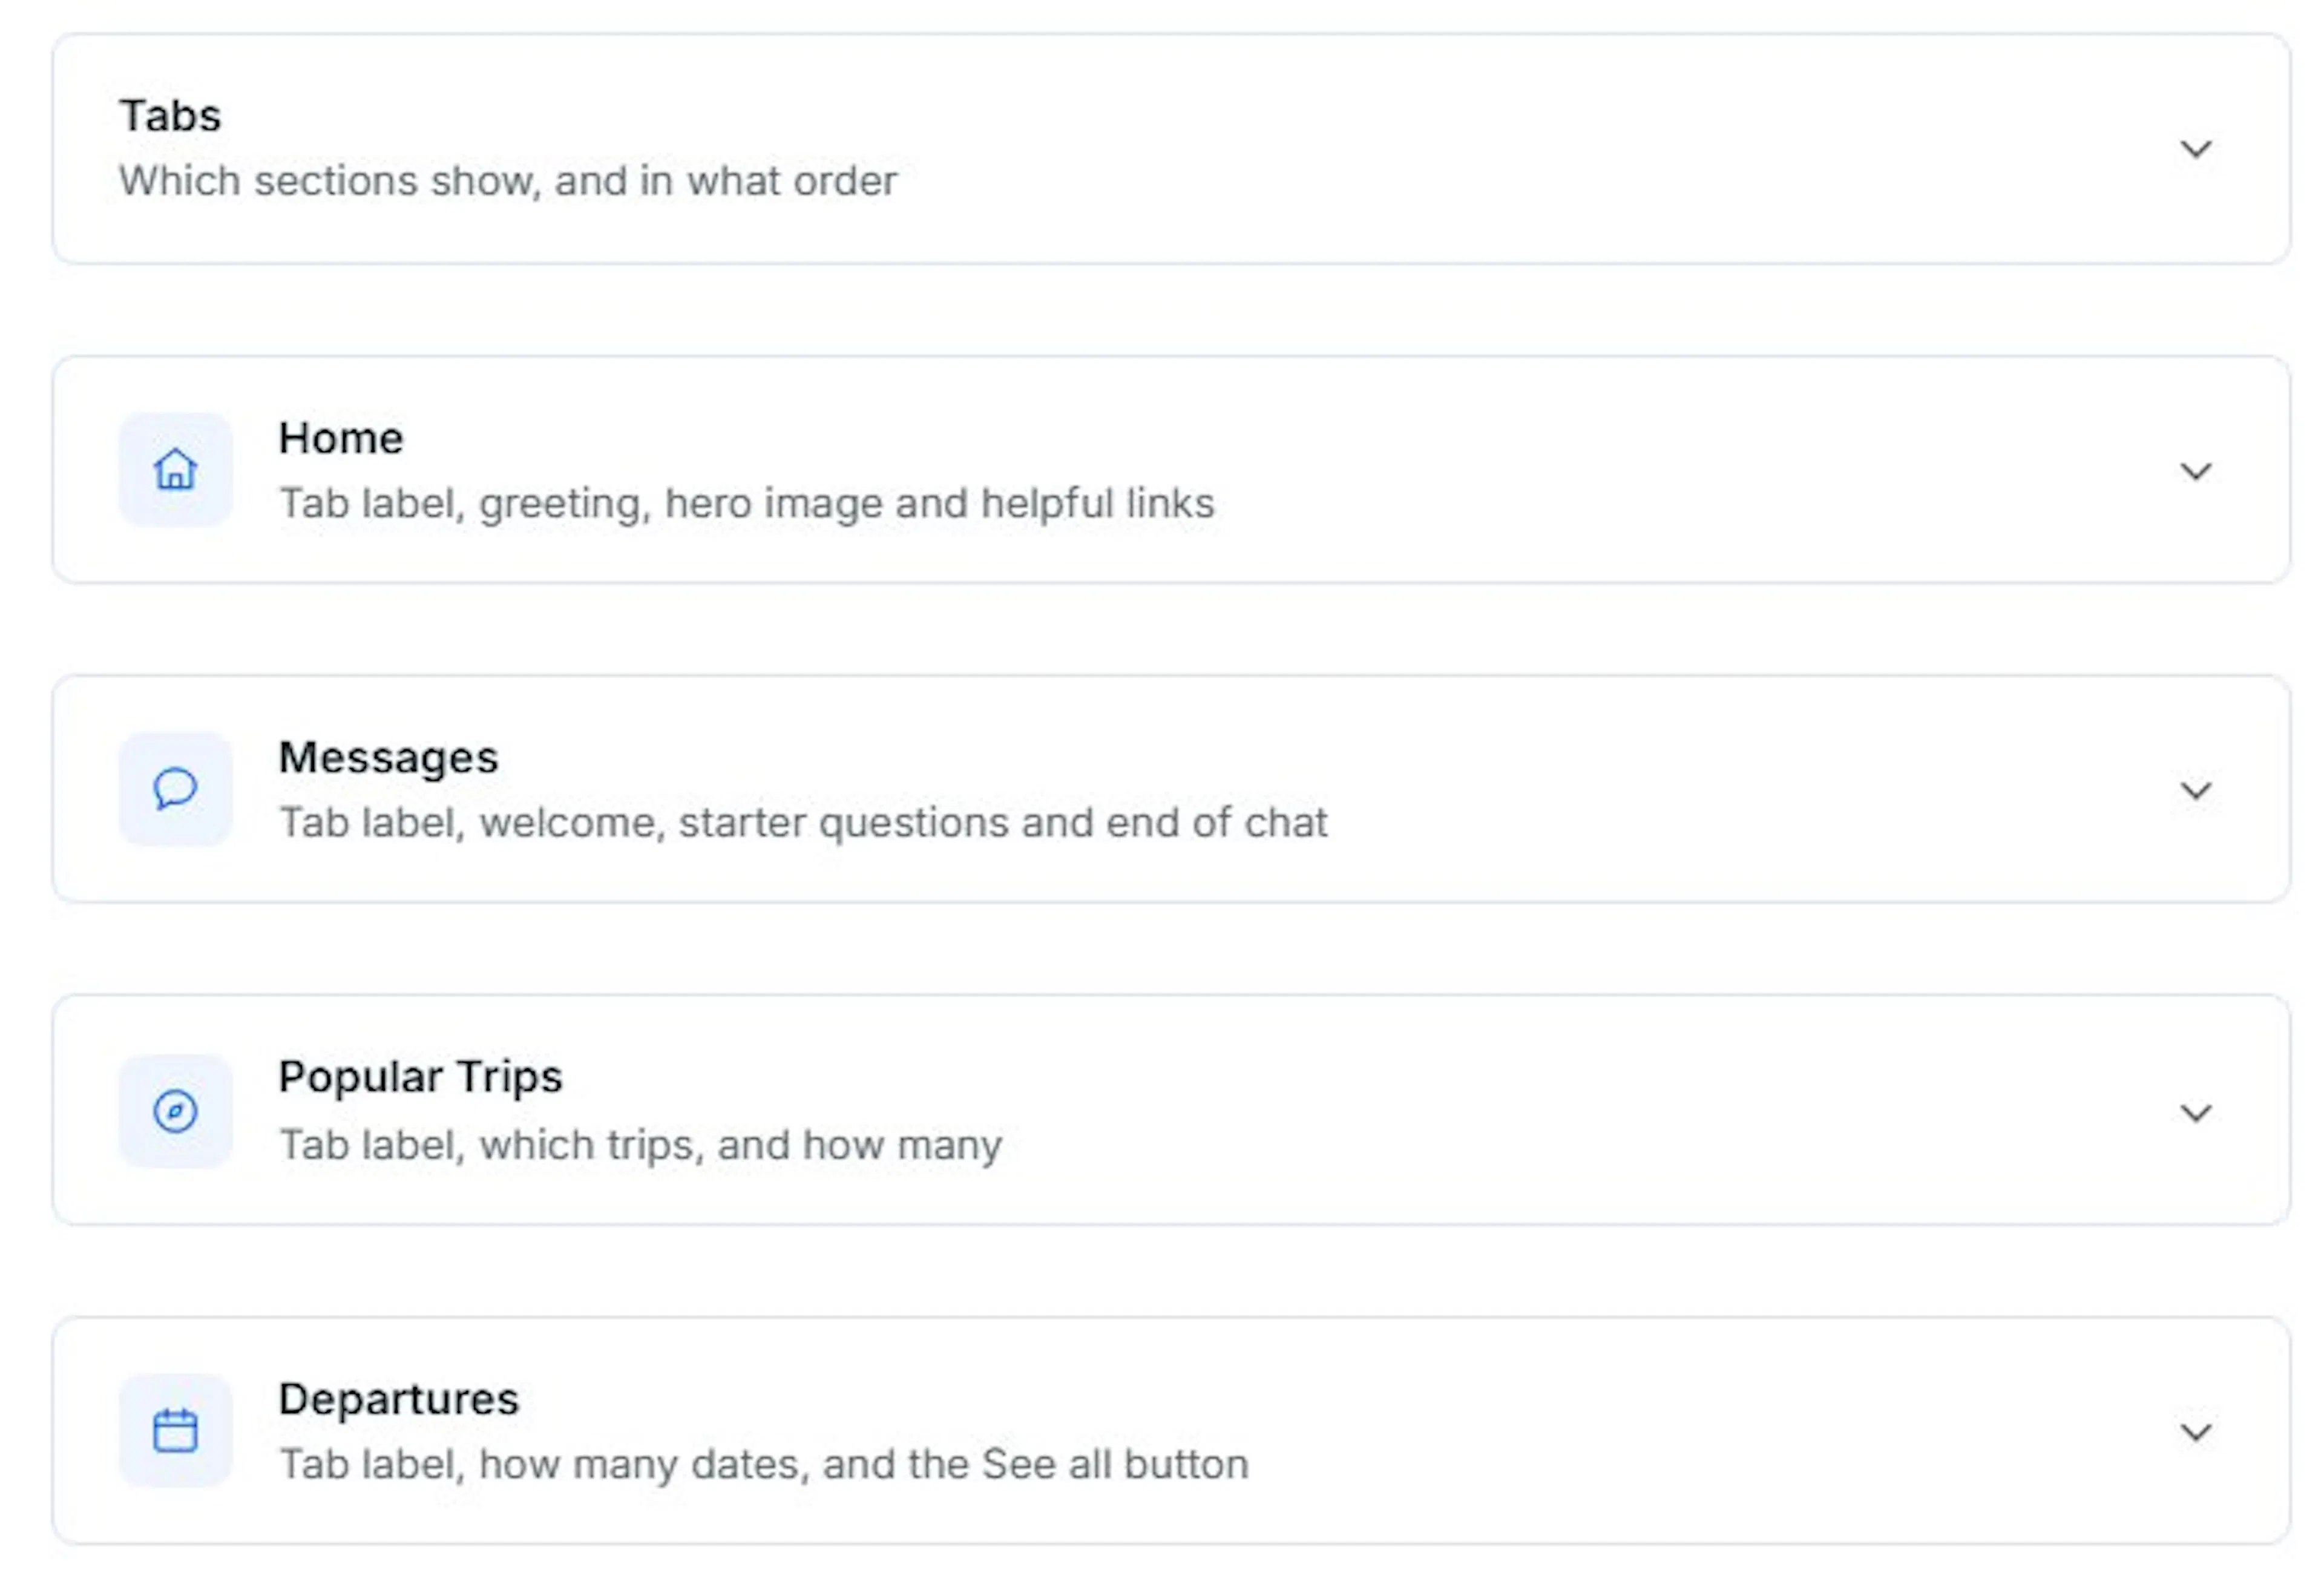
Tabs
Drag rows to reorder which sections appear in the preview, top to bottom. Toggle Popular Trips and Departures on or off. Home and Messages are always on.
Home
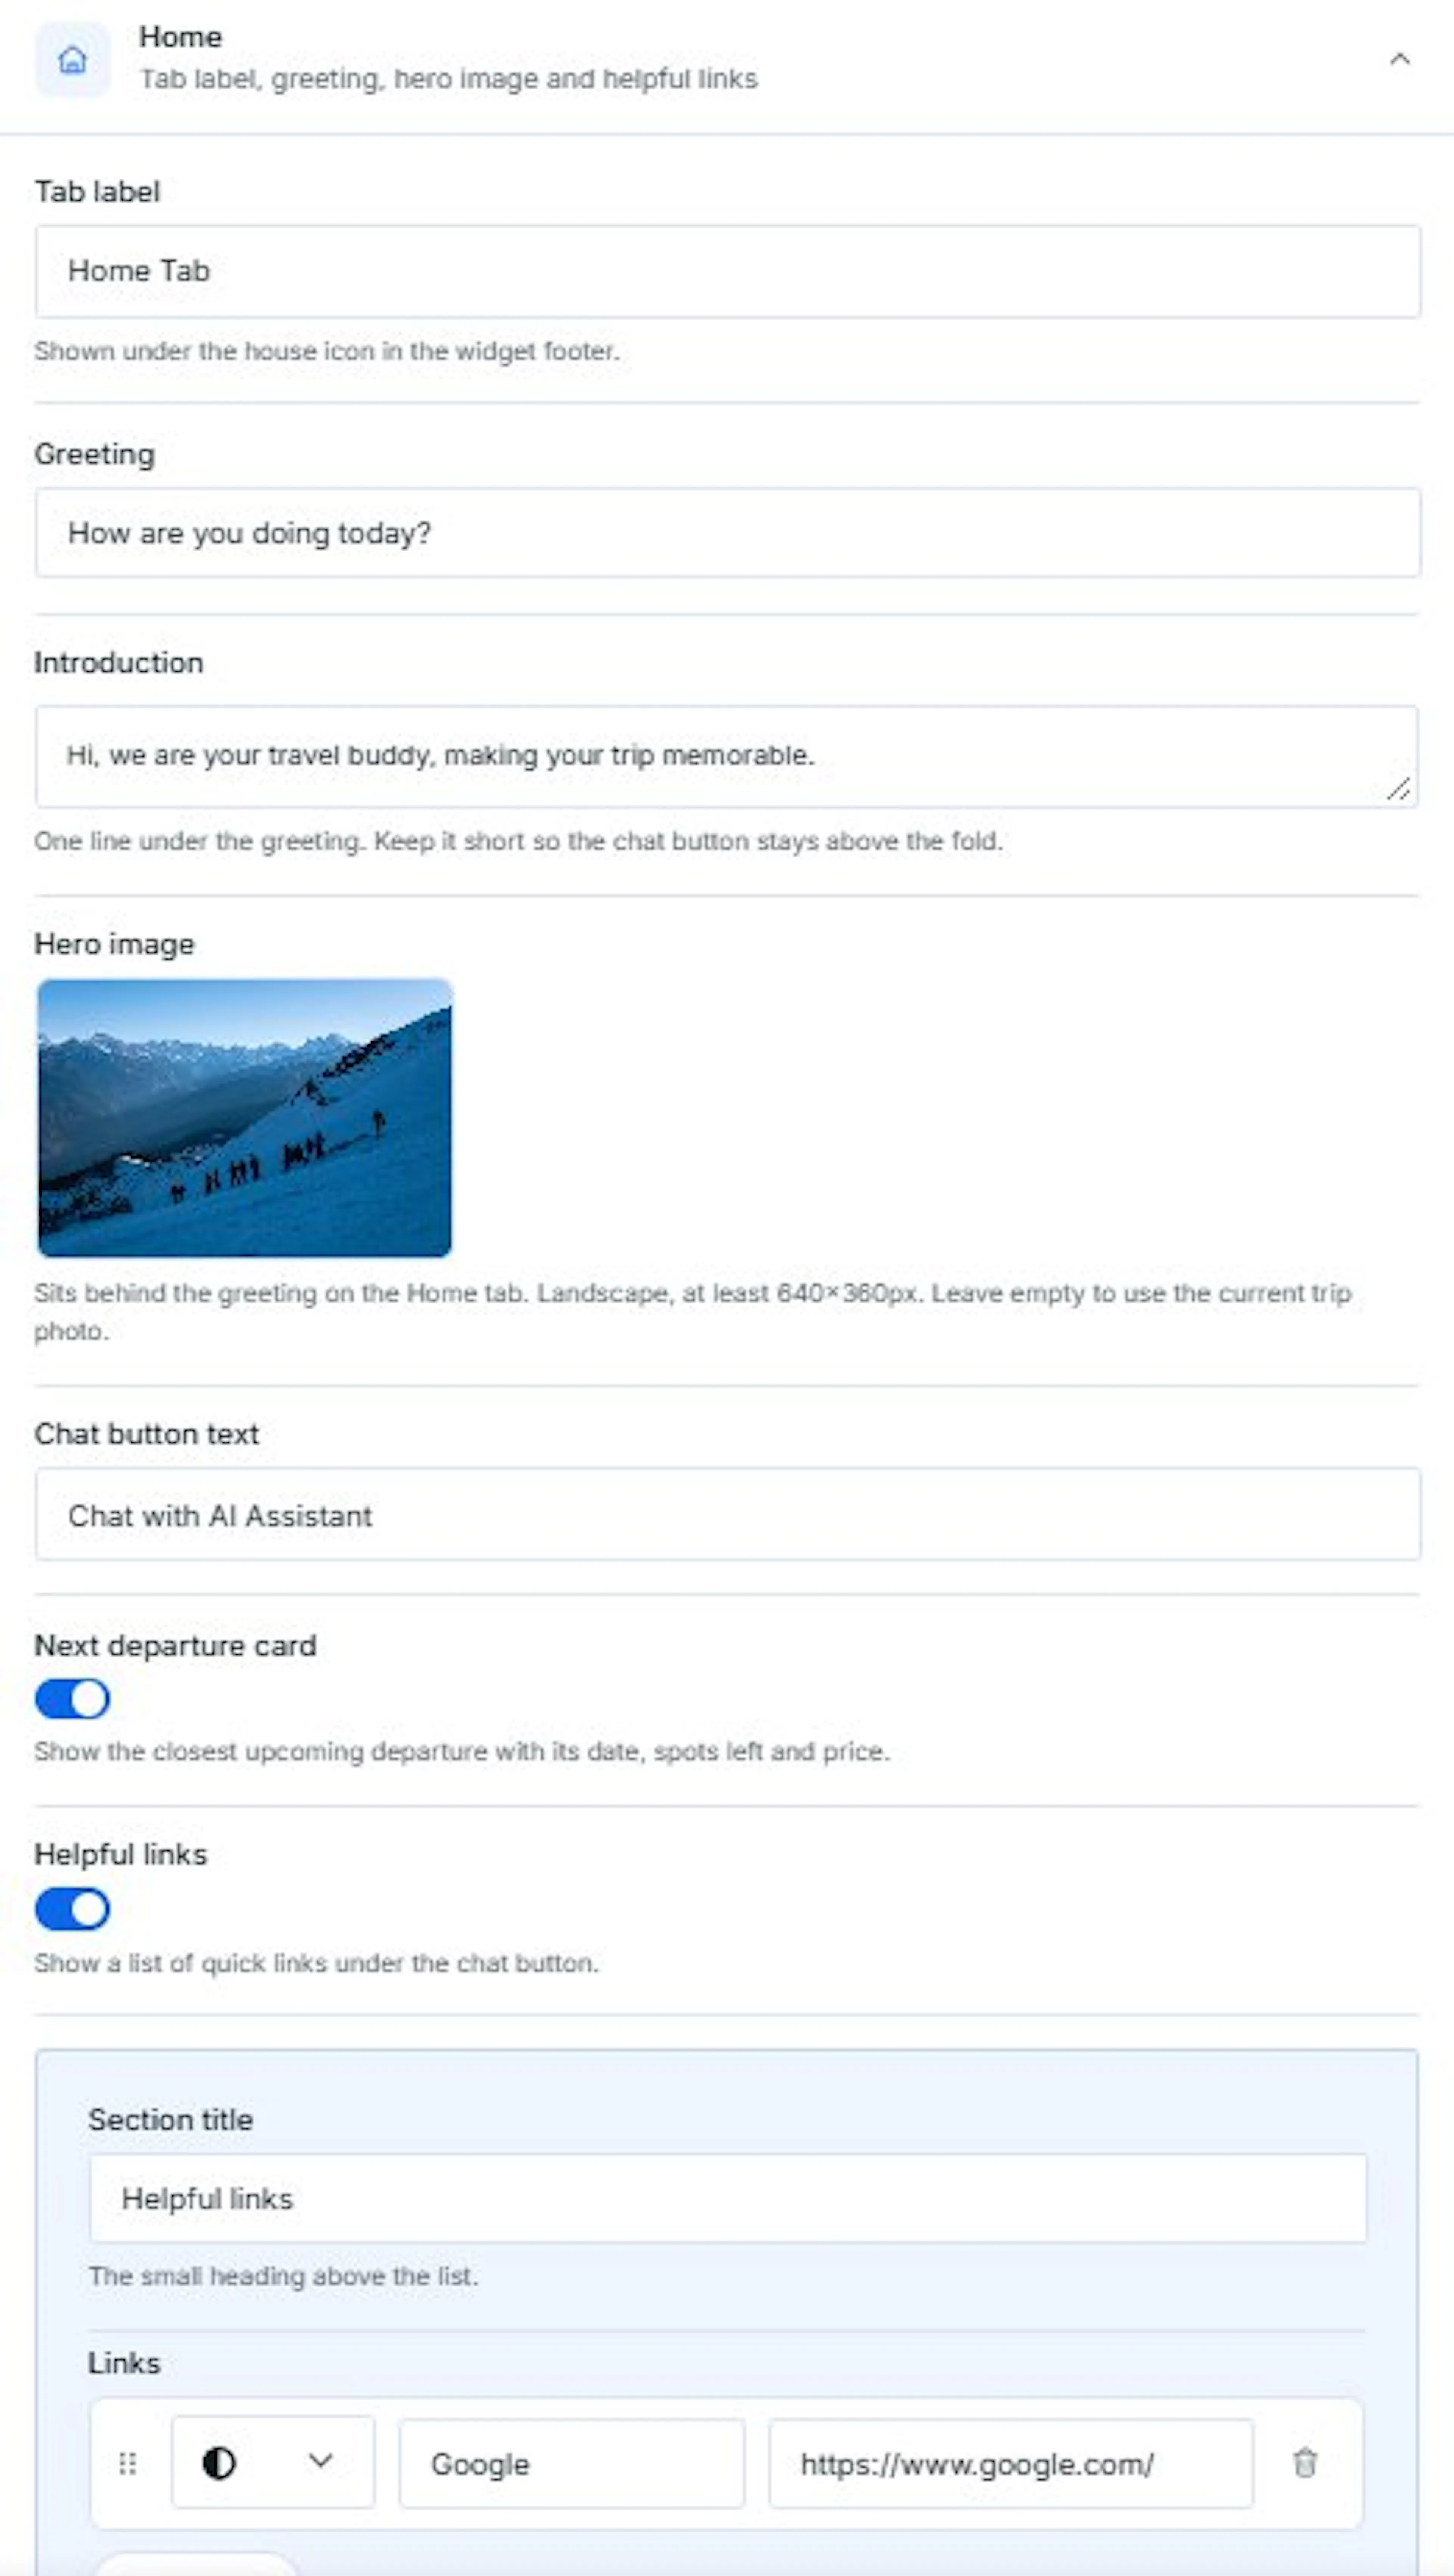
- Tab label: Enter the label to preview under the house icon.
- Greeting: Enter the greeting text to preview.
- Introduction: Enter one line to preview under the greeting.
- Hero image: Upload a landscape image, at least 640×360px, to preview. Leave empty to preview the current trip's photo instead.
- Chat button text: Enter the label to preview on the main chat button.
- Next departure card: Toggle on to preview the closest upcoming departure with its date, spots left, and price.
- Helpful links: Toggle on to preview a list of quick links under the chat button.
- Section title: Enter the small heading to preview above the list.
- Links: Add up to 6 links to preview. Pick an icon, then set the label and destination URL for each.
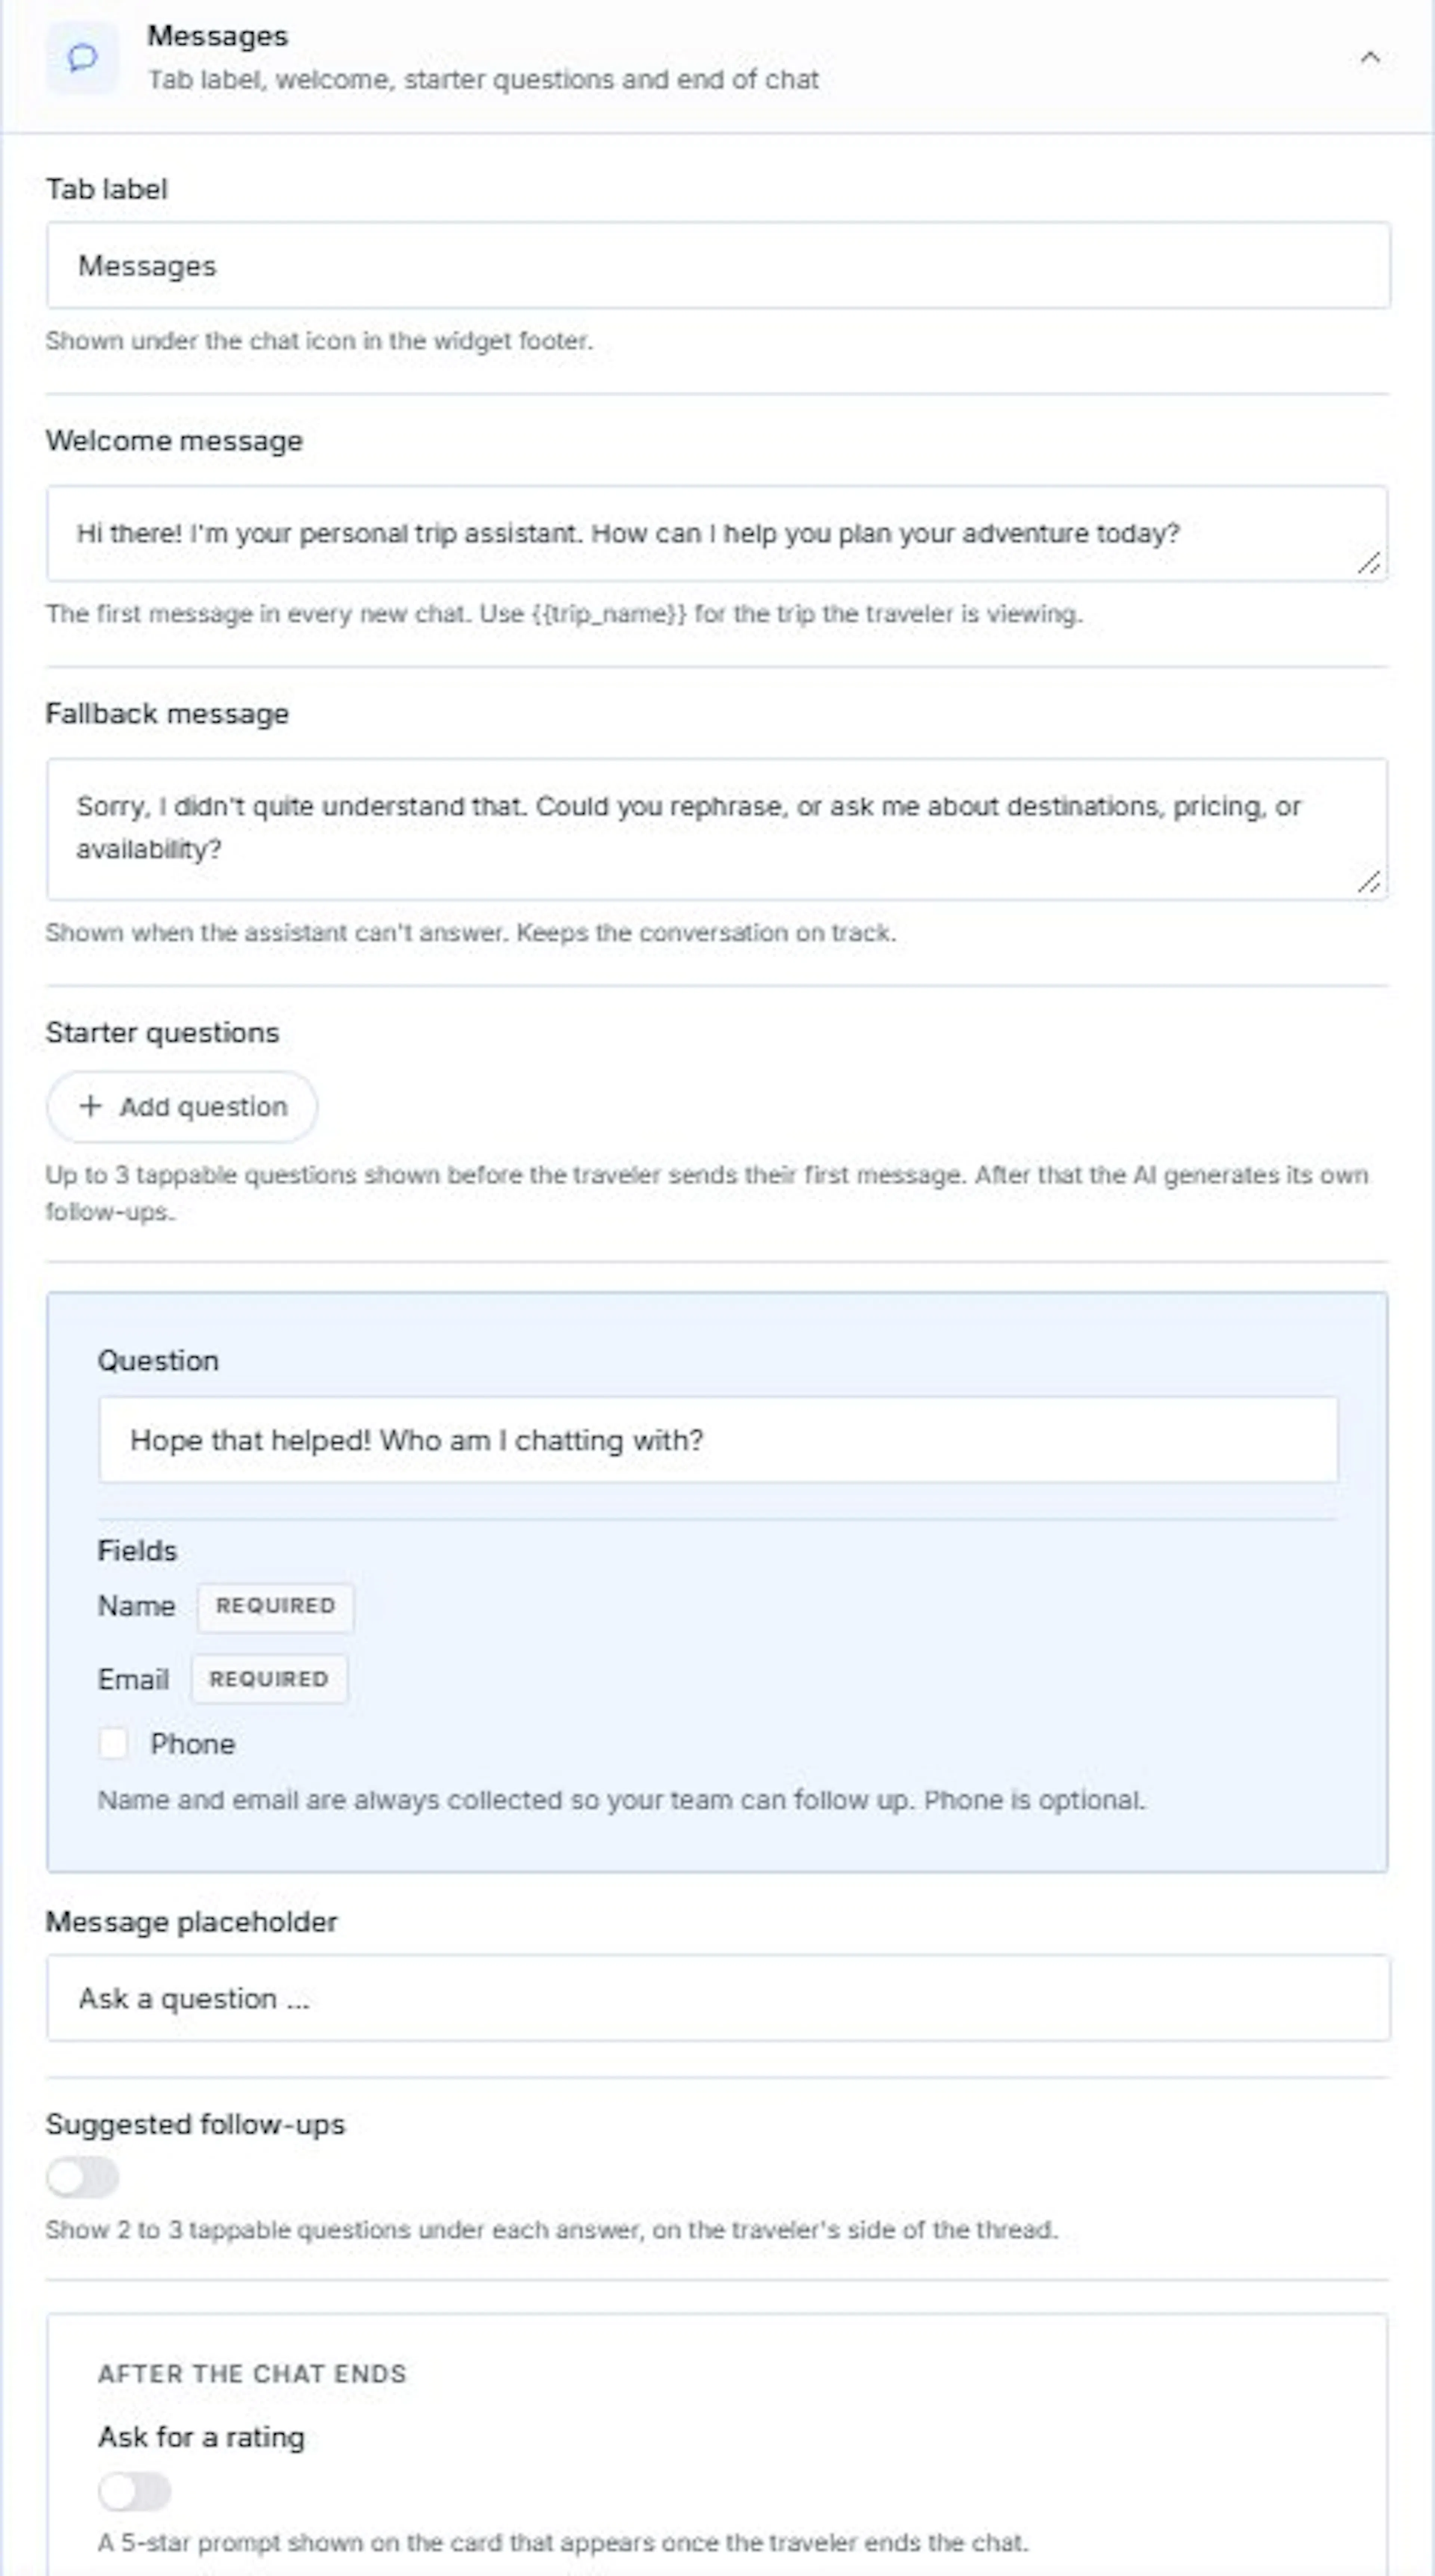
Messages
- Tab label: Enter the label to preview under the chat icon.
- Welcome message: Enter the first message to preview in a new chat. Use
{{trip_name}}for the trip being viewed. - Fallback message: Enter the message to preview when the assistant can't answer.
- Starter questions: Add up to 3 tappable questions to preview before the first message.
- Question: Enter the message that asks travelers to identify themselves once the chat has been useful.
- Fields: Name and email are always collected. Toggle Phone on to also ask for a phone number.
- Message placeholder: Enter the placeholder text to preview in the composer.
- Suggested follow-ups: Toggle on to preview 2–3 tappable follow-up questions under each answer.
- Ask for a rating: Toggle on to preview the 5-star prompt on the end-of-chat card.
- Show "Email now": Toggle on to preview the Email now button on that card.
- Send to: Enter the address the button would send to.
- Subject: Enter the subject line to preview. Use
{{trip_name}}so you know which trip the email is about.
Popular Trips
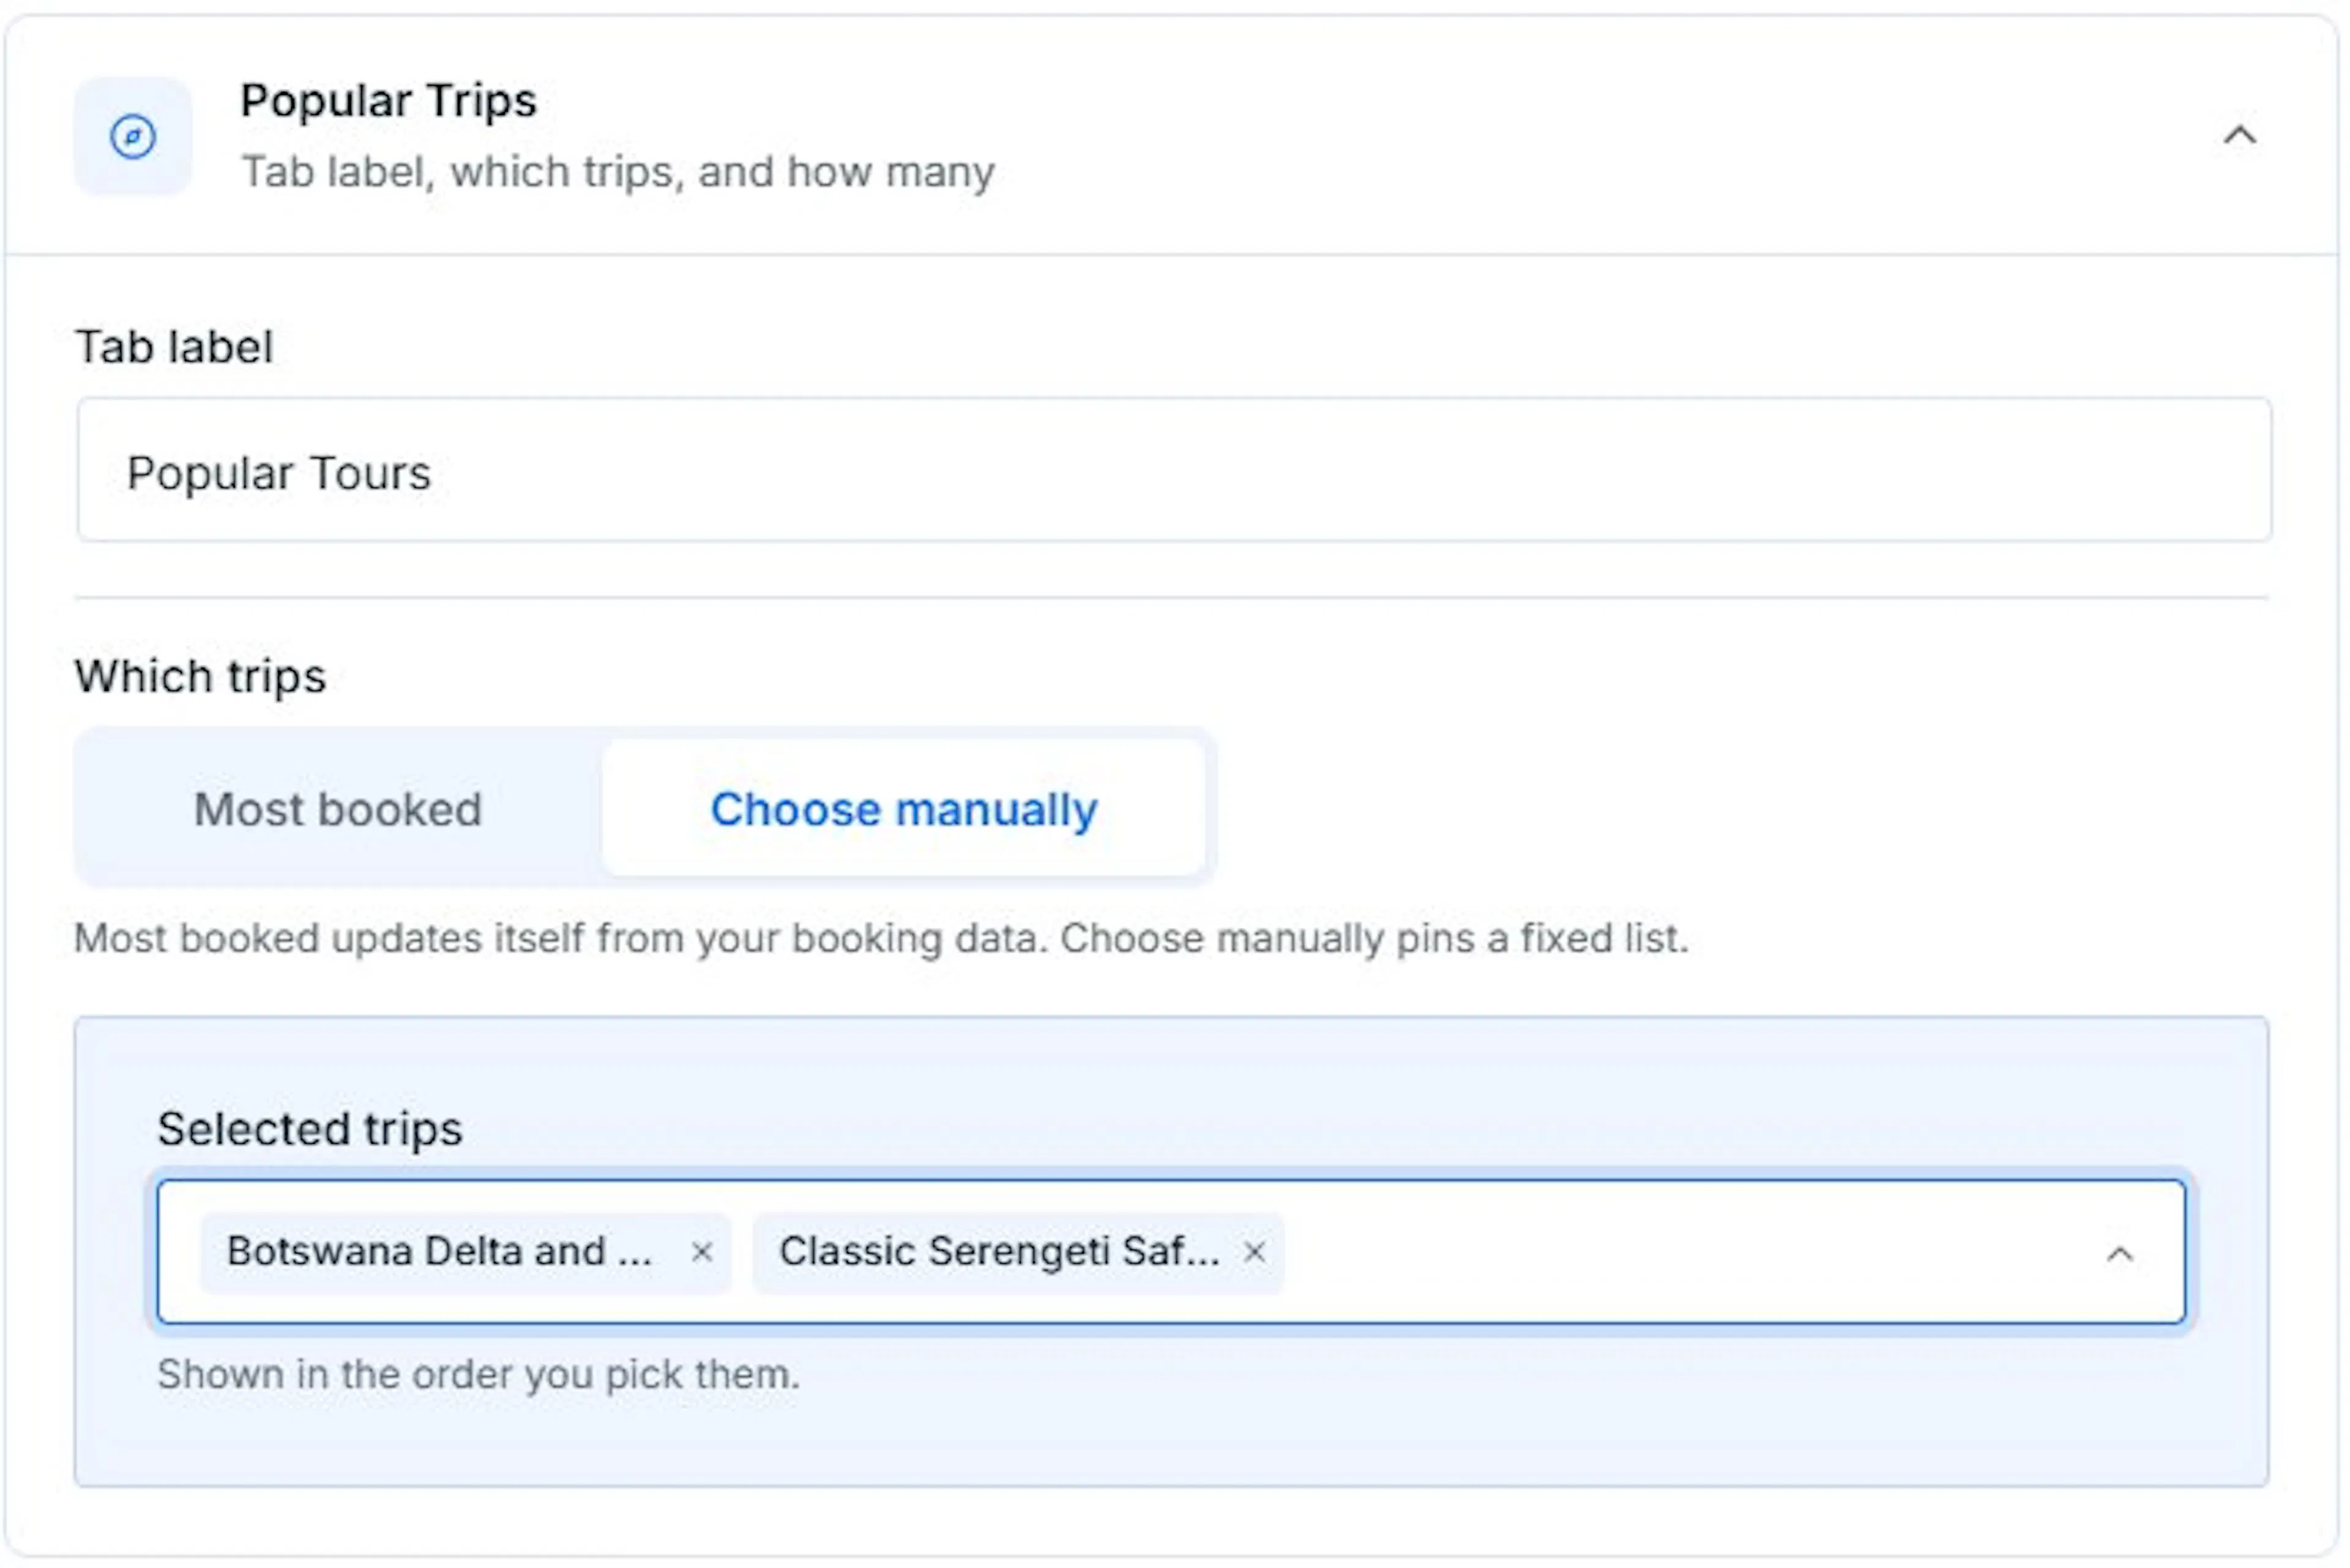
- Tab label: Enter the label to preview under the compass icon.
- Which trips: Choose Most booked or Choose manually to preview.
- Selected trips (Choose manually): Search and select trips to preview, in the order you pick them.
- Number of trips (Most booked): Set how many cards to preview before travelers have to scroll, up to 20.
Departures
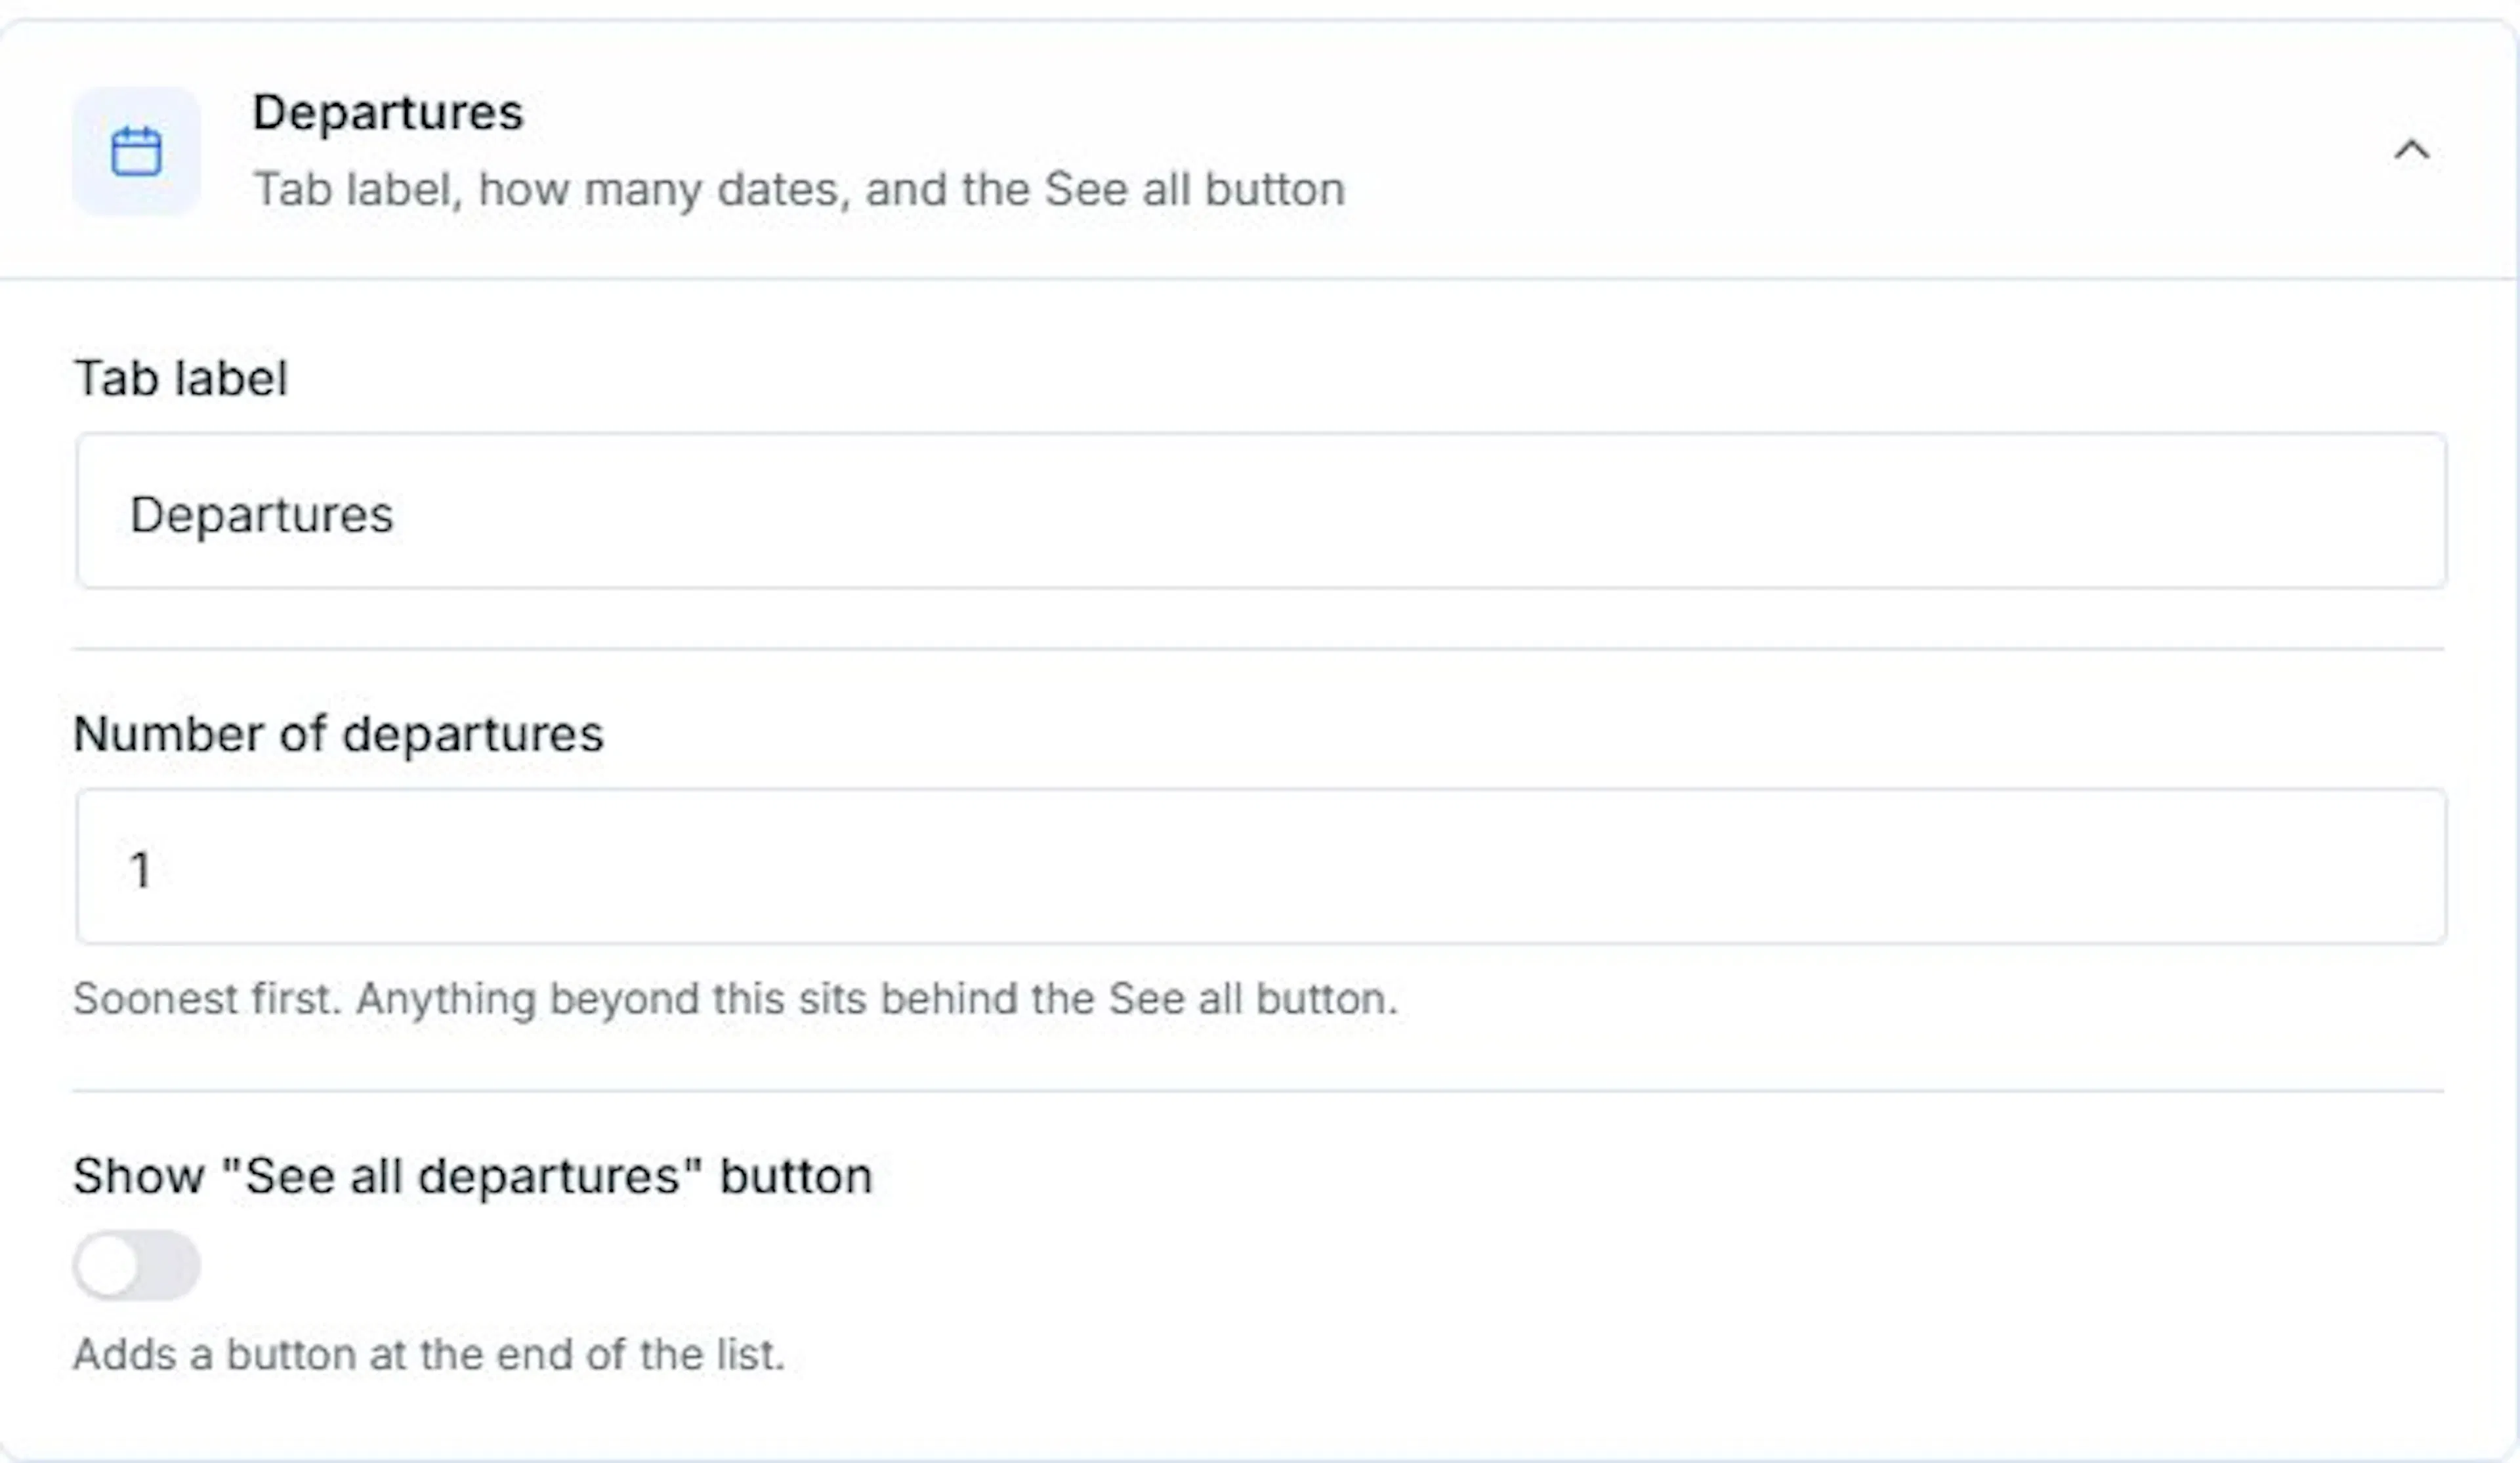
- Tab label: Enter the label to preview under the calendar icon.
- Number of departures: Set how many upcoming dates to preview, soonest first, up to 20.
- Show "See all departures" button: Toggle on to preview a button at the end of the list.
- Departures page: Enter the URL the button would take travelers to.
Note: Departures needs the WP Travel Engine Fixed Starting Dates add-on. Without it, this tab stays hidden in the preview even if you configure it here.
If you're still stuck or have a question we didn't cover, our support team is happy to help. Reach out at our support page and we'll get you sorted.