User History add-on tracks and displays the user browsing history before the user actually books or sends an inquiry to the trip. After successful booking or inquiry, user browsing history for each of the pages visited prior to the booking and inquiry is saved with timestamps and displayed in Admin Dashboard.
WP Travel Engine User History addon requires WP Travel Engine plugin v. 2.2.0 or later installed and activated on the site.
Installation #
UPLOADING IN WORDPRESS DASHBOARD
- Navigate to the ‘Add New’ in the plugins dashboard
- Navigate to the ‘Upload’ area
- Select wp-travel-engine-user-history.zip from your computer
- Click ‘Install Now’
- Activate the plugin in the Plugin dashboard
USING FTP
- Download wp-travel-engine-user-history.zip
- Extract the wp-travel-engine-user-history directory to your computer
- Upload the wp-travel-engine-user-history directory to the /wp-content/plugins/ directory
- Activate the plugin in the Plugin dashboard
Plugin License #
After the activation of the User History addon, site admins will need to add and activate the license key to receive regular updates.
To activate the addon license go to the Admin Dashboard > WP Travel Engine > Plugin License. Enter the license key received during the purchase of addon to the License field for User History. After adding the license key, save the key with the “Save Changes” button.

A new “Activate License” button will appear after a page refresh, which should be pressed to activate the license on the site. The activation message will be shown after successful activation.
After successful activation, User History addon can be updated from the plugins page normally, whenever a new update is released.
How does it work? #
Upon activation of the plugin, visitors browsing history is automatically tracked through cookies. When users visit any new URL, the URL address and timestamp is saved in the unique user hash and temporarily stored in Database.
When booking or inquiry is made by the customer, the stored data is saved in the booking and inquiry data. Site Admins can view the browsing history data in the booking and inquiry details section on the WP Travel Engine plugin.

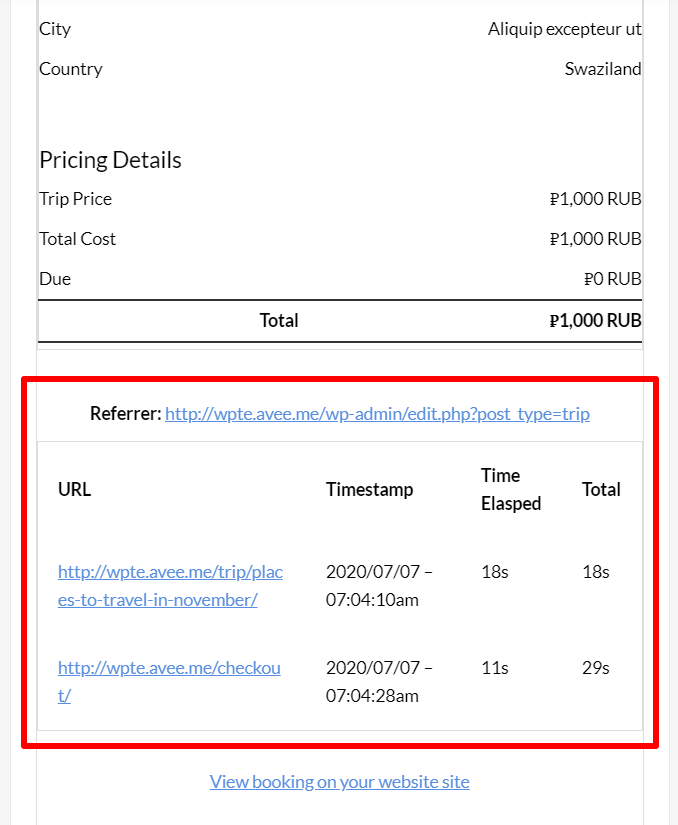
The customer browsing history meta box contains a table with the list of referral URLs, all visited URLs before booking with time spent on each page. It also shows details on the total elapsed time in the site frontend before actually making the booking and/or inquiry request.
No data is saved if users do not make any booking or inquiry on the site.
Global Options #
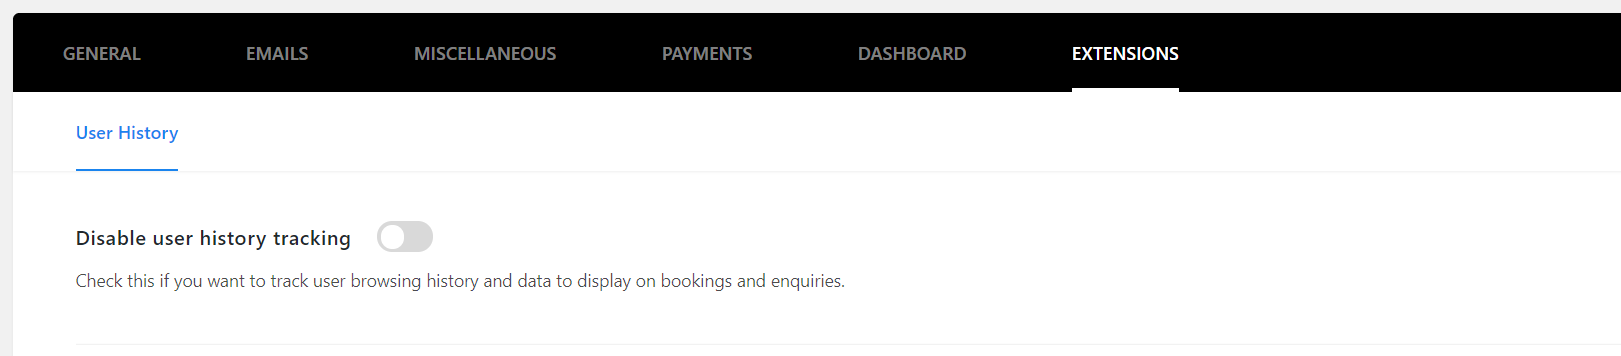
WP Travel Engine User history addon provides the following Global options accessed from WP Dashboard > WP Travel Engine > Settings > Extensions > User History. All of the available addon options are explained in detail below.
- Disable user history tracking: The setting will disable the user history tracking and will not save any data if turned on. With the setting enabled, no data will be saved on booking and customer inquiries. However, previously saved user history data from older bookings will remain intact.
2. Enable cookie consent message: As WP Travel Engine user history addon uses cookies to track and save data from visitors, we have added an additional cookie consent information option to the settings. When enabled, a cookie consent information is shown to the visitors about the use of cookies, as per EU GDPR and CASL compatibility requirements.


#
Cookie consent message box layout, colors, position, and contents can be customized with the range of options available in the general settings section. The options are briefly explained below:
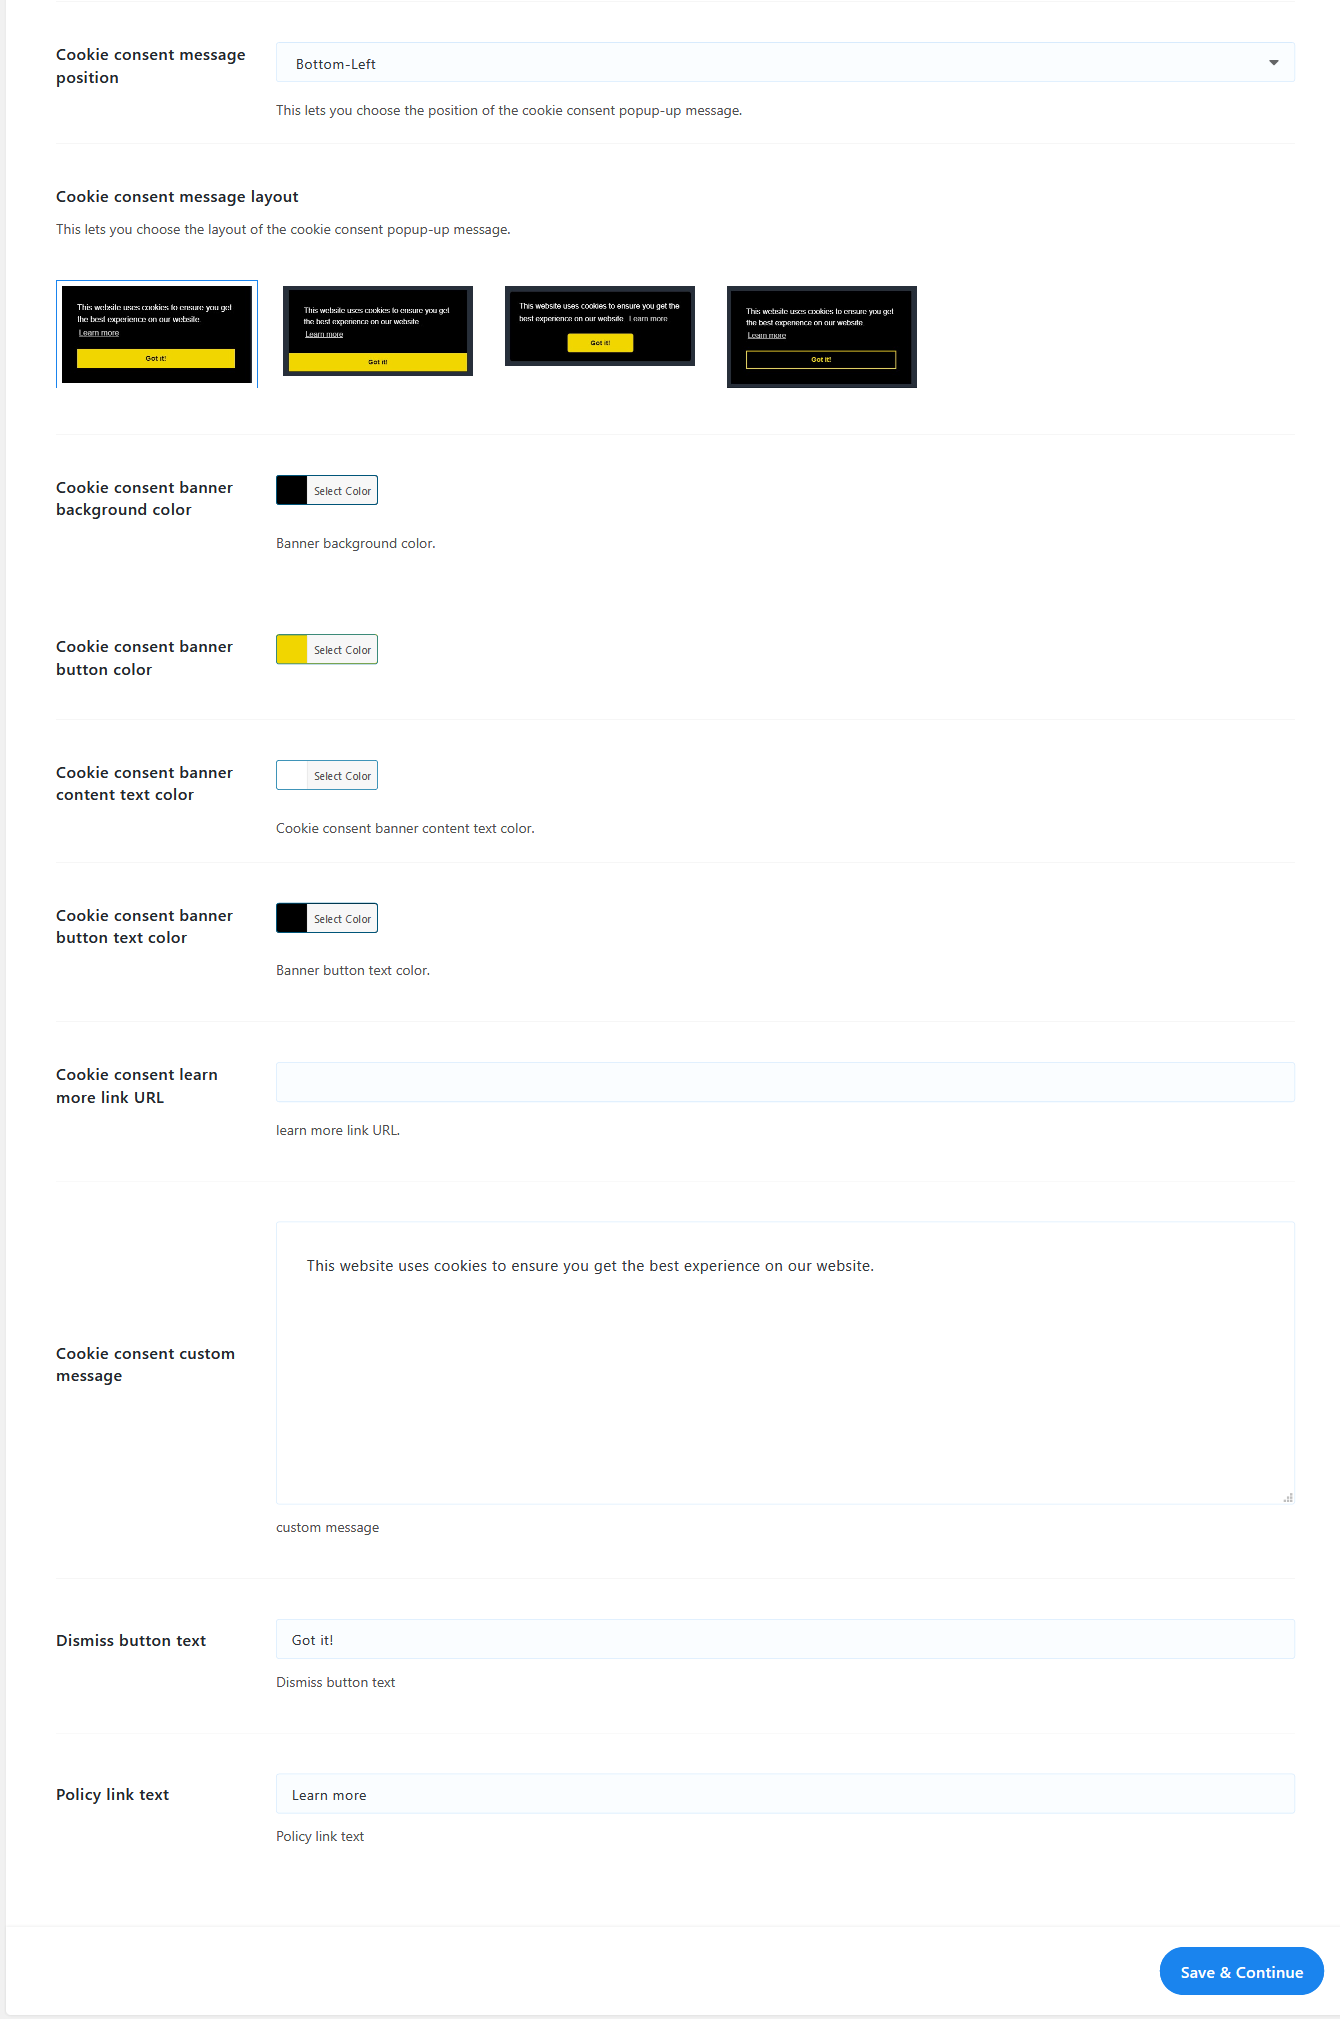
- Cookie consent message position: This option controls the position of the cookie consent message. You can either choose to display the cookie consent message on top, bottom, bottom-left or bottom-right as per the requirements.
- Cookie consent message layout: You can choose one of the four available layouts for the message display. All the layouts can be used in any position in the front-end.
- Color options: There are four different color options available for the consent message layout. You can choose the background color, text color, button background and button text color for the message.
- Cookie consent learn more link URL: You can set the learn more URL to link the message to any custom privacy policy or cookie terms page URL.
- Cookie consent custom message: This Textarea field can be used to update/change the cookie consent message.
- Dismiss button text: Text label for the cookie consent dismiss button.
- Policy link text: This field will let you edit the “Learn More” link text in the consent message.
#
User History plugin provides additional email tags that can be used in the Admin booking email notification if required to display the user browsing history even in the booking email message.

To display the user browsing history in the booking email sent to site admin, you can simply set the {user_history} tag in the booking email template editor.
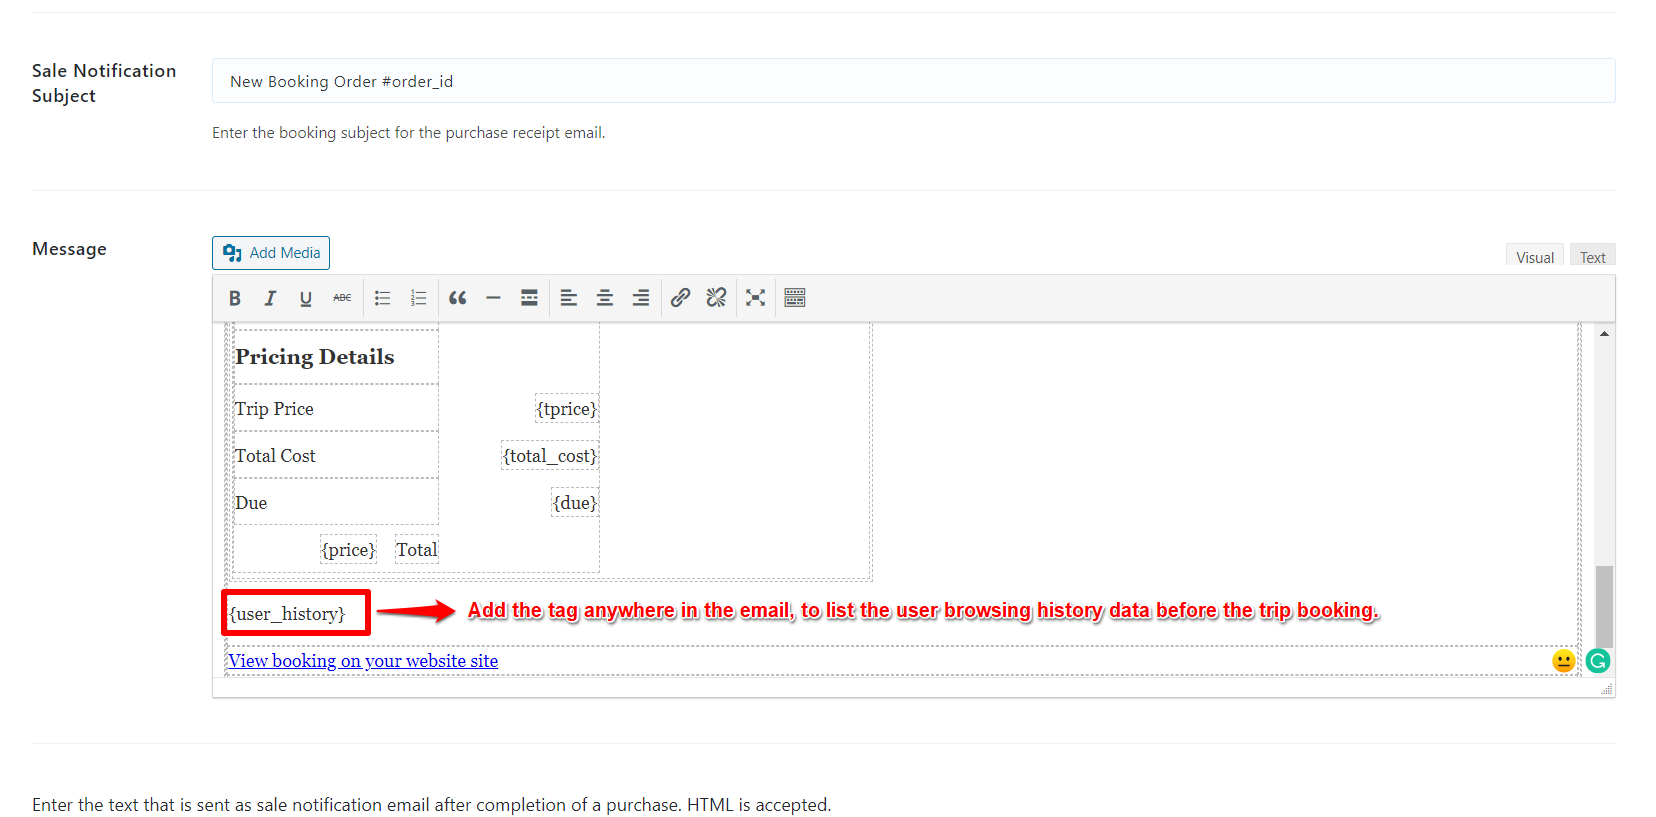
This will output the browser history table in the email before the booking was completed.
Additional Options #
Gravity Forms support #
WP Travel Engine user history addon supports integration with Gravity Forms plugin also. With the feature, site admins can choose to save user history on gravity forms submission.
Upon submission of the selected Gravity Forms form, user history will be collected and added into the entry meta for the submission.
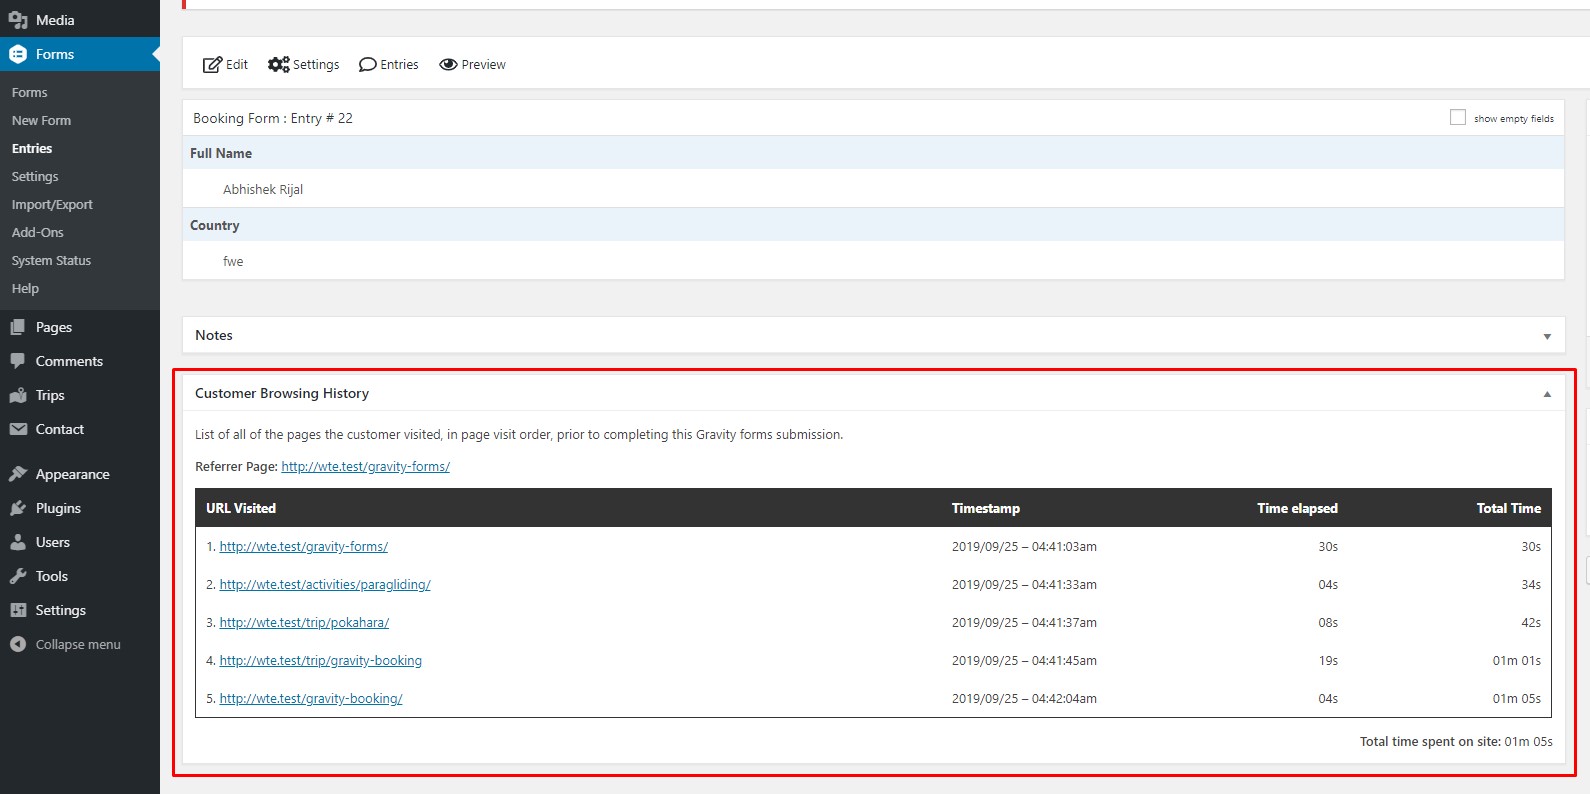
After any of the selected Gravity Forms forms is submitted by the user, the browsing history of the user before submitting the form will be collected and saved in the entry data. The history can be seen in the new entry’s detail screen in the admin area as shown in the screenshot below:
Gravity Forms selection #
Site admins can select to choose the forms that need to capture the user history data as per their requirements.
To set up the forms for the user history collection, desired forms can be set-up by the admin in Admin Dashboard > WP Travel Engine > Settings > Extensions > User History > Gravity form(s) to capture user history.
Multiple gravity forms can be selected in the dropdown. User history data will only be stored upon submission of the forms selected here.
