The Trip Tab feature in WP Travel Engine allows you to create additional tabs on the single trip page. This is helpful when you want to display extra information, such as FAQ, Gallery, Travel Tips, or any other custom content.
How to Add a New Trip Tab #
Follow these steps to create and configure a new trip tab:
- Navigate to Trip Tabs Settings
- Go to your WordPress Dashboard.
- Navigate to WP Travel Engine > Settings > General > Trip Settings > Trip Tabs.
- Create a New Trip Tab
- Click the Add New Tab button.
- Fill in the following details:
- Tab Label: Enter the name of the new tab (e.g., FAQs, Travel Guide).
- Icon (Optional): Choose an icon to display next to the tab label.
- Enable/Disable: Toggle to enable the tab.
- Click Save Changes.

Note: Default tabs like Overview, Itinerary, Cost, Reviews cannot be deleted.
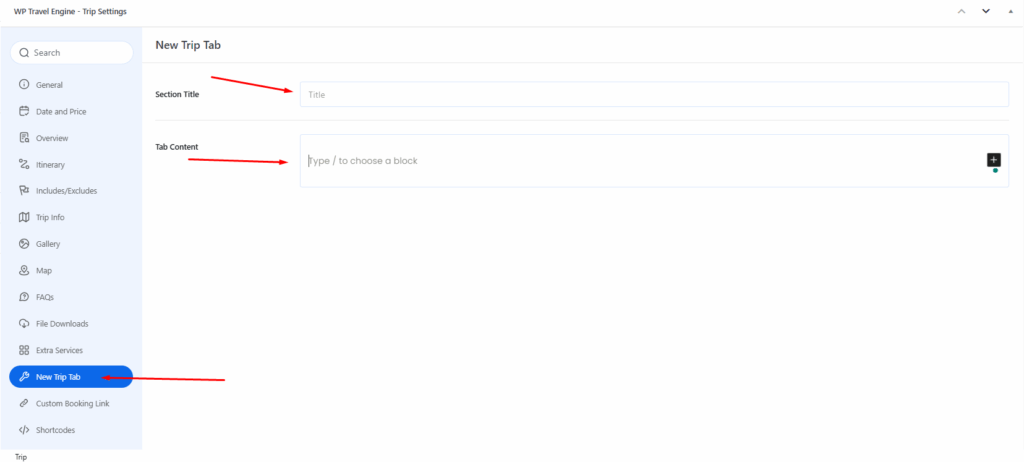
Adding Content to the New Tab #
Once you have created the tab:
- Go to Trips > All Trips and edit a trip.
- Scroll down to the newly created tab section.
- Add a Section Title and Tab Content (text, images, or shortcodes).
- Click Save to save the trip.
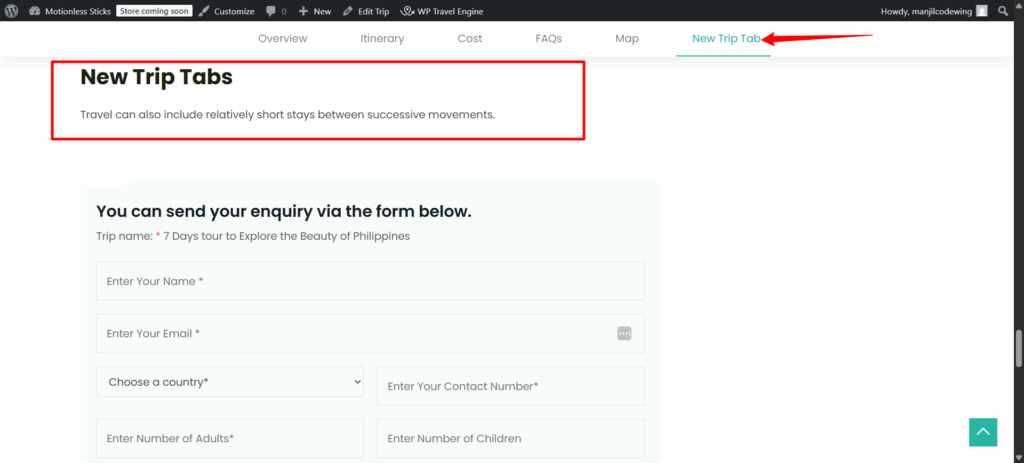
Your new tab will now appear on the single trip page with the content you added.
FAQs #
1. Can I delete the default trip tabs?
No. Default tabs (Overview, Itinerary, Cost, Reviews, etc.) cannot be deleted, but you can disable custom tabs anytime.
2. Can I reorder tabs?
Yes. You can drag and drop tabs in the Trip Tabs settings to change the order in which they appear.
3. My new tab isn’t showing up. What should I check?
Make sure the tab is enabled and you have added content in the trip editor. Also, click Update after making changes.
4. Can I use images or shortcodes in the tab content?
Yes. You can add formatted text, images, videos, or shortcodes to display dynamic content.
5. Can I add multiple custom tabs?
Yes. There’s no limit to how many custom tabs you can add.