The Email Customizer add-on enables you to customize the booking and payment email layouts, designs, and content. You can also add dynamic content and personalize the emails to create a lasting impression for your brand.
In this documentation, first, you will learn about plugin installation, setup, and initial configuration options step-by-step.
Requirement: Email Customizer requires WP Travel Engine plugin v-5.7.6 or later installed and activated on your website.
You can either follow the video or the below steps to configure this add-on.
Download the Add-on File #
After the purchase, you can download the add-on file by visiting the individual add-on pages from here – https://wptravelengine.com/plugins/
Here are the steps you need to follow:
- Visit the WP Travel Engine website and log in to your account through the “My Account” page (https://wptravelengine.com/my-account/).
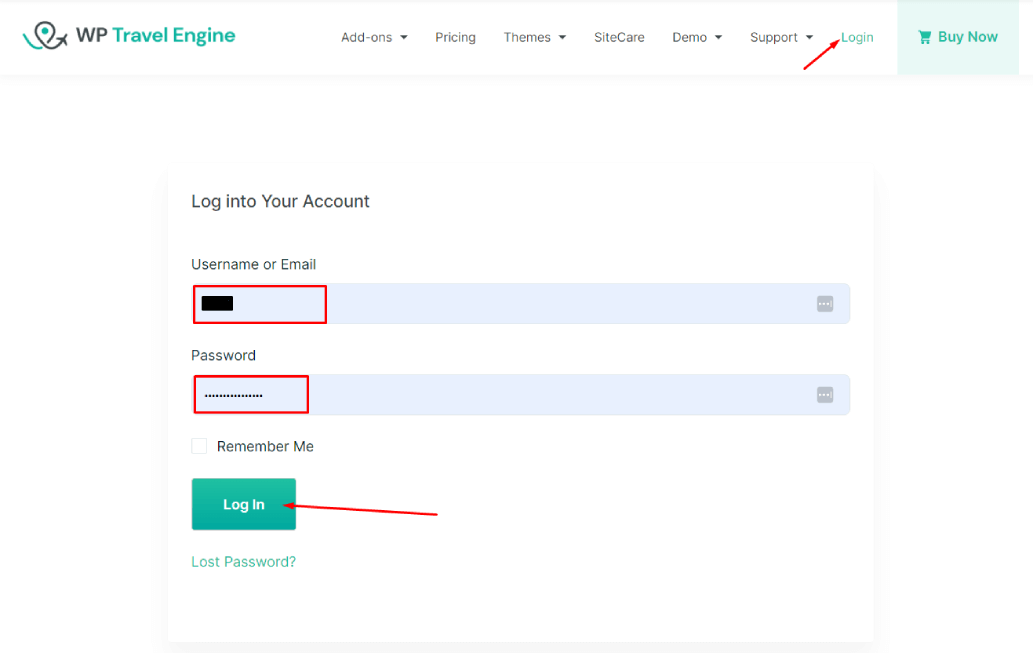
- Go to the Group Discount add-on page- https://wptravelengine.com/plugins/email-customizer/
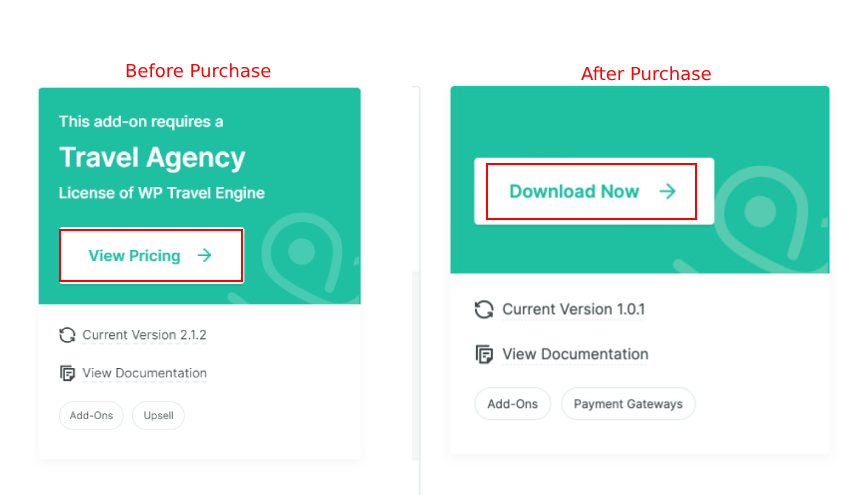
- Now, you will see the Download option on the right side of the page instead of View Pricing. Click on it to download the add-on file.
Installing the Add-on #
To upload the downloaded file to your WordPress dashboard, follow the below steps:
- Navigate to the Plugin > Add New
- Click on the Upload Plugin button.
- Select the downloaded file, “wp-travel-engine-email-customizer.zip” from your computer.
- Click on Install Now.
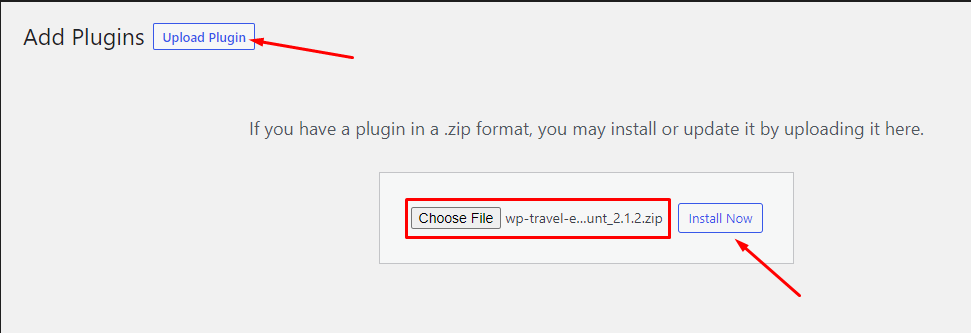
- Once the file is installed, click on Activate to enable the add-on on your website.
Activating the Plugin License #
To activate the plugin license and receive regular updates, follow these steps:
- Go to your Admin Dashboard and navigate to WP Travel Engine > Plugin License.
- Enter the license key in the provided field.
- Click Save Changes.
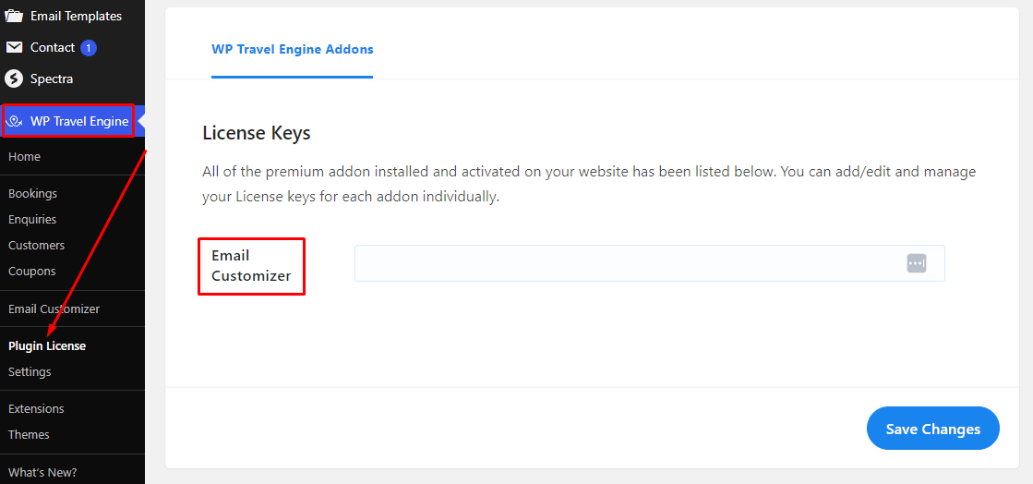
- Refresh the page to see the Activate License button, then click on it.
After successful activation, you can update the Group Discount add-on from the plugins page normally whenever a new update is released.
How to Use Email Customizer #
Once the installation and activation is complete, follow these steps to customize your email templates:
- From the WordPress dashboard, go to WP Travel Engine > Email Customizer.
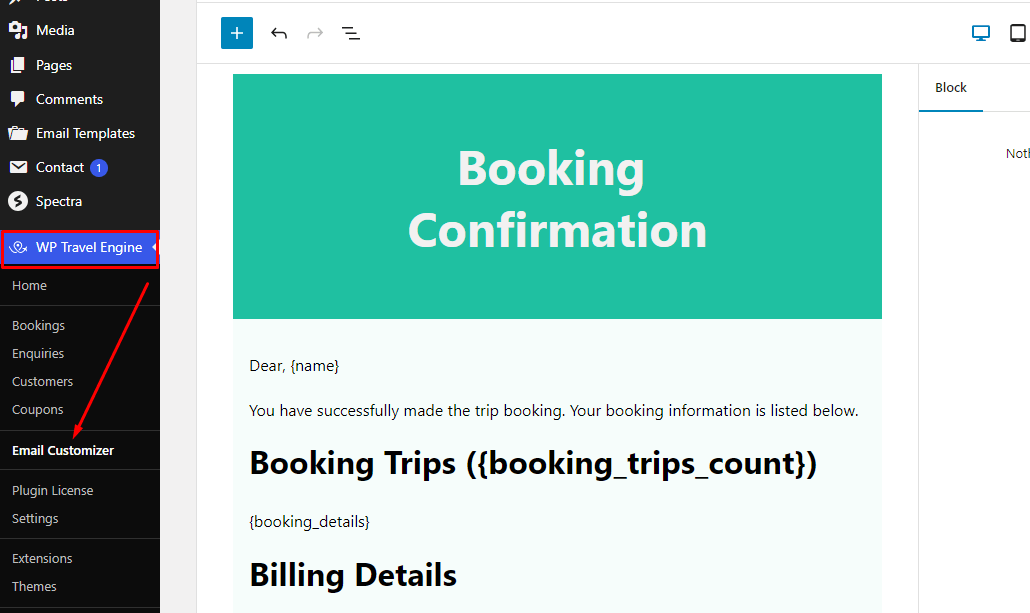
Note: With the Email Customizer add-on, you can customize the default email templates for Booking and Payment notifications only.
- Booking Notification: This template is used to send emails when a booking is made.
- Payment Notification: This template is used to send emails when a payment is made.
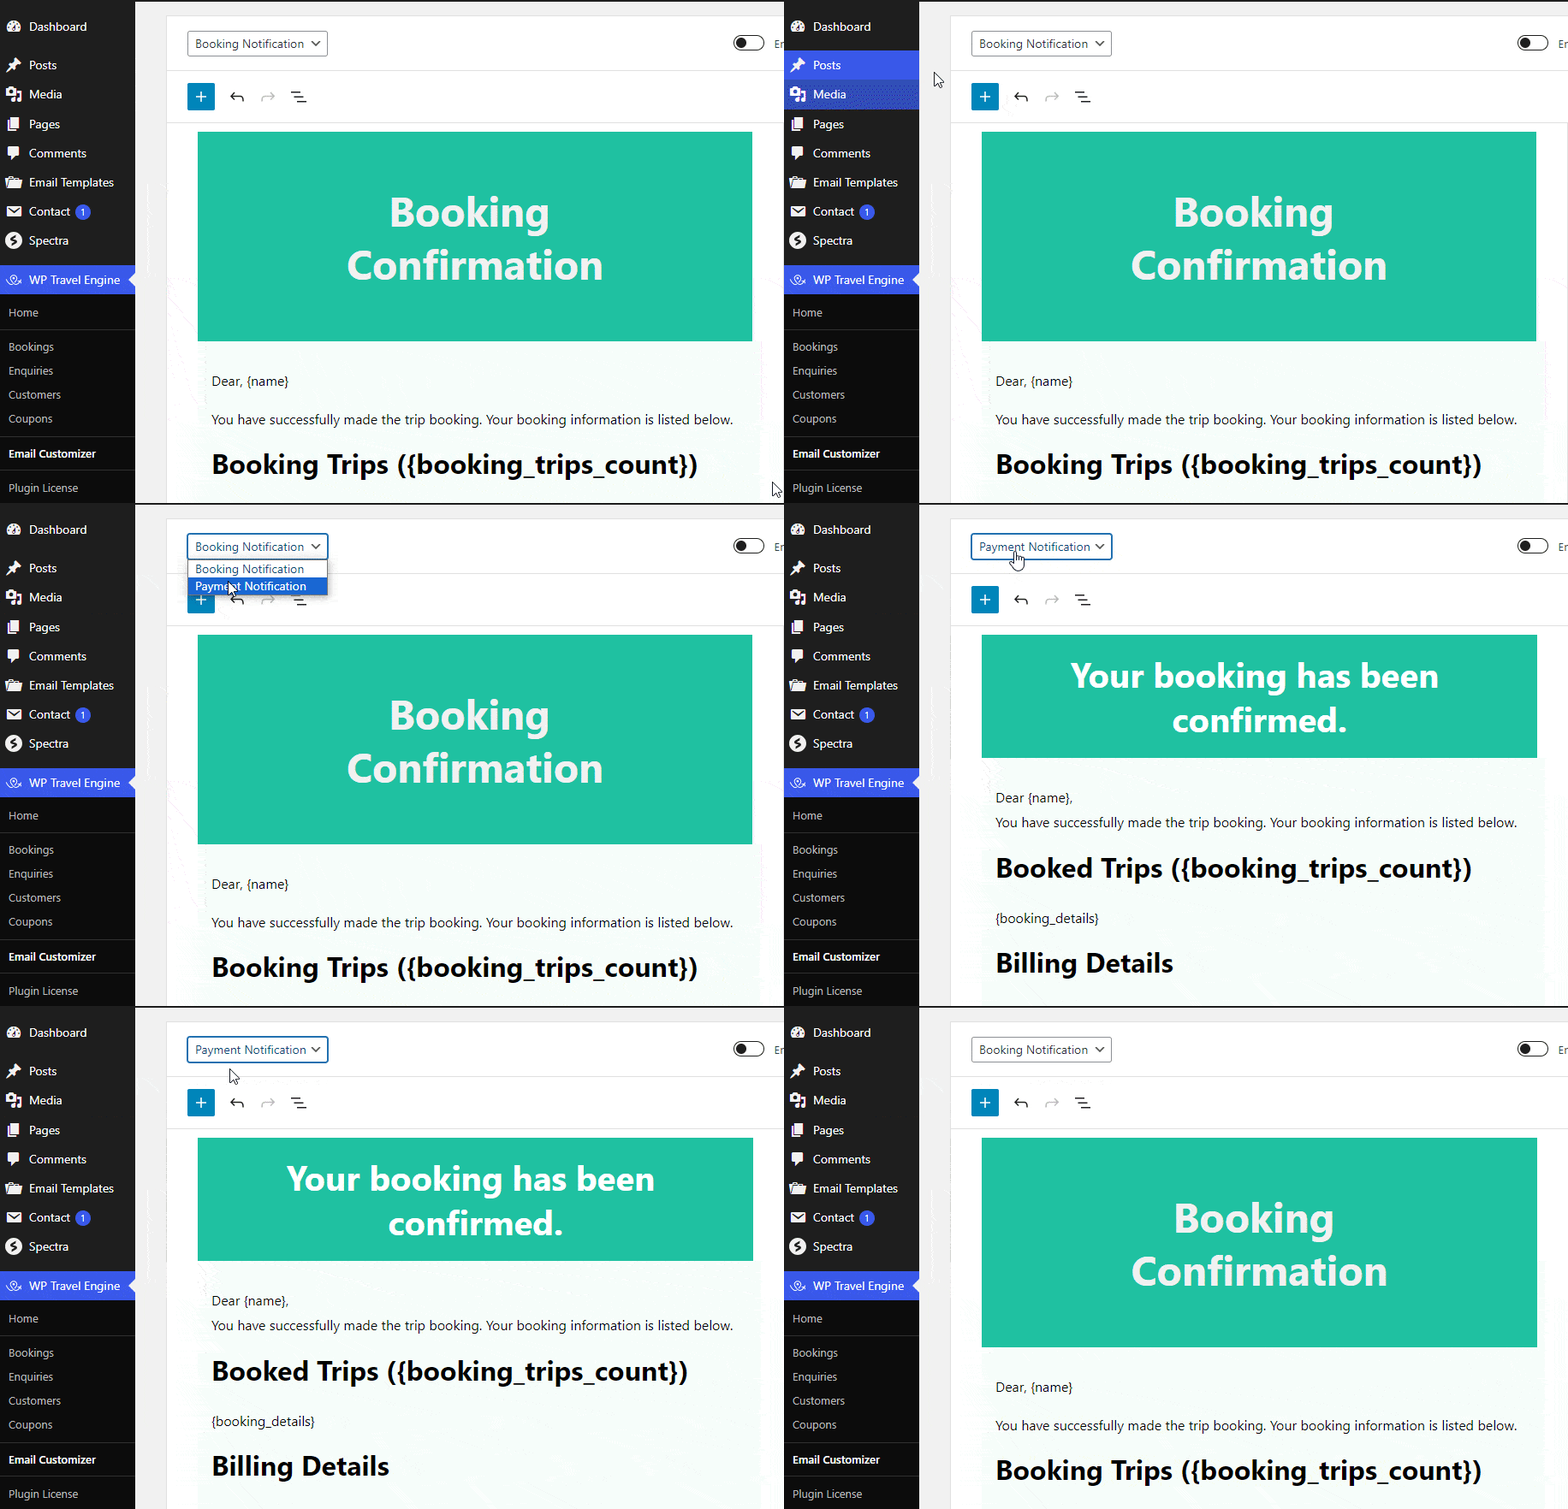
Customizing the Email Templates #
Select either the Booking or Payment template to customize and customize the following aspects:
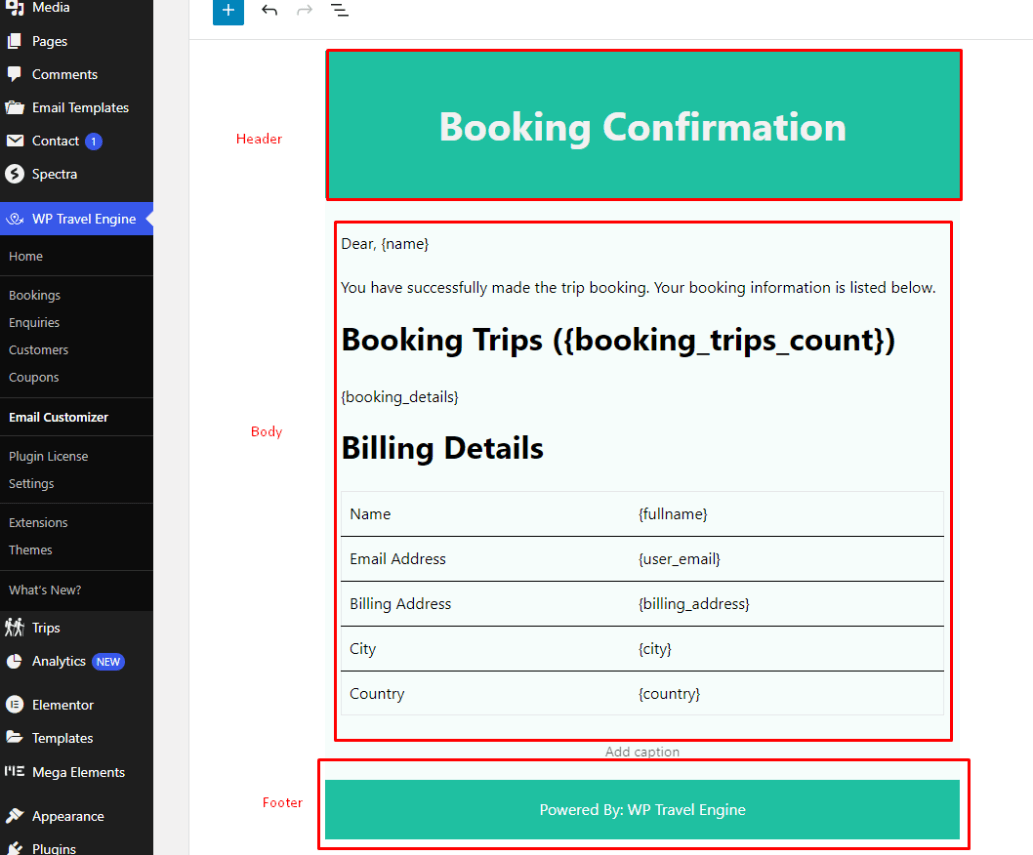
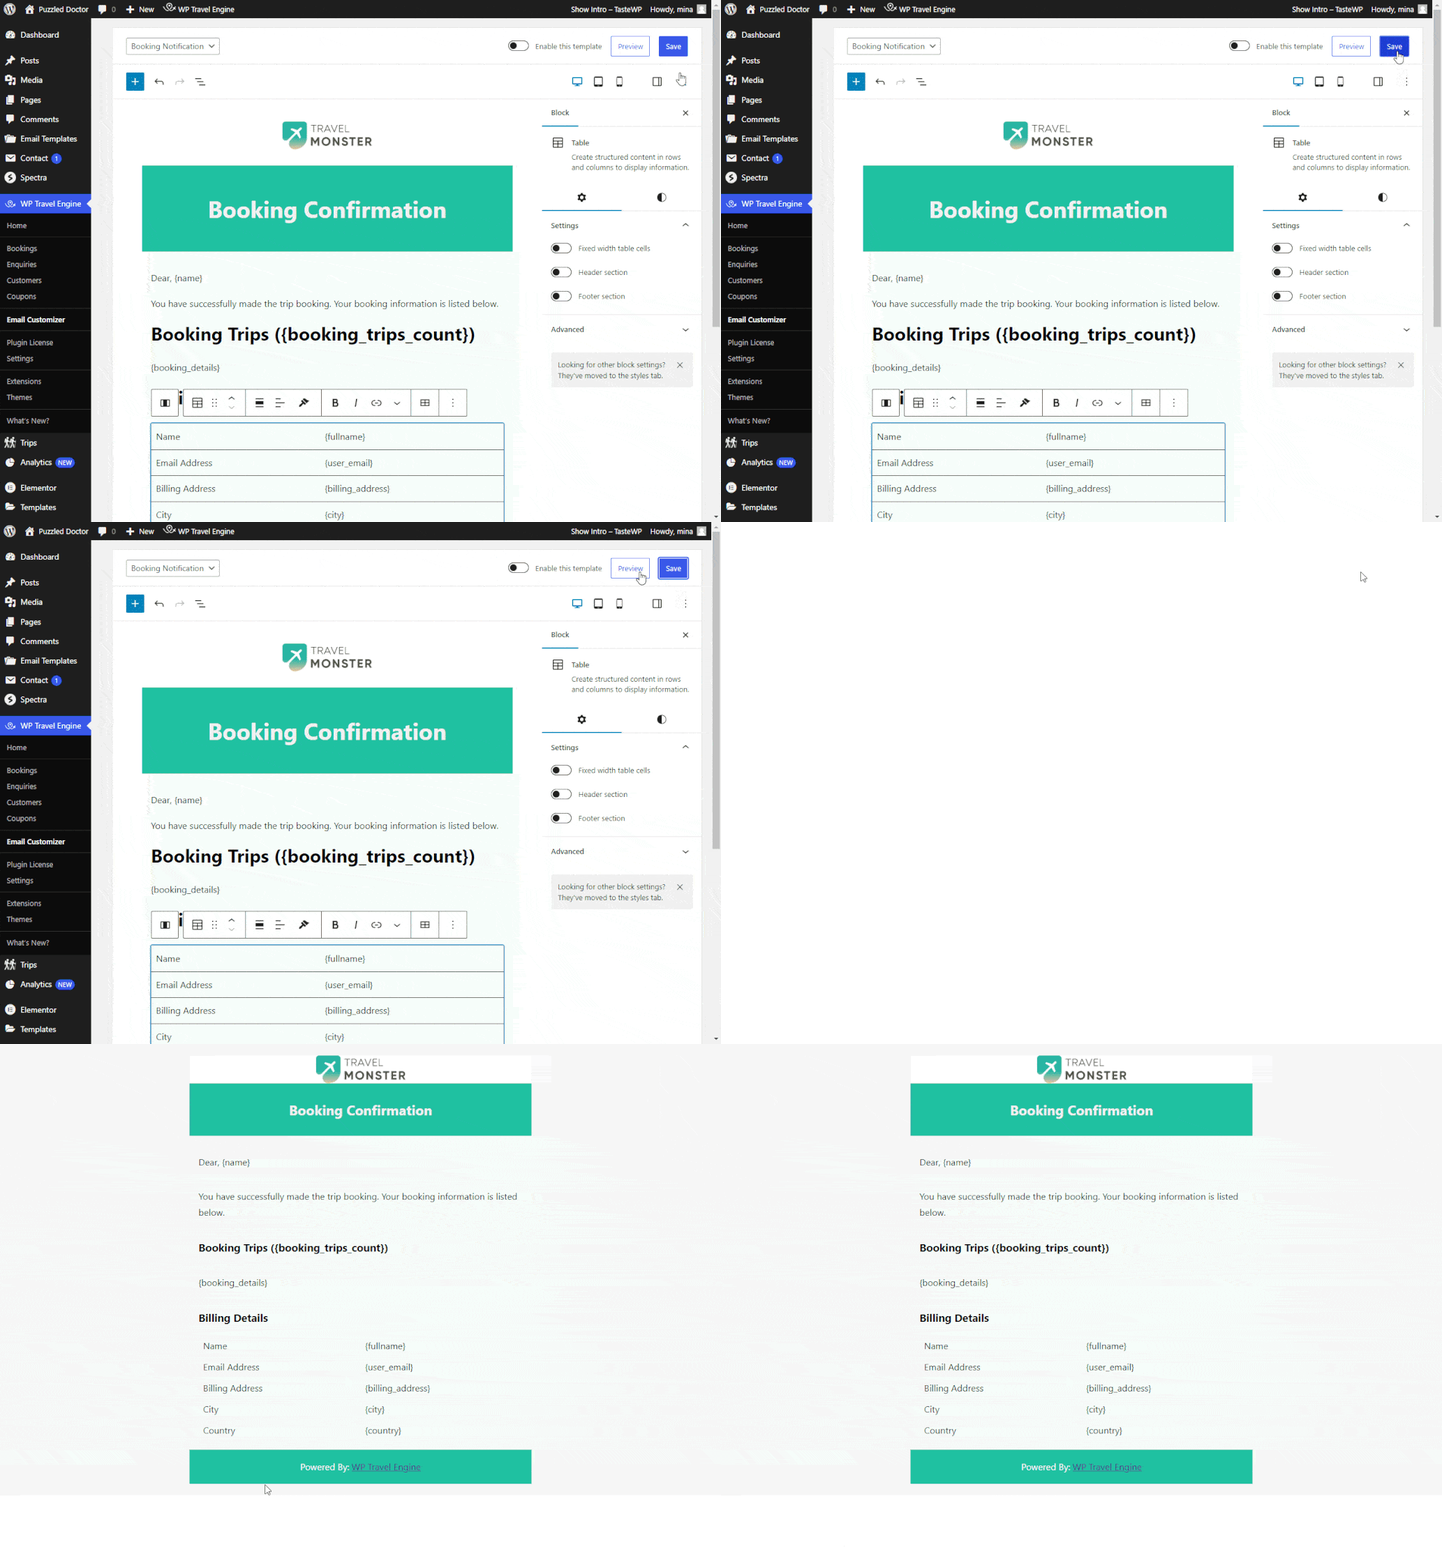
- Layouts: The default email template is divided into three sections: Header, Body, and Footer. You can change the layout of each section by dragging and dropping the blocks.
- Color: You can change the color of different sections and text of your email template to match your company’s identity.
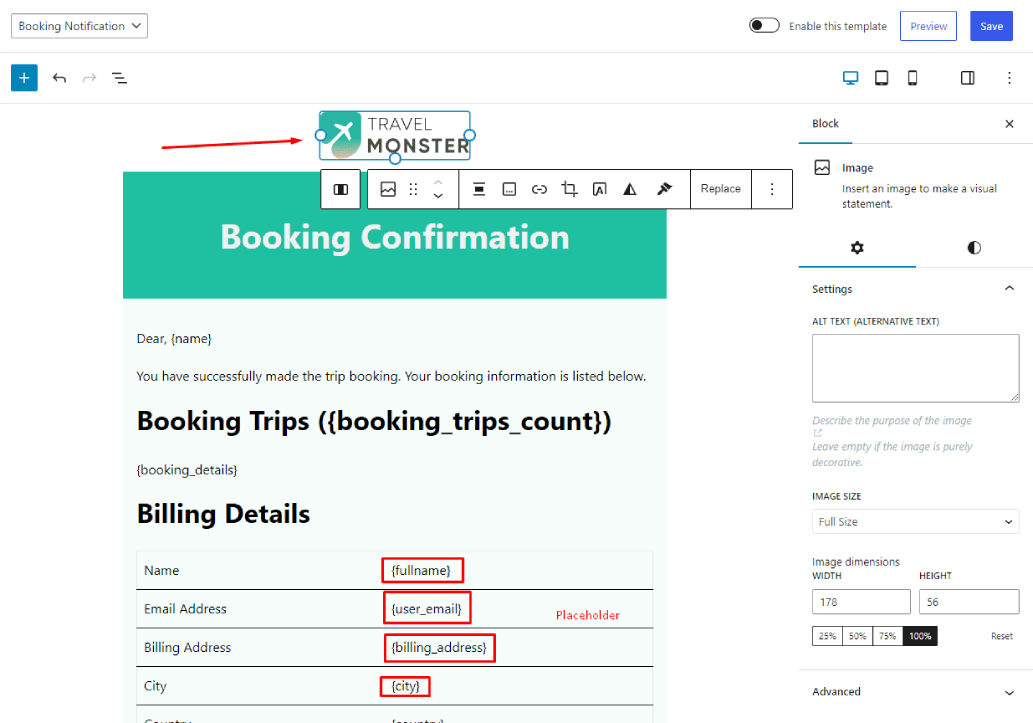
- Image: You can add images like your company’s logo to personalize your email template.
- Placeholders: You have the option to add dynamic placeholders like customer names, booking details, payment information, and other relevant data for personalized content.
Preview: Save the email template and instantly preview your customized email in a new screen.
Dynamic Placeholders #
Dynamic placeholders are used to add dynamic content to your email templates. The following placeholders are available in WP Travel Engine:
- {trip_url} The trip URL for each booked trip
- {name} The buyer’s first name
- {fullname} The buyer’s full name, first and last
- {user_email} The buyer’s email address
- {billing_address} The buyer’s billing address
- {city} The buyer’s city
- {country} The buyer’s country
- {tdate} The starting date of the trip
- {date} The trip booking date
- {traveler} The total number of traveler(s)
- {child-traveler} The total number of child traveler(s)
- {tprice} The trip price
- {price} The total payment made of the booking
- {total_cost} The total price of the booking
- {due} The due balance
- {sitename} Your site name
- {booking_url} The trip booking link
- {ip_address} The buyer’s IP Address
- {booking_id} The booking order ID
- {bank_details} Banks Accounts Details. This tag will be replaced with the bank details and sent to the customer receipt email when the Bank Transfer method has been chosen by the customer.
- {check_payment_instruction} Instructions to make check payment.
- {booking_details} The booking details: Booked trips, Extra Services, Traveller details etc
- {traveler_data} The traveler details: Traveler details and Emergency Contact Details
- {payment_method} Payment Method used to checkout.
Enable/Disable Email Templates #
You can toggle on Enable this template to send your personalized emails to your customers.
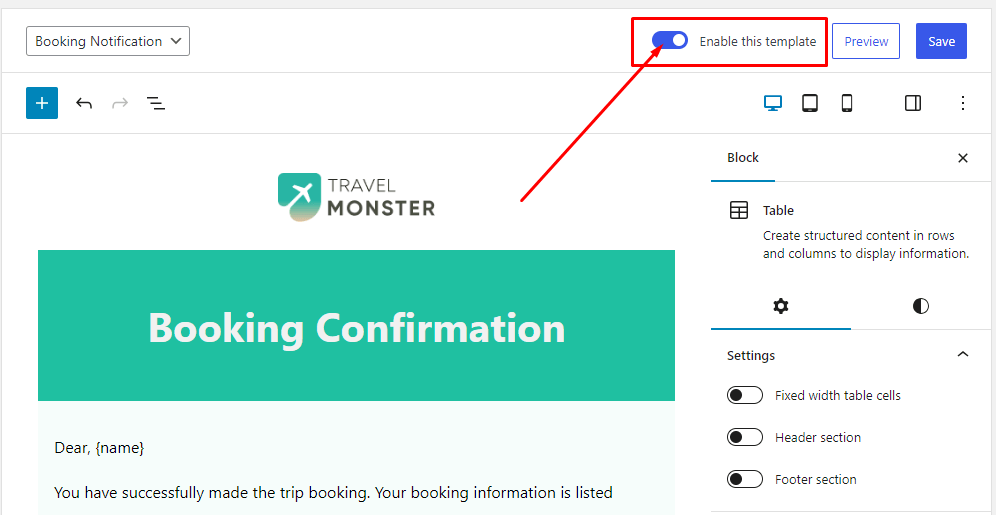
Note: If you choose to disable the template, you will still have the option to customize and save the template as per your preferences. However, your changes will not be applied to the email. Instead, the system will revert to the default email layout.