Introduction #
The Extra Services add-on for WP Travel Engine lets you offer travellers additional options alongside their main trip booking. Instead of just selling a trip package, you can also sell add-ons such as travel insurance, airport pickup, meal upgrades, or equipment rentals.
This feature helps you increase revenue, improve customer satisfaction, and allow travellers to personalise their bookings with optional or required services.
Benefits #
- Create simple or advanced add-ons for your trips
- Offer optional or required services for travellers
- Assign multiple service options under one category (for example, Basic or Standard Insurance)
- Choose different pricing models such as per traveller or per unit
- Show extra services in the booking popup so customers clearly see add-ons before checkout
- Include service details in booking confirmation emails automatically
Prerequisites #
Before using this add-on, make sure:
- You have WP Travel Engine installed and activated on your WordPress site (Version 6.5.0 or more)
- You have installed and activated the Extra Service add-on
- You have added at least one trip
How to Install the Trip Fixed Starting Dates Add-on
You can check the indepth tutorial here:
General Settings for Extra Services #
To configure global settings:
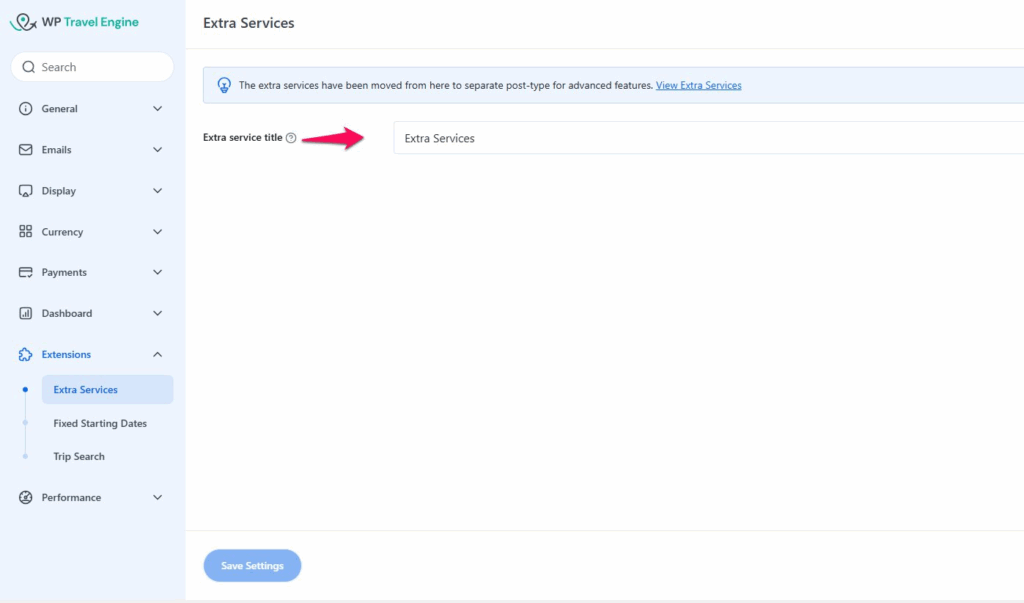
- Go to Dashboard → WP Travel Engine → Settings → Extensions → Extra Services
- Add a title for the extra services section. This title will appear above the list of services in the booking pop-up.
- Example: “Additional Services” or “Trip Add-ons”
- Example: “Additional Services” or “Trip Add-ons”
Creating Extra Services #
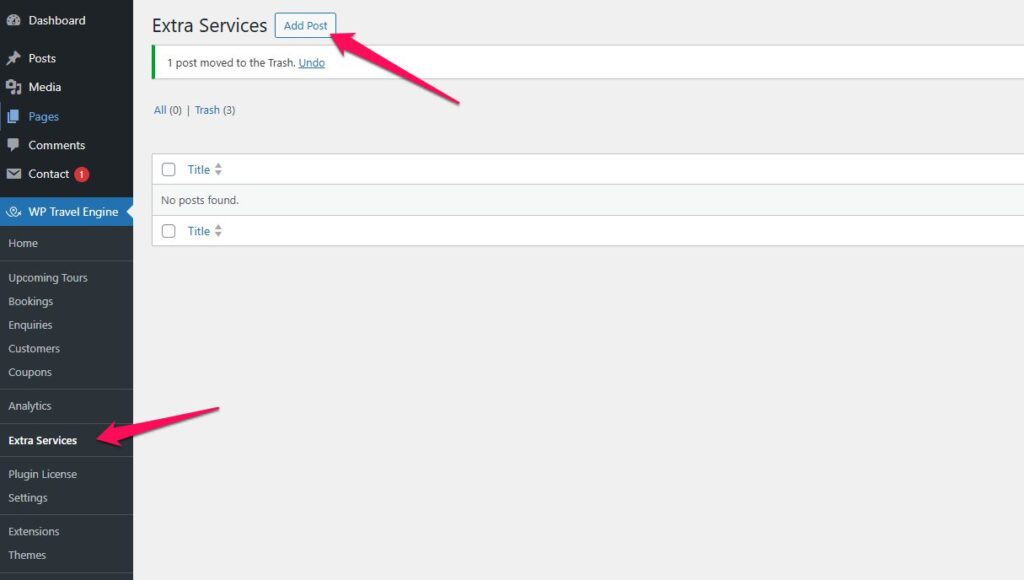
- Go to Dashboard → WP Travel Engine → Extra Services
- Click Add Post to create a new service
- Enter the name of the service (for example: Travel Insurance, Airport Pickup and Drop-off)
- Configure the settings below.
Service Settings Options #
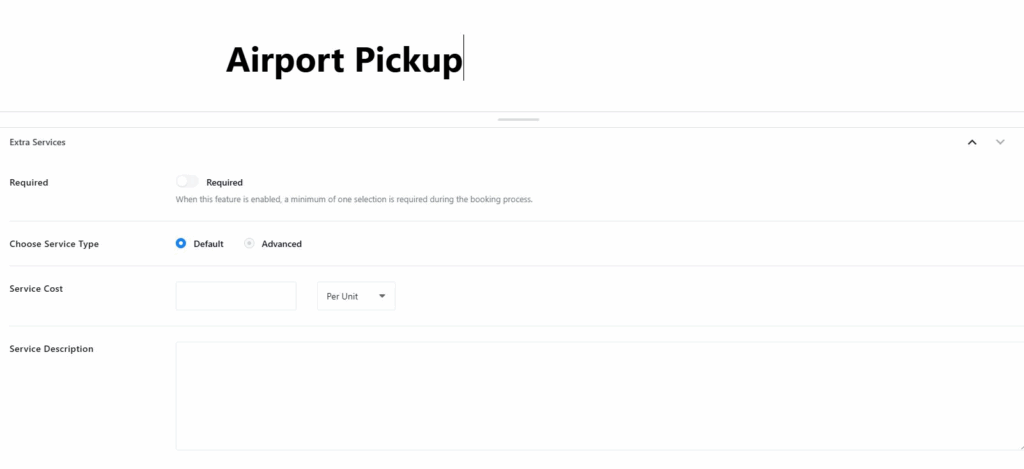
- Required: Turn this on if the service must be selected (example: mandatory insurance).
- Choose Service Type:
- Default: The Default Service option allows you to create a simple extra service with a single price and a short description. This type is best suited for services that do not require multiple variations. Once selected, you will see the following settings:
Service Cost:
Enter the price of the service here. You can define the cost based on one of two pricing models:
- Per Unit – A fixed price that does not change with the number of travelers.
- Example: $50 for airport pickup (applies to the whole booking).
- Per Traveler – The price is multiplied by the number of travelers.
- Example: $15 per traveler for a lunch package.
Choose the pricing model that best fits your service.
- Description: Provide a short description of the service to explain what it covers. Example: “Includes hotel pickup and drop-off within the city limits.”
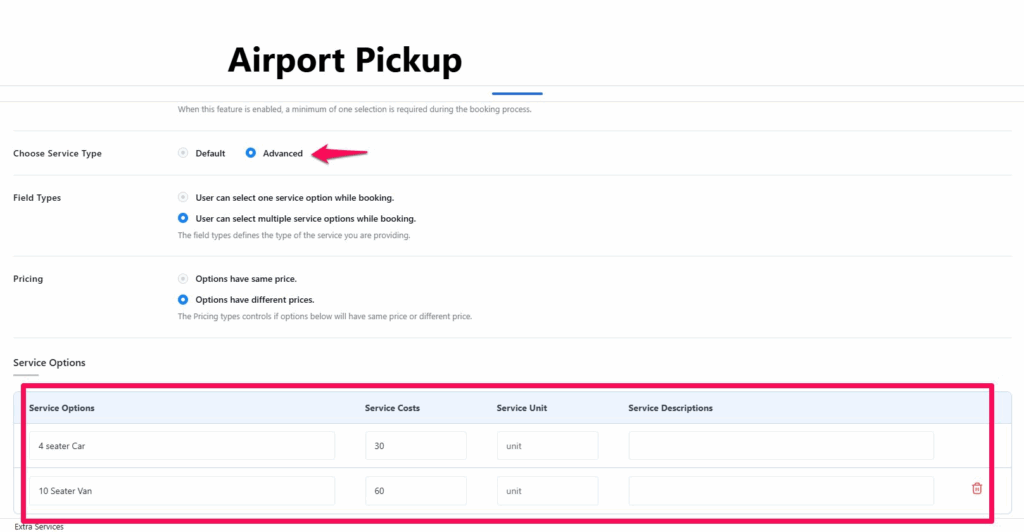
- Advanced:
The Advanced Service option allows you to create a complex extra service with multiple variations. Each option can have its own price, description, and service unit, giving customers the flexibility to choose the option that best suits them.
Once you select this type, the following settings will be available:
- Field Type (for Advanced services):
- Single selection: Only one option can be selected.
- Multiple selection: Customers can choose more than one.
- Pricing: Decide how you want to manage the pricing for the service options:
- Same Price for All Options – Every option will share the same cost.
- Individual Pricing – Each option can have a different price.
- Add Service Options: You can add multiple service options, and for each option, you will need to define:
- Service Name – The name of the option (e.g., Basic Coverage, Standard Coverage).
- Cost – The price of the service option.
- Service Unit – Pricing model (per unit or per traveler).
- Description – A short explanation of what the option includes. Repeat the same process to add another sub-item by clicking on Add Service Option.
Example of Service Variations
- Airport Pickup:
- Option 1: 4 Seater Car – $30
- Option 2: 10 Seater Van – $60
- Porter/Guides:
- Option 1: Local Guide – $50
- Option 2: Expert Mountain Guide – $100
- Local Food or Dining Experiences:
- Option 1: Street Food Tour – $20
- Option 2: Fine Dining Experience – $100
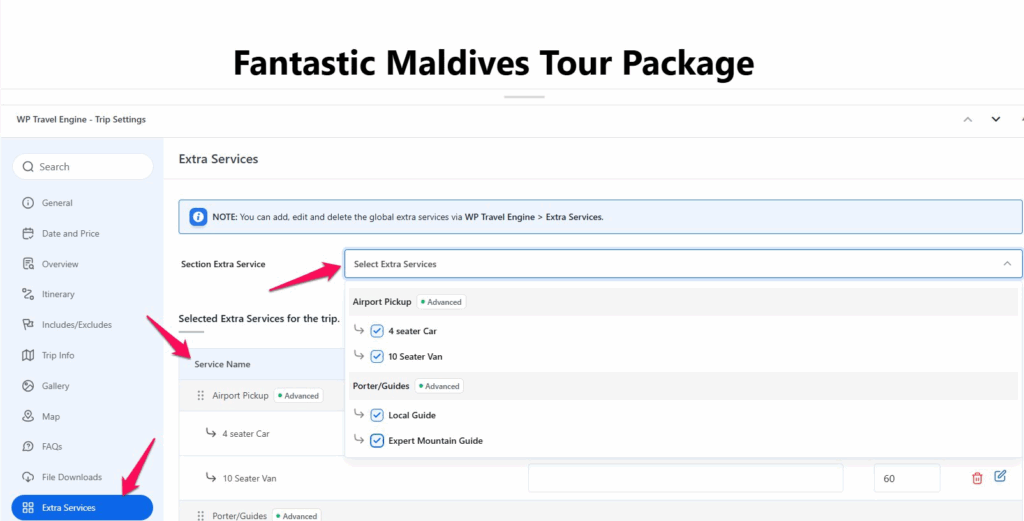
Assigning Extra Services to a Trip #
- Go to Dashboard → Trips → Edit Trip
- Click on the Extra Services tab
- Select the services you want to assign from the dropdown list. You can also customize the service description or price for each trip. This allows you to set a different price than the original cost defined in the extra service settings.
- Save changes
How Extra Services Display in Booking #
When a traveller clicks Book Now, the extra services will appear in the booking pop-up.
- Default services appear as single add-ons with a set price
- Advanced services appear as grouped options under one service
- Travellers can adjust the quantity of each service before checkout
- The cost of selected services is automatically added to the booking total
Troubleshooting #
1. Extra Service not showing in checkout
- Make sure you have assigned the service to the trip in the Extra Services tab.
- Check that the service is published and not in draft.
2. Price is not displaying correctly
- Verify whether you selected Per Unit or Per Traveller pricing.
- For advanced services, check that you added a price for each option.
3. Required service not working
- Ensure the required toggle is enabled in the service settings.
FAQs #
Can I assign the same service to multiple trips? #
Yes. Services are created globally and can be assigned to as many trips as you like.
What is the difference between Per Unit and Per Traveller pricing? #
Per Unit means the price does not change, no matter how many travellers are booked. Per Traveller multiplies the price by the number of travellers.
Can I make some services optional and others required? #
Yes. Each service has its own required toggle. For example, Travel Insurance can be mandatory, but Airport Pickup can remain optional.
Will extra services appear in booking confirmation emails? #
Yes. The add-on integrates with WP Travel Engine’s email system. Extra services selected by the traveller will be included in the booking and payment confirmation emails.
Feel free to contact our support team for any other assistance.