Table of Contents
This guide provides step-by-step instructions for setting up Trip Info, which offers essential details about the trip, including destinations, schedules, accommodations, and activities. It helps participants or team members understand the logistics and objectives of the trip.
To access Trip Info Settings, navigate to Dashboard > Settings > General > Trip Settings > Trip Info.

For predefined Trip Info, you can rename the trip, select an icon, and enable or disable it as needed. However, you cannot delete the predefined Trip Info. Custom Trip Info, on the other hand, can be deleted as required.
Please refer to this documentation regarding how to assign Trip facts on an individual Trip:
How to add a Custom Trip Info? #
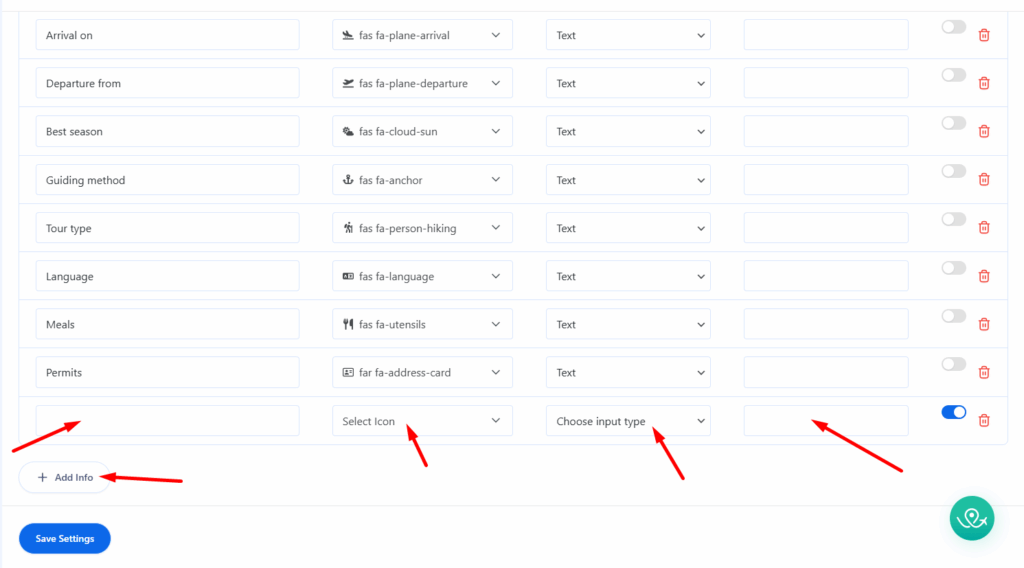
- Click on “Add Info” to add a custom Trip Info
- Enter the Name of the Trip Info(e.g., “Permits”), select an appropriate Icon and input type, and use the toggle switch to enable or disable. To remove the Trip Info, click on the Delete icon.
- You can sort the order of the trip info by dragging upward or downward.
- Click Save Changes to save your changes.