Ottokit is a powerful automation and form response tool designed to streamline and centralize data collected from your website. When integrated with WP Travel Engine, it helps automate form submissions like trip enquiries, booking responses, and customer input, saving time and reducing manual data entry.
Prerequisites #
Before setting up the OttoKit integration with WP Travel Engine, make sure you have the following:
- A WordPress website with WP Travel Engine installed and configured.
- An OttoKit account.
Benefits of OttoKit Integration with WP Travel Engine #
- Automated Form Collection: Collect data from trip enquiry forms, adult/child fields, and location preferences directly in OttoKit.
- Streamlined Automation: Use SureTriggers to map and trigger actions automatically without manual steps.
- Centralized Contact Records: Organize user form data in OttoKit for segmentation and marketing.
- Improved Data Insights: Analyze collected data to customize your packages, marketing efforts, and support.
Step-by-Step Integration Guide #
You can check this step-by-step, in-depth tutorial for integrating the Ottokit.
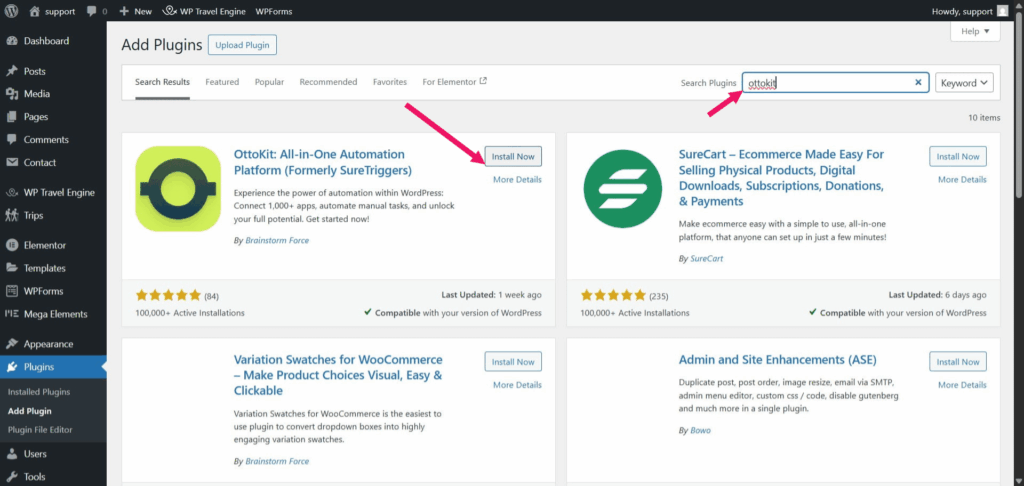
Step 1: Install the OttoKit Plugin on the WordPress Site #
- Log in to your WordPress admin panel.
- Go to Plugins > Add New, search for OttoKit, and click Install.
- After installation, click Activate, then click Get Started from the plugin’s settings.
- You’ll be redirected to the OttoKit login screen. Log in using your OttoKit account credentials.
- Once logged in, you’ll be directed to your OttoKit Dashboard, where you can create a workflow.
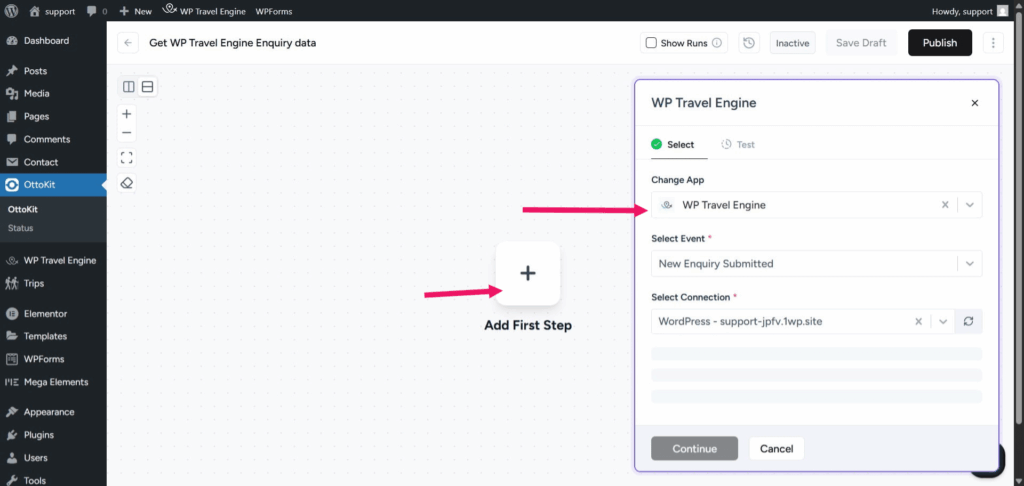
Step 2: Create a New Workflow #
- In the OttoKit dashboard, click “Create Workflow.”
- You’ll be asked to select a Trigger App, search for WP Travel Engine.
- Under trigger events, select “New Enquiry Submitted.”
- Next, choose the WordPress site where the WP Travel Engine plugin is installed.
- Click Connect to link OttoKit to your WordPress site.
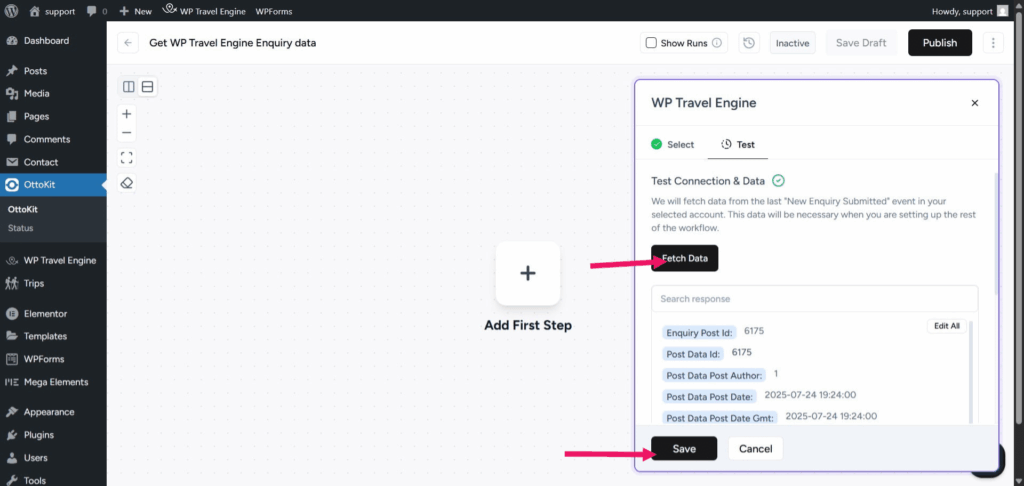
Step 3: Test and Fetch Sample Data #
- Click on the Test tab in OttoKit.
- Submit a real or dummy enquiry form from your website.
- Click Fetch Data to pull in the submitted information.
- If everything looks good, click Save.
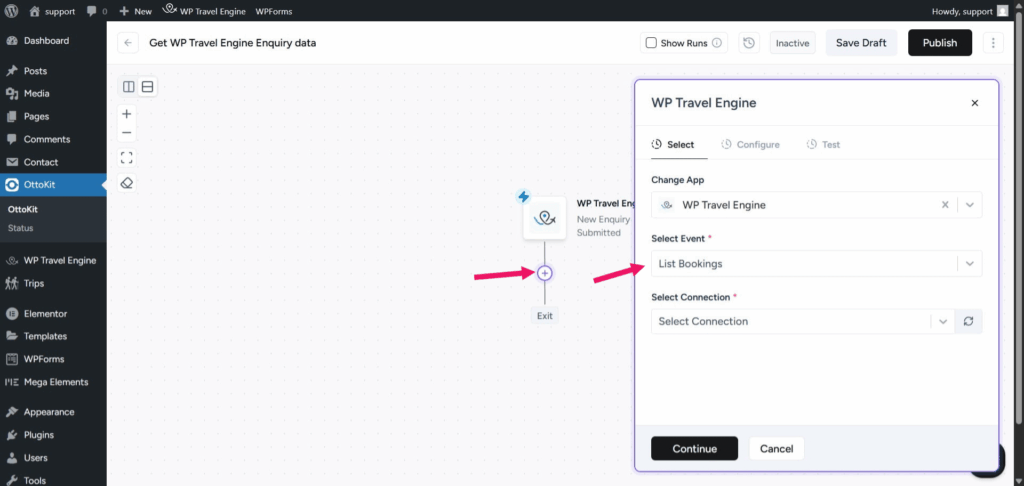
Step 4: Add Additional Events (Optional) #
You can repeat similar steps to add more triggers using WP Travel Engine. Some examples:
- Trip Booked
- Booking Status Updated
- Trip Viewed
- Click the “+” icon in the workflow builder to add another app.
- Again, select WP Travel Engine and choose a new trigger event.
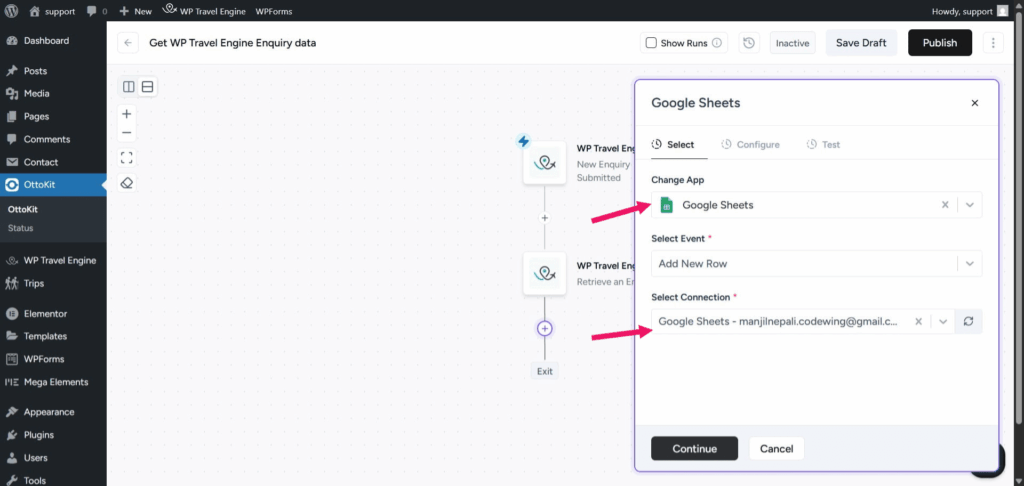
Step 5: Add another app as an Action(Google Sheet Example) #
- Click the “+” icon to add a new Action Step.
- Choose the App where you want to store the data. In this case, we are using Google Sheets as an example.
- Under the action dropdown, select “Add New Row.”
- Click Create New Connection to connect your Google account.
- Authorize access when prompted.
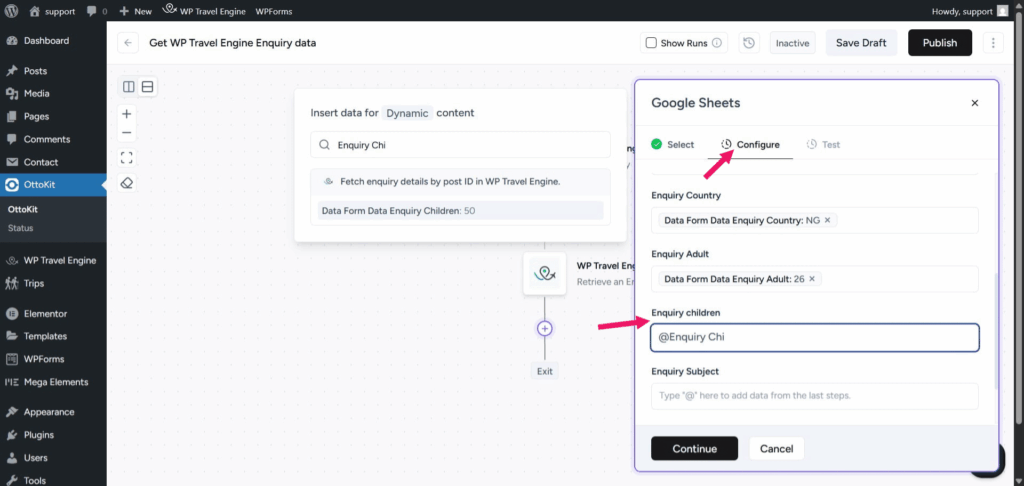
Step 6: Configure Google Sheets Action #
- Under the Configure tab, choose the spreadsheet where you want to store enquiry data.
- Select the sheet (tab) within that spreadsheet.
- OttoKit will now display a list of all the column headers in that sheet.
- Map the OttoKit fields to your sheet columns.
- Once you’ve mapped all the required fields, click Save.
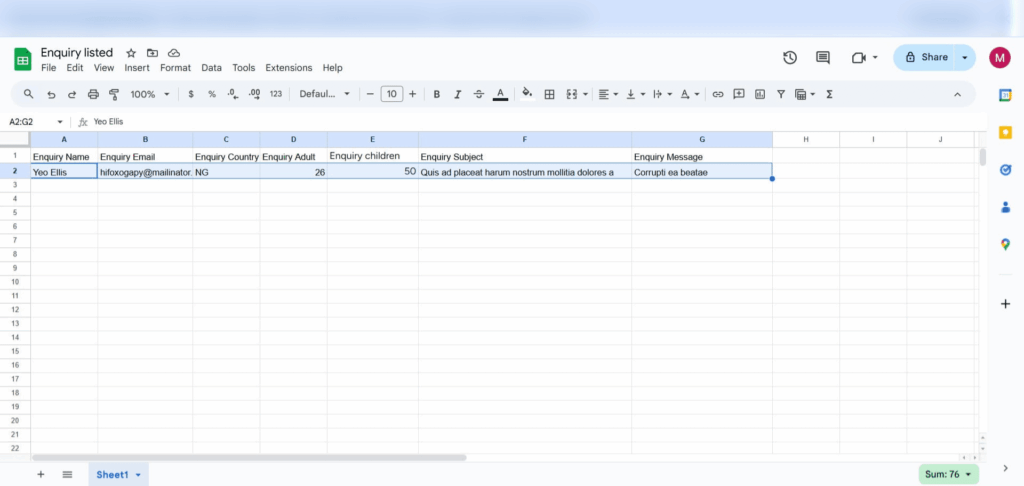
Step 7: Test the Entire Workflow #
- Go to your site and fill out the Enquiry Form as a test.
- Submit the form with test data (e.g., Name: Sam, Country: Nepal, Adults: 2, Children: 1).
- Check your connected Google Sheet or any other app; a new row should be added with all the data.
Troubleshooting #
- OttoKit is not showing in app list: Make sure your OttoKit account is connected in Ottokit > App Connections.
- Form fields are not showing in the mapping area: Ensure you’ve submitted a test form entry and clicked “Fetch Data” from Ottokit.
- Test data not appearing: Try resubmitting your form and refreshing Ottokit. Double-check that the correct form is selected in the trigger.
Frequently Asked Questions #
Is OttoKit integration free? #
OttoKit and SureTriggers both offer free plans, but premium features like WhatsApp automation may require upgrades.
Do I need to code to connect WP Travel Engine to OttoKit? #
: No. Ottokit provides a no-code automation interface.
Can I use this integration for multiple trips or forms? #
Yes. You can create separate workflows for each form or trip type.
Is real-time data sync supported? #
Yes. As soon as a form is submitted, SureTriggers passes the data to OttoKit instantly.
Can I use WhatsApp automation based on form responses? #
Yes. OttoKit supports WhatsApp messaging flows which can be triggered based on incoming data like destination or number of travelers.