WP Fusion is a powerful WordPress plugin that connects your website with your CRM (Customer Relationship Management) system. It enables you to automate user management, marketing, and email campaigns by syncing your website data, such as purchases, sign-ups, and user activity, with your CRM in real-time.
WP Fusion supports integration with over 50+ popular CRMs, including Brevo, HubSpot, ActiveCampaign, MailerLite, Keap, Salesforce, Drip, and many more, providing you with full flexibility to work with the platform of your choice.
How WP Fusion Integration Benefits WP Travel Engine Sites #
- Automatically tag users based on actions they take, such as booking a trip, submitting an inquiry, or abandoning checkout.
- Add or remove users from specific email lists depending on the trip they purchase or the stage of their journey.
- Instantly trigger email campaigns, reminders, or follow-ups using webhooks when a user books a trip or completes a form.
- Easily group and segment customers by trip type, or booking status directly inside your CRM.
- Send targeted emails, offers, or retargeting campaigns based on the specific trips users have viewed or booked.
Prerequisites #
- WP Travel Engine (latest version) installed & activated.
- WP Fusion Pro plugin installed & activated
- A connected CRM (ActiveCampaign, FluentCRM, HubSpot,Brevo etc.)
ℹ️ You can purchase the WP Fusion Pro from here.
How to Integrate WP Fusion with WP Travel Engine #
Watch the step-by-step interactive guide below to set up WP Fusion with your travel site.
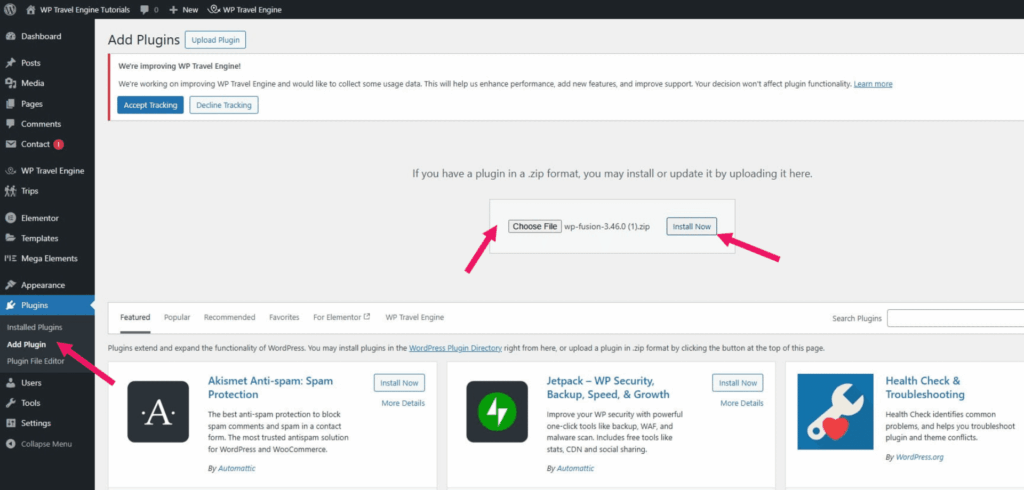
1. Install WP Fusion Pro #
- Go to your WordPress dashboard.
- Navigate to Plugins > Add New.
- Upload and install the WP Fusion Pro ZIP file.
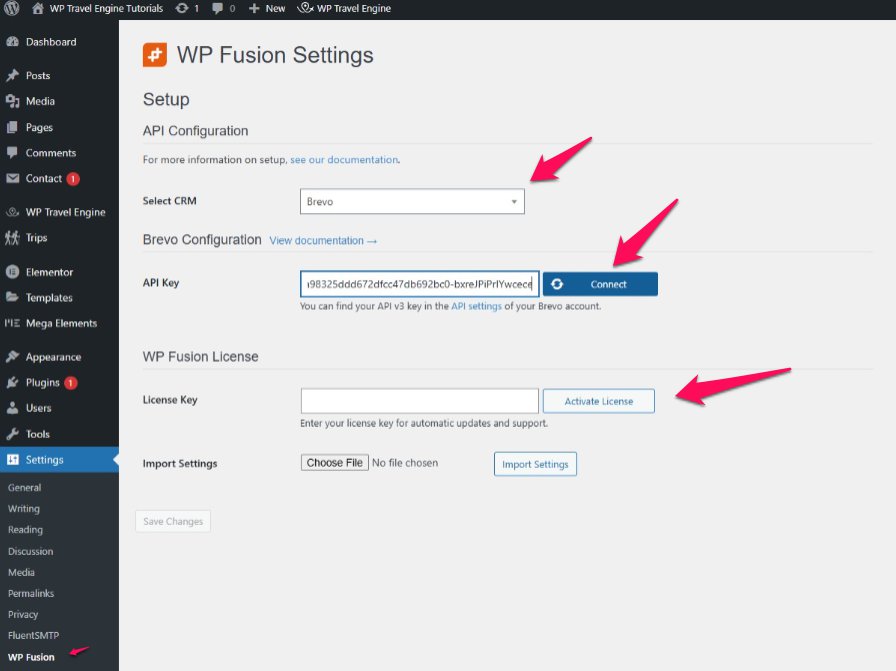
2. Connect WP Fusion with Your CRM #
- Go to Settings > WP Fusion.
- Click on “Select your CRM” and choose any CRM from the list that WP Fusion supports. WP Fusion is compatible with over 50 CRMs, so you can select the one you’re already using or prefer.
- Add the API Key from your CRM account.
- Click Save Changes.
You can use any other CRM of your choice. You can check the list of CRM compatible with the plugin here.
3. Select the Contact List of Your CRM in WP Fusion #
In WP Fusion, selecting a contact list is an essential step to ensure that the data from your WP Travel Engine site, like trip bookings or customer inquiries, is sent to the right place in your CRM.
A contact list is a group of contacts (users, leads, or customers) inside your CRM. You’ll find some default contact lists already available in your CRM, which you can use as they are or rename them to fit your needs. The General List captures overall site activity, such as all trip bookings, and stores the contact data in a central list within your CRM.
Please follow the steps below to select the General Contact List:
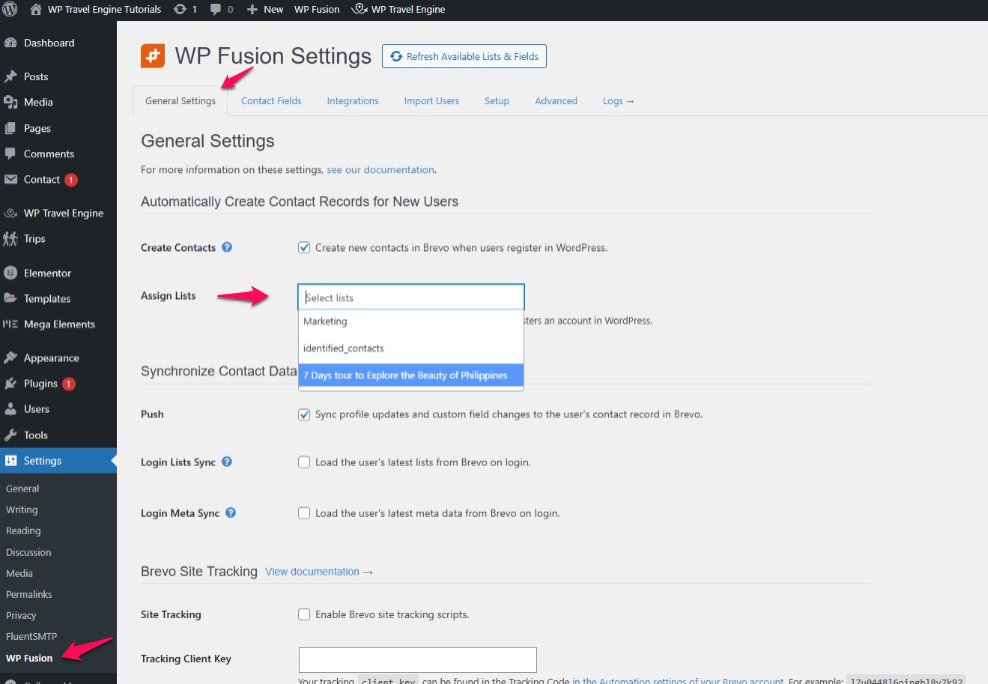
- Under WP Fusion > General Settings, select the list where new contacts should be added.
- Click the Refresh button to load the available contact lists from your selected CRM.
- Once the lists are updated, click the Save Changes button to apply the settings.
4. Assign Lists per Trip #
You can create multiple custom contact lists based on your specific needs, for example, a separate list for each trip.
Organizing contacts by trip allows you to collect detailed booking data, segment your audience effectively, and run targeted marketing campaigns customized to each destination or package. This enhances communication and improves customer engagement.
Steps to Assign Contact Lists Per Trip:
- Go to Trips > All Trips in your WordPress dashboard.
- Edit the trip you want to configure.
- Scroll down to the WP Fusion settings section.
- Under Apply List, select the contact list(s) you want this trip to sync with.
- If you’ve created multiple lists for different trips, you can assign more than one list.
- When a user books this trip, their details will be added to all selected lists.
- Click Save to apply the changes.

5. How to Test the Integration #
- Complete a test trip booking on your website by selecting a trip, filling in the required details, and finishing the checkout process as a regular user would.
- Log in to your CRM account (e.g., Brevo, ActiveCampaign, Mailchimp, etc.).
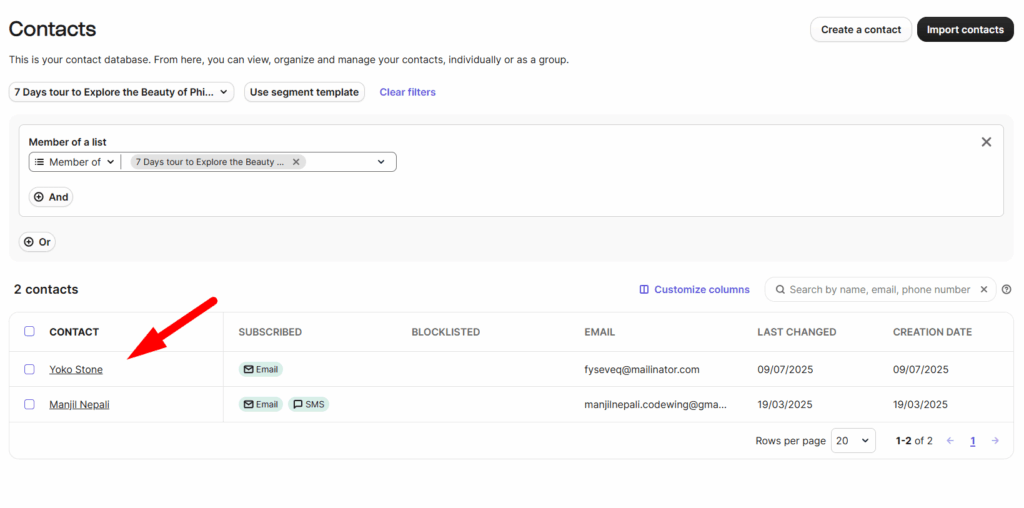
- Go to the Contacts or Audience section of your CRM.
- Open the contact list you assigned under the Apply List option in WP Fusion settings for that specific trip.
- Look for the test contact entry in the list.
- Click on the contact to review synced details, including name, email, and any associated tags or custom fields.
- If you’ve configured any automations or tag-based actions, verify that they have been triggered correctly.
Syncing Customer Data #
WP Fusion allows you to sync data both ways between your WordPress user profiles, WP Travel Engine trip records, and your connected CRM contact records. This ensures that traveler information, booking details, and custom fields remain consistent across your site and CRM.
To set it up, go to Dashboard > Settings > WP Fusion > Contact Fields.
In this section, the left column displays all detected WordPress fields (organized by plugin), while the right column lets you map each field to a corresponding custom field in your CRM. This ensures that your user and contact data stays consistent across platforms.
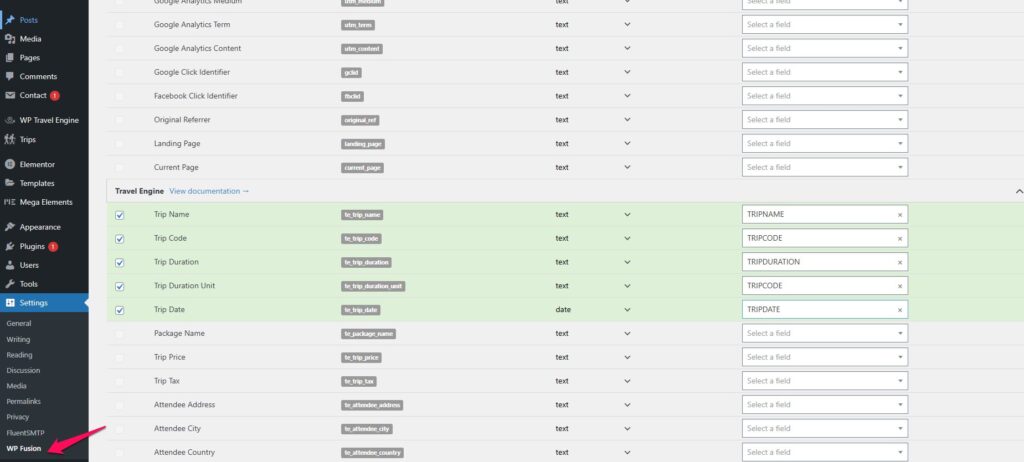
ℹ️ Tip: If a new CRM field isn’t showing, start typing its name. If no match appears, click the “Resynchronize” link in the dropdown to load the latest fields.
| Data Type | Details Sent to CRM |
|---|---|
| Personal Information | -Full Name -Email Address -Phone Number |
| Booking Details | -Trip Name -Booking Date -Trip Price -Booking Status |
| Trip-Level Segmentation | -Tags or List Assignment Based on Booked Trip |
| Custom Fields | -Any extra fields added via WP Fusion mapping or forms |
How to Troubleshoot If You Face Any Issue #
If you encounter issues while integrating WP Fusion with WP Travel Engine, here are some common problems and their solutions:
- Contact Not Added to List
Ensure that the correct API key is entered and saved in WP Fusion settings. If the issue persists, try reconnecting your CRM. - The List Is Not Showing in WP Fusion Settings
Confirm that the contact list is created in your CRM first. Then, go back to WP Fusion and refresh the settings to load the latest lists. - Data Is Syncing Incorrectly
Review the list of assignments for each trip under Trips > Edit Trip > WP Fusion settings. Make sure the correct list is selected. - CRM Not Connecting
Some CRMs may require IP whitelisting, advanced API permissions, or OAuth setup. Refer to your CRM’s documentation or contact their support for connection requirements.
FAQs #
Do I need the Pro version of WP Fusion for this integration? #
Yes, webhook functionality and CRM integrations are part of WP Fusion Pro.
Can I sync different trips to different CRM lists? #
Absolutely. You can assign a unique list to each trip under Trips > Edit Trip > Apply List.
What CRMs are supported? #
WP Fusion supports a number of CRMs, including Brevo, MailerLite, ActiveCampaign, HubSpot, Drip, and more. You can check the list here.
Does this integration require coding? #
No. The entire setup is done via WP Fusion’s UI with dropdowns and list selectors.
Will this work with staged or test environments? #
Yes, but avoid syncing test data with your live CRM. Use staging API keys if supported by your CRM.
Feel free to contact our support team for any other assistance.