- What’s New in the Update?
- Trips Section Settings:
- Sorting and Filtering:
- Block Layout Settings:
- Trip Display Settings:
- Additional Settings:
- Section Settings:
- Cards Layouts:
- Sorting and Filtering:
- Cards Display Settings:
- Additional Settings:
- Section Settings:
- Cards Layouts:
- Sorting and Filtering:
- Cards Display Settings:
- Additional Settings:
- Section Settings:
- Cards Layouts:
- Sorting and Filtering:
- Cards Display Settings:
- Additional Settings:
- Trip Search Section Settings:
- Search Form Display Settings:
We are very excited to announce the release of a new feature update for the WP Travel Engine plugin.
The best thing about this update is that you don’t have to pay even a penny to use this feature on your travel booking website.
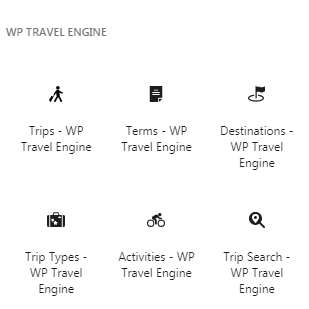
We have added five new blocks under the WP Travel Engine section which you can access via Posts or Pages from your WordPress Dashboard. This exciting update makes it easier for you to display different trip packages on your travel booking website.
Here’s what changed with this new update:
BEFORE
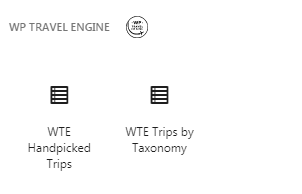
AFTER
What’s New in the Update? #
Now, let’s discuss the five new blocks of the WP Travel Engine plugin added in this new update with their detailed settings:
- Trips – WP Travel Engine
Using this block, you can add different trips to your blog post or page with a single click of the button. You can later showcase these trip packages in an organized way via your travel booking website.
You can also find the following settings for this block which you can configure and make your blog post look more organized:
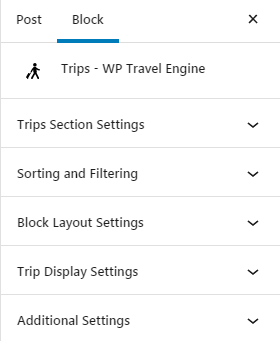
Trips Section Settings: #
Here, you can find two different options:
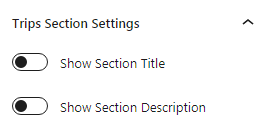
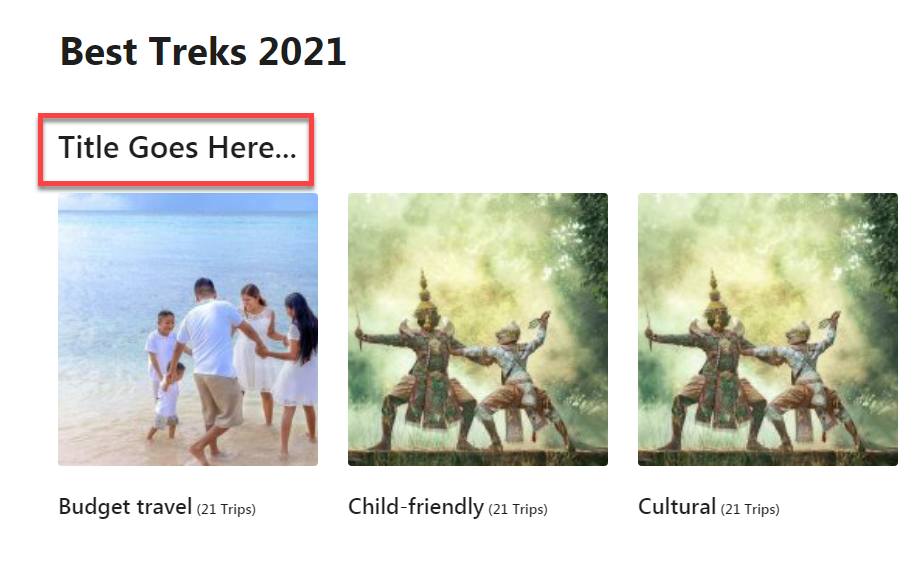
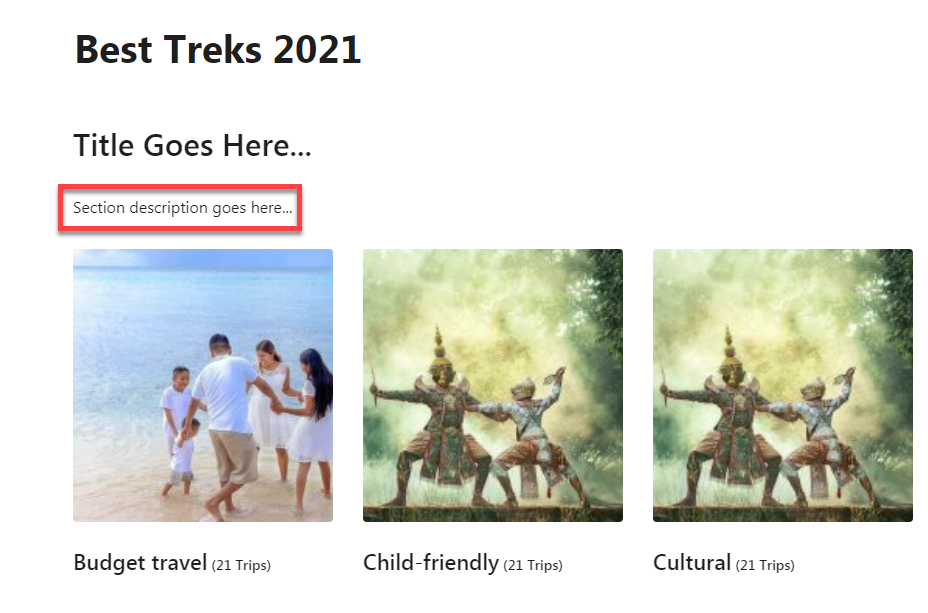
- Show Section Title: Once you enable this setting, you can then specify the title of the trip section.
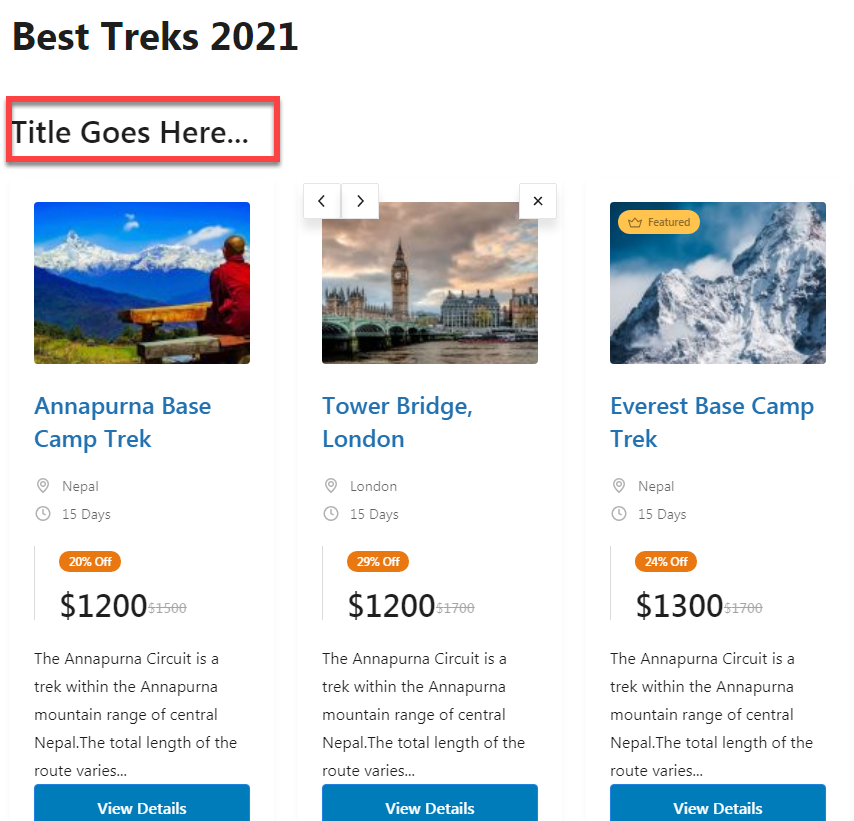
- Show Section Description: Once you enable this setting, you can then specify the description of the trip section.
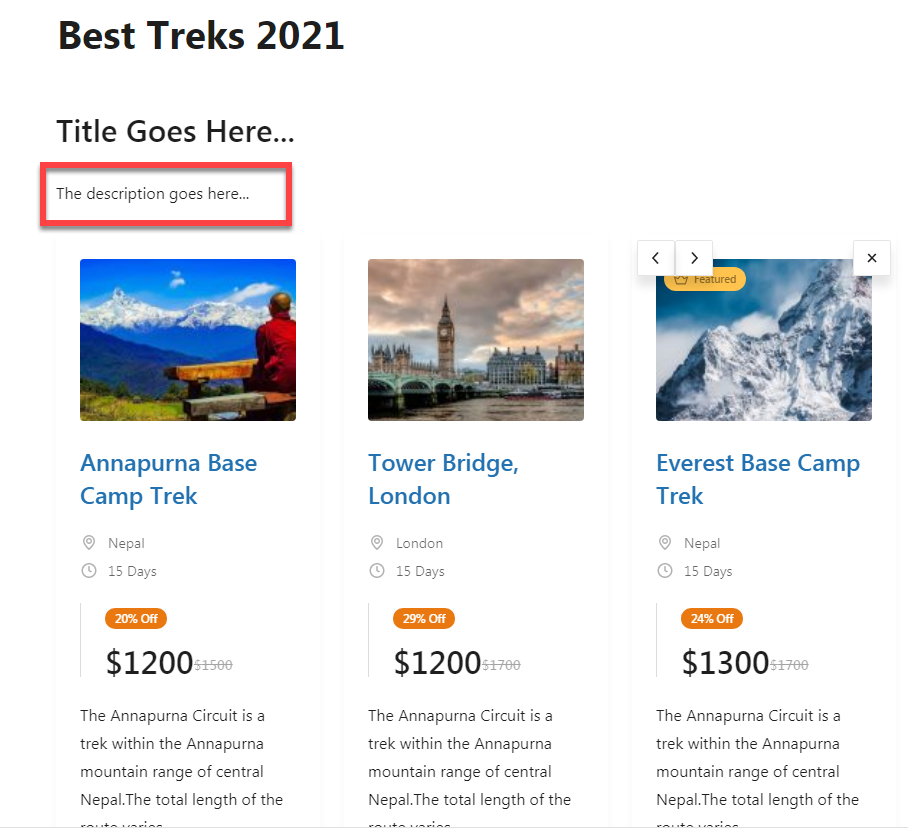
Sorting and Filtering: #
In this section, you can sort and filter the trips that you can show based on different parameters. This section includes the following options:
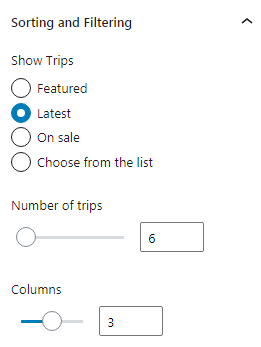
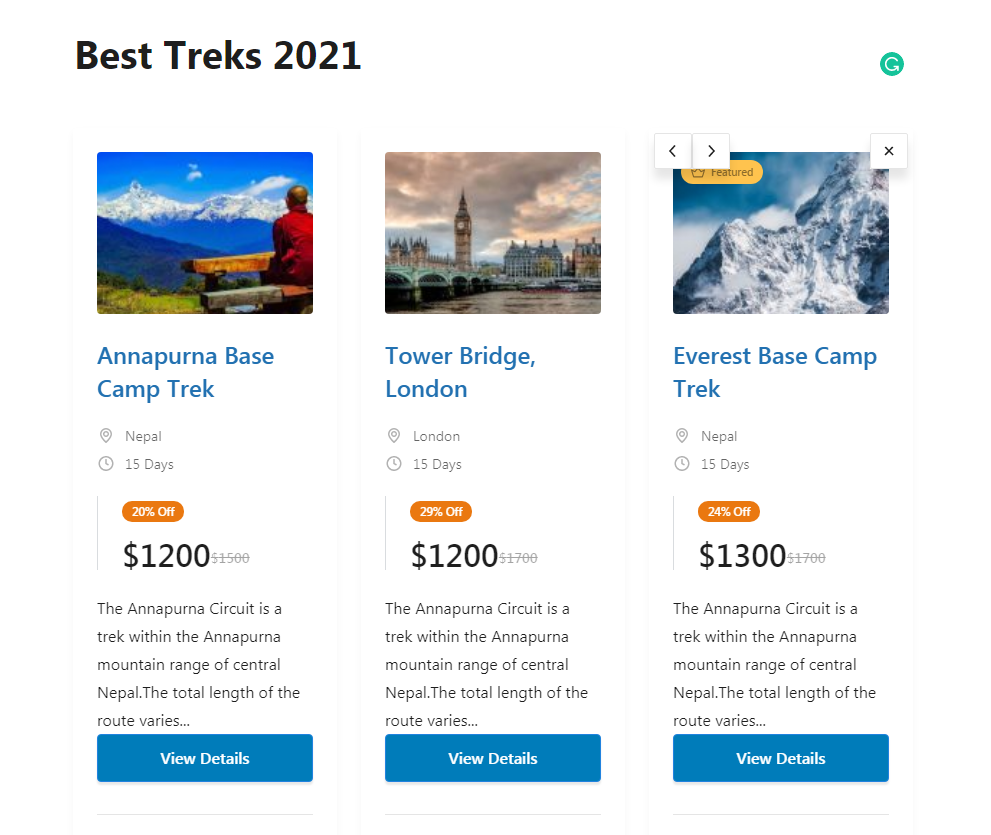
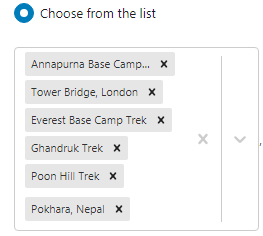
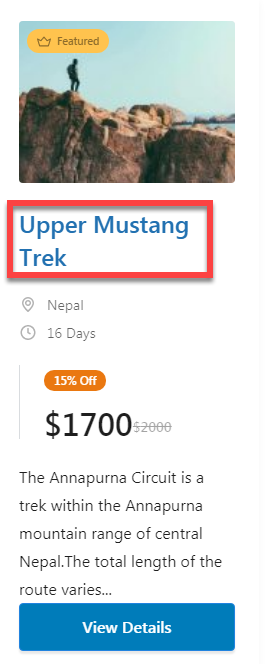
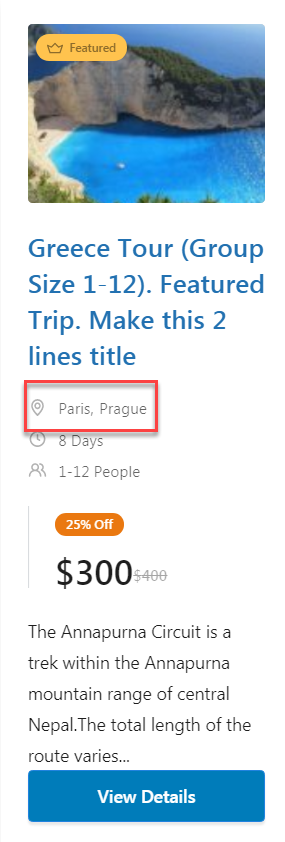
- Show Trips: Here, you can filter the trips based on different labels like Featured, Latest, and On sale. Moreover, you can choose from the list of different trips available as shown below:
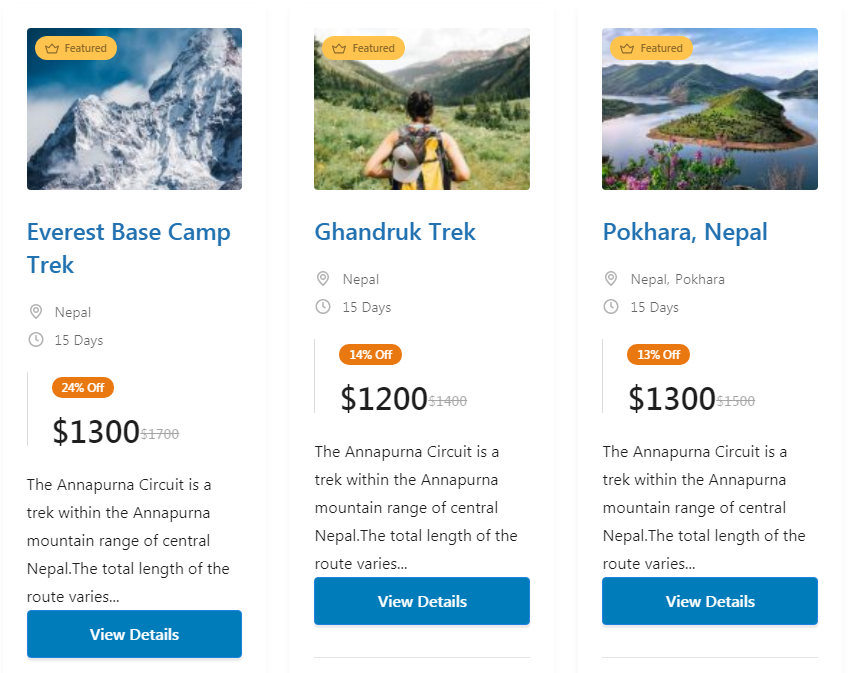
This is how your trips appear if you choose to filter them based on the Featured label:
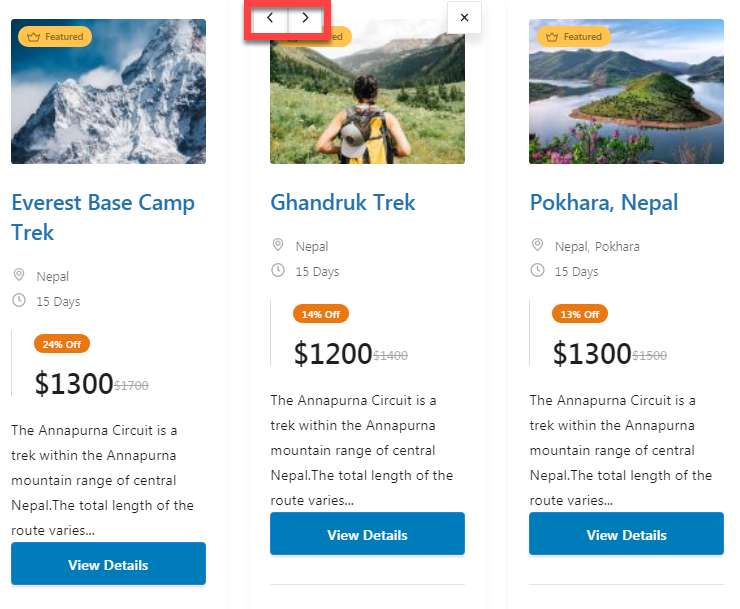
You can even switch the position of your trips by clicking on the right or the left arrow that appears when you select a specific trip. This is also one form of sorting and filtering the available trips.
- Number of trips: You can specify how many trips you want to show on your blog post or page. Note: You can display from 1 to 100 trips using this setting.

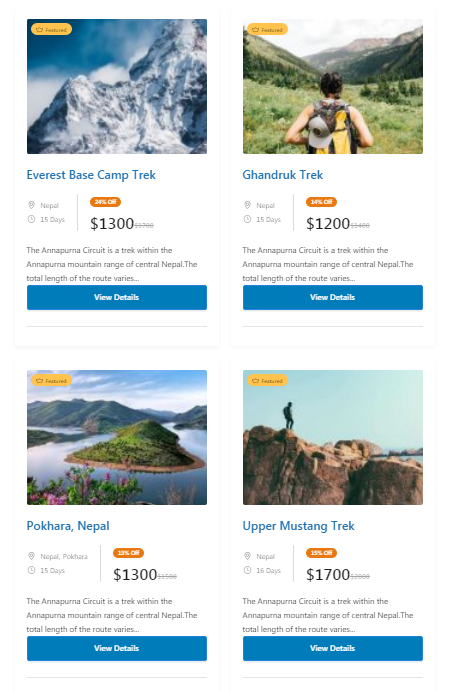
- Columns: You can define the columns to showcase your trip packages in a more subtle way. Having two or three columns is considered better for a proper user experience.
Block Layout Settings: #
In this section, you can choose how you want to display your trip packages on your website. You can either showcase trips on a grid layout or a list layout. These are the options you get in this section:
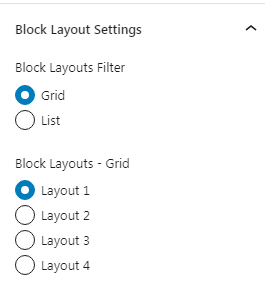
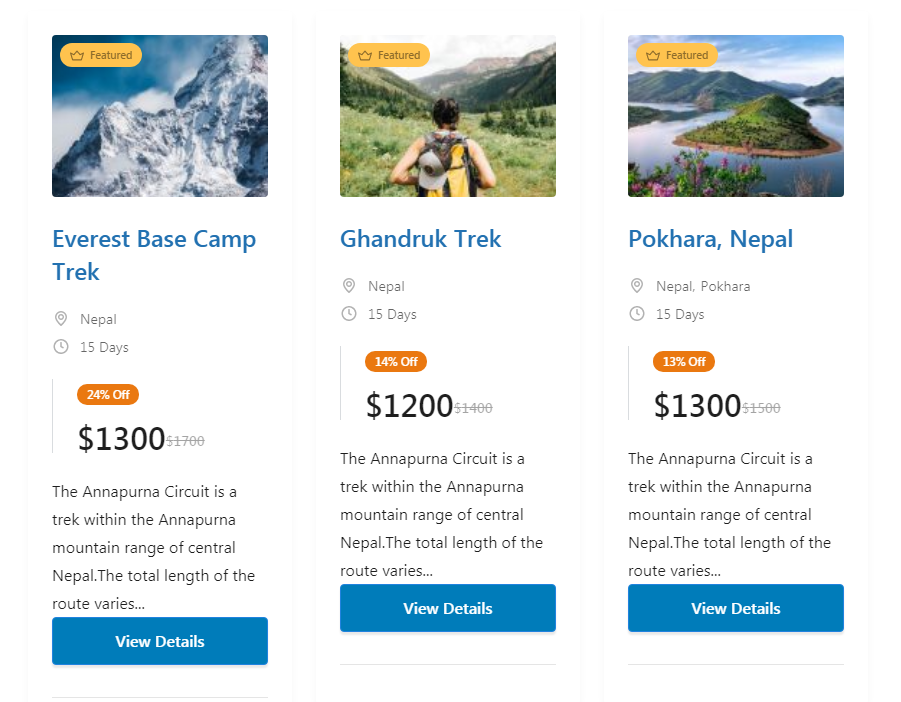
- Block Layouts Filter: In this part, you can choose any of the two different block layouts filters available. If you pick the Grid layout filter, your trips appear like this:
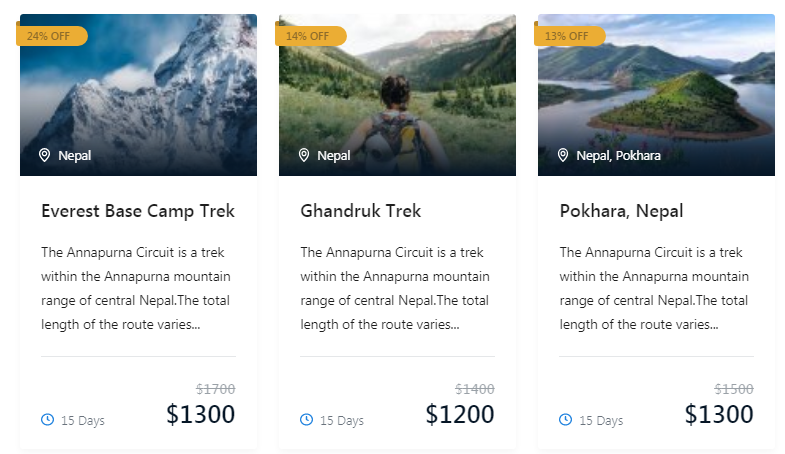
Similarly, if you pick the List layout filter, the trips on your travel booking website appear as:
- Block Layout – Grid/List: Once you pick your favorite layout filter, you can now choose from different layout types. For instance, if you choose Grid layout filter and Layout 1 in the layout style, the trips on your website appear as:

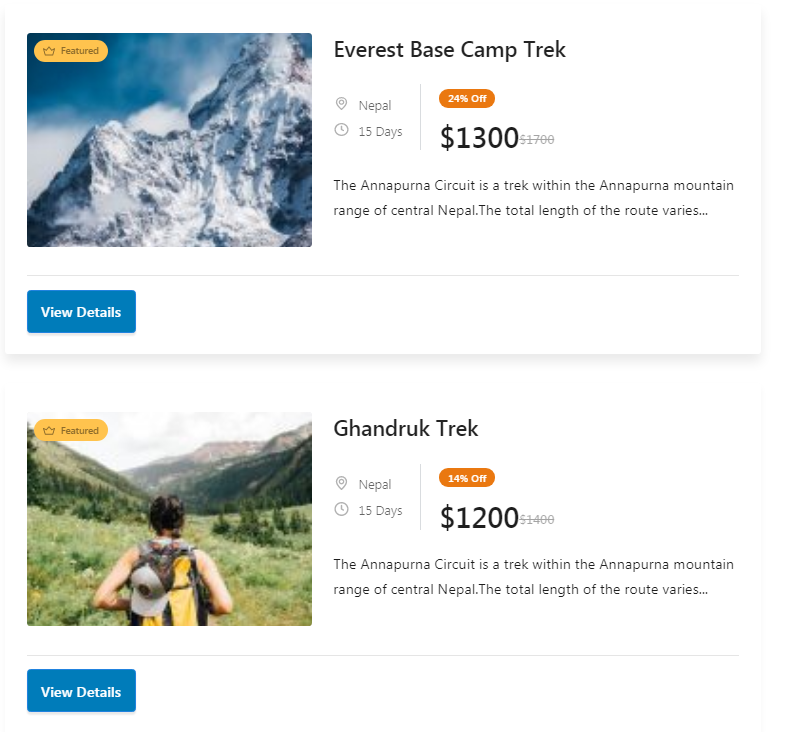
On the other hand, if you choose the Layout 2 option, you can see some changes in how the details are reorganized accordingly as shown below:
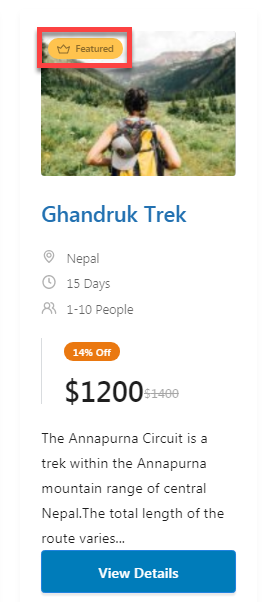
Trip Display Settings: #
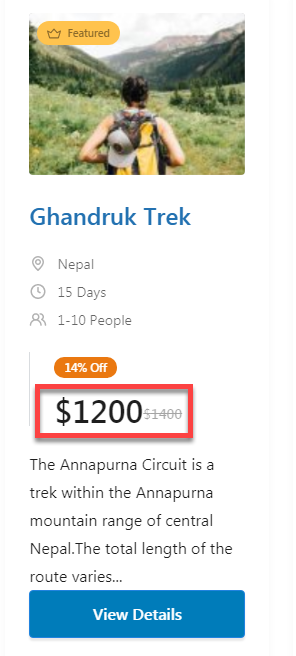
This is one of the most important parts of the whole block setting process. Here, you specify if you want to showcase the featured image, title, price, duration, location, discount, trip available time, reviews of the available trips, and so on. Likewise, you can define the maximum number of words to include in each trip description.
You can find the following options in this setting:
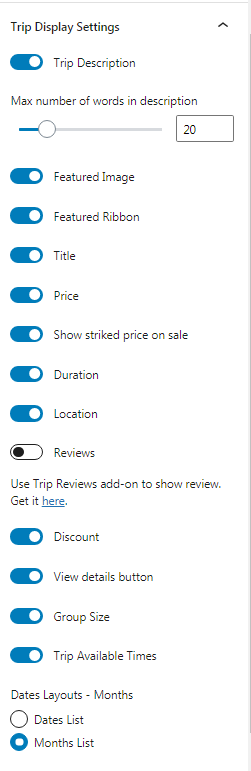
- Trip Description: Once you enable this option, you can define the maximum number of words to be included in the description of each trip.
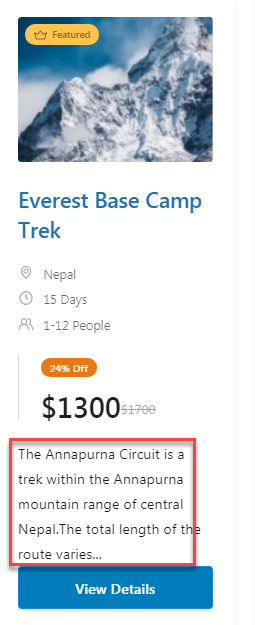
- Featured Image: If you enable this option, you can see the featured image of a trip displayed right above the title of the trip.
- Featured Ribbon: Enabling this will put a ‘Featured’ label on that particular trip.
- Title: You can enable this option and show the main title of the trip package.
- Price: Enabling this option will show the total price of that particular trip package.
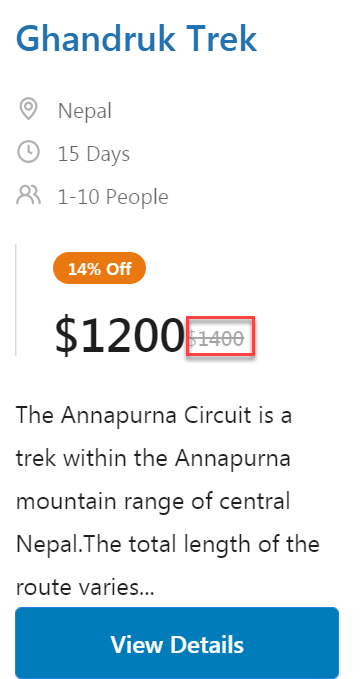
- Show striked price on sale: Once you enable this option, it shows the actual price of the trip which was specified before offering a certain discount.
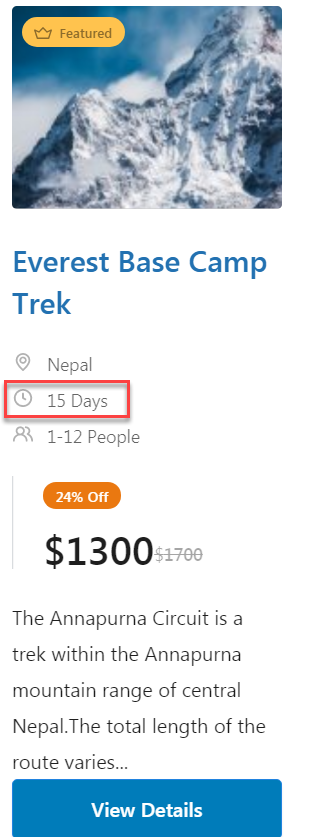
- Duration: You can enable this option to show the total duration of the particular trip.
- Location: You can enable this option to show the location of the particular trip.
- Reviews: Enabling this option allows you to show the reviews of your happy customers for that particular trip.
Note: You should install and activate the Trip Reviews add-on for the WP Travel Engine plugin to show reviews.
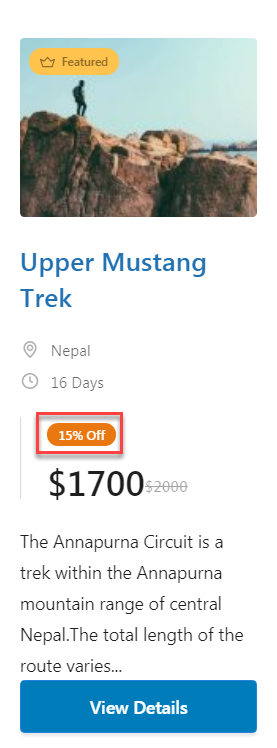
- Discount: Once you enable this option, you can display the proposed discount for a particular trip package.
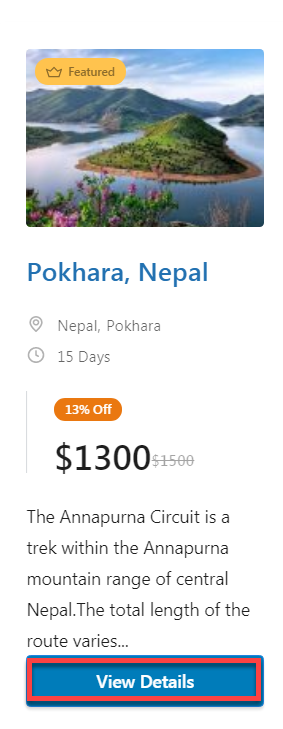
- View details button: This option when enabled allows you to place the View Details button right below your trip’s short description. Your users can later click on the button to read the full description of that particular trip.
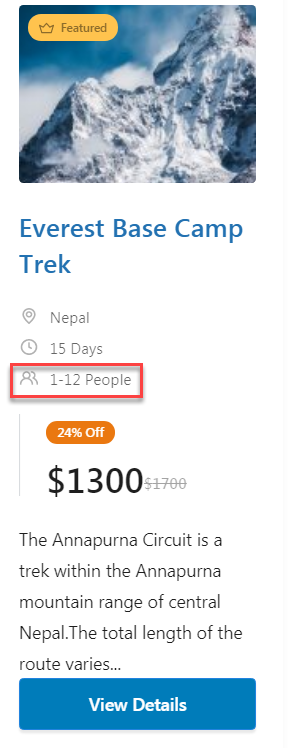
- Group Size: In this section, you can specify the total number of people for whom the particular trip is available for booking.
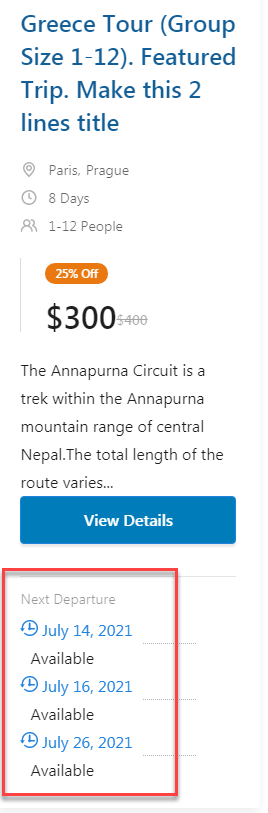
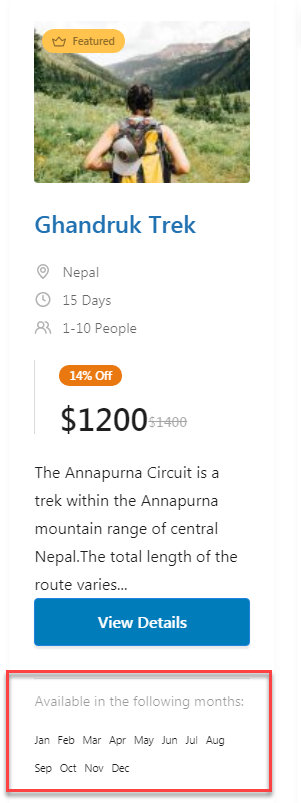
- Trip Available Times: In this section, you can specify the trip availability using specific dates or months.
If you choose the Dates List from the option, the trip available times appear as:
Similarly, if you choose the Months List option, the availability of a trip appears as:
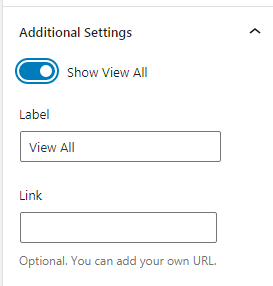
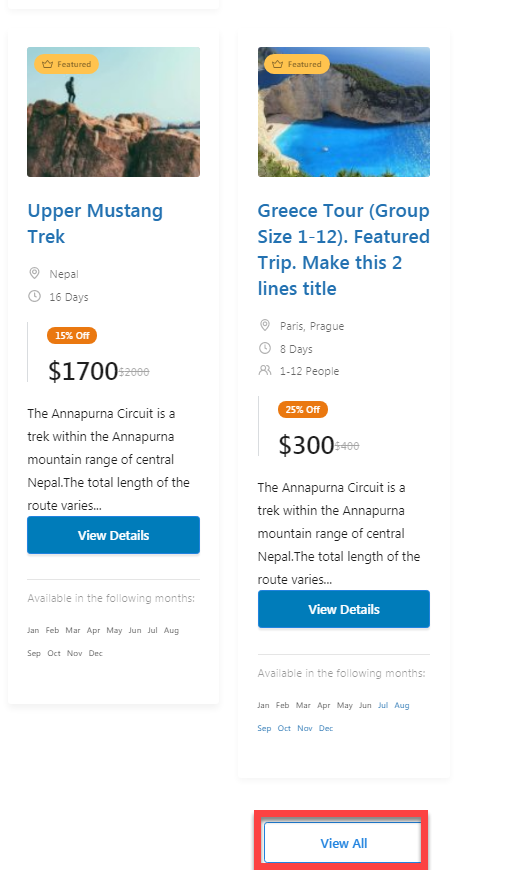
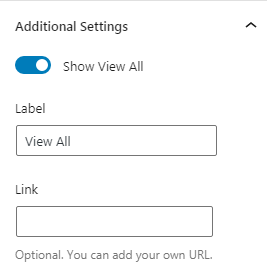
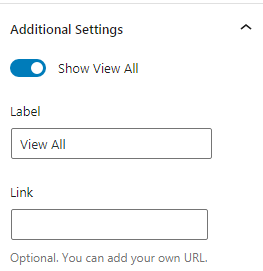
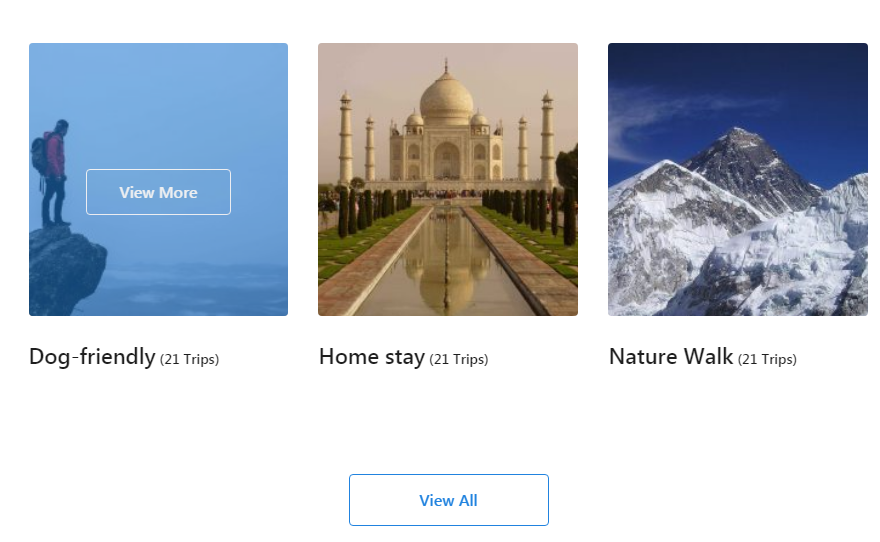
Additional Settings: #
Here, you just get the option to enable the View All option so that your users can click on the button to view more trip packages.
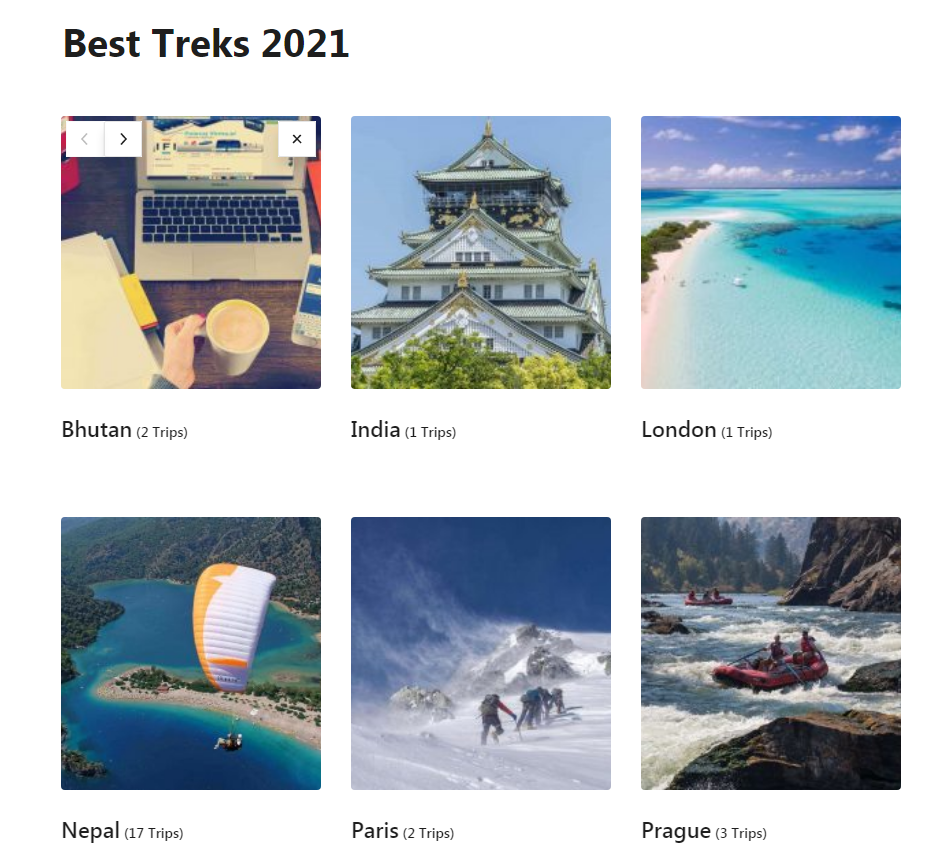
- Destinations – WP Travel Engine
This block allows you to add different trips to your blog post or page based on the destinations with a single click of the button. Later, your users can easily explore different trips related to their favorite destinations through your travel booking website.
You can also find the following settings for this block which you can configure and make your blog post look more organized:
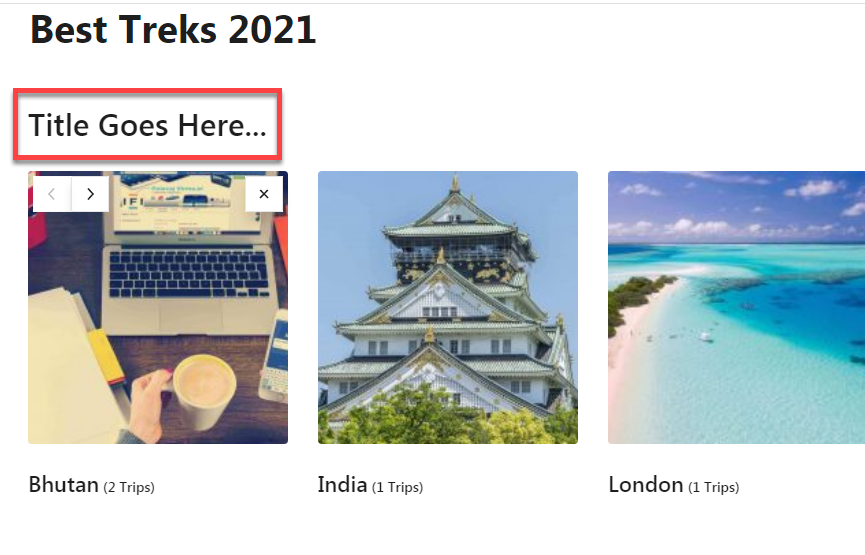
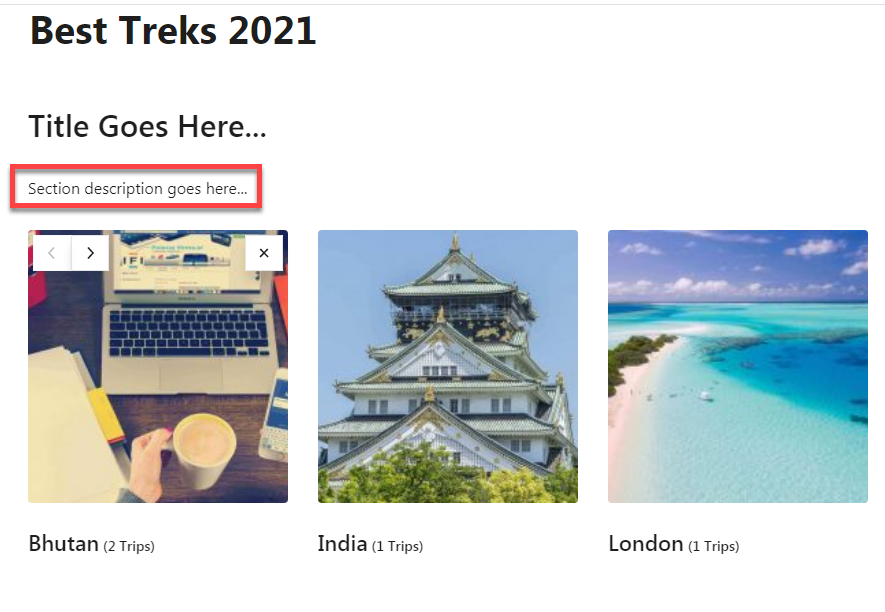
Section Settings: #
Under this setting, you can find the following options:

- Show Section Title: After you enable this setting, you can then specify the title of the trip section.
- Show Section Subtitle: Once you enable this option, you can write the description for the section.
Cards Layouts: #
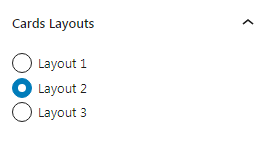
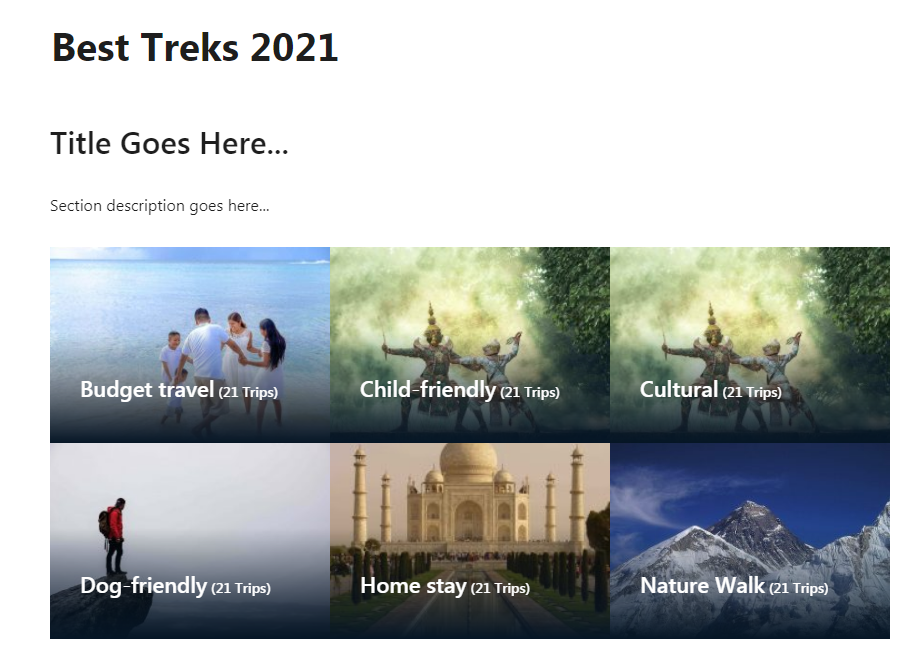
In this section, you can specify how you want to show the available trips on your travel booking website. By default, the layout of the cards is set as Layout 1. You can switch to Layout 2 and see the result as below:

Sorting and Filtering: #
In this section, you can sort and filter the trips that you can show based on different parameters. This section includes the following options:
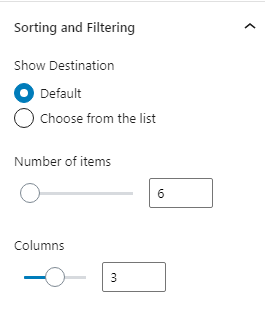
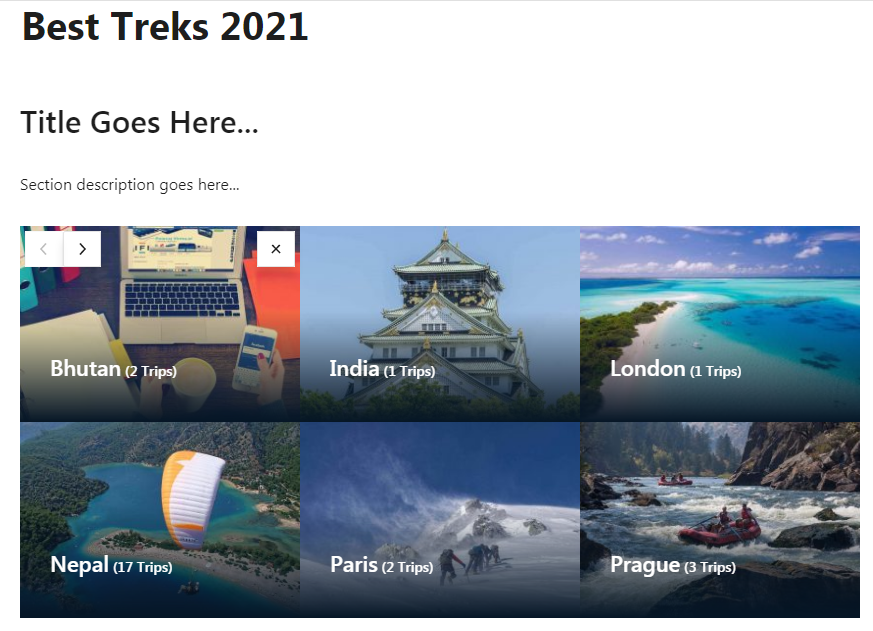
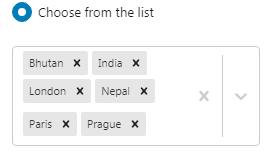
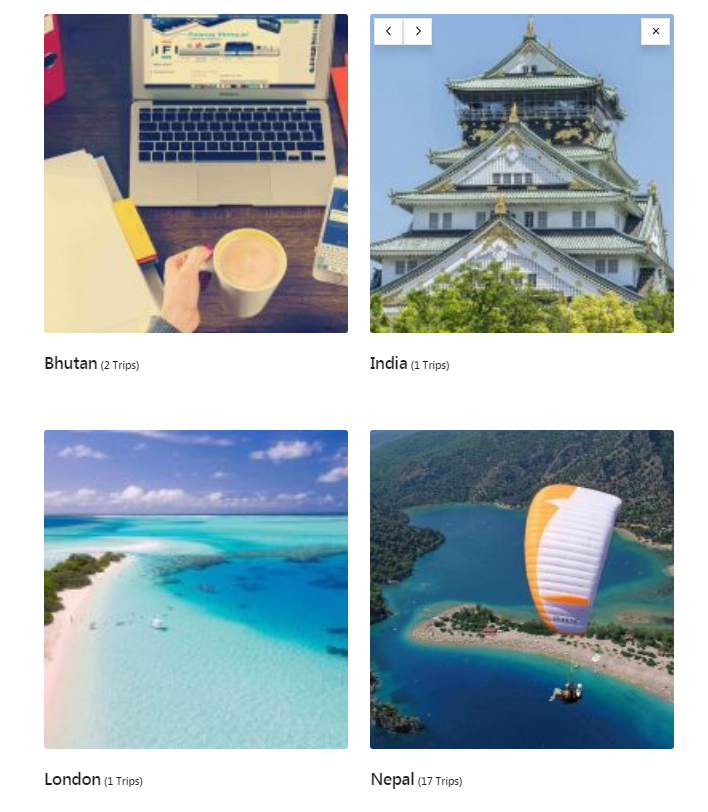
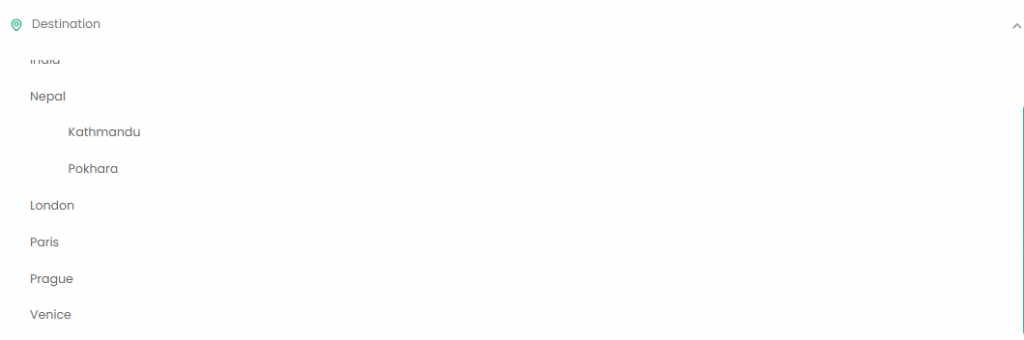
- Show Destination: Here, you can choose to show different destinations as default or choose from the list of destinations as shown below:
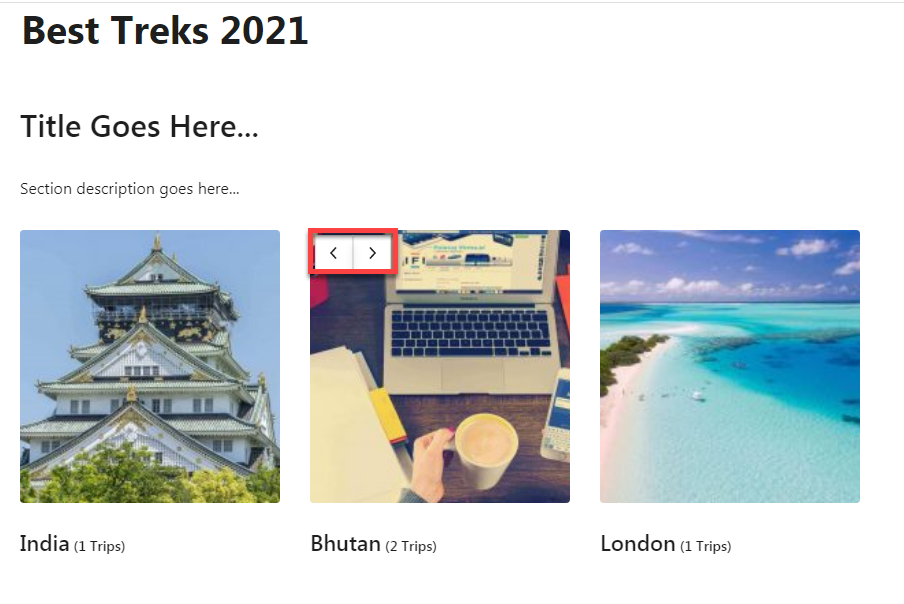
You can even switch the position of your trip destinations by clicking on the right or the left arrow that appears when you select a specific trip. This is also one form of sorting and filtering the available trips.
- Number of items: You can specify how many trip destinations you want to show on your blog post or page. Note: You can display from 1 to 100 trip destinations using this setting.

- Columns: You can define the columns to showcase your trip packages in a more subtle way. Having two or three columns is considered better for a proper user experience.
Cards Display Settings: #
In this section, you can customize how you want to organize the information of each trip card. This setting allows you to show the destination name and trip counts of every trip package available.
You can find the following options under this setting:
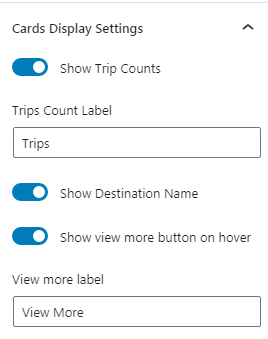
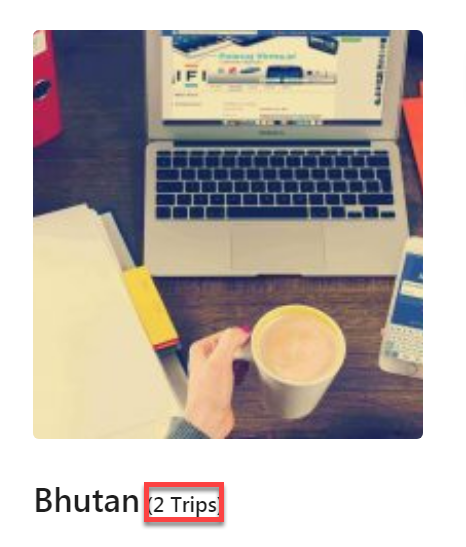
- Show Trip Counts: Enabling this option shows the total number of trips associated with the particular destination.
- Show Destination Name: Once you enable this option, you can see the name of the destination on each trip card.

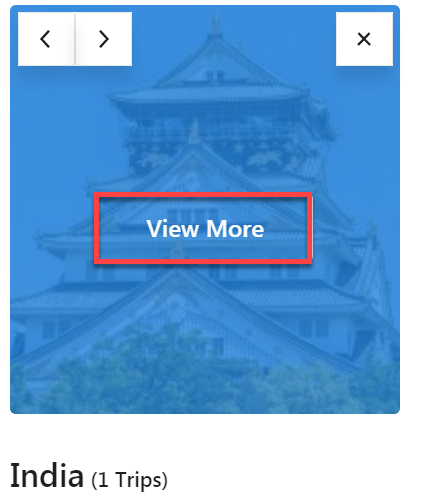
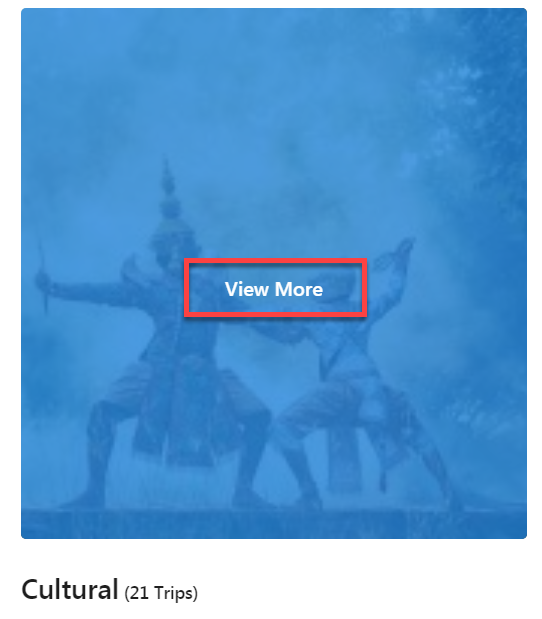
- Show view more button on hover: You can enable this option to display the View More button whenever your users hover over the specific trip destination card. Clicking on the button will let them get detailed information about the trips related to that particular destination.
Additional Settings: #
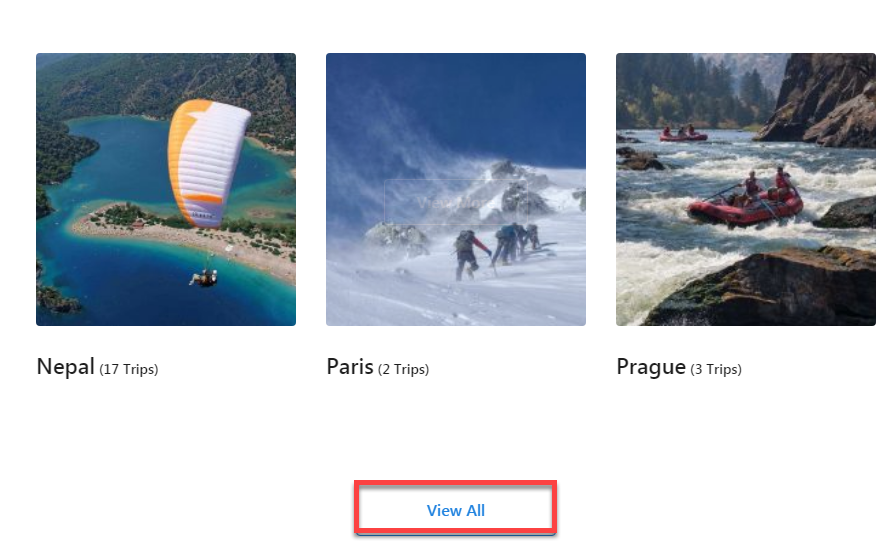
Here, you just get the option to enable the View All option so that your users can click on the button to view more trip destinations.
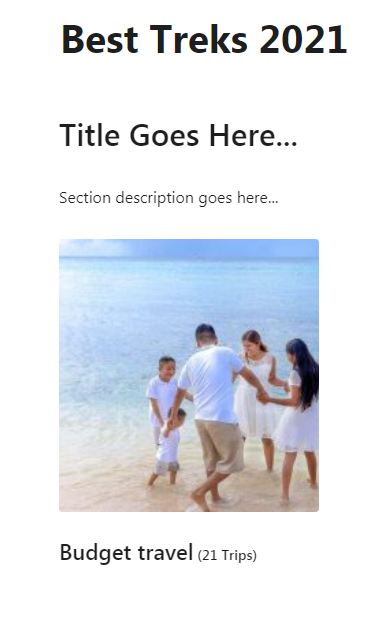
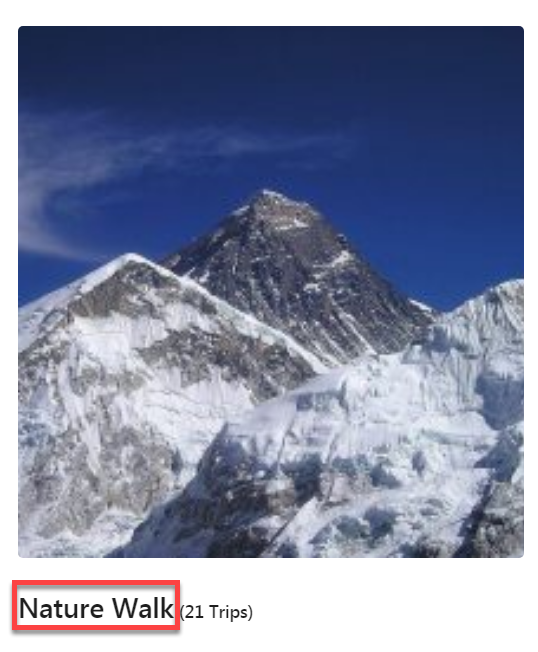
- Trip Types – WP Travel Engine
This block allows you to display your trip packages based on different trip types. While creating trip packages, you can categorize the trips as budget-friendly, child-friendly, dog-friendly, and so on. Later, you can integrate those categorized trip types into your blog post or page using this newly-added block.
You can also find the following settings for this block which you can configure and make your blog post look more organized:
Section Settings: #
Under this setting, you can find the following options:

- Show Section Title: After you enable this setting, you can then specify the title of the trip section.
- Show Section Subtitle: Once you enable this option, you can write the description for the section.
Cards Layouts: #
Here, you can specify how you want to show the available trip types on your travel booking website. By default, the layout of the cards is set as Layout 1. You can switch to Layout 2 and see the result as below:
Sorting and Filtering: #
In this section, you can sort and filter the trip types that you can show based on different parameters. This section includes the following options:
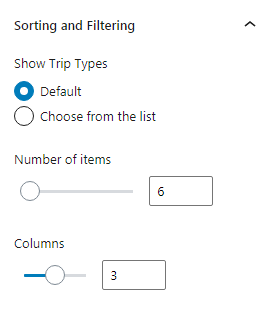
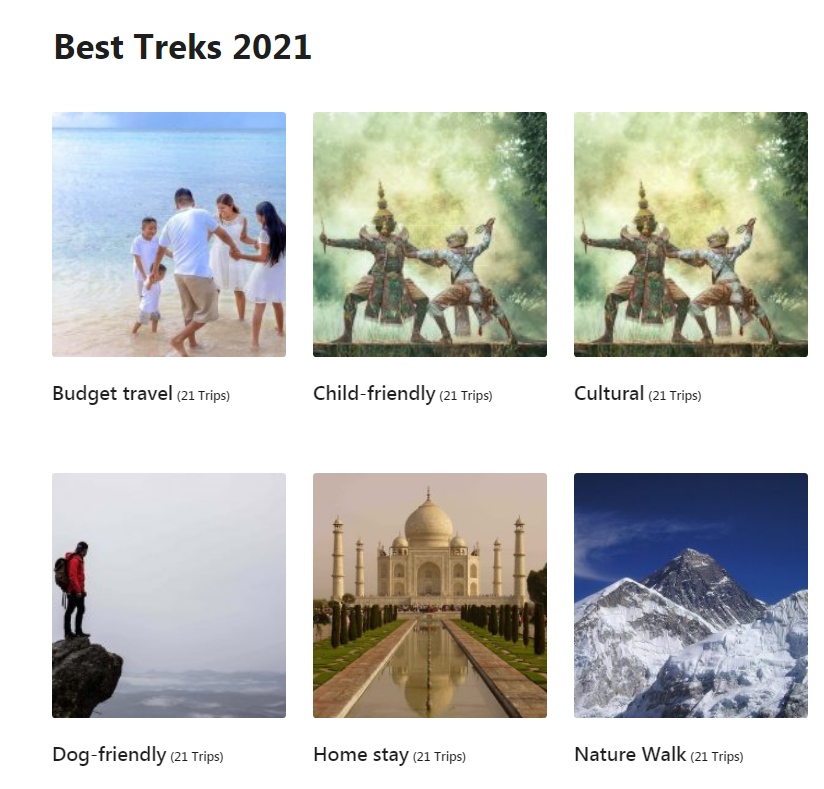
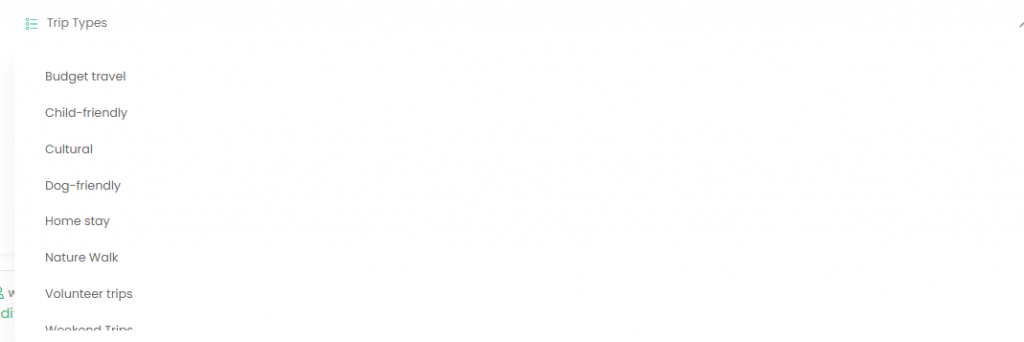
- Show Trip Types: In this section, you can choose to show different trip types as default or pick from the list of trip types as shown below:

You can even switch the position of your trip types by clicking on the right or the left arrow that appears when you select a specific trip. This is also one form of sorting and filtering the available trips.

- Number of items: You can specify how many trip types you want to show on your blog post or page. Note: You can display from 1 to 100 trip types using this setting.
- Columns: You can define the columns to showcase your trip types in a more subtle way. Having two or three columns is considered better for a proper user experience.

Cards Display Settings: #
In this section, you can customize how you want to organize the information of each trip card. This setting allows you to show the trip type name and trip counts of every trip package available.
You can find the following options under this setting:
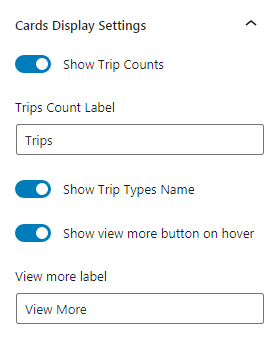
- Show Trip Counts: Enabling this option shows the total number of trips associated with the particular trip type.
- Show Trip Types Name: Once you enable this option, you can see the name of the trip type on each trip card.
- Show view more button on hover: You can enable this option to display the View More button whenever your users hover over the specific trip type card. Clicking on the button will let them get detailed information about the trips related to that particular trip type.
Additional Settings: #
Here, you just get the option to enable the View All option so that your users can click on the button to view more trip types.
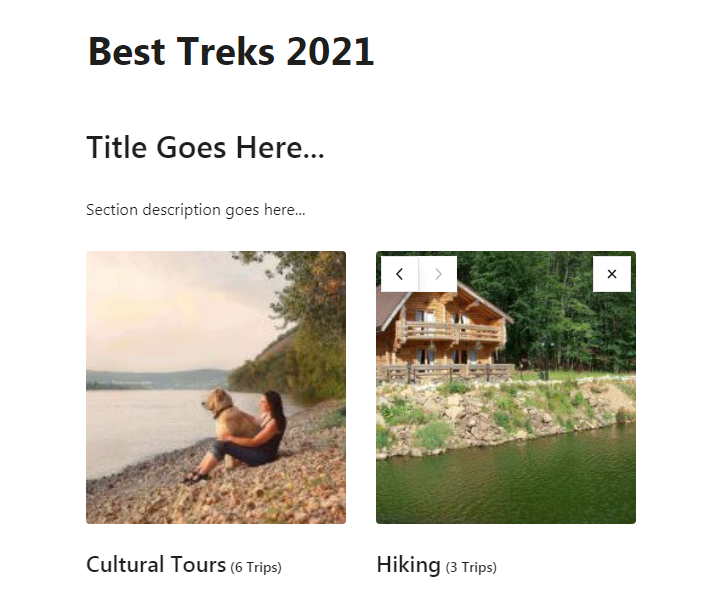
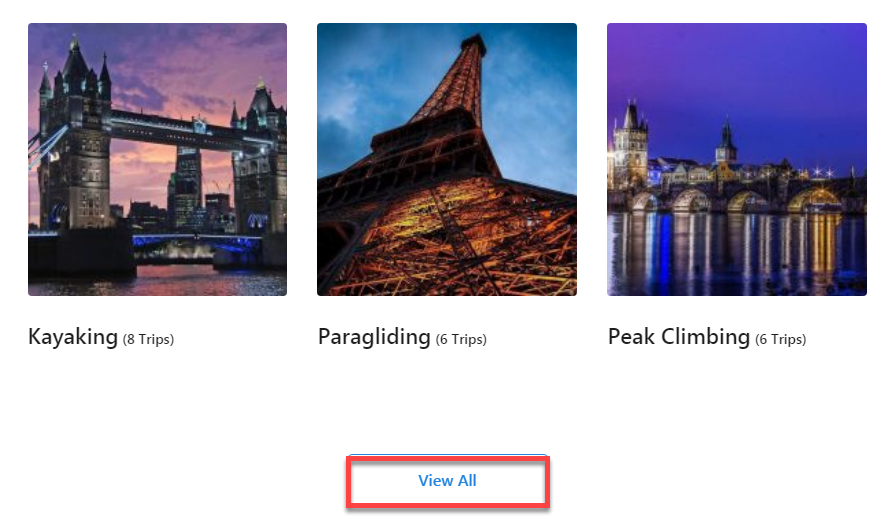
- Activities – WP Travel Engine
This newly-added block allows you to display your trip packages based on different activities. While creating trip packages, you can categorize them under different activities like hiking, peak climbing, paragliding, and so on. Later, you can integrate those categorized activities into your blog post or page using this block.

You can also find the following settings for this block which you can configure and make your blog post look more organized:
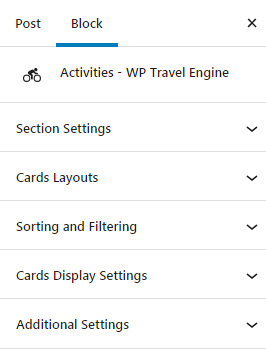
Section Settings: #
Under this setting, you can find the following options:

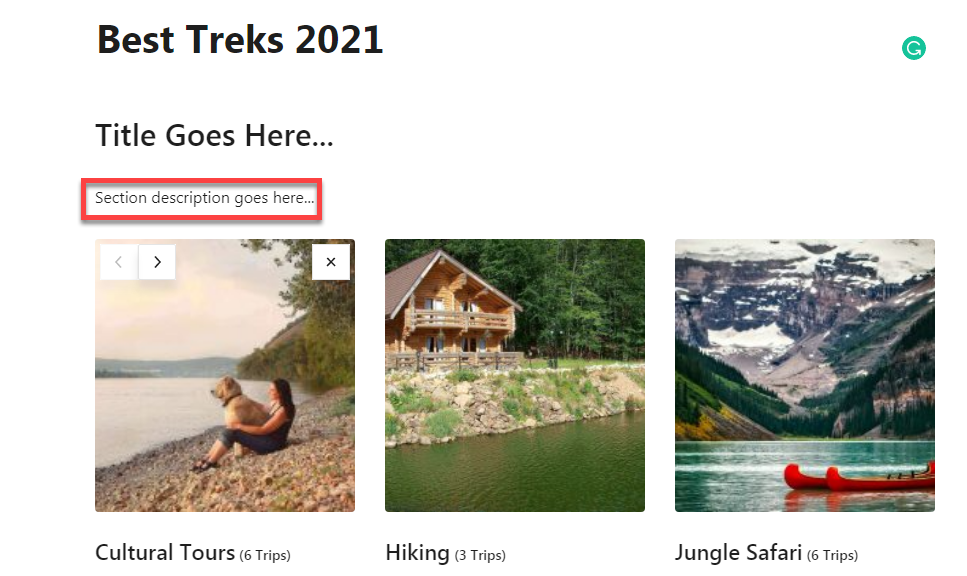
- Show Section Title: After you enable this setting, you can then specify the title of the trip section.
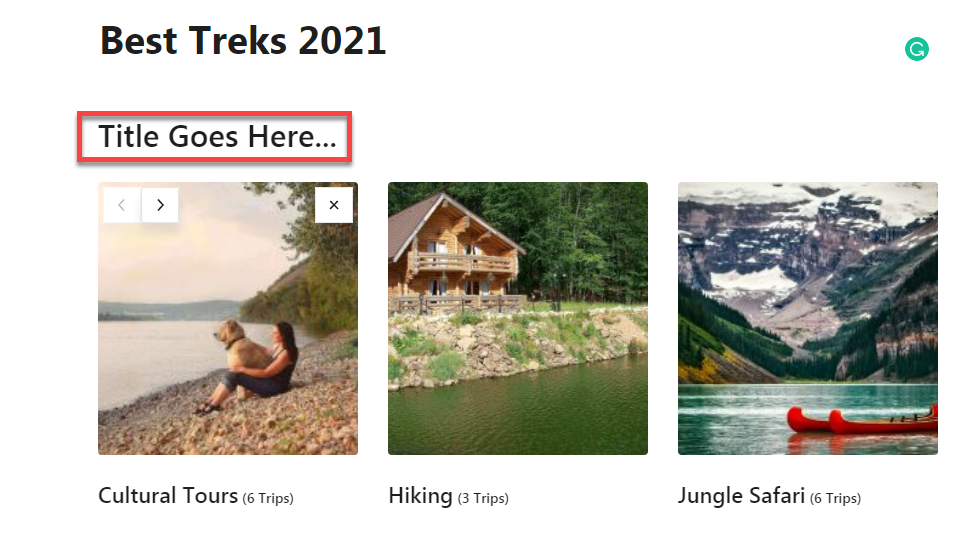
- Show Section Subtitle: Once you enable this option, you can write the description for the section.
Cards Layouts: #
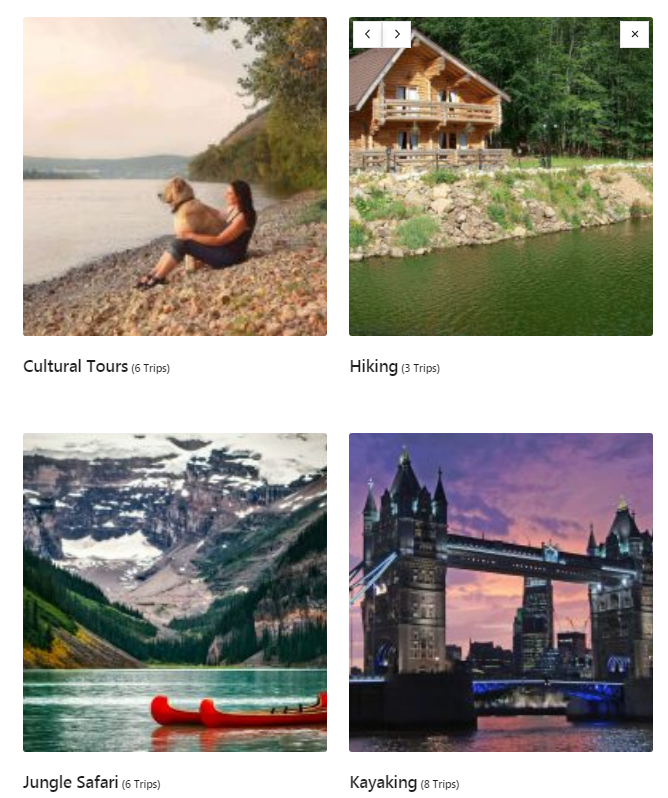
Here, you can specify how you want to show the available activities on your travel booking website. By default, the layout of the cards is set as Layout 1. You can switch to Layout 2 and see the result as below:


Sorting and Filtering: #
Using this section you can sort and filter the trip activities that you can show based on different parameters. This section includes the following options:
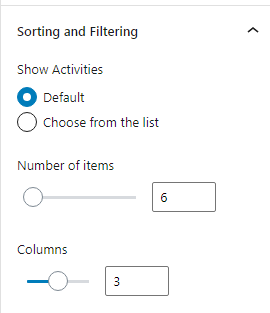
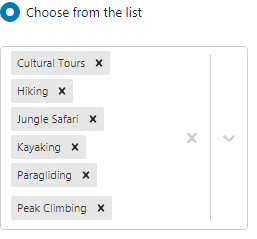
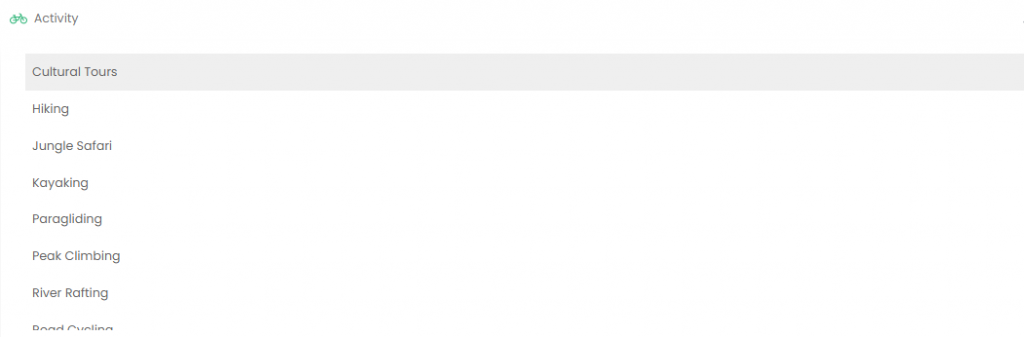
- Show Activities: In this section, you can choose to show different activities as default or pick from the list of activities as shown below:
You can even switch the position of your activities by clicking on the right or the left arrow that appears when you select a specific trip. This is also one form of sorting and filtering the available trips.

- Number of items: You can specify how many activities you want to show on your blog post or page. Note: You can display from 1 to 100 activities using this setting.
- Columns: You can define the columns to showcase activities in a more subtle way. Having two or three columns is considered better for a proper user experience.
Cards Display Settings: #
In this section, you can customize how you want to organize the information of each trip card. This setting allows you to show the activities’ names and trip counts of every activity available.
You can find the following options under this setting:
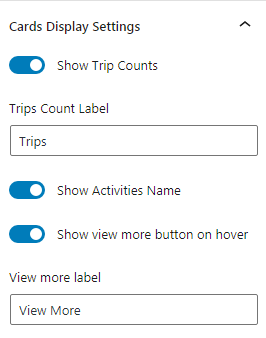
- Show Trip Counts: Enabling this option shows the total number of trips associated with the particular activity.
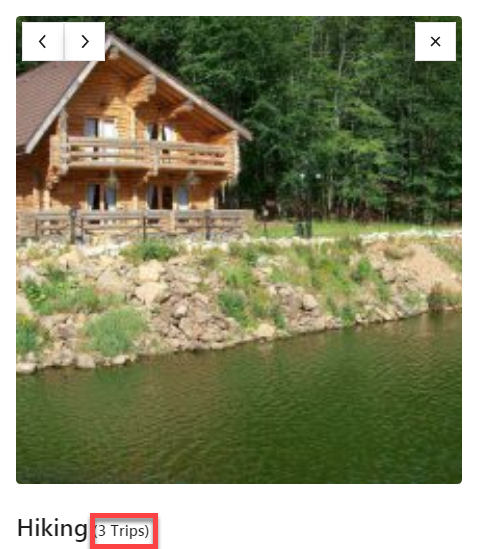
- Show Activities Name: Once you enable this option, you can see the name of the activity on each trip card.
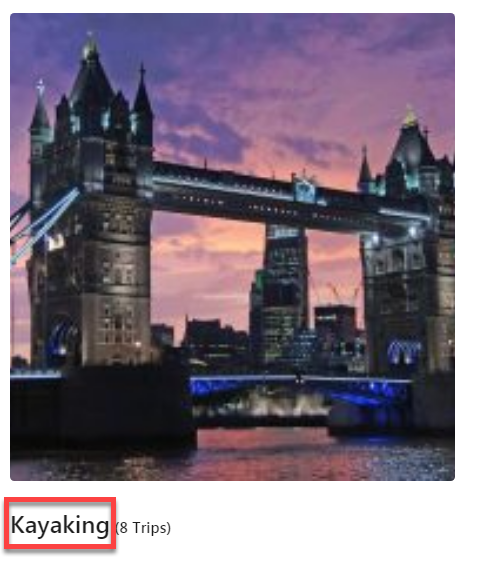
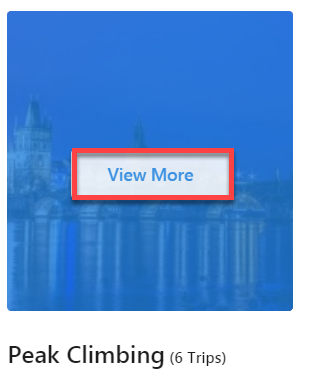
- Show view more button on hover: You can enable this option to display the View More button whenever your users hover over the specific activity. Clicking on the button will let them get detailed information about the trips related to that particular activity.
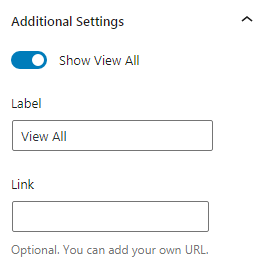
Additional Settings: #
Here, you just get the option to enable the View All option so that your users can click on the button to view more activities.
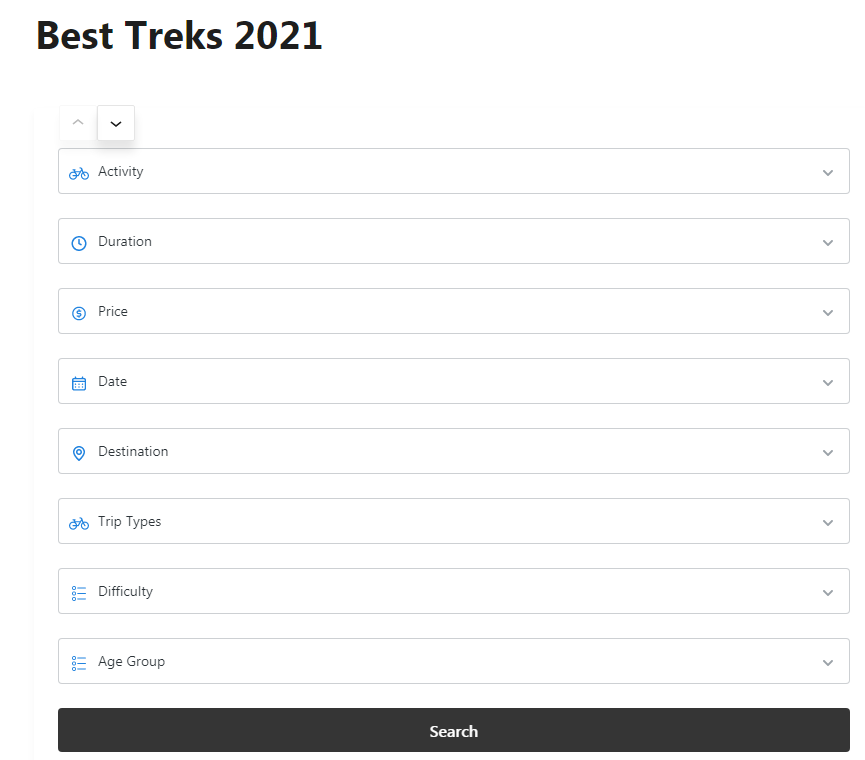
- Trip Search – WP Travel Engine
Using this block, you can make it easier for your users to search for their favorite trips via your travel booking website. Once you integrate this block on your page or post, your website visitors can easily find trips based on destination, activities, trip types, duration, price, date, difficulty, and age group.
You can also find the following settings for this block which you can configure and make your blog post look more organized:
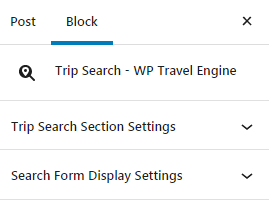
Trip Search Section Settings: #
Under this setting, you can find the following options:
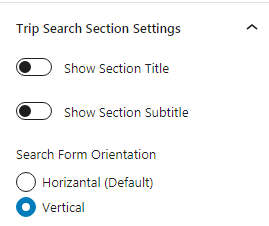
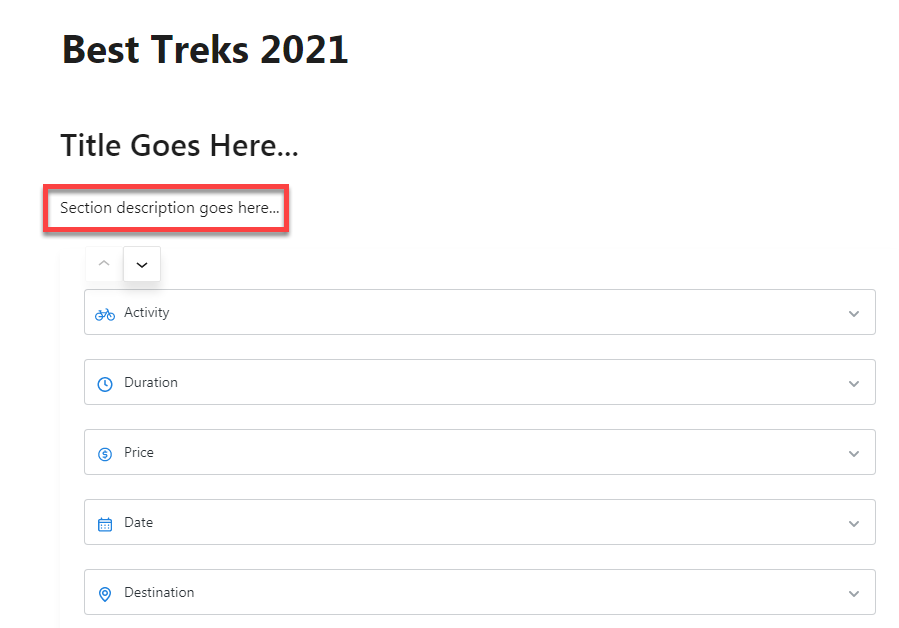
- Show Section Title: After you enable this setting, you can then specify the title of the trip section.
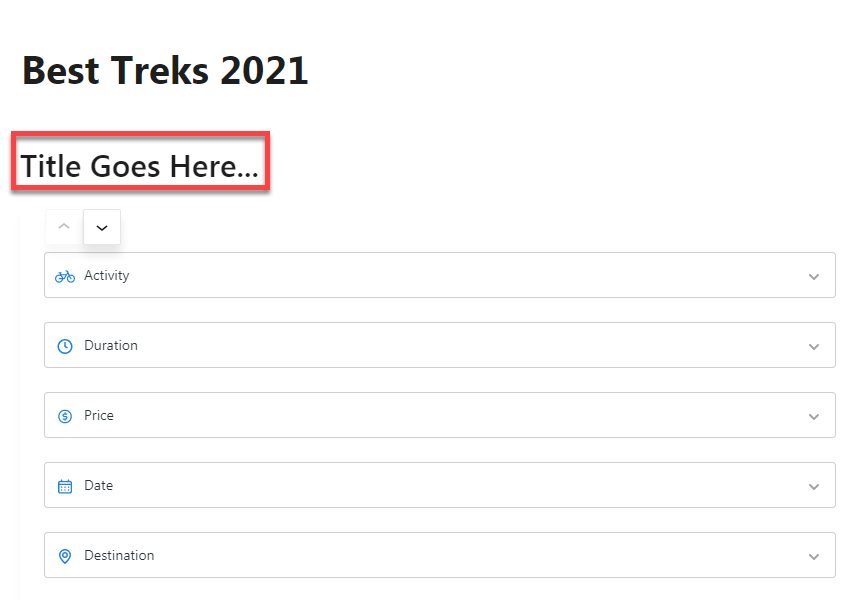
- Show Section Subtitle: Once you enable this option, you can write the description for the section.
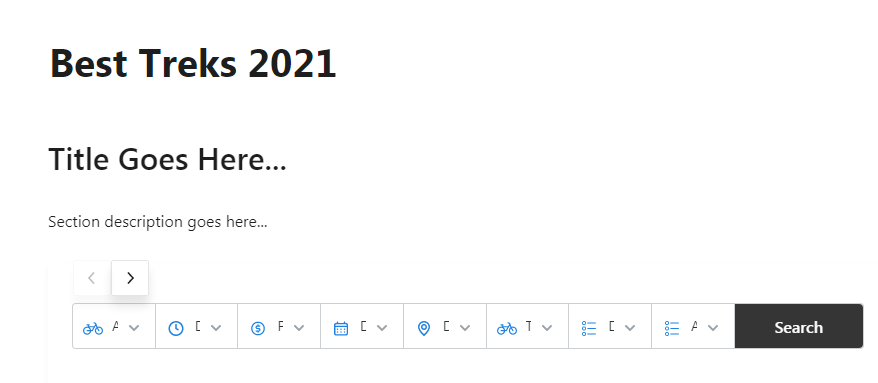
- Search Form Orientation: In this section, you can specify how you want to display the whole trip search block. By default, it is set to Horizontal, which looks like this:
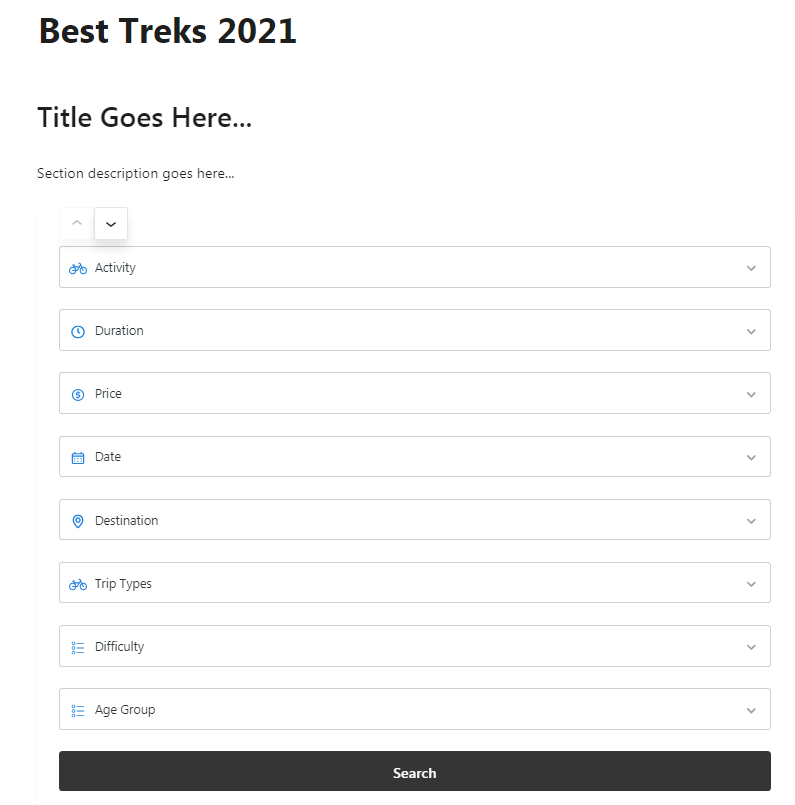
You can change it to Vertical to get the result like this:
Search Form Display Settings: #
Through this setting, you can set different options for your users to find their favorite trip packages easily. The section includes these options:
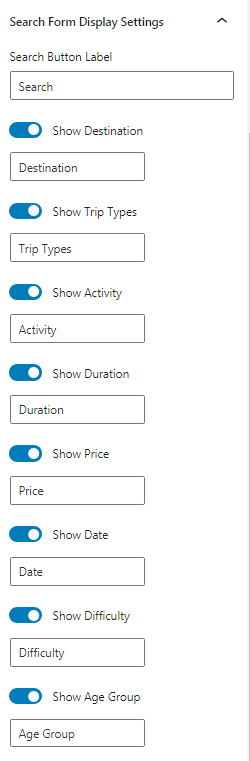
- Search Button Label: You can define the label for the search button here which your users can later click to look for their favorite trips.

- Show Destination: As you enable this option, your users can later search for their favorite trips based on different destinations.
- Show Trip Types: As you enable this option, your users can later search for their favorite trips based on different trip types.
- Show Activity: As you enable this option, your users can later search for their favorite trips based on different activities.
- Show Duration: As you enable this option, your users can later search for their favorite trips based on different duration.

- Show Price: As you enable this option, your users can later search for their favorite trips based on different price ranges.

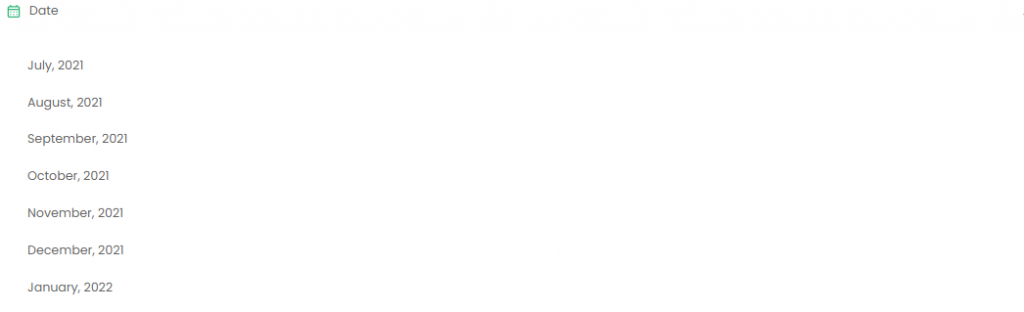
- Show Date: As you enable this option, your users can later search for their favorite trips based on different dates.
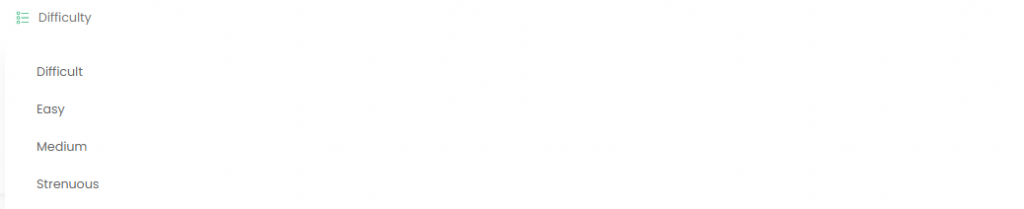
- Show Difficulty: As you enable this option, your users can later search for their favorite trips based on the difficulty level.
- Show Age Group: As you enable this option, your users can later search for their favorite trips based on different age groups.
