Introduction #
WP Travel Engine introduces a new Performance feature designed to optimize the loading speed of your single trips. By enabling the right settings, you can make your trips more efficient, leading to faster page load times and improved SEO performance.
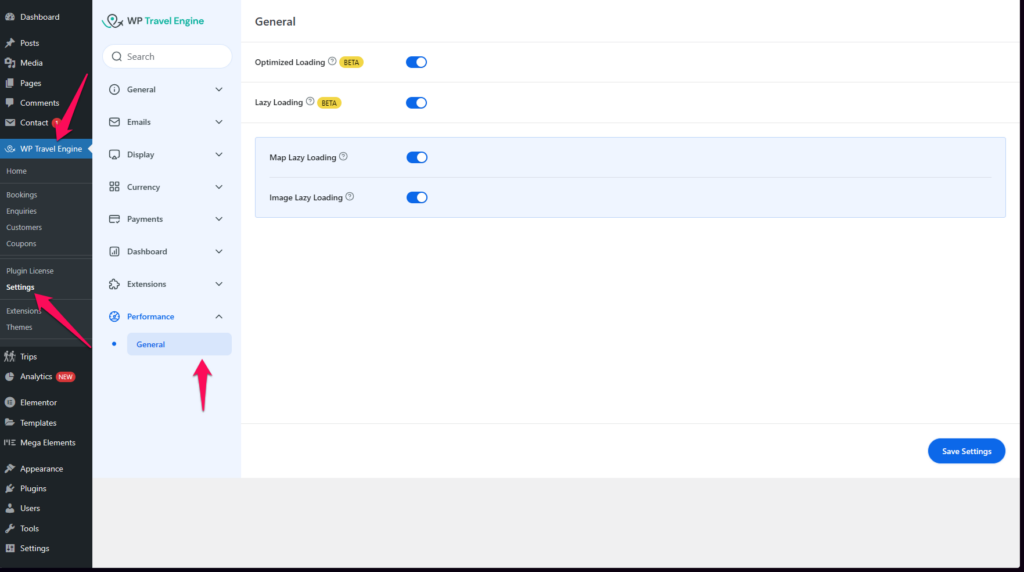
Accessing the Performance Settings #
To configure the Performance settings in WP Travel Engine, follow these steps:
- Log in to your WordPress admin dashboard.
- Navigate to Dashboard > WP Travel Engine > Settings > Performance.
- Click on the General tab to access the available settings.
Here, you’ll find a set of options that can help optimize the loading speed of your site.
Overview of the Available Options #
The Performance settings contain four main options, each aimed at improving different aspects of your site’s performance:
1. Optimized Loading #
Optimized Loading enables the conditional loading of assets like scripts and stylesheets based on the specific pages being viewed. By only loading the necessary assets for each page, this feature reduces unnecessary resource consumption, speeding up page load times.
- How it works: This feature ensures that only the relevant resources for each page are loaded, avoiding the loading of scripts or styles that aren’t needed on the current page.
- Benefits: Faster page loads, better performance, and reduced page size.
2. Lazy Loading (Experimental) #
Lazy Loading is an experimental feature that only loads certain media elements on the single trip when needed. This includes images, videos, or other media files that are not immediately visible to the user when they first land on the page.
- How it works: Media files (e.g., images, videos) are loaded only when the user scrolls to them or interacts with them, instead of loading them all at once when the page is first accessed.
- Benefits: Faster initial single trip load, and improved user experience, especially on mobile devices with slower internet connections.
2. a. Map Lazy Loading #
Map Lazy Loading delays the loading of embedded map iframes (such as Google Maps) until the user interacts with your site (e.g., by scrolling or clicking on a map). This reduces the initial page load time, which is especially useful if your site contains multiple maps.
- How it works: Instead of loading the map iframe immediately upon a single trip load, it only loads when the user performs an action or the map becomes visible in the viewport.
- Benefits: Decreased trip load time, and reduced resource consumption, especially if there are multiple maps on the page.
2. b. Image Lazy Loading #
Image Lazy Loading ensures that images on your site are only loaded when they are about to enter the user’s viewport (i.e. when they are close to being visible on the screen). This is particularly useful for image-heavy pages or blogs.
- How it works: Images will only be loaded as the user scrolls down the trip, preventing unnecessary loading of images that aren’t visible yet.
- Benefits: Improved trip load speed, reduced bandwidth usage, and better performance for image-rich pages.
How to Enable and Configure Each Option #
Each of the performance options can be enabled or disabled from the Performance Settings page. Here’s how to configure them:
- Optimized Loading:
- To enable optimized loading, simply toggle the option on.
- This setting will automatically start optimizing the loading of resources for pages that require them.
- Lazy Loading:
- Enable this feature by toggling the Lazy Loading option to “On”.
- Keep in mind that this feature is still in the experimental stage, and while it can improve performance, it may need further testing in your specific environment.
- Map Lazy Loading:
- To activate Map Lazy Loading, toggle the setting to “On”.
- This will delay the loading of map iframes until the user interacts with your page.
- Image Lazy Loading:
- Enable Image Lazy Loading by toggling the option to “On”.
- This will ensure that only images within the viewport (visible to the user) are loaded, which will improve your site’s loading performance.
After enabling any of these settings, make sure to click the Save Changes button to apply the changes.
Additional Notes & Best Practices #
- Testing: Since Lazy Loading is an experimental feature, it’s recommended to test it thoroughly on your site before enabling it on a live production environment. Check how it performs on different devices, especially mobile.
- Compatibility: Some themes and other plugins may conflict with the Lazy Loading feature. Ensure you test your site thoroughly after enabling any of these performance settings.
- Mobile Performance: All the performance features are particularly beneficial for mobile devices where loading speeds and bandwidth can be more limited. Enabling these options will lead to a smoother experience for your mobile visitors.
- Caching: We recommend using a caching plugin to complement these performance settings. Caching can help further speed up your site by storing a static version of the page and reducing server load.
Conclusion #
The Performance feature in WP Travel Engine offers a set of powerful tools to enhance your website’s speed and user experience. By enabling the appropriate settings—such as Optimized Loading, Lazy Loading, Map Lazy Loading, and Image Lazy Loading—you can improve load times, reduce resource usage, and provide a better browsing experience for your visitors.