With Per Trip Emails, you can create custom emails for each trip, giving your customers a personalized and engaging experience.
In this documentation, you will learn about plugin installation, setup, and initial configuration options step-by-step.
Requirement: Per Trip Emails requires WP Travel Engine plugin v-5.0.0 or later installed and activated on your website.
You can either follow the video or the below steps to configure Per Trip Emails add-on.
Download the Plugin File #
After the purchase, you can download the add-on file by visiting the individual add-on pages from here – https://wptravelengine.com/plugins/
Here are the steps you need to follow:
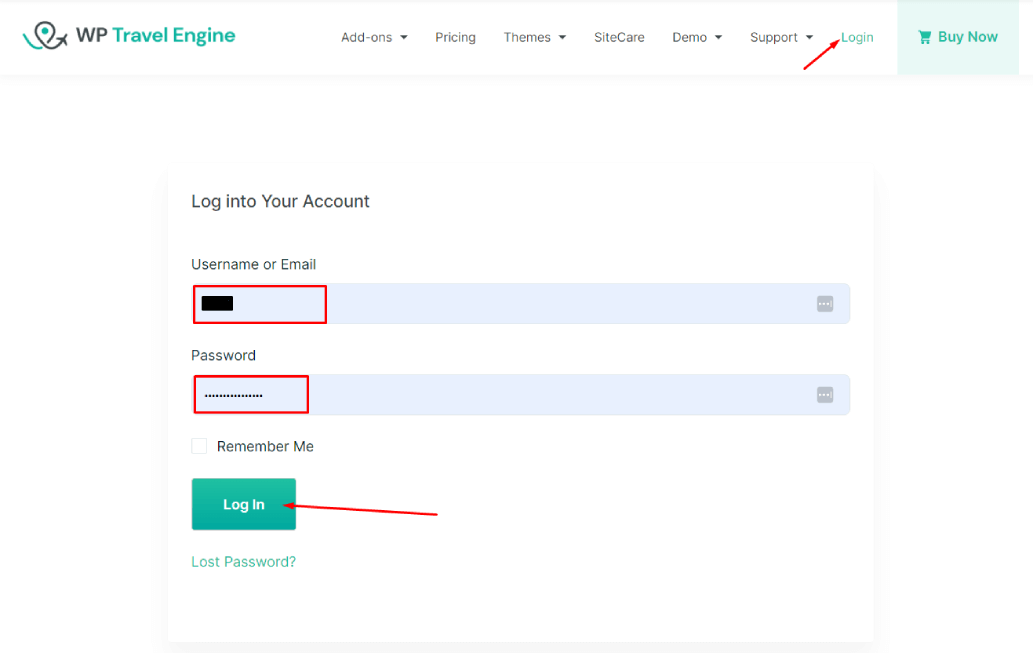
- Visit the WP Travel Engine website and log in to your account through the “My Account” page (https://wptravelengine.com/my-account/).
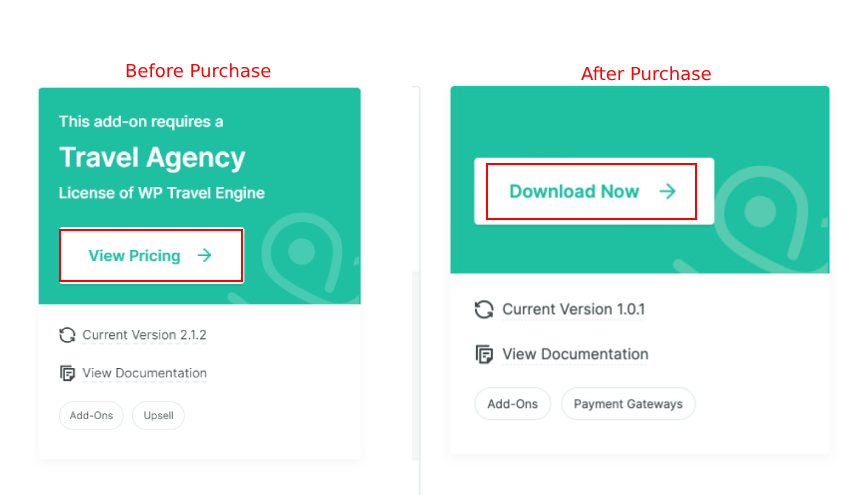
- Go to the Per Trip Emails add-on page – https://wptravelengine.com/plugins/per-trip-emails/
- Now, you will see the Download option on the right side of the page instead of View Pricing. Click on it to download the add-on file.
Installing the Add-on #
To upload the downloaded file in your WordPress dashboard, follow the below steps:
- Navigate to the Plugin > Add New.
- Click on the Upload Plugin button.
- Select the downloaded file, “wp-travel-engine-per-trip-emails.zip,” from your computer.
- Click on “Install Now.”
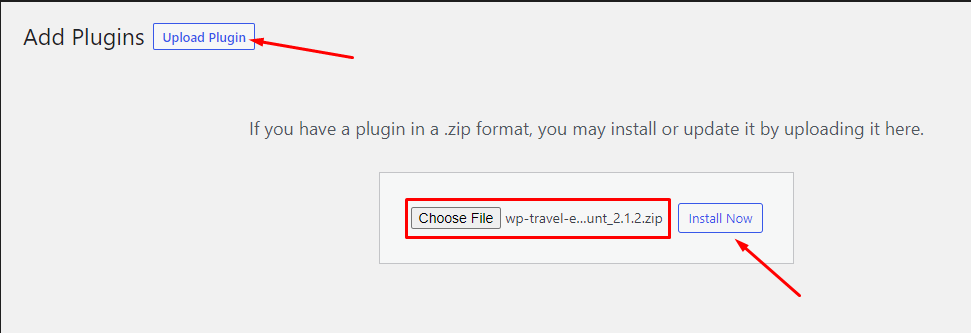
- Once the file is installed, click on “Activate” to enable the add-on on your website.
Activating the Plugin License #
To activate the plugin license and receive regular updates, follow these steps:
- Go to your Admin Dashboard and navigate to WP Travel Engine > Plugin License.
- Enter the license key in the provided field.
- Click Save Changes.
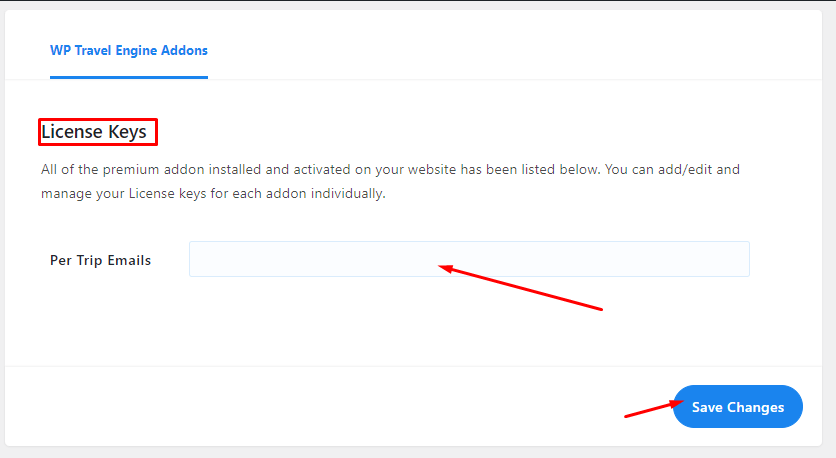
- Refresh the page to see the Activate License button, then click on it.
After successful activation, you can update the Per Trip Emails add-on from the plugins page normally, whenever a new update is released.
Creating Personalized Email Templates #
Now, to create the personalized email templates for your trips, follow these steps:
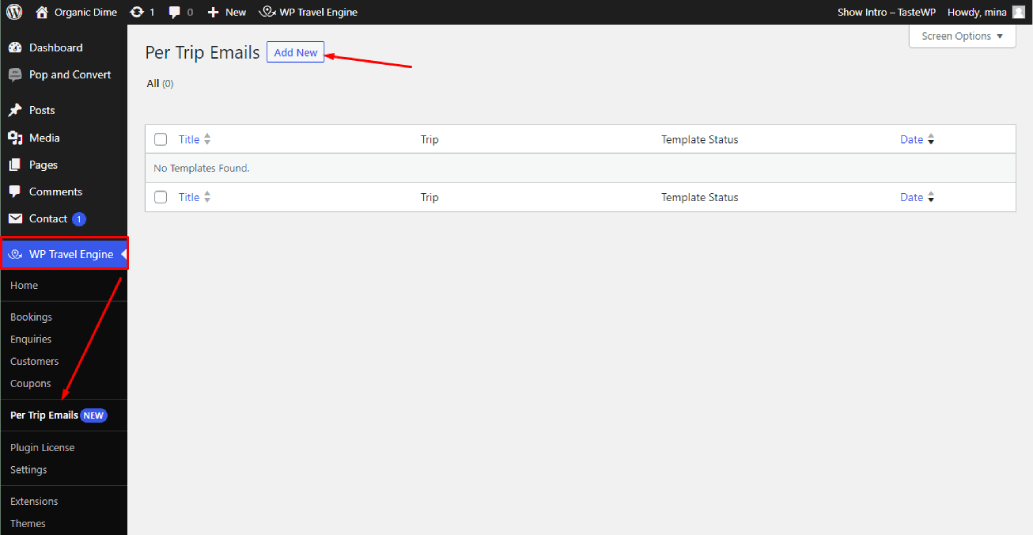
- On your WordPress dashboard, go to WP Travel Engine > Per Trip Emails > Add New.
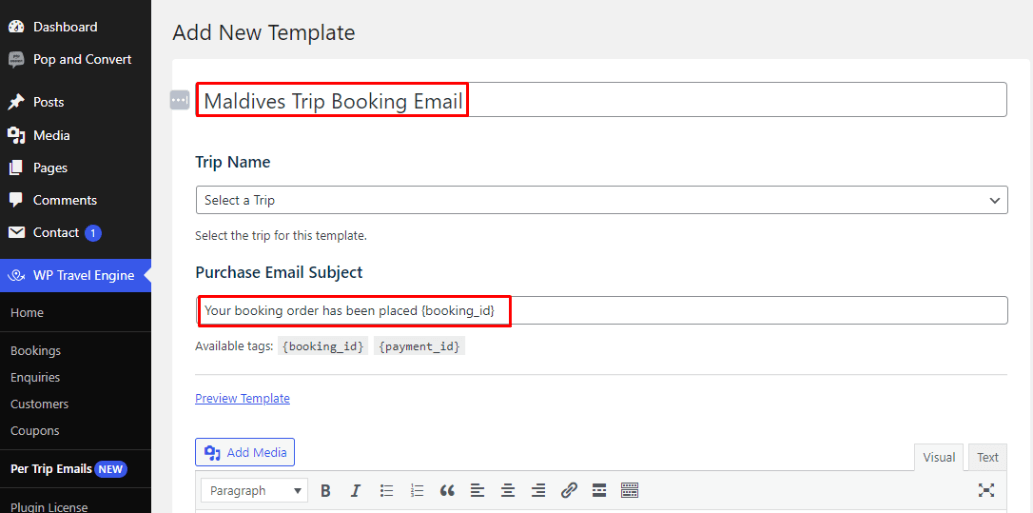
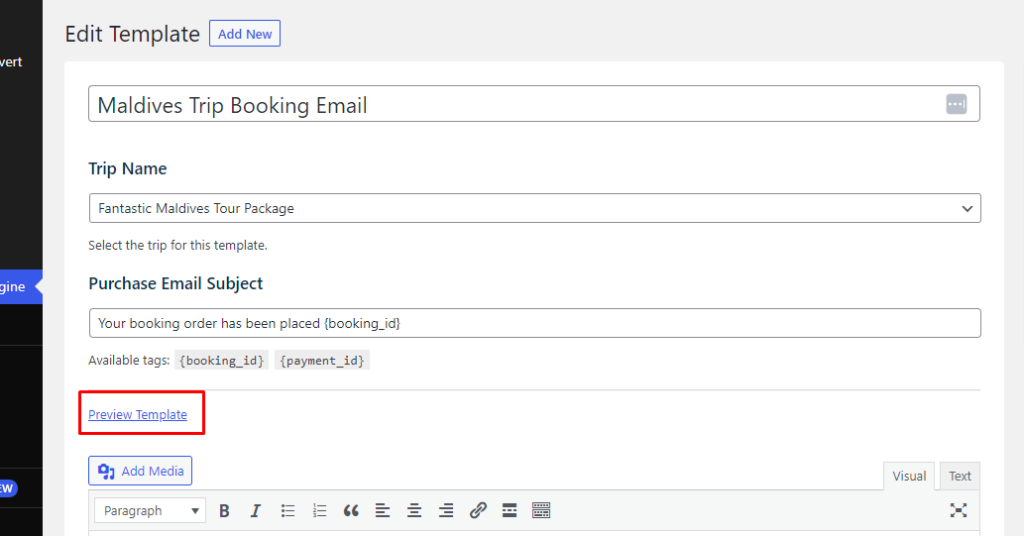
- Enter a title for your template. For e.g., Maldives Trip Booking Email.
- Now, enter an email subject line. You can use the available tags, such as {booking_id} {payment_id}. For e.g., The subject line can be: Your booking order has been placed {booking_id}.
- Next, compose your email content in the text area, using the available tags to personalize it. For instance, you can use tags like {trip_url} and {name} to display the trip URL and buyer’s first name for each booked trip, respectively.
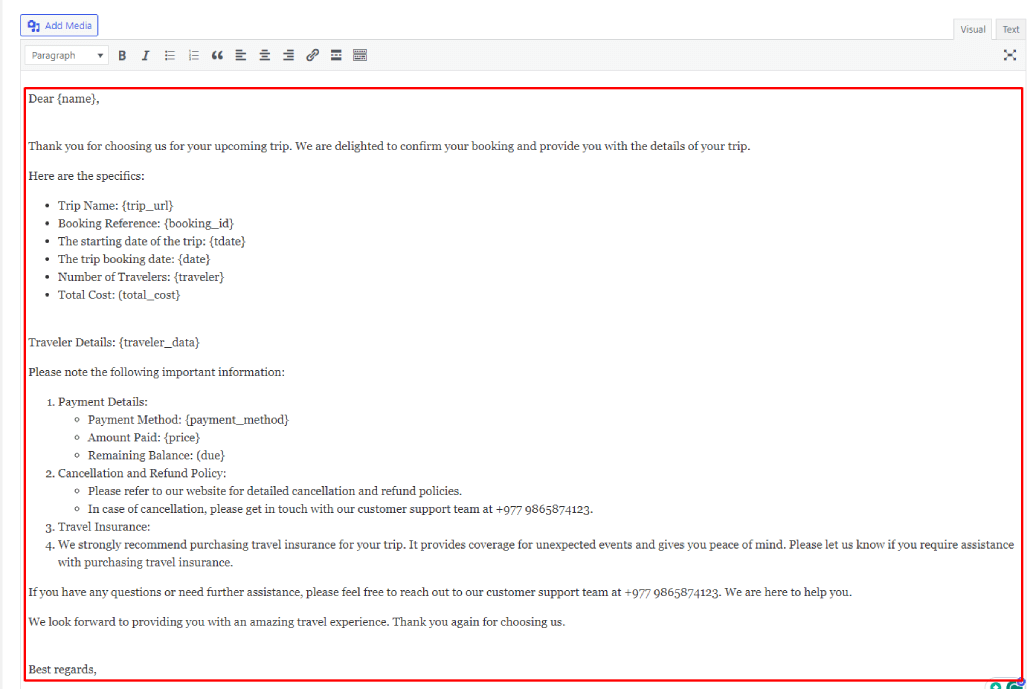
Note: You can find various tags below the text area in each email template to personalize your email for each trip.
- Now, assign your drafted email to a trip by selecting it from the Trip Name drop-down menu.
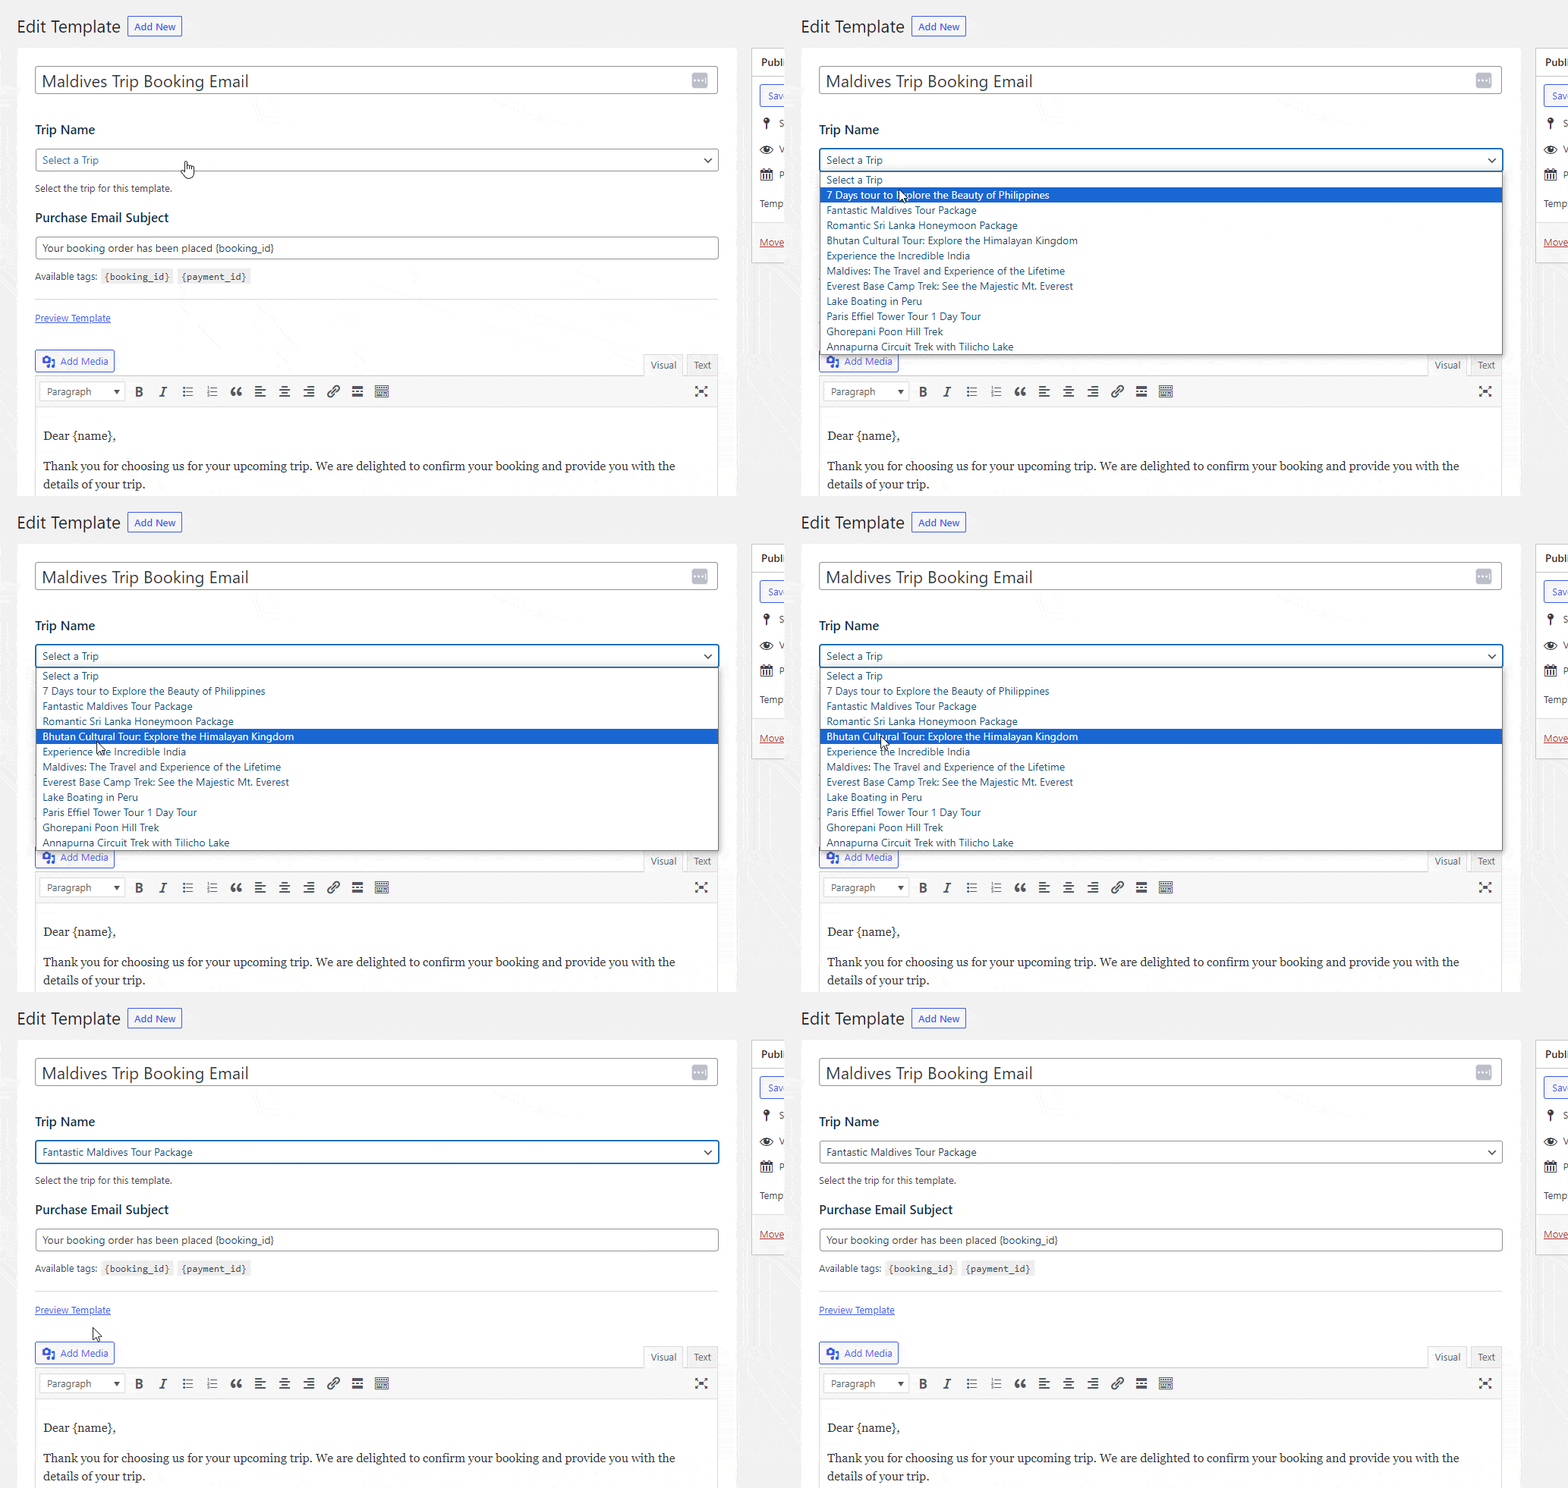
- You can also preview your email with the Preview button and make changes before sending it.
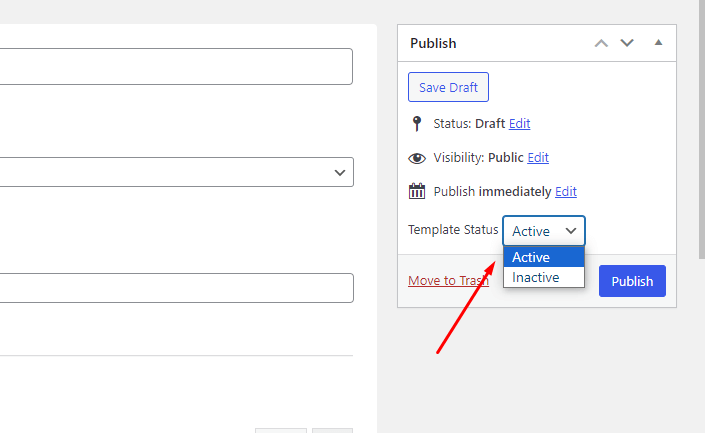
- Under the Publish settings, you can save your email template as a draft or publish it immediately.
Note: If you do not change the template status from Inactive to Active, the default email template will be sent to your customers.
You can create a personalized email template for each unique trip by repeating the same process.