Legal Documents is an extension for the WP Travel Engine plugin that allows you to upload and display legal documents relevant to your travel business on your website. The documents uploaded through this addon can help establish the credibility of your business and the services you offer.
Legal Documents requires WP Travel Engine v5.0+ installed and activated on your website.
Installation #
UPLOADING IN WORDPRESS DASHBOARD
- Navigate to the Admin Dashboard > Plugins > Add New
- Click on the ‘Upload Plugin’ button
- Select and upload the ‘wp-travel-engine-legal-documents.zip’ file from your computer
- Click on ‘Install Now’ button
- Activate the plugin
USING FTP
- Download the extension from your dashboard
- Upload the folder to your /wp-content/plugins/ directory
- Activate WP Travel Engine – Legal Documents from the Plugins menu within WordPress
Plugin License #
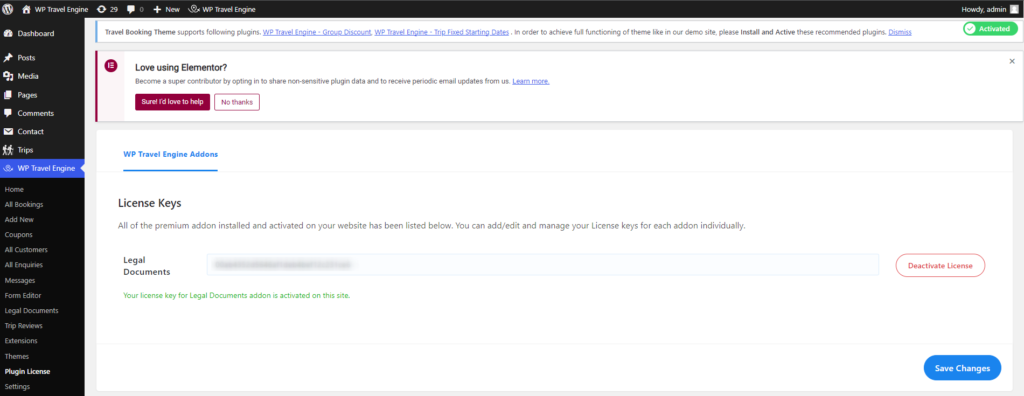
After the activation of Legal Documents addon, site admin will need to add and activate the license key to receive regular plugin updates.
To activate the addon license go to the Admin Dashboard > WP Travel Engine > Plugin License. Enter the license key received during the purchase of addon to the License Key field for WP Travel Engine –Legal Documents. After adding the license key, save the key with the “Save Changes” button.
How it works? #
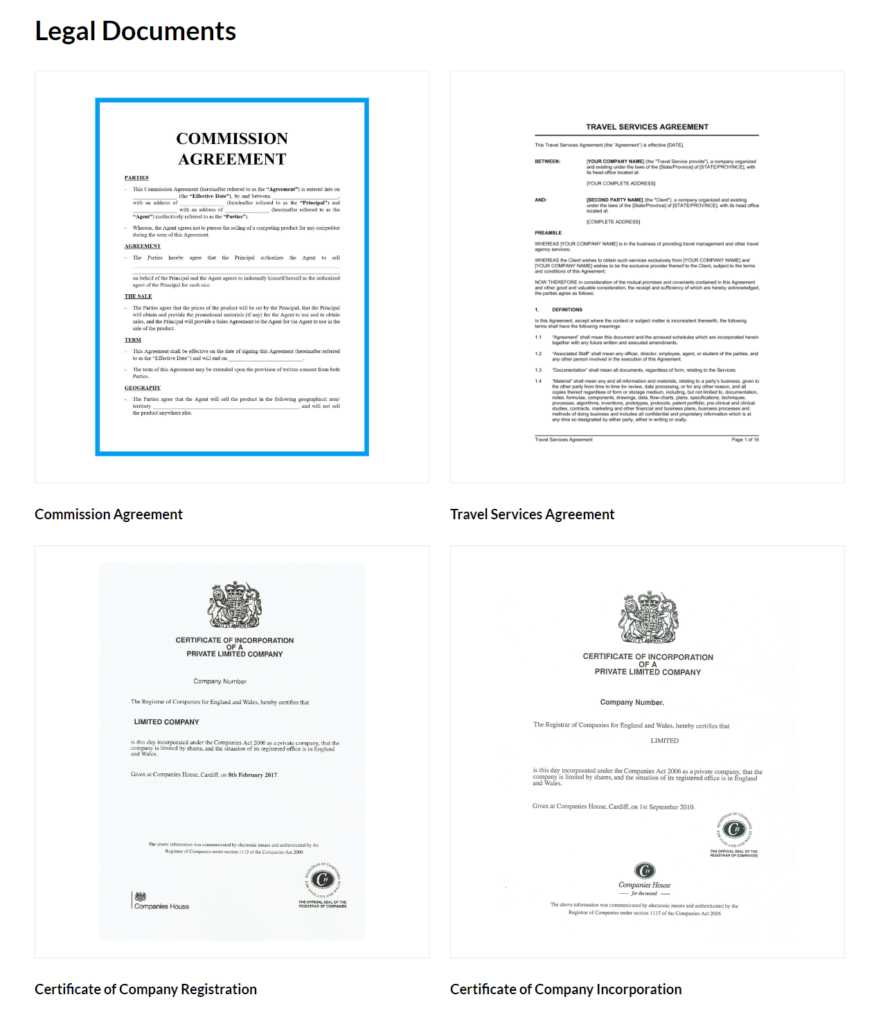
The addon allows you to upload any legal documents such as PAN Registration Certificate, Company Registration Certificate, Certificate of Tourism Industry Division, Sales Commission Agreement, Certificate of Value Added Tax (VAT), Service Contract, Liability Waiver, Privacy Policy, Insurance Requirements, Commercial Real Estate Lease, Non Disclosure Agreement and so on along with the option to add the respective document name and description.
These documents can be in either of the following file formats:
- JPEG
- PNG
Once you upload the documents and its details, you can use the provided Shortcode to show the list of added documents on your site pages/posts/widgets.
Configuration #
To add a document to your website using the Legal Documents extension,
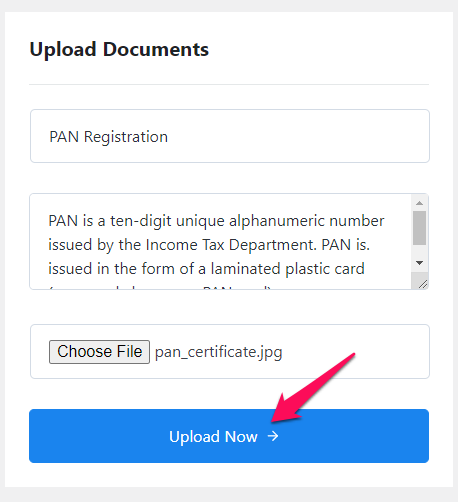
- Go to Dashboard > WP Travel Engine > Legal Documents.
- On the Upload Documents form, enter the document name and description.
- Click on ‘Choose File’ button to upload the document file.
- Click on Upload Now button.
Further, to display the added documents on a page, you can follow the below listed steps:
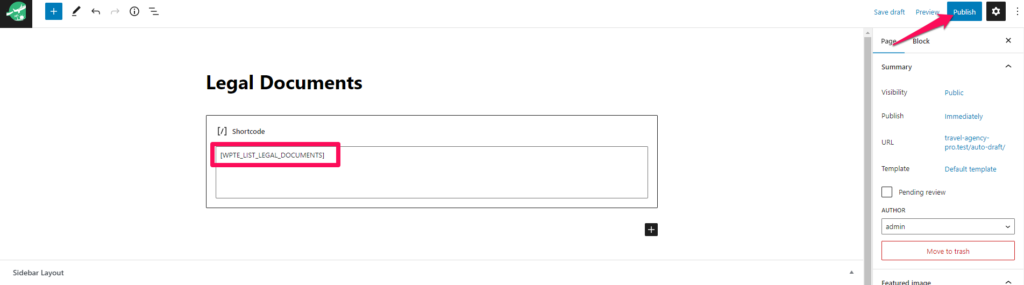
- Visit Dashboard > Pages > Add New and enter the title for the page.
- Click on the Add block (+) icon and select the Shortcode block.
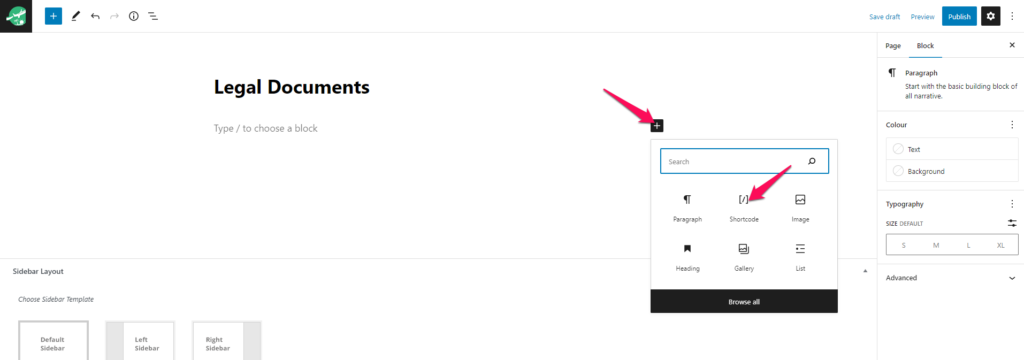
- Enter the following shortcode inside the Shortcode block. The shortcode has argument option
colsto provide the number of columns while displaying documents.[WPTE_LIST_LEGAL_DOCUMENTS cols="3"]
- Click on Publish to save the changes made.
Features #
As a site administrator, you can preview, edit, delete and sort the order of the added documents.
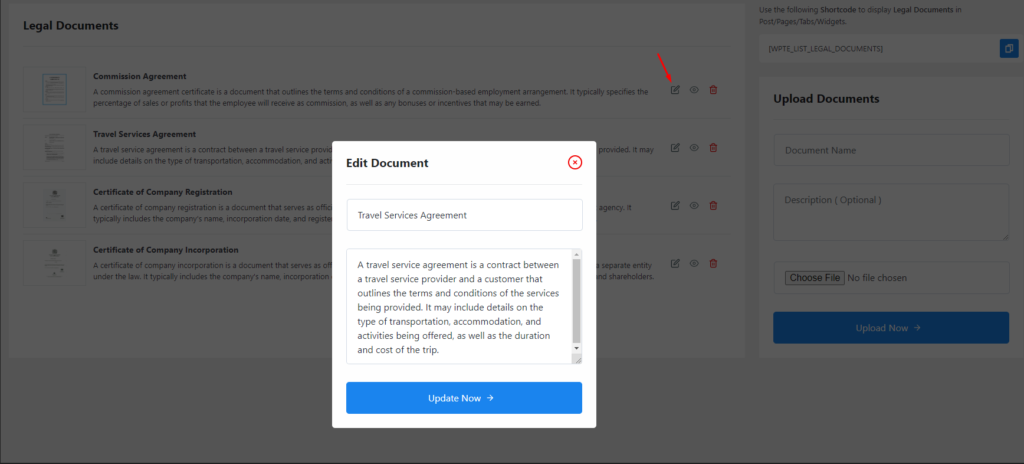
Edit Document: The addon allows you to edit the uploaded document’s title and description. This way, you won’t have to delete and re-upload the files with any incorrect information.
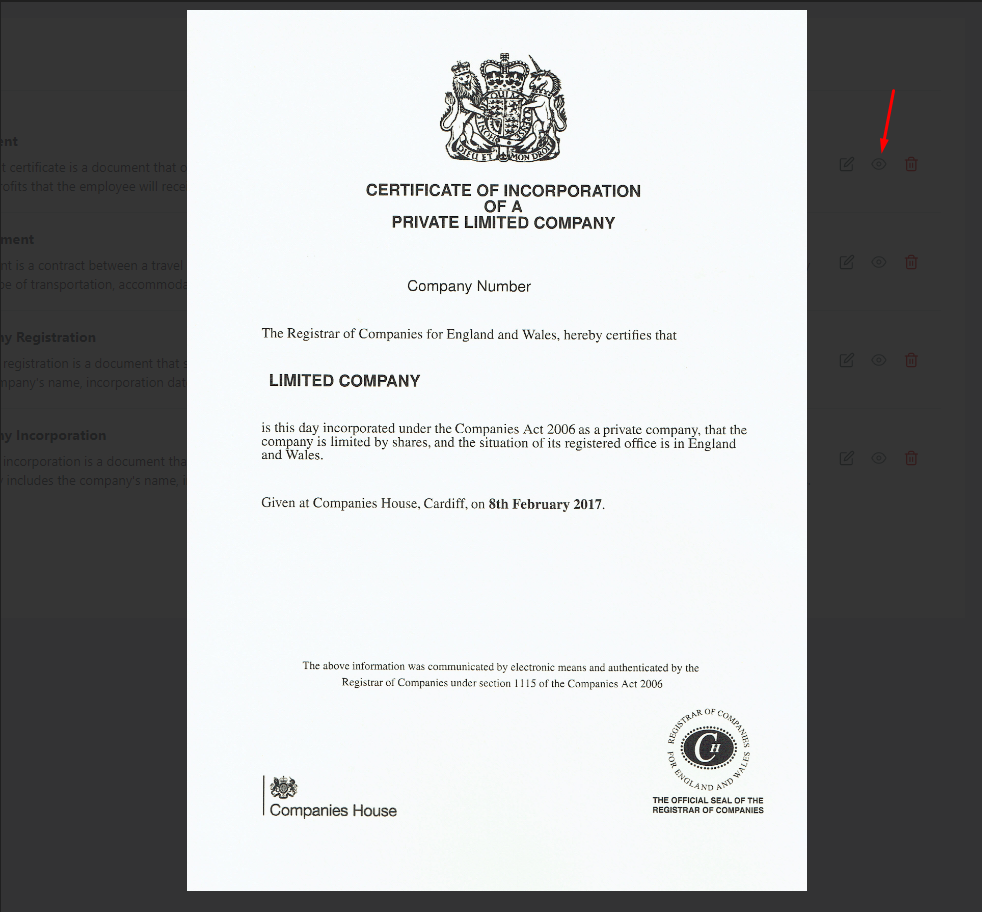
Preview Document: You can get a quick preview of the image or pdf file you have uploaded for each document, simply by clicking on the eye icon.
Delete Document: No need to worry if you uploaded any wrong file or if you do not want to display a document anymore, as you can easily delete it with a single click.
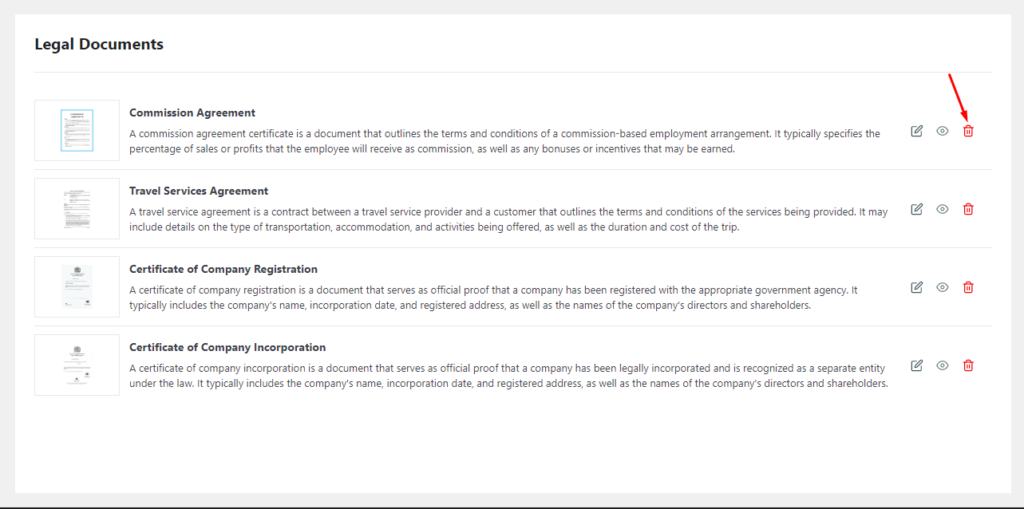
Sort Documents: Hover over a document block and drag and drop the added documents in the order of your preference. The documents on the live site will appear in the exact order you set via this setting.
Frontend Preview #