The SliceWP Integration addon seamlessly integrates your travel booking site with the SliceWP plugin, allowing you to expand your reach through affiliate marketing. With this addon, you can sell your trips by affiliating them on different websites, providing commissions to affiliates and tracking their performance effortlessly. It enables you to monitor the number of affiliates registered, track trips sold through each affiliate, and manage commission payouts—all from a single dashboard. Boost your sales and grow your travel business with an effective affiliate marketing strategy powered by WP Travel Engine and SliceWP.
Download the Plugin File #
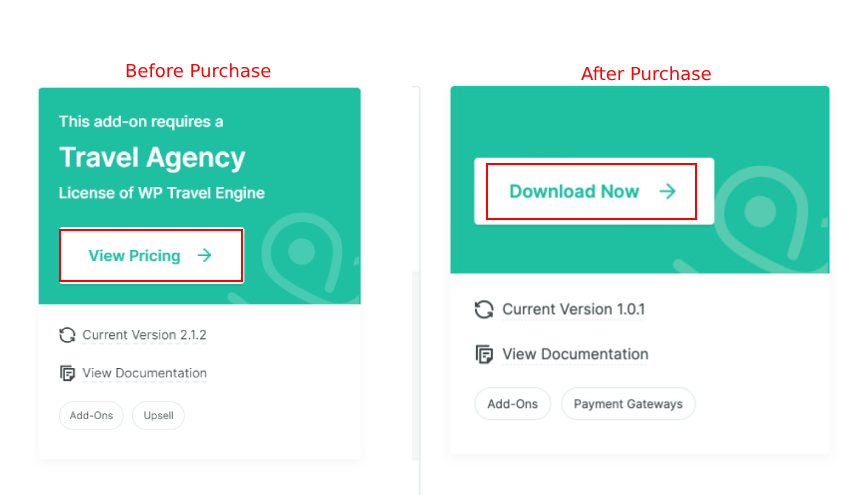
After the purchase, you can download the add-on file by visiting the individual add-on pages from here – https://wptravelengine.com/plugins/
Here are the steps you need to follow:
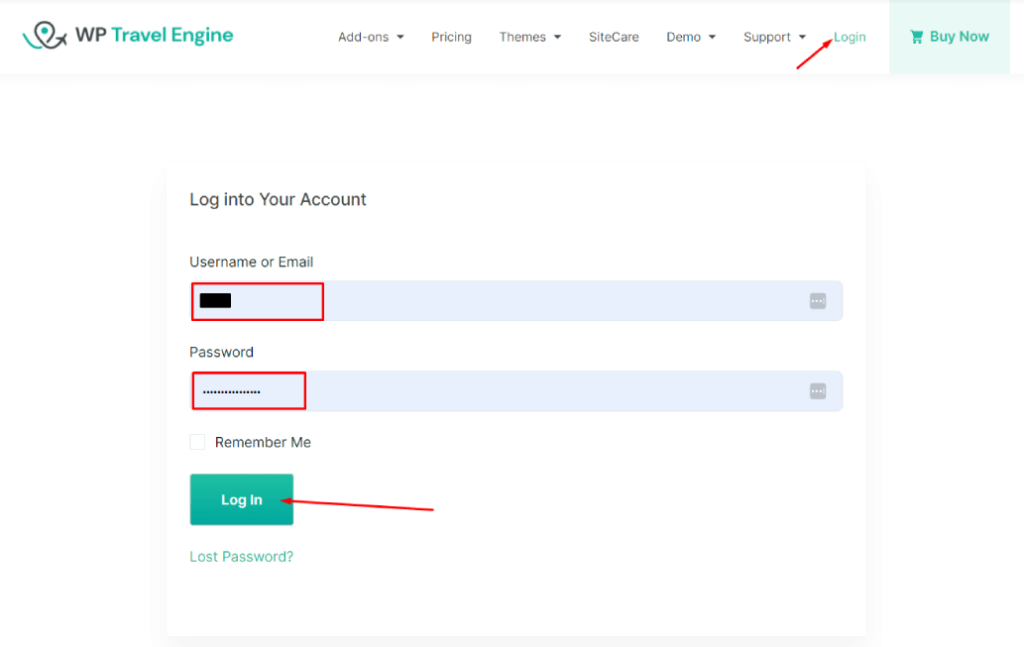
- Visit the WP Travel Engine website and log in to your account through the “My Account” page (https://wptravelengine.com/my-account/).
- Go to the WP Travel Engine-SliceWP add-on page-
- Now, you will see the Download option on the right side of the page instead of View Pricing. Click on it to download the add-on file.
Installing the Add-on #
To upload the downloaded file in your WordPress dashboard, follow the below steps:
- Navigate to the Plugin > Add New
- Click on the Upload Plugin button.
- Select the downloaded file, “wptravelengine-slicewp-integration.zip,” from your computer.
- Click on Install Now.

- Once the file is installed, click on “Activate” to enable the add-on on your website.
Activating the Plugin License #
To activate the plugin license and receive regular updates, follow these steps:
Step 1: Enabling WP Travel Engine Integration with SliceWP #
Before adding affiliates and managing commissions, you need to enable the WP Travel Engine integration in SliceWP.
- Navigate to Dashboard > SliceWP > Settings > Integration.
- Find WP Travel Engine in the list of integrations.
- Toggle the switch to enable integration.
- Once enabled, SliceWP will track commissions for trips sold through affiliates.

Step 2: Create a User Account for Affiliates #
After enabling the integration, you need to create a user account for affiliates.
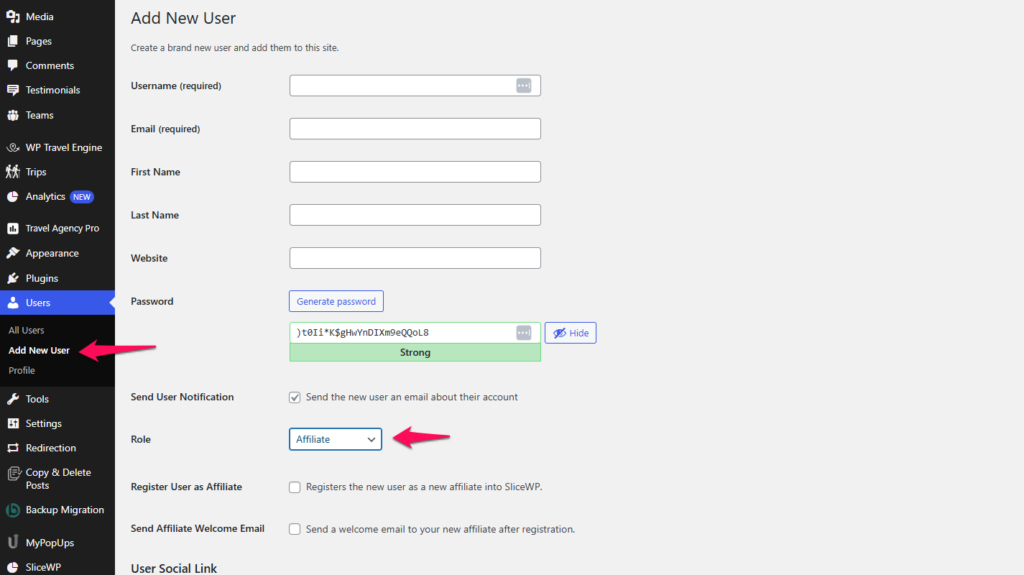
- Go to Users > Add New in your WordPress dashboard.
- Fill in the required details like Username, Email, and Password.
- Set the Role to Affiliate from the dropdown.
- Check the box for Register User as Affiliate to automatically add them to SliceWP.
- Click Add New User to complete the registration.
Note: You can also check this instruction of SliceWP for creating an affiliate account here.
Note: You can also manually add an existing user as an affiliate in the SliceWP dashboard.
Step 3: Assigning a User as an Affiliate in SliceWP #
Once a user account is created, you need to assign them as an affiliate in SliceWP.
- Navigate to Dashboard > SliceWP > Affiliates.
- Click Add New.
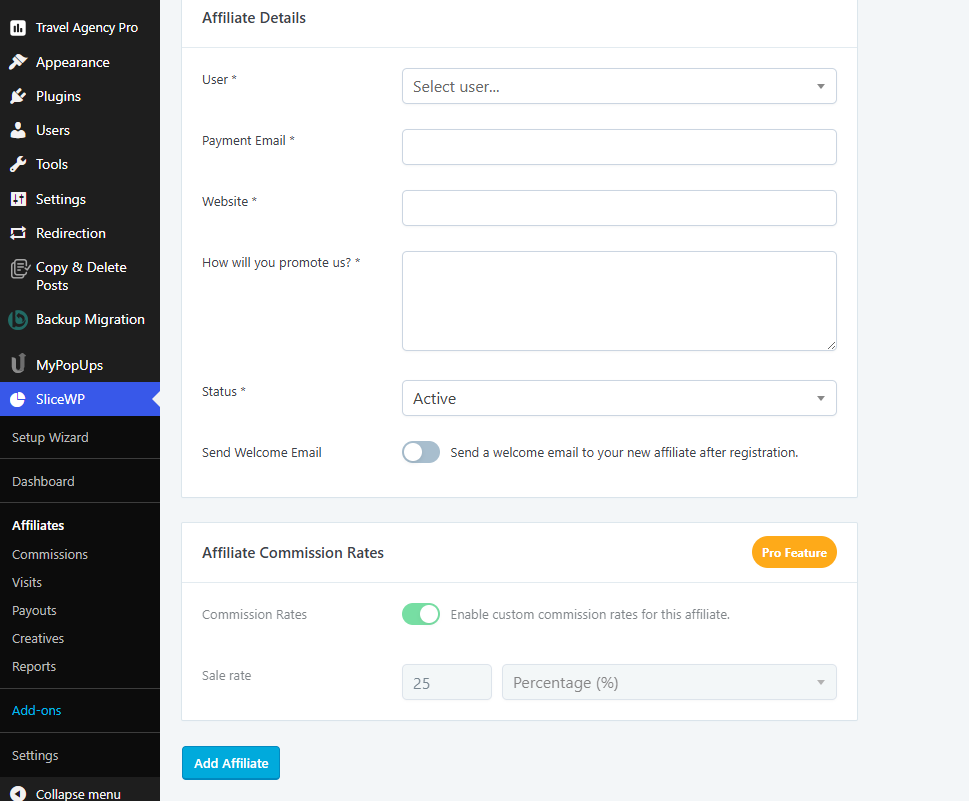
- In the Affiliate Details section:
- Select the User from the dropdown.
- Enter the Payment Email for commission payouts.
- (Optional) Provide the Website and ask how they will promote your trips.
- Set their Status to Active.
- Enable Send Welcome Email if you want to notify them.
- Click Add Affiliate to save the affiliate profile.
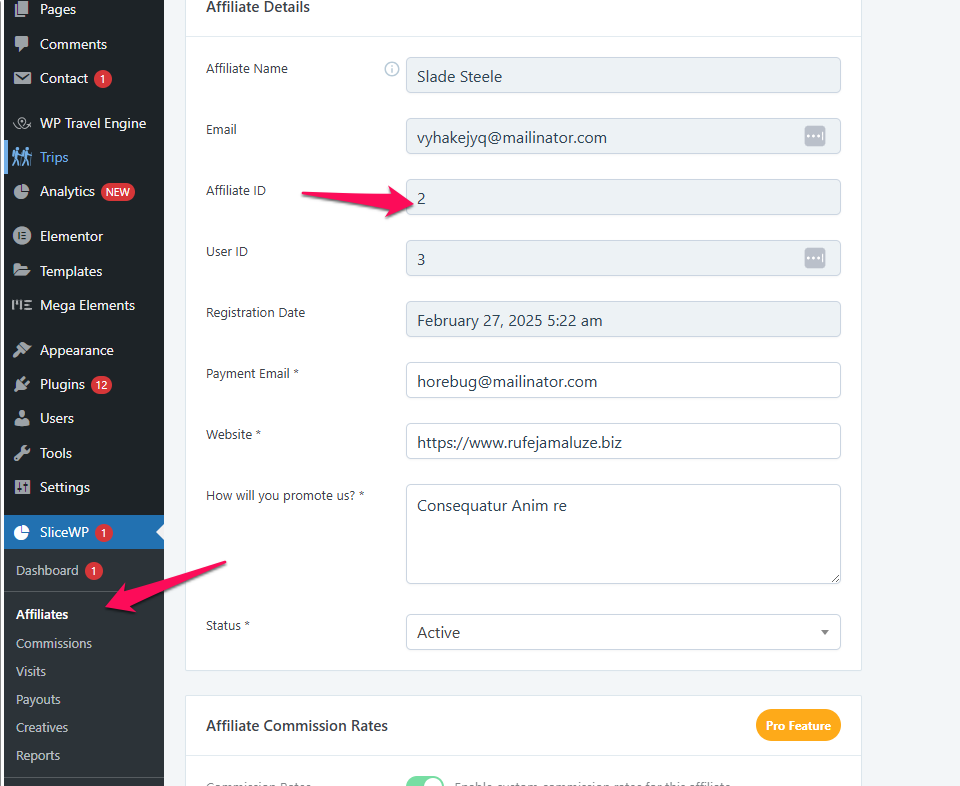
Step 4: Generating Affiliate URLs for Trips #
Each affiliate is assigned a unique Affiliate ID. They need to use this unique ID in each trip URL to track sales.
Example of an affiliate link:https://example.site/trip/5-days-tour-to-philippines/?aff=2
Note: The number 2 at the end of the URL represents the Affiliate ID. The affiliate must replace it with their respective Affiliate ID.
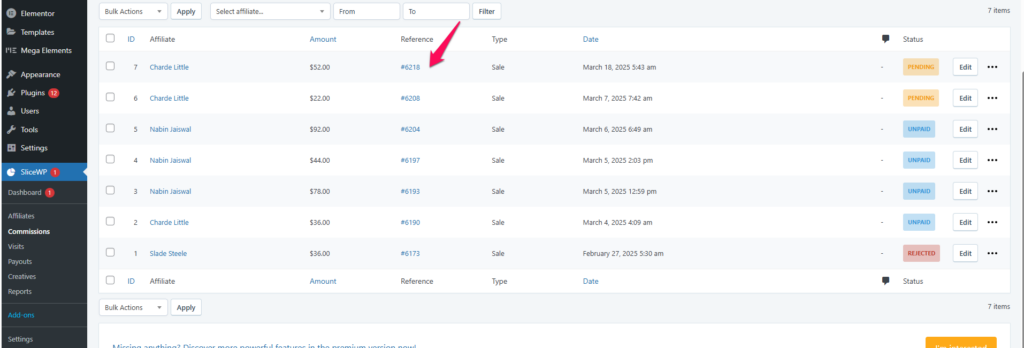
Step 5: Viewing and Managing Commissions #
To track and manage commissions:
- Go to Dashboard > SliceWP > Commissions.
- You will see a list of all commissions along with:
- Affiliate Name
- Commission Amount
- Reference (Booking ID)
- Type (Sale, Refund, etc.)
- Date
- Status
- Understanding Commission Status:
- Pending: The trip has been referred but not yet purchased.
- Unpaid: The trip has been purchased, but the commission hasn’t been paid yet.
- Paid: The commission has been processed and given to the affiliate.
- Rejected: The trip was canceled, and the commission was not approved.
Step 6: Checking Booking Details from the Commission Page #
In the Commissions section:
- Under the Reference column, you will see booking reference numbers.
- Click on a Reference Link to open the booking details.
- In the Commission Details box, you can see the commission amount assigned to the affiliate for that sale.

This section helps you track which affiliates are bringing in sales and how much commission they have earned.
Step 7: Processing Affiliate Payouts #
To pay affiliates for their earned commissions:
- Go to Dashboard > SliceWP > Payouts.
- Select the Unpaid Commissions that need to be processed.
- Click Process Payment.
- Once the payment is completed, mark the commissions as Paid.
For any further assistance, feel free to reach out to our support team.