Overview #
The Pickup Points addon for WP Travel Engine allows site administrators to define specific pickup points for each trip. These points can be configured as either free or paid options, providing flexibility to travel operators in managing transportation logistics for customers. During the booking process, customers can select their preferred pickup point from the available list, and any applicable cost will be automatically added to the cart.
Why Use the Pickup Points Addon? #
- Flexibility in Transport Options: Offer free or paid pickup points based on your business model.
- Seamless Integration: Automatically add pickup charges to the cart, ensuring transparent pricing for customers.
- Convenient for Travelers: Customers can select their preferred pickup point directly at checkout, enhancing the user experience.
Step-by-Step Guide to Configure Pickup Points Addon #
1. Addon Installation #
To use the Pickup Points addon, you first need to install and activate it. For detailed instructions, please refer to this guide: How to install and activate license for pro addons.
2. Adding Pickup Points to a Trip #
Once the addon is activated, you can add pickup points from the Trip Edit Settings for each trip. Below are the steps for adding pickup points to a trip:
- Navigate to Admin Dashboard > Trips and select the trip where you want to define pickup points and click Edit.
- In the Trip Editor page, you will find a tab labeled Pickup Points within the Trip Edit Settings panel.
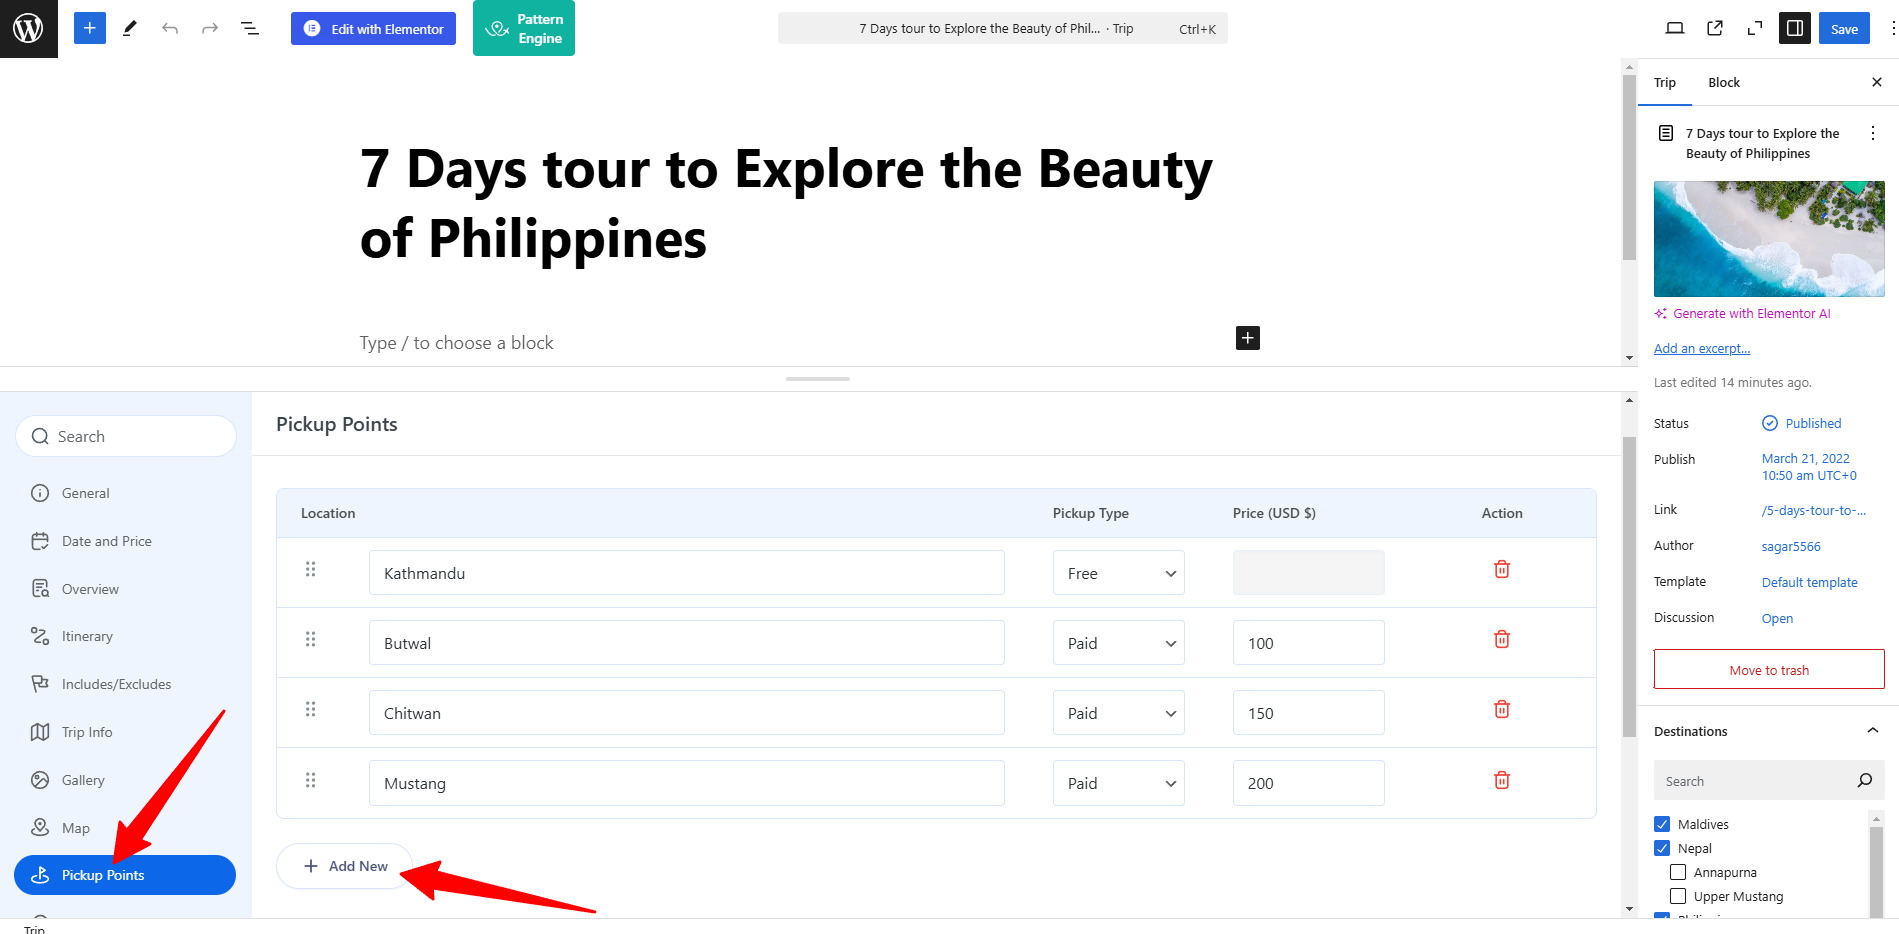
- To define a new pickup point, click the Add New button.
- Fill in the Details:
- Location: Enter the name of the pickup location.
- Pickup Type: Choose whether the pickup is Free or Paid.
- Price: If Paid is selected as Pickup Type, specify the cost of the pickup point.
- Once all necessary pickup points are added, click Save Changes to apply the settings.
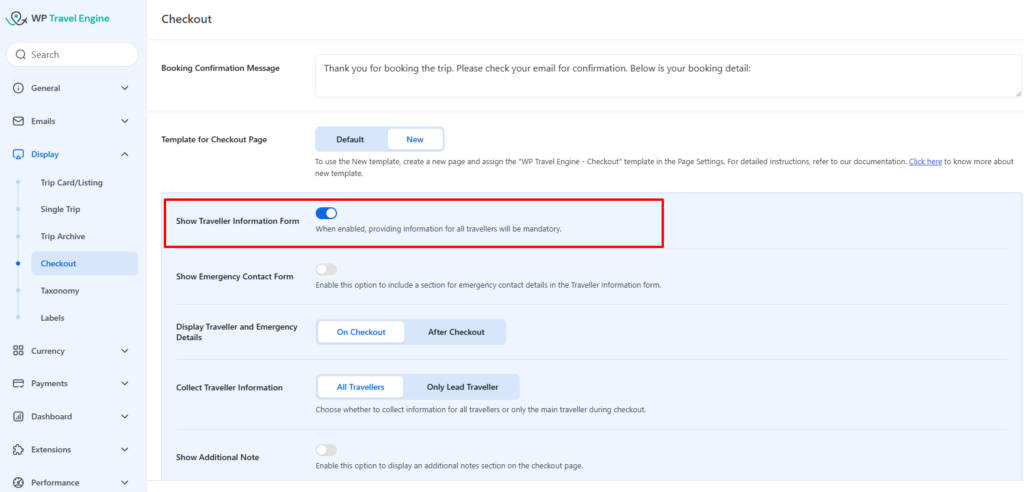
3. Displaying Pickup Points on the Checkout Page #
For customers to select their preferred pickup point during booking, make sure that Traveler’s Information Form is enabled via Admin Dashboard > WP Travel Engine > Settings > Display > Checkout.
4. Customer Experience on the Checkout Page #
- Selecting a Pickup Point:
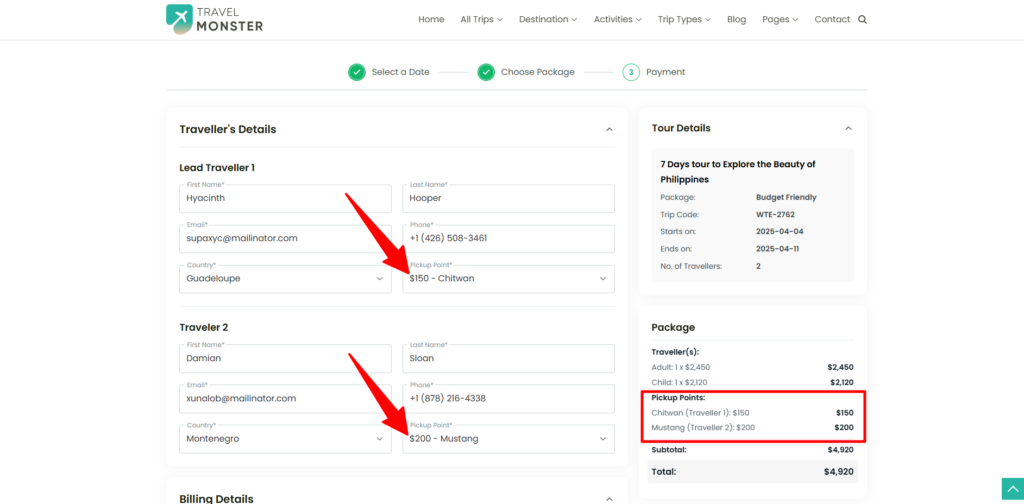
While booking the tour, customers can select the preferred Pickup Point while filling out the Traveler’s Information Form. In the Traveler’s Information Form, a new dropdown field for the Pickup Points is added listing the available pickup points. If the pickup point selected by the customer has an associated cost, it will be automatically added to the booking summary. - Cost Calculation:
The cost of the selected pickup point will be displayed in the booking summary on the checkout page, ensuring transparent pricing for the customer.
5. Example Workflow #
- Admin defines pickup points (e.g., Kathmandu, Chitwan, Mustang) with different types (Free or Paid).
- A customer books a trip and selects “Chitwan – $150” as the pickup point during checkout.
- The system automatically adds the $150 pickup fee to the booking total, providing the customer with a clear breakdown of charges.
- Once the booking is complete, the selected pickup point is saved with the booking details for the admin’s reference.
6. Use Cases #
- Airport Pickup Services: Offer free or paid pickup services from airports or designated locations.
- Custom Pickup Locations: Provide customers the option to choose from multiple pickup points (e.g., hotel, bus station, or city center).
- Tiered Pricing for Convenience: Set different prices based on distance or convenience, such as nearby or distant pickup points.
Conclusion #
The Pickup Points addon for WP Travel Engine enhances your site’s booking experience by allowing you to offer flexible pickup options. Whether you need to provide free pickups or charge customers based on location, this addon ensures a streamlined process for both admins and customers.
For any further assistance, feel free to reach out to our support team.