The Form Editor add-on allows you to manage the form fields used in the WP Travel Engine core plugin. You can add, edit, remove, and sort fields for the Trip Enquiry Form, Booking Form, Traveller’s Information Form, and Emergency Contact Form, all from a central options page in your Admin Dashboard.
In this documentation, you will learn step-by-step about add-on installation, setup, and initial configuration options.
Requirement: Form Editor requires the WP Travel Engine plugin v. 4.0.0 or later installed and activated on your website.
You can follow the video or the below steps to configure the Form Editor add-on.
Download the Plugin File #
After the purchase, you can download the add-on file by visiting the individual add-on pages from here – https://wptravelengine.com/plugins/
Here are the steps you need to follow:
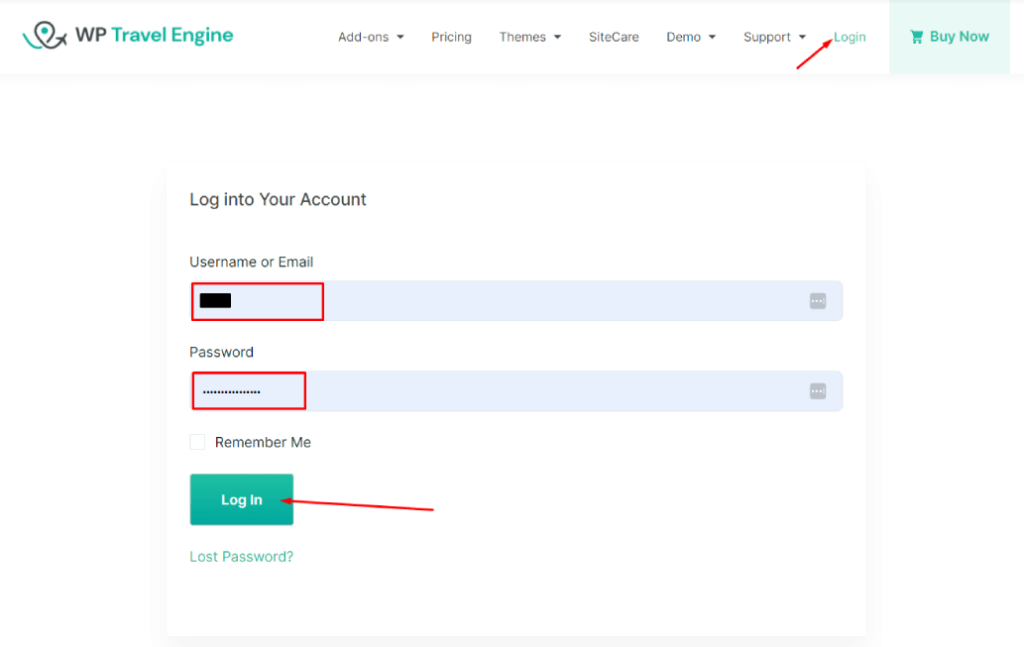
- Visit the WP Travel Engine website and log in to your account through the “My Account” page (https://wptravelengine.com/my-account/).
- Go to the Form Editor add-on page – https://wptravelengine.com/plugins/form-editor/
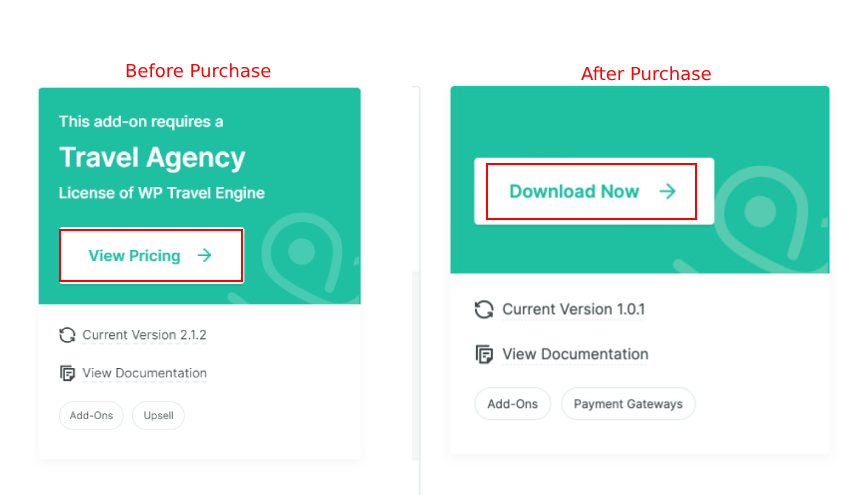
- Now, you will see the Download option on the right side of the page instead of View Pricing. Click on it to download the add-on file.
Installing the Add-on #
To install the add-on, upload the downloaded file to your WordPress dashboard. Follow the steps below:
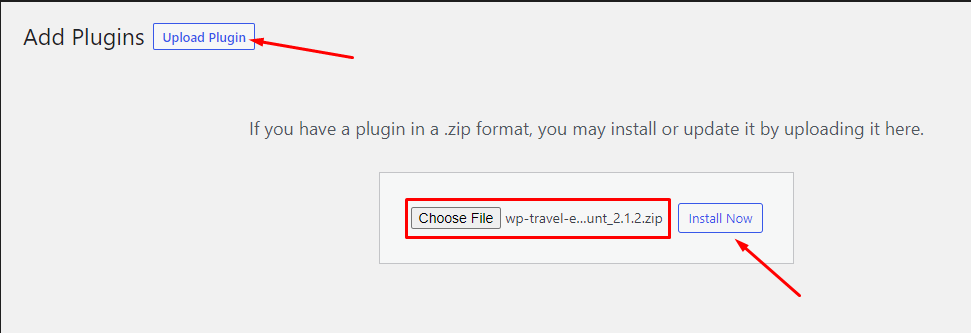
- Navigate to the Plugin > Add New.
- Click on the Upload Plugin button.
- Select the downloaded file, “wp-travel-engine-form-editor.zip,” from your computer.
- Click on Install Now.
- Once the file is installed, click “Activate” to enable the add-on on your website.
Activating the Plugin License #
To activate the plugin license and receive regular updates, follow these steps:
- Go to your Admin Dashboard and navigate to WP Travel Engine > Plugin License.
- Enter the license key in the Form Editor field.
- Click Save Changes.
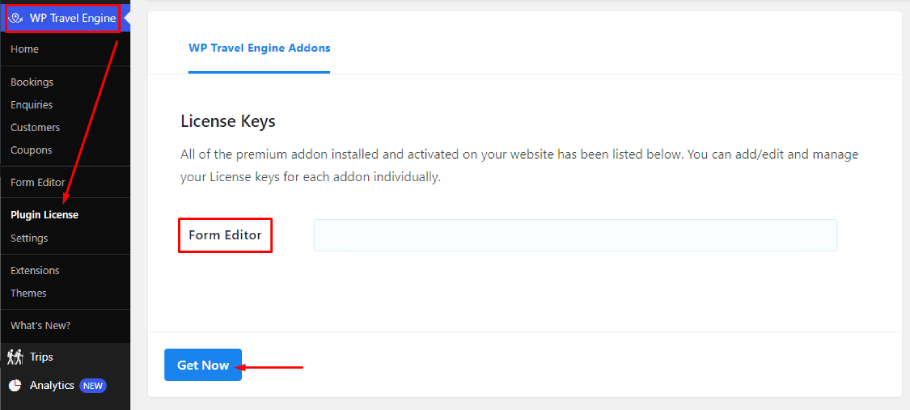
- Refresh the page to see the Activate License button, then click on it.
After successful activation, you can usually update the Form Editor add-on from the Plugins page whenever a new update is released.
Configuring Global Settings #
To configure the global settings for the Form Editor add-on, navigate to WP Travel Engine > Settings > Extensions > Form Editor.
Google reCAPTCHA Site Key: Enter the Google reCAPTCHA site key to activate the reCAPTCHA service on your website.
Google reCAPTCHA Secret Key: Enter the Google reCAPTCHA secret key to activate the reCAPTCHA service on your website.
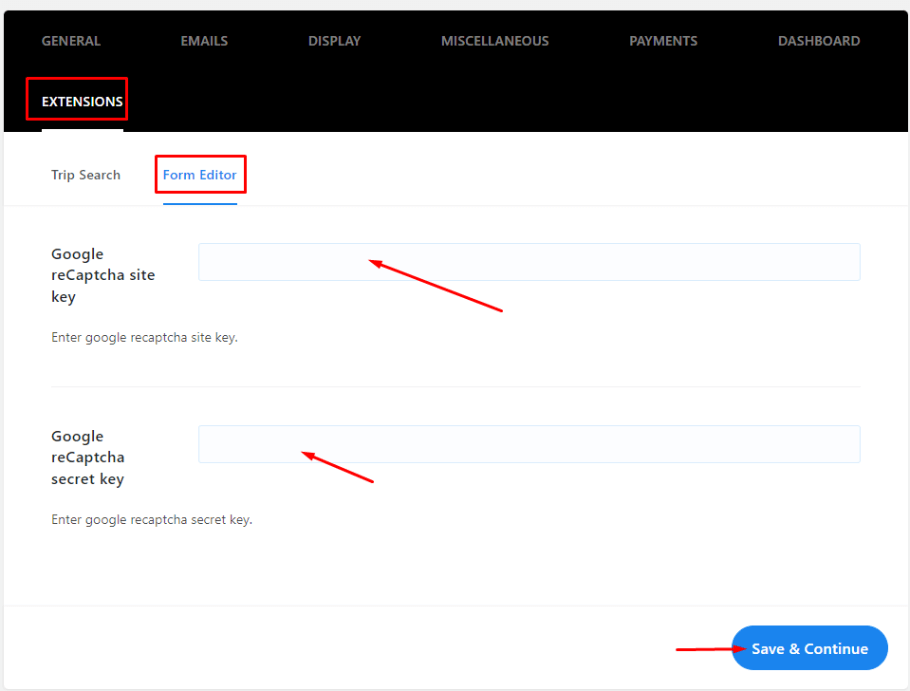
Click Save and Continue.
Note: Please keep the reCAPTCHA secret key confidential for security purposes.
Main Settings for Form Editor #
The Form Editor add-on provides an easy-to-use interface for website admins to add, edit, delete, and sort form fields in all WP Travel Engine plugin forms.
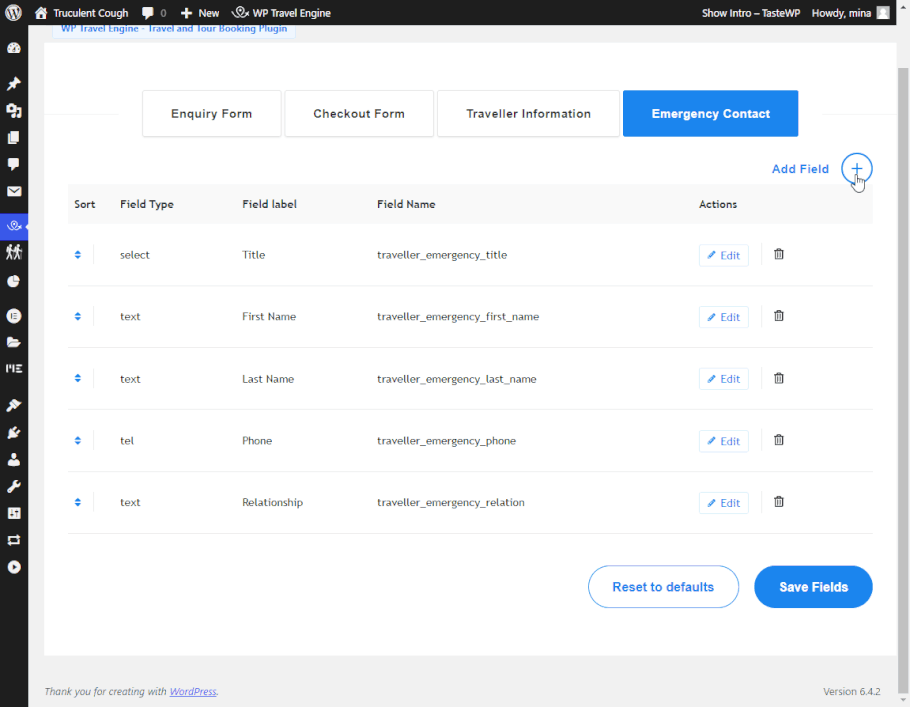
To customize any of the four WP Travel Engine forms, navigate to the Form Editor section under the WP Travel Engine menu. This menu provides access to all settings and options for each form through a dedicated settings page.
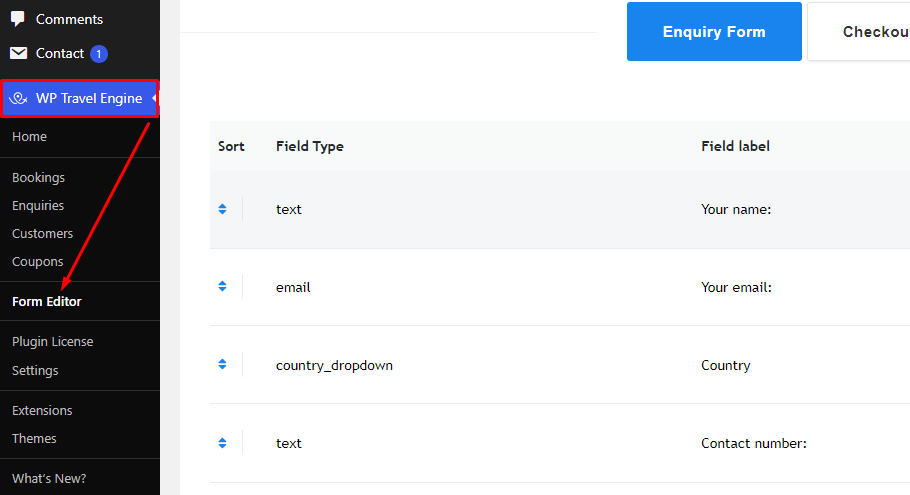
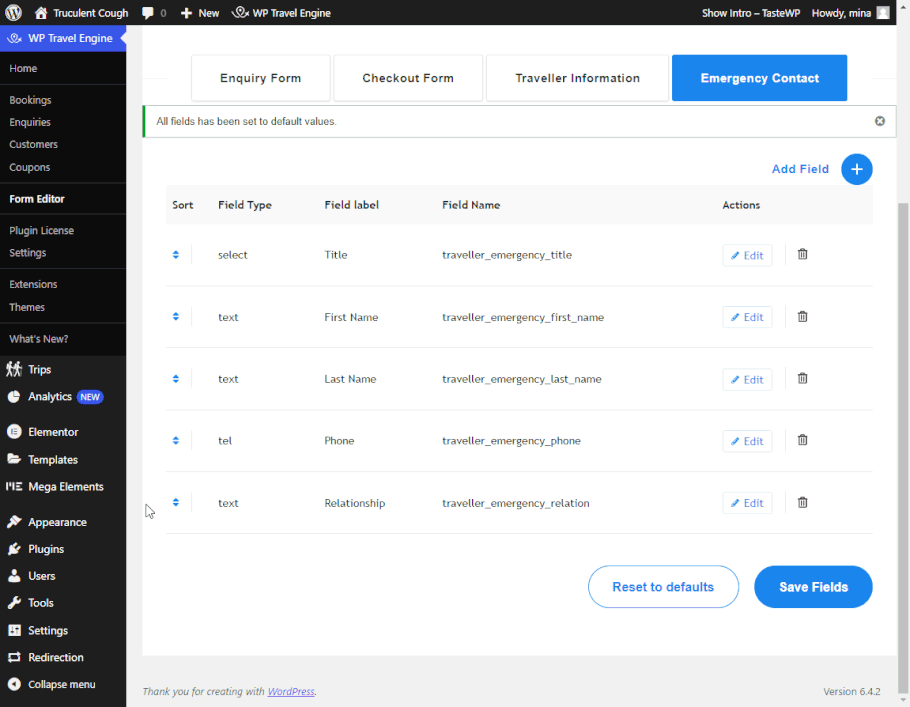
Clicking on the menu opens the main Form Editor settings screen, where you’ll find dedicated tabs for each form in the WP Travel Engine core plugin:
- Enquiry
- Checkout
- Traveller Information, and
- Emergency Contact.
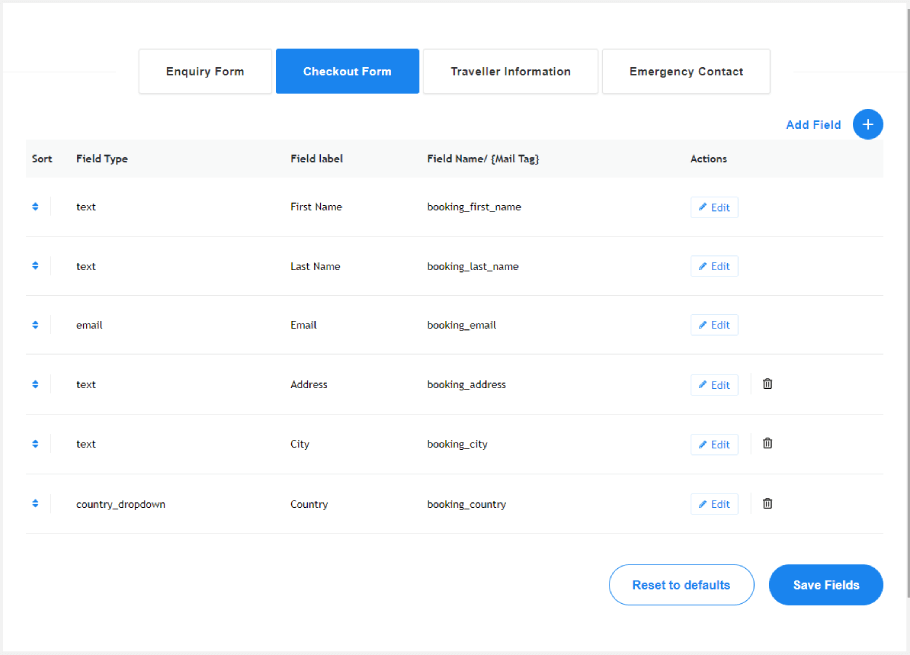
Table Row Fields #
All the default fields added by WP Travel Engine for each form are listed on the settings page. Each row in the settings table represents a form field within the form (indicated by a tab label). Each row has a piece of information and an option to edit the field and sorting handle.
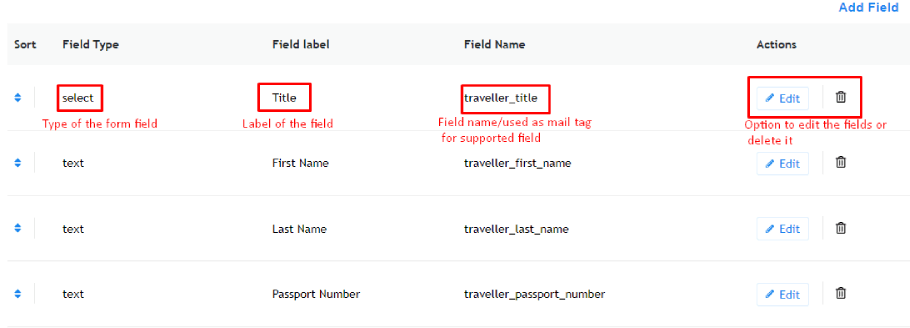
Field Type: Displays the type of field.
Field Label: Displays the text of the field label.
Field Name: Shows information about the field, including its unique identifier (name), which can be used as an email tag to display field data.
Actions: Provides options to edit or delete fields. (The Delete option is unavailable for some required default fields.)
Here, you can perform the following actions from the main settings of this add-on:
Editing Existing Form Fields #
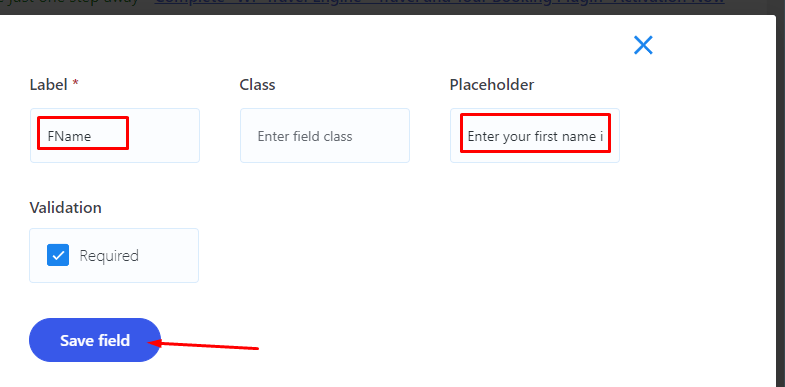
To edit a field, click the Edit button for its row. This opens a pop-up form where you can modify various attributes:
- Label: Enter the desired text displayed for the field. (For example, changing “First Name” to “FName”).
- Class: Add custom CSS classes for styling the field.
- Placeholder: Specify the placeholder text displayed within the field before user input. (e.g., “Enter your first name in all capital”).
- Validation: Check this box to make the field mandatory for users to fill out.
- Click the Save field button.
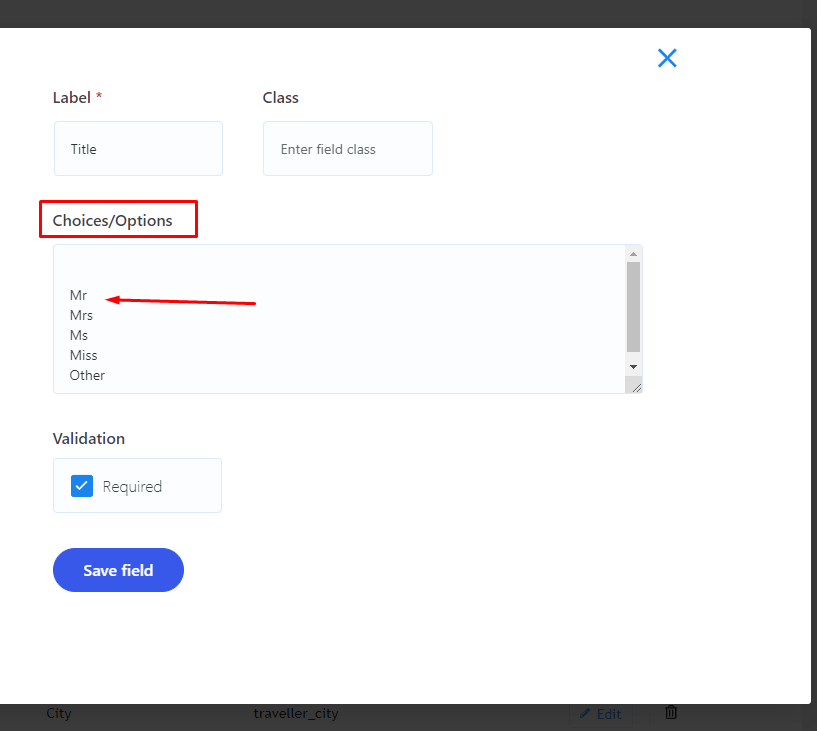
Some fields may have drop-down selection options. The process to edit these is the same as above. However, instead of editing a placeholder, you can rename the choices for the drop-down menu.
Adding New Form Fields #
To add a new field to any form, head to the desired form’s tab and click the “Add field” button.

This action opens a slide-out sidebar displaying available field types you can add. These fields are categorized into two main groups:
- Basic Fields: It includes fields options like Text, Text Area, Select, Checkbox, Radio Buttons, Attachment
- Advance Fields: It includes field options like Country Dropdown, Telephone, Number, Trips List, Captcha, Datepicker
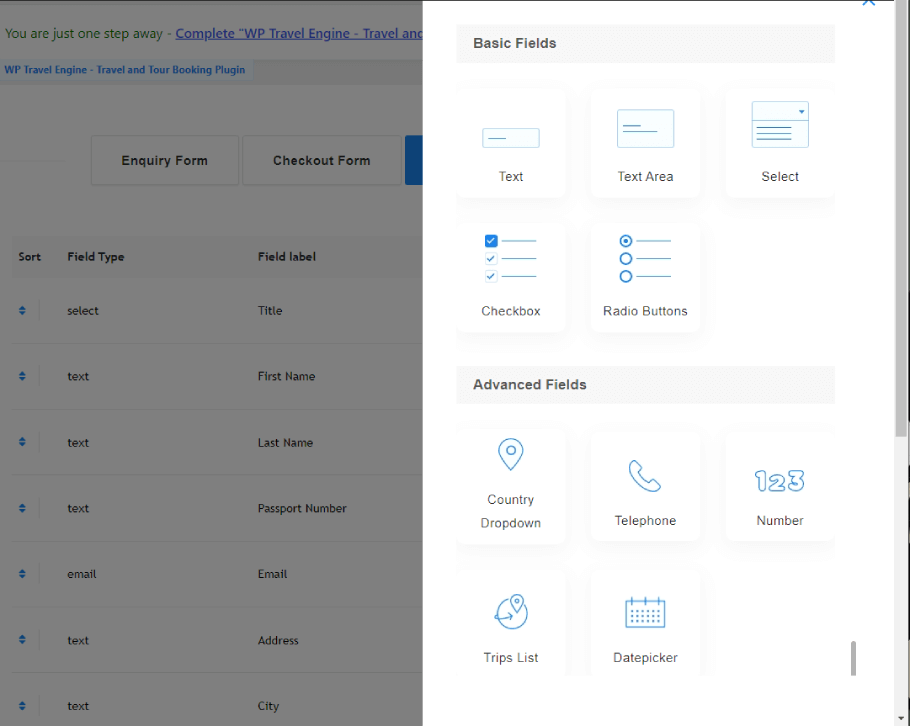
To add a field, click on the desired type. This opens a popup with options to customize your new field.
Note: The Name and ID fields automatically populate based on the label when empty. If you want to modify them, ensure each new field has unique values.
Additionally, the add field popup varies depending on the chosen type. For fields with options (radio, checkbox, and select), the pop-up will have an additional textarea. Add one option per line, and the text values will be used as choices in the form.
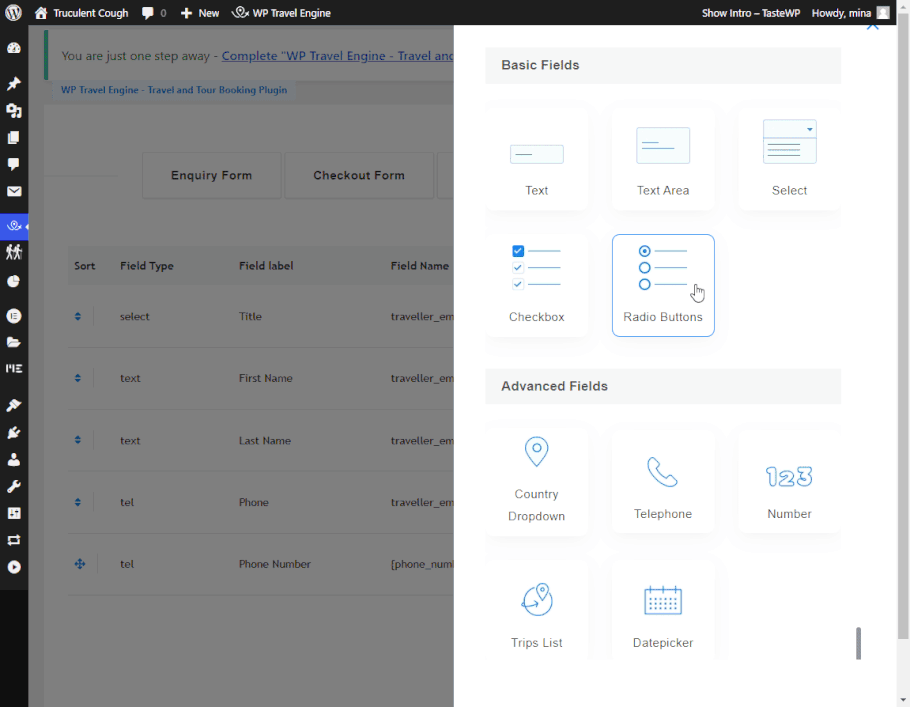
Click the Save Field button to save your newly added field.
Sorting Form Fields #
You can reorder both default and newly added form fields in any desired order for each form. To sort the fields, simply drag and drop the field row using the sorting handle.
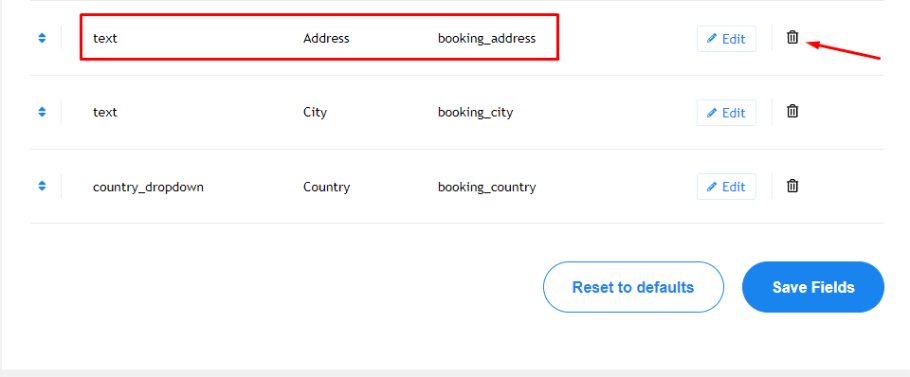
Deleting Form Fields #
To delete any default field (which is not required) or newly added fields, simply click the delete icon in the fields row. Once confirmed, the field will be deleted.
Reset to Defaults #
Made a mistake while editing fields or accidentally deleted default ones and need them back? You can easily revert everything to the original state with a single click.
Simply click the “Reset to defaults” button to restore the default settings.
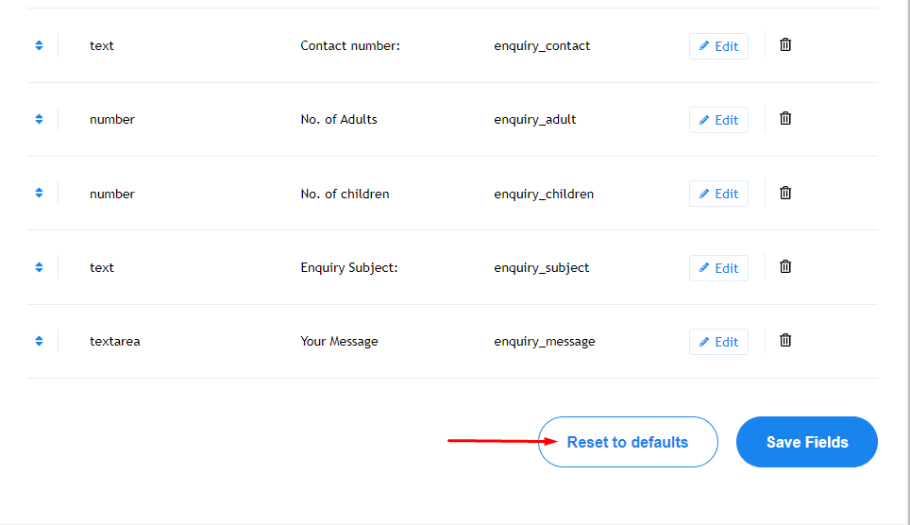
Note: Please remember that resetting will clear everything, get default form fields back, and remove any newly added form fields.