WP Travel Engine provides comprehensive Currency Settings to manage how currency is displayed on your travel website. These settings allow you to configure the preferred currency, format, decimal precision, and separators, ensuring the pricing aligns with your target audience’s expectations.
This guide will walk you through the available options and how to configure them effectively.
Accessing Currency Settings #
To access the Currency Settings:
- Log in to your WordPress Admin Dashboard.
- Navigate to WP Travel Engine > Settings > Currency > General.
- Here, you will find the options to configure your site’s currency settings. Each setting is described below.
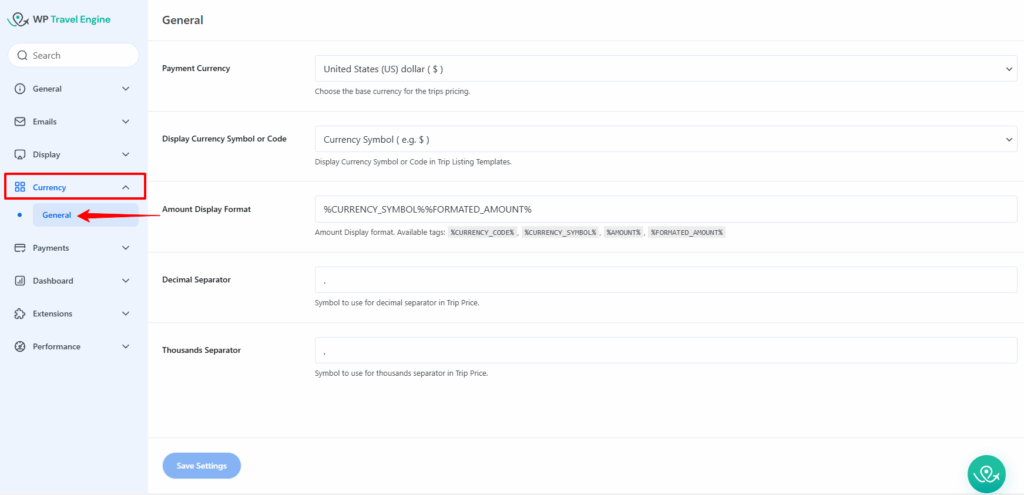
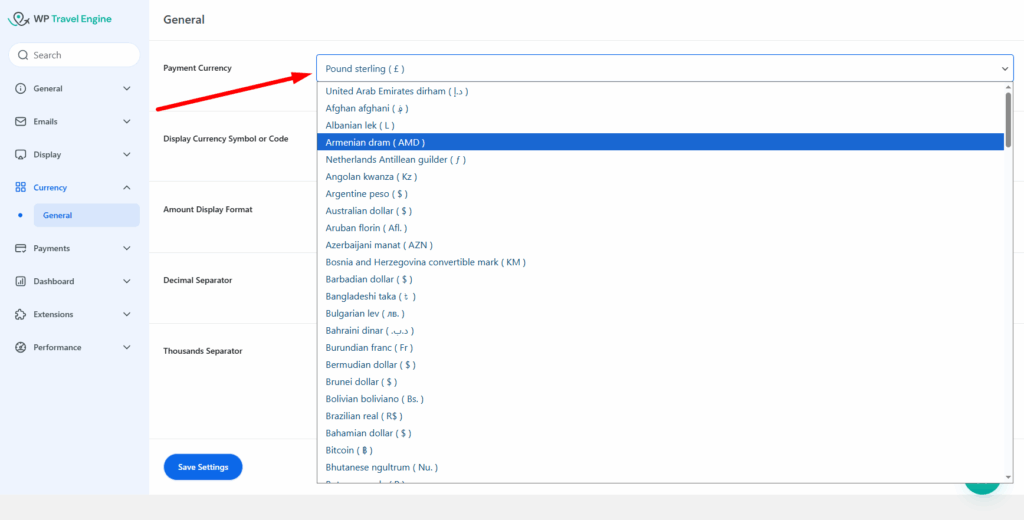
1. Payment Currency #
- Description: This dropdown field allows you to select the preferred currency for your website, such as USD, INR, Yuan, Yen, etc. By default, the currency is set to US Dollar (USD).
- How to Use:
- From the Payment Currency dropdown, select your desired currency.
- Click Save Settings to apply the new currency.
2. Display Currency Symbol or Code #
- Description:
This option determines whether the currency is displayed as a symbol (e.g., $) or as a code (e.g., USD). - Available Options:
- Currency Symbol: Displays the currency using its symbol, such as $ for US Dollar or ₹ for Indian Rupee.
- Currency Code: Displays the currency using its code, such as USD for US Dollar or INR for Indian Rupee.
- How to Use:
- Select Currency Symbol or Currency Code from the dropdown.
- Ensure that the Amount Display Format is updated accordingly to reflect your choice (see Section 3 for details).
- Click Save Settings.

3. Amount Display Format #
- Description:
This setting allows you to define how the currency and amount are displayed. It uses tags to structure the format. - Available Tags:
%CURRENCY_CODE%: Displays the currency code (e.g., USD).%CURRENCY_SYMBOL%: Displays the currency symbol (e.g., $).%AMOUNT%: Displays the raw amount (e.g., 1000).%FORMATED_AMOUNT%: Displays the amount with proper formatting (e.g., 1,000.00).
- Default Format:
%CURRENCY_SYMBOL%%FORMATED_AMOUNT% - Important Note:
The format must align with the Display Currency Symbol or Code setting. For example:- If Currency Code is selected, use
%CURRENCY_CODE%%FORMATED_AMOUNT%. - If Currency Symbol is selected, use
%CURRENCY_SYMBOL%%FORMATED_AMOUNT%.
Failure to align these settings may not display the trip prices as expected.
- If Currency Code is selected, use
- How to Use:
- Enter the desired format in the Amount Display Format field using the tags above.
- Click Save Settings to apply the format.

4. Decimal Separator #
- Description:
This setting allows you to specify the symbol used as the decimal separator in trip prices.- Example: Using a dot (
.) as the separator results in 1,000.00.
- Example: Using a dot (
- How to Use:
- Enter the desired decimal separator (e.g.,
.) in the Decimal Separator field. - Click Save Settings.
- Enter the desired decimal separator (e.g.,

5. Thousands Separator #
- Description:
This setting allows you to specify the symbol used as the thousands separator in trip prices.- Example: Using a comma (
,) as the separator results in 1,000.
- Example: Using a comma (
- How to Use:
- Enter the desired thousands separator (e.g.,
,) in the Thousands Separator field. - Click Save Settings.
- Enter the desired thousands separator (e.g.,

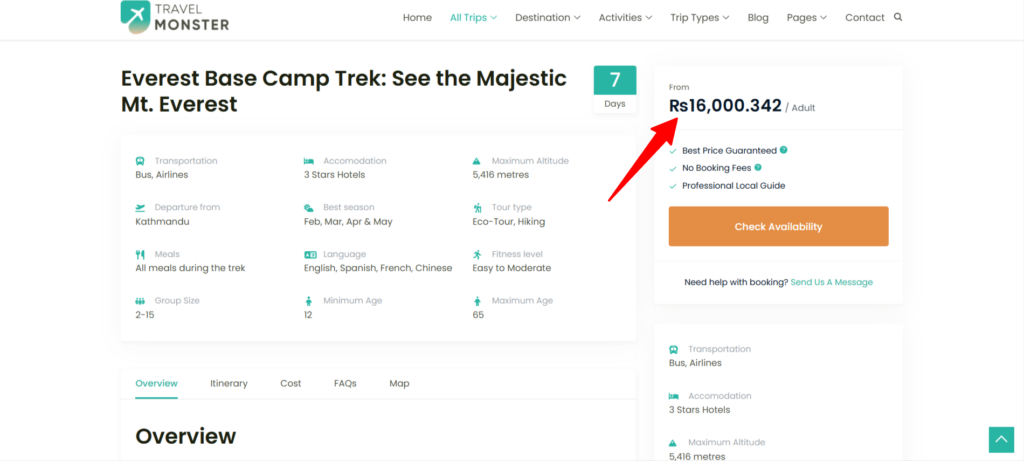
Example Configuration #
Here’s an example of how you might configure the settings for a Nepal-based travel website:
- Payment Currency: Nepalese Rupees ( Rs )
- Display Currency Symbol or Code: Currency Symbol
- Amount Display Format:
%CURRENCY_SYMBOL%%FORMATED_AMOUNT% - Decimal Digits: 3
- Decimal Separator:
. - Thousands Separator:
,
The resulting display for a price of 1000 would be: Rs16,000.342.
Conclusion #
The Currency Settings in WP Travel Engine allow you to customize how pricing is displayed on your travel website fully. By selecting the appropriate currency, format, and separators, you can ensure a user-friendly experience tailored to your audience.
If you face any difficulties, feel free to contact our support team.