Managing trip bookings effectively is crucial for running a successful travel business. WP Travel Engine provides an easy-to-use Bookings section where you can view, add, edit, and export your trip bookings. This guide will walk you through the process.
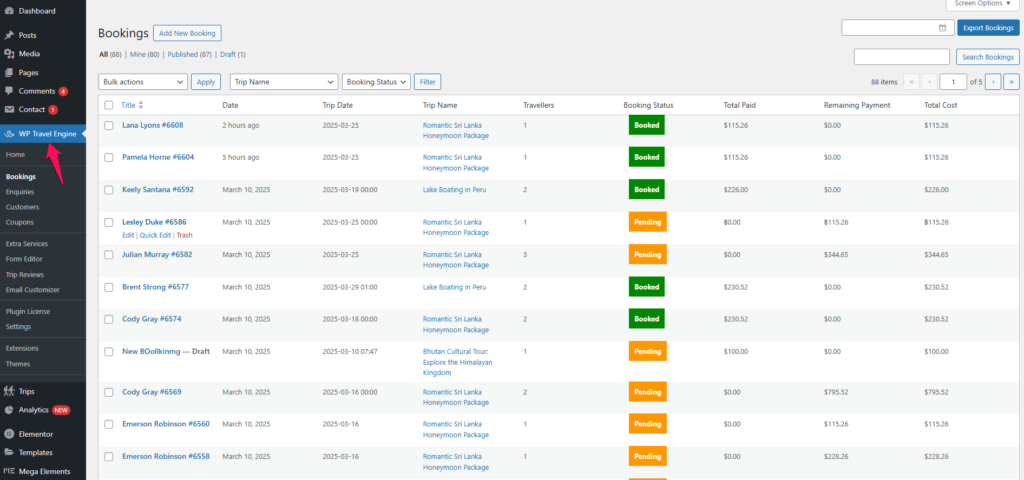
1. Viewing All Bookings #
To view the list of all trip bookings:
- Navigate to WP Travel Engine > Bookings from your WordPress dashboard.
- Here, you will see a list of all bookings, including:
- Name
- Booking Status (Pending, Booked, Canceled, etc.)
- Date
- Trip Date
- Trip Name
- Total Paid
- Remaining Payment
- Total Cost
- You can use the Filters to search for specific bookings based on trip name, booking status, or date.
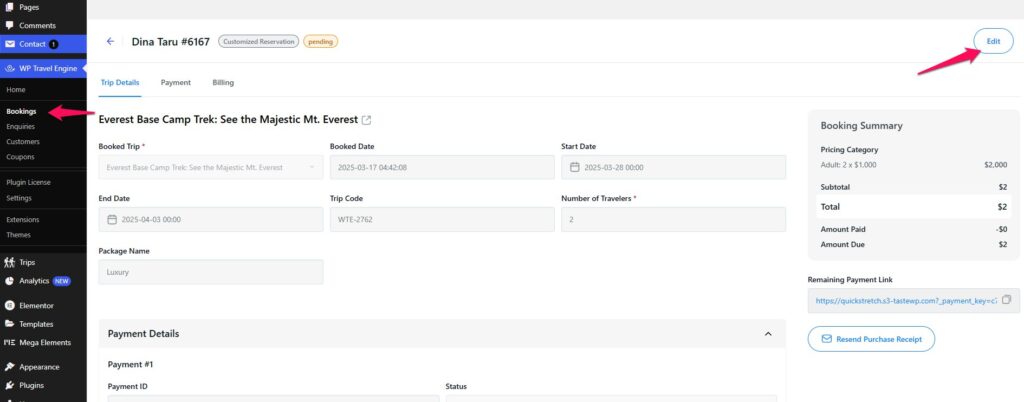
Edit Booking Detail #
You also have the option to modify existing bookings if any details need to be updated. To make changes, simply click on the “Edit” button, which will allow you to adjust the necessary information as required.
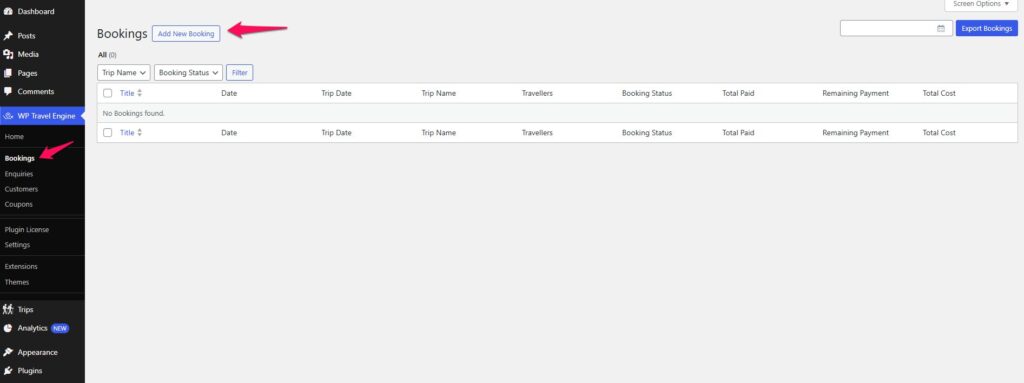
2. Adding a Manual Booking #
If a customer books a trip offline or via direct inquiry, you can manually add a booking.
Steps to Add a Manual Booking: #
- Go to WP Travel Engine > Bookings and click Add New Booking.
- Fill in the necessary details under different tabs:
Tabs to Fill in Manual Booking #
- Trip Details
- Choose the booked trip from the dropdown.
- Select the Booked Date as well.
- Select the Start Date and End Date of the trip.
- Enter the Trip Code (if applicable).
- Enter the number of travelers.
- Write the Package Name
- Traveller(s) Details
- Add traveler details such as First Name, Last Name, Email, Phone, and Country.
- You can add multiple travelers by clicking on + Add Traveler.
- Emergency Contact
- Enter emergency contact details, including First Name, Last Name, Relationship, Phone, and Country.
- You can add multiple emergency contacts by clicking on Add Emergency Contact.
- Payment Details.
- Add the payment details including the Payment ID, Status, Payment Gateway, Amount, Currency, Transaction ID and Gateway Response.
- Billing
- Enter billing details such as First Name, Last Name, Email, Address, City, and Country.
- Your Notes
- Add any additional notes related to the booking for future reference.
- Booking Summary
- You need to add Pricing Category, Subtotal, Discount, Fees , Amount Paid and Due Amount as well.
After filling in all the details, click the Save button at the top-right corner to confirm the booking.
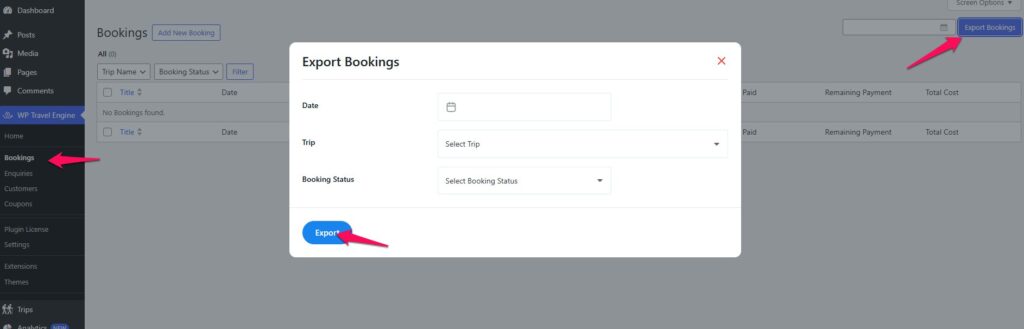
3. Exporting Bookings #
WP Travel Engine allows you to export booking data based on filters like date, booking status, and trip name.
Steps to Export Bookings: #
- Navigate to WP Travel Engine > Bookings.
- Click on Export Bookings at the top-right corner.
- A popup will appear where you can:
- Select the Date range.
- Choose a specific Trip Name.
- Filter by Booking Status (Pending, Booked, Canceled, etc.).
- Click Export to download the booking data in a CSV format.