WP Travel Engine provides various settings to control the appearance and behavior of trip archives on your tour booking site. These settings allow you to customize the layout and sorting options of the trips displayed on archive pages, enhance the user experience, and make navigation smoother.
This guide will walk you through the available settings to ensure your trip archive pages are optimized for both user experience and functionality.
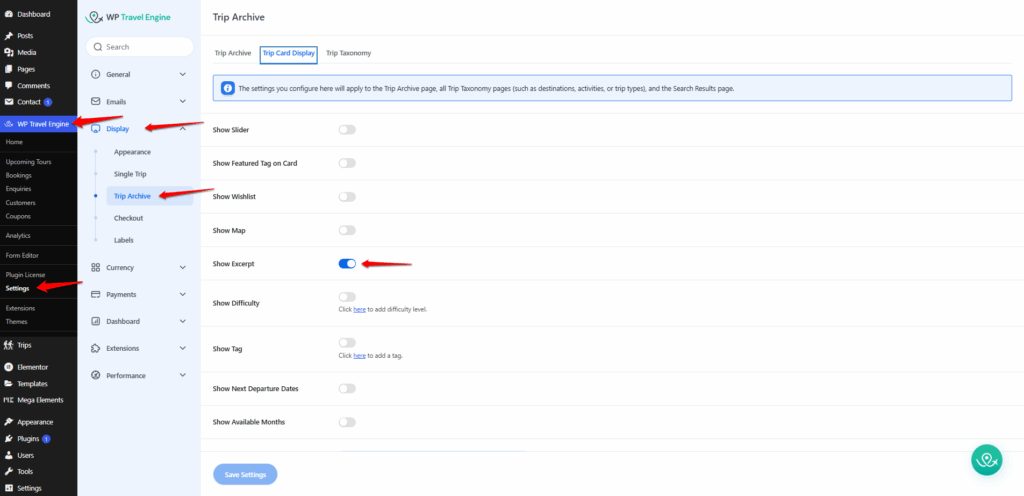
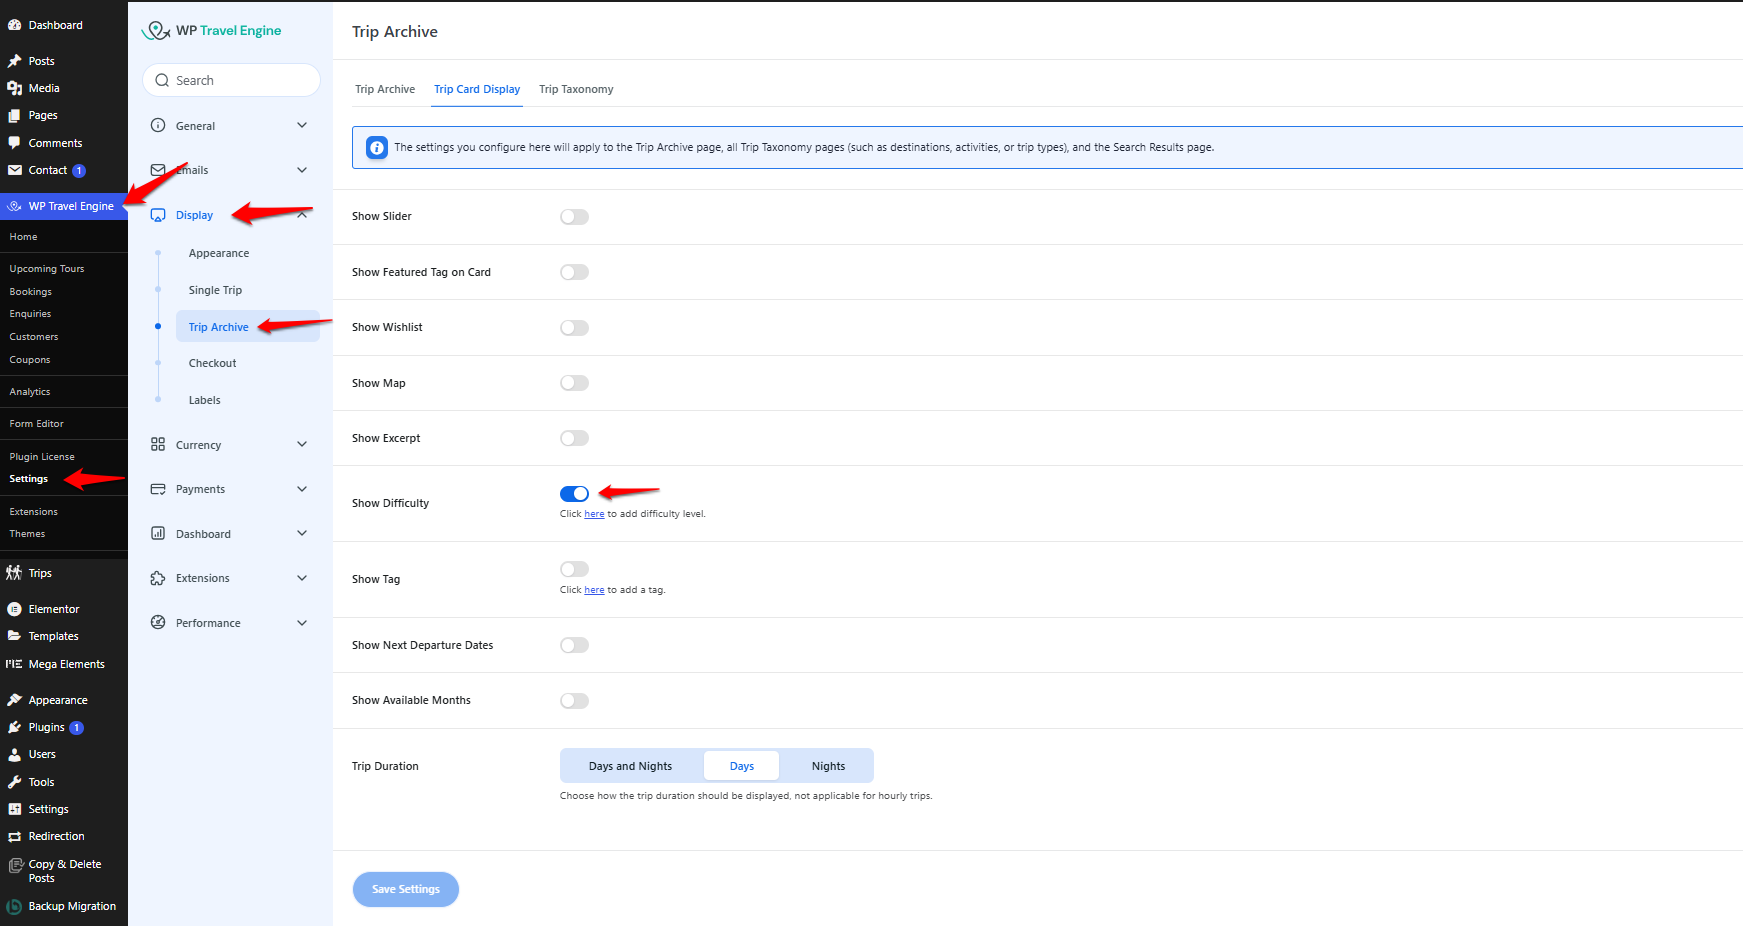
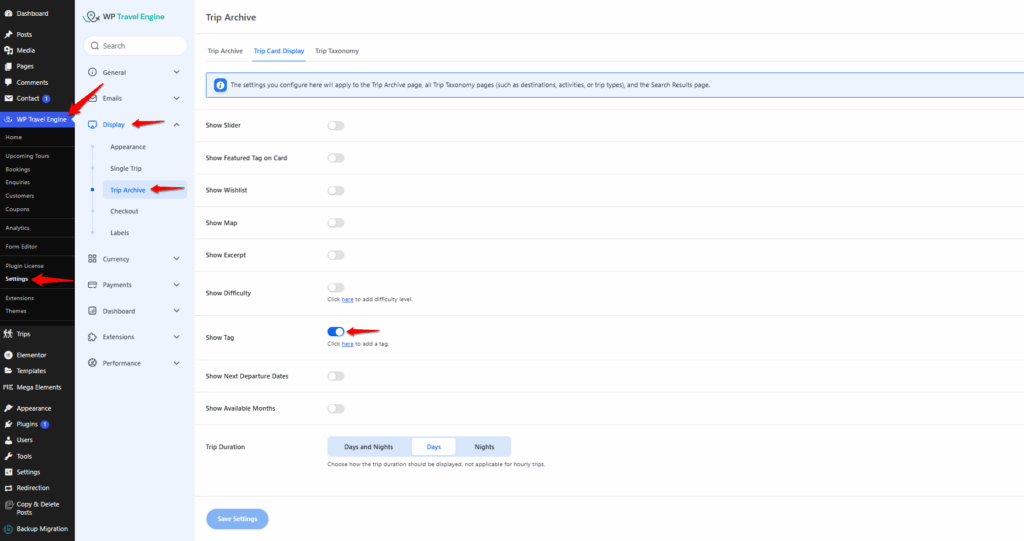
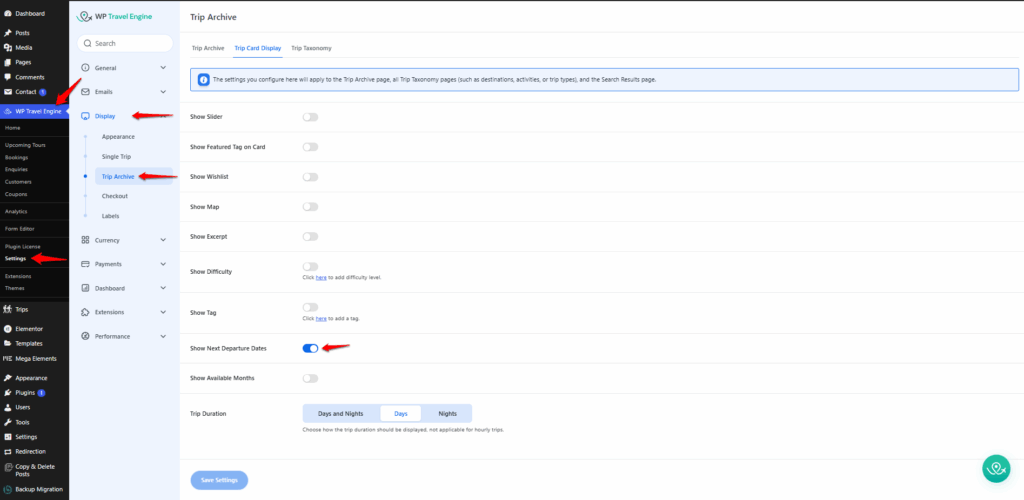
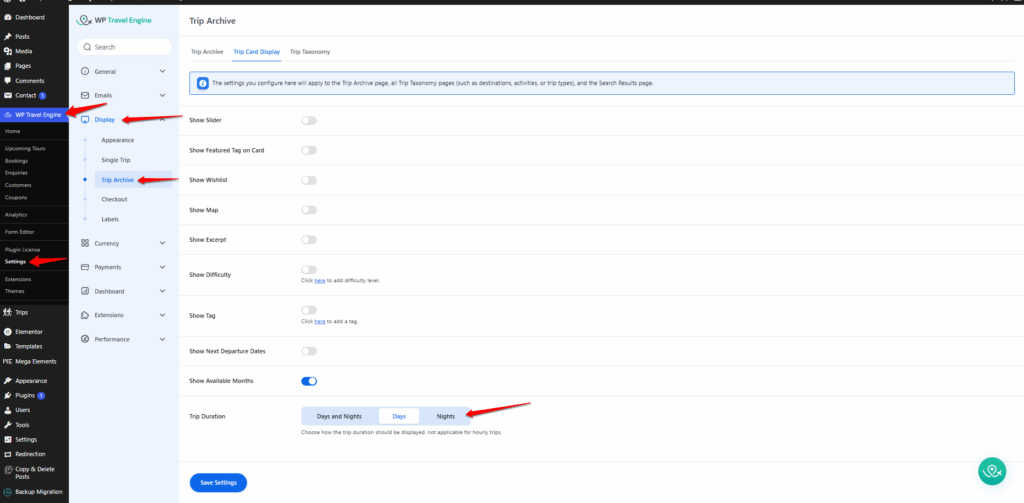
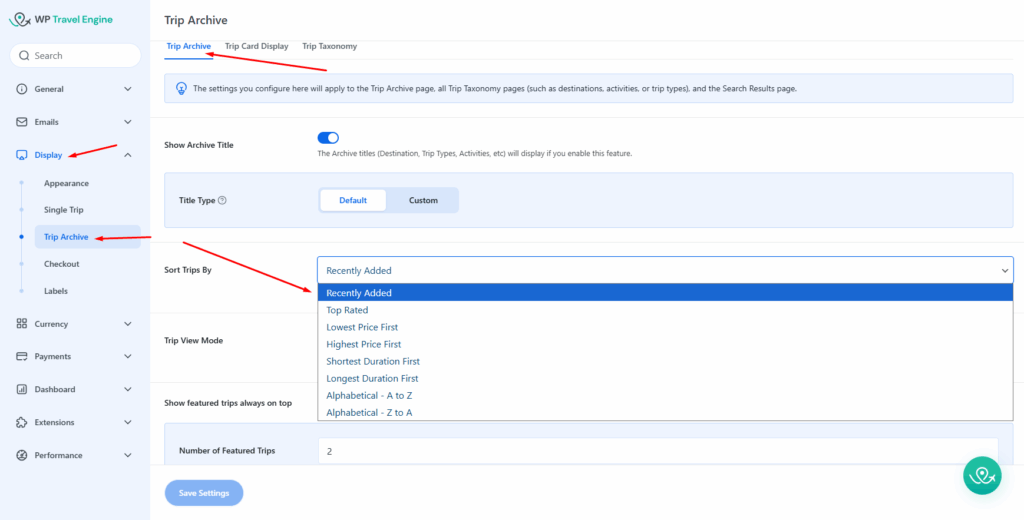
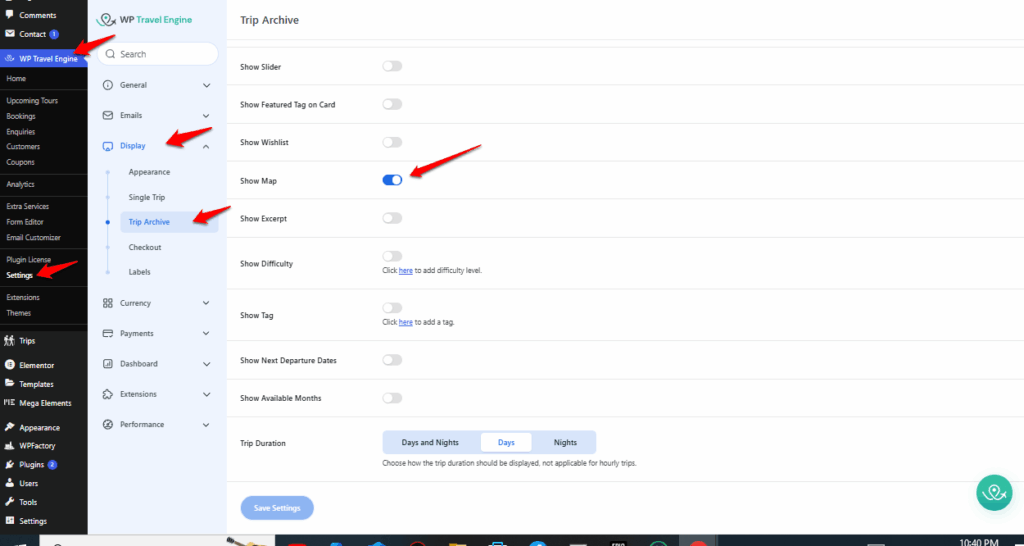
To access the Trip Archive settings, go to your WordPress Admin Dashboard and navigate to WP Travel Engine > Settings > Display > Trip Archive. Here, you will find various options to configure the Trip Archive page. Each setting is described below, along with guidance on how to use it effectively.
1. Show Archive Title #
- Description: This setting controls whether the archive titles (e.g., Destination, Trip Types, Activities) are displayed at the top of the trip archive pages.
- Options:
- Enabled: Archive titles will be visible on the page.
- Disabled: Archive titles will be hidden.
- How to Use: Toggle this setting to display or hide the archive titles based on your preference.
2. Sort Trips By #
- Description: This setting lets you control how trips are sorted on the archive pages. You can choose from several sorting options to better organize your trips.
- Available Sorting Options:
- Recently Added: Display trips starting from the newest.
- Top Rated: Show trips with the highest ratings first.
- Lowest Price First: Sort trips from lowest to highest price.
- Highest Price First: Sort trips from highest to lowest price.
- Shortest Duration First: Sort trips by duration, from shortest to longest.
- Longest Duration First: Sort trips by duration, from longest to shortest.
- Alphabetical – A to Z: Sort trips alphabetically from A to Z.
- Alphabetical – Z to A: Sort trips alphabetically from Z to A.
- Additional Sorting Options (if extensions are installed):
- Earliest Departures: Sort trips by departure dates. For this sorting type, the Trip Fixed Starting Dates extension must have been installed.
- How to Use: Select the preferred sorting method from the dropdown menu to organize the trips according to your desired criteria.
3. Trip View Mode #
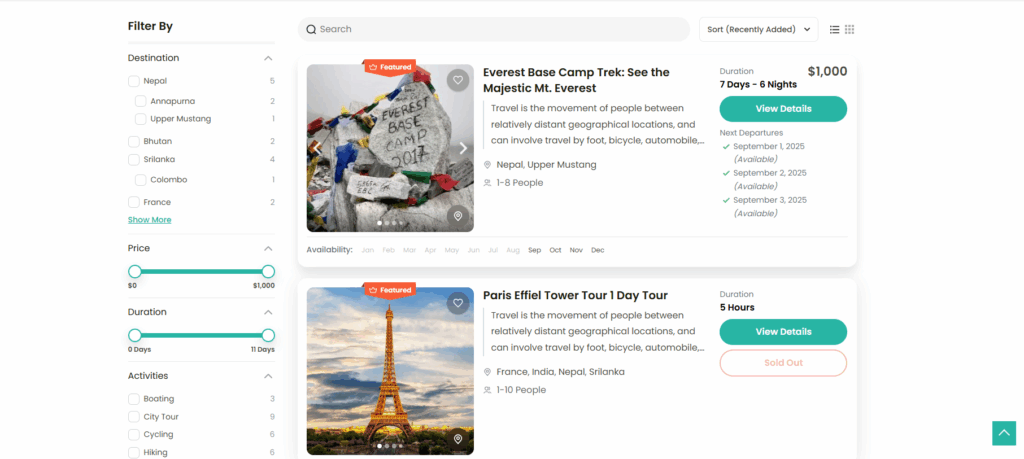
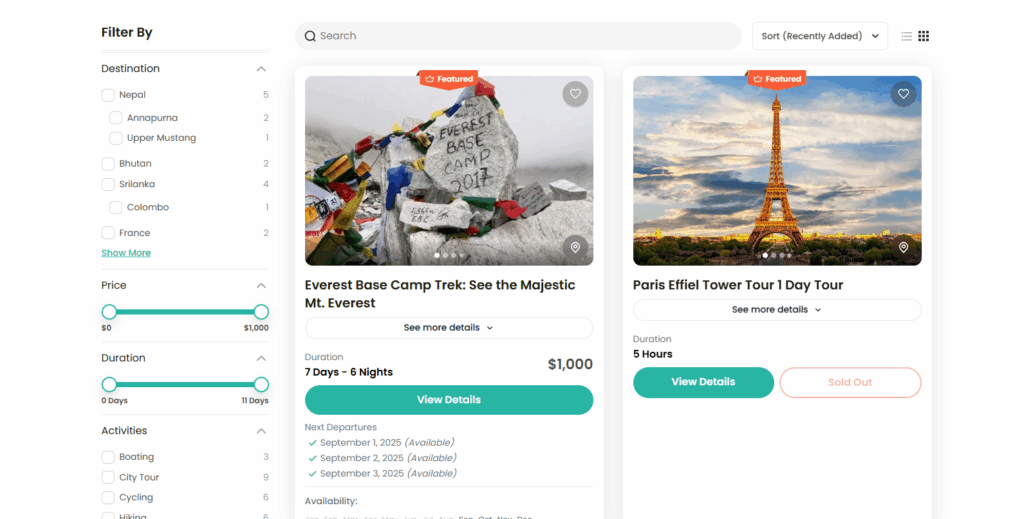
- Description: This setting lets you choose the layout format for displaying trips on the archive pages. You can select between two layout styles: List view or Grid view.
- Options:
- List View: Trips are displayed in a vertical list format.
- Grid View: Trips are displayed in a grid format with multiple columns.
- How to Use: Select the default layout for trips. Note that users can change the view mode on the frontend, but this option sets the default view.
The screenshots below display the visual appearance of both List and Grid view modes:
4. Show Featured Trips Always on Top #
- Description: This feature ensures that featured trips appear at the top of the archive list or grid, giving them prominence on the page.
- Options:
- Enabled: Featured trips will always be displayed at the top of the archive page.
- Disabled: Featured trips will not be prioritized and will appear in the default sorting order.
- How to Use: Toggle this setting to display featured trips at the top. Once enabled, the setting Number of Featured Trips will appear, where you can define how many featured trips you want to show at the top.
5. Side Filter #
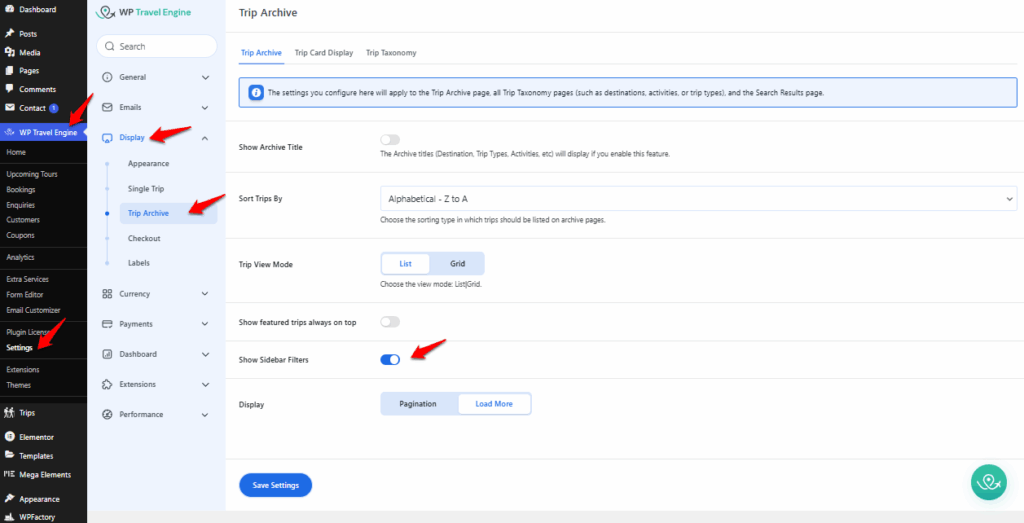
To control the display of the Side Filter on the Search / Archive page:
- In the WordPress Admin Dashboard, go to WP Travel Engine > Settings > Display > Trip Archive.
- Toggle the Show Sidebar Filters option to enable or disable the Side Filter.
- Click Save to apply the changes.
6. Display #
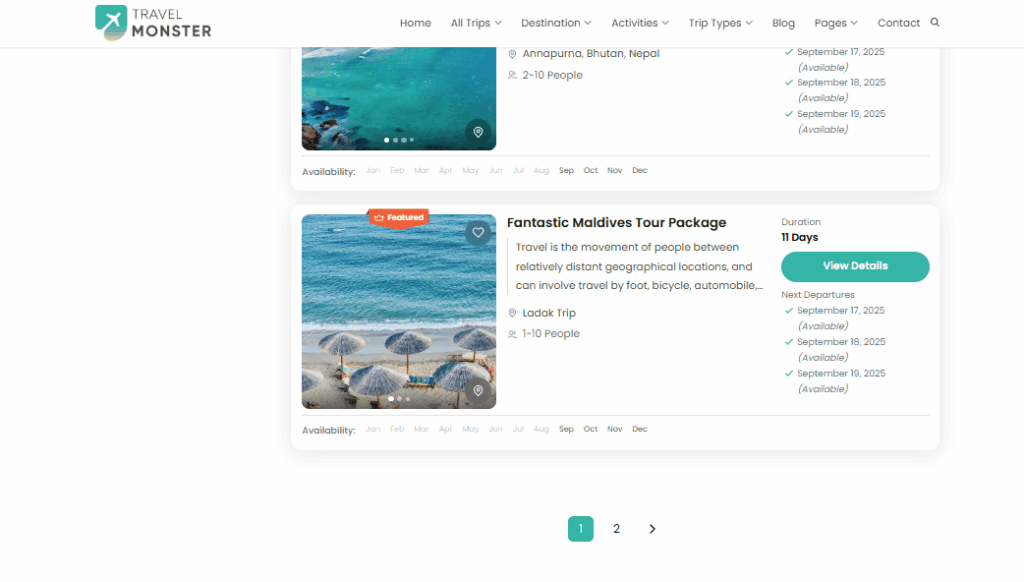
You can select how trips are loaded on the Archive Page, either using Pagination or a Load More button:
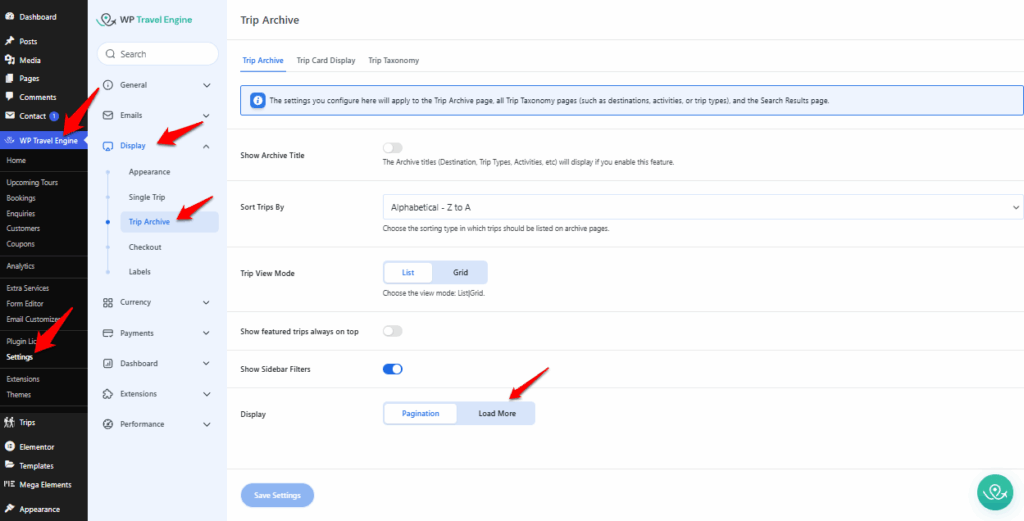
- In the WordPress Admin Dashboard, go to WP Travel Engine > Settings > Display > Trip Archive.
- In Display, choose either Pagination or Load More for your Archive Page.
- Click Save to apply the changes.
Trip Card Display #
You can also configure how your trip card displays. Please check the settings below.
Show Slider: #
You can enable or disable the slider on the Trip Search / Archive Page.
Enabled: trips appear in a scrolling slider. Disabled: trips appear in the standard layout.
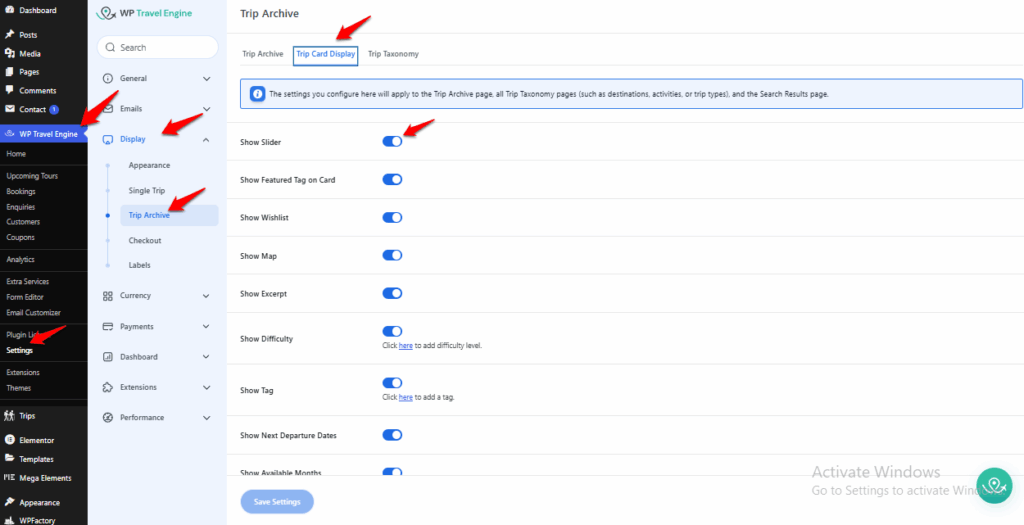
- In the WordPress Admin Dashboard, go to WP Travel Engine > Settings > Display > Trip Archive.
- Under the Trip Card Display tab, toggle the Show Slider option to enable or disable the slider.
- Click Save to apply the changes.
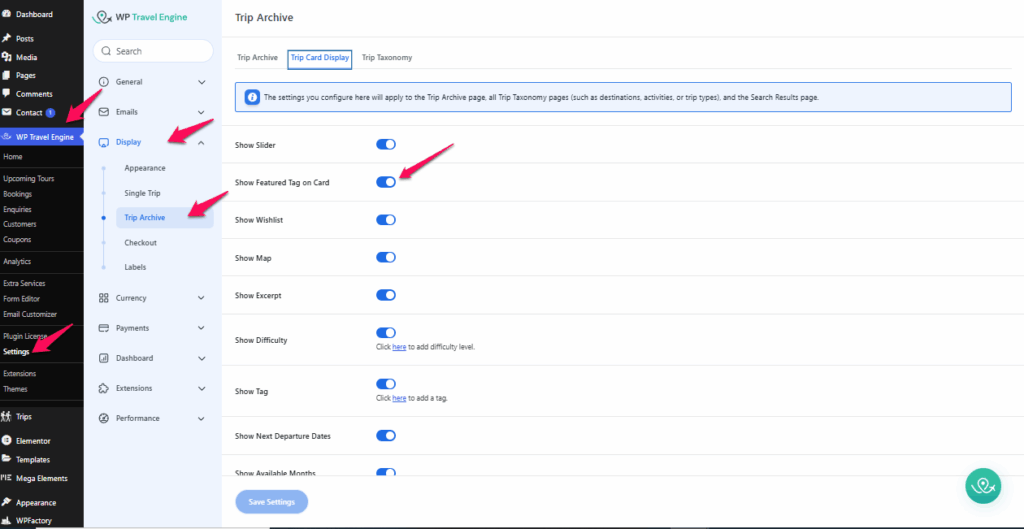
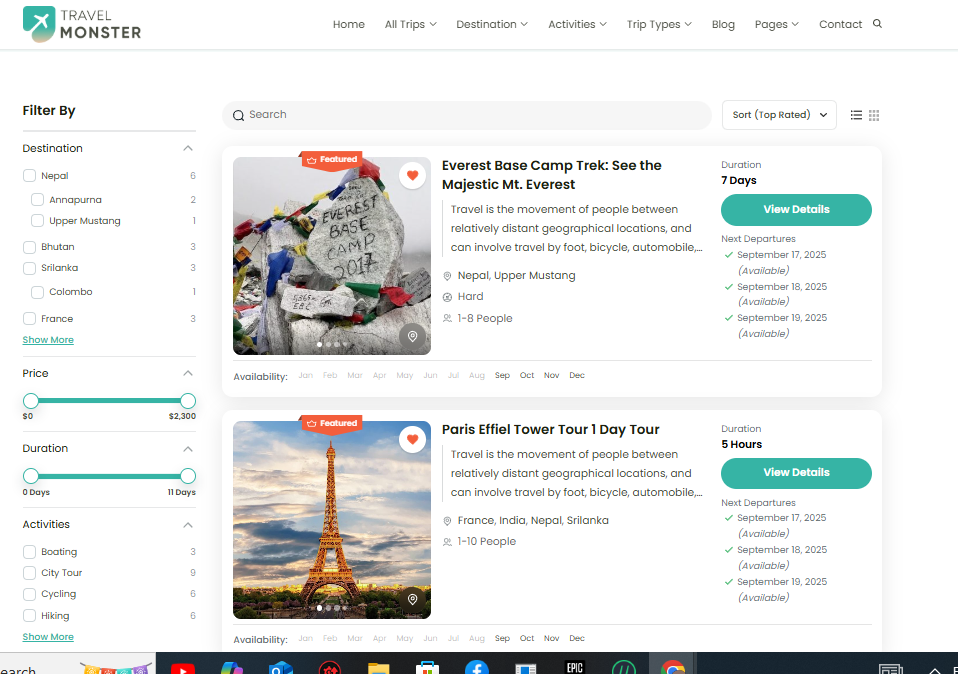
Show Featured Tag on Card: #
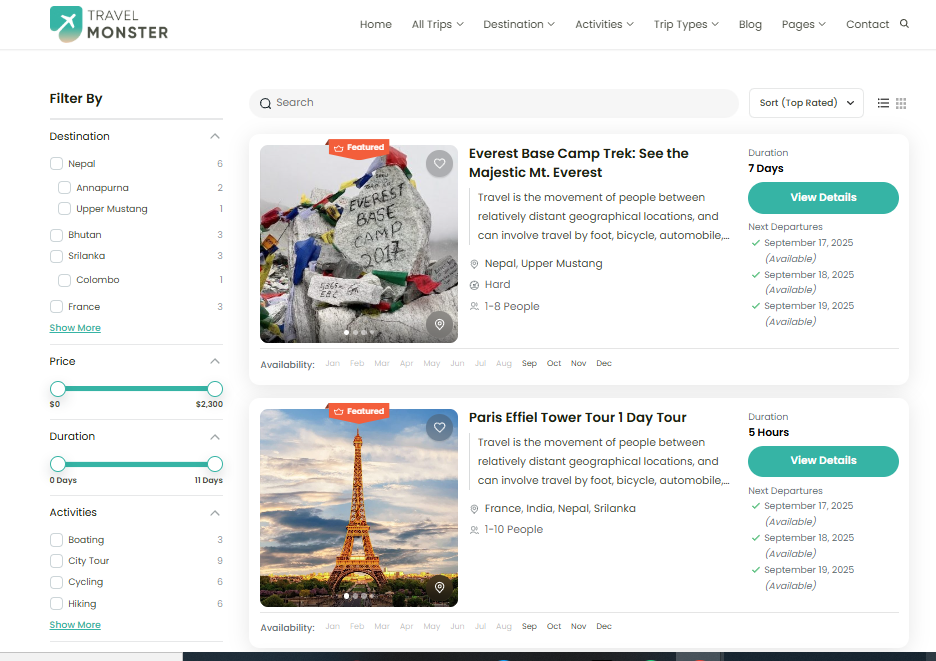
You can enable or disable the feature tag on the Trip Search / Archive Page. Enabled: trips show the feature tag. Disabled: trips do not show the feature tag.
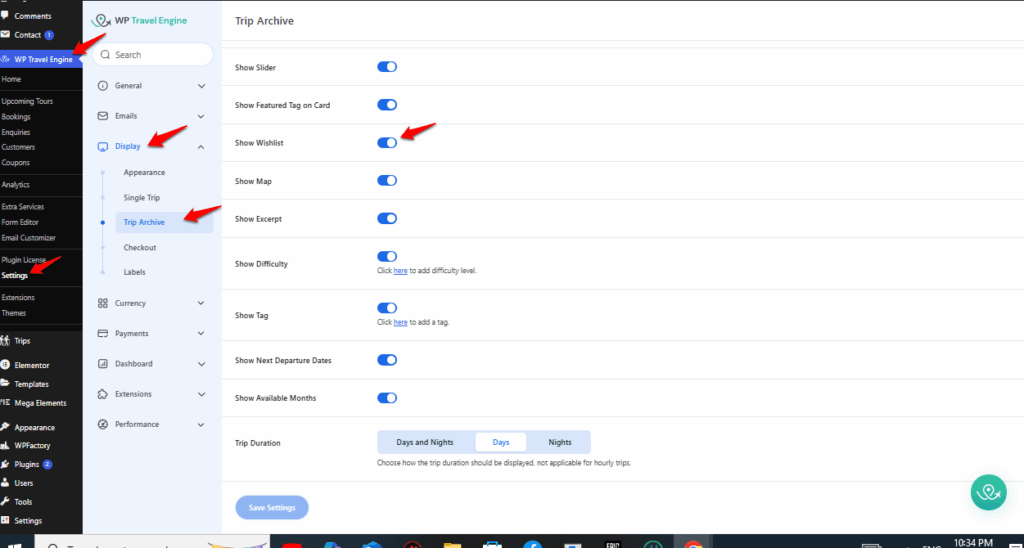
Show Wishlist #
You can enable the Wishlist feature on the Trip Search / Archive Page to allow users to save trips they are interested in.
Show Map #
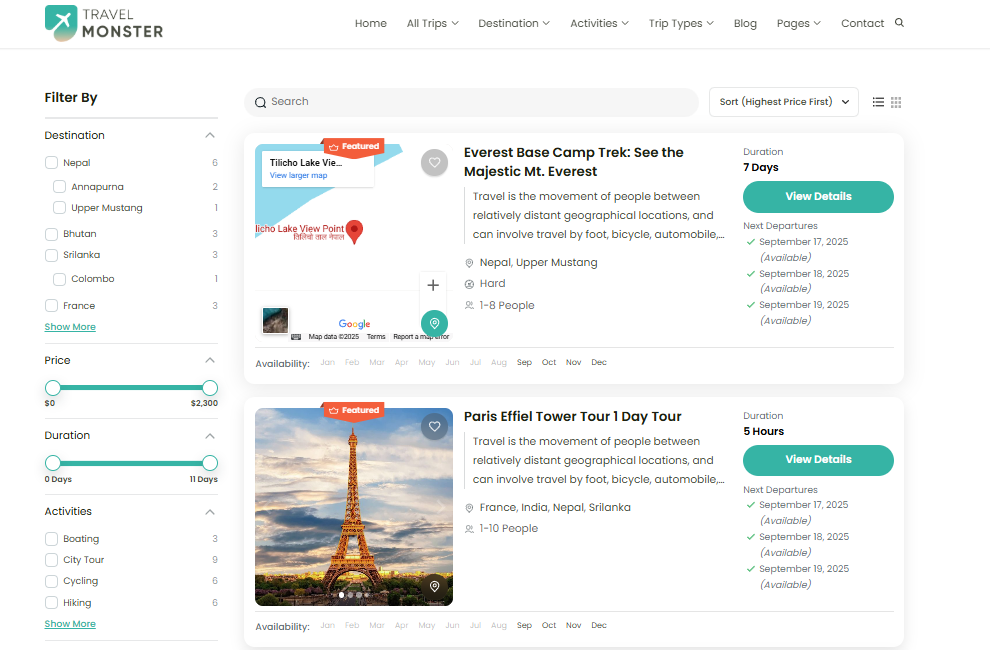
You can enable the map on the Trip Search / Archive Page to show the location of each travel destination, helping users quickly identify where the trips take place
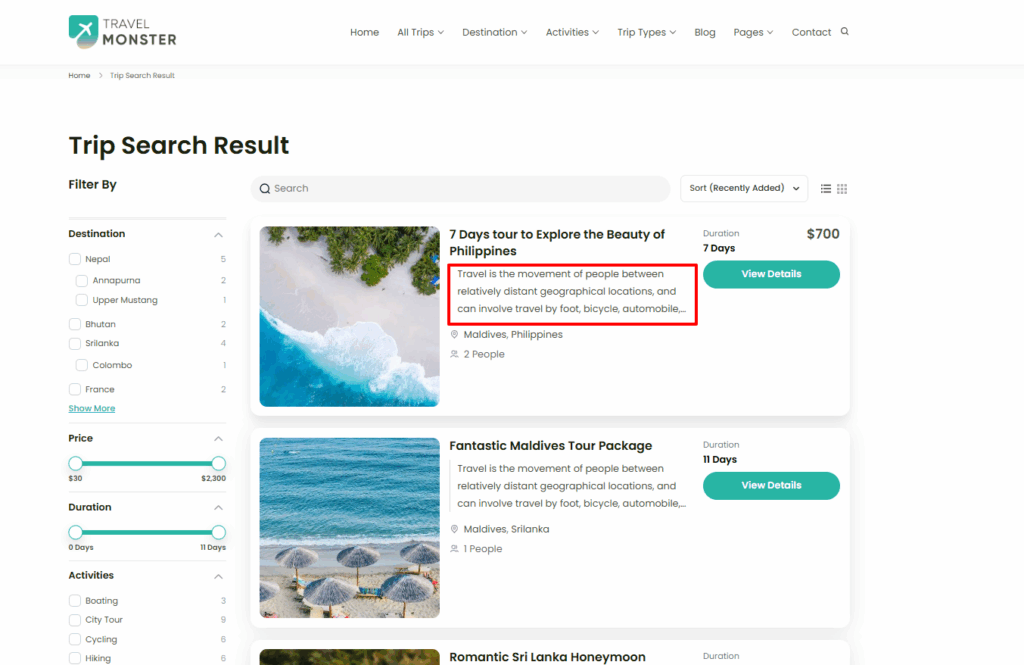
Show Excerpt #
You can enable the excerpt on the Trip Search / Archive Page to display a short summary of each trip, helping users quickly understand what the trip is about.
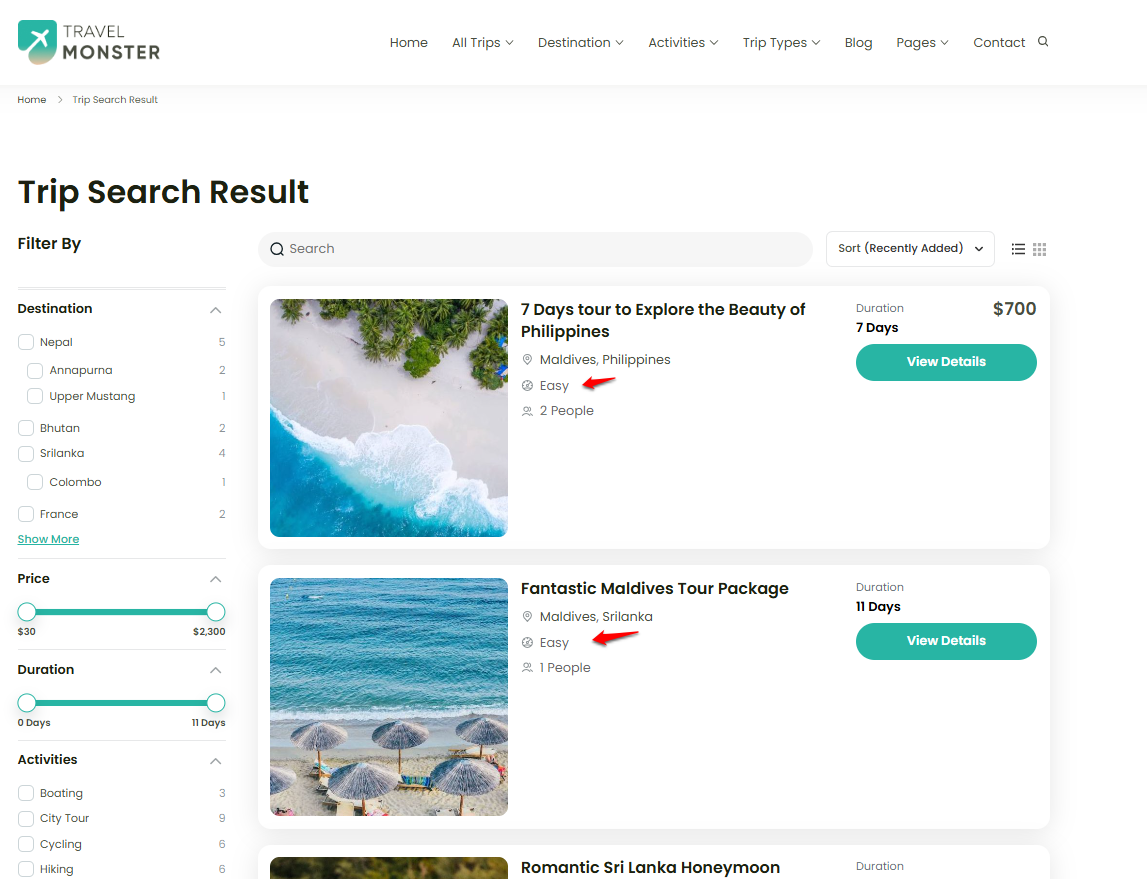
Show Difficulty #
You can enable the trip difficulty on the Trip Search / Archive Page to display the difficulty level of each trip, helping users quickly see how challenging the trip is.
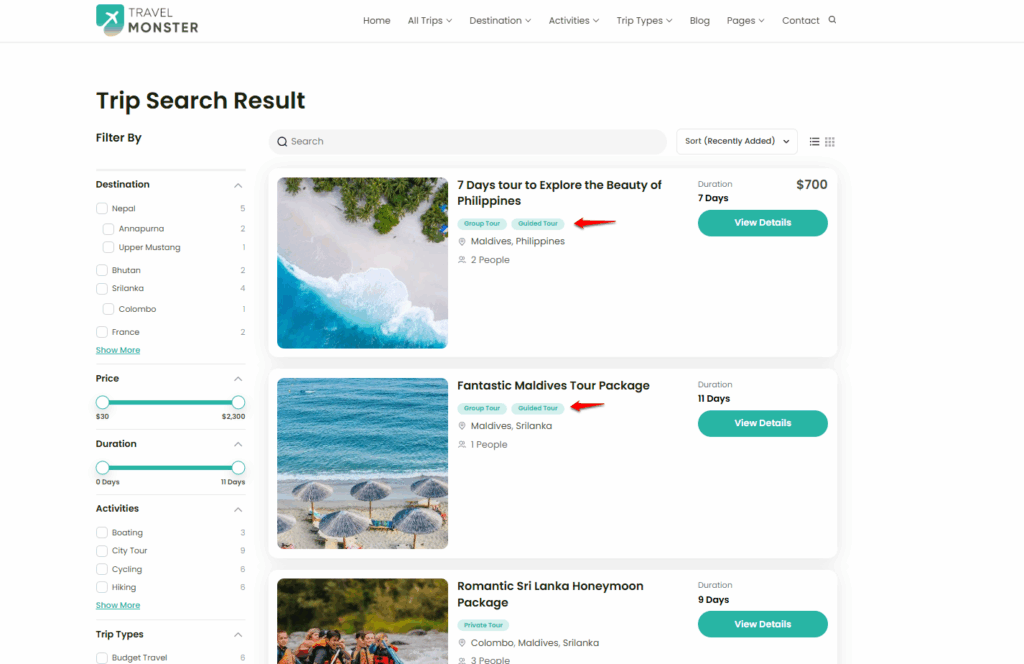
Show Tag #
You can enable trip tags on the Trip Search / Archive Page to display the tags assigned to each trip, helping users quickly identify trip categories.
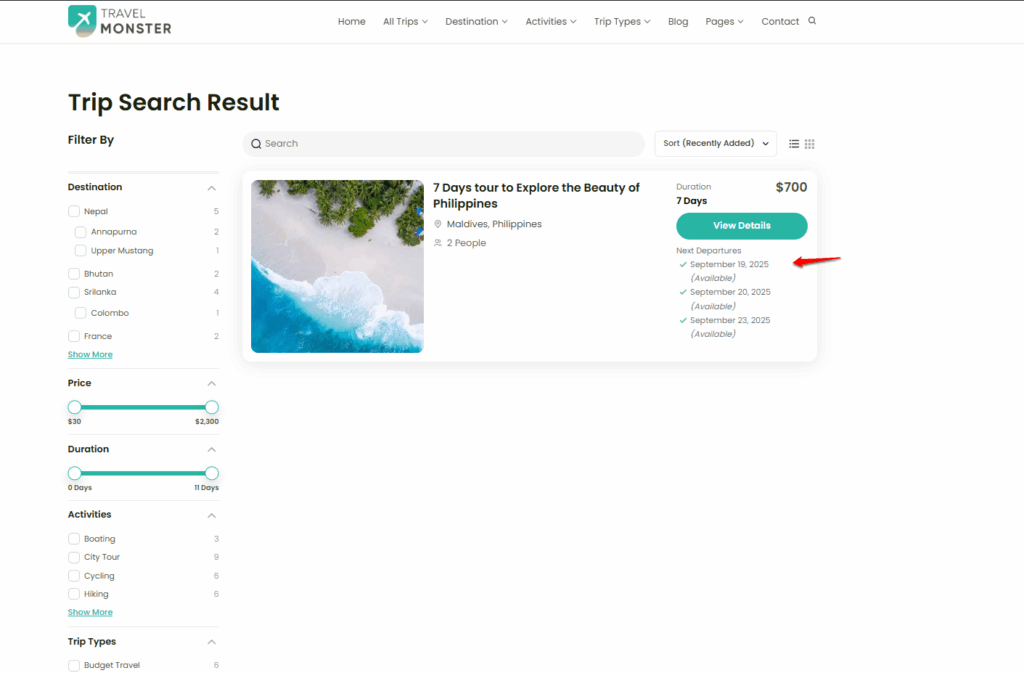
Show Next Departure Dates #
You can enable the next departure dates on the Trip Search / Archive Page to show the upcoming departure schedule for each trip, helping users quickly know when the trip is next available.
Show Months Available #
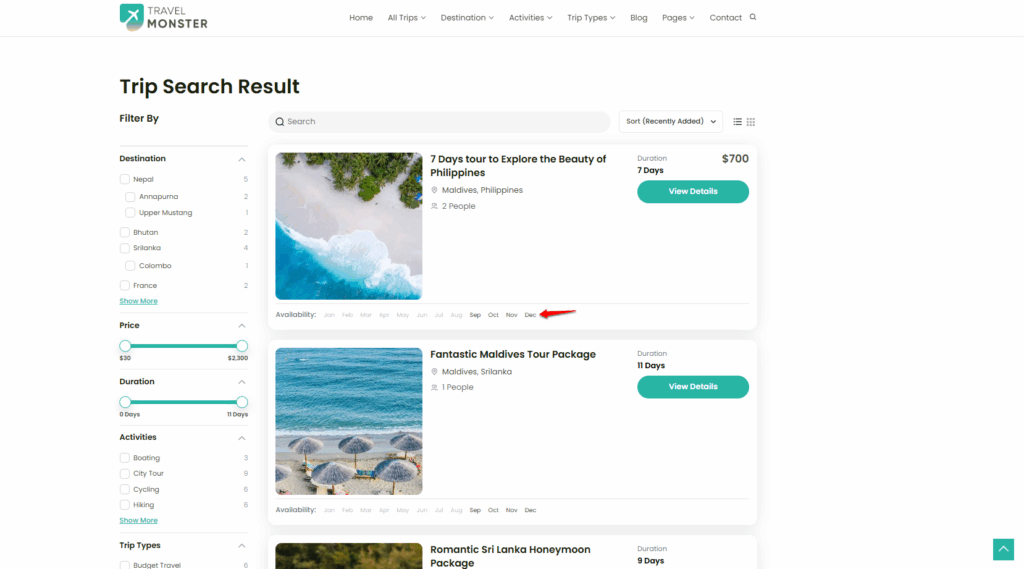
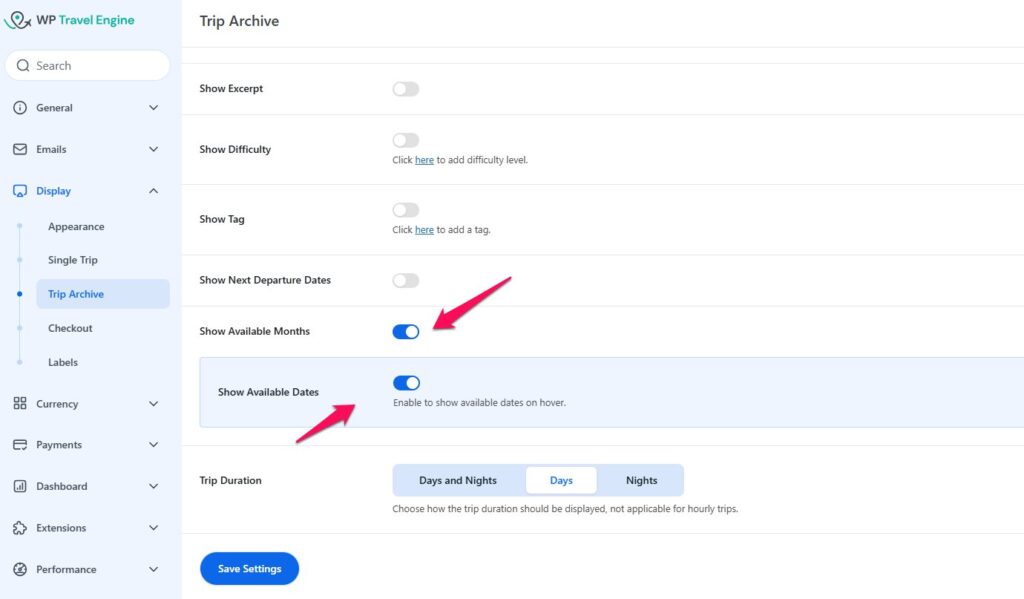
You can enable available months on the Trip Search / Archive Page to display the months when each trip is available, helping users quickly find trips that fit their travel schedule. Once you enable this feature, you will also have the feature to show available months on hover.
Trip Duration #
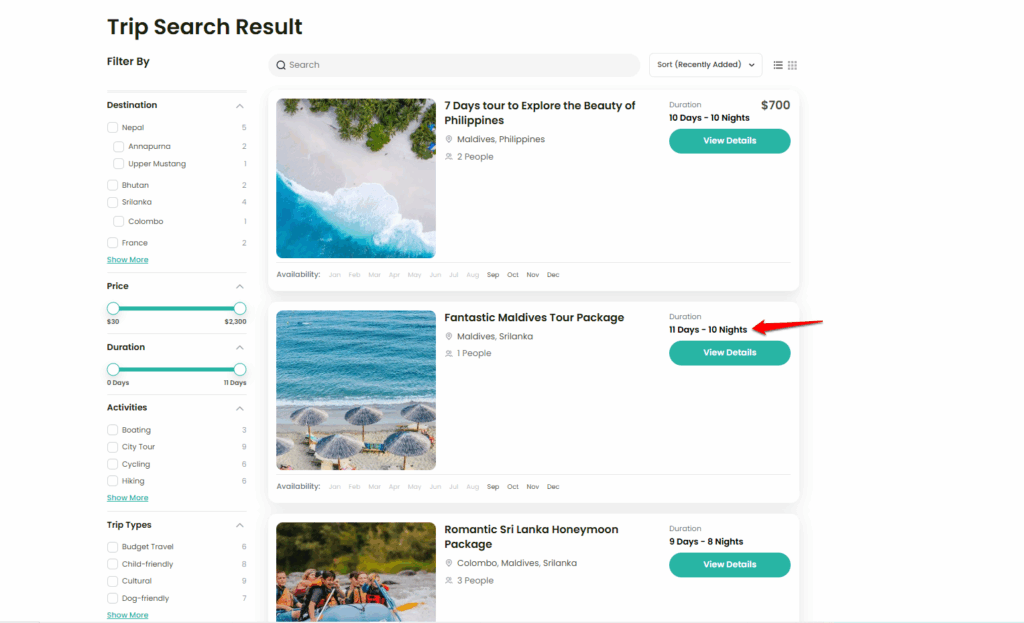
You can enable trip duration on the Trip Search / Archive Page to display how long each trip lasts. This helps users quickly understand the length of the trip before exploring further.You can then choose to display the duration in one of the following formats:
- Days and Nights
- Days Only
- Nights Only
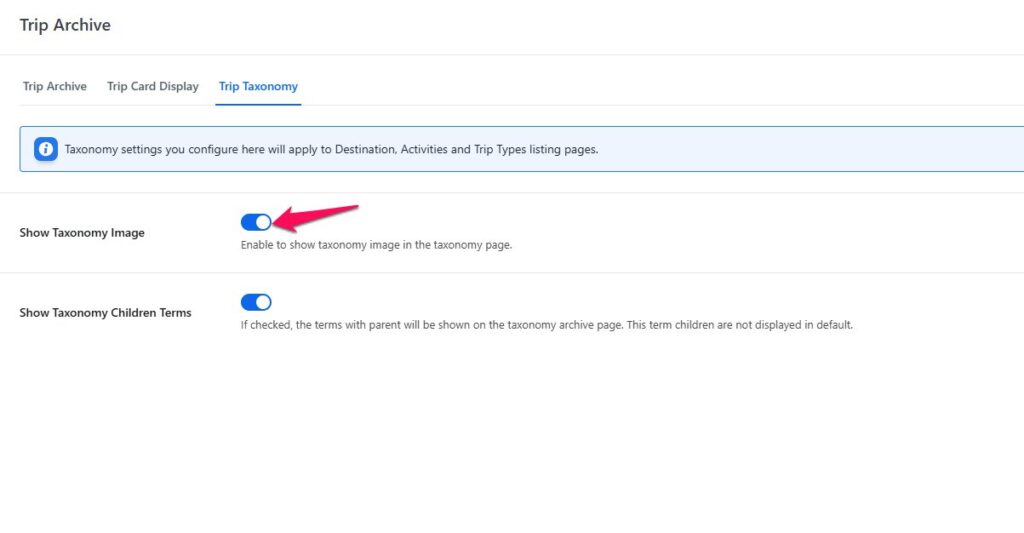
Trip Taxonomy #
You can configure the look of the taxonomy page here.
Show Taxonomy Image: #
Enable this toggle to display the image in the taxonomy page.
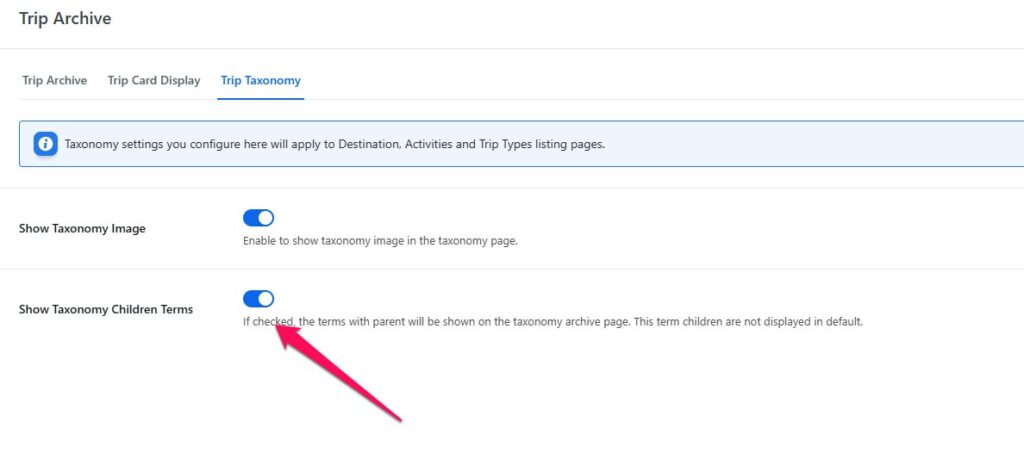
Show Taxonomy Children Terms: #
If this option is enabled, taxonomy terms that have parent terms will be displayed on the taxonomy archive page. However, the child terms associated with these parent terms will remain hidden by default unless explicitly configured to be shown.
Feel free to contact our support team for any other assistance.
