WP Travel Engine is now fully compatible with WPML, the most popular multilingual plugin for WordPress. This guide will walk you through how to translate your travel website step-by-step so you can reach a global audience.
Prerequisites #
Before you begin, make sure you have the following:
- A WordPress website with the WP Travel Engine plugin installed and activated
- The WPML Multilingual CMS plugin (paid)
- For most websites, the WPML Multilingual CMS plan is sufficient:
- Includes all WPML features
- Free automatic translation for ~45k words
- Costs just 99€ per year
- For most websites, the WPML Multilingual CMS plan is sufficient:
- WPML’s required components:
- String Translation
- Translation Management
- Media Translation (optional but recommended)
Install and Set Up WPML #
- Go to Plugins → Add New → Upload Plugin
- Upload and install the WPML Multilingual CMS plugin.
- Activate the plugin.
- Follow the setup wizard:
- Choose the site’s default language
- Add the languages you want to translate into
- Set up the language switcher (menu, widget, or footer)
- Register your WPML license
For details, refer to WPML official documentation.
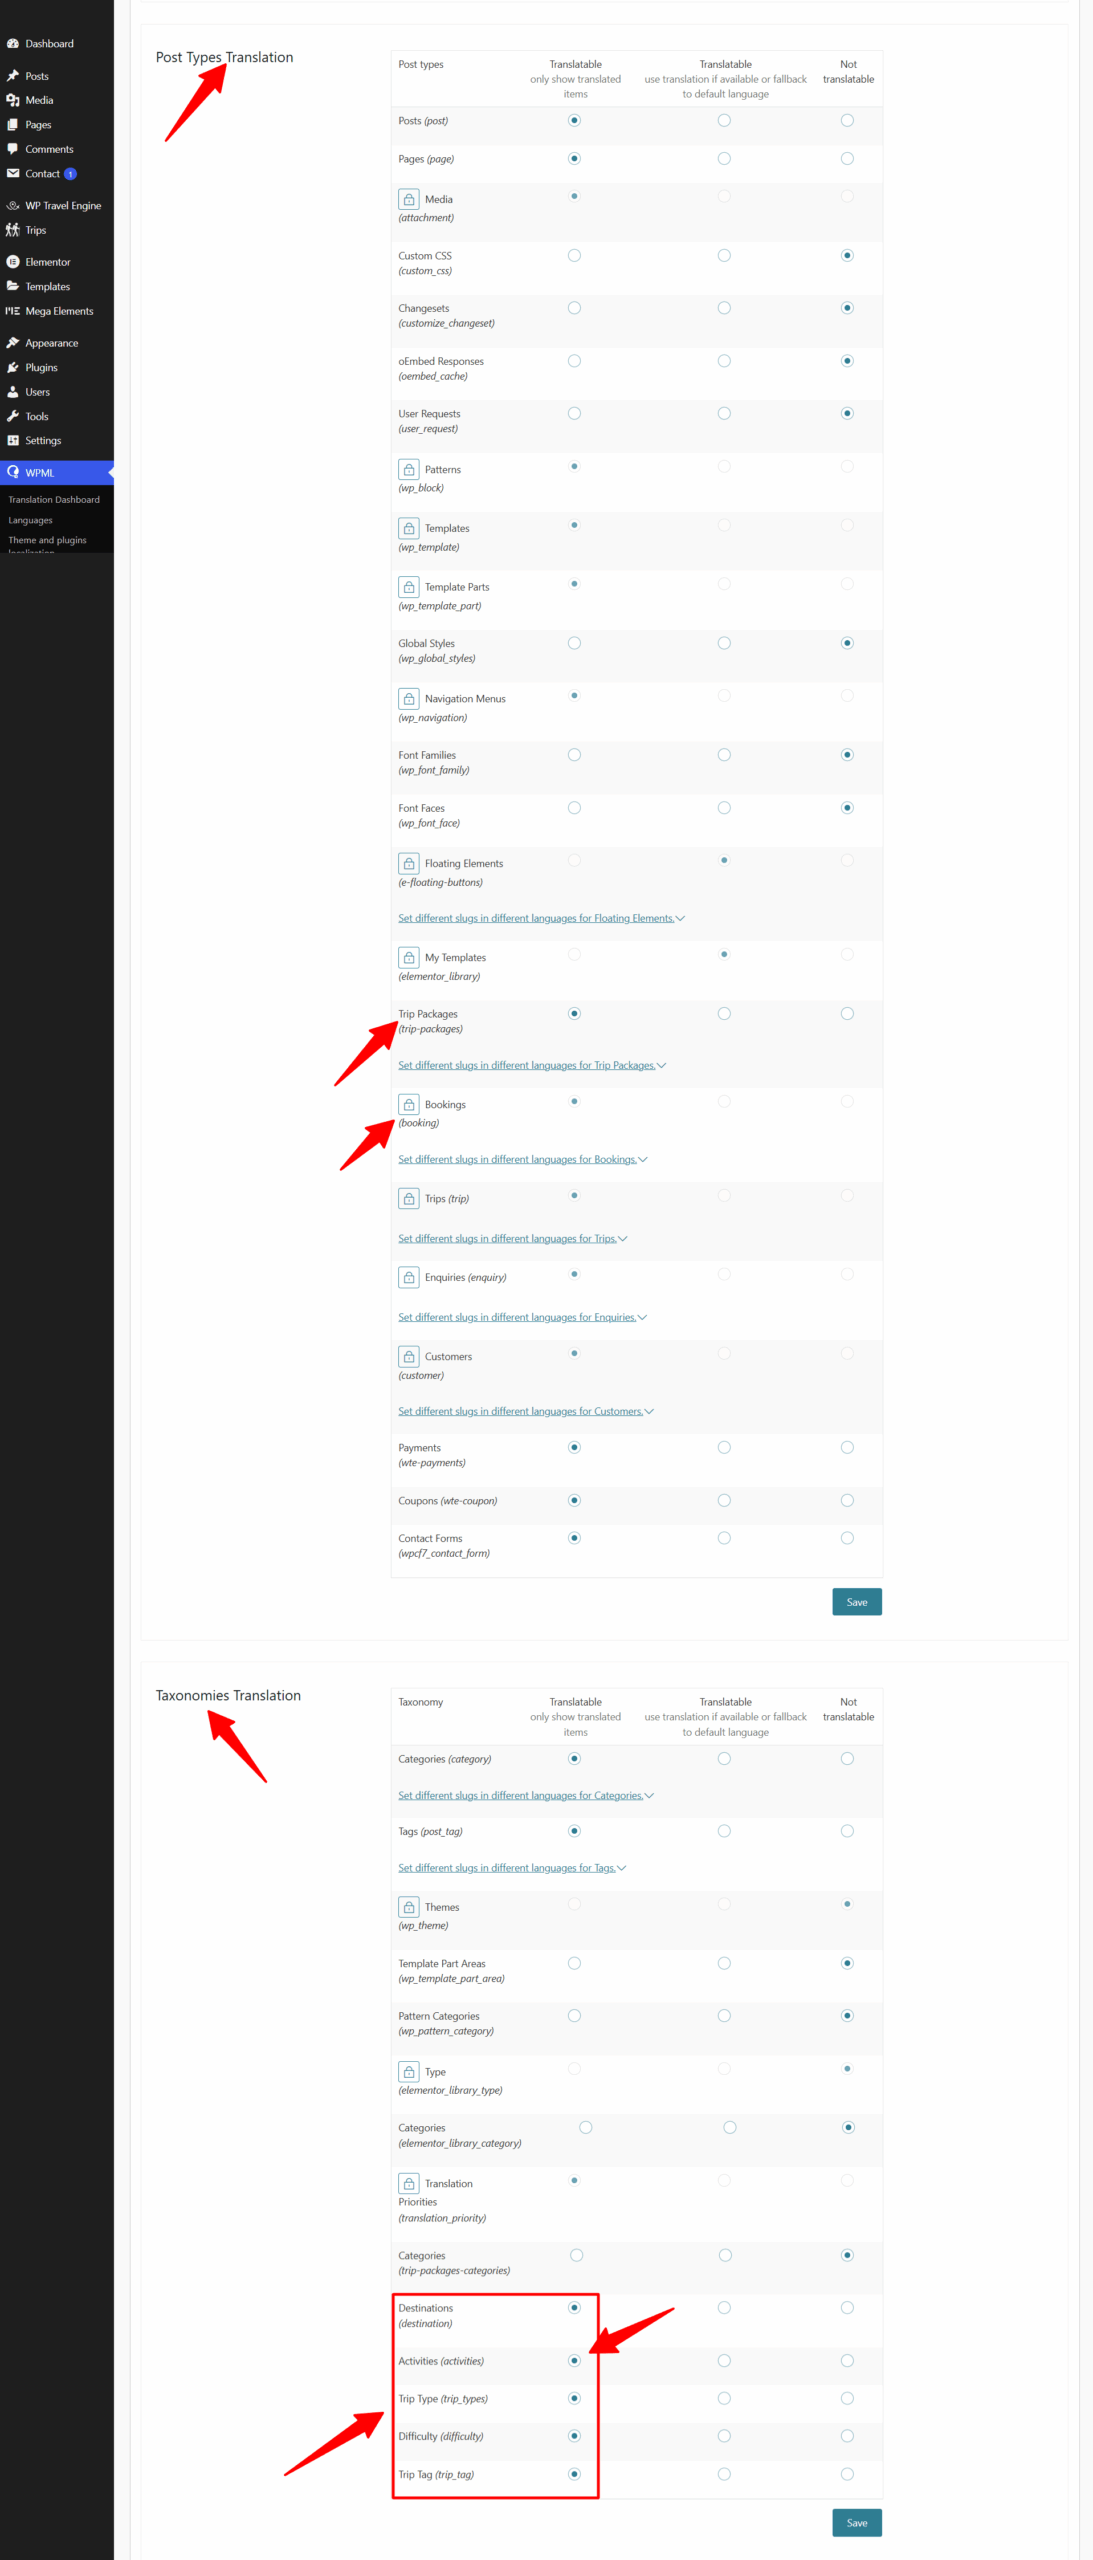
Configure WPML for WP Travel Engine #
- Navigate to WPML → Settings
- Under Post Types Translation, ensure the Trips post types from WP Travel Engine are set to Translatable.
- Do the same under Taxonomies Translation for:
- Destinations
- Activities
- Trip Types
- Difficulty
- Trip Tag
- Any custom taxonomy added by WP Travel Engine
- Ensure that Categories (trip-packages-categories) option is set to Not Translatable. Otherwise, it will cause issues with pricing among translated trips
Translate Trip Packages #
- Go to Trips → All Trips
- Next to each trip, you’ll see a plus (+) icon under each language column.
- Click the icon to start translating.
- WPML will open the Advanced Translation Editor (you can also use the Classic Editor if preferred).
- Translate:
- Trip title
- Description
- Itinerary
- Highlights
- FAQs
- Price & duration (only if different per language)
- Click Complete once you’re done.
✅ You can also enable Automatic Translation from WPML → Translation Management → Settings, which uses DeepL, Google, or Microsoft.
Translate Trip Attributes #
Each trip is made up of more than just the main content. Here’s how to handle additional fields:
Custom Fields (Itinerary, Pricing, FAQs, etc.) #
- WP Travel Engine stores these as custom fields.
- WPML auto-detects most of them, but if any field isn’t showing:
- Go to WPML → Settings
- Scroll down to Custom Fields Translation
- Find the field and set it to Translate
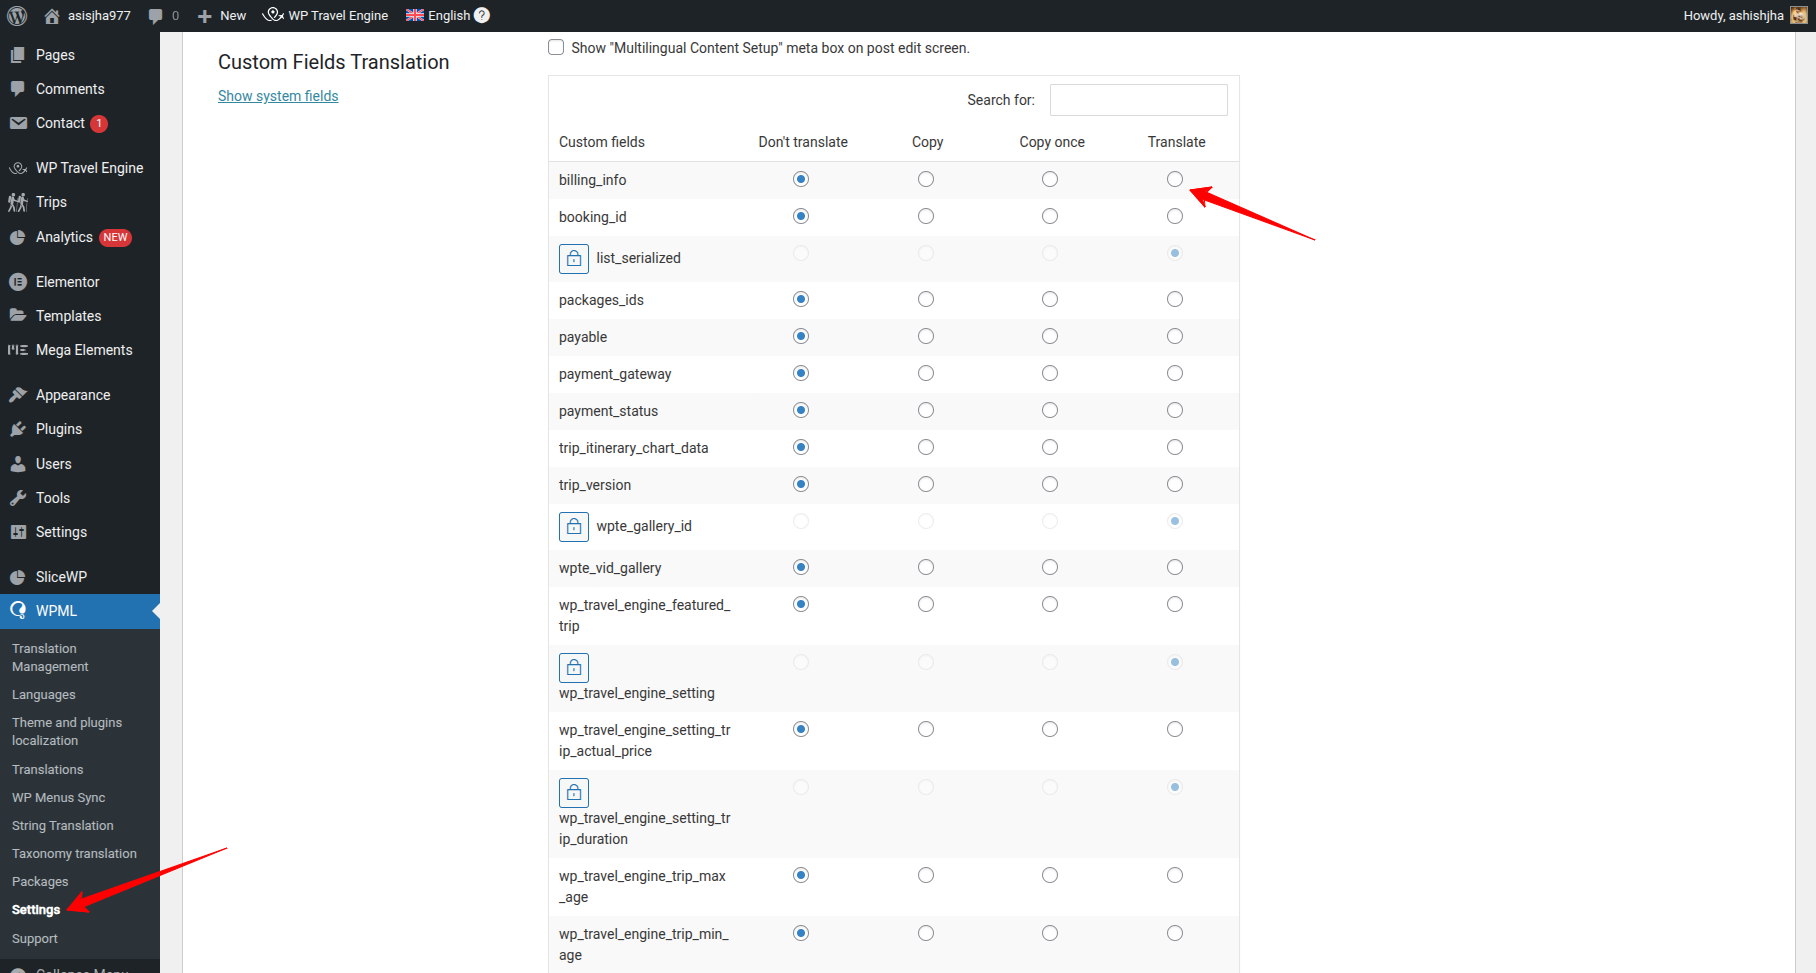
Image Galleries and Media #
To translate media:
- Go to WPML → Media Translation
- Upload alternative images (if needed)
- Translate image titles and alt text for SEO
Translate Widgets, Menus, and Strings #
Menus: #
- Go to Appearance → Menus
- Select your primary menu
- Click on “+” icons to create menu versions in other languages
- Add translated links (e.g., translated trip pages, blog, contact)
Widgets: #
Use the WPML Widget Logic or Block Widgets to display language-specific widgets.
Strings (like “Book Now”, “Read More”, etc.): #
- Go to WPML → String Translation
- Search for the string
- Add translations for each language
✅ You can also scan WP Travel Engine for additional translatable strings under WPML → Theme and Plugin Localization.
Optional: Enable Automatic Translation #
You can enable automatic translation via:
- WPML → Translation Management
- Choose the content types
- Enable Translate Everything Automatically
Need Help? #
If you face any issues or need personalized support, feel free to contact our support team or refer to WPML’s official documentation.