Selling accommodation separately means more back-and-forth, more invoices, and more chances for things to fall through. The Accommodation Add-on keeps it all in one place.
Set up room types with guest capacity, pricing, and descriptions once, then control what’s available and how it’s priced for each trip. Travelers pick their room during booking, and their choice carries through to confirmations and payment emails automatically.
Key Features & Benefits #
| Feature | Benefit |
| Global room type library | Set up rooms once and reuse them across any trip |
| Per-trip pricing | Charge different rates for the same room on different trips |
| Included room toggle | Mark rooms as included in the package so travelers aren’t charged extra |
| Room upgrades | Offer premium upgrade options tied to specific hotels |
| Mandatory accommodation | Require travelers to select a room before completing their booking |
| Pricing format control | Choose whether prices apply per traveler or per room |
Prerequisites #
- You have WP Travel Engine installed and activated on your WordPress site.
- You have updated WP Travel Engine to its latest version.
- You have installed and activated the Accommodation add-on.
How to Install the Accommodation Add-on #
Verification #
To confirm the add-on is active and working:
- Go to your WordPress dashboard.
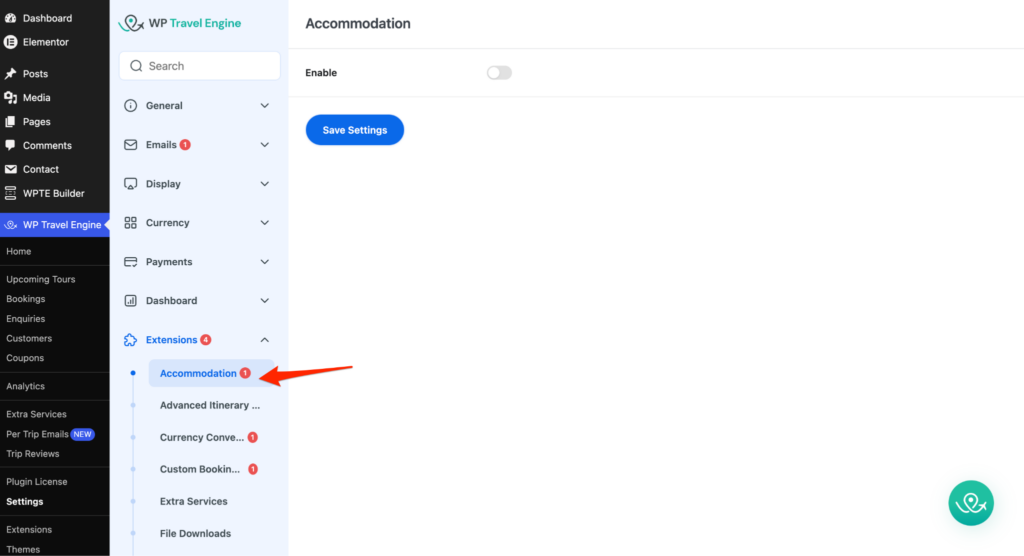
- Navigate to WP Travel Engine → Settings → Extensions.
- Confirm that Accommodation appears in the extensions list.
- Open any trip for editing and click the Accommodation tab in the left sidebar under WP Travel Engine – Trip Settings.
If the tab doesn’t appear, deactivate and reactivate the add-on from the Plugins screen.
Configuring Global Settings for Accommodation #
These settings apply across your entire site. Access them by going to WP Travel Engine → Settings → Extensions → Accommodation.
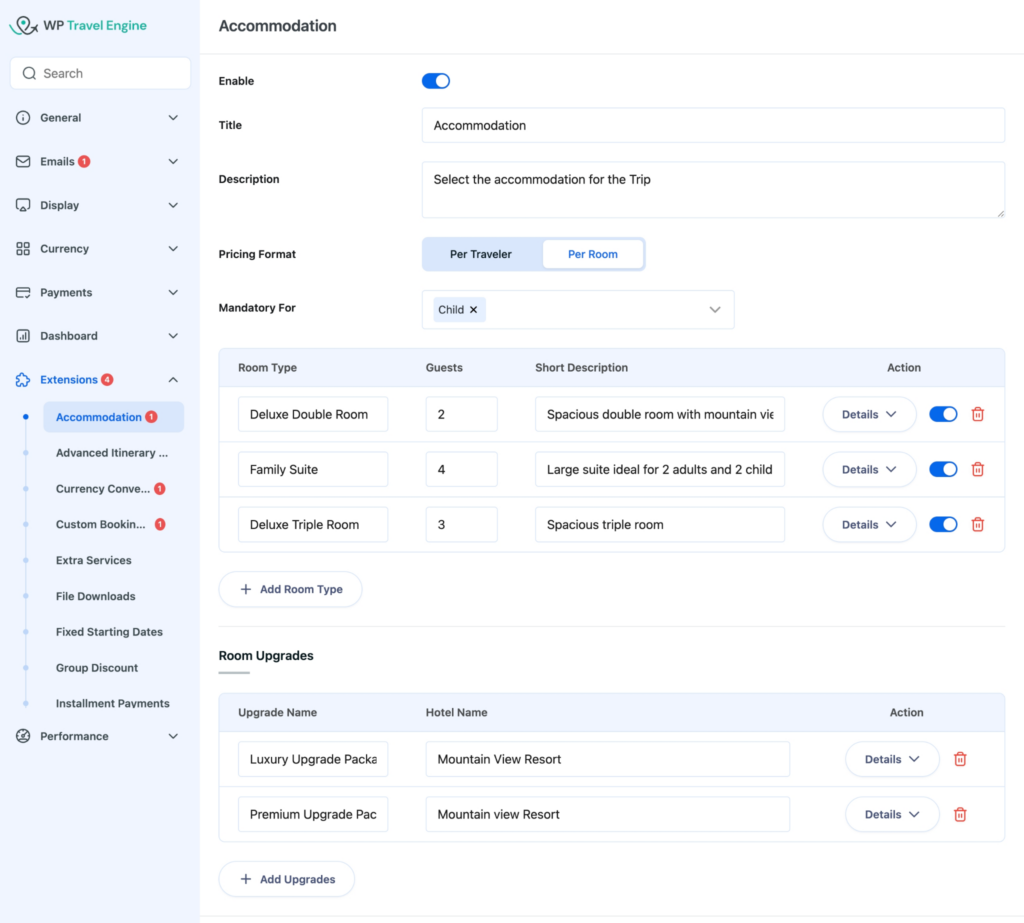
Enable #
Toggle on to activate accommodation management across your trips. The fields below only appear once this is turned on.
Title #
The label travelers see above the accommodation section during booking. Defaults to “Accommodation” – change it if your trips use a different term.
Description #
A short line of text is shown below the title on the booking pop-up modal. Use it to guide travelers on what to select, for example: “Select the accommodation for your trip.”
Pricing Format #
Controls how accommodation prices are calculated at checkout.
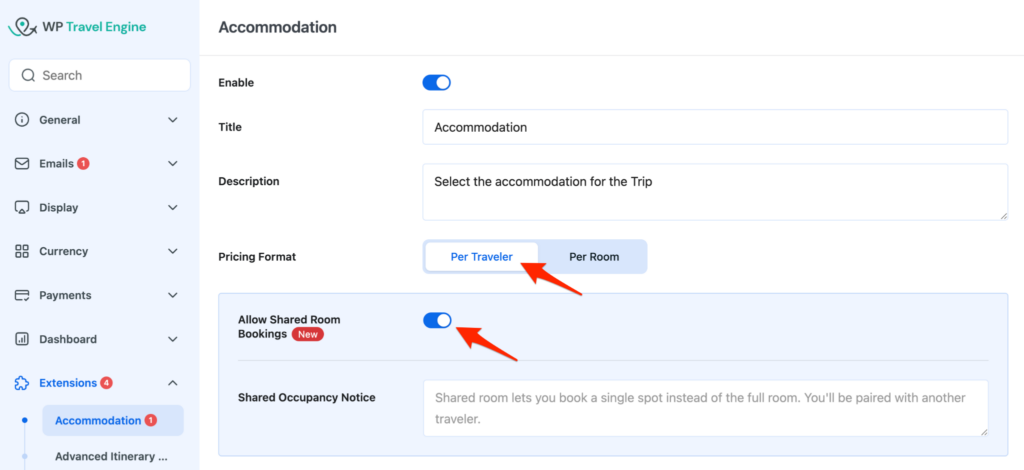
Per Traveler
Travelers see a “Select Room(s)” dropdown with options based on guest capacity, for example “1 Room (2 people)” or “2 Rooms (4 people).”
Per Room
Travelers see a “Select Traveler(s)” dropdown with options based on the number of travelers, for example “2 Travellers” or “4 Travellers.” Room sharing is only available when this format is selected.
Allow Shared Room Bookings #
Available when Pricing Format is set to Per Traveler. Toggle on to allow travelers to book fewer spots than the full room capacity. The cost is split based on the number of spots booked, and the tour operator manages how travelers sharing a room are coordinated.
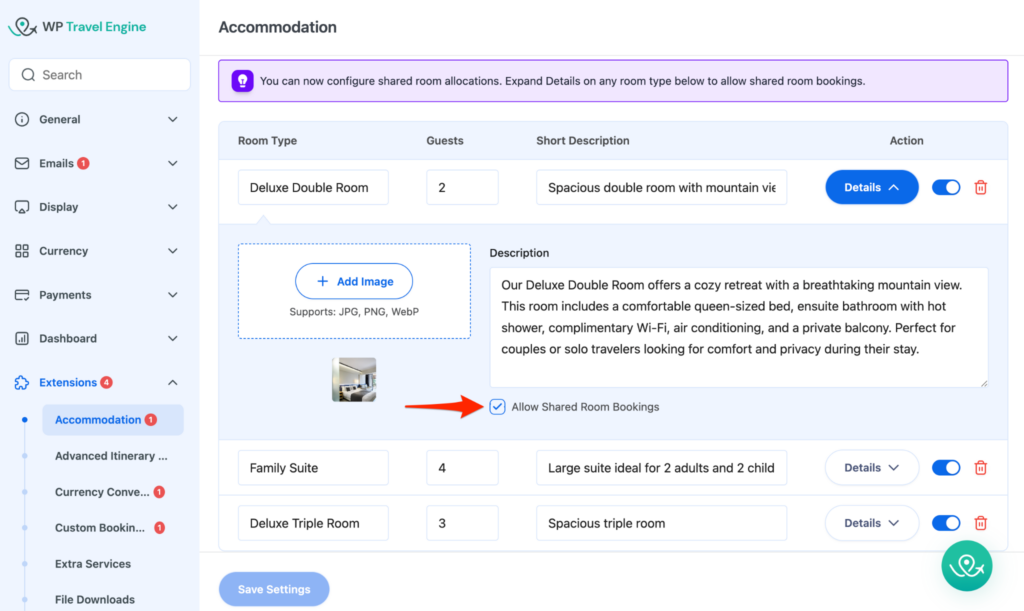
Once enabled, you can turn on sharing for individual room types by expanding their Details panel and checking Allow Shared Room Bookings for that room.
Shared Occupancy Notice #
Use it to explain what shared booking means. This message appears at the accommodation step in the booking modal when a traveler’s group size does not fully fill the selected room. For example, when a single traveler books a double room with one spot still open.
Mandatory For #
Select which traveler categories must choose an accommodation option before completing their booking. For example, selecting Child means a room selection is required whenever a child is included in the booking. Leave empty if accommodation is optional for all categories.
Room Types #
This is your global room library. Every room type you add here becomes available to assign to individual trips.
Click + Add Room Type to create a new room. Each row in the table has the following fields:
- Room Type: The name of the room, for example “Deluxe Double Room” or “Family Suite.”
- Guests: The maximum number of guests the room accommodates.
- Short Description: A brief summary shown to travelers on the booking form.
- Action: Toggle the room on or off.
- Details: Click on it to expand the room and add an image and a longer description.
Under Details:
- Image: Upload a photo of the room. Supports JPG, PNG, and WebP.
- Description: A longer description of the room’s amenities and features.
- Allow Shared Room Bookings: Check this box to allow travelers to book fewer spots than the full capacity of this room. Only available when Allow Shared Room Bookings is enabled.
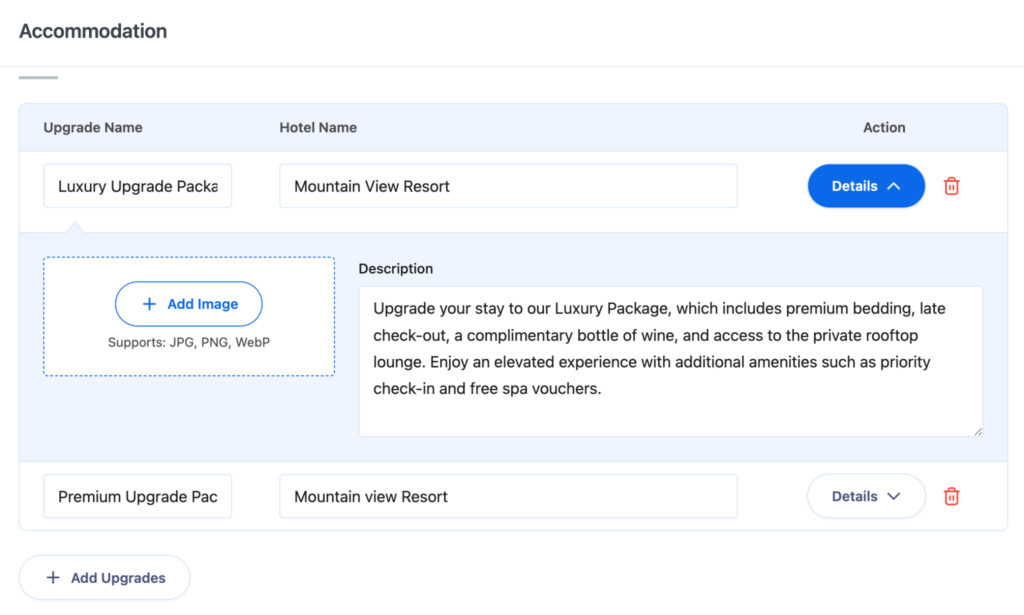
Room Upgrades #
Room upgrades are premium options travelers can add on top of their base room selection. They are created globally here and then assigned to specific room types on individual trips.
Click + Add Upgrades to create a new upgrade. Each row has:
- Upgrade Name: The name of the upgrade, for example “Luxury Upgrade Package.”
- Hotel Name: The hotel this upgrade applies to, for example “Mountain View Resort.”
- Details: Click to expand and set the upgrade price.
Click Save Settings after making any changes.
Trip-Specific Settings for Accommodation #
These settings let you control accommodation options for an individual trip. Go to Trips, open the trip you want to edit, and click the Accommodation tab in the trip settings sidebar.
Room Types #
All room types created in the global settings appear here automatically. For each room in the list, you can configure:
- Short Description: Override the global description with something specific to this trip.
- Price Per Room: Set the price for this room on this trip. This is trip-specific and does not affect other trips. Leave at 0 if the room is included in the package price.
- Action toggle: Turn a room on or off for this trip. Rooms toggled off won’t appear on the booking form.
- Details: Override the global image and description.
- Included: When a room is included in the trip price at no extra cost, it shows an Included tag next to the room name on the booking form. The price per room is disabled.
Room Upgrades #
Select which upgrades are available for this trip using the Add Upgrades dropdown. Only upgrades created in the global settings appear here.
Once added, each upgrade row shows:
- Upgrade Name and Hotel Name: Pulled from the global settings. Not editable at the trip level.
- Price Per Room: Set the upgrade price for this specific trip.
- Room Types: Select which base room types this upgrade applies to. For example, you can allow “Luxury Upgrade Package” for Deluxe Double Room only, or make it available across all room types.
- Action toggle: Turn the upgrade on or off for this trip.
Troubleshooting #
Accommodation options are not showing on the booking form
Make sure the add-on is enabled under WP Travel Engine > Settings > Extensions > Accommodation and that at least one room type is toggled on for the trip.
Room upgrade not appearing on the booking form
Confirm the upgrade is assigned to the correct room types in the trip settings and that the action toggle is on.
Accommodation details missing from booking confirmation emails
Check that your email templates are updated to include accommodation fields. Go to WP Travel Engine → Email Customizer to verify.
FAQs #
Can I include accommodation in the trip price by default? #
Yes, you can set a room type with zero or included pricing (example: Standard Room included in package).
Can I offer multiple upgrades for one room type? #
Yes, you can add as many upgrades as you like, each with its own hotel name and price.
Does this work with emails? #
Yes, the accommodation details appear in booking confirmations and payment receipts.
Feel free to contact our support team for any other assistance.