
If you run trips through WP Travel Engine, two tasks take up a lot of time: writing good content for every trip you list and constantly logging into WordPress just to check or update small things like bookings.
Altus AI is a plugin designed to take some of that work off your hands by connecting AI directly to your WP Travel Engine site.
Think of it like having two separate helpers, each doing a different job:
- One helper writes trip content for you, so you’re not staring at a blank page every time you add a new trip.
- The other helper lets you talk to your website in plain English (through an AI assistant like Claude or ChatGPT) instead of clicking through the WordPress dashboard every time you need to check something.
These two helpers are packaged as separate modules inside Altus AI, and you choose which one(s) you actually want:
- Content Generation – Writes the text for your trips: the overview, highlights, day-by-day plan, what’s included, and FAQs. You fill in a few basic details, and the AI writes a draft for you, right inside the page where you normally add a trip. You still review and edit everything before it goes live.
- MCP – Short for Model Context Protocol. It lets you connect an AI assistant, like Claude or ChatGPT, directly to your website. Once connected, you can ask the assistant things like “how many bookings do I have this month?” or ask it to update a booking, and it will actually go and check or change your real website data. You’re just having a conversation with it, and it does the clicking around for you.
You might or might not need both modules. Turn on the ones you need. They work independently of each other, so enabling one doesn’t require the other.
This guide walks you through installing the plugin and turning on whichever module(s) you want. Once a module is on, there’s a separate, more detailed guide for that specific module, linked at the bottom of this page.
Before You Start #
Before setting up Altus AI, make sure you have:
- WordPress version 7.0 or newer
- WP Travel Engine version 6.8.5 or newer
- Altus AI installed and activated with your license key
How to Purchase and Activate Your Altus AI License #
Follow these steps to purchase Altus AI and activate your license on your WordPress website.
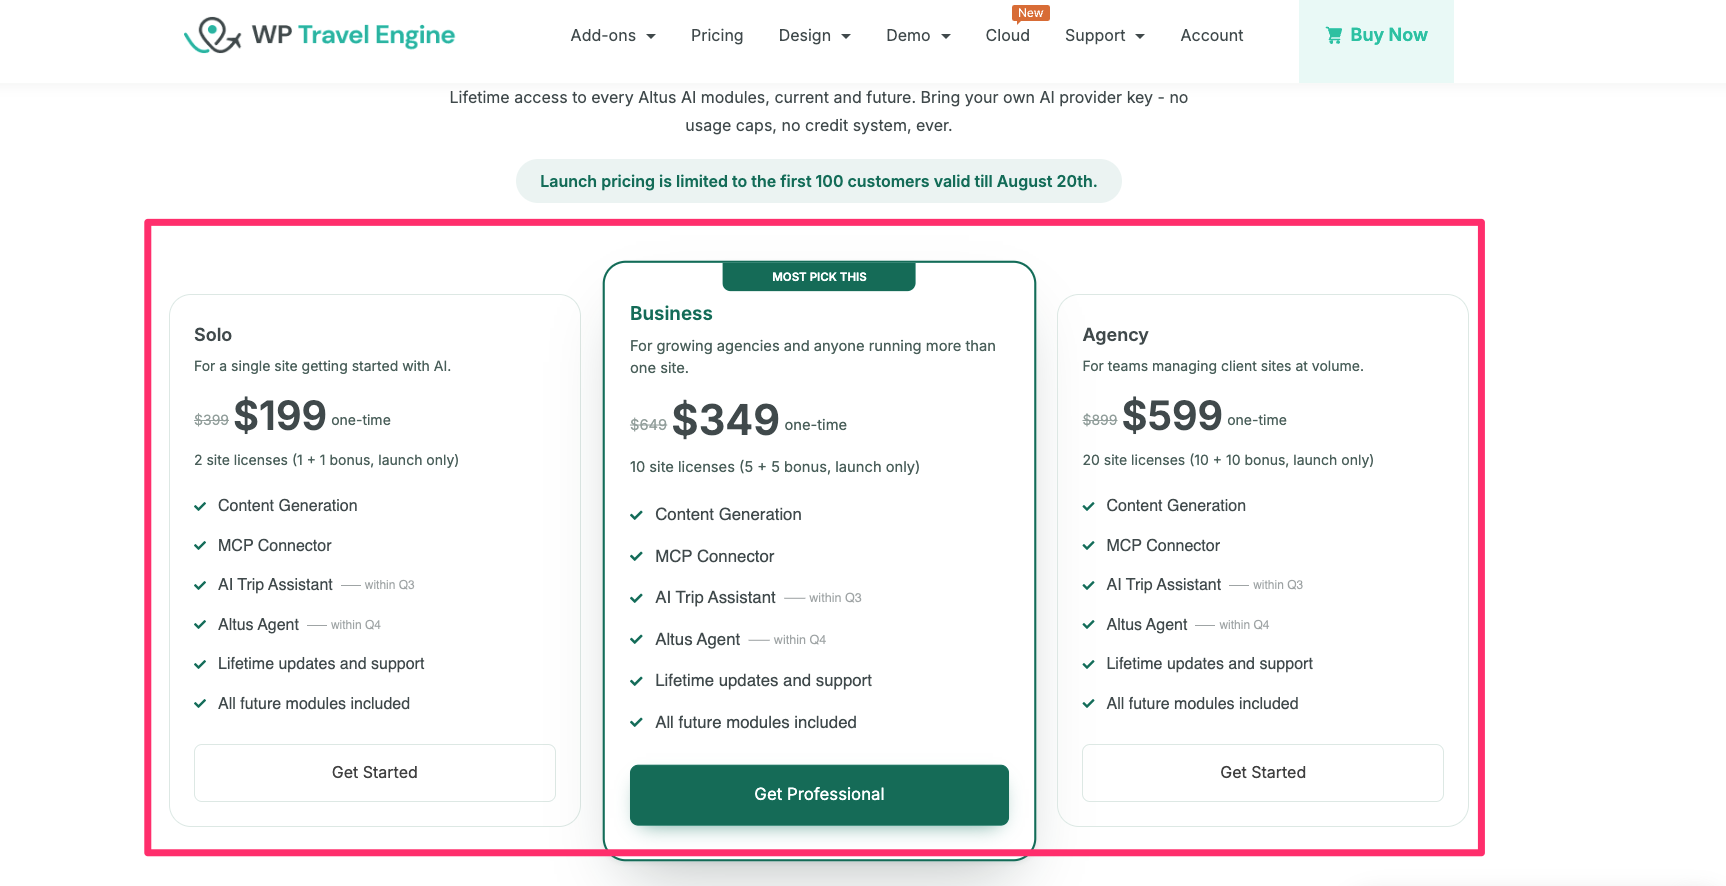
1. Choose a Pricing Plan
Choose from:
- Solo – 1 site license
- Business – 10 site licenses (5 + 5 bonus during the launch offer)
- Agency – Multiple site licenses for agencies
Click Get Started (Solo or Agency) or Get Professional (Business) to continue.
2. Complete Your Purchase
On the checkout page:
- Review your order.
- Enter your Email Address, First Name, and Last Name.
- Choose a payment method.
- Complete the payment.
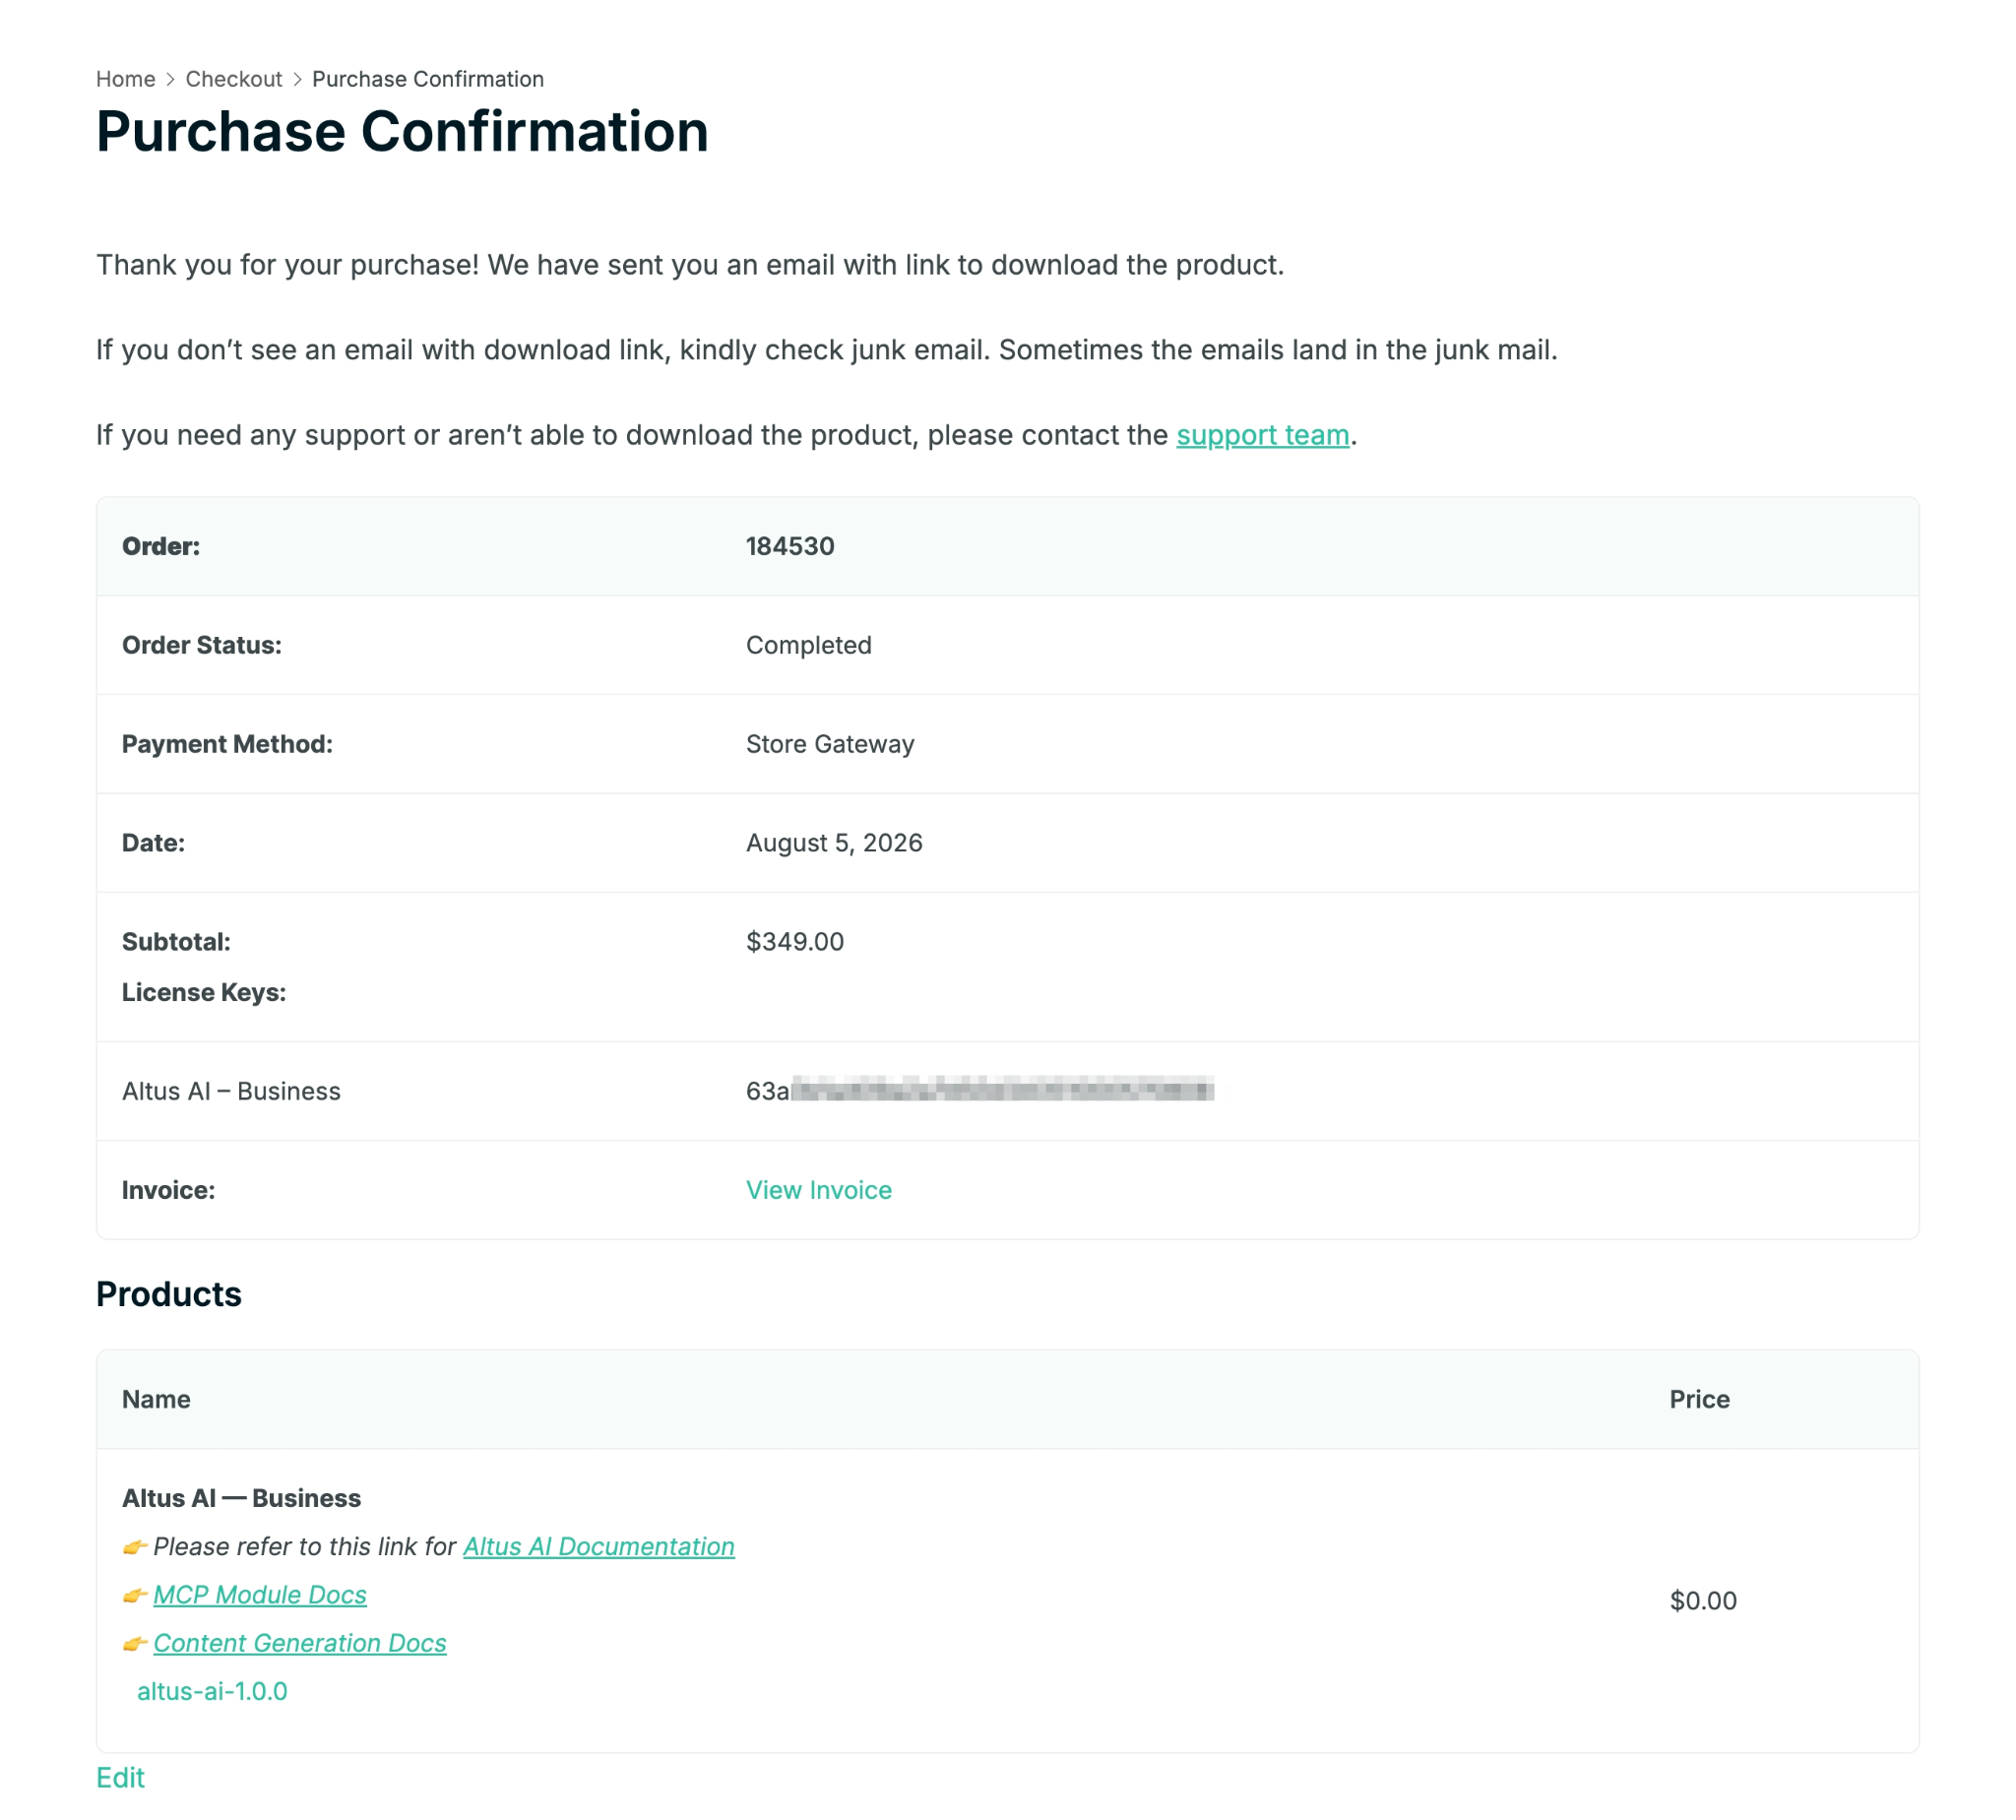
3. Copy Your License Key
After your purchase is complete, you’ll be redirected to the Purchase Confirmation page. Under License Keys, copy the license key for your Altus AI plan.
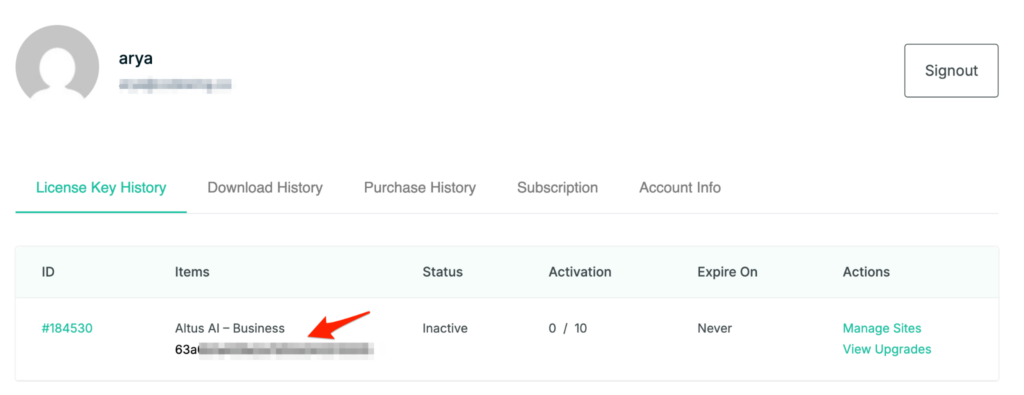
4. Find Your License Key Later (Optional)
You can access your license key at any time from your account.
- Sign in to your WP Travel Engine account.
- Open My Account.
- Go to the License Key History tab.
- Copy the license key for your Altus AI license.
5. Activate your license on your site.
In your WordPress dashboard:
- Go to Altus AI > License.
- Paste your license key into the License Key field.
- Click Activate.
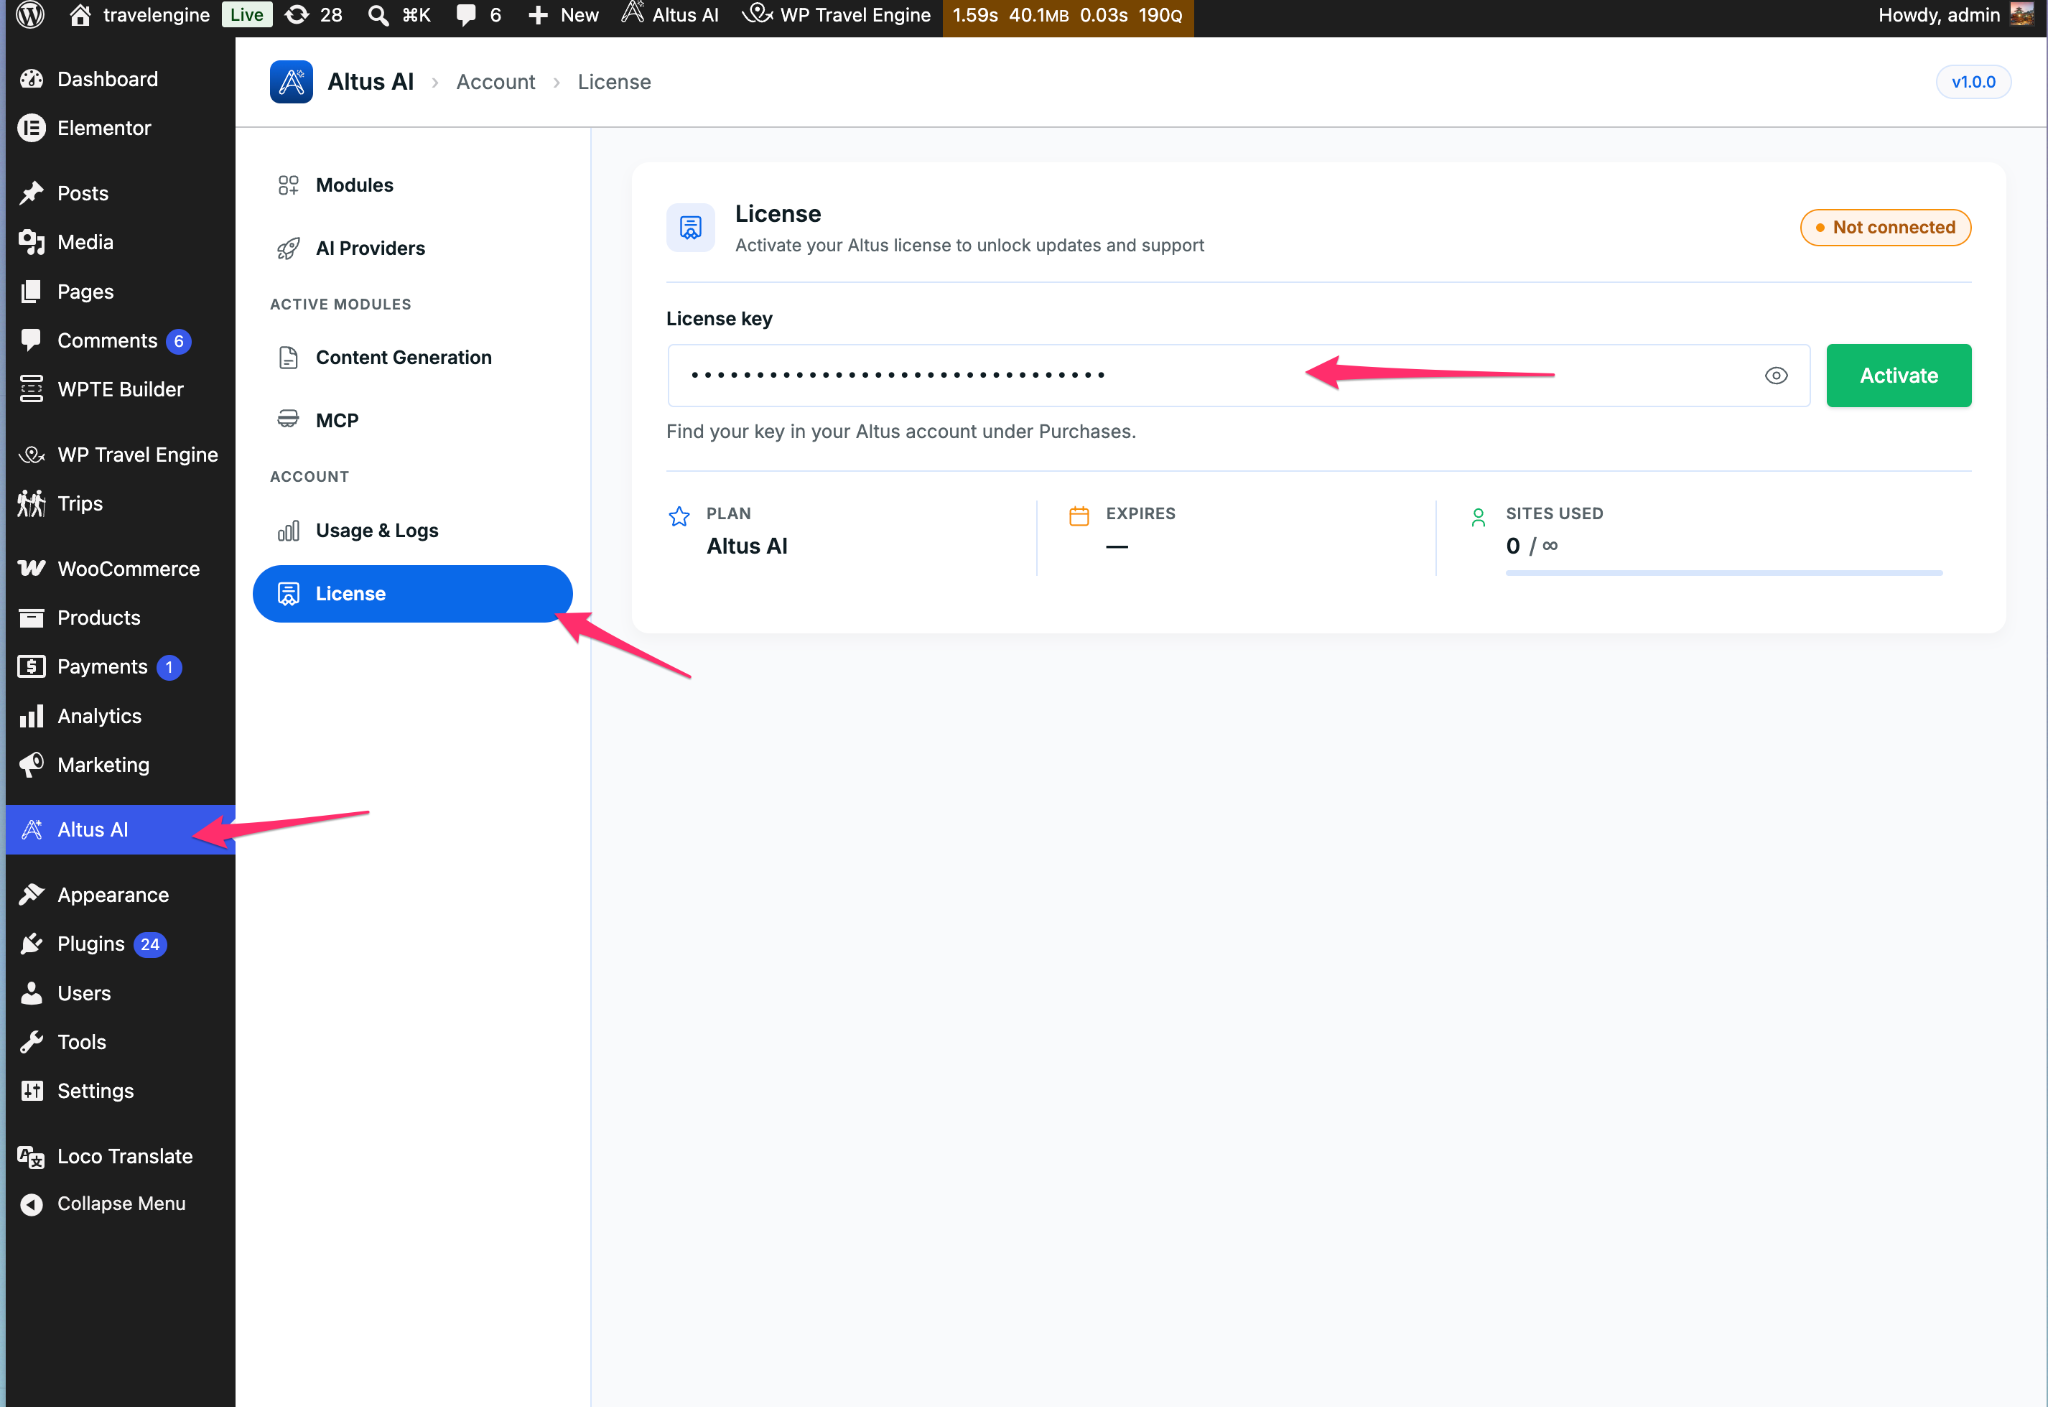
Once your license is activated successfully, you’ll see:
- Status: Connected
- Plan
- Expiration Date
- Sites Used
How to Check It Worked #
After installing, here’s how to make sure everything is set up correctly:
- Log in to your WordPress Dashboard.
- Look at the menu on the left-hand side. You should see Altus AI listed there.
- Click on it. This opens the Modules page, this is the main screen for the whole plugin.
How to Turn On a Module #
Follow these steps for whichever module you want to use:
- Go to Altus AI > Modules.
- Find the box for the module you want, either Content Generation or MCP.
- Click the switch on that box to turn it on.
- Scroll down and click the Save Settings button in the bottom-right corner. This step matters, clicking the switch alone doesn’t save your change.
- Once it’s saved, the box will now say Active, and a Configure link will appear so you can go set it up properly.
Good to know: These two modules don’t depend on each other. You can turn on just one, both at the same time, or switch either one off later without affecting the other.
Configuring the AI Provider #
Each module needs a working AI provider connection before it can generate anything.
Each module needs a working AI provider connection before it can generate anything.
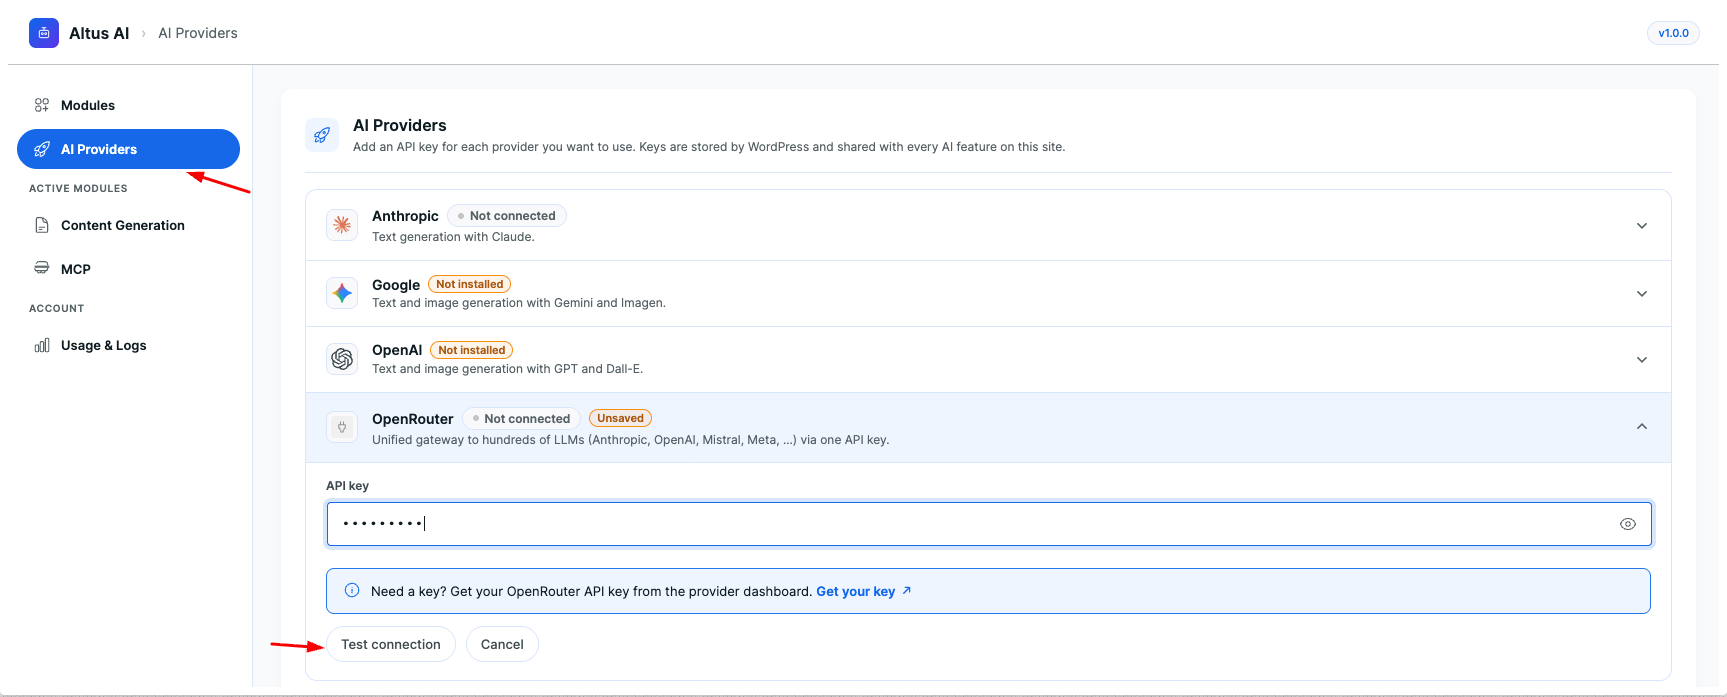
- Go to Altus AI > AI Providers.
- Choose a provider: Anthropic, Google, OpenAI, or OpenRouter. Each shows its own status badge until connected.
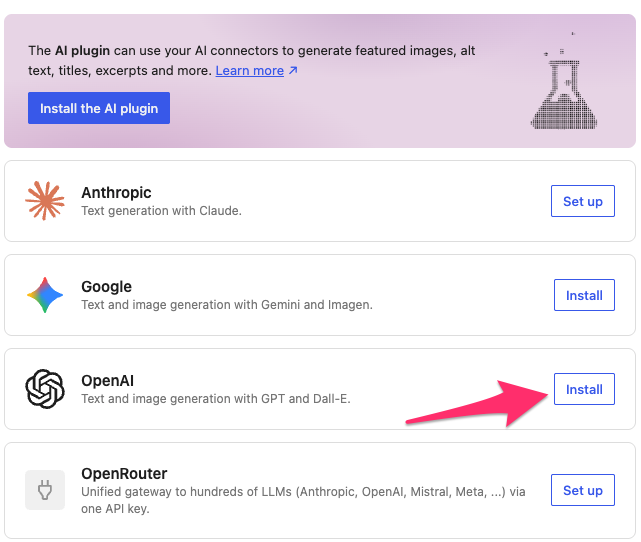
If you’re going to use Anthropic, Google, or OpenAI, you’ll need a separate plugin. Click Install, and you’ll be redirected to a different page.
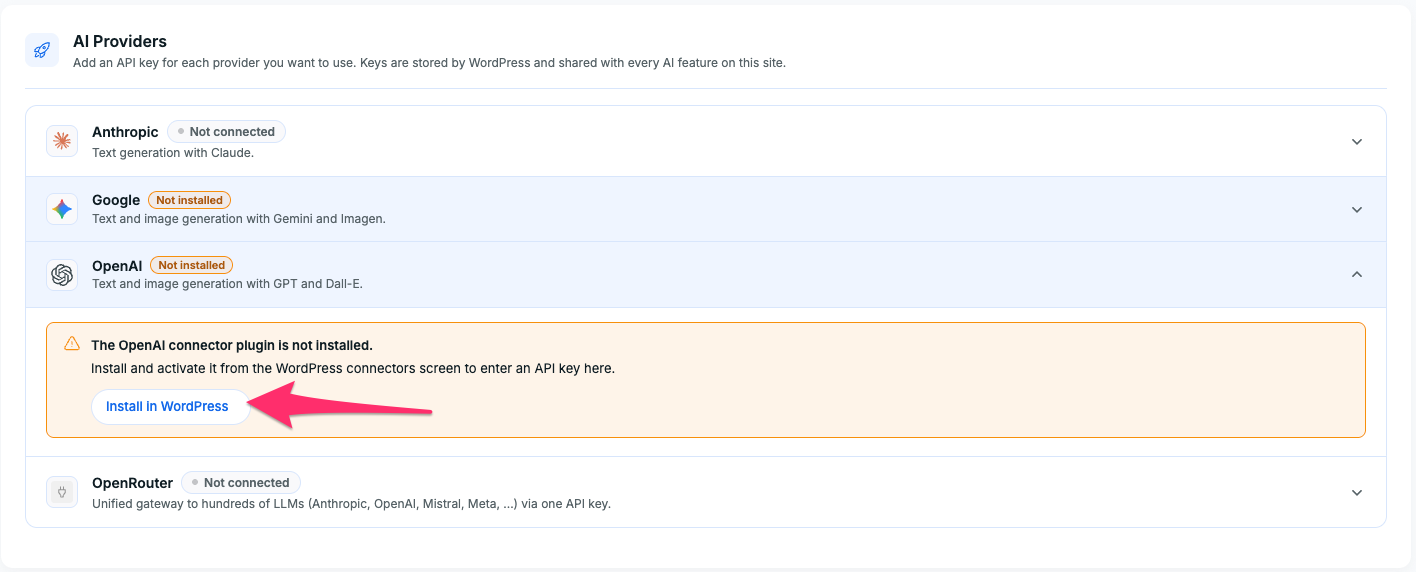
- Click Install, then return to the Altus AI page.
- Click a provider to expand it and enter your API key.
- Test the connection to confirm the key works and pull in that provider’s model list.
- Save the settings once the connection test succeeds to apply the provider configuration.
What to Do Next #
Once you’ve turned a module on, here’s where to go for the full setup:
- Turned on Content Generation? Head to the Content Generation guide. It walks you through connecting an AI provider, setting your brand’s tone and voice, and actually generating content for a trip.
- Turned on MCP? Head to the Connecting AI Assistants to Altus via MCP guide. It walks you through connecting Claude, ChatGPT, or a coding tool like Cursor or VS Code to your site.
If Something Isn’t Working #
- Altus AI doesn’t show up in the menu at all – Go to Plugins and make sure it’s activated there, and double-check your license key was entered and activated.
- The module still says Inactive after I turned the switch on – Make sure you clicked Save Settings at the bottom of the page. The switch by itself doesn’t save anything until you do.
- I don’t see a Configure link – This only appears after the module shows as Active. Try refreshing the page after saving.
FAQs #
Do I have to turn on both modules? #
No. Just turn on whichever one(s) you actually plan to use. They work completely independently of each other.
Will this cost me extra money on top of what I already pay? #
That depends on which module you use and how. Content Generation uses whatever AI provider you connect (like Anthropic or OpenAI), and you’re billed by that provider directly, not by Altus AI. Check each module’s own guide for more detail on costs.
What version of WP Travel Engine do I need? #
Version 6.8.5 or newer. If you’re on an older version, update WP Travel Engine first before installing Altus AI.