Itinerary Downloader is an extension for the WP Travel Engine plugin to generate the itinerary PDF and include various content of the trip to create an offline, quick accessible trip detail brochure file to help you get updated and plan every moment of your trip.
The addon grants the ability to download the trip details including various sections such as trip overview, trip availability, trip cost, trip itinerary, trip fact, most frequently asked question about the trip, quick contact detail, and so on.
This one-stop travel companion addon helps you access the important and most necessary details about the trip.
Installation #
UPLOADING IN WORDPRESS DASHBOARD #
- Navigate to the ‘Add New’ in the plugins dashboard
- Navigate to the ‘Upload’ area
- Select wp-travel-engine-itinerary-downloader.zip from your computer
- Click ‘Install Now’
- Activate the plugin in the Plugin dashboard
USING FTP #
- Download wp-travel-engine-itinerary-downloader.zip
- Extract the wp-travel-engine-itinerary-downloader directory to your computer
- Upload the wp-travel-engine-itinerary-downloader directory to /wp-content/plugins/directory
- Activate the plugin in the Plugin dashboard
How does it work? #
Usage: #
Few of the basic settings and required fields and enabled/added automatically when add on is enabled. So, you can simply use the shortcode and paste it on the editor inside any of the trip posts to create the quick link. The shortcode usable is [wte_itinerary_downloader].

There’s only single shortcode and all other configurations are controlled through the setting on the plugin dashboard which is described in detail as below:
Setting page #
After you enable this addon, the global settings tab will be displayed in Admin Dashboard > Trips > Settings > Itinerary Downloader. You will be able to configure the various setting as required to modify the behavior of the addon.
The global setting is divided into 6 sections,
- Main Settings
- Text Settings
- User Consent Settings
- Email Settings
- PDF Content Settings
- Include/Exclude Particular PDF content
Main Settings #
From this setting section, you can control the major aspect of the addon such as enabling disabling the addon, enabling popup form instead of single click download, and MailChimp form. You can find the following configurable settings under this subhead.
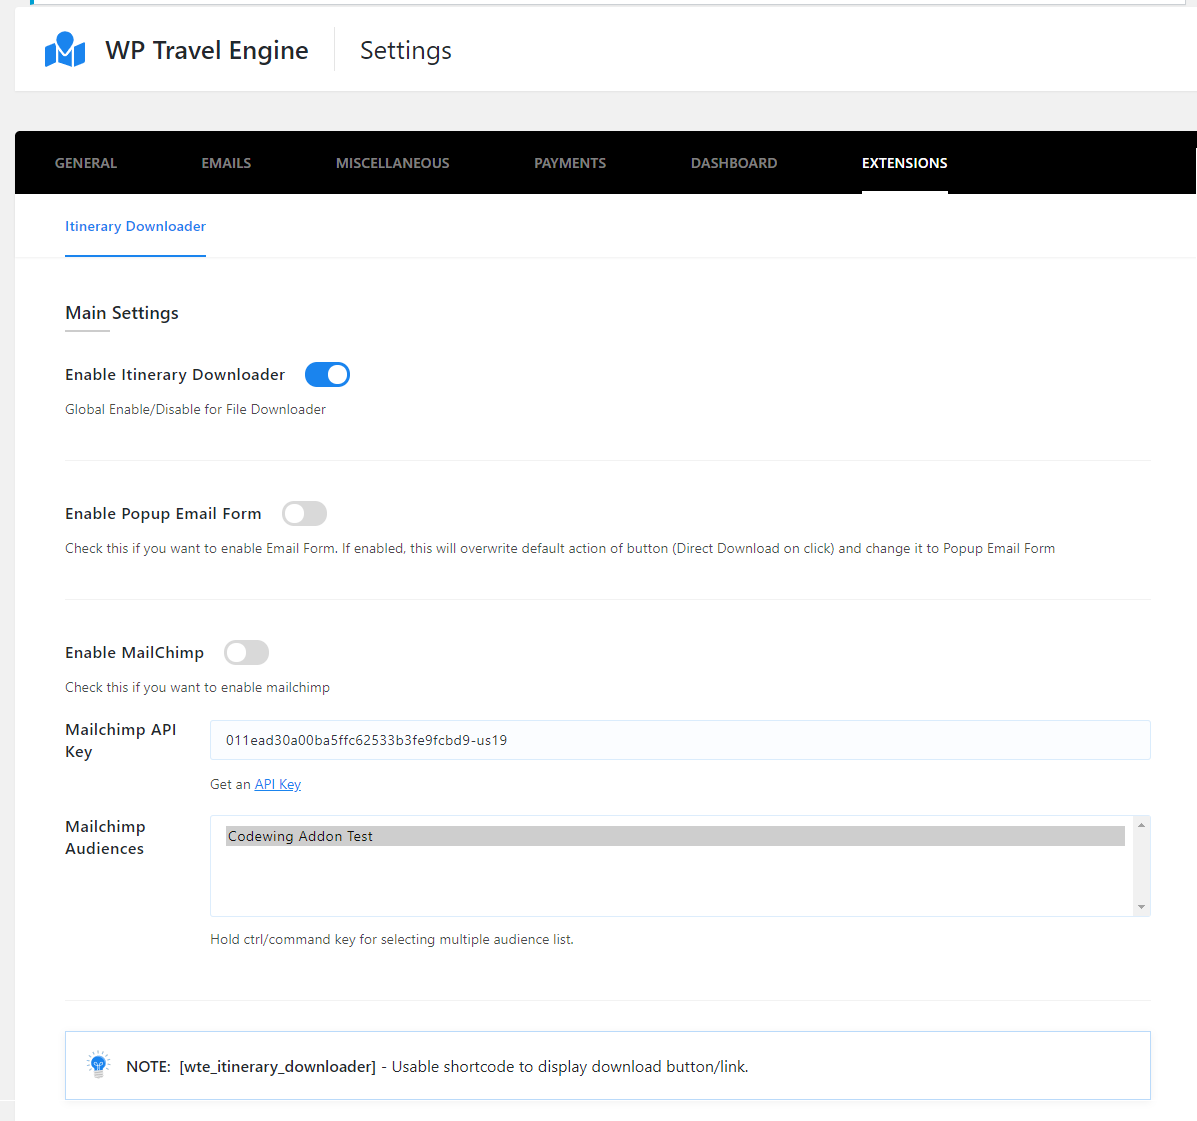
- Enable Itinerary Downloader
- From this setting, you can either enable or disable the add on without having to actually disable the plugin to temporarily stop the plugin feature.
- Enable Popup Email Form
- This setting, when enabled, will replace the “One-Click Download” button on the front to that of the popup email form. The same button will work as the trigger for the popup email form. When the email address is entered, pdf will be directly sent to email as an attachment.
- Enable MailChimp
- This setting if enabled will allow users to add the email address entered in the form to the Mailchimp list. If not enabled, the user will just be sent the Itinerary PDF in the email and there will be no Mailchimp action.
- MailChimp API Key
- In order for MailChimp to work, you will have to add the API key generated from this link. You can add API in this field.
- MailChimp Audiences
- When the API key is added and if the API is valid, this section will pull the Mailchimp Audience list as created in the Mailchimp Site. And you can select on which list the email address will be added to.
Text Settings #
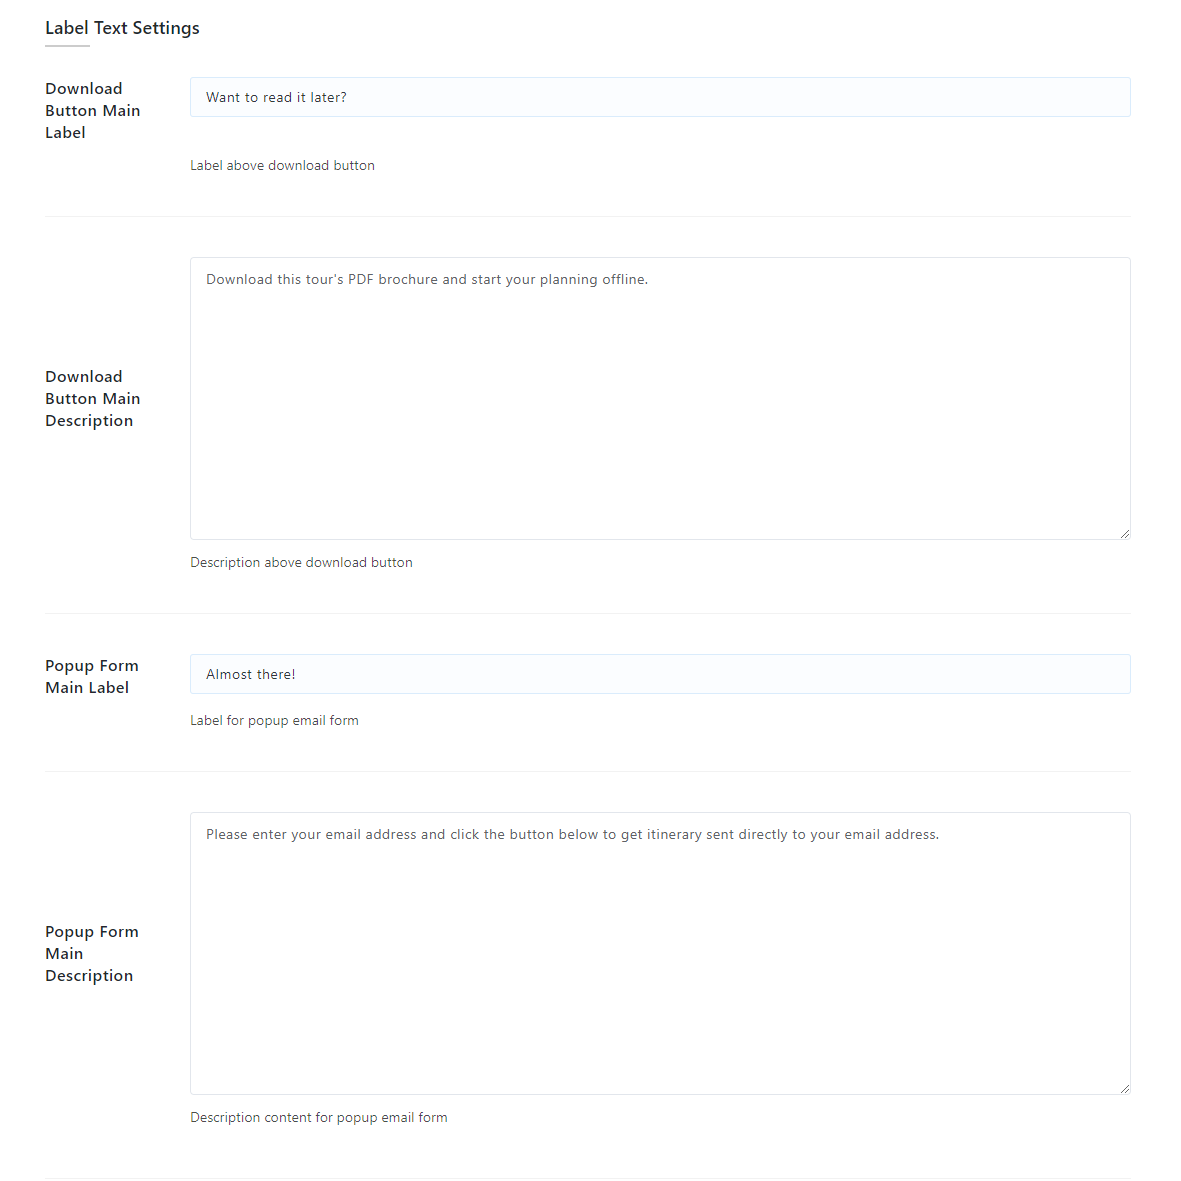
- Download Button Main Label
- This setting allows you to add text to be displayed in the itinerary downloader section in the front trip view. This setting is for the first text which will appear in the section. Default: Want to read it later?
- Download Button Main Description
- This setting will allow you to add the description on the itinerary downloader section in the front trip view. Default: Download this tour’s PDF brochure and start your planning offline.
- Popup Form Main Label
- This text will be displayed in the popup email form to describe the purpose of the form. Default: Almost there
- Popup Form Main Description
- This section will be the description of the popup form. Default: Please enter your email address and click the button below to get an itinerary sent directly to your email address.
User Consent Settings #
User consent is very useful in response to the various laws and policies recently being emerged as the GDPR. You can configure the following settings.
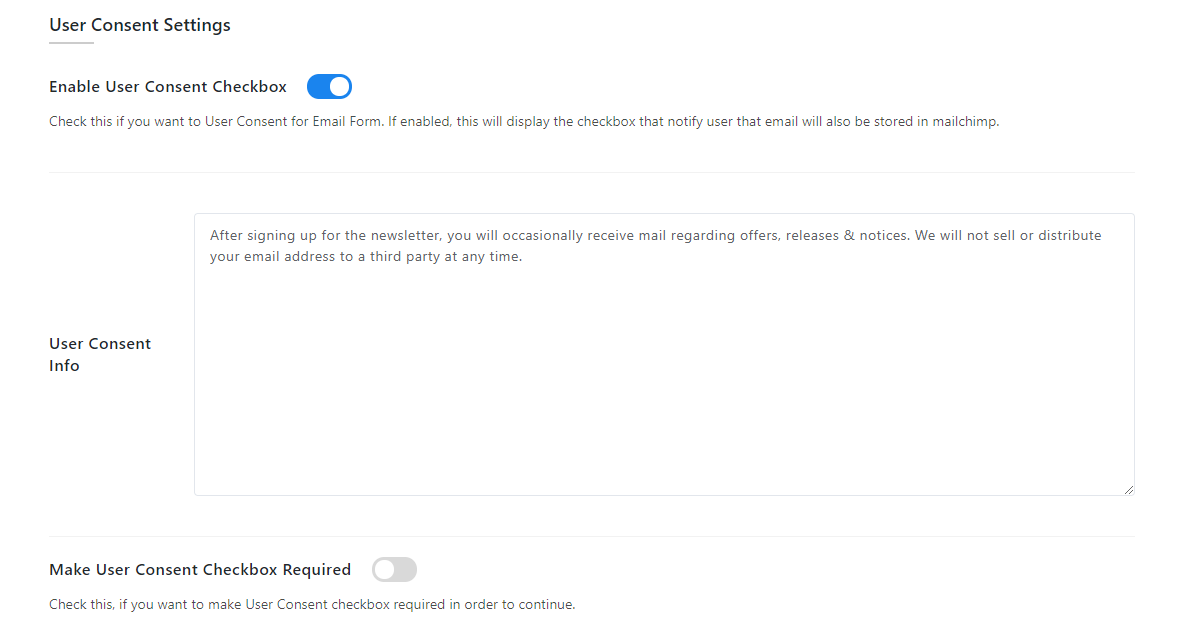
- Enable User Consent Checkbox
- This setting, when enabled, will add a user consent checkbox to the email popup form.
- User Consent Info
- You can add the additional info in the user consent checkbox beside “I accept” with a little more info such as, after signing up for a newsletter, you will occasionally receive mail regarding offers, releases & notices and such.
Email Settings #
The email form when enabled will allow the ability to send the email to the user with itinerary pdf attached. And you can configure the following info that will be sent to the user as below:
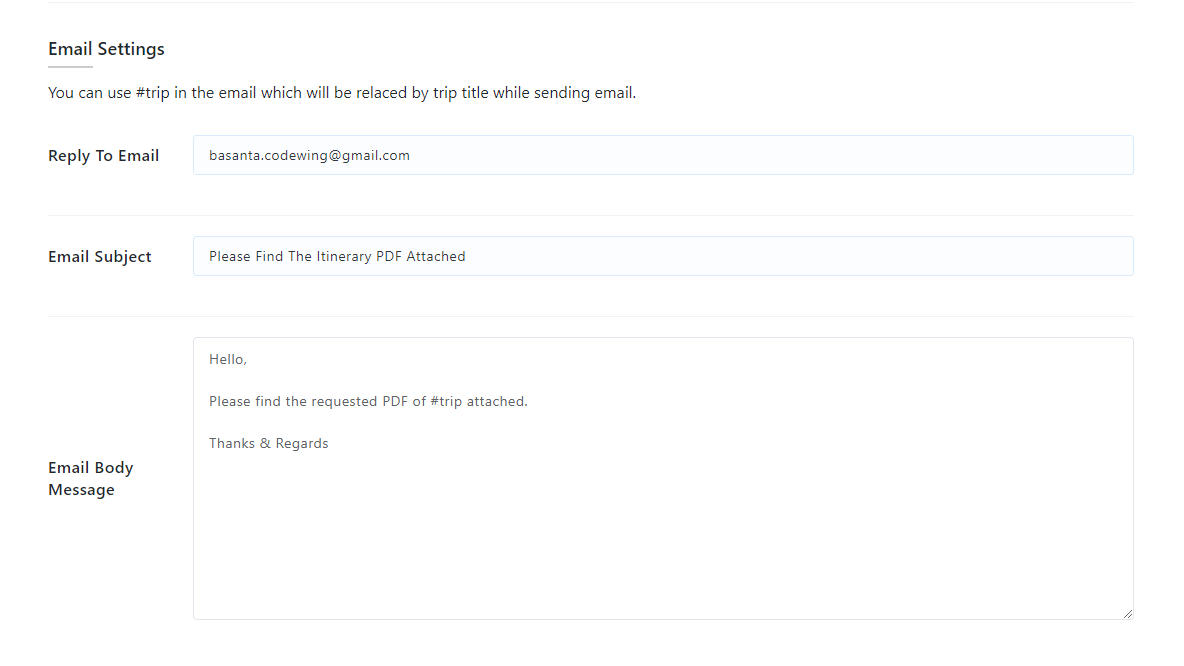
- Email Subject
- The email subject will be added to the email when the Itinerary PDF is sent to the user. Default: Email With Itinerary File Attachment
- Email Body Message
- Same as above, this field will be used as the email body.
PDF Content Settings #
In this setting, you can configure various sections and fields that will be added in generating the PDF. This section allows you to configure text and various other section-wise configuration. PDF description pages, footers, last page(that contains the info about the company and person to contact and as such), and so on. You can configure various of these as available below:
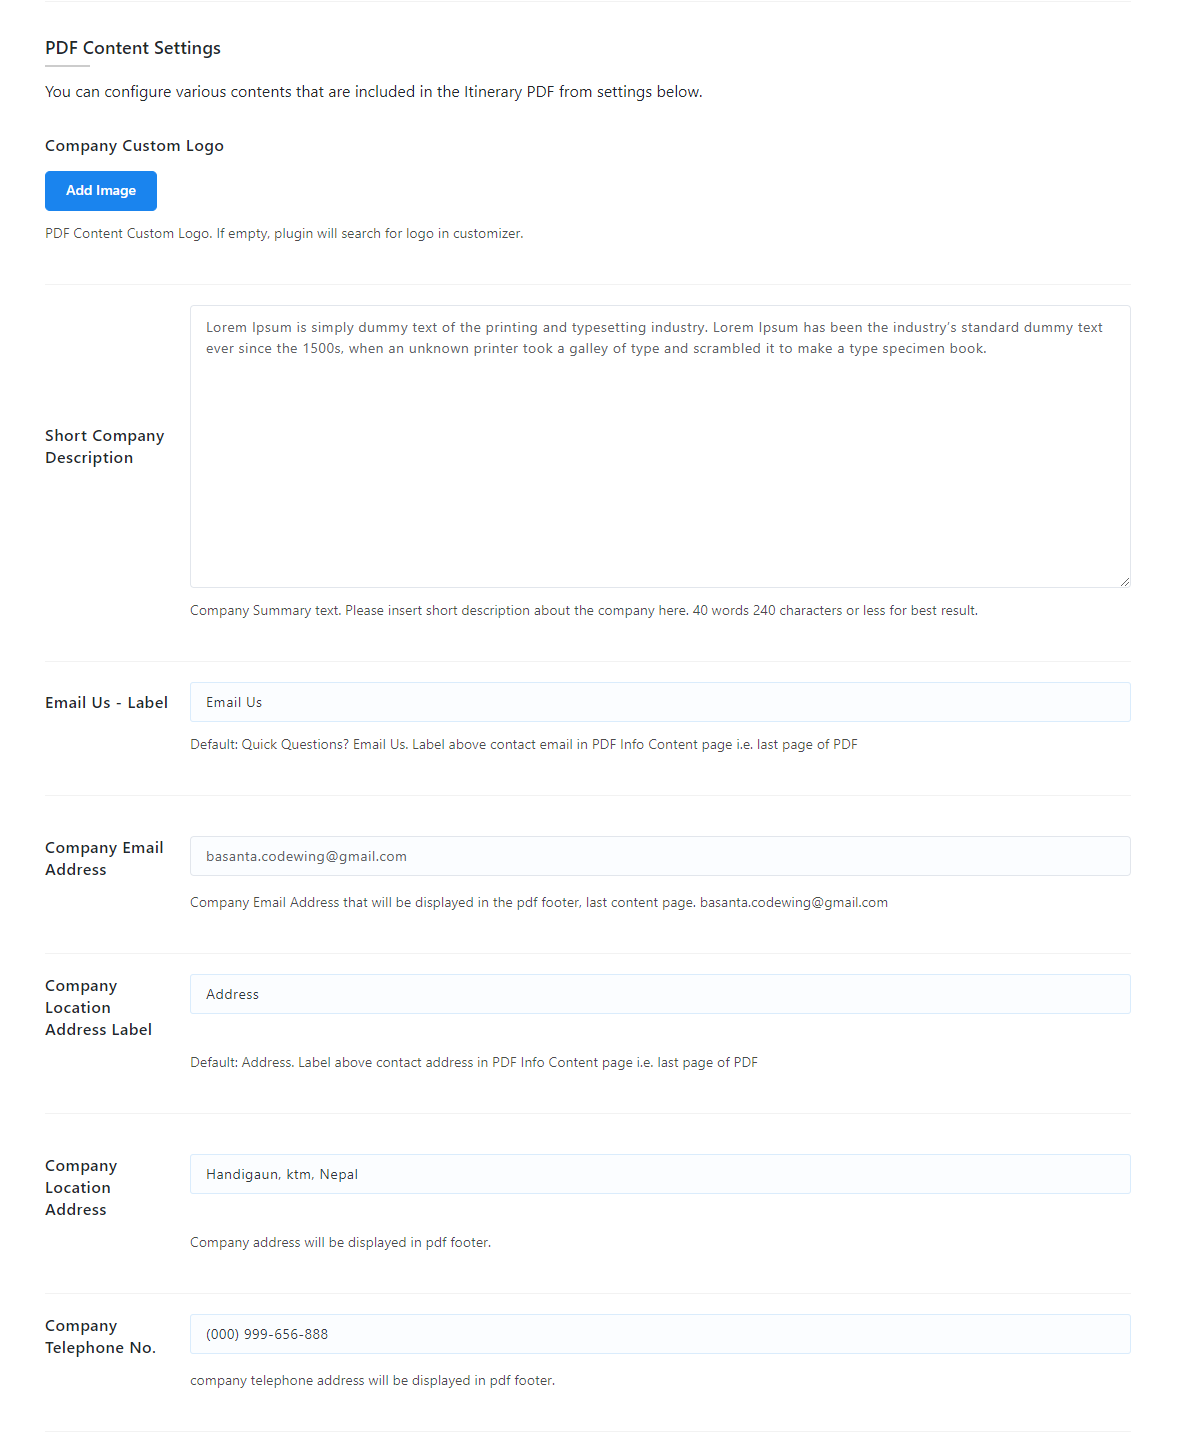
- Company Custom Logo
- The company custom logo will be displayed on the PDF first page as well as the company info page. This setting will allow you to add the image logo. And if you leave this section empty, the addon will instead search for the default logo setting from the customize section. Or else, this section will be hidden.
- Short Company Description
- As the setting implies you can add a short description of the company from here. You can add the description as much as you can but, due to the design issue, it is best to insert description as much as the short description about the company around 40 words 240 characters or less for best result.
- Company Email Address
- You can configure the company email address from here. By default, the one you have inserted in the default WordPress setting page is loaded. You can also change it.
- Company Location Address
- You can add the company’s physical location address from here in case some client would like to contact you directly via email address.
- Company Telephone No.
- You can also leave the company email address in the pdf section in case some clients would like to contact you directly via telephone no.
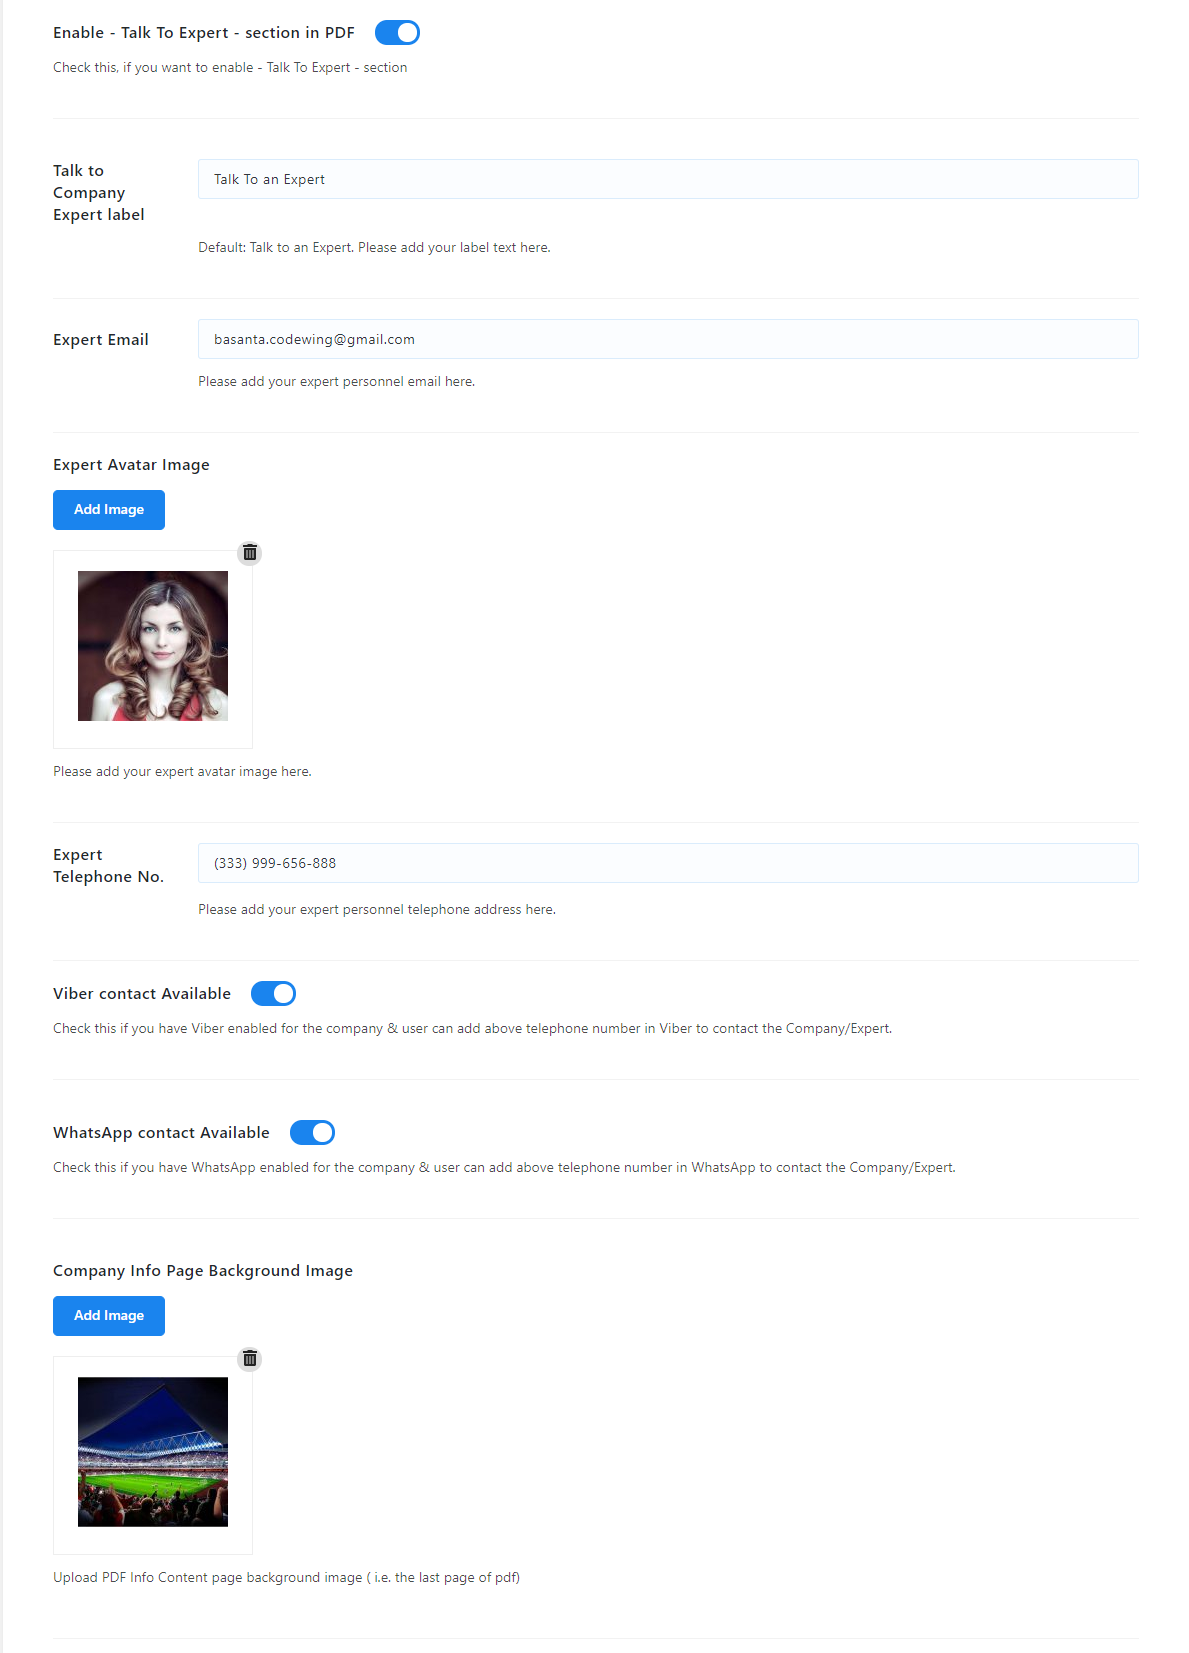
- Enable – Talk To Expert – section in PDF
- When enabled, this will add the Talk To Expert section on the company info page on the last page of the PDF. Talk TO Expert basically implies the representative of the company to whom the client can talk to in case of the query, issue, trouble, or anything as such. Else, the section will be hidden.
- Talk to Company Expert Text
- This is the text that will be displayed below the Expert image section. Default: Talk To Expert
- Expert Email
- You can configure the representative person’s email address in the case of contact from here.
- Expert Avatar Image
- An expert or representative individual’s images can be added from this setting.
- Expert Telephone No.
- You can add the direct cell phone number or direct contact number of any sort from here making it easy for clients to contact and express queries, issues, or anything else.
Include/Exclude particular PDF content #
This setting will allow you to configure whether to include or exclude certain sections while generating the PDF. By default, the following fields are shown in the pdf section:
- Trip Facts
- Various quick facts about the trip such as the no. of individuals per trip, altitude of the trip, transportation type for the trip, etc.
- Trip Overview
- Short description regarding the trip, what it basically includes, and what are the basic info the trip that visitors are interested in.
- Day to Day Itinerary
- Description of itinerary with informative and descriptive details per day in the Itinerary section of a particular trip.
- Cost
- Cost inclusive and exclusive from the trip that will be beared during the trip period. This section includes all the costs that will be incurred and costs that will not be incurred by the client, or costs that will be beared by the travel company.
- Faqs
- Frequently asked questions about the trip and their quick answers.
- Availability
- Details about the trip fixed starting dates and number of spaces available for booking. For e.g., if the client has fixed dates for a trip and only limited seats are available for the date. Then using this extension, you can add the dates and number of seats available for the dates.
All other fields are displayed by default. Currently, configurable settings are as below:
- Add – Trip Fixed Date Availability – to PDF
- You can configure it if you want to add the availability section into the pdf.