- How to use this Documentation?
- Requirements for Getting Started
- Recommended Image Size (in px)
- Demo Import (Instantly Make Website Like Demo)
- How to Check and Update WordPress Version:
- Theme Installation & Activation
- Installing Recommended Plugins
- Activating License Key
- Setting up the Front/Landing/Home Page and Blog Page
- Logo and Header Settings
- Appearance Settings
- Layout Settings
- Typography Settings
- Front Page Settings
- About Page Settings
- Contact Page Settings
- Trip Page Settings
- General Settings
- Footer Settings
Thank you for choosing the Travel Muni Pro WordPress theme!
This documentation covers the installation and the usage of the theme.
The main goal of the documentation is to provide guidance and a walk-through to set up the theme on your website in an easy-to-follow manner while also introducing you to some of the features of the theme. We encourage you to go through this document and keep it handy for reference.
If you have any questions about the theme or need assistance with anything related to the theme, please feel free open a support ticket. Our support team will be happy to assist you.
In this documentation, first, we’ll make sure that everything is ready for the installation, then we’ll set up the theme, and cover some initial configuration and customization options.
You can either follow the video or the below documentation to install and setup Travel Muni Pro Theme:
How to use this Documentation? #
We recommend everyone go through each step of the documentation to better understand the theme and its features.
However, if you are looking for a specific section, you can easily navigate using our table of contents on the left-hand side of the screen.
If you want to find a specific keyword, hit “Ctrl+F” on your browser to start searching.
Requirements for Getting Started #
Make sure Travel Muni Pro is compatible with your WordPress version.
Travel Muni Pro will work with 4.5 and above versions of WordPress.
However, for the best experience, added features, and updated security patches, we recommend you to update your WordPress to the latest version.
If you haven’t downloaded WordPress already, you can download it from the WordPress repository via https://wordpress.org/download/.
Checklist for Getting Started: #
- Check WordPress Version and Update it
- Install and Activate Travel Muni Pro theme
- Install Necessary Plugins. Some functionality of the theme might not work if you do not install the recommended plugins.
Recommended Image Size (in px) #
Banner Slider Image: 1920X600 Pixels
Header Image: 960X650 Pixels
Header Background Image: 1920X350 Pixels
Site Logo: 600X60 Pixels
Trip Taxonomy Image: 600X600 Pixels
Post thumbnail image: 610X343 Pixels
Mega Menu image: 594X373 Pixels
Single Trip Page Banner:1920X500 Pixels
Demo Import (Instantly Make Website Like Demo) #
You can easily make your website exactly like the live preview (demo) of the Travel Muni Pro theme by importing the demo content. Importing demo content is a great way of getting started with your website. You can get a guideline on how to set up this theme if you import the demo content.
To import the demo with a click, you need to install One Click Demo Import plugin and follow the below steps:
- Go to Appearance > Import Demo Data
- Click on the Import Demo Data button.
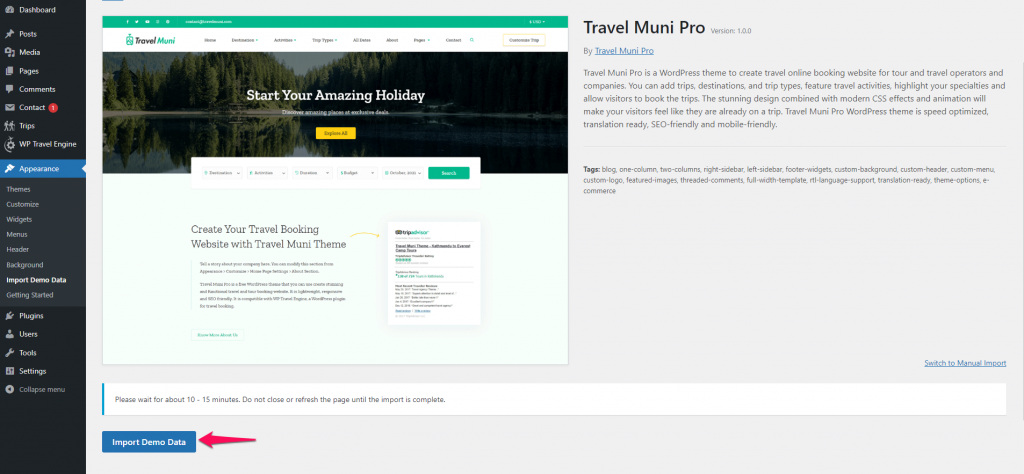
Once the demo import is successful, you will get a demo import successful message.
How to Check and Update WordPress Version: #
- Go to Dashboard >Updates.

Please update your WordPress version if there is an update available.
Theme Installation & Activation #
After you have the latest version of WordPress, save the downloaded Travel Muni Pro theme somewhere handy on your computer, as you will be using the included files for the rest of the installation process.
The Travel Muni Pro theme file includes:
A WordPress Theme Files (in .zip format)— This (travel-muni-pro.zip) is a compressed WordPress theme file containing all of the required templates, images, and icons required for the theme to function properly.
Note for Safari users (macOS): If you are using Safari to download the theme file, the file may unzip automatically. So, make sure your theme file is in .zip format. Here’s how to stop Safari from automatically unzipping your .zip file.

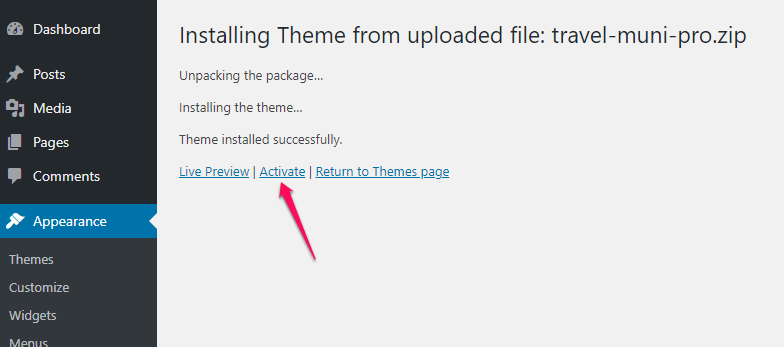
To install and activate the theme follow these steps or the above gif:
- Go to Appearance > Themes.
- Click on Add New button
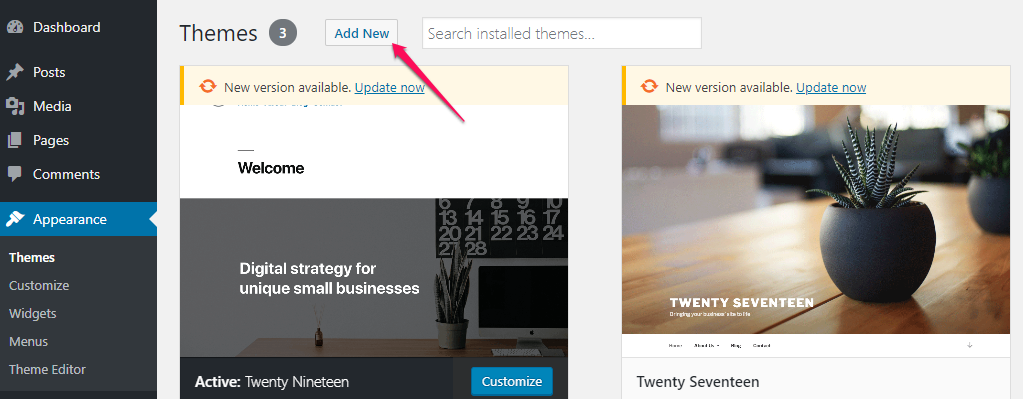
- Click on Upload Theme.
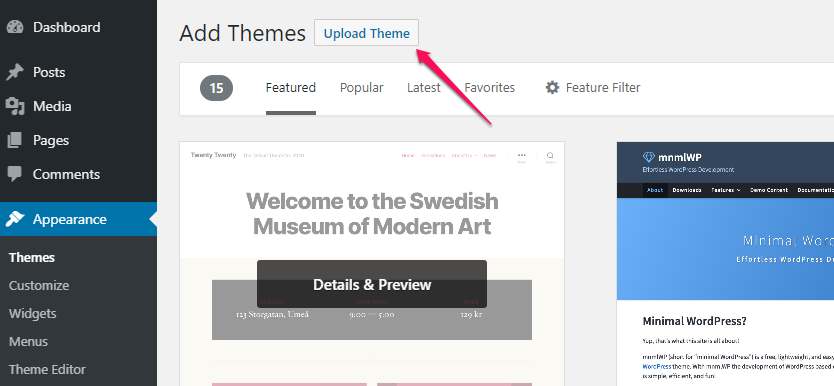
- Click on “Choose File…”, select the “travel-muni-pro.zip” file from your computer and click Open.

- After the theme is installed, click on “Activate” to use the theme on your website.
Installing Recommended Plugins #
You must install and activate the following plugins to get the best out of the Travel Muni Pro theme.
WP Travel Engine by WpTravelEngine: This plugin helps you create and add travel trips, destinations, itineraries, and other trips details. This plugin extends the functionality of your travel website.
Contact Form 7 by Takayuki Miyoshi: Contact Form 7 helps you add and manage multiple contact forms.
Regenerate Thumbnails by Alex Mills (Viper007Bond): This will help you update your image thumbnails sizes if you have existing content. To update the thumbnails, you must run this plugin.
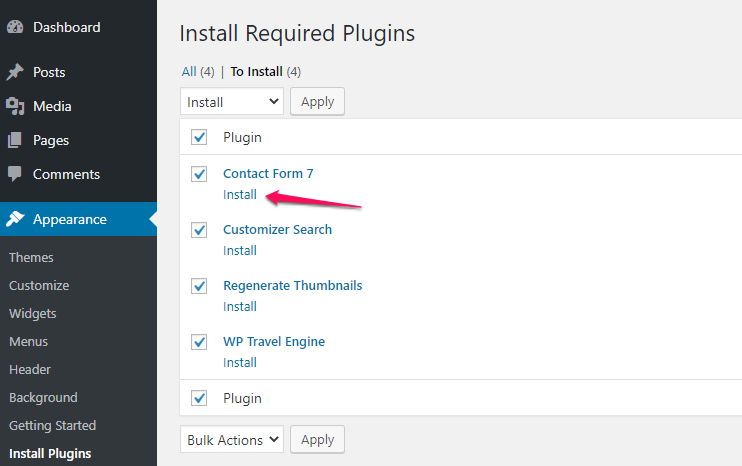
How to Install Recommended Plugin: #
- Go to Appearance> Install Plugins
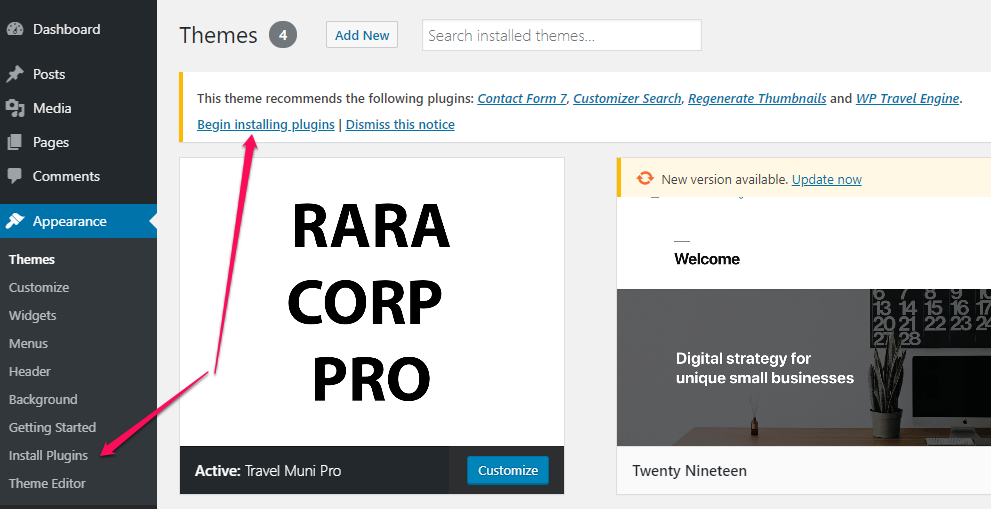
- Click “Install” to install the plugins.
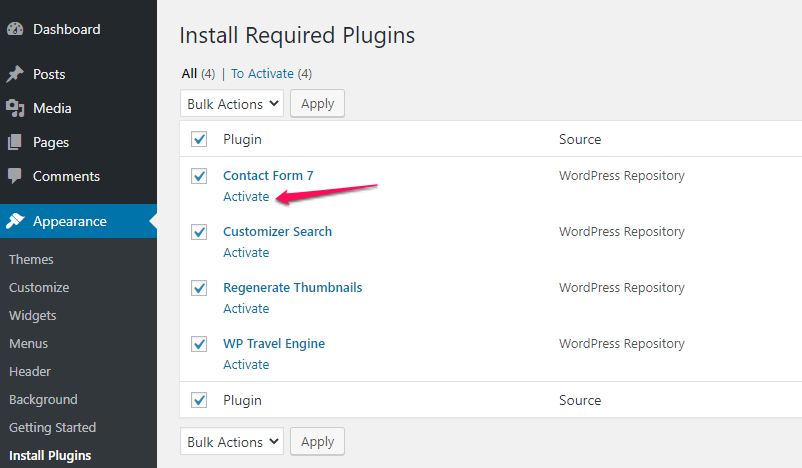
- Click “Activate” to activate the plugins
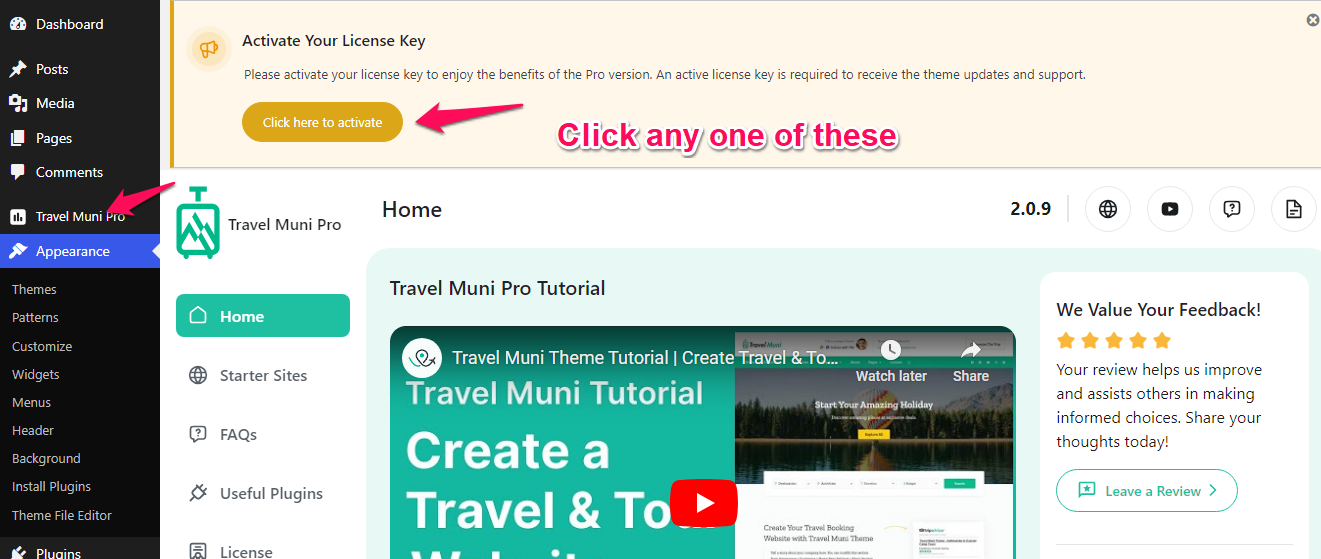
Activating License Key #
You need to activate the Premium Theme’s license key to receive theme updates and get quick support from our support team. We update our theme regularly to solve compatibility issues, fix bugs, make the theme more secure, and even add extra features.
Please follow the below steps to activate the license key for the Travel Muni Pro theme installed on your website:
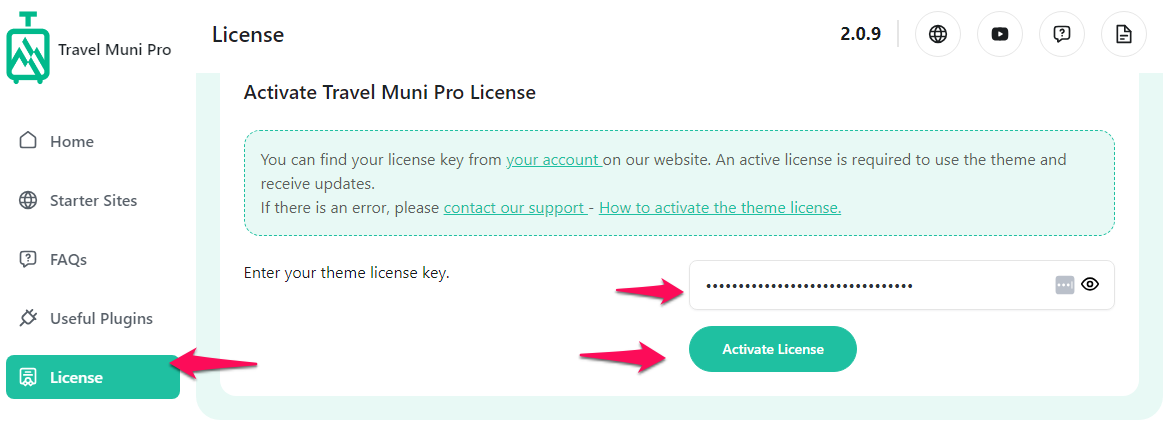
- Navigate to Admin Dashboard > Appearance > Theme’s Name > License
- On the right side, enter your license key and click on Save Changes ( (The license key is sent in the purchase receipt email. You can also find your plugin license key from your profile on WP Travel Engine.)
- Finally, click on Activate License to activate the license key.
Issues You Might Face During License Activation
We have implemented a firewall on our website to protect it from bots. If you are facing any issues with the license activation, then your website will probably be blocked by our firewall. Our firewall blocks the IPs of websites reported in the abuseipdb.com database. You can find your website IP from NSLookup.io website by entering your website address.
If you are unable to activate the license key, please contact our support team using your purchase email and the website URL where you are trying to activate the license key.
We apologize for the inconvenience.
Setting up the Front/Landing/Home Page and Blog Page #
To get started with customizing the theme, you first need to set up a front page. If you want to make your website look like the demo, you should select FrontPage as Static Page.
Please follow the below steps to set up the homepage and blog page for your Website.
Configure the Home Page and Blog Page #
- Go to Appearance > Customize > Homepage Settings
- Select A Static page under Your homepage displays.
- If you are using this theme in a fresh WordPress installation, go to the next point. If you are using this theme in an old WordPress, choose the page you want to set as Frontpage and choose the page you want to set as a blog page as Posts Page.
- Click on Publish.

Logo and Header Settings #
You can add your logo, tagline, phone number, search form, and social media icons on the top of your website here.
Site Identity (Add Logo/Name and Tagline on your website) #
You can change the name and logo of your website here.
- Go to Appearance > Customize > Site Identity
- Click Select Logo and upload your logo.
- Enter Site Title and Tagline.
- Check Display Site Title and Tagline if you want to show your website’s name and tagline.
- Set the Width of the Site Logo. We suggest you set a reasonable width for appearance reasons.
- Click Select Image and upload Image for Site Icon (favicon).
- Select the font, font size & site title color for the site title.
- Click on Publish.

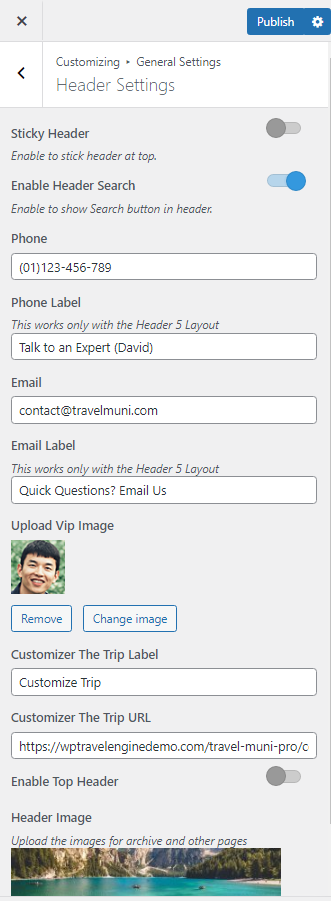
Header Settings #
You can add the contact information and a button on the site header by following the below instructions.
- Go to Appearance > Customize > General Settings > Header Settings
- Enable the Sticky Header option to stick the header at the top.
- Enable the Header Search option to show the search button in the header.
- Enter the necessary information in the Phone and Email fields.
- Upload the contact person image on the Upload Vip Image field.
- Enter the Button Label in the Customize The Trip Label.
- Enter the button link in the Customizer The Trip URL.
- Enable/ Disable the Top Header
- Enter the Top Header Title
- Enter the Top Header button label and URL
- Upload a Header Image to display on the archive and other site pages.
- Click on Publish.
Appearance Settings #
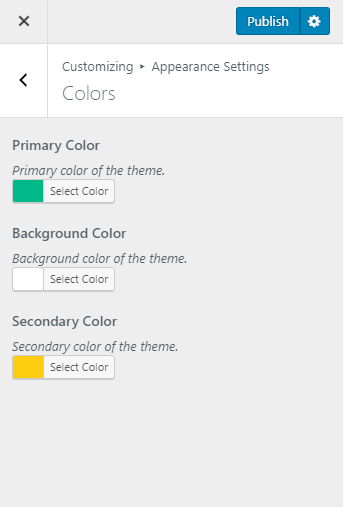
Color Scheme #
Please follow the below steps to configure the color scheme of your website.
- Go to Appearance > Customize > Appearance Settings > Colors
- Select the Primary Color, Background Color & Secondary Color.
- Click on Publish
Background Settings #
You can add a background image or pattern from this setting.
Please follow the below steps to configure the Background settings of your website.
- Go to Appearance > Customize > Appearance Settings > Background
- Click on “Image” tab
- Click on “Select image” button to add the background image.
- Click on “Remove” to remove the image. Click on “Change image” to change the background image.
- Click on Publish

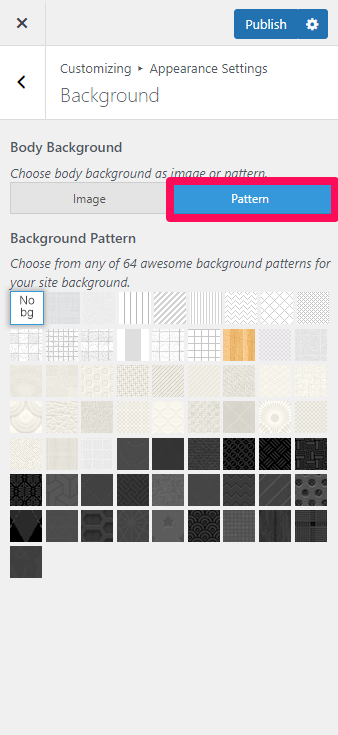
Adding Background Pattern #
- Go to Appearance > Customize > Appearance Settings > Background
- Click on the “Pattern” tab
- Select the pattern you like
- Click on “No bg” pattern to remove the pattern
- Click on Publish
Layout Settings #
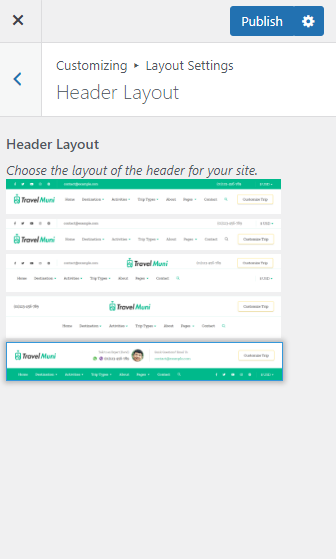
Header Layout: #
- Go to Appearance > Customize > Layout settings> Header layout
- Select a header layout for your website
- Click Publish.
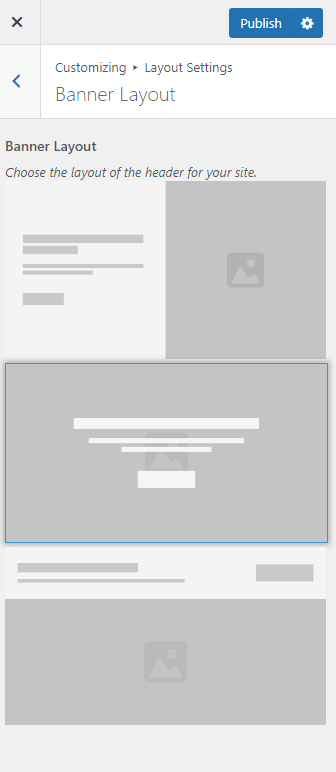
Banner Layout: #
- Go to Appearance > Customize > Layout settings> Banner layout
- Select a banner layout for your website
- Click Publish.
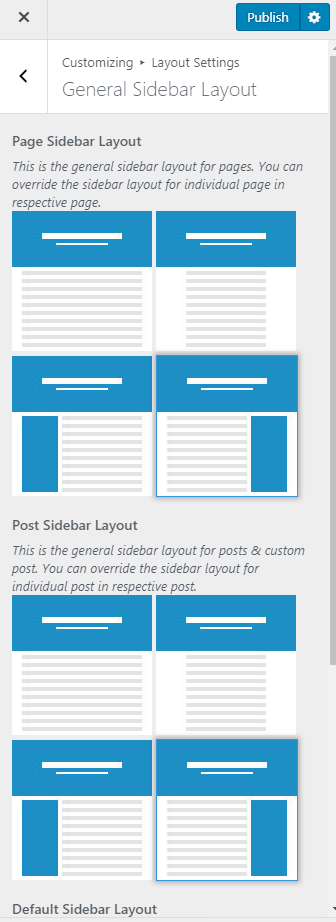
General Sidebar layout : #
- Go to Appearance > Customize >Layout Settings> General Sidebar Layout
- Select the Sidebar option for Page, Post, and Default sidebar layout.
- Click Publish.
Pagination Type: #
Please follow the below steps to change the pagination type of your website.
- Go to Appearance > Customize > Layout Settings > Pagination Settings
- Select the Pagination of your choice
- Click on Publish

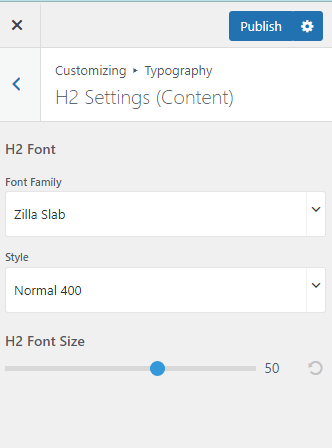
Typography Settings #
You can change the fonts of your contents and Heading tags here.
- Go to Appearance> Customize> Typography Settings
- Select the content type to change its typography

- Configure Font Family, Style, and Size.
- Click on Publish
Front Page Settings #
You can manage and edit homepage sections here. You must be on Home Page to customize the sections.
Also, make sure you have set the home page as a static front page– if not, please refer to the Setting up the Front Page section of this documentation.
Banner Section #
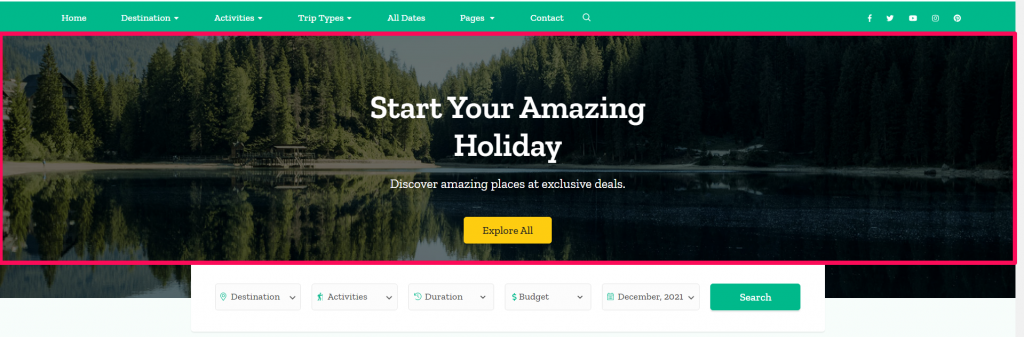
You can attract your visitors using the banner section. You can add image, video, or slider in the banner section. If you choose to add image or video, you can add a search form on the top of the image or video.
Travel Muni Pro theme features two banner options. You can set up the banner of your choice among two three options.
Please follow the below steps to configure the banner section on your website. The steps to configure all two types of banner on your website are explained in detail:
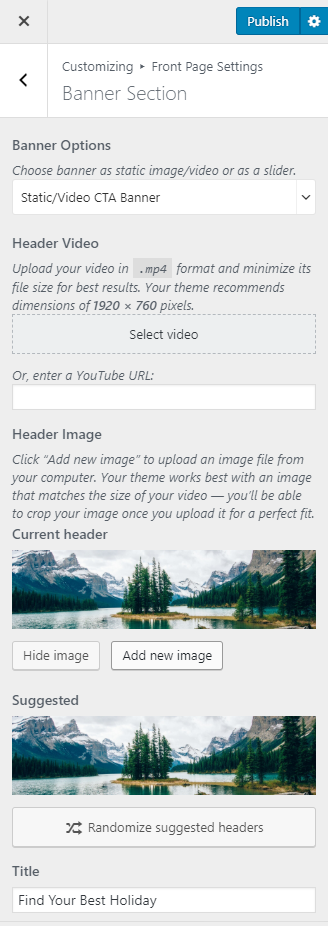
Static/Video CTA Banner #
Note By default, in WordPress, the audio is muted in Video Header and the fallback image is used instead of Video on mobile devices. So to avoid design, please set both banner image too to display on mobile devices.
Please follow the below steps to add a Static/Video Banner on the banner section of your website.
- Go to Appearance> Customize> Front Page Settings> Banner Section
- Choose “Static/Video CTA Banner” in Banner Options
- Upload and select a video. You can also enter a youtube link. If you have the video link or the video, the image will not be displayed.
- If you want to put an image in the banner, click on “Add new image” to add images to the banner section.
- Select the image you want to display on the banner section. You can also randomize added images. When you click on the “Randomize uploaded headers” button, the uploaded banner images will be displayed randomly every time your website is loaded. Make sure you don’t have a video selected if you want to show an image.
- Enter the title and subtitle for the banner.
- Enter the Banner Label and Banner Link for the banner.
- Select the Slider Caption Position.
- Click on Publish
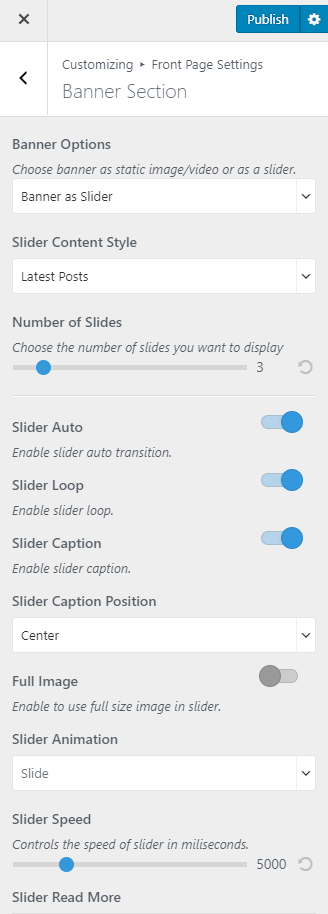
Banner as a Slider #
- Go to Appearance> Customize> Front Page Settings> Banner Section
- Choose “Banner as Slider” in Banner Options
Slider using Latest Posts #
- Select Slider Content Style as Latest Posts
- Select the number of Slides you want to display
- Enable Slider Auto to make slides transition automatically without clicking (Blue is enabled).
- Enable Slider Loop to allow the slider to repeat selected posts automatically.
- Enable Slider Caption to show the post title on the slider post image.
- Select Slider Caption Position.
- Enable Full Image to display full image in slider.
- Choose Slider Animation type.
- Select Slider Speed.
- Enter the label for the Slider Read More button.
- Click on Publish
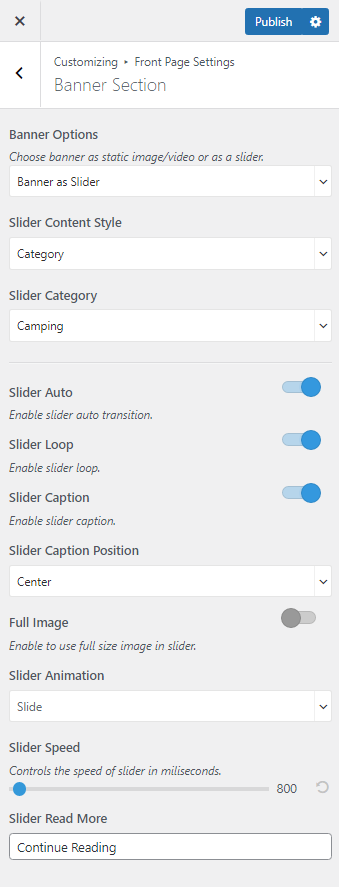
Creating Slider using Category #
- Choose Slider Content Style to Category
- Choose the Slider Category.
- The featured Image of the posts under the selected category will appear as Slide Images.
- Post Title of the post under the selected category will appear as Slide Title.
- Post Excerpt will appear on the Slider as slide Content. The first few sentences of the post content will appear as slide content if the Post excerpt is not entered.
- Enable Slider Auto to make slides transition automatically without clicking (Blue is enabled).
- Enable Slider Loop to allow the slider to repeat selected posts automatically.
- Enable Slider Caption to show the post title on the slider post image.
- Select Slider Caption Position.
- Enable the Full Image option to use full size image in the slider.
- Select Slider Animation from the drop-down.
- Select Slider Speed.
- Enter the Readmore Button Label
- Click on Publish.
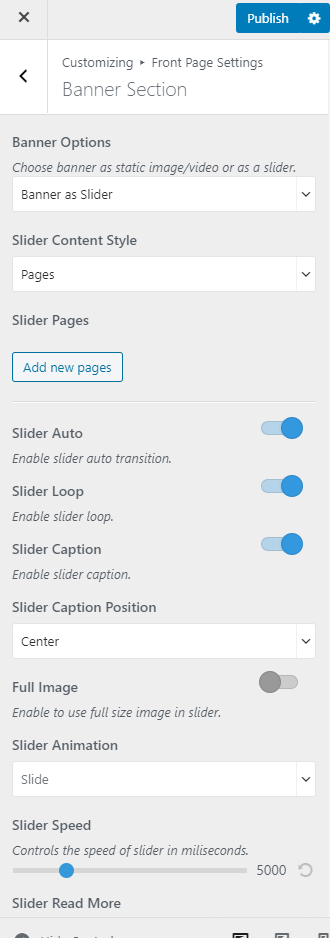
Slider as Pages #
- Select Slider Content Style as Pages
- Click on Add New Pages & Select Pages to be displayed in the slider section
- Enable Slider Auto to make slides transition automatically without clicking (Blue is enabled).
- Enable Slider Loop to allow the slider to repeat selected posts automatically.
- Enable Slider Caption to show the post title on the slider post image.
- Select Slider Caption Position.
- Enable Full Image to display Full-size of the image.
- Select Slider Animation from the drop-down
- Select Slider Speed.
- Enter the Readmore Button Label
- Click on Publish.
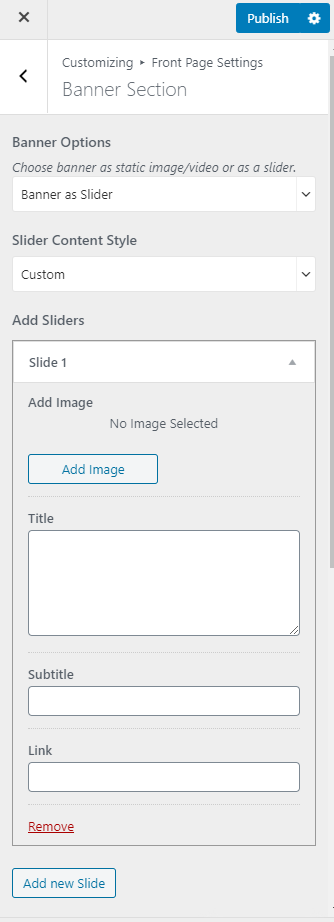
Creating Slider using Custom slides #
- Choose Slider Content Style to Custom.
- Click on Add new slide.
- Click Add Image to upload an Image.
- Enter Title, Description and Link for the Slide.
- Click Add new Slide to add new slides. Click on Slide No. (1,2,3…) to modify the slides
- Enable Slider Auto to make slides transition automatically without clicking (Blue is enabled).
- Enable Slider Loop to allow the slider to repeat selected posts automatically.
- Enable Slider Caption to show the post title on the slider post image.
- Select Slider Caption Position.
- Choose Slider Animation type.
- Enable Full Image To display the full size of the image.
- Select Slider Animation from the drop-down.
- Select Slider Speed.
- Enter the Readmore Button Label
- Click on Publish.
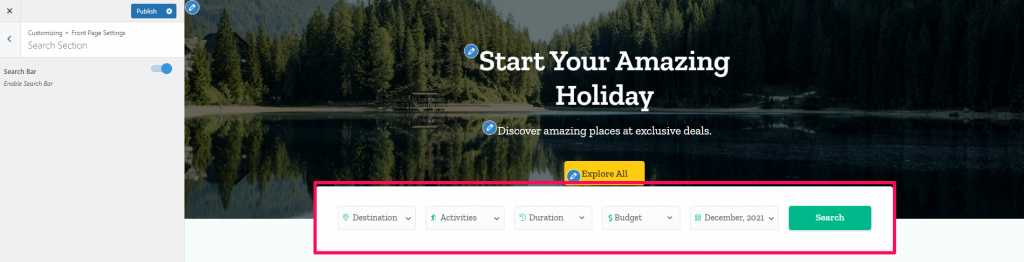
Search Section #
Note: Make sure you have installed and activated the WP Travel Engine – Trip Search plugin for this section to work properly.
- Go to Appearance> Customize> Front Page Settings> Search Section
- Enable Search Bar to display the trip search option below the banner section.
- Click Publish.
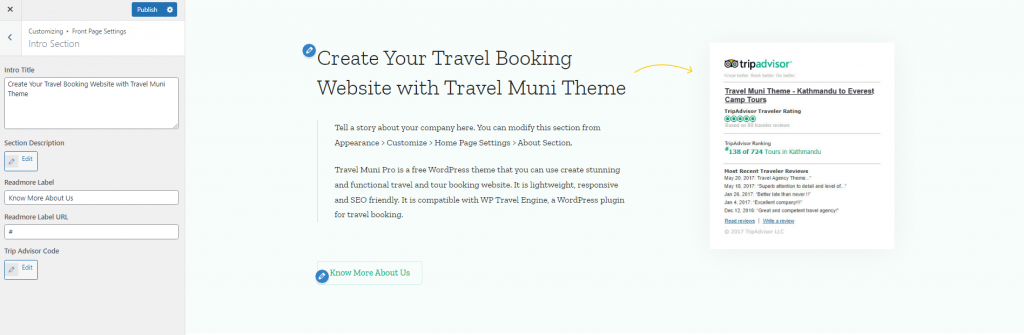
Intro Section #
- Go to Appearance > Customize > Front Page Settings> Intro Section
- Add the Intro Title, Section Description, Read More Label, Read More Label URL, Trip Advisor Code.
- Click on Publish.
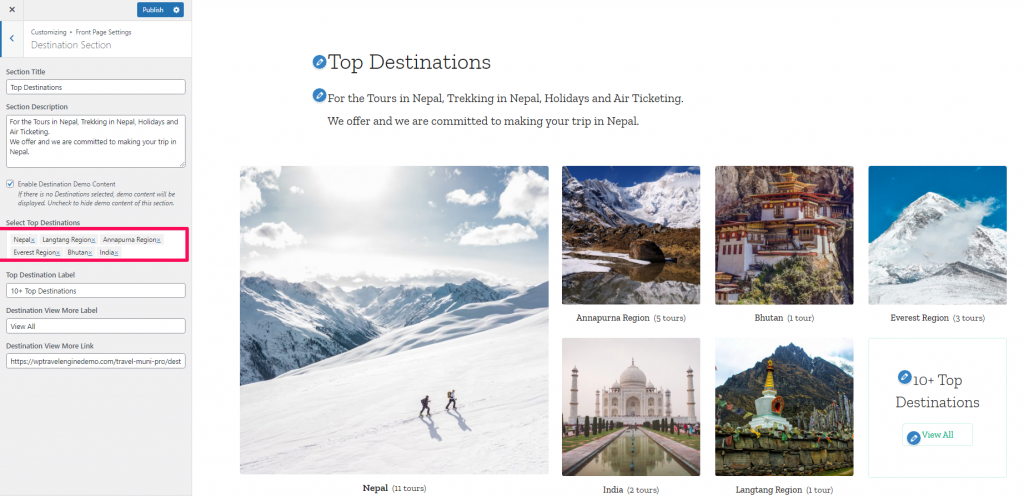
Destination Section #
You can showcase your top destination in this section.
Please follow the below steps to configure the Destination Section of your website.
- Go to Appearance> Customize> Front Page Settings> Destination Section
- Enter the Section Title.
- Enter Section Description.
- Checkmark the Enable Destination Demo Content option if you want to display the demo content on this section.
- Select Top Destinations.
- Enter the Top Destination Label.
- Enter the Label in the Destination View More Label field.
- Enter the link in the Destination View More Link field.
- Click Publish.
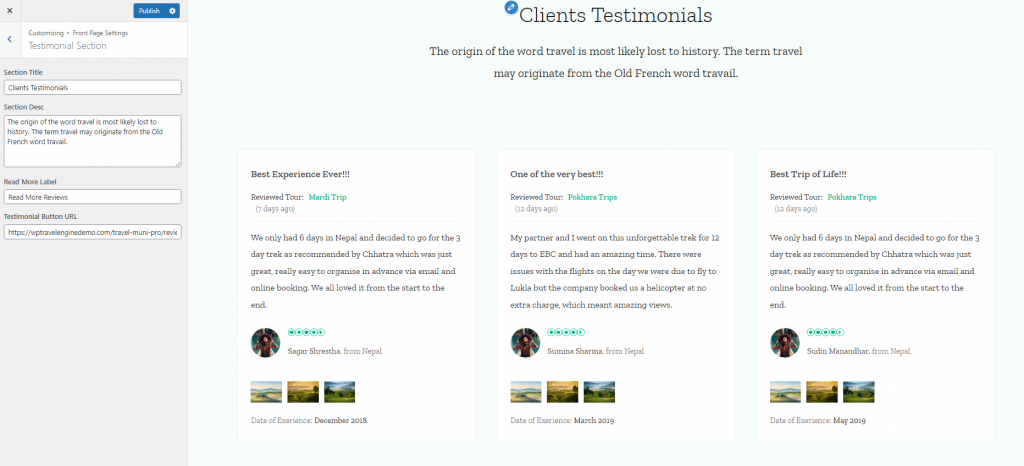
Testimonial Section #
Please follow the below steps to configure the Testimonial Section of your website.
- Go to Appearance> Customize> Front Page Settings> Testimonial Section
- Enter the Section Title.
- Enter Section Description.
- Enter the Label in Read More Label field.
- Enter the link in the Testimonial Button URL field.
- Click Publish.
Note: This section is made compatible with our WP Travel Engine – Trip Reviews addon. So, you need to have that addon to obtain the section as shown below.
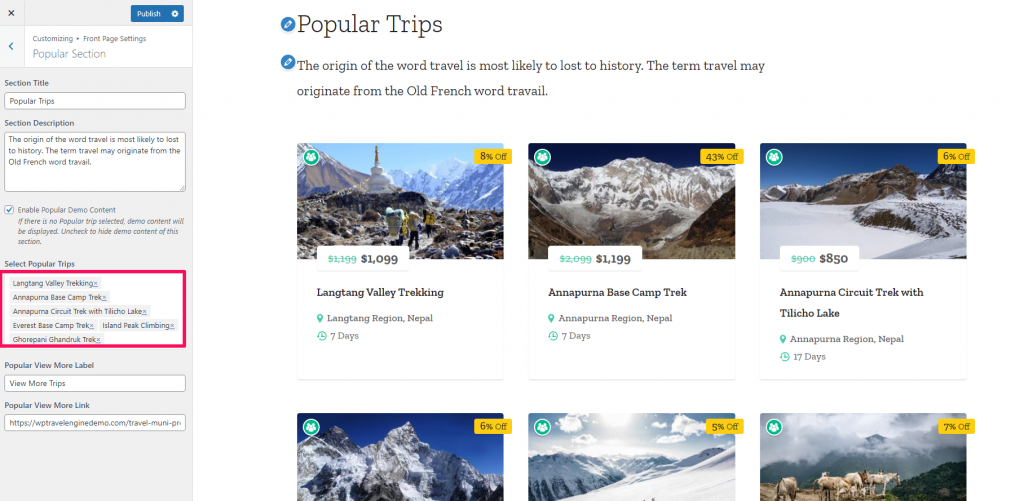
Popular Section #
Please follow the below steps to configure the Popular Section of your website.
- Go to Appearance> Customize> Front Page Settings> Popular Section
- Enter the Section Title and Section Description.
- Checkmark the Enable Popular Demo Content option if you want to display the demo content on this section.
- Select the popular trips for your site.
- Enter the Label in Popular View More Label field.
- Enter the link in the Popular View More Link field.
- Click Publish.
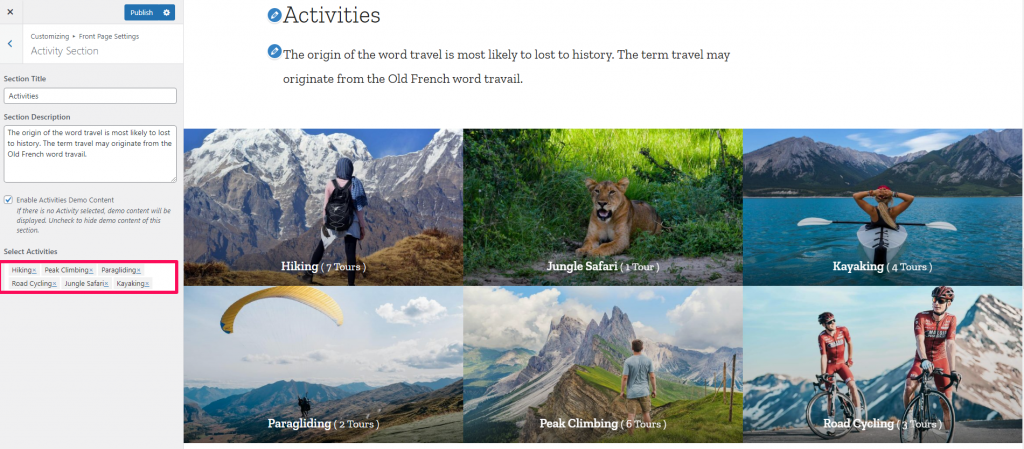
Activity Section #
Please follow the below steps to configure the Activity Section of your website.
- Go to Appearance> Customize> Front Page Settings> Activity Section
- Enter the Section Title and Section Description.
- Checkmark the Enable Activities Demo Content option if you want to display the demo content on this section.
- Select the activities you wish to display on the front page.
- Click Publish.
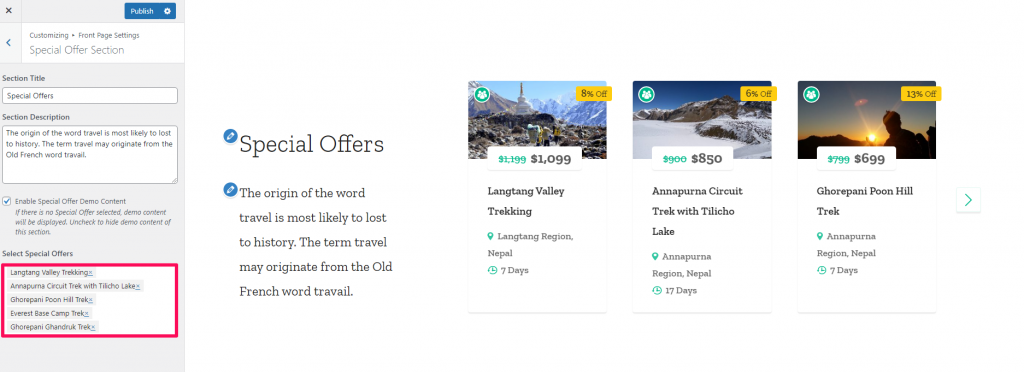
Special Offer Section #
Please follow the below steps to configure the Special Offer Section of your website.
- Go to Appearance> Customize> Front Page Settings> Special Offer Section
- Enter the Section Title and Section Description.
- Checkmark the Enable Special Offer Demo Content option if you want to display the demo content on this section.
- Select the trips with special offers.
- Click Publish.
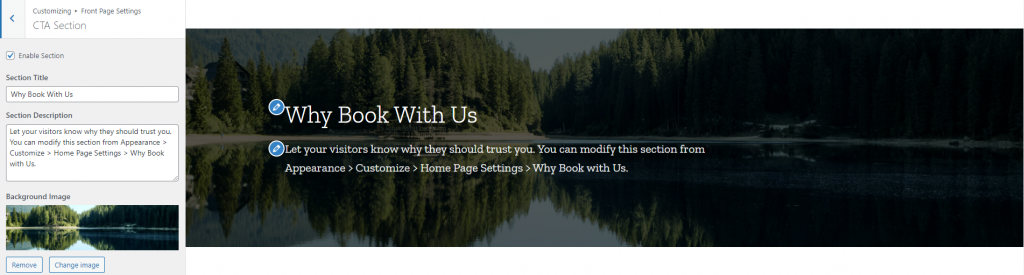
CTA Section #
Please follow the below steps to configure the CTA Section of your website.
- Go to Appearance> Customize> Front Page Settings> CTA Section
- Enter the Section Title and Section Description.
- Select the Background Image for the CTA section.
- Click Publish.
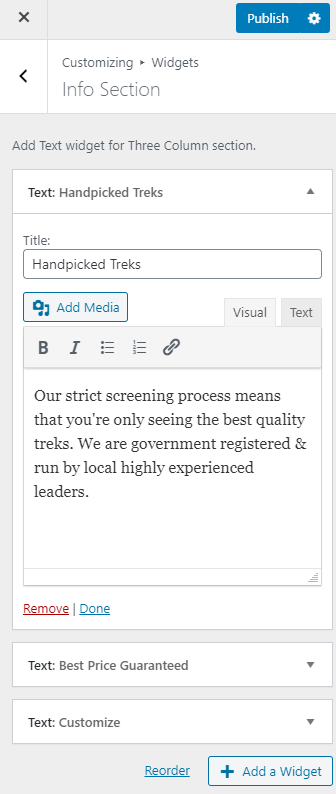
Info Section: #
Please follow the below steps to configure the Info Section of your website.
- Go to Appearance > Customize > Front Page Settings> Info Section
- Click on Add a Widget and add the Text Widget
- Enter the Title and Description.
- Click on Publish.
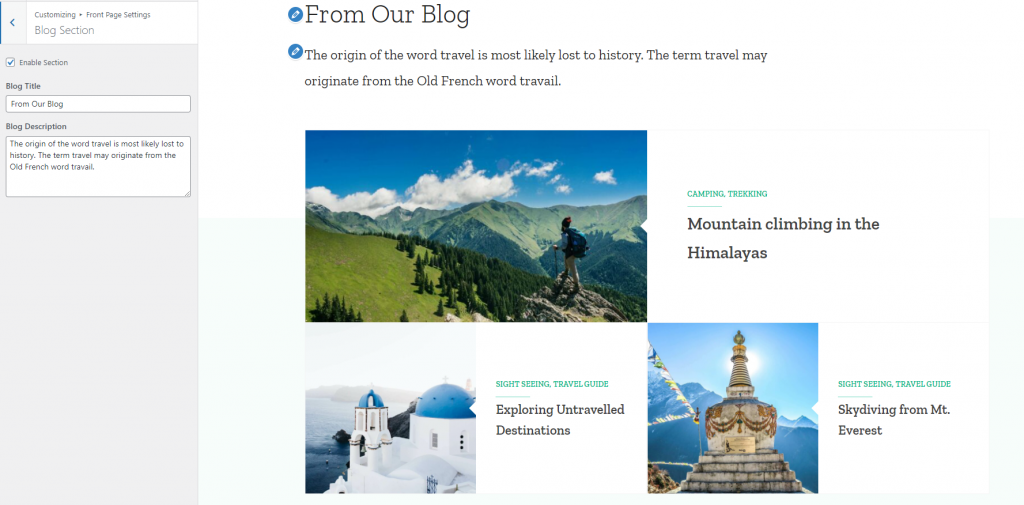
Blog Section: #
Please follow the below steps to configure the Blog Section of your website.
- Go to Appearance > Customize > Front Page Settings> Blog Section
- Enter the Blog Title and Blog Description.
- Click on Publish.
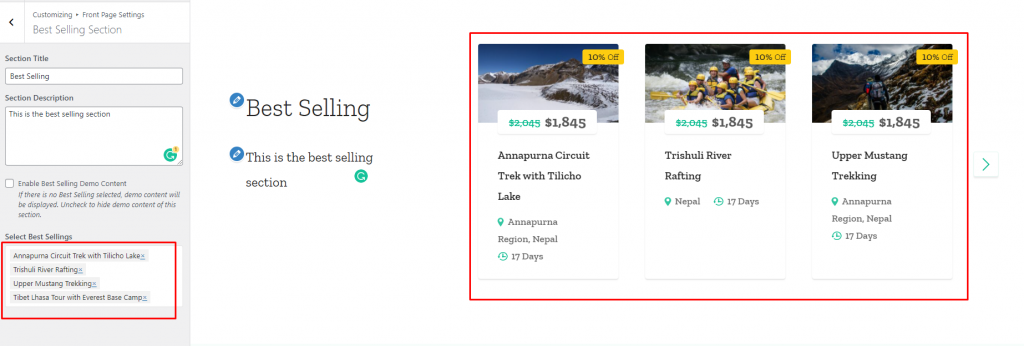
Best Selling Section: #
Please follow the below steps to configure the Best Selling Section of your website.
- Go to Appearance > Customize > Front Page Settings> Best Selling Section
- Enter the Section Title and Section Description.
- Checkmark the Enable Best Selling Demo Content option if you want to display the demo content on this section.
- Select your Best Selling Trips.
- Click on Publish.
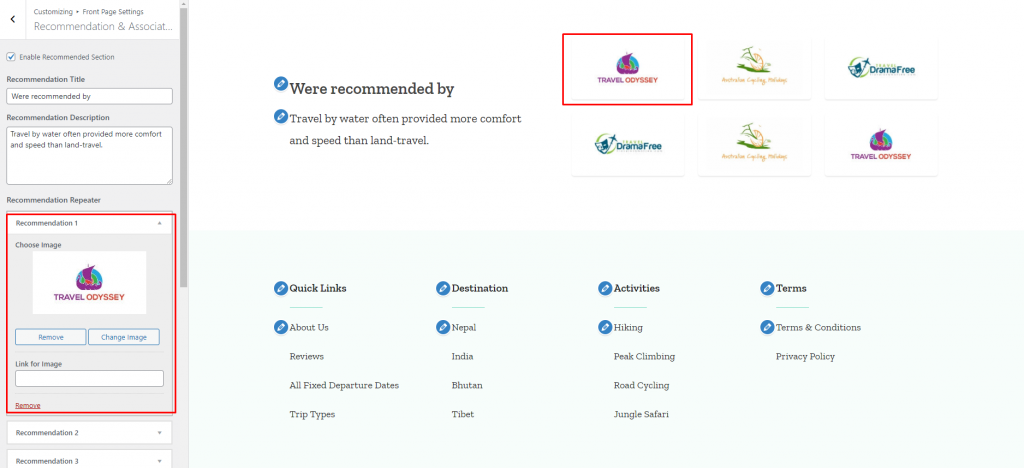
Recommendation & Associated Section: #
Please follow the below steps to configure the Recommendation & Associated Section of your website.
- Go to Appearance > Customize > Front Page Settings> Recommendation & Associated Section
- Enter the Recommendation Title and Recommendation Description.
- Click on Add new Recommendation to add the Recommendation information.
- Enter the Associated Title and Associated Description.
- Click on Add new Associated to add the Associate information.
- Checkmark the Enable Recommendation & Associated Content option if you want to display the demo content in this section.
- Click on Publish.
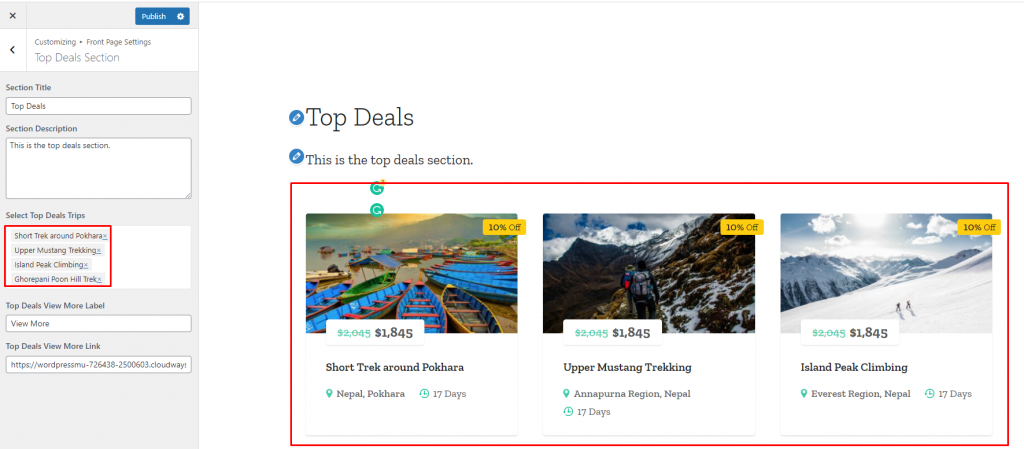
Top Deals Section: #
Please follow the below steps to configure the Top Deal Section of your website.
- Go to Appearance > Customize > Front Page Settings> Top Deals Section
- Enter the Section title and Section description.
- Select the trips that are set as Top deals.
- Enter the Top Deal View More Label and Top Deal View More Link.
- Click on Publish.
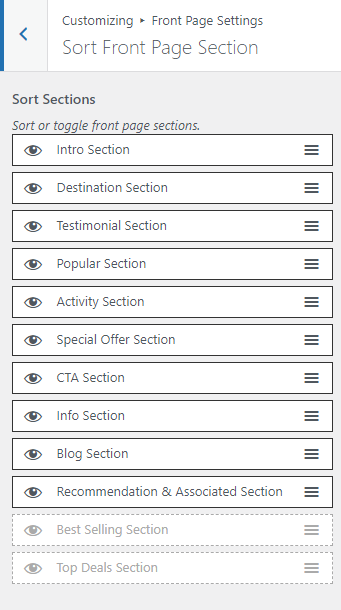
Sort Front Page Section: #
- Go to Appearance > Customize > Front Page Settings> Sort Front Page Section
- You can drag front page sections to sort them in a particular order and to display them as per that order in the frontend.
- Also, clicking on the eye icon specifies to either show/hide that section.
- Click on Publish.
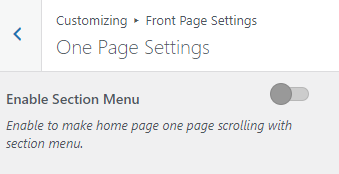
One Page Section: #
- Go to Appearance > Customize > Front Page Settings> One Page Section
- Enable section menu to make home page one page scrolling with section menu
- Click on Publish.
About Page Settings #
You can edit About page from this setting.
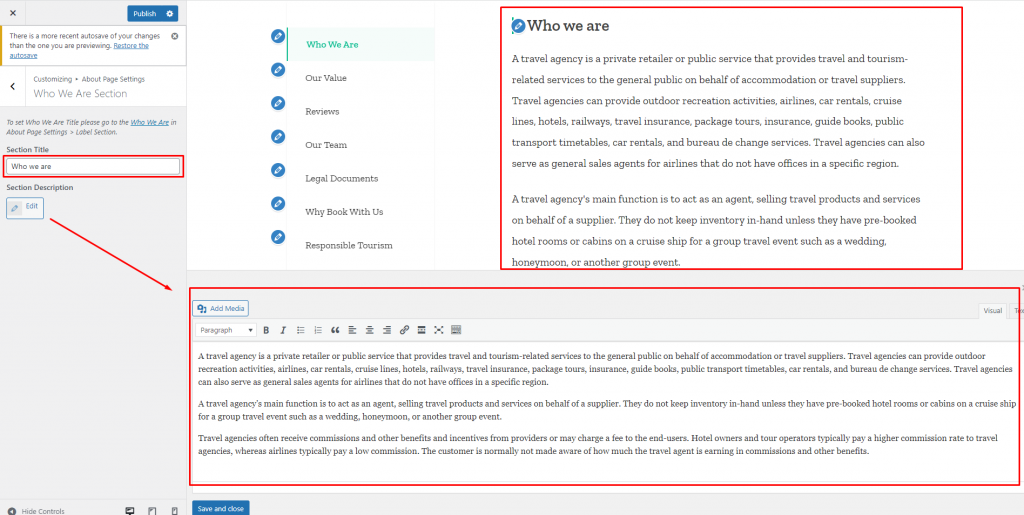
Who We Are Section #
- Go to Appearance > Customize > About Page Settings>Who We Are Section
- Set the Section Title and Section Description.
- Click on Publish.
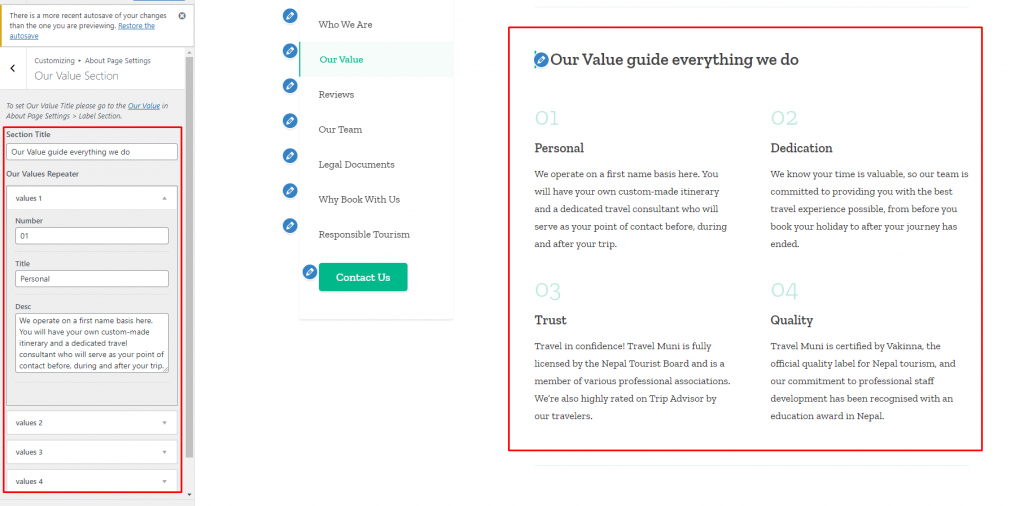
Our Value Section #
- Go to Appearance > Customize > About Page Settings>Our Value Section
- Click on add new values and give them a Number, Title, and Description.
- Click on Publish.
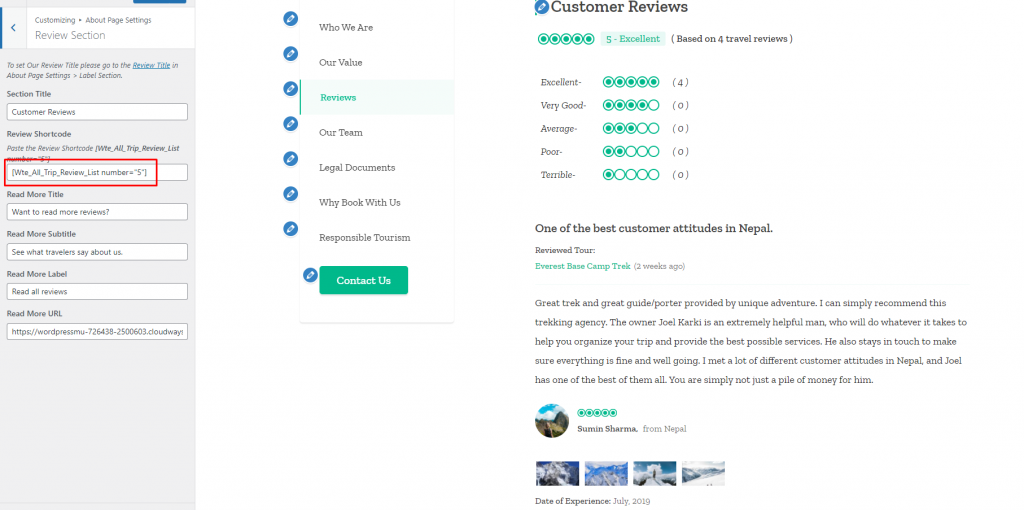
Review Section #
- Go to Appearance > Customize > About Page Settings>Review Section
- Set Section Title and add shortcode of WP Travel Engine – Trip Reviews addon.
- Enter Read More Title, Read More Subtitle, Read More Label and Read More URL.
- Click on Publish.
Note: This section is made compatible with our WP Travel Engine – Trip Reviews addon. So, you need to have that addon to obtain the section as shown below.
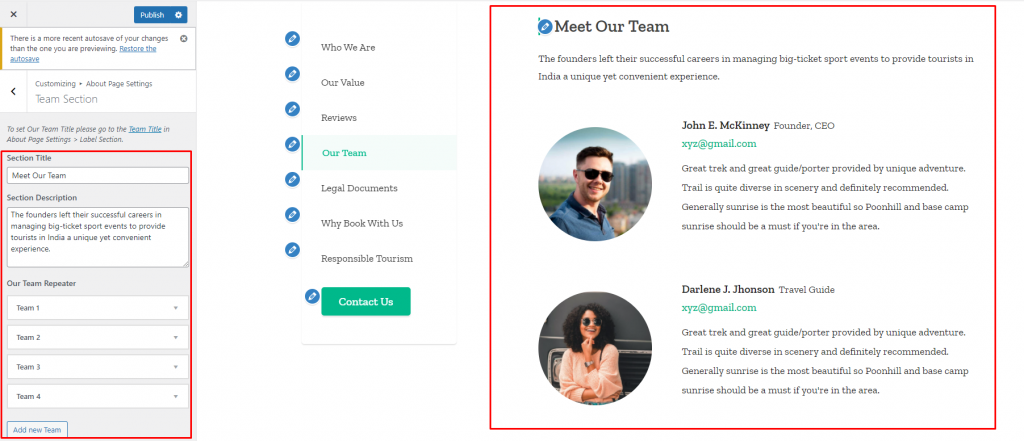
Team Section #
- Go to Appearance > Customize > About Page Settings>Team Section
- Add a Section Title and Section Description.
- Click on Add new Team and add a Name, Designation, Email, Description, and Image of a team member.
- Click on Publish.
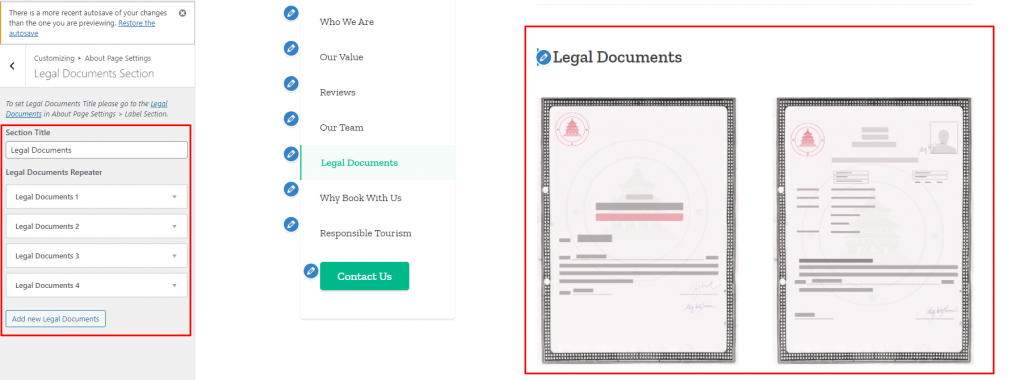
Legal Documents Section #
- Go to Appearance > Customize > About Page Settings>Legal Documents Section
- Add a Section Title.
- Click on add new Legal Documents and upload an image of each.
- Click on Publish.
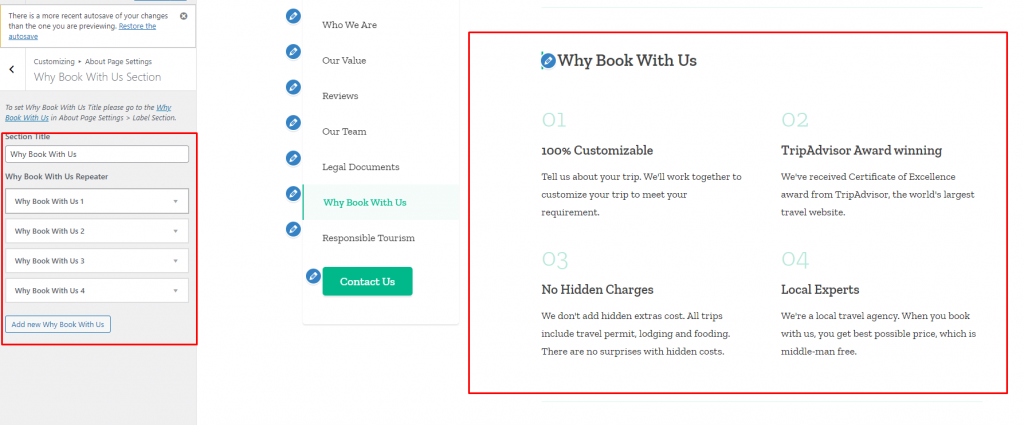
Why Book With Us Section #
- Go to Appearance > Customize > About Page Settings>Why Book With Us Section.
- Set Section Title.
- Click on Add new Why Book With Us and add the Number, Title, and Description of each one of them.
- Click on Publish.
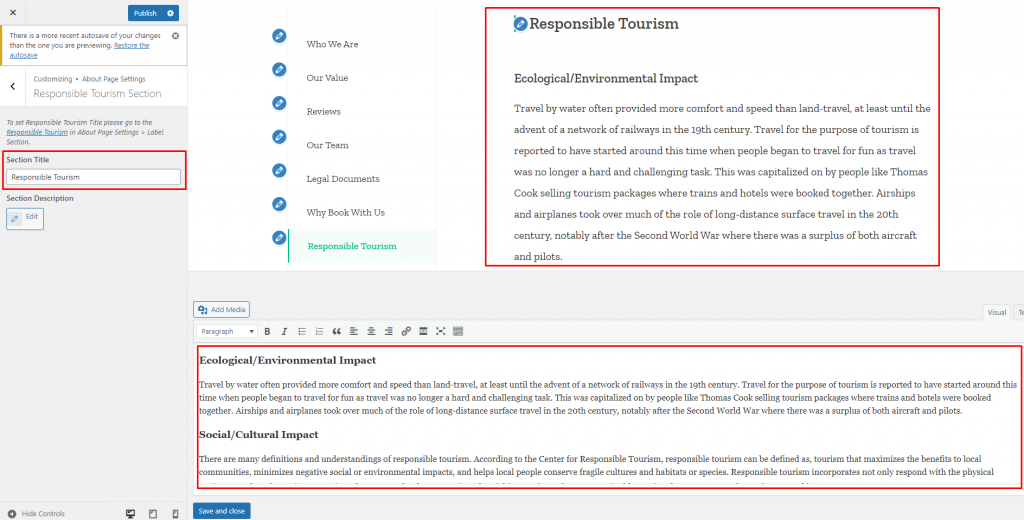
Responsible Tourism Section #
- Go to Appearance > Customize > About Page Settings>Responsible Tourism Section
- Add a Section Title and Section Description.
- Click on Publish.
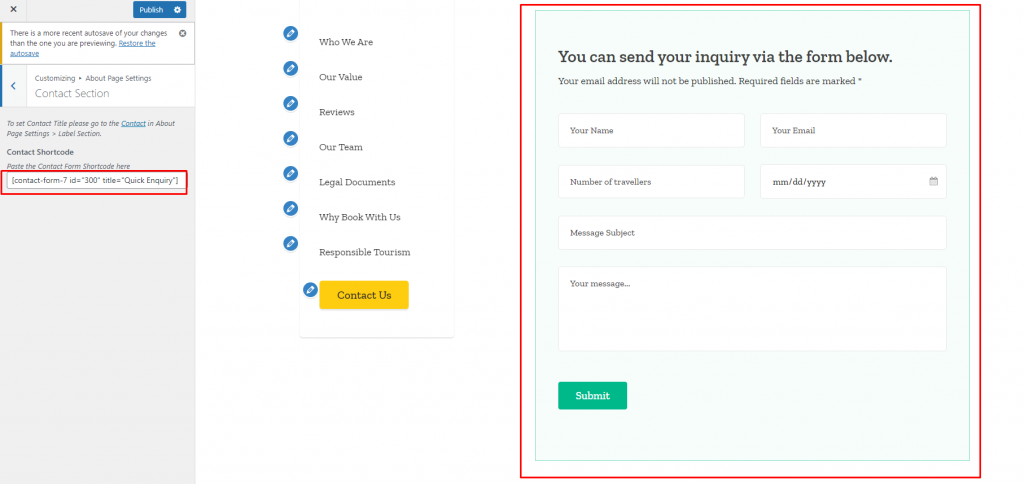
Contact Section #
- Go to Appearance > Customize > About Page Settings >Contact Section
- Add a Contact Shortcode to display the contact form.
- Click on Publish.
Note: This section is made compatible with Contact Form 7 plugin. So, you need to have that plugin to obtain the section as shown below.
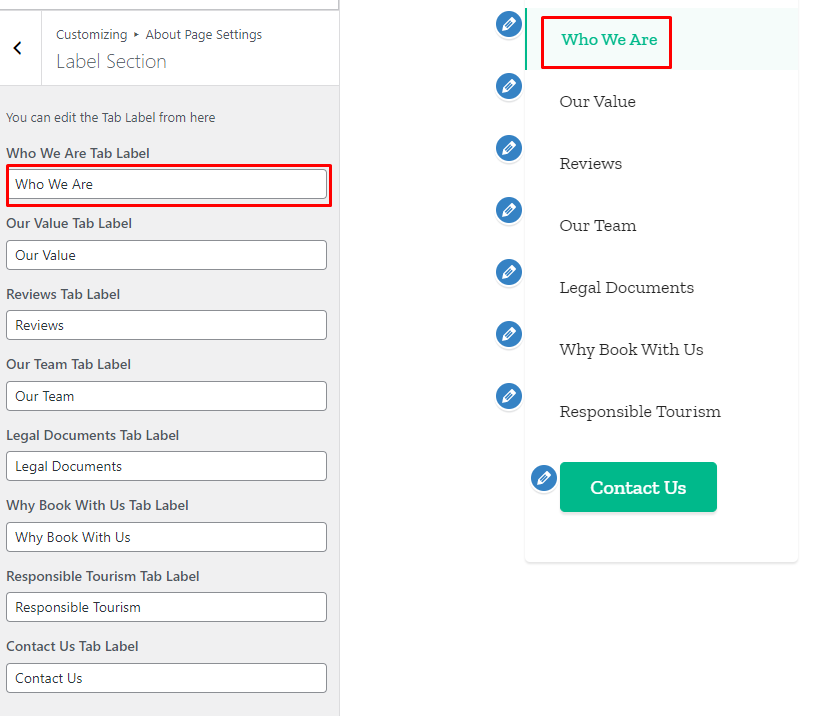
Label Section #
- Go to Appearance > Customize > About Page Settings>Label Section
- Set the Label for each tab as per your wish.
- Click on Publish.
Contact Page Settings #
You can edit the contact page from this setting.
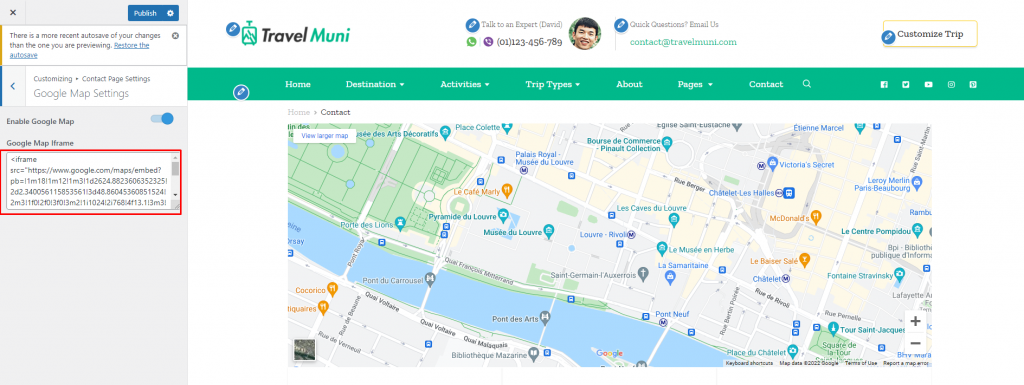
Google Map Settings #
- Go to Appearance > Customize > Contact Page Settings> Google Map Settings
- Enable/disable the Google map section on the contact page.
- Add the Google Map Iframe to display the google map of your desired location.
- Click on Publish.
Contact Details Settings #
- Go to Appearance > Customize > Contact Page Settings> Contact Details Settings
- Enable/disable the Contact Details Section on the contact page.
- Enter the Phone Label, Contact Phone, Email Label, Email Address, Address Label, and Contact Addresses in their respective fields.
- Click on Publish.

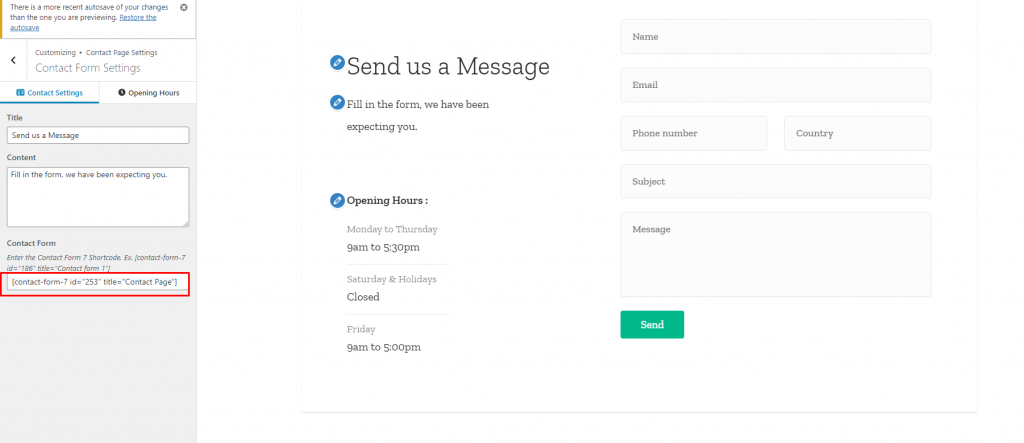
Contact Form Settings #
- Go to Appearance > Customize > Contact Page Settings> Contact Form Settings
- In Contact Settings tab, set the Title, Content and add Contact Form 7 Shortcode.
- In Opening Hours tab, set the Opening hours Label and add Opening Hours.
- Click on Publish.
Trip Page Settings #
You can edit the related section of the single trip page here. You must be on Single Trip Page to customize the sections.
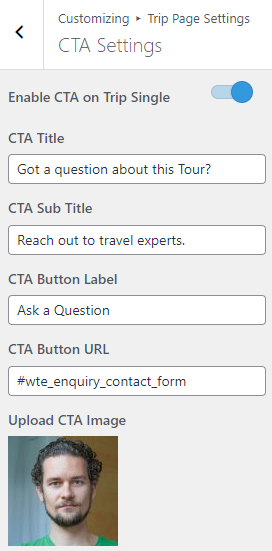
CTA Settings #
- Go to Appearance > Customize > Trip Page Settings> CTA Settings
- Enable/disable the CTA section on the trip single page.
- Enter the CTA Title, CTA Sub Title, CTA Button Label, and CTA Button URL.
- Upload CTA image.
- Click on Publish.
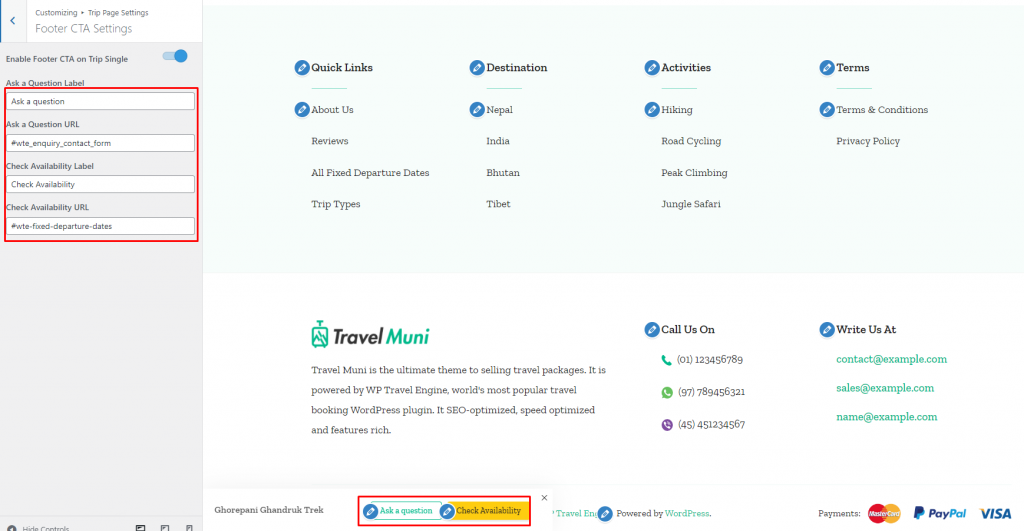
Footer CTA Settings #
- Go to Appearance > Customize > Trip Page Settings> Footer CTA Settings
- Enable/disable the Footer CTA section to display on trip single page.
- Enter the Ask a Question label, Ask a Question URL, Check Availability label and Check Availability URL.
- Click on Publish.
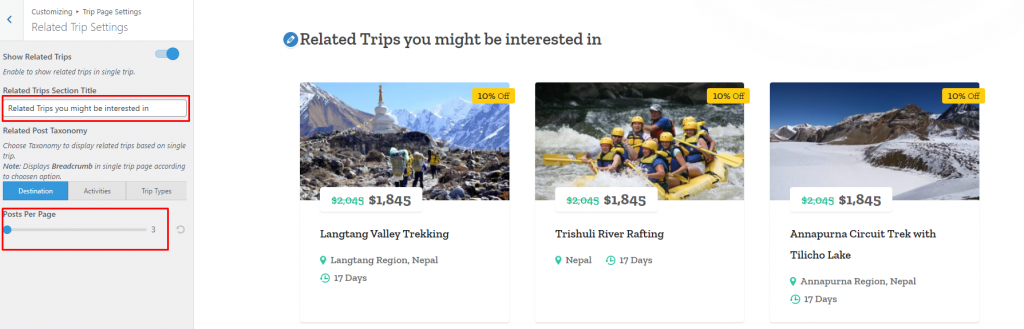
Related Trip Settings #
- Go to Appearance > Customize > Trip Page Settings> Related Trip Settings
- Enable/disable the Related Trips Section.
- Enter the Related Trips Section Title
- Choose the taxonomy based on which you want the posts on the Related Trips Section to be displayed.
- Set the number of Posts Per Page that you want to display under the Related Trips Section.
- Click on Publish.
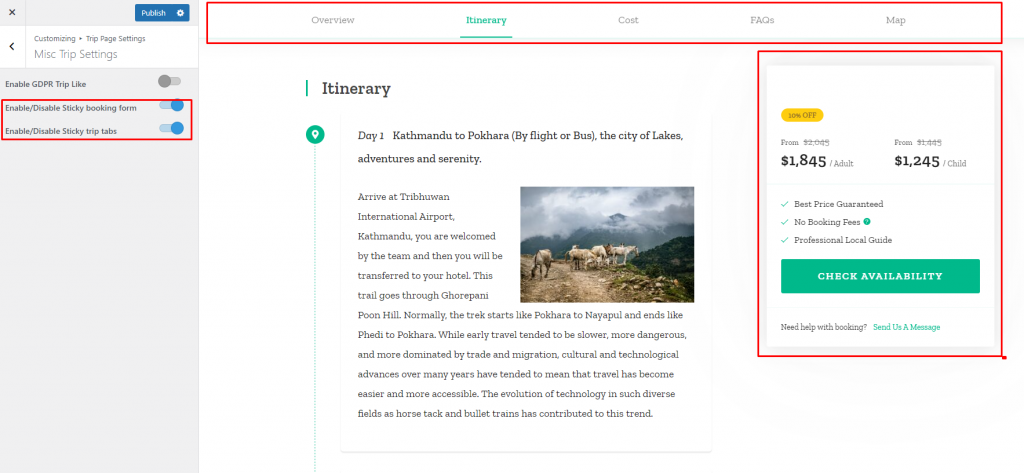
Misc Trip Settings #
- Go to Appearance > Customize > Trip Page Settings> Misc Trip Settings
- Enable/disable GDPR Trip like on the single trip page.
- Enable/disable the Sticky Booking form and Sticky Trip tabs.
- Click on Publish.
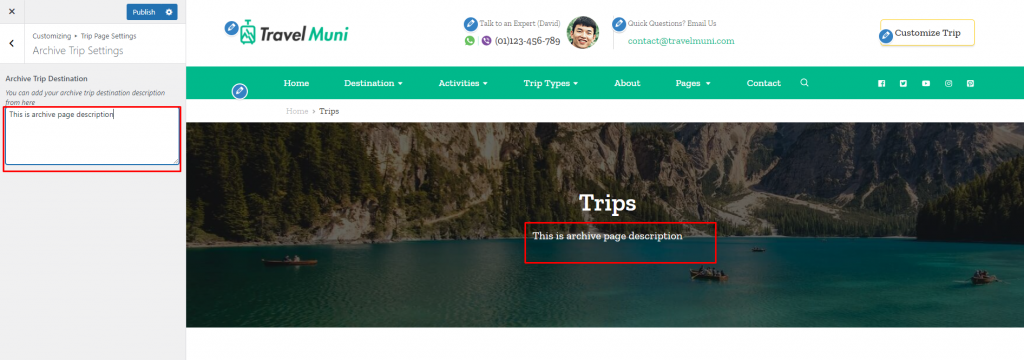
Archive Trip Settings #
- Go to Appearance > Customize > Trip Page Settings> Archive Trip Settings
- Add the archive trip description to be displayed on the trip archive page.
- Click on Publish.
General Settings #
You can set up some general settings from this section.
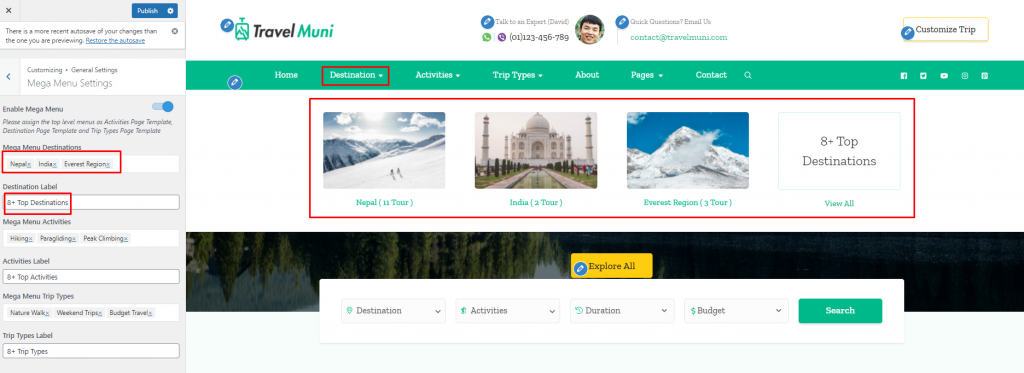
Mega Menu Settings #
- Go to Appearance > Customize > General Settings> Mega Menu Settings
- Enable the Mega Menu option. Please select the top level menus as Activities Page Template, Destination Page Template, and Trip Types Page Template to effectively use the Mega menu.
- Select destination to display them as a sub-menu of Destination and set the Mega Menu Destination label.
- Select activities to display them as a sub-menu of Activities and set the Mega Menu Activities label.
- Select trips to display them as sub-menus of Trip Types and set the Mega Menu Trip Types label.
- Click on Publish.
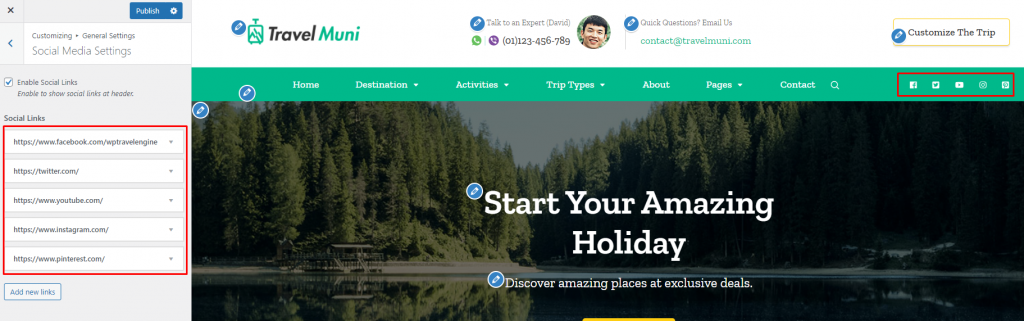
Social Media Settings #
- Go to Appearance > Customize > General Settings> Social Media Settings
- Choose to Enable Social Links at the header.
- Add Social Links.
- Click on Publish.
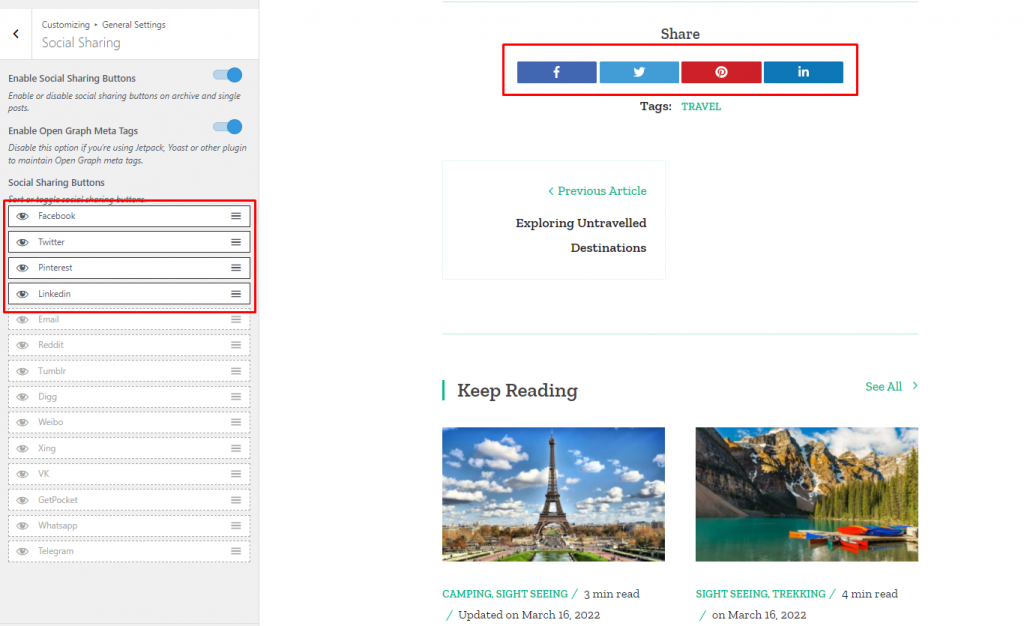
Social Sharing #
- Go to Appearance > Customize > General Settings> Social Sharing
- Enable Social Sharing Buttons on archive and single posts.
- Enable Open Graph Meta Tags.
- Sort/Toggle available social sharing buttons.
- Click on Publish.
SEO Settings #
- Go to Appearance > Customize > General Settings> SEO Settings
- Enable to show the last updated post date on listing and single post.
- Enable the Breadcrumb option
- Enter the Breadcrumb Home Text.
- Click on Publish.

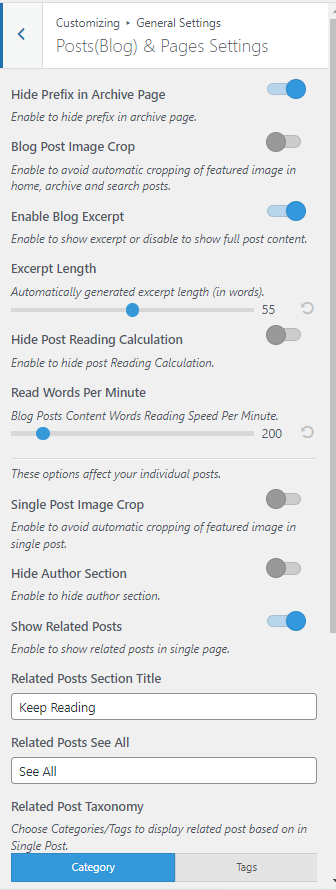
Posts and Pages Settings #
- Go to Appearance > Customize > General Settings> Posts(Blog) & Pages Settings
- Enable to Hide Prefix in Archive Page.
- Enable the Blog Post Image Crop option to avoid automatic cropping of the featured images in home, archive, and search posts.
- Enable Blog Excerpt to show excerpt or disable to show full post content.
- Set Excerpt Length.
- Enable to Hide Post Reading Calculation displayed in blog posts.
- Set Read Words Per Minute to set blog posts content words reading speed per minute.
- Enable Single Post Image Crop to avoid automatic cropping of the featured image in a single post.
- Enable/Disable Hide Author Section on a single page.
- Enable to Show Related Posts on a single page
- Enter the Related Posts Section Title
- Enter the Related Posts Section See All label
- Choose Related Posts based on Category/Tags.
- Enable to Show Comments in a single post/page
- Enable to show comment section right after post content. Refresh site for changes.
- Enable to Hide Category in a single post.
- Enable to Hide Post Author in a single post.
- Enable to Hide Posted Date in a single post.
- Enable to Show Featured Image in a single post.
- Click on Publish.
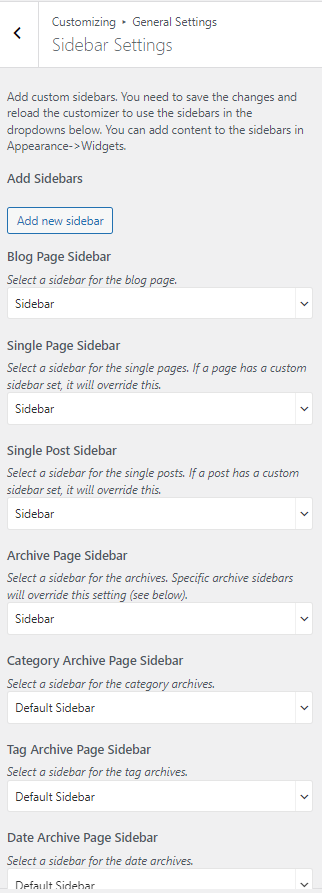
Sidebar Settings #
- Go to Appearance > Customize > General Settings> Sidebar Settings
- Add a new sidebar.
- Set Blog Page Sidebar, Single Page Sidebar, Single Post Sidebar, Archive Page Sidebar, Category Archive Page Sidebar, Tag Archive Page Sidebar, Date Archive Page Sidebar, Author Archive Page Sidebar and Search Page Sidebar
- Click on Publish.
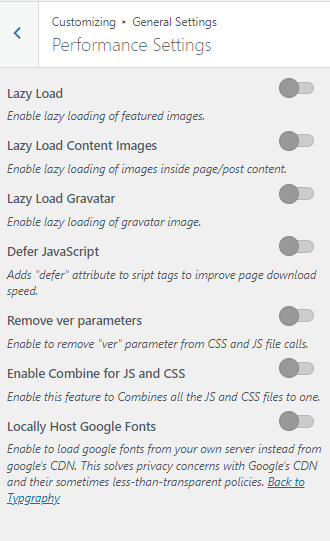
Performance Settings #
- Go to Appearance > Customize > General Settings> Performance Settings
- Choose to enable lazy loading of featured images.
- Choose to enable lazy loading of images inside page/post content.
- Choose to enable lazy loading of gravatar image.
- Choose to Defer JavaScript to add the “defer” attribute to script tags to improve page download speed.
- Choose to Remove ver parameters to remove “ver” parameter from CSS and JS file calls.
- Choose to enable Combine for JS and CSS to combine all the JS and CSS files to one.
- Choose to Locally Host Google Fonts to load google fonts from your own server instead from google’s CDN. This solves privacy concerns with Google’s CDN and their sometimes less-than-transparent policies.
- Click on Publish.
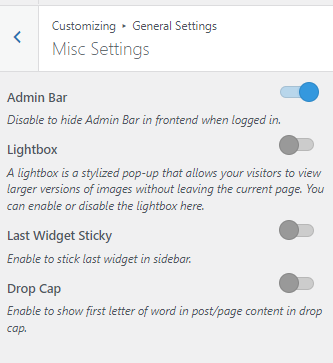
Misc Settings #
- Go to Appearance > Customize > General Settings> Misc Settings
- Choose to disable the Admin Bar to hide Admin Bar in the frontend when logged in.
- Choose to enable Lightbox to view a larger versions of images without leaving the current page.
- Choose to enable Last Widget Sticky to stick the last widget in the sidebar.
- Choose to Drop Cap to show the first letter of the word in post/page content in drop cap.
- Click on Publish.
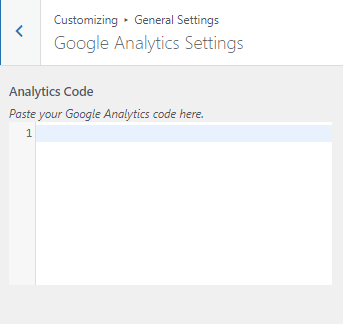
Google Analytics Settings #
- Go to Appearance > Customize > General Settings> Google Analytics Settings
- Add your Google Analytics Code that can help to improve your site performance and collect visitors insights.
- Click on Publish.
Footer Settings #
This setting helps set the Footer Section of your website.
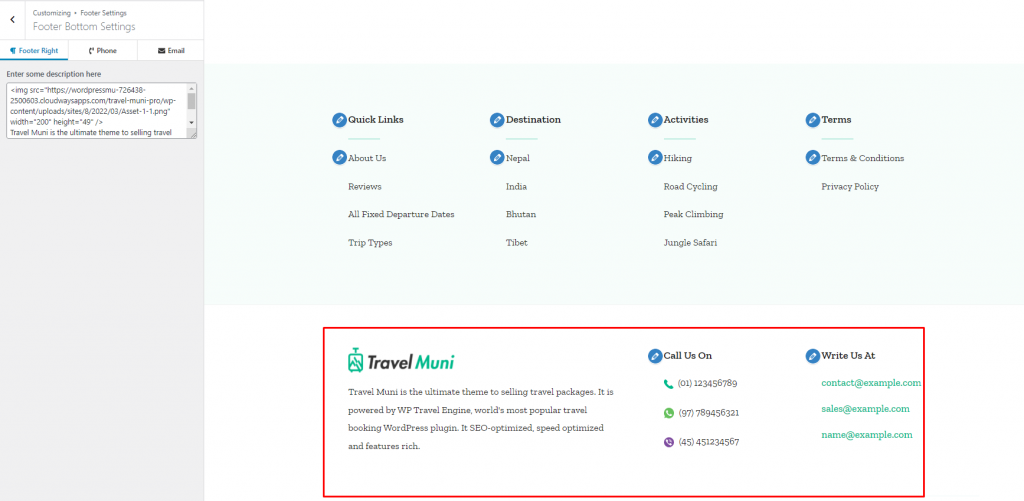
Footer Bottom Settings #
- Go to Appearance > Customize > Footer Settings > Footer Bottom Settings
- It is divided into the Footer Right Section,Phone and Email Section.
- In Footer Right tab, enter the Footer Description to be displayed in the footer.
- In the Phone tab, enter Label for the Phones, Enter Phone Number and add WhatsApp and Viber numbers.
- In the Email tab, enter Label for the Email and Enter Emails.
- Click on Publish.
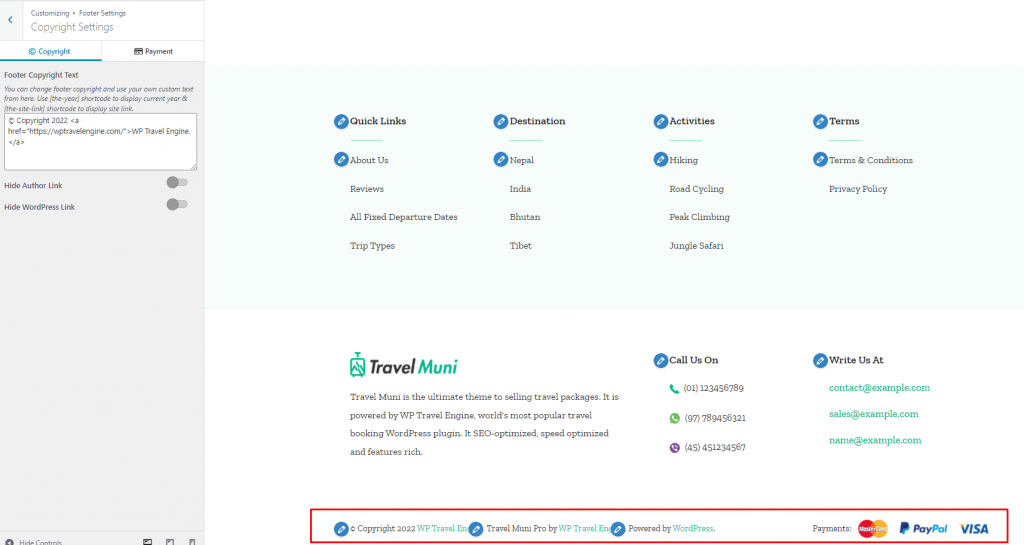
Copyright Settings #
- Go to Appearance > Customize > Footer Settings > Copyright Settings
- Add Footer Copyright Text.
- Enable the toggle to Hide Author link
- Enable the toggle to Hide WordPress link
- In the Payment tab, add Payments Label and Payment Image.
- Click on Publish.