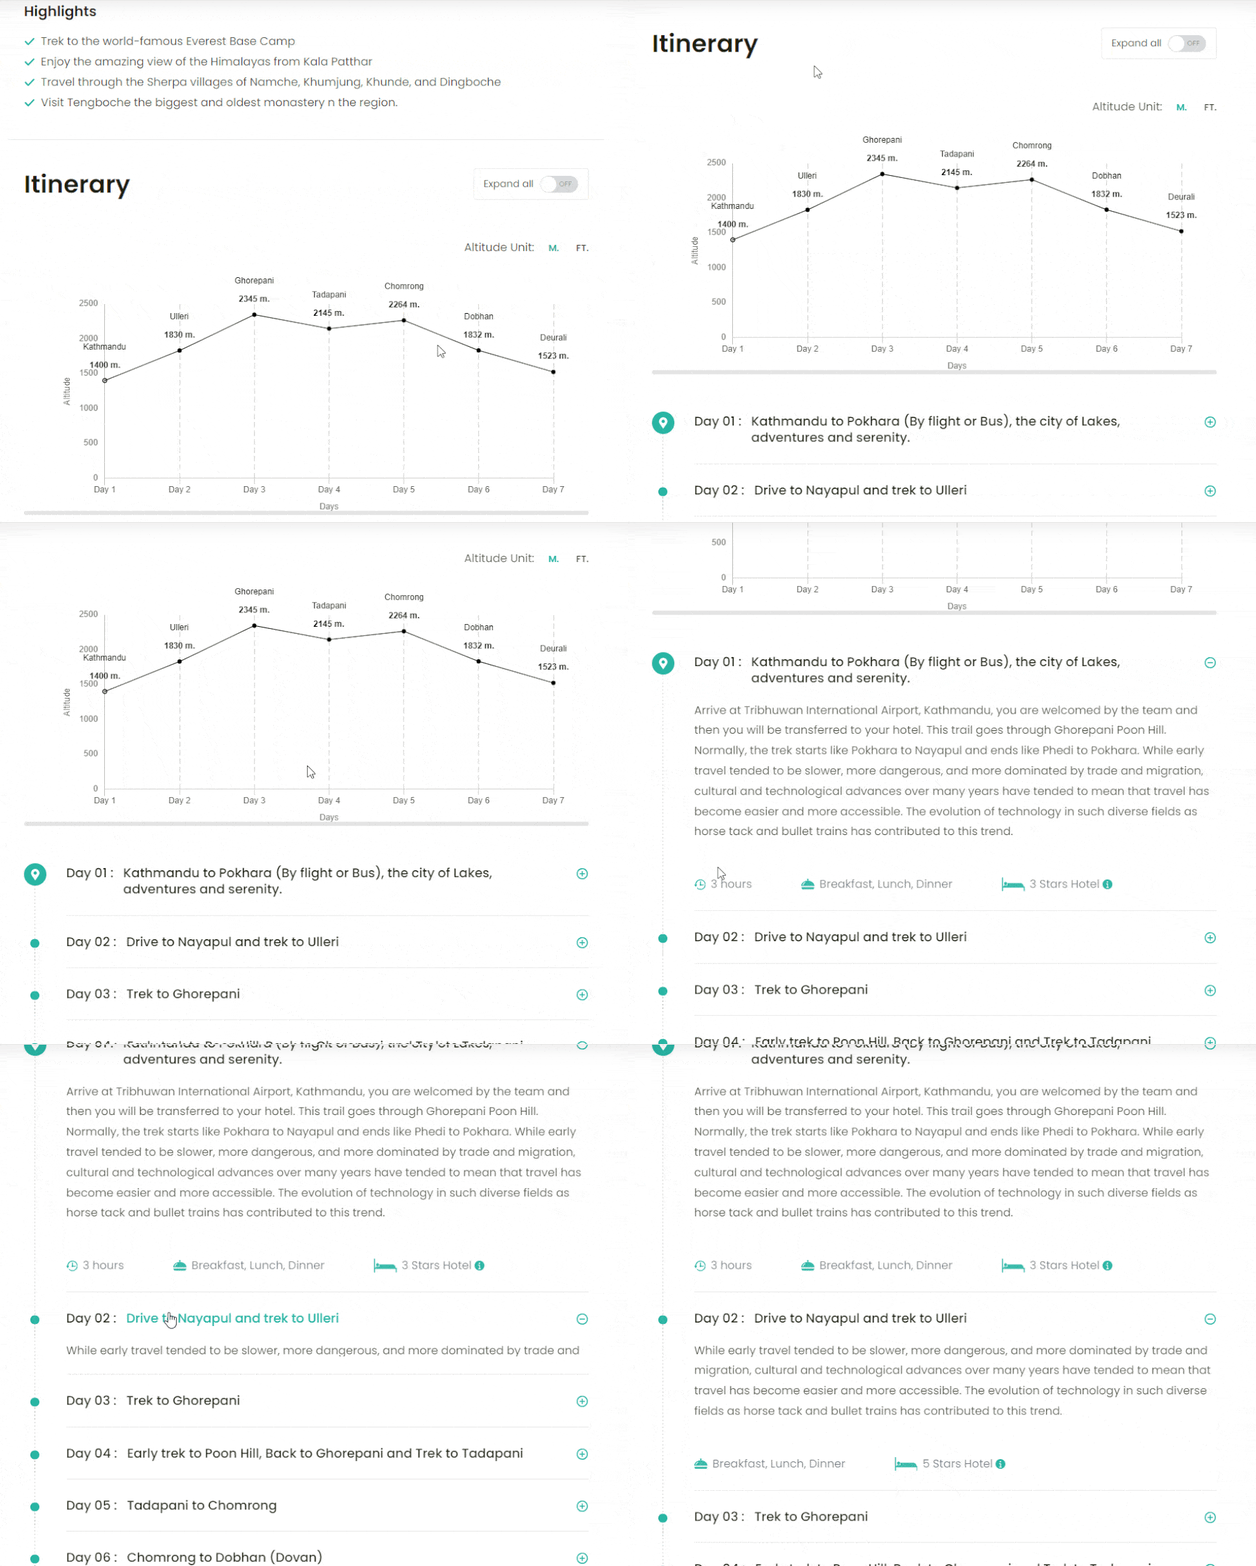
With the Advanced Itinerary Builder, you can add informative and descriptive details per day in the Itinerary section of a particular trip. With the addon, you can showcase the details of your trip in a much more interactive approach.
In this documentation, you will learn step-by-step about add-on installation, setup, and initial configuration options.
Requirement: Advanced Itinerary Builder requires the WP Travel Engine plugin v. 4.0.0 or later installed and activated on your website.
You can follow the video or the steps below to configure the Advanced Itinerary Builder add-on.
Download the Plugin File #
After the purchase, you can download the add-on file by visiting the individual add-on pages from here – https://wptravelengine.com/plugins/
Here are the steps you need to follow:
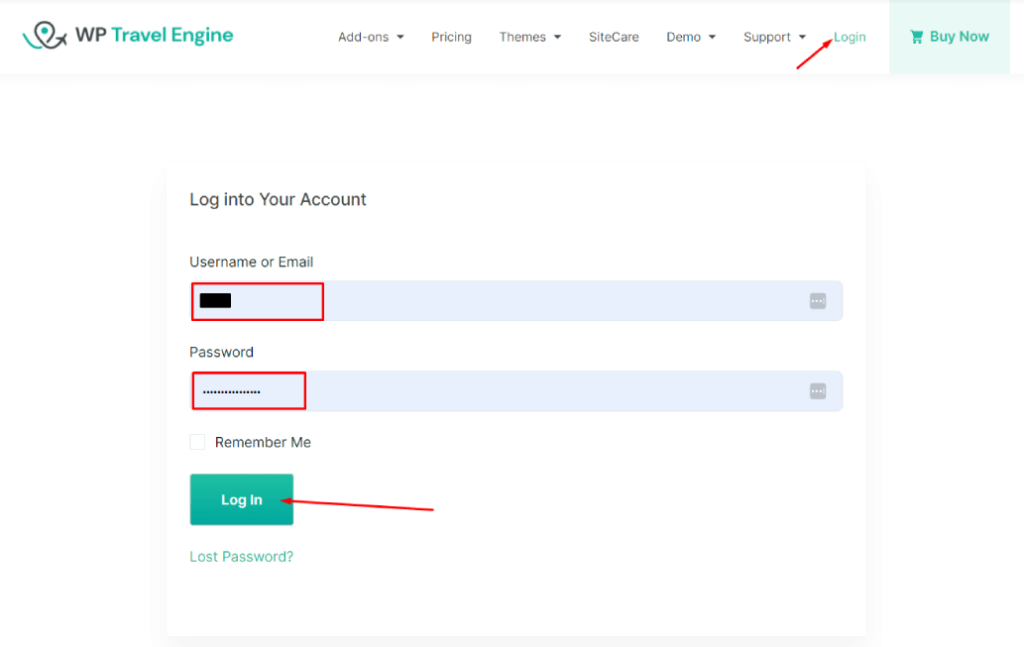
- Visit the WP Travel Engine website and log in to your account through the “My Account” page (https://wptravelengine.com/my-account/).
- Go to the Advanced Itinerary Builder add-on page – https://wptravelengine.com/plugins/advanced-itinerary-builder/
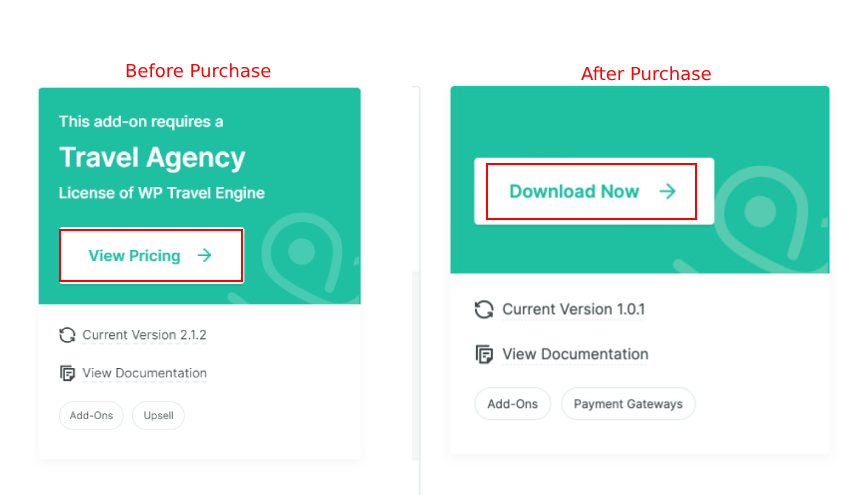
- Now, you will see the Download option on the right side of the page instead of View Pricing. Click on it to download the add-on file.
Installing the Add-on #
To install the add-on, upload the downloaded file to your WordPress dashboard. Follow the steps below:
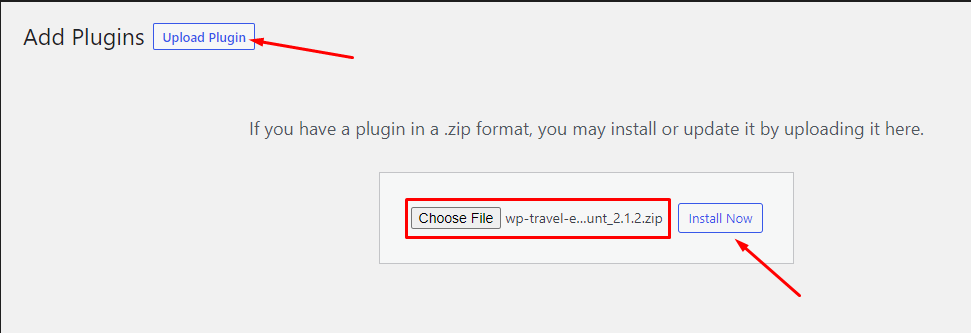
- Navigate to the Plugin > Add New.
- Click on the Upload Plugin button.
- Select the downloaded file, “wp-travel-engine-itinerary-builder.zip,” from your computer.
- Click on Install Now.
- Once the file is installed, click “Activate” to enable the add-on on your website.
Activating the Plugin License #
To activate the plugin license and receive regular updates, follow these steps:
- Go to your Admin Dashboard and navigate to WP Travel Engine > Plugin License.
- Enter the license key in the Advanced Itinerary Builder field.
- Click Save Changes.
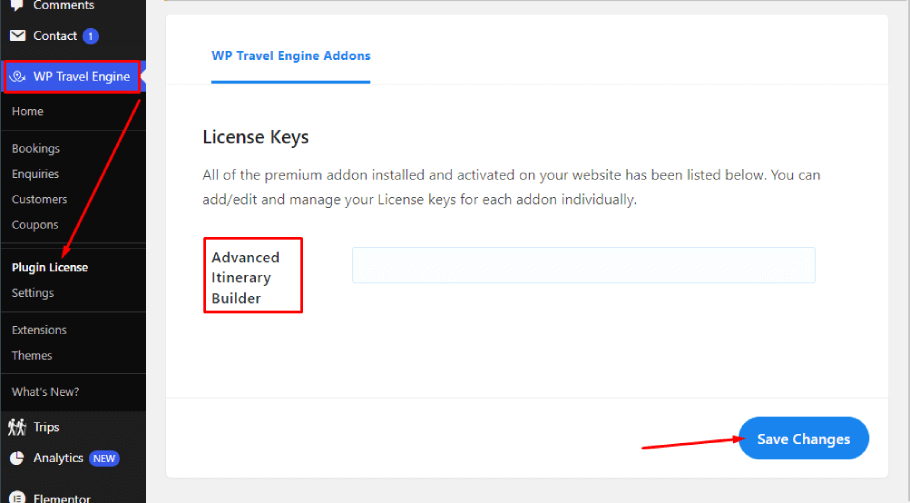
- Refresh the page to see the Activate License button, then click on it.
After successful activation, you can normally update the Advanced Itinerary Builder add-on from the plugins page whenever a new update is released.
Configuring Global Settings #
To configure the global settings for Advanced Itinerary Builder, navigate to WP Travel Engine > Settings > Extensions > Advanced Itinerary Builder.
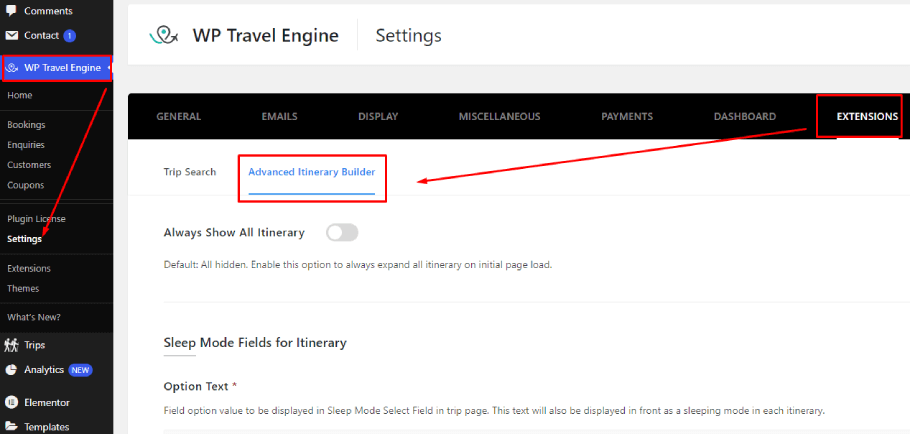
Always Show All Itinerary: If you toggle on this option, you can always expand all itineraries on the front-end page.
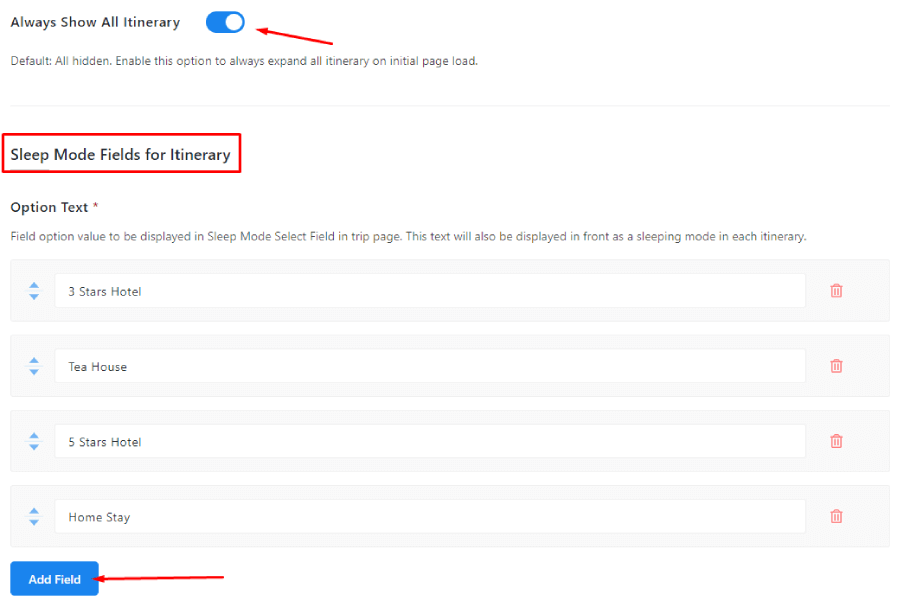
Sleep Mode Fields for Itinerary: This section includes the sleep mode field add/edit section. Since different locations have different means of sleeping/resting arrangements. This field allows you to control what kinds of fields are available.
- Click on Add Field to define new sleep modes (e.g., tent, lodge, hotel).
- Click Save & Continue.
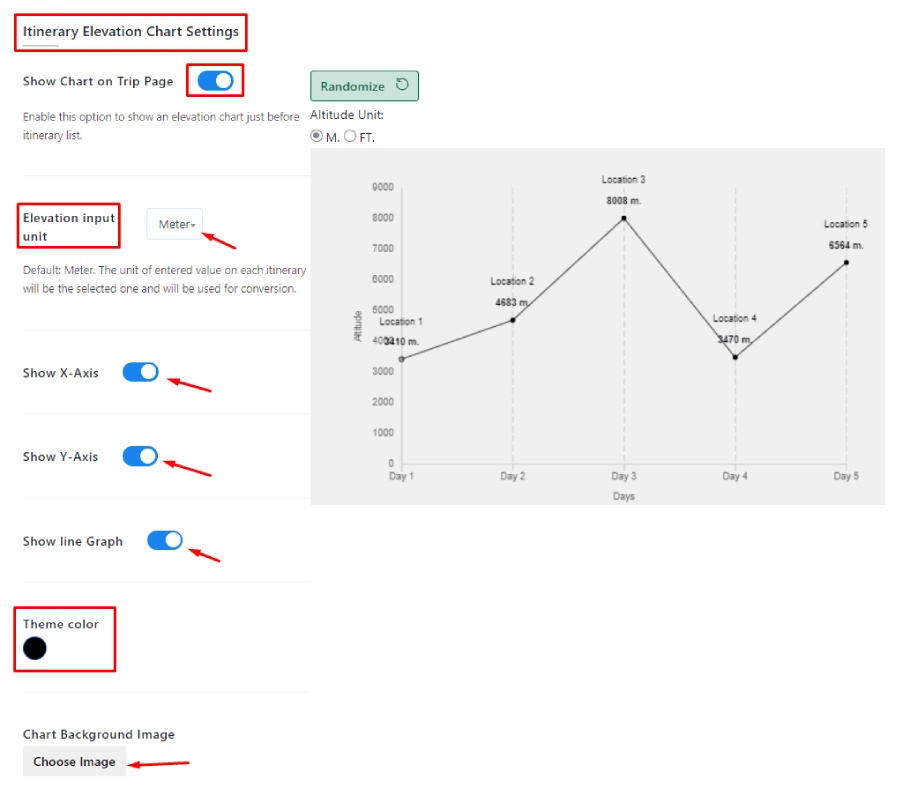
Itinerary Elevation Chart Settings: These settings allow you to control the elevation chart, its color, design, and input unit.
- Toggle on the Show Chart on Trip Page to show an elevation chart just before the itinerary list.
- Select the default Elevelation Input Unit meter or foot.
- Customize the chart by enabling the x-axis/y-axis.
- Choose a theme color and add a background image as you desire.
- Click Save & Continue. The elevation chart will be displayed based on the location and altitude details provided for each day in the itinerary.
How to Use Advance Itinerary Builder on Trip Page #
Since the trip page already includes a default itinerary builder with title and description fields, the Advanced Itinerary Builder add-on, when enabled, will display additional fields alongside those existing details.
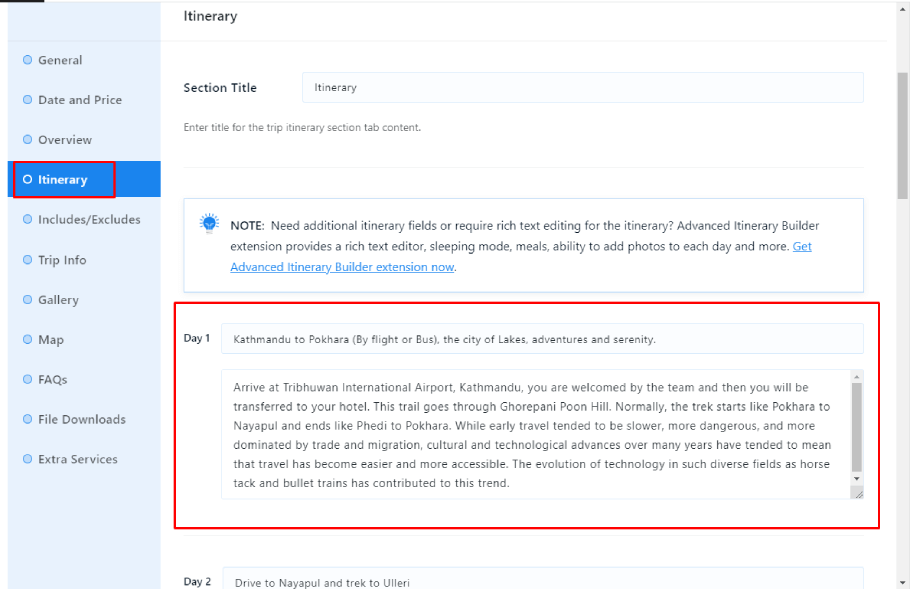
Default Itinerary Builder
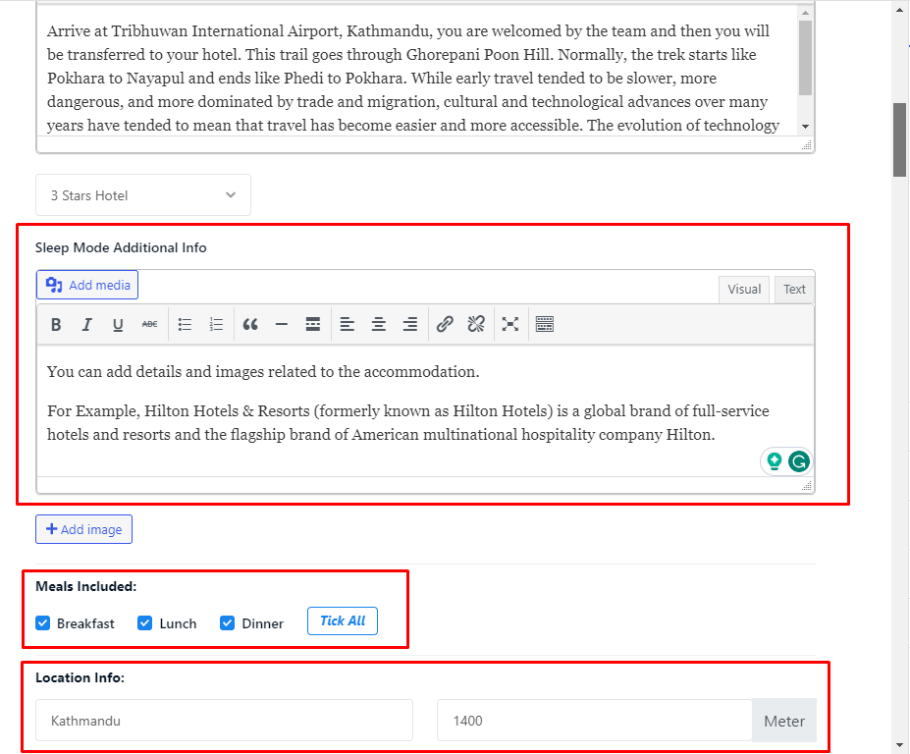
Added Fileds in Advanced Itinerary Builder
Then, you can simply add the additional fields such as:
- Duration: Duration of traveling that particular day. This field accepts numeric values.
- Duration Type: You can also define if the value set in “Duration” is either in minutes or hours.

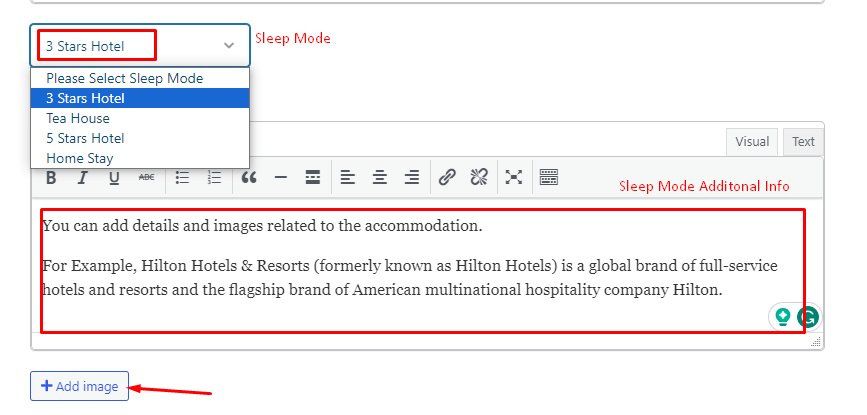
- Sleep Mode: Sleep mode is the field that allows you to define and add information regarding how travelers will spend the night. This could be either a tent stay, lodge stay, homestay, hotel stay, etc. These fields can be added dynamically through Settings.
- Sleep Mode Additional Info: You can provide additional info on the sleep mode by adding information here. You can add various information such as the Name of the hotel, the number of beds available, services available, etc.
- Add Image: This allows you to import images from your device’s gallery to create a visual reference. By adding images, you can show users what views a traveler can expect on that day.
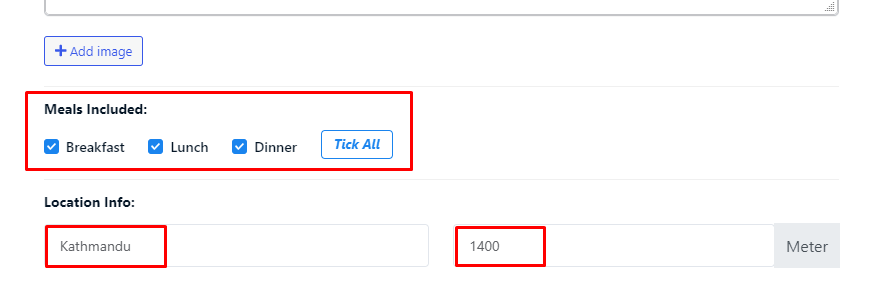
- Meals Included: This setting allows you to add what kind of meals will be provided to travelers. This option can be controlled via a checkbox. Available values are meal, breakfast, and dinner.
- Location Info: This setting allows you to add the location info and its altitude, which will later be shown in the elevation chart.
Note: Your title and description for itinerary details will be displayed as usual, even if the Advanced Itinerary Builder addon is deactivated or deleted.
Frontend Preview #
