Overview #
The Razorpay Payment Gateway addon for WP Travel Engine enables you to accept secure online payments directly on your travel booking website. With this integration, you can provide a seamless booking experience for your customers by allowing them to pay using various payment methods supported by Razorpay.
What is Razorpay Payment Gateway? #
Razorpay is a popular and secure online payment gateway that provides businesses with the ability to accept, process, and manage payments efficiently. Razorpay supports multiple payment options, ensuring flexibility for customers and a broader reach for businesses.
Supported Payment Methods #
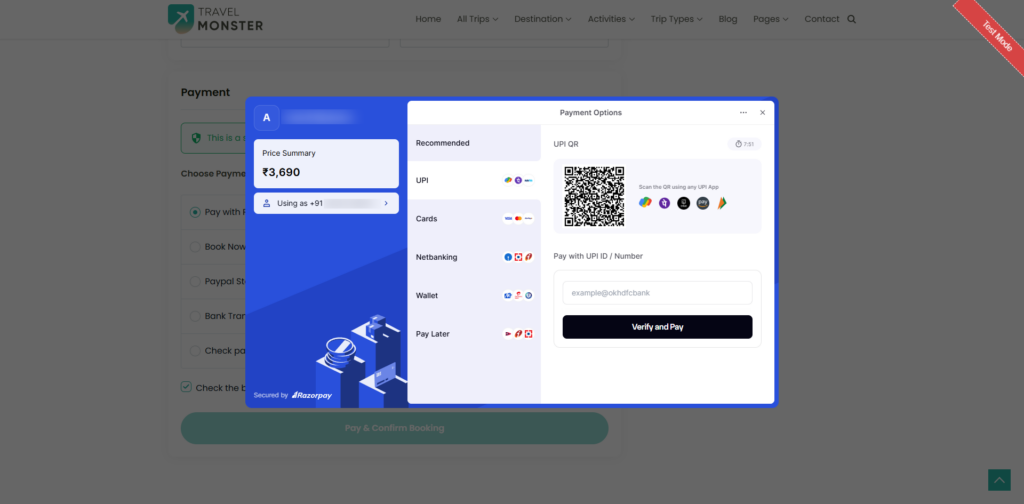
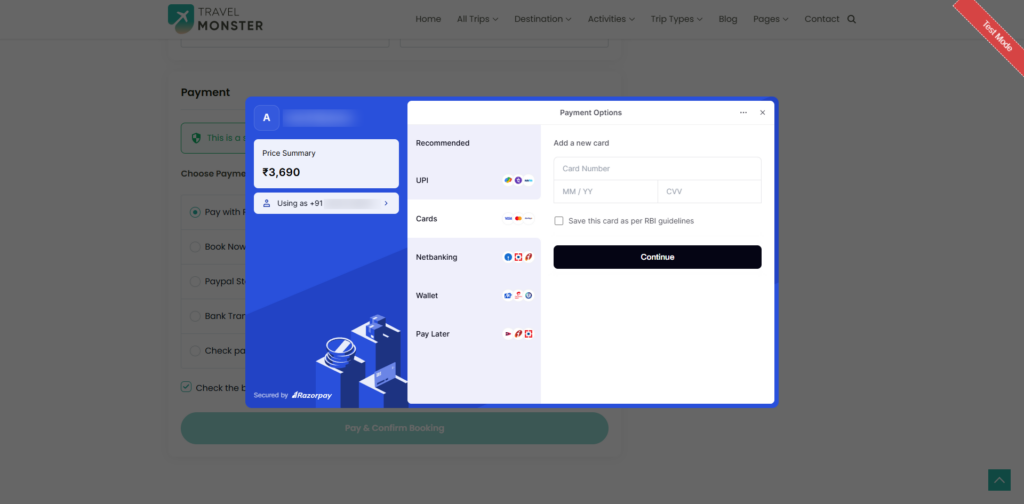
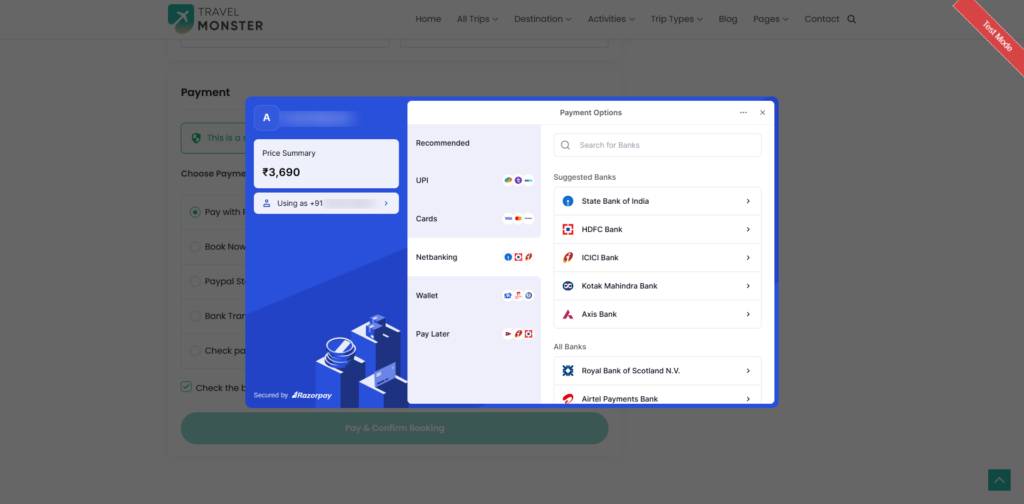
When you integrate Razorpay with WP Travel Engine, your customers can pay using the following options:
- Credit and Debit Cards (Visa and Mastercard)
- Net Banking (major banks in India)
- UPI (Unified Payments Interface)
- Digital Wallets (Airtel Payments Bank, Mobikwik, Jio Money, Freecharge, etc.)
- Pay Later (LazyPay, ICICI, ePayLater, Kotak Mahindra Bank, Amazon Pay Later, RazorpayX Postpaid, etc.)
For more detailed information about the supported payment methods in Razorpay, please refer to their official documentation via this link: Supported Payment Methods in Razorpay
Supported Regions #
Razorpay primarily supports businesses and payments in India. However, it also allows businesses with international operations to accept payments from global customers using cards. You can check the full list of supported regions on the Razorpay official website.
Why Use Razorpay for Your Travel Booking Website? #
- Wide range of payment options: Allow customers to pay using their preferred method.
- Instant payment processing: Provide a smooth and reliable payment experience.
- Enhanced security: Razorpay complies with PCI-DSS standards to ensure secure transactions.
- Real-time updates: Instantly get payment confirmation for bookings through your WP Travel Engine site.
Step-by-Step Configuration Guide #
1. Installing the Razorpay Payment Gateway Addon #
- To install the Razorpay Payment Gateway addon for WP Travel Engine on your site, please refer to this detailed guide: How to install pro addons and activate the license?
2. Configuring the Razorpay Payment Gateway Settings #
Once the addon is activated, navigate to Admin Dashboard > WP Travel Engine > Settings > Payments > Razorpay.
General #
Under General, you will see the following configuration options:
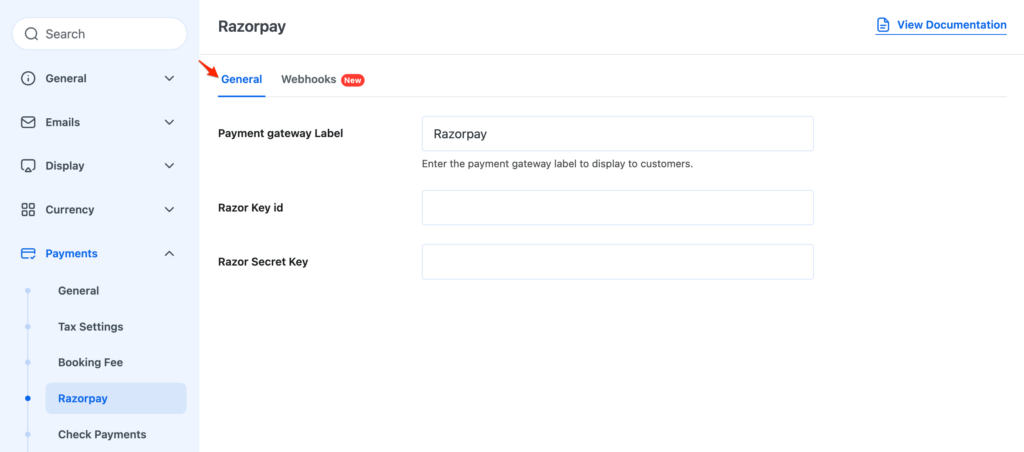
Payment Gateway Label
- This option allows you to change the label of the Razorpay payment option as it appears on the checkout page.
- By default, the label is set to “Razorpay”, but you can customize it based on your preference.
- Example: If you want the label to appear as “Pay with Razorpay”, you can modify it here.
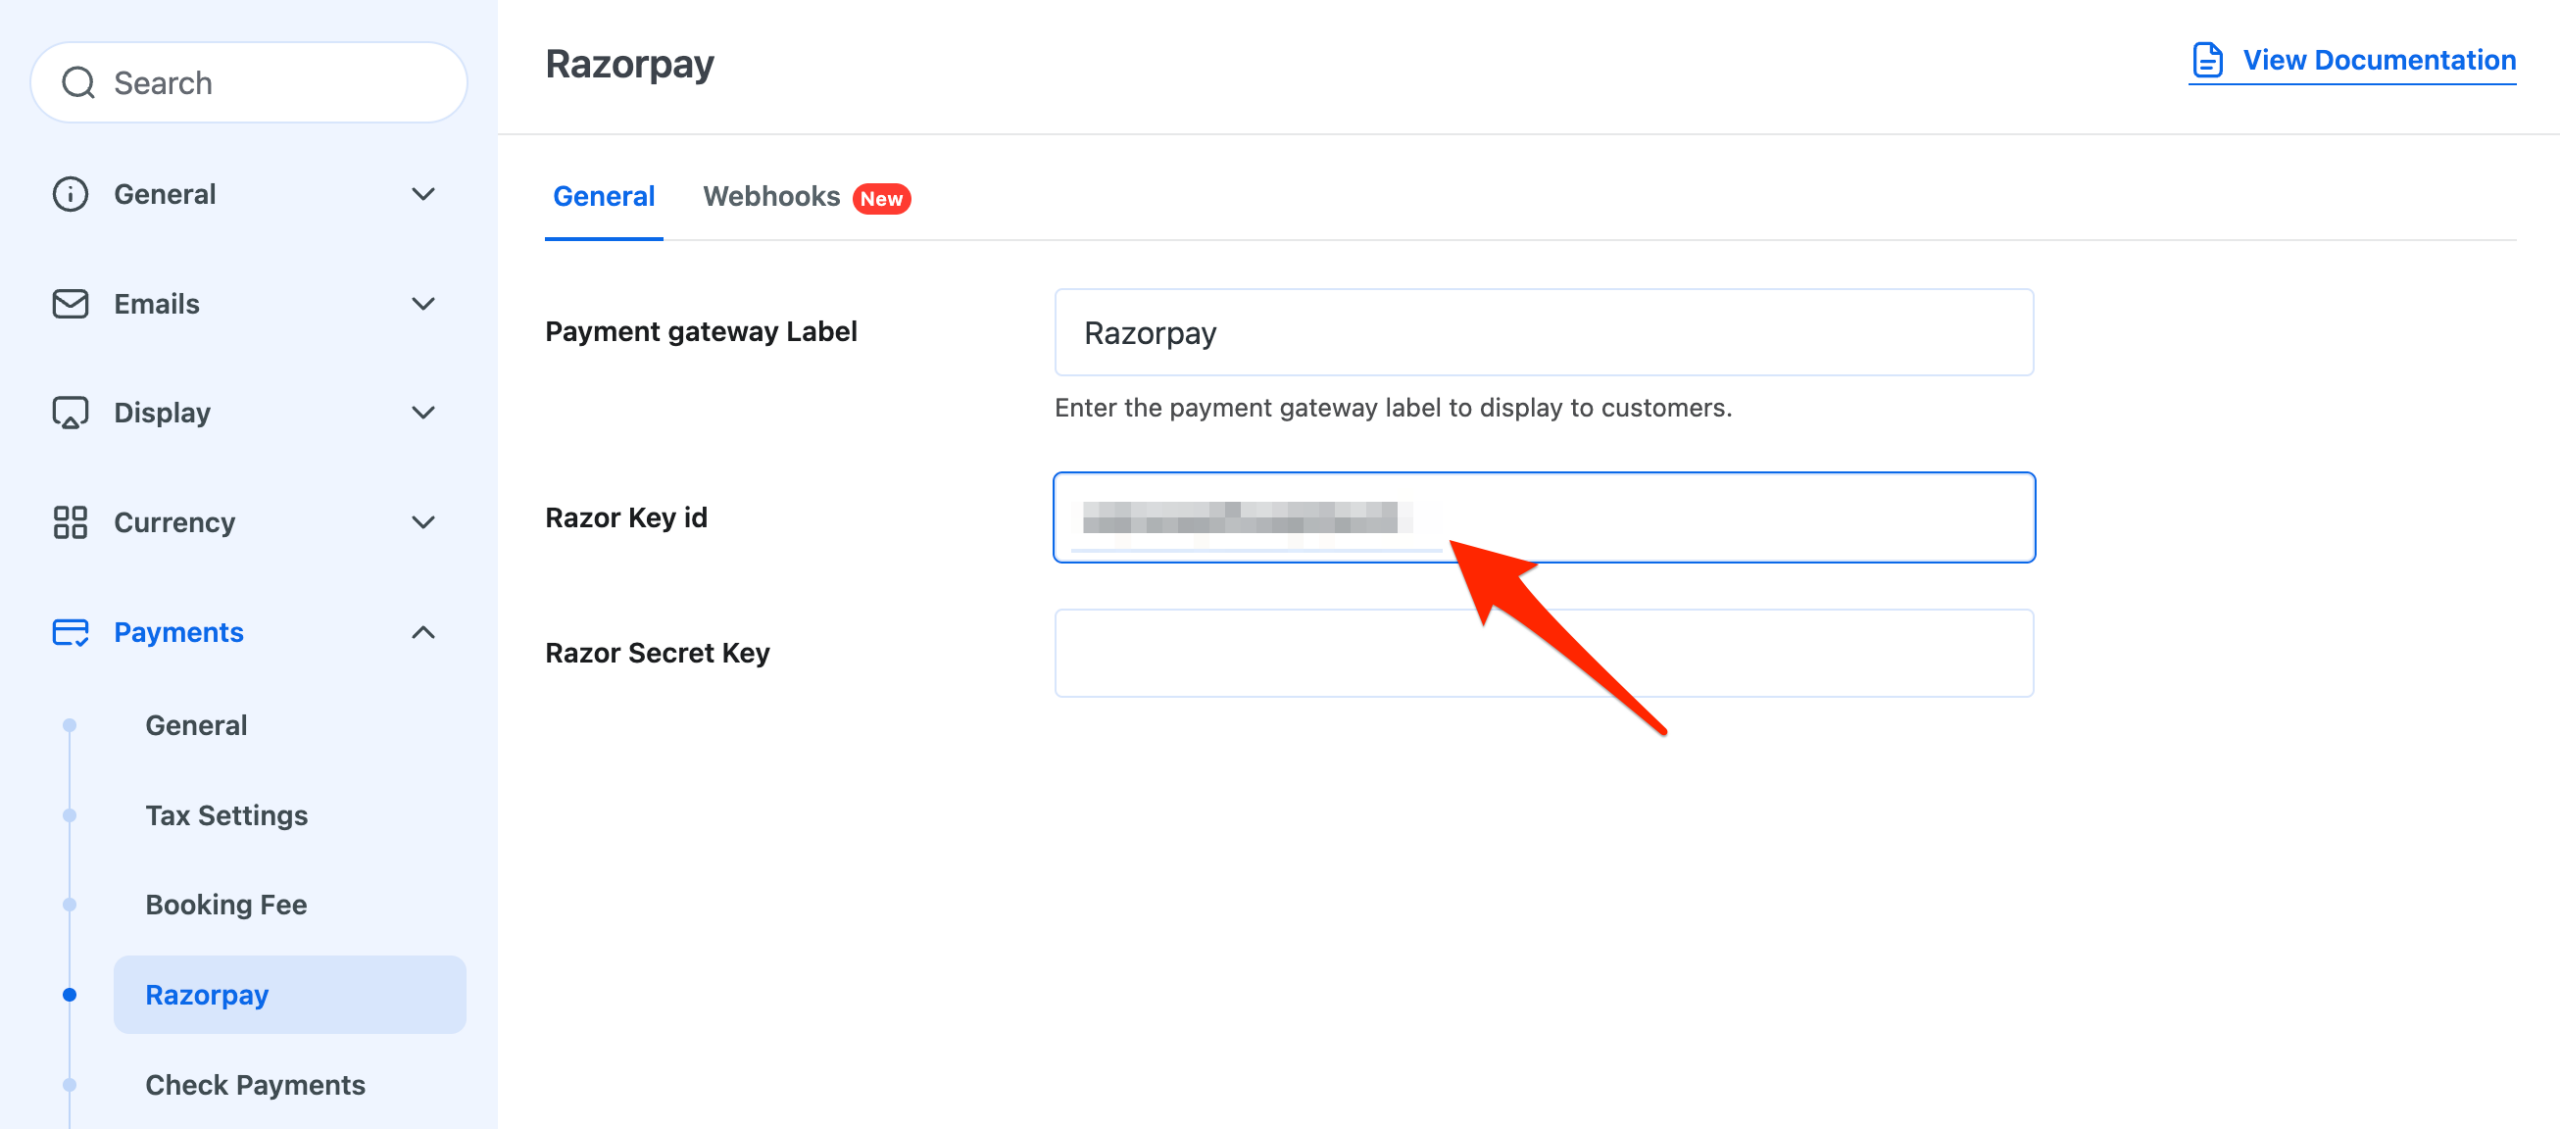
Razor Key ID
- Enter your Razorpay Key ID here.
- You can find this key by logging into your Razorpay Dashboard and navigating to Settings > API Keys. For more detailed instructions on generating the API Keys in Razorpay Payment Gateway, please refer to their official documentation via this link: Generate and regenerate Test and Live API Keys using the Razorpay Dashboard.
- Copy the Key ID and paste it into this field.
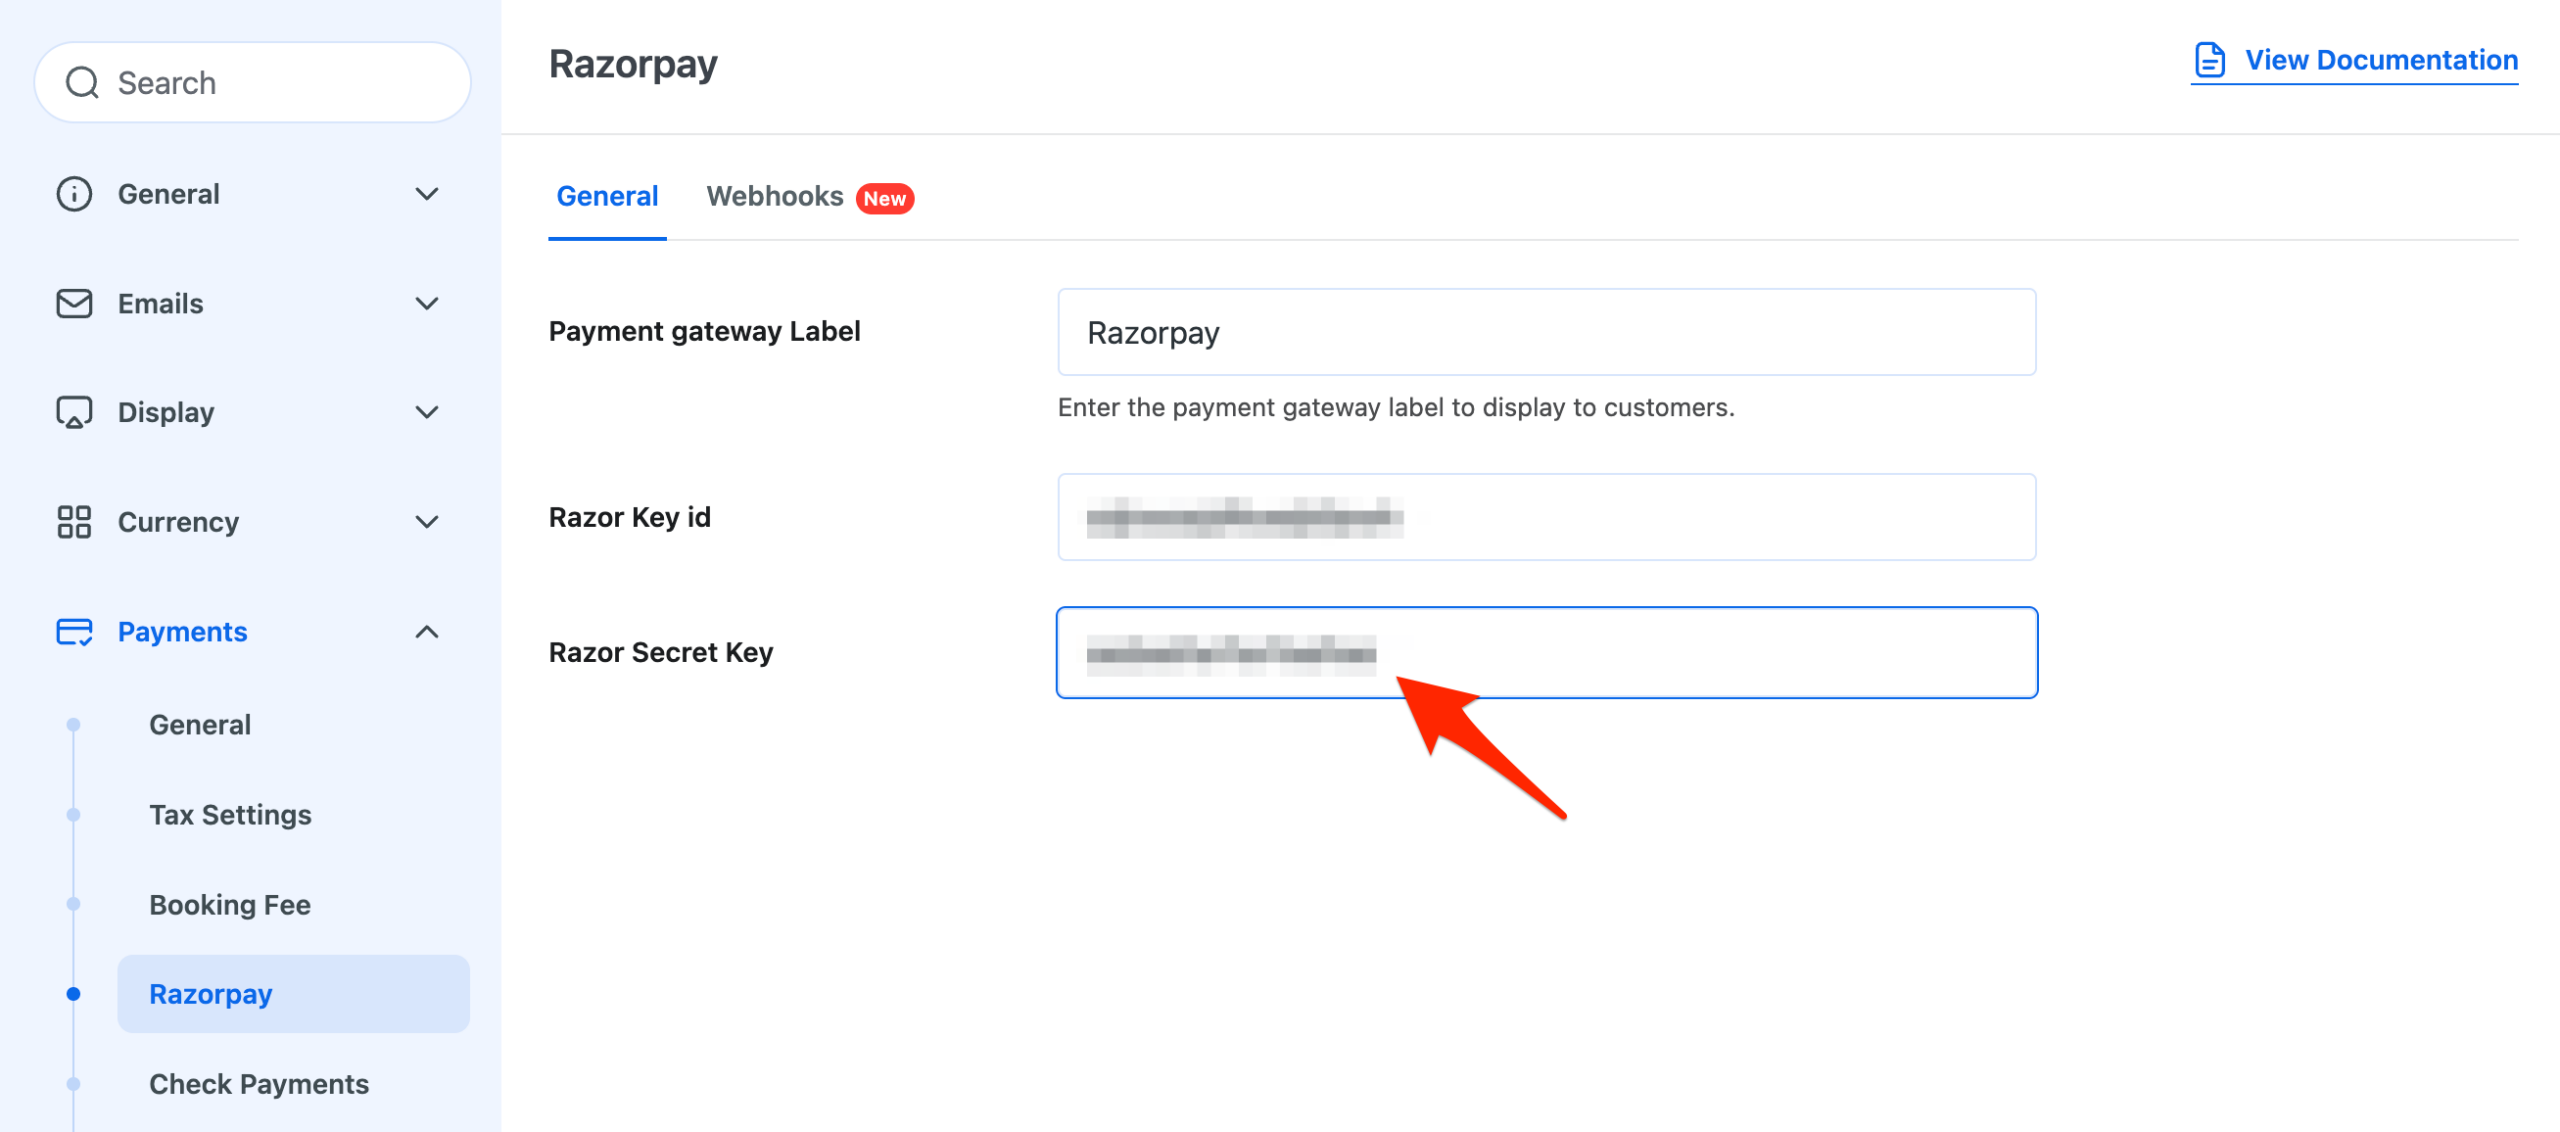
Razor Secret Key
- Enter your Razorpay Secret Key here.
- Similar to the Key ID, you can find the Secret Key from Razorpay Dashboard > API Keys.
- Copy the Secret Key and paste it into this field.
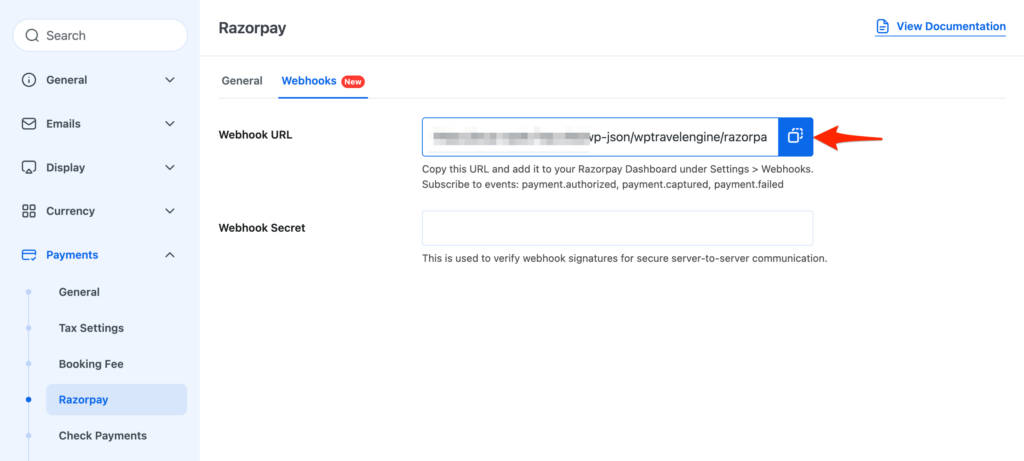
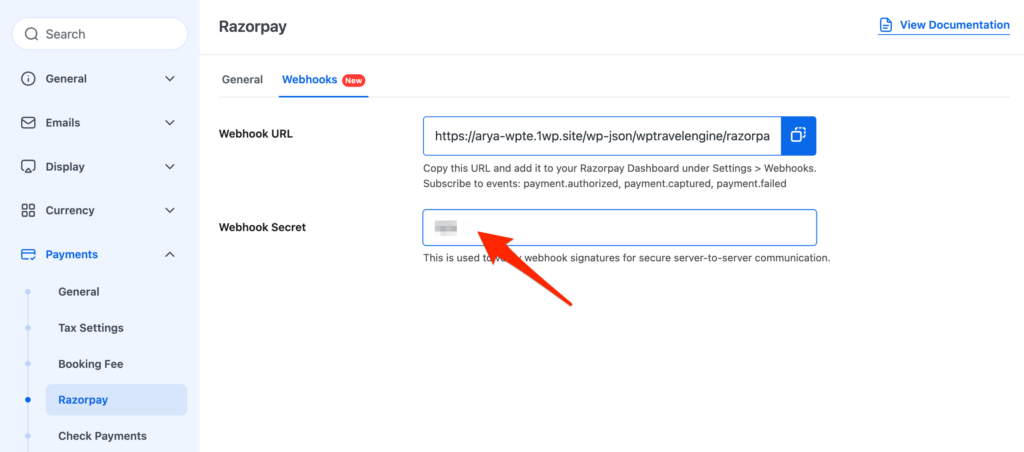
Webhooks #
Under Webhooks, you will see the following settings:
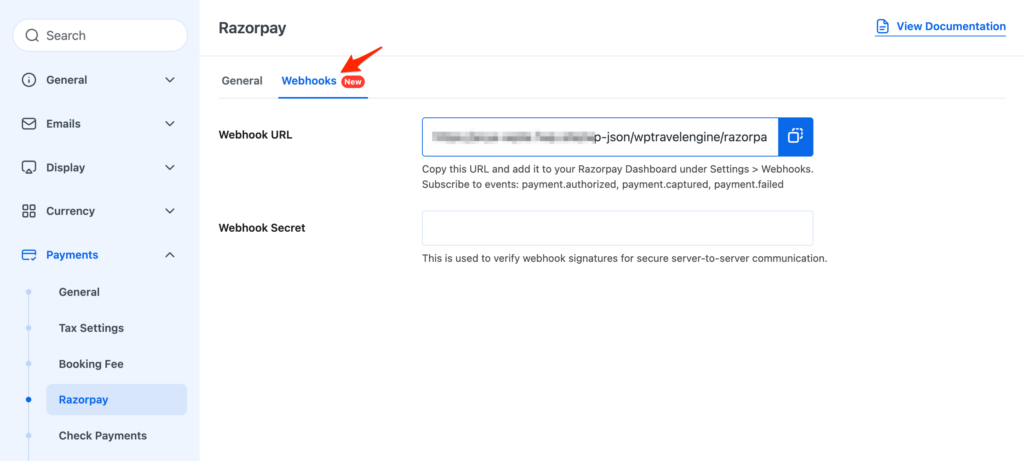
- Copy the Webhook URL by clicking on the copy icon next to the URL.
- Go to your Razorpay Dashboard.
- Click on Account & Settings from the left sidebar.
- Under Website and app settings, click Webhooks.
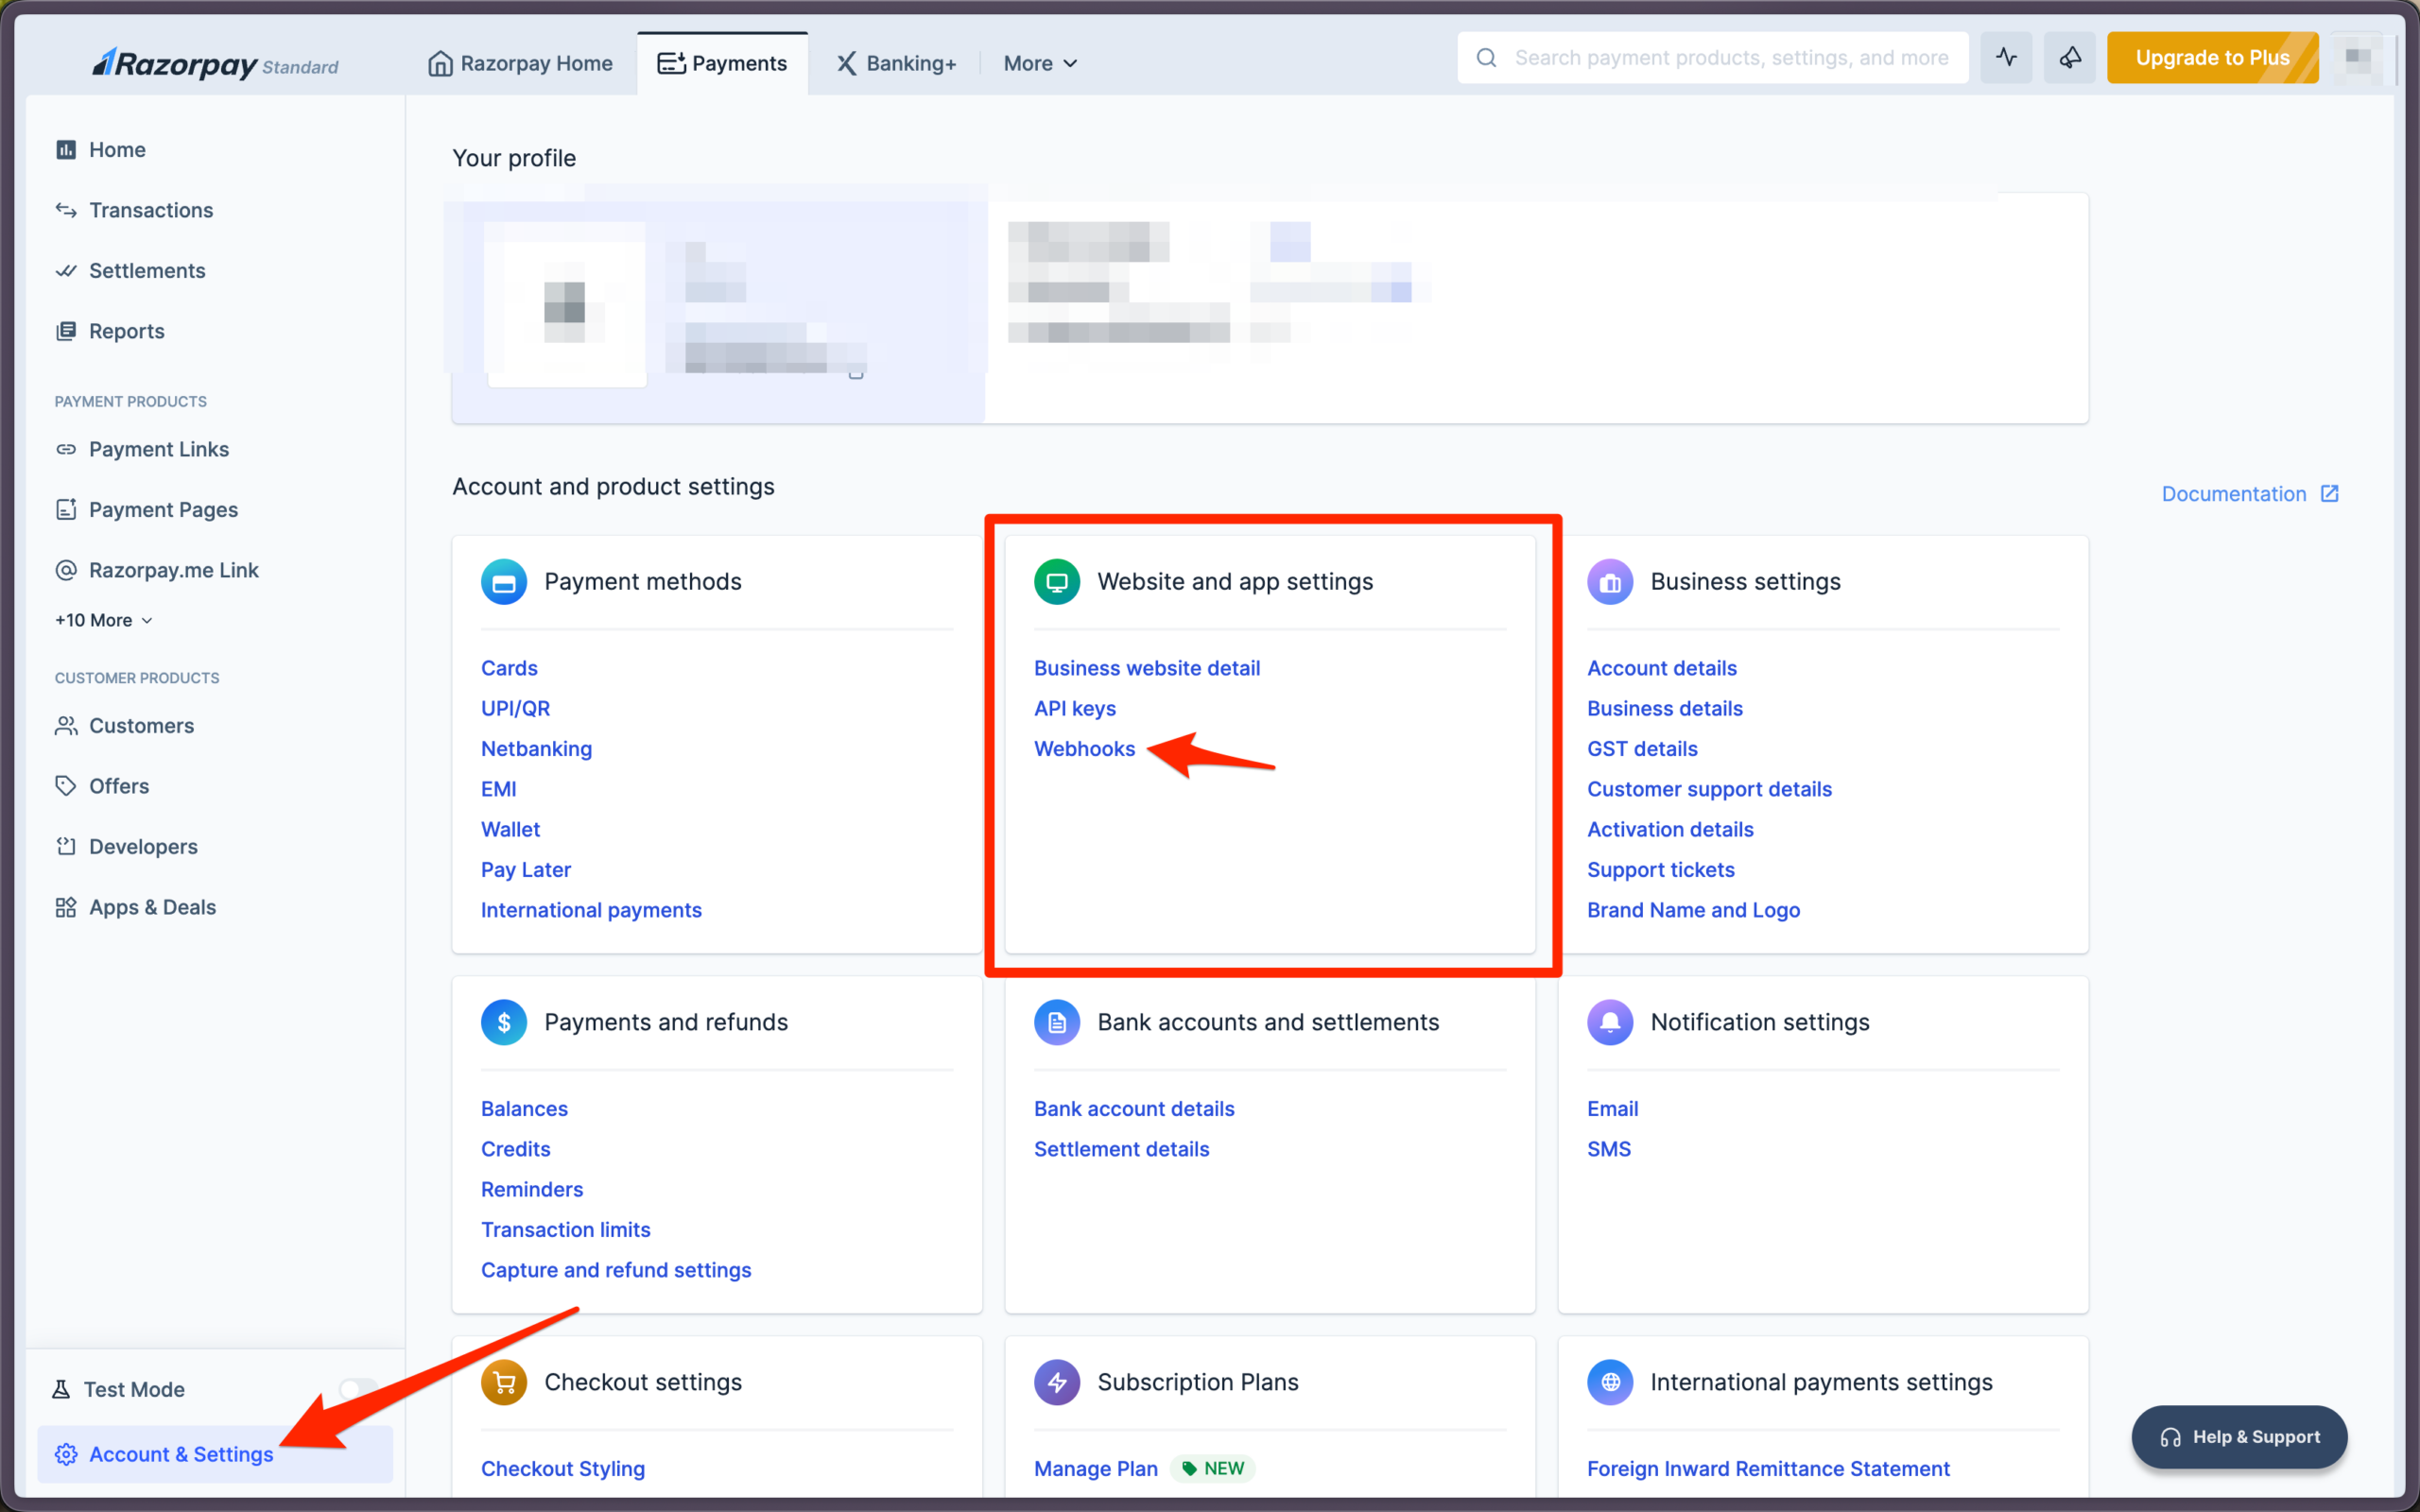
- On the Webhooks page, click +Add New Webhook.
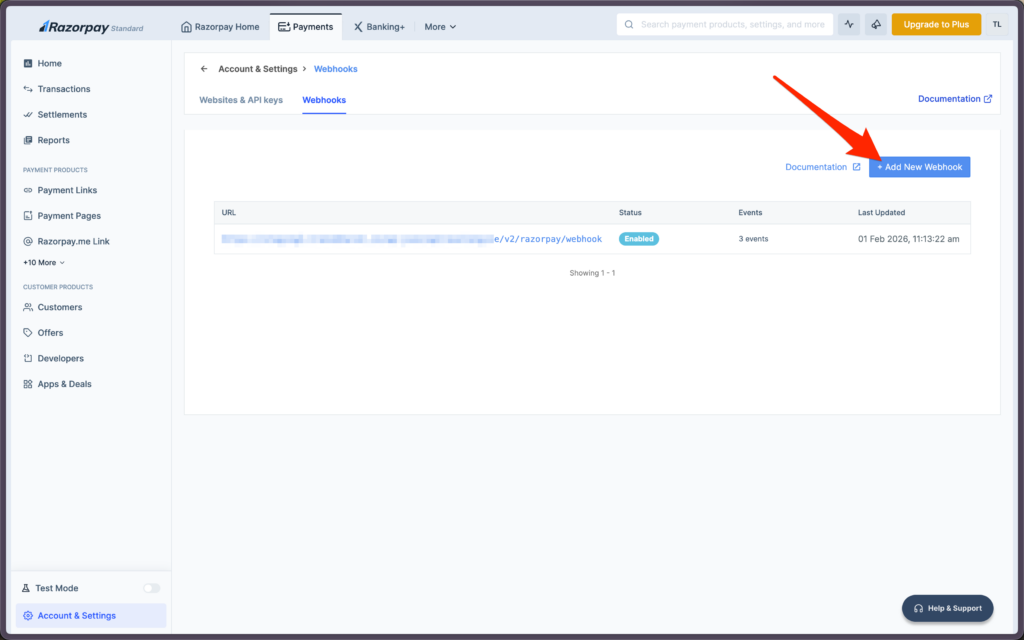
- In the Webhook Setup modal:
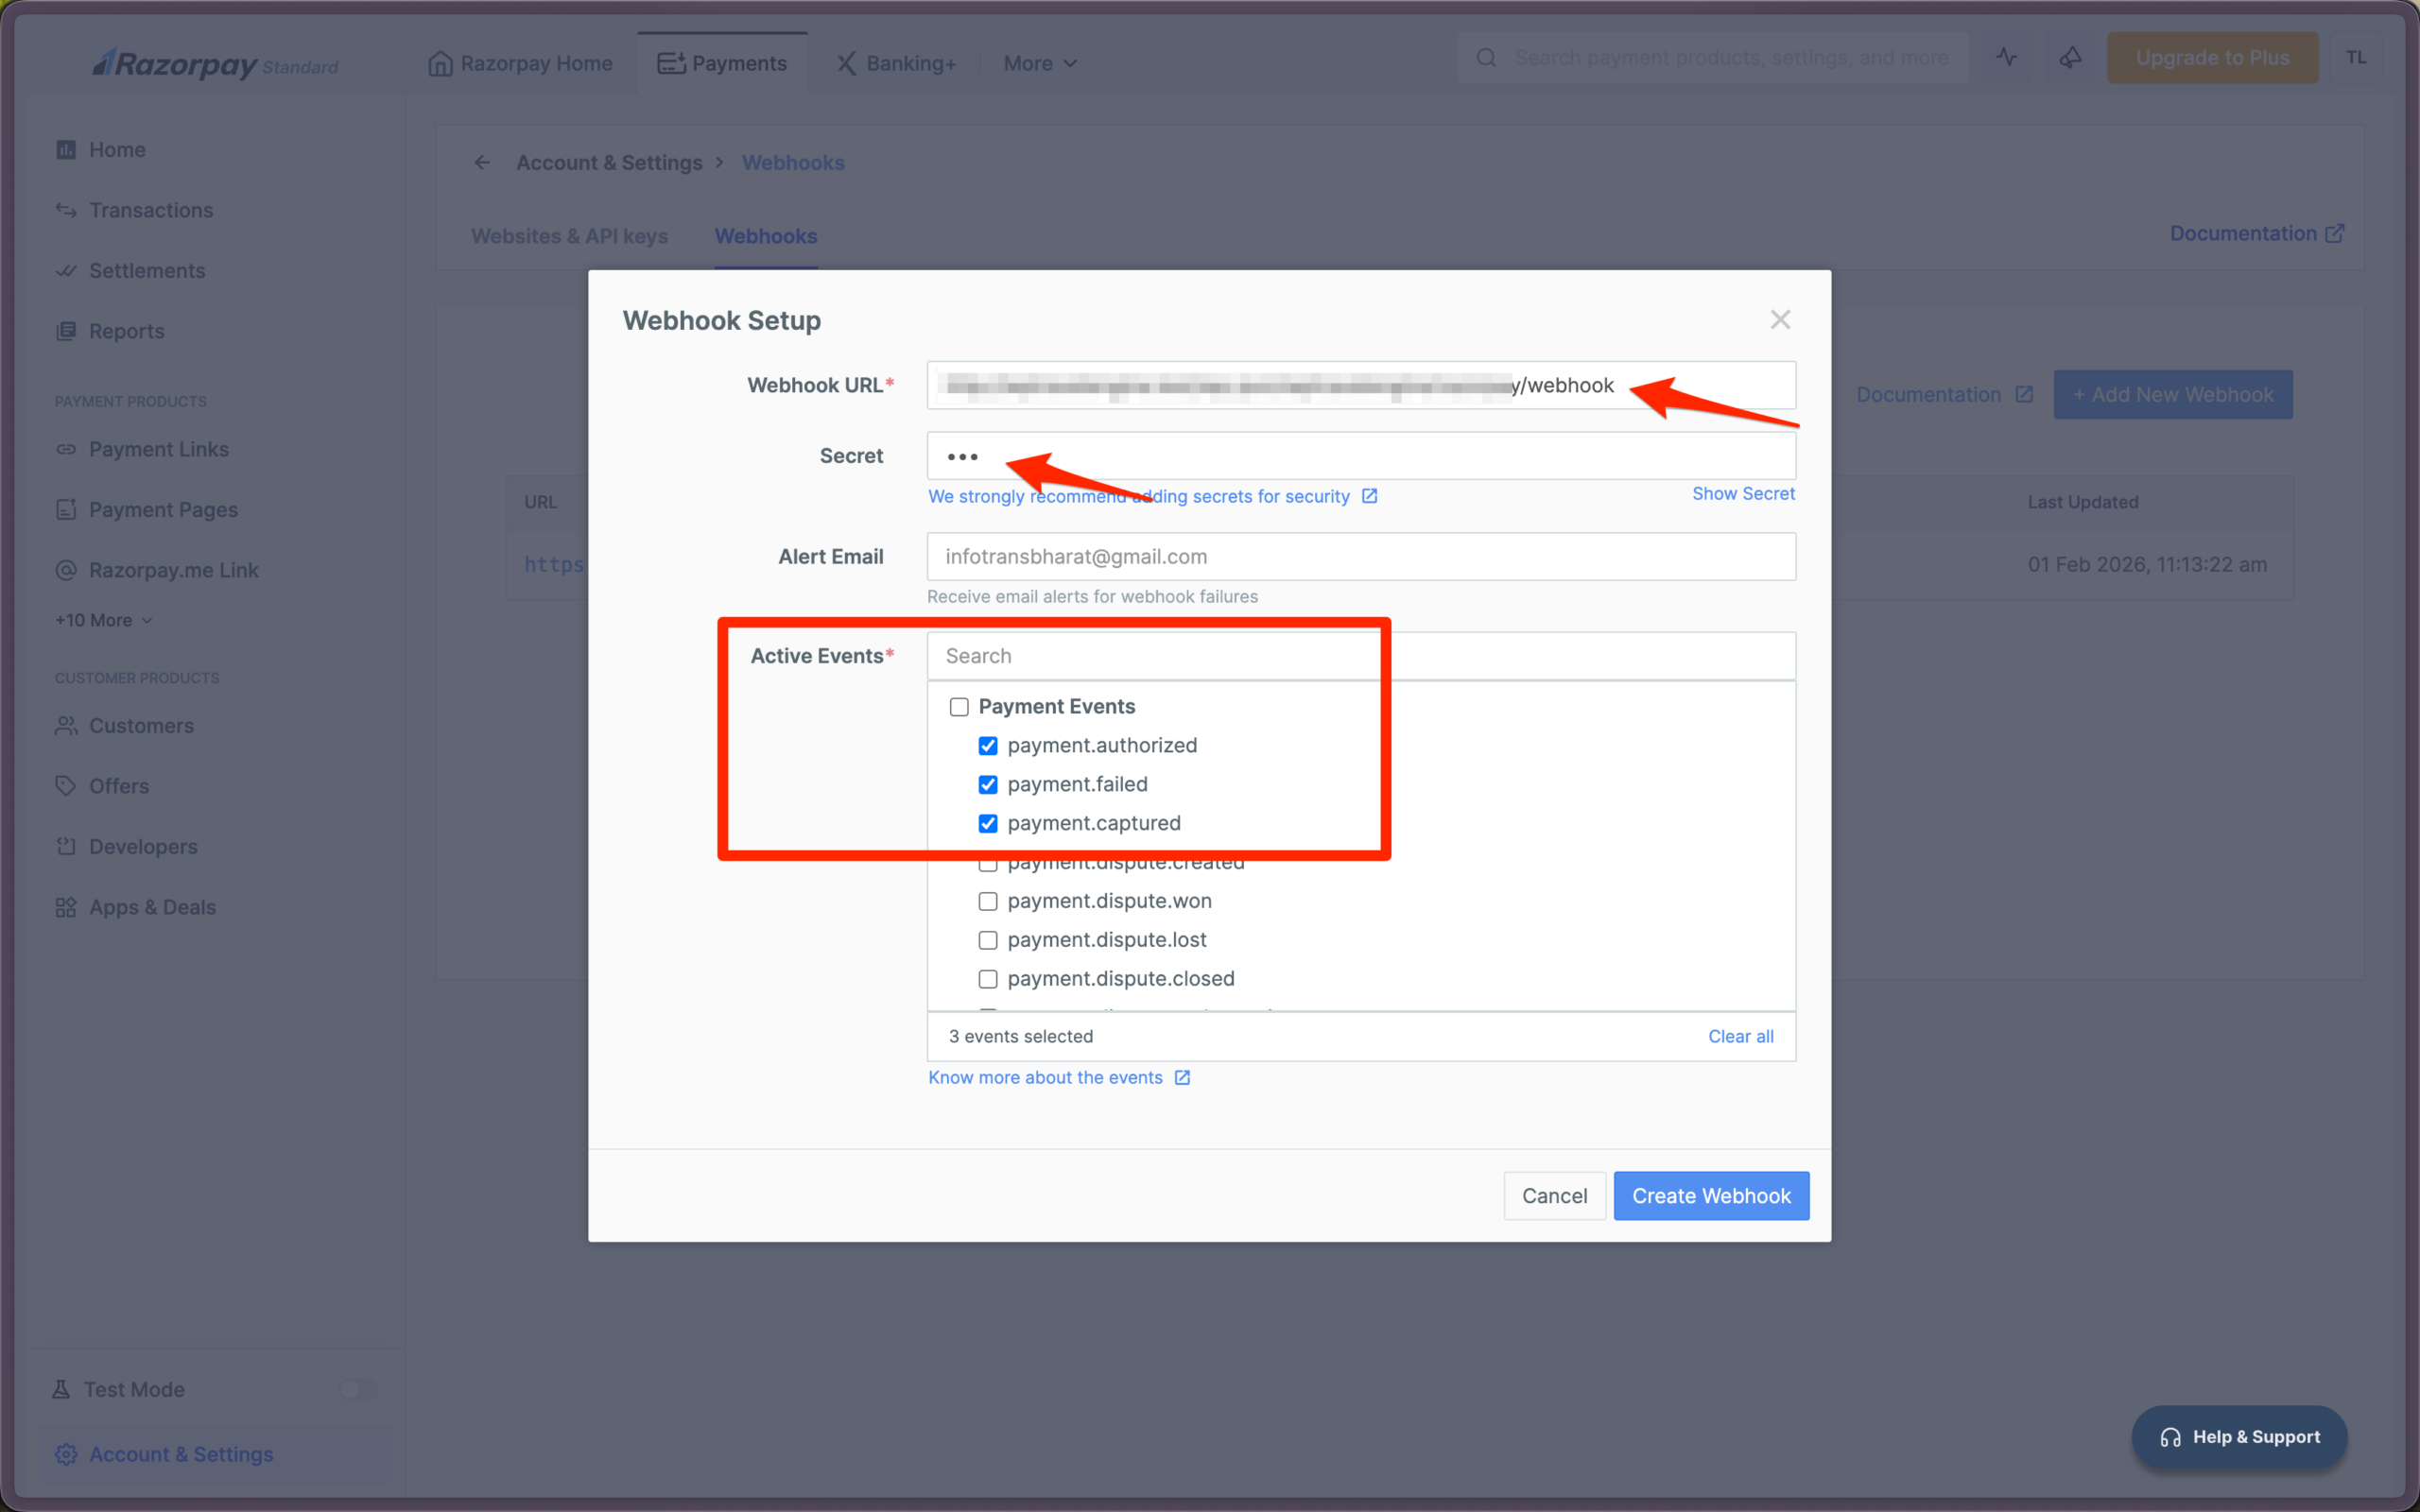
- Paste the copied Webhook URL.
- Enter a Secret Key of your choice and store it securely.
- Subscribe to events:
payment.authorized,payment.captured,payment.failed. - Click Create Webhook.
- Return to your Razorpay add-on settings on your site and paste the same Secret Key you used when creating the webhook.
3. Enabling the Razorpay Payment Gateway for Bookings #
After configuring the Razorpay settings, follow these steps to enable Razorpay as an active payment gateway on the checkout page:
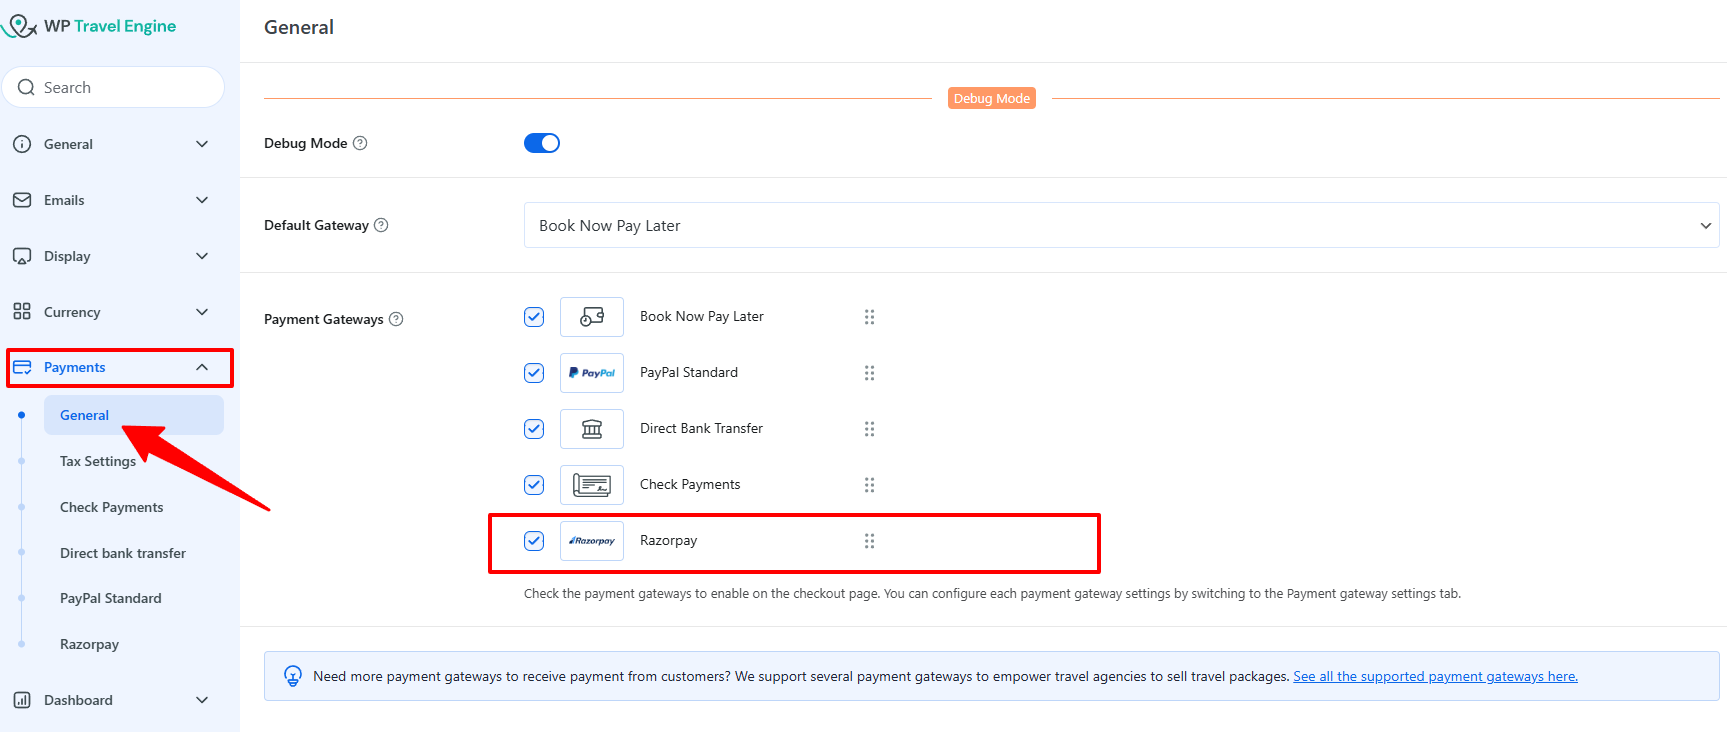
- Navigate to Admin Dashboard > WP Travel Engine > Settings > Payments > General.
- Under the Payment Gateways section, you will see a list of available payment options.
- Find and checkmark the Razorpay option to enable it.
- Save the settings by clicking Save Changes.
4. Testing the Razorpay Payment Gateway #
Before making the Razorpay payment gateway live, you may want to test it to ensure it is working correctly:
- Switch to Test Mode in the Razorpay Dashboard under Settings > API Keys to generate test credentials. For switching to the Test Mode and generating API Keys in Test Mode, please refer to Razorpay’s official documentation via this link: RazorpayX Test Mode
- Enter the test credentials (Key ID and Secret Key) in the Razorpay settings of WP Travel Engine.
- Enable the Debug Mode via WP Travel Engine > Settings > Payments > General.
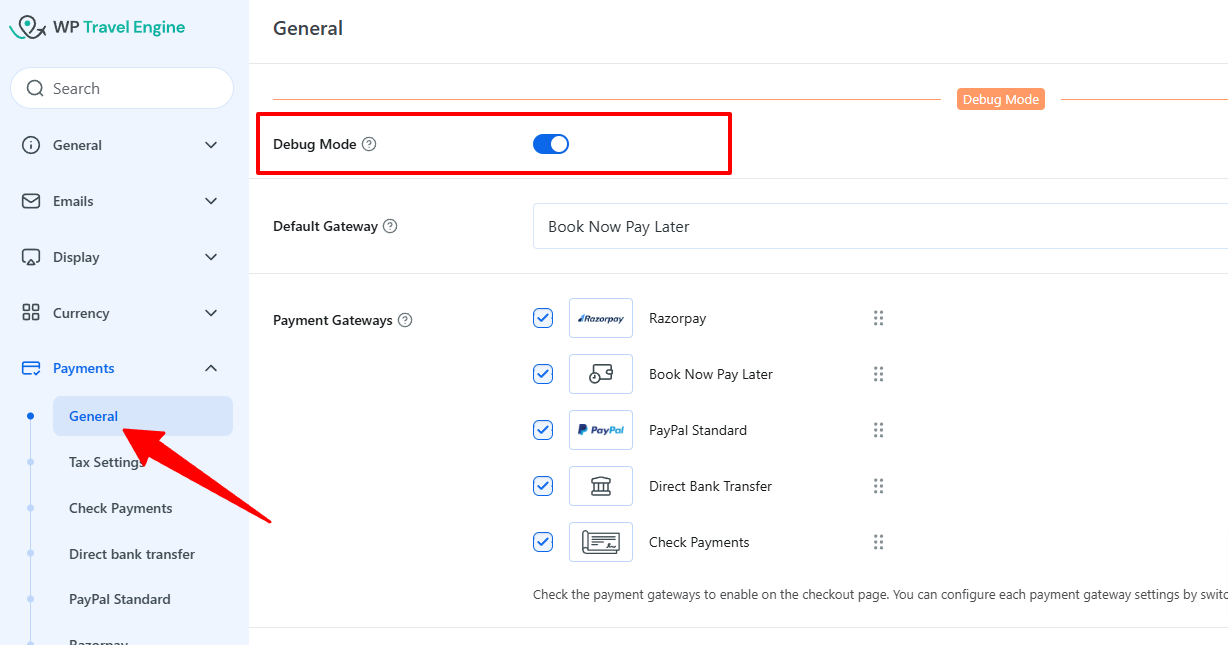
- Make a test booking on the site and complete the payment using test payment details provided by Razorpay.
- Once testing is complete, switch back to Live Mode and enter the live API keys.
Final Verification #
- Navigate to the Checkout page on your website and make sure the Razorpay payment option appears with the correct label.
- Perform a live booking to ensure the payment flow works as expected.
Troubleshooting #
| Issue | Possible Cause | Solution |
|---|---|---|
| Razorpay payment option not visible | Razorpay payment gateway not enabled | Go to WP Travel Engine > Settings > Payments > General and make sure Razorpay is checkmarked. |
| API keys are incorrect | Incorrect Key ID or Secret Key entered | Double-check your API keys in Razorpay Dashboard > API Keys and ensure they match. |
| Payment not processing | Server or firewall blocking requests | Ensure your server allows outgoing connections to Razorpay. |
Conclusion #
The Razorpay Payment Gateway addon is designed to help you provide a smooth and secure payment experience for your customers. By following this step-by-step guide, you can easily set up and start accepting payments for your trip bookings.
If you encounter any issues or need further assistance, please feel free to reach out to our support team.
Checkout Page Preview #