Advanced Itinerary Builder is a premium add-on for WP Travel Engine that transforms basic trip itineraries into rich, detailed travel experiences. This add-on is designed for travel agencies, tour operators, and adventure travel companies who want to showcase comprehensive day-by-day itineraries with visual elements, accommodation details, meal plans, and interactive elevation charts.
Whether you’re organizing multi-day treks, city tours, or adventure expeditions, this add-on helps you present professional, detailed itineraries that give travelers confidence in their journey.
Perfect for:
- Trekking and mountaineering companies
- Multi-day tour operators
- Adventure travel agencies
- Educational travel programs
- Pilgrimage and cultural tours
Key Features #
- Day-by-Day Itinerary: Add and manage itinerary days with titles and descriptions.
- Sleep Modes & Meals: Define accommodation types and select included meals for each day.
- Additional Itinerary Info: Add structured fields like walking distance, activities, and highlights.
- Elevation Charts: Display daily altitude changes with customizable axes, colors, and units.
- Image Galleries: Upload multiple images per day to showcase destinations.
Prerequisites #
Before installing and using the Advanced Itinerary Builder add-on, ensure your system meets these requirements:
- You have WP Travel Engine installed and activated on your WordPress site (Version 4.3.0 or more).
- You have installed and activated the Advanced Itinerary Builder add-on.
Benefits at a Glance #
| Feature | User Benefit |
| Altitude Charts | Visualize elevation changes throughout the journey, helping trekkers prepare mentally and physically for climbs and descents |
| Sleep Modes | Clearly communicate accommodation types (hotel, tent, lodge, homestay) so travelers know what to expect each night |
| Meals Tracking | Show which meals are included (breakfast, lunch, dinner) to help travelers plan their budget and dietary needs |
| Duration Fields | Specify exact walking/trekking time for each day so travelers can gauge daily effort levels |
| Image Galleries | Add multiple photos per day to showcase destinations, making itineraries more engaging and trustworthy |
| Location Data | Track overnight locations with altitude information for detailed route planning |
| Expand All Option | Allow users to view the complete itinerary at a glance or expand day by day as needed |
| Unit Switching | Toggle between meters and feet for international audiences |
| Rich Text Content | Format itinerary descriptions with full text editing capabilities for clarity and emphasis |
| Custom Chart Design | Match elevation charts to your brand with custom colors and background images |
| Additional Itinerary Info Fields | Display structured details like walking distance, activities, or highlights for each day, giving travelers a clearer daily overview. |
How to Install the Advanced Itinerary Builder Add-on #
Verification #
To confirm the add-on is active and working:
- Navigate to WP Travel Engine → Settings → Extensions
- You should see the Advanced Itinerary Builder tab under Extensions.
- When editing any Trip post, go to the Itinerary tab
- You should see additional fields for Duration, Sleep Mode, Meals, Start Location, Altitude, and Itinerary Info.
Configuring the Global Settings for Advanced Itinerary Builder #
These settings apply to all trips across your site.
You can configure the global settings for Advanced Itinerary Builder via WP Travel Engine > Settings > Extensions > Advanced Itinerary Builder
Always Show All Itinerary #
The toggle controls whether itinerary days are expanded or collapsed by default on the frontend.
Expected Result: When you view any trip on the frontend, itineraries will display according to this setting. Users can still manually expand/collapse using the “Expand all” toggle button.

Sleep Mode Fields #
Create a list of accommodation types that you can assign to each itinerary day (e.g., Hotel, Tent, Lodge, Guesthouse, Camping, Homestay).
Steps:
- Under Sleep Mode Fields for Itinerary, you’ll see a list of existing options
- To add a new sleep mode:
- Click the Add Sleep Mode button at the bottom
- Enter the accommodation type (e.g., “3 Stars Hotel”, “Tea House”, “5 Stars Hotel”)
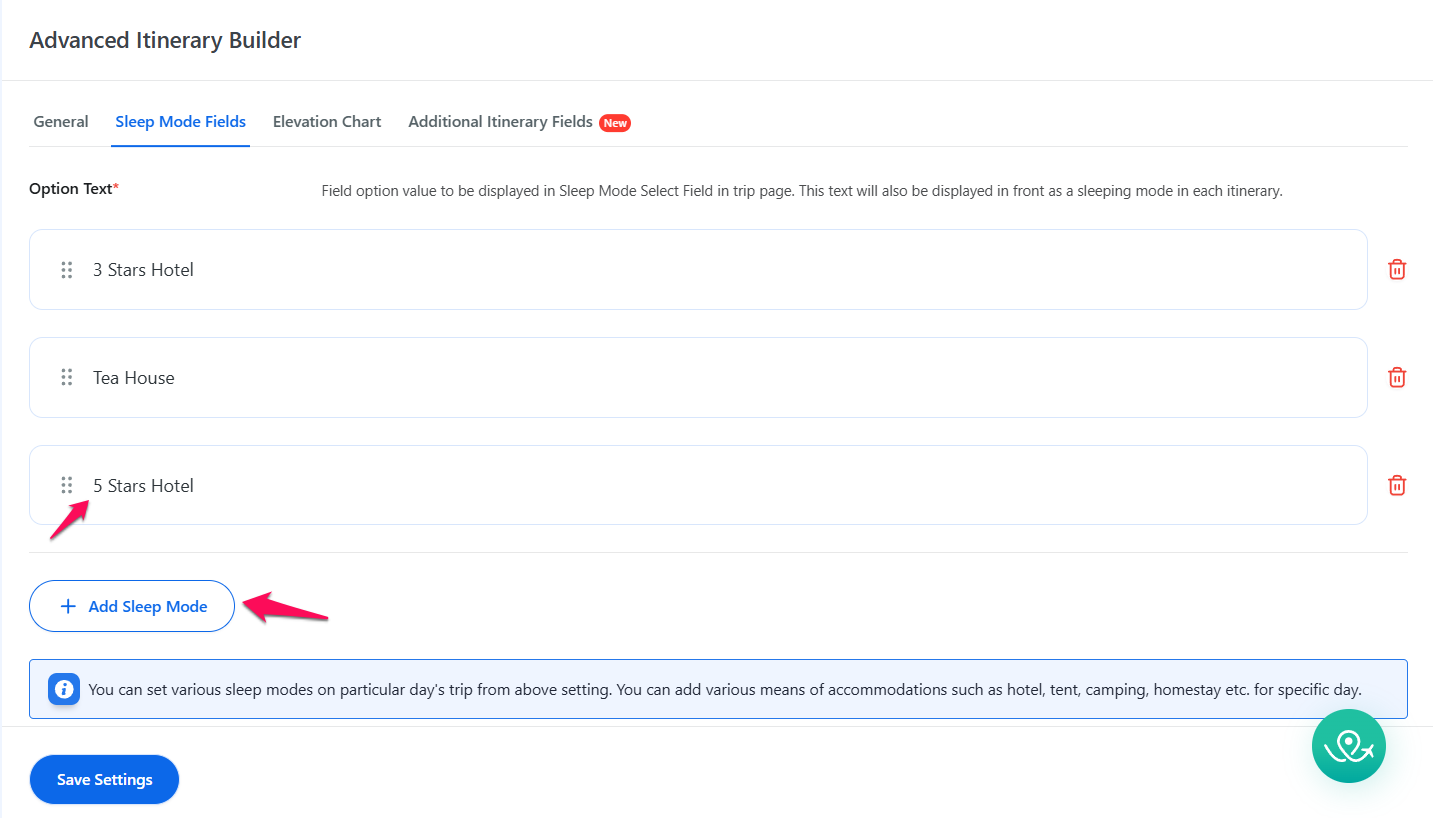
Expected Result: When editing individual trip itineraries, you’ll see these
sleep modes in the dropdown menu for each day.
Note: Sleep modes are global. Deleting a sleep mode here will remove it
from all the trips.
Itinerary Elevation Chart Settings #
Configure how the altitude chart appears on your trip pages.
- Show Chart on Trip Page: Toggle On to display the elevation chart above the itinerary and Off to to hide charts side-wide
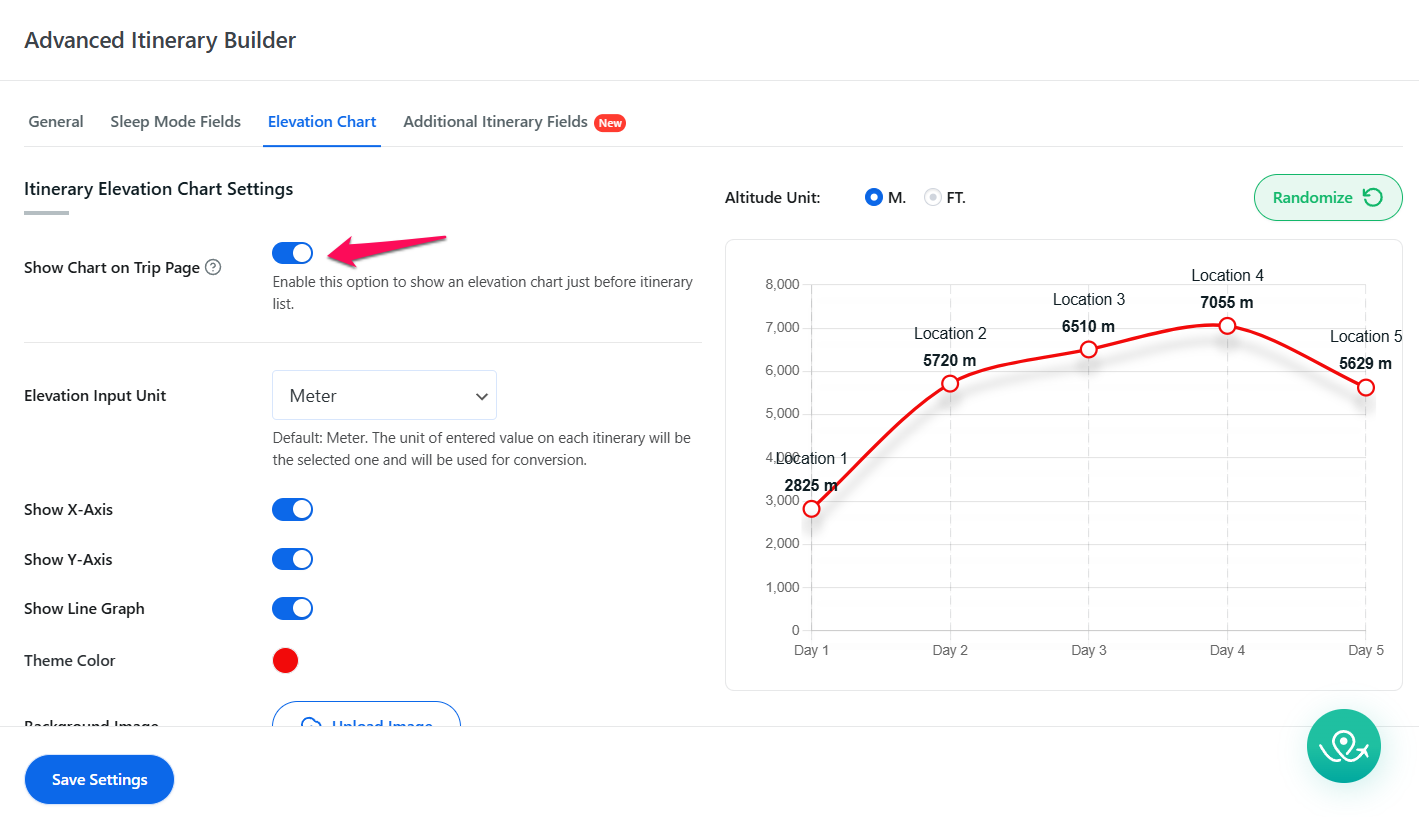
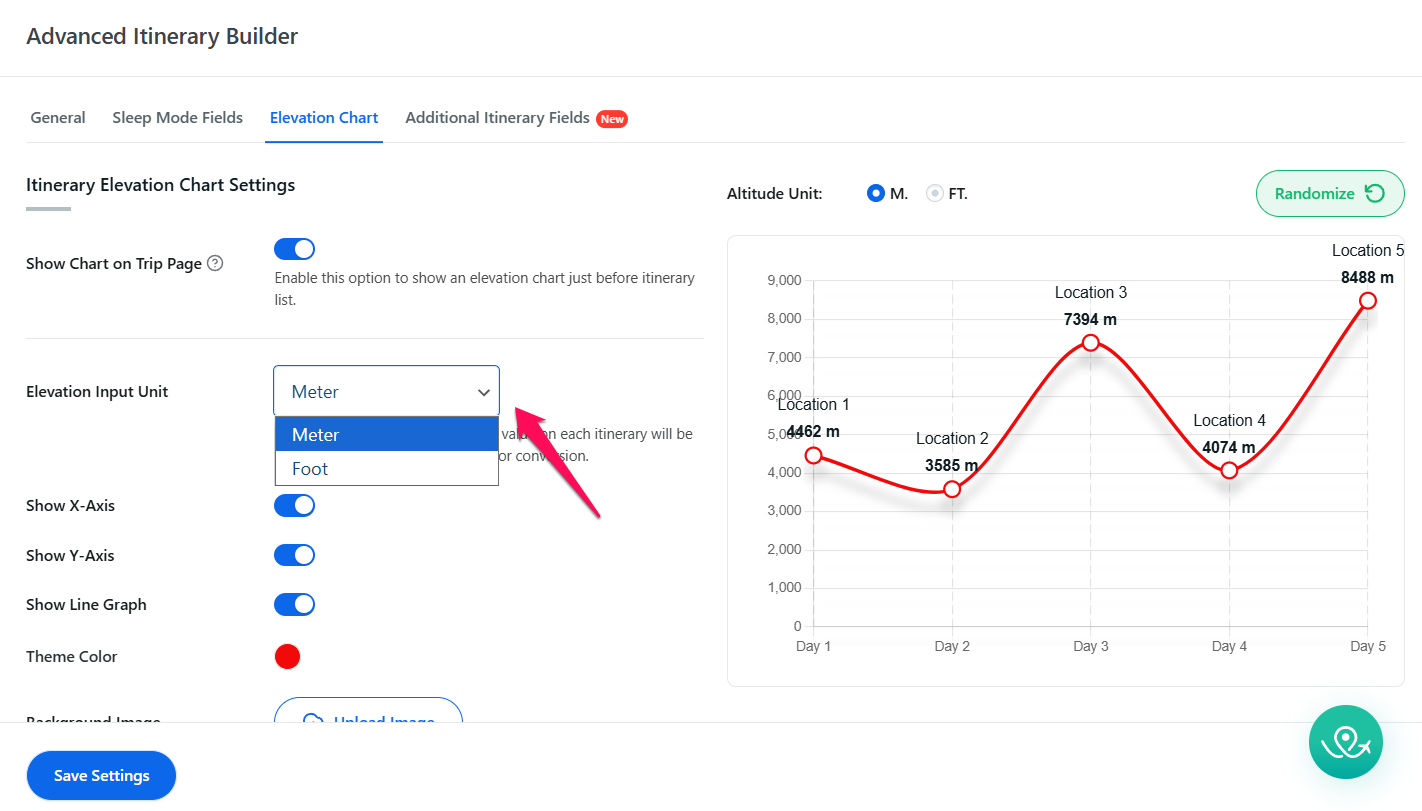
- Elevation Input Unit: Set the default measurement unit for altitude data entry.
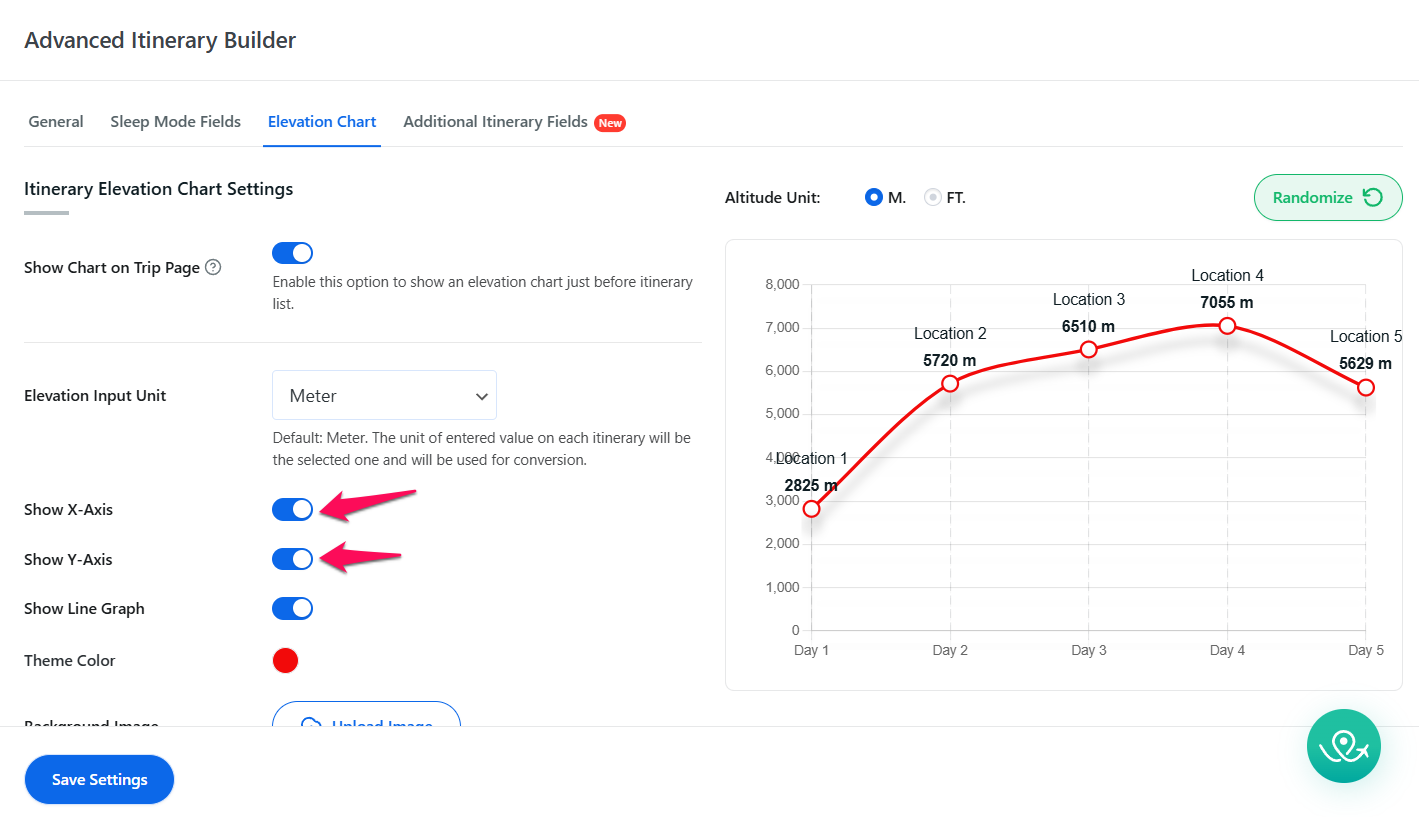
- Show X-Axis / Show Y-Axis: Enable “Show X-Axis” to display day labels along the bottom. Enable “Show Y-Axis” to display altitude values along the left side
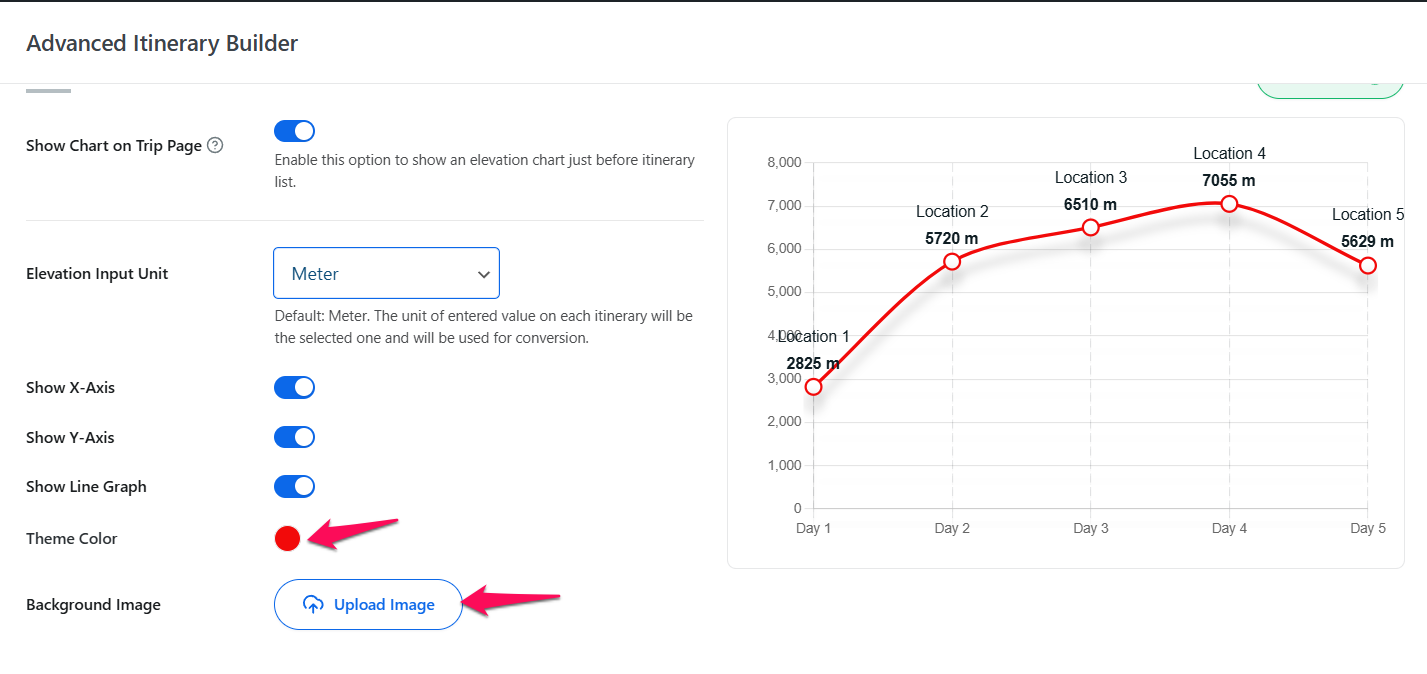
- Show Line Graph: Choose between a filled area chart (gradient fill below the line) and a simple line chart.
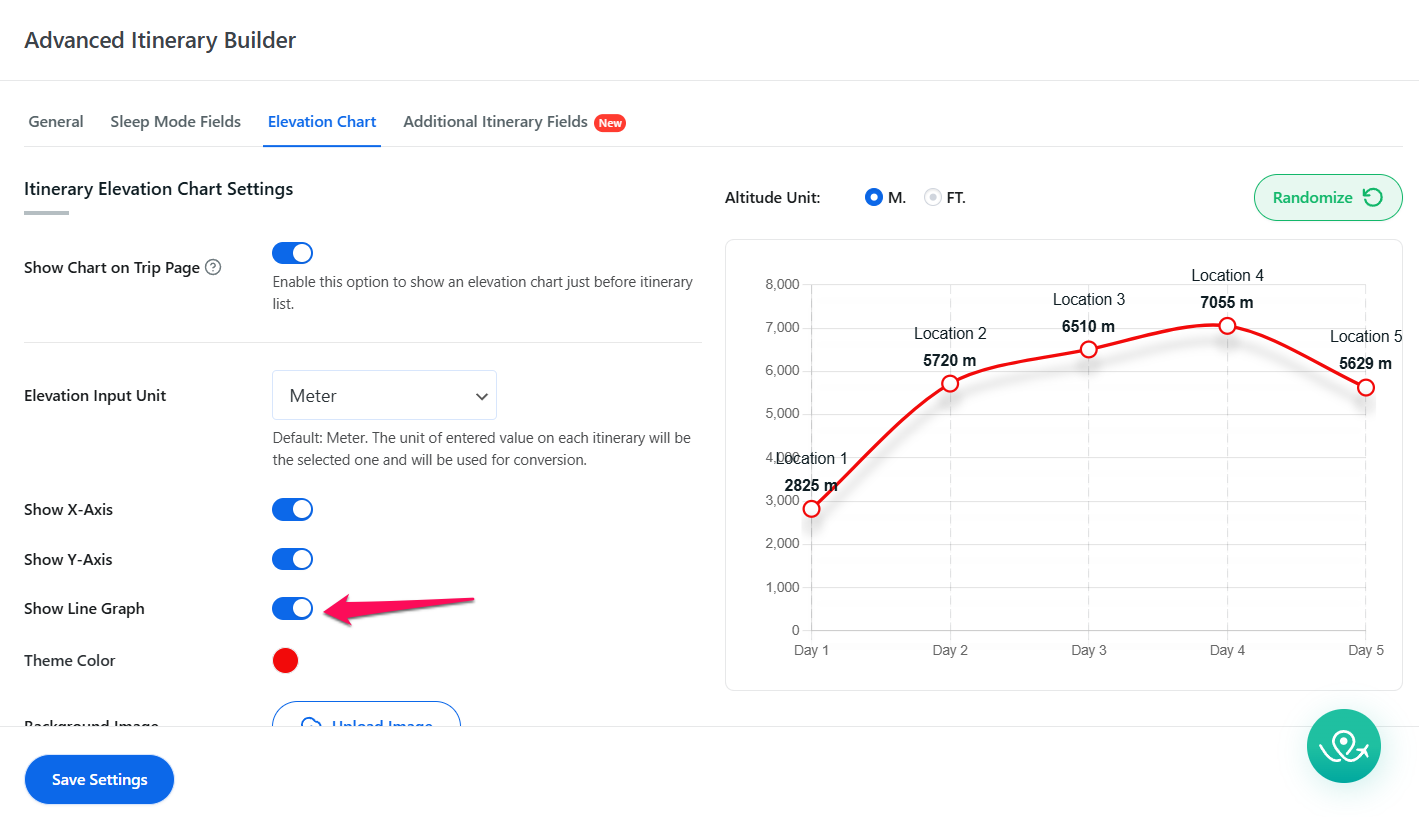
- Theme Color: Customize the chart line and fill color to match your website branding. Additionally, you can add a background image to the chart.
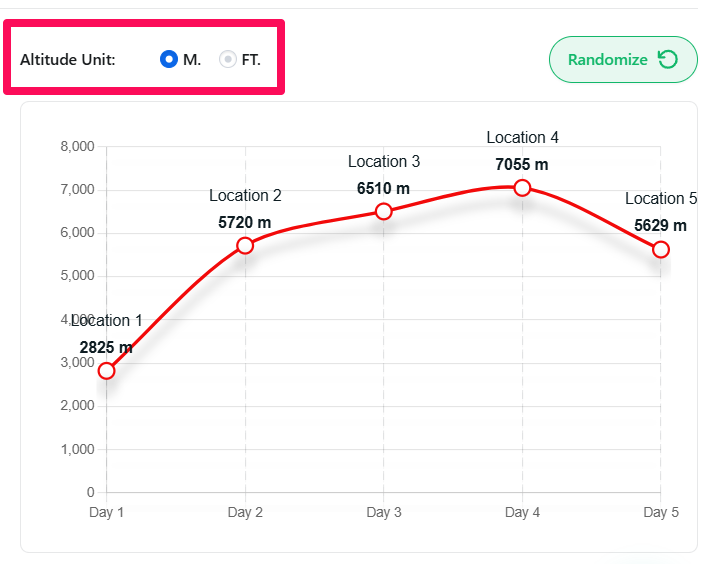
- Altitude Unit: Choose meters (m) or feet (ft) to display the altitude height in the chosen unit within the chart.
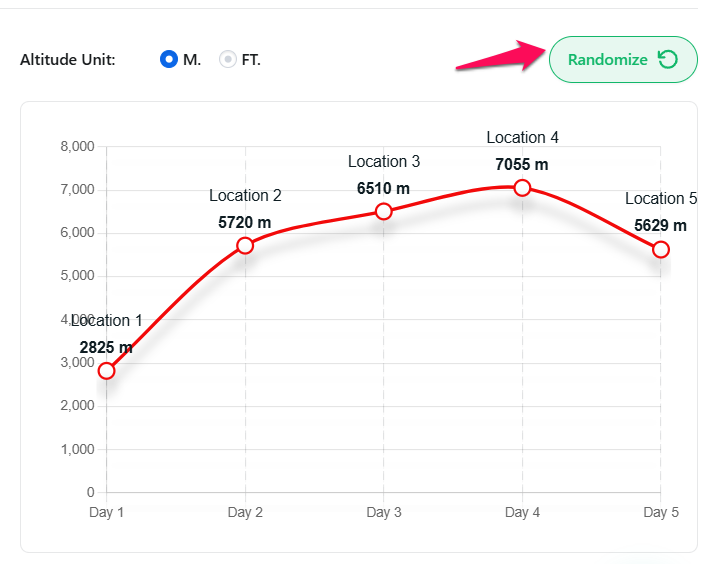
- Randomize Button and Preview: Click the “Randomize” button to preview the changes in the altitude values for each location on the chart while keeping the days and other details constant.
Expected Result: When enabled, the elevation chart will appear above the itinerary on the frontend of all trips. The chart will display the altitude data according to the unit selected (meters or feet) and follow the visual settings you configured, including the X-axis, Y-axis, line style, and theme color. Any changes made to the chart settings will be reflected immediately on the trip page preview, showing the altitude profile for each day of the itinerary.
Additional Itinerary Fields #
These settings allow you to create and manage extra day-by-day itinerary info fields that will appear for each trip.
- Show Itinerary Info: Toggle ON to turn on structured itinerary details for each day.
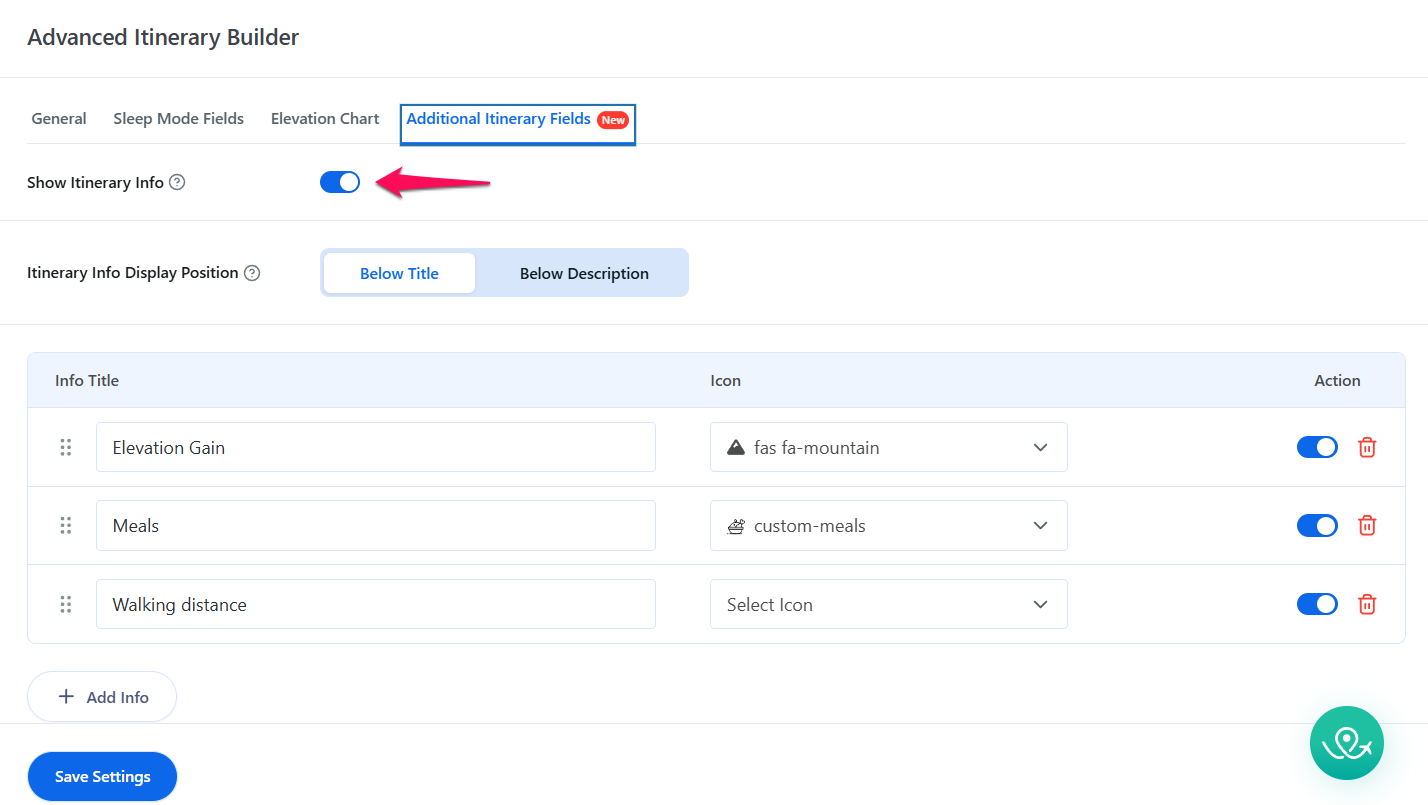
- Itinerary Info Display Position: Select where the itinerary info will appear on the trip page, either Below Title (default) or Below Description. Choosing Below Title places the additional info immediately under the day title, while Below Description displays it after the day’s detailed itinerary content.

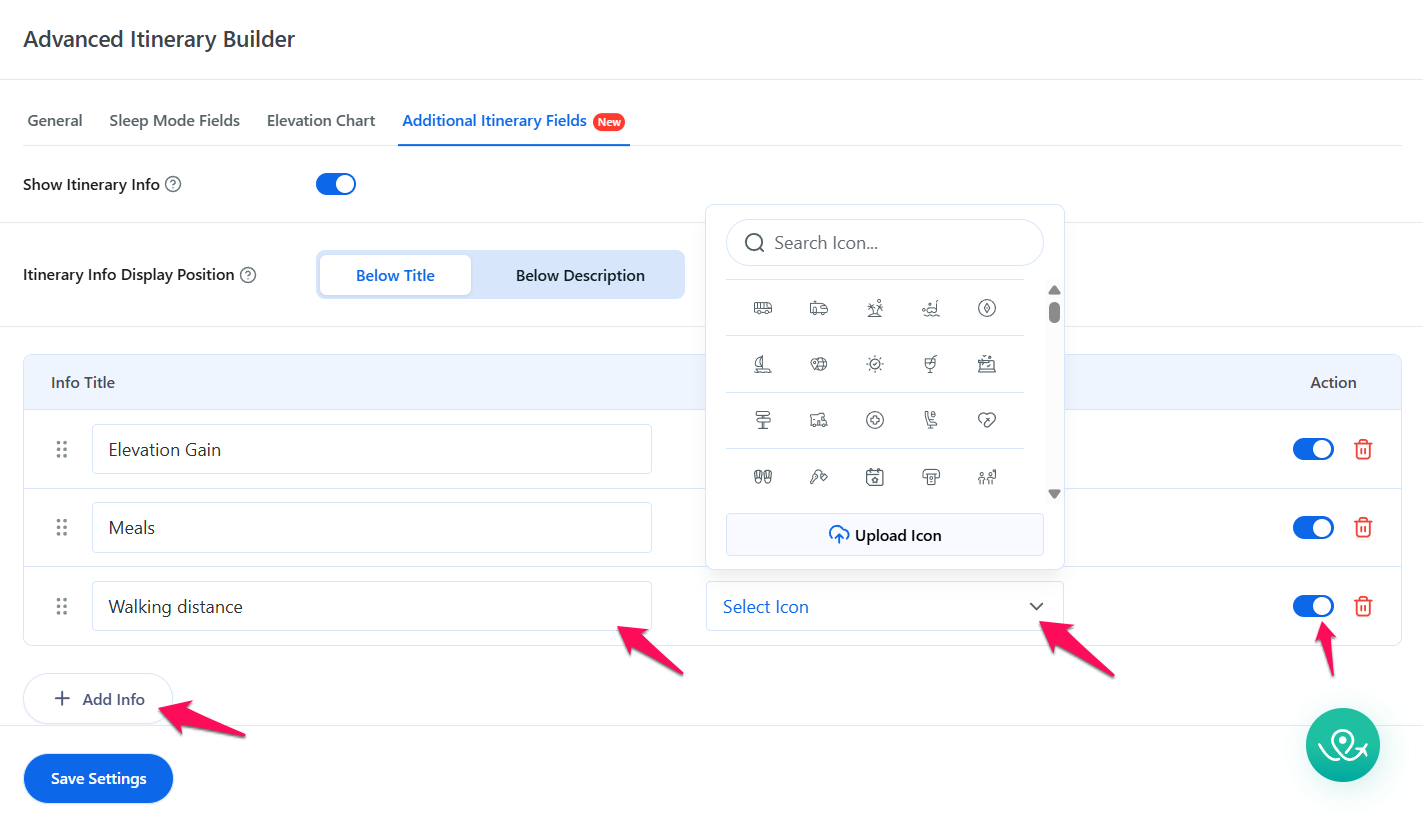
- Add New Info:
- Click the Add Info button to add a new itinerary info field.
- Enter the field Name and select or upload an Icon.
- Use the toggle to enable or disable visibility and the Delete icon to remove a field.
- Drag and drop fields to reorder them as desired. The order can only be set in the global settings, and this arrangement will be reflected in the single trip settings and on the frontend.
Expected Result:
When enabled, the Additional Itinerary Info fields appear for each day on all trip pages. They display in the order set in the global settings, showing their names and icons. Only enabled fields with values entered will be visible, and any changes made to the field setup are instantly reflected in single trip settings and on the frontend.
Advanced Itinerary Builder Trip-Specific Settings #
These settings are configured individually for each trip.
Since the trip page already includes a default itinerary builder with title and description fields, the Advanced Itinerary Builder add-on, when enabled, will display additional fields alongside those existing details.
Each new day includes configurable fields such as Itinerary Title, Days Label, Duration, and other itinerary details that help you structure daily activities clearly.
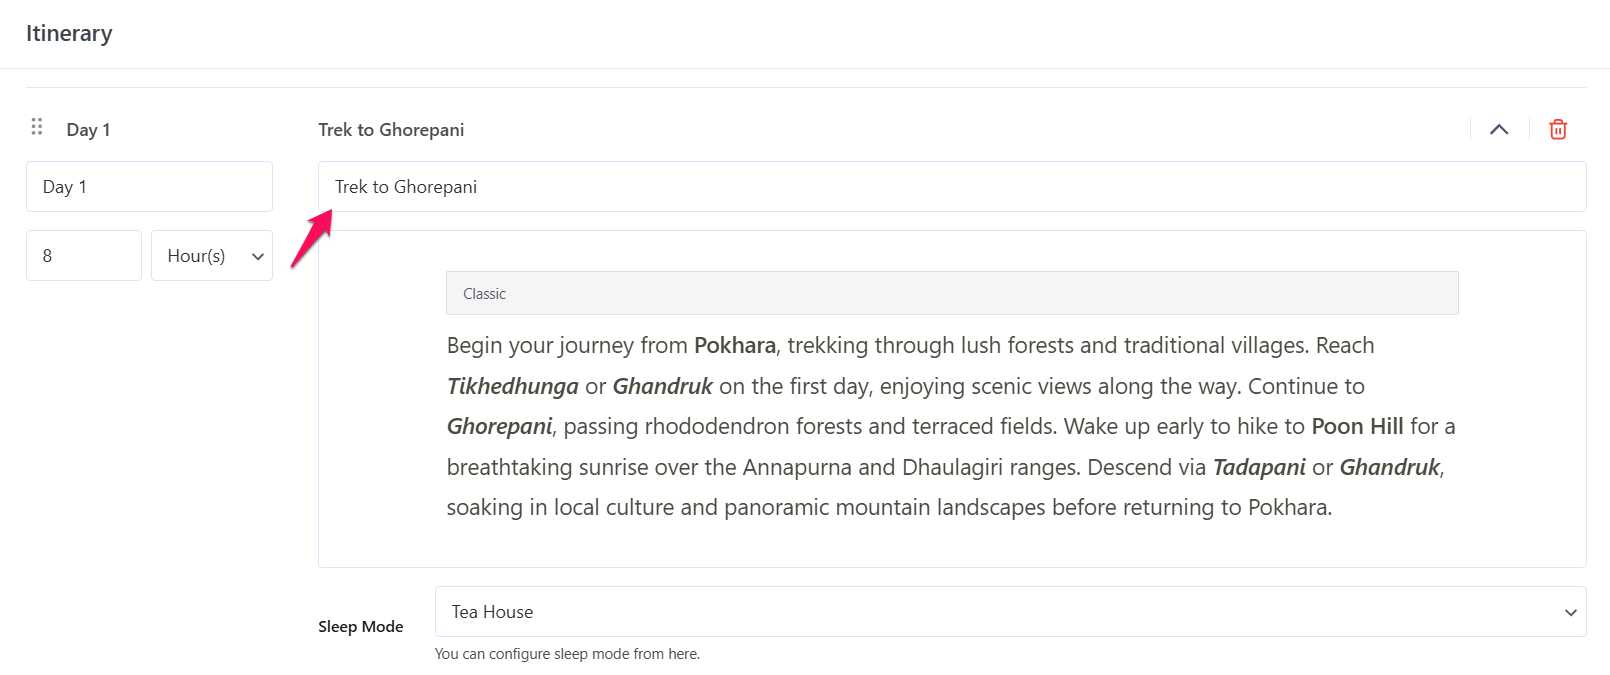
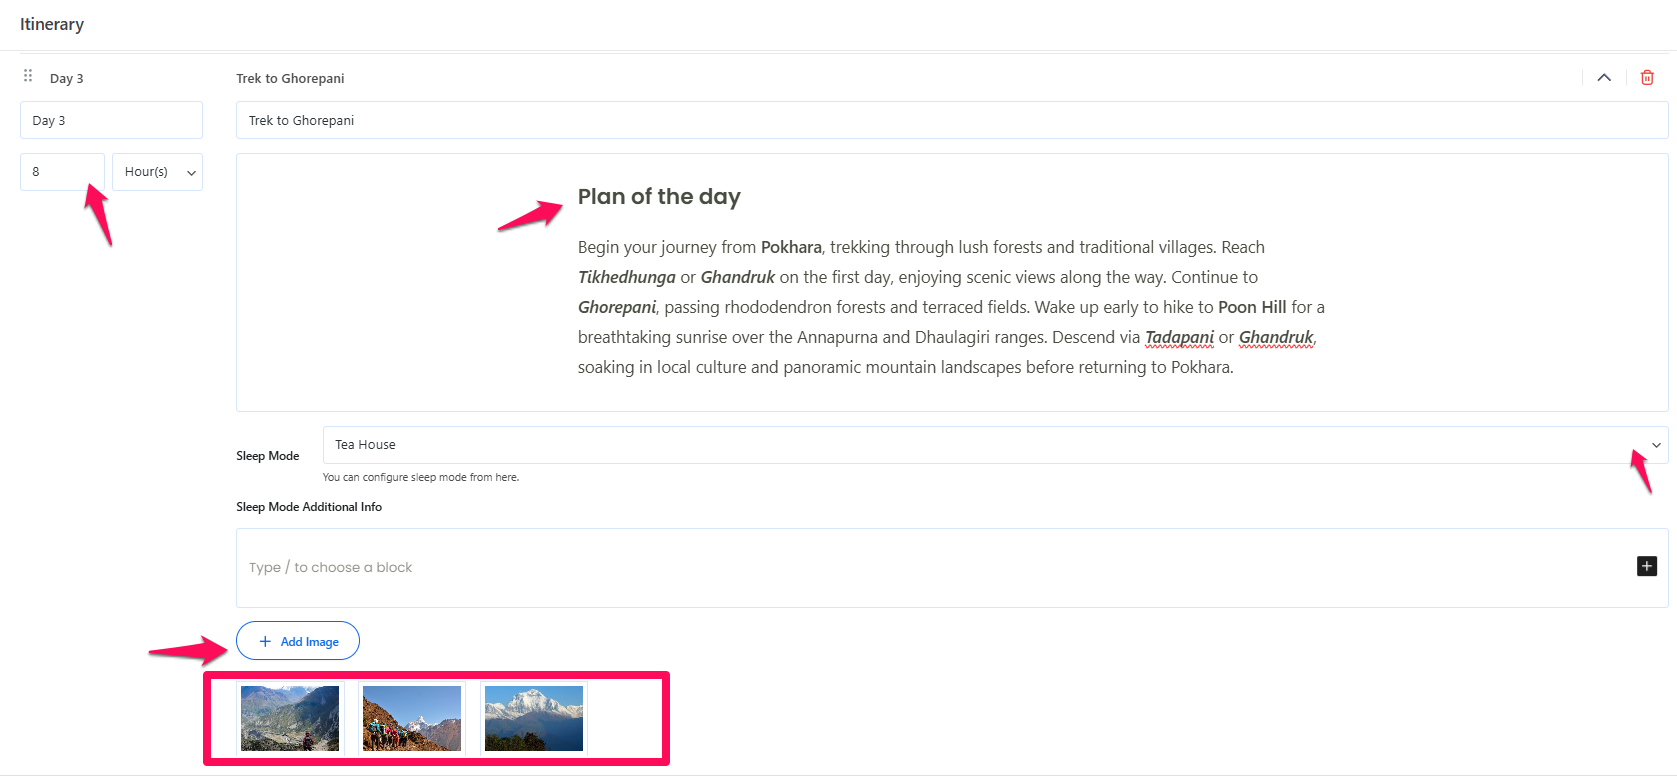
Itinerary Title #
Enter a clear and descriptive title for the day, such as “Trek to Ghorepani.” This will appear as the main heading for that day on the trip page, helping travelers quickly identify each section of the journey.
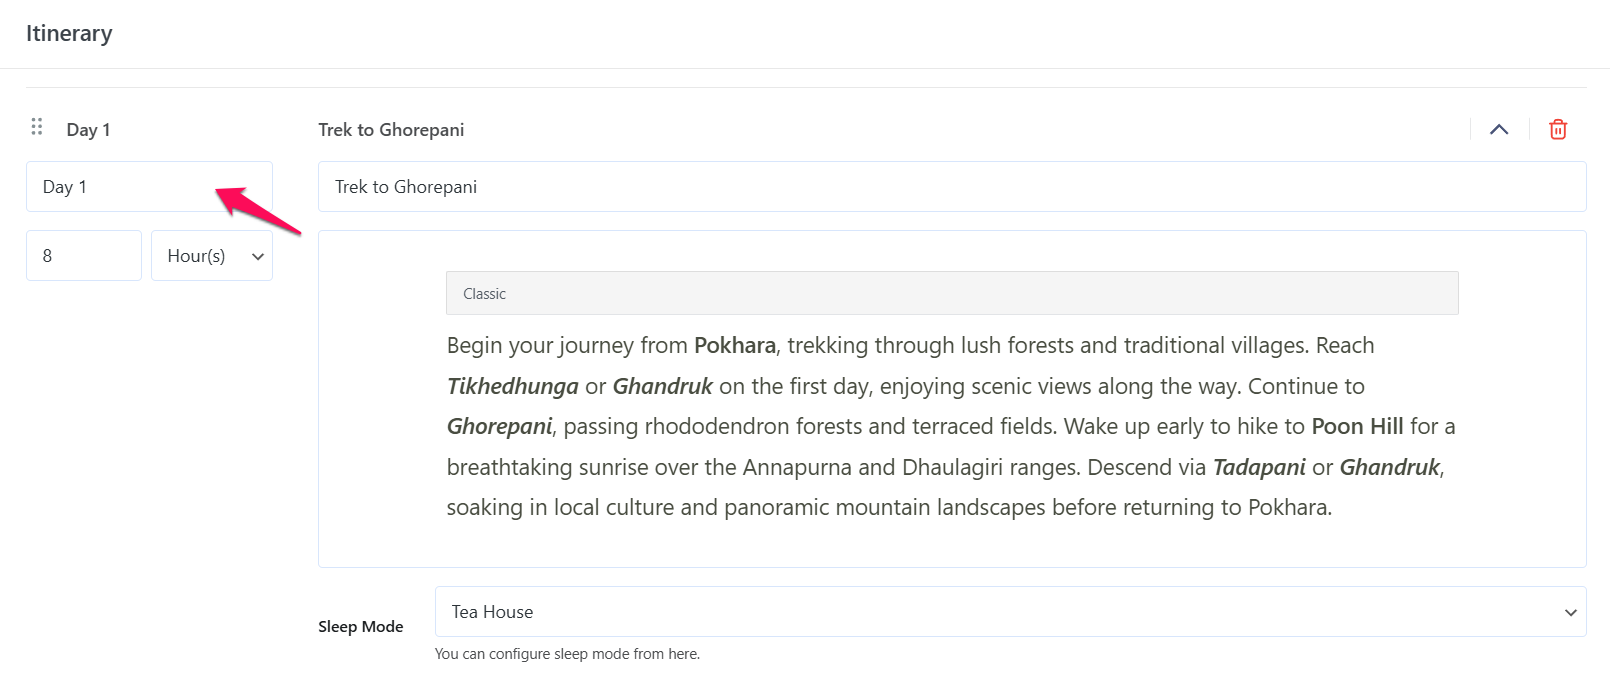
Days Label #
Customize the label for the day (default: Day 1, Day 2). You can also use custom names for flexibility, such as Optional Day or Rest Day, to better describe the itinerary flow.
Duration #
Specify how long the day’s activity will take by entering a duration value and selecting the appropriate unit, Hour(s) for trekking or walking time, or Minute(s) for shorter activities. For example, entering 8 Hour(s) indicates a 8-hour trek.
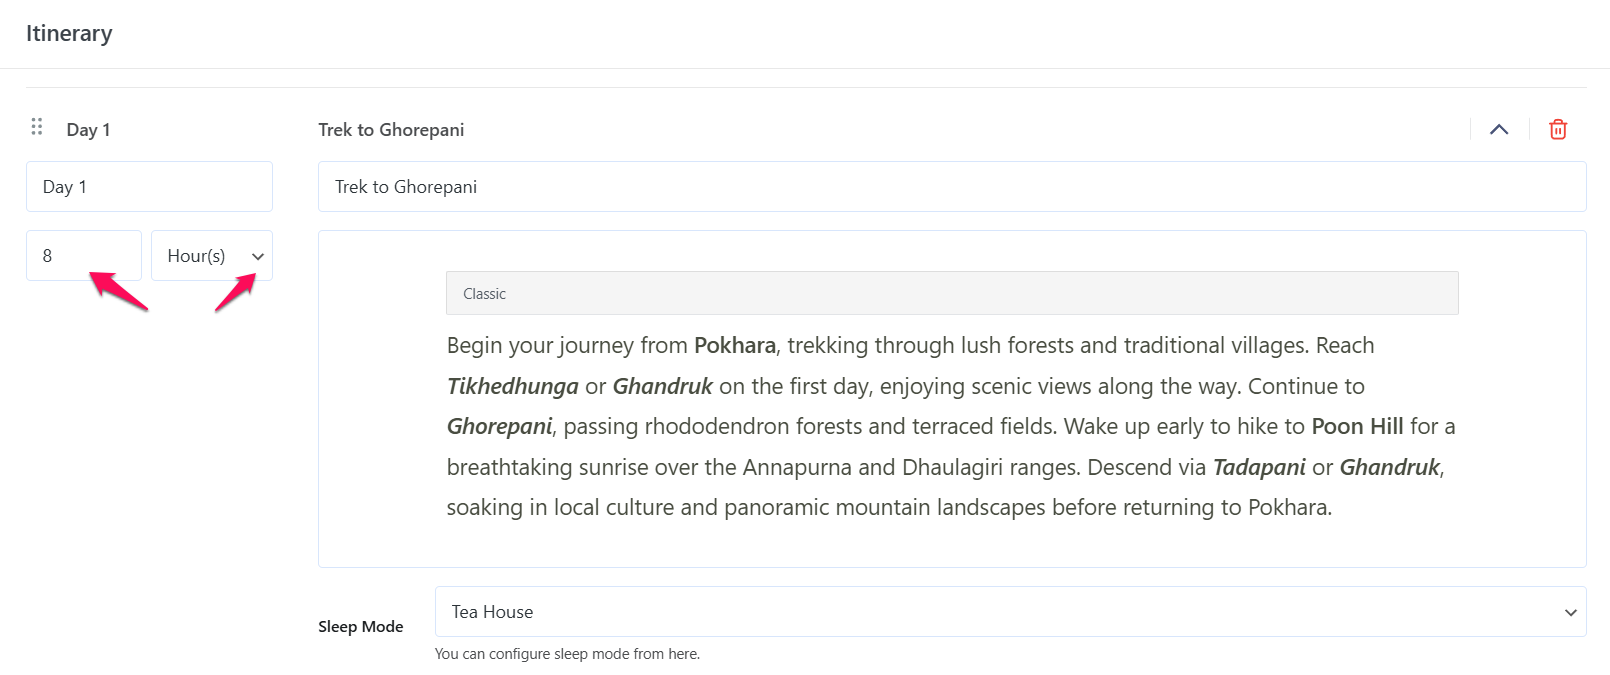
Itinerary Content #
Use the rich text editor to write detailed descriptions for each day. You can include route details, landmarks, activities, and safety information, along with formatted content like bold text, lists, or links for better readability.

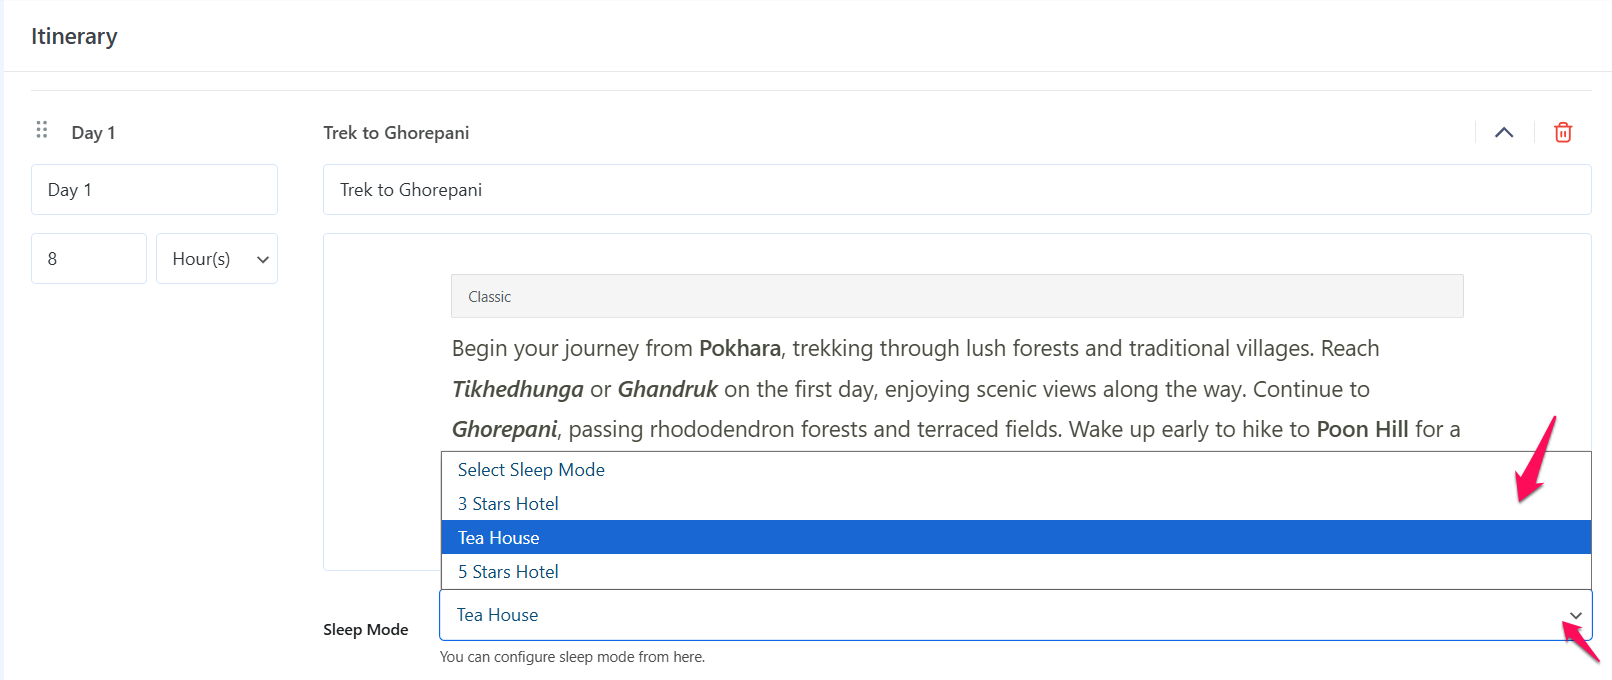
Sleep Mode #
Choose the type of accommodation for that day from the dropdown list. These options are managed under WP Travel Engine → Settings → Extensions → Advanced Itinerary Builder → Sleep Mode Fields. If you don’t see any options, you’ll need to add them first in the global settings.
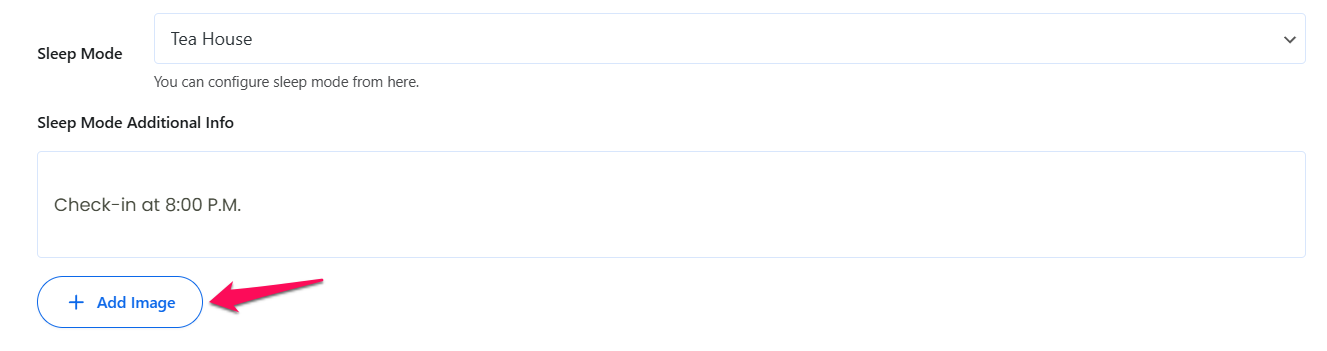
Sleep Mode Additional Info #
Add more details about the selected accommodation, such as hotel name, amenities, check-in times, or contact details. This information appears on the frontend when travelers click the info icon next to the sleep mode.

Add Image #
Attach one or more images for the day by clicking the Add Image button. Images appear as a gallery for that itinerary day. To replace or delete an image, hover over it and use the respective buttons. For best results, use high-quality landscape images of at least 1200×800 pixels.
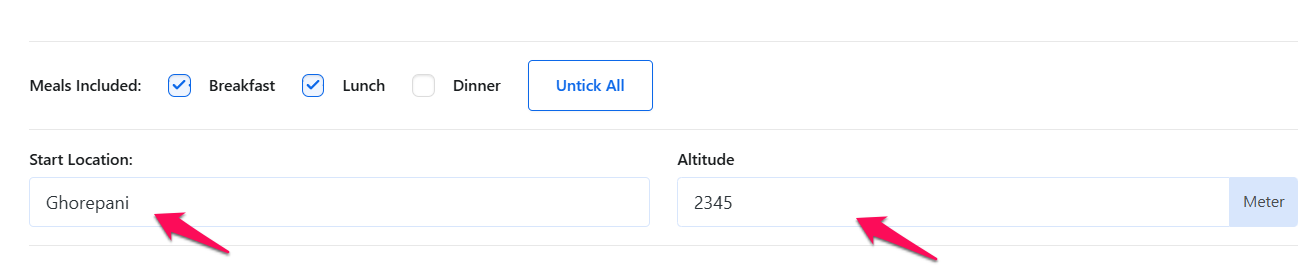
Meals Included #
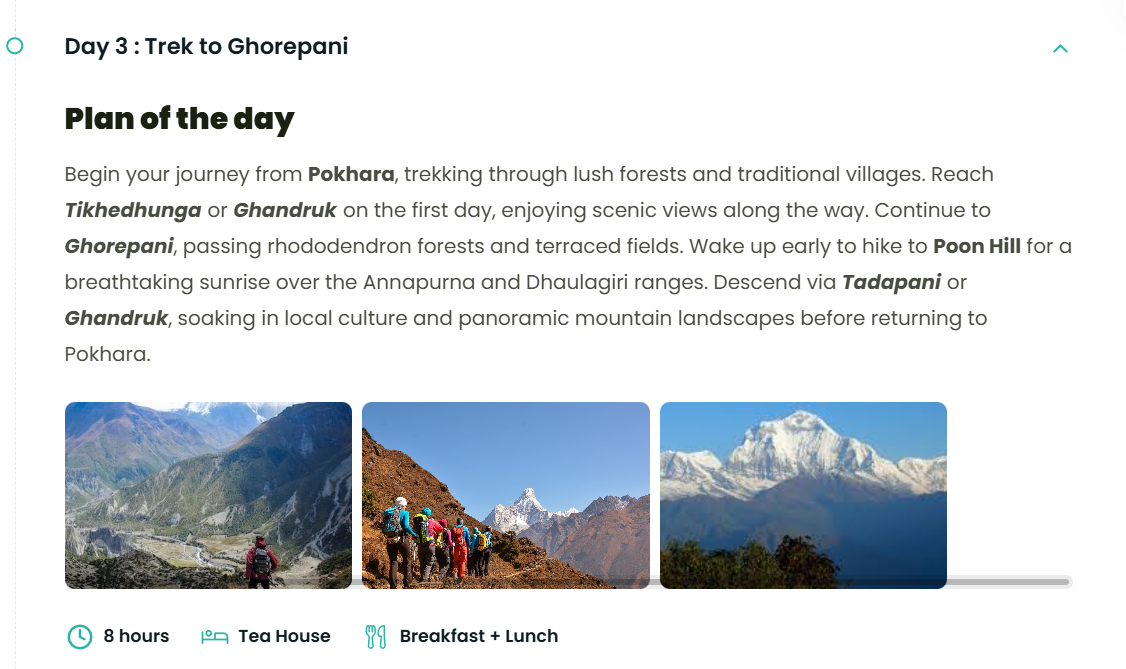
Select the meals provided for this day by checking the boxes for Breakfast, Lunch, and Dinner. You can also click Tick All or Untick All to select or deselect all three options at once. On the frontend, meal icons will be displayed along with their names, for example, Breakfast + Lunch .
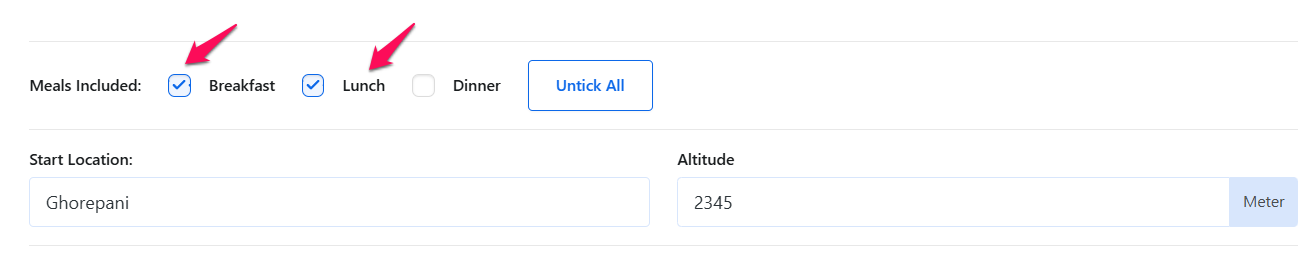
Start Location and Altitude #
This section includes two fields used for the altitude chart data: Start Location and Altitude.
In the Start Location field, enter the starting point or location for that day.
In the Altitude field, enter the elevation value using the same unit you’ve configured in your global settings (for example, 3440 for 3440 meters).
The altitude chart will only appear if both the Location and Altitude fields are filled for at least two days.
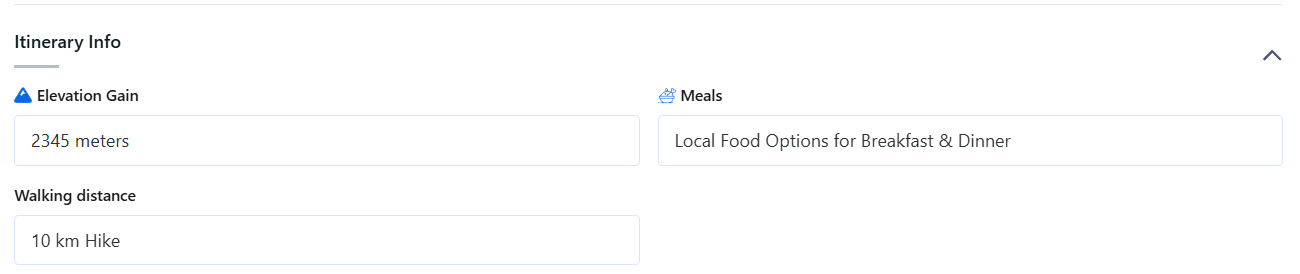
Itinerary Info #
This section displays all the itinerary info fields that were configured and enabled in the global settings. Enter the value for each field as needed, for example, 10 km Hike for Walking Distance. If a field does not apply for a particular day, you can leave it blank, and it will not be shown on the frontend.
Frontend Preview #
Use Cases #
Use Case 1: Multi-Day Tours with Varied Meal Plans #
Situation: You offer a 3-day tour where meal inclusion varies by locations.
Implementation:
- For day 1: Include Lunch + Dinner
- For day 2: Include Breakfast
- For day 3: Include all meals
Tip: In Sleep Mode Additional Info, add restaurant recommendations for days with fewer included meals.
Benefit: Travelers can budget accurately for meals and plan accordingly.

Use Case 2: Trips with Rich Multimedia Itineraries #
Situation: You run trekking tours where visual storytelling is important.
Implementation:
- Add 2-3 high-quality images per day.
- Use Rich Editor to format content with:
- Headings for different activities
- Bold text for important notes
- Set accurate durations for each activity block
- Use Sleep Mode to show heritage hotels vs. modern hotels
Benefit: Educational travelers get a comprehensive preview of the cultural immersion, increasing booking confidence.
Troubleshooting #
Problem: Elevation chart not visible
- Ensure both Start Location and Altitude fields are filled for at least two days.
Problem: Additional Itinerary Info fields not appearing
- Verify that Enable Itinerary Info is toggled on in the Additional Itinerary Fields global settings.
- Make sure the info values are entered for the specific trip days.
Problem: Meals not displaying for an individual day
- Confirm that the meals are selected for the corresponding day in the single trip settings.
FAQ #
Can I create different sleep modes for different trips?
No. Sleep modes are global settings that apply to all trips. However, you can:
- Create a comprehensive list of all accommodation types you use
- Select different ones for each trip
- Not all sleep modes need to be used on every trip
Example: Create “Hotel”, “Lodge”, “Tent”, “Guesthouse”, “Homestay”, “Camping” globally, then use only “Hotel” and “Guesthouse” for city tours, and “Lodge” and “Tent” for treks.
Can I reorder itinerary days after creating them?
Yes, you can reorder itinerary days. To do so, simply click and drag each day to the desired position in the itinerary.
Can I customize the chart colors for different trips?
No. Chart colors are global and apply to all trips. However, you can set a brand color and a background image that works well across all your trips.