The Trip Reviews feature allows travellers to share their real experiences after completing a trip. These reviews appear directly on your trip pages, giving future travellers honest feedback about the trip, service quality, guides, and overall experience.
For trip operators, trip reviews act as powerful social proof. When potential customers see genuine reviews from past travellers, it builds trust and confidence in your brand. Reviews help visitors feel reassured that your trip delivers what it promises, which often leads to higher bookings and fewer pre-booking doubts.
Prerequisites #
Before setting up the Trip Review Add-on with WP Travel Engine, make sure you have the following:
- A WordPress website with the premium version of the WP Travel Engine plugin installed and configured.
- The Trip Review Add-on is installed and the license key is activated.
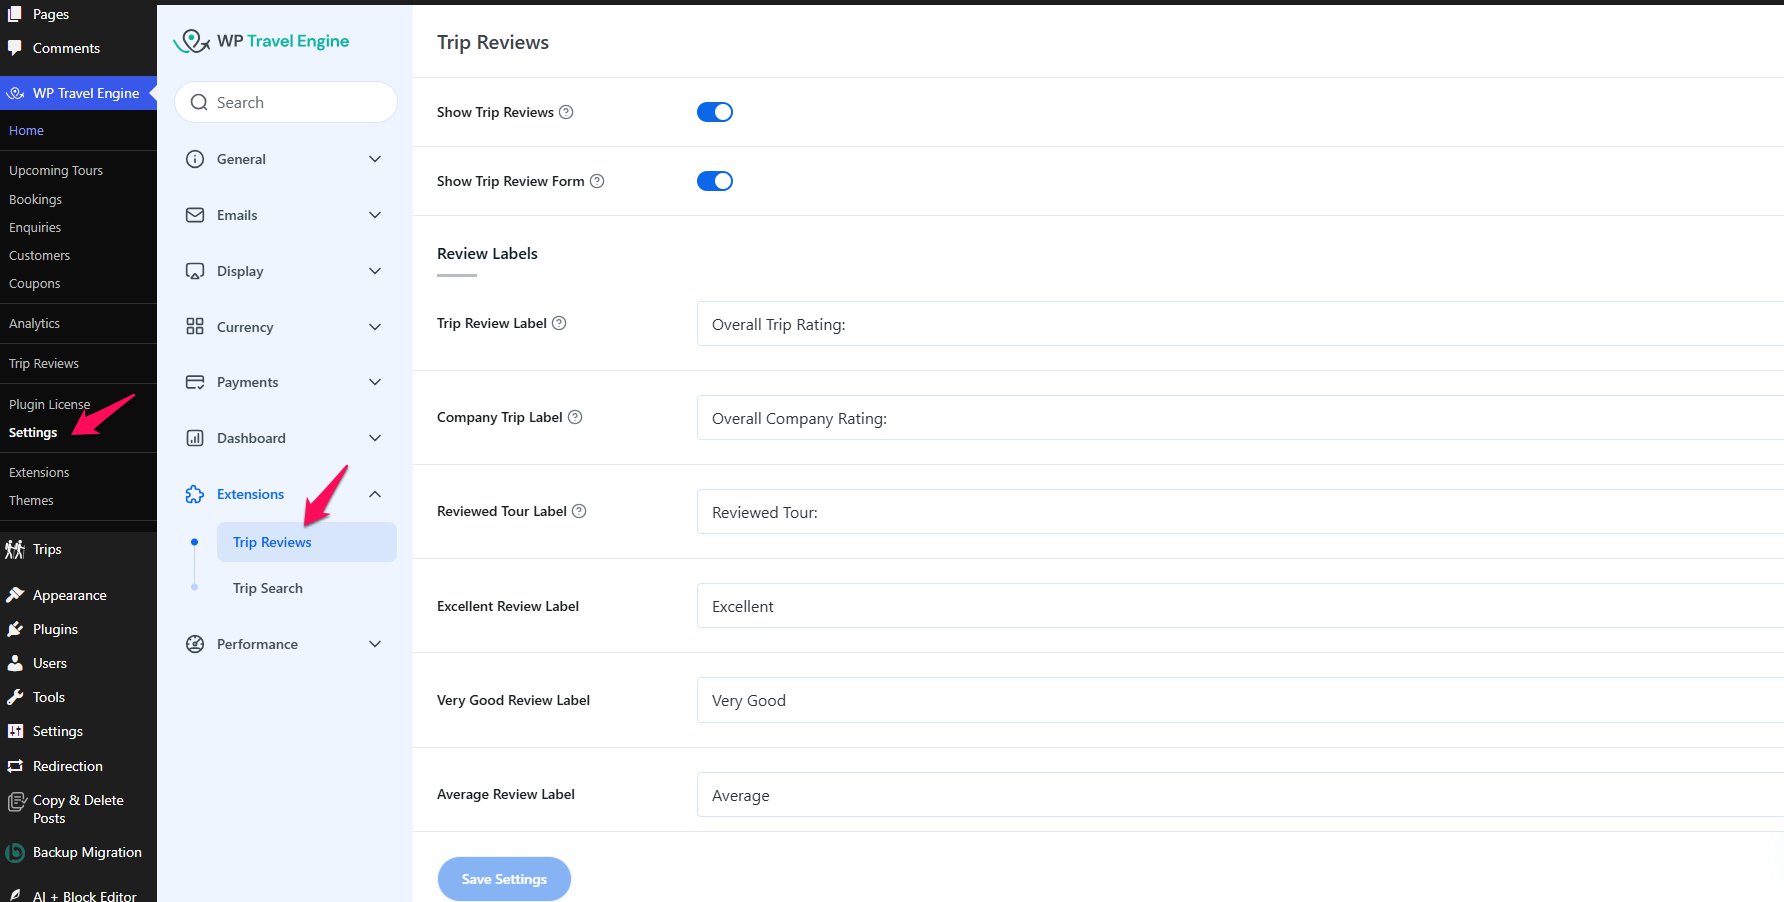
Configuring Global Settings #
To configure the global settings for Trip Reviews, navigate to WP Travel Engine >Settings> Extensions> Trip Reviews.
Hide Trip Reviews: Enable the switch to hide the whole trip reviews section on your trip page.
Hide Trip Review Form: Enable the switch to hide the trip review form section on your trip page.
Review Labels
Scroll down, and you’ll see the different field descriptions where you can input your custom labels for each category in the provided boxes.
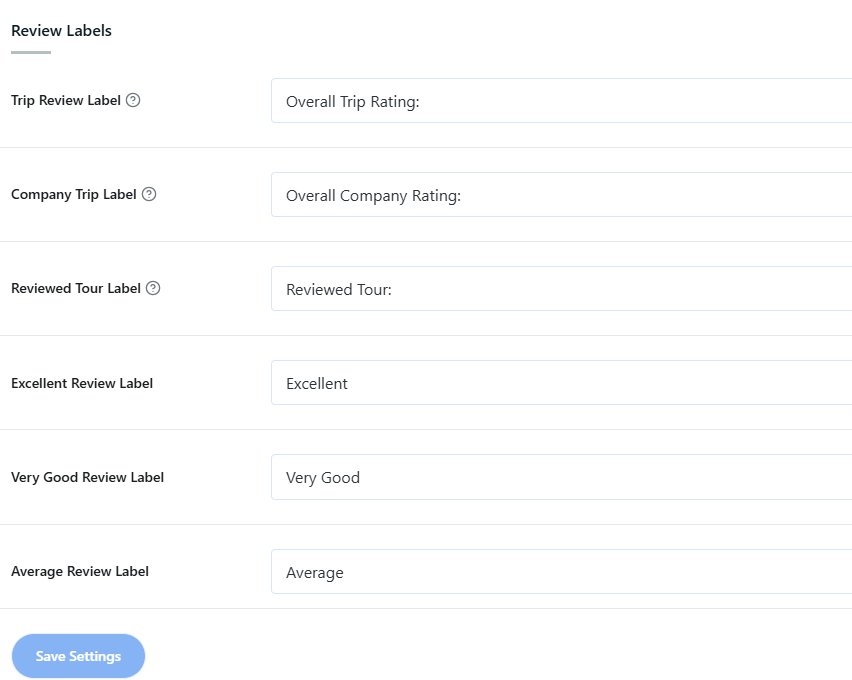
Fields descriptions available in the Global Setting are as below:
- Trip Review Label
- Company Trip Label
- Reviewed Tour Label
- Excellent Review Label
- Very Good Review Label
- Average Review Label
- Poor Review Label
- Terrible Review Label
Emoticons Setting
- Show Trip Review Emoticons: If checked, emoticons will be shown for the average review and overall overage review section.

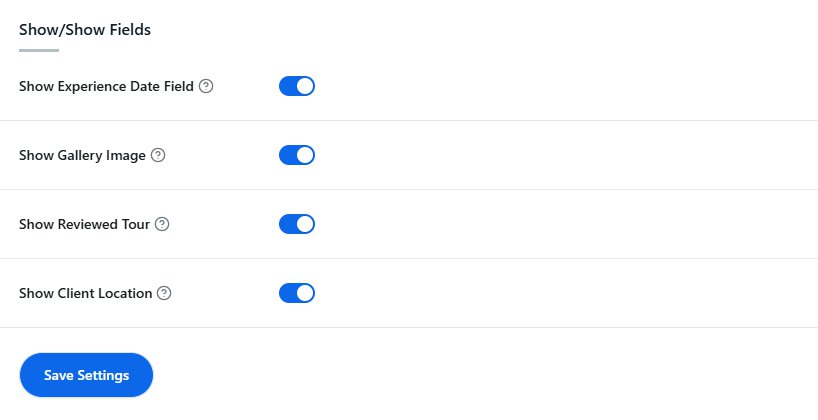
Show or Hide fields
- Hide Experience Date Field: If checked, the Experience Date field will be hidden from the form and won’t be shown in the review section.
- Hide Gallery Image: If checked, the Gallery Image field will be hidden from the form and won’t be shown in the review section.
- Hide Reviewed Tour: If checked, the Reviewed Tour Link won’t be shown in the review section.
- Hide Client Location: If checked, the Client Location field will be hidden from the form and won’t be shown in the review section.
At last, click on Save and Continue to ensure all changes are saved.
Adding Reviews Manually by Admin #
As an admin, you have the ability to directly add reviews for individual trips within the WordPress dashboard. Here’s how:
- Navigate to WP Travel Engine > Trip Reviews > Trip Review Form.
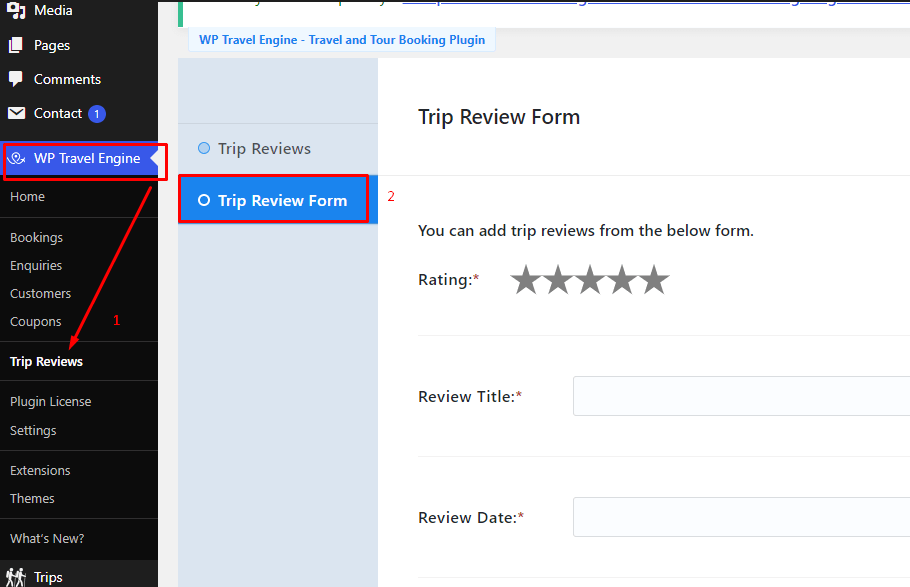
- Fill out the provided fields with the desired review details, including title, Date, Star ratings, review content and any other relevant information.
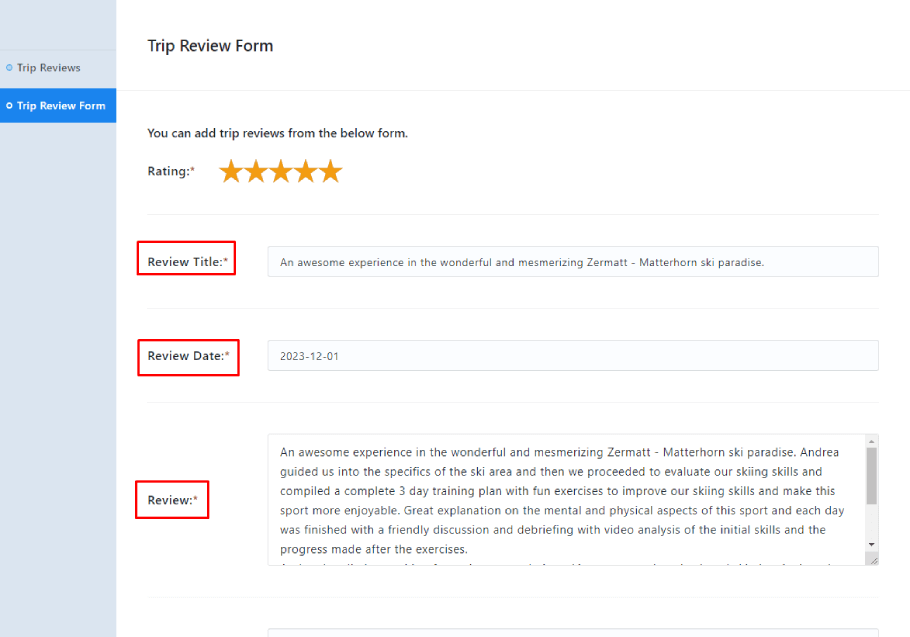
- Click on the Add Review button to publish the review.
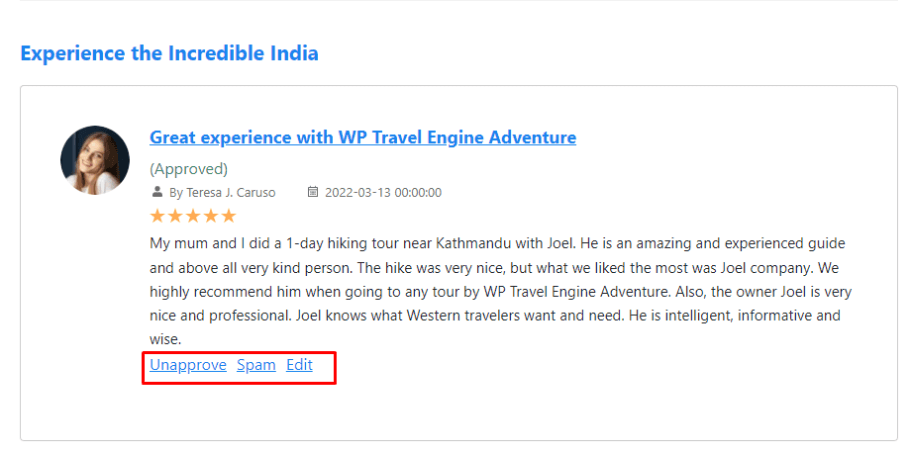
Approving Trip Reviews #
When your customers submit reviews on individual trip pages, you’ll need to manually approve them before they appear in the Review tab. This allows you to maintain the quality and integrity of your reviews.
To manage these reviews:
- Go to WP Travel Engine > Trip Reviews > Trip Reviews
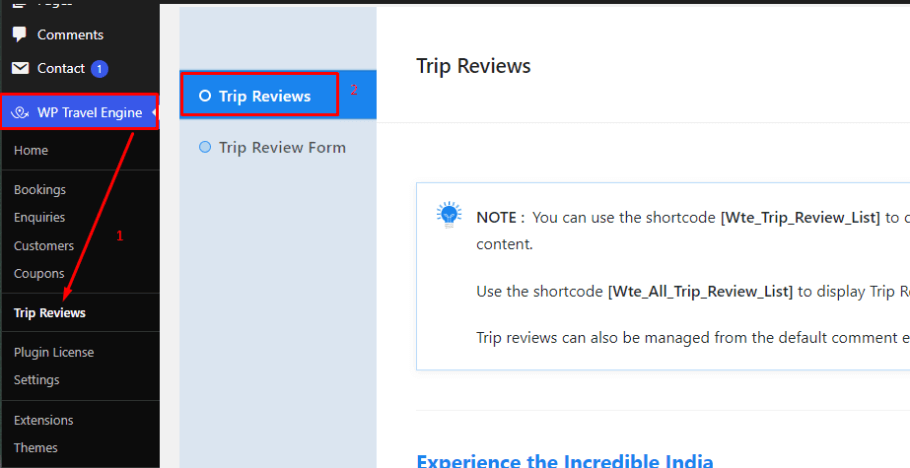
- Use the available options to:
- Approve reviews to make them publicly visible.
- Unapprove reviews if they require further editing or violate guidelines.
- Mark as Spam to remove malicious or irrelevant reviews.
- Edit reviews directly before approving them (optional).
How Will it Look on the Trip Page? #
After approval, all the reviews will appear in the Review tab. Trip Reviews calculates the average ratings for a trip based on the total number of reviews.

Feel free to contact our support team for any other assistance.