Trips Embedder lets you quickly add/embed selected trips in between your blog posts and website pages content area, right from the WordPress WYSIWYG content editor.
With the addon, you can easily display the details of your trip in grid or list format right in between posts or page contents, giving your readers easier access to related trip details.
Trips Embedder addon requires WP Travel Engine plugin v. 2.2.4 or later installed and activated on your website.
Installation #
UPLOADING IN WORDPRESS DASHBOARD
- Navigate to the ‘Add New’ in the plugins dashboard
- Navigate to the ‘Upload’ area
- Select wp-travel-engine-trips-embedder.zip from your computer
- Click ‘Install Now’
- Activate the plugin in the Plugin dashboard
USING FTP
- Download wp-travel-engine-trips-embedder.zip
- Extract the wp-travel-engine-trips-embedder directory to your computer
- Upload the wp-travel-engine-trips-embedder directory to the /wp-content/plugins/ directory
- Activate the plugin in the Plugin dashboard
Plugin License #
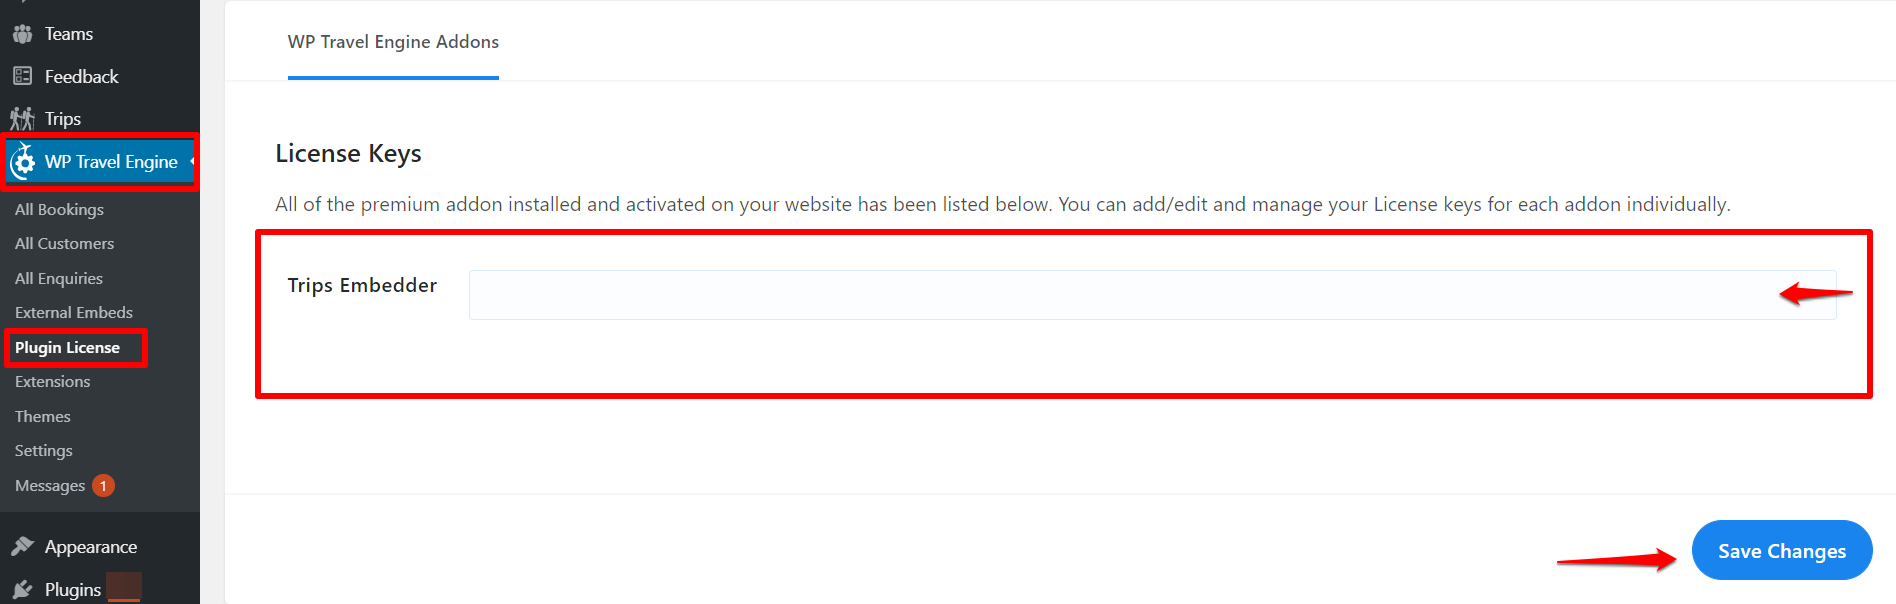
After the activation of WP Travel Trips Embedder addon, site admins will need to add and activate the license key to receive regular updates.
To activate the addon license go to the Admin Dashboard > WP Travel Engine > Plugin License. Enter the license key received during the purchase of addon to the License field for Trips Embedder. After adding the license key, save the key with the “Save Changes” button.
A new “Activate License” button will appear after a page refresh, which should be pressed to activate the license on the site. The activation message will be shown after successful activation.
After successful activation, Trips Embedder addon can be updated from the plugins page normally, whenever a new update is released.
How it works? #
Trips Embedder addon lets you embed trips in a list or grid layout from the WordPress classic editor and Gutenberg editor.
Embedding trips inside blog posts/pages ( Classic Editor ) #
Inserting trips #
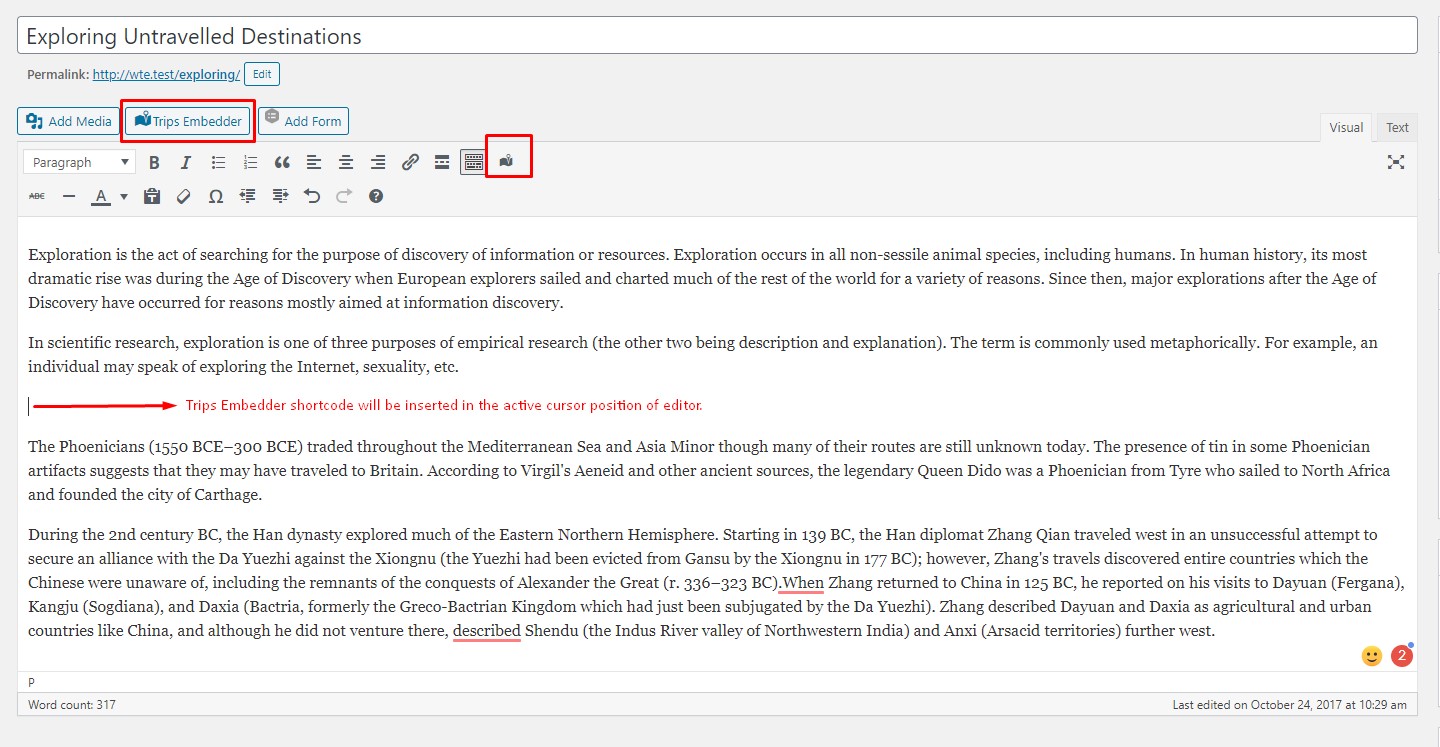
To embed trips inside the blog post while editing in the classic editor, simply click on any of the new trips embedder buttons in the editor. This will open a popup modal with the intuitive user interface to choose your trips.
The popup shows four different tabs to list available Trips, Destinations, Activities, and Trip Types. Trips Embedder will insert embed shortcode based on the selection for each active tab.
Note: As trips, embedder add-on inserts different shortcodes to the content editor for each tab, trips will be shown on the basis of settings/selection in the active tab only at a time.
You can choose multiple trips, destinations, activities and trip types and add to selection for embed.
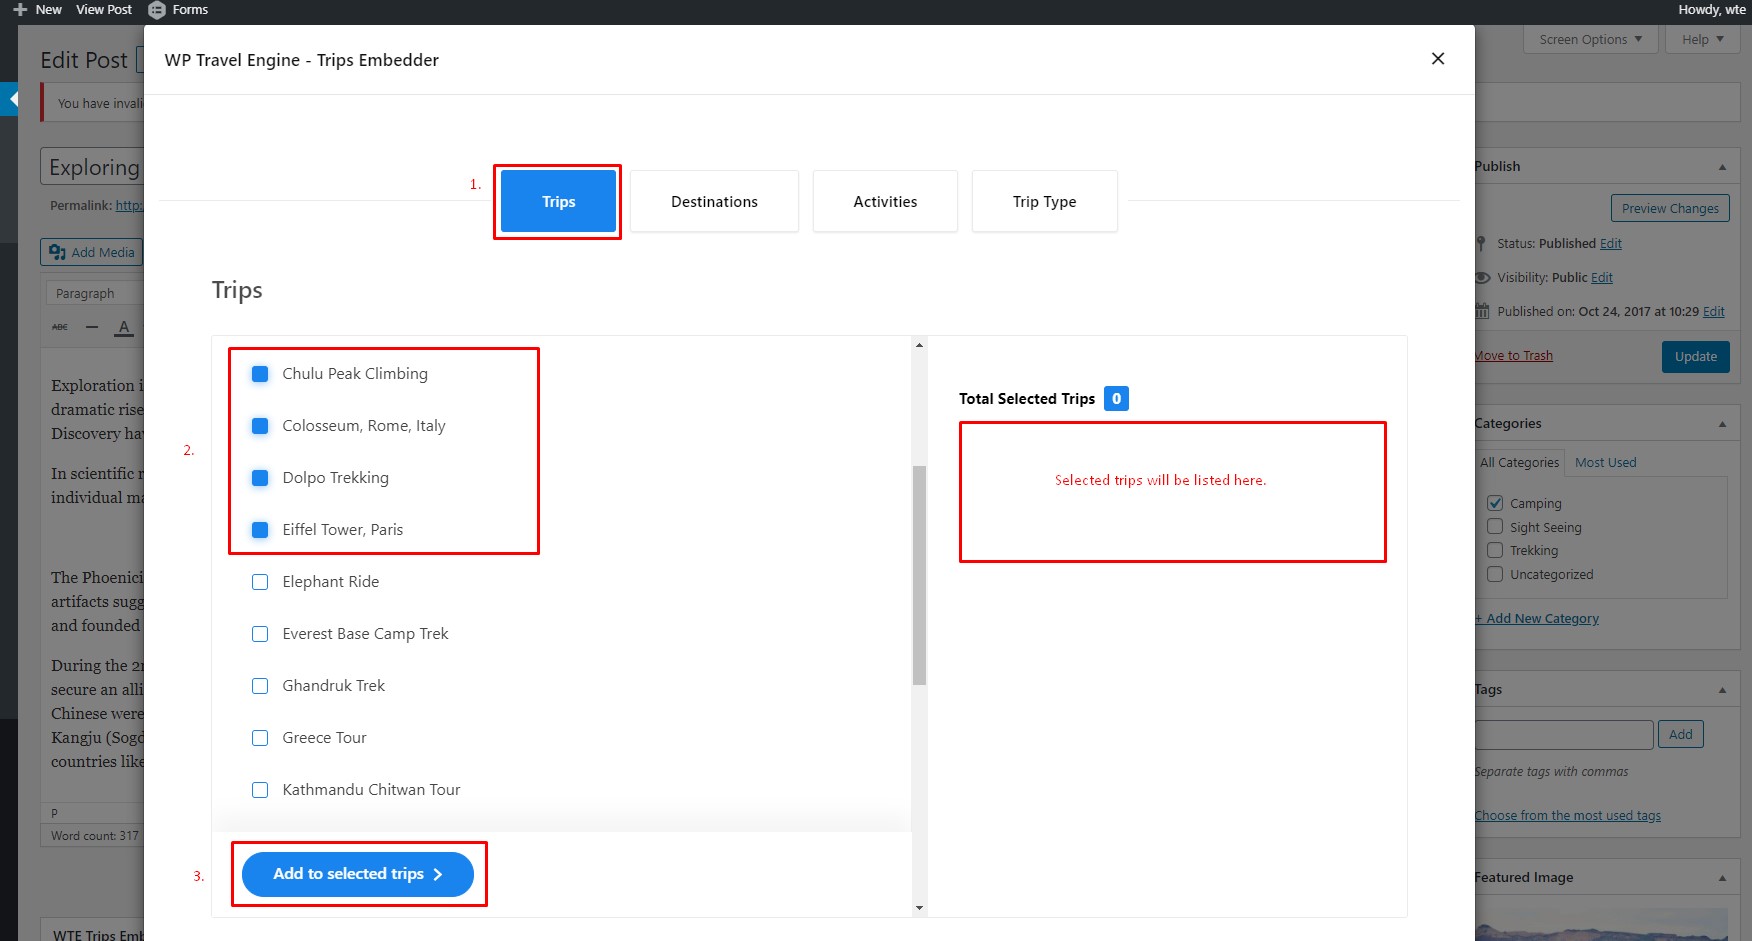
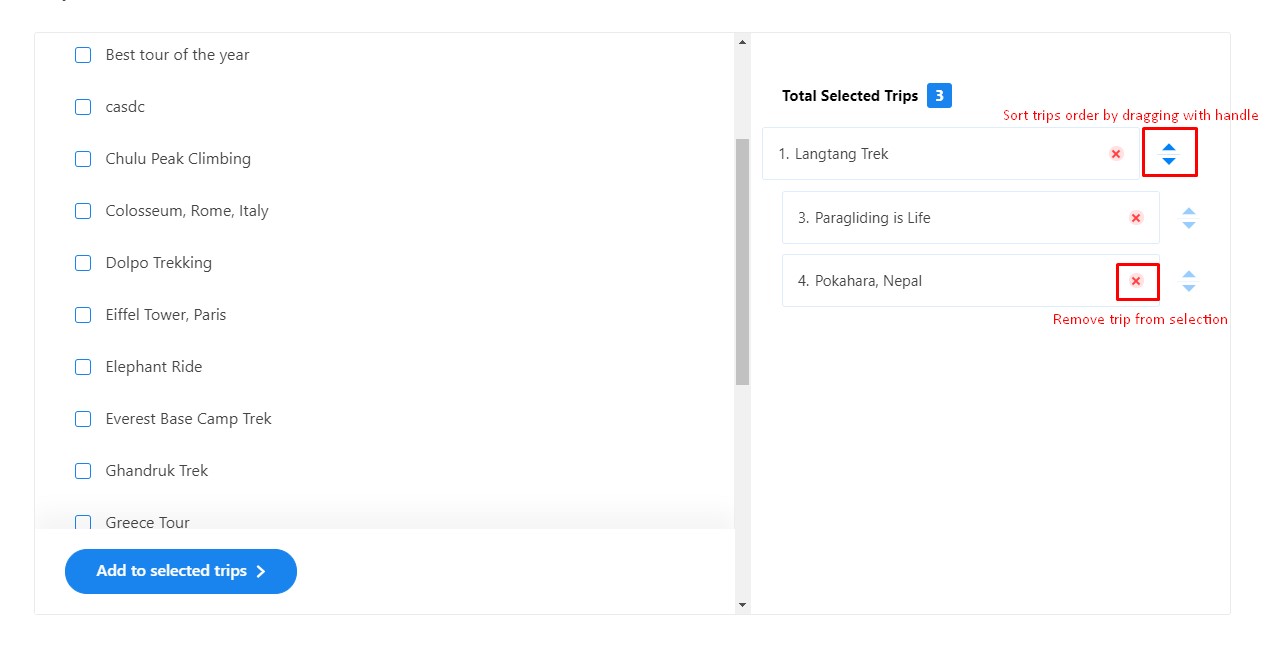
After choosing desired trips to embed, you can add the trips to selection by clicking on the “Add to selected trips” button. This will move selected trips to the selection area.
When selection is done, you can also further drag-sort the trips to reorder or remove the selection by simply clicking on the cross icon beside each title.
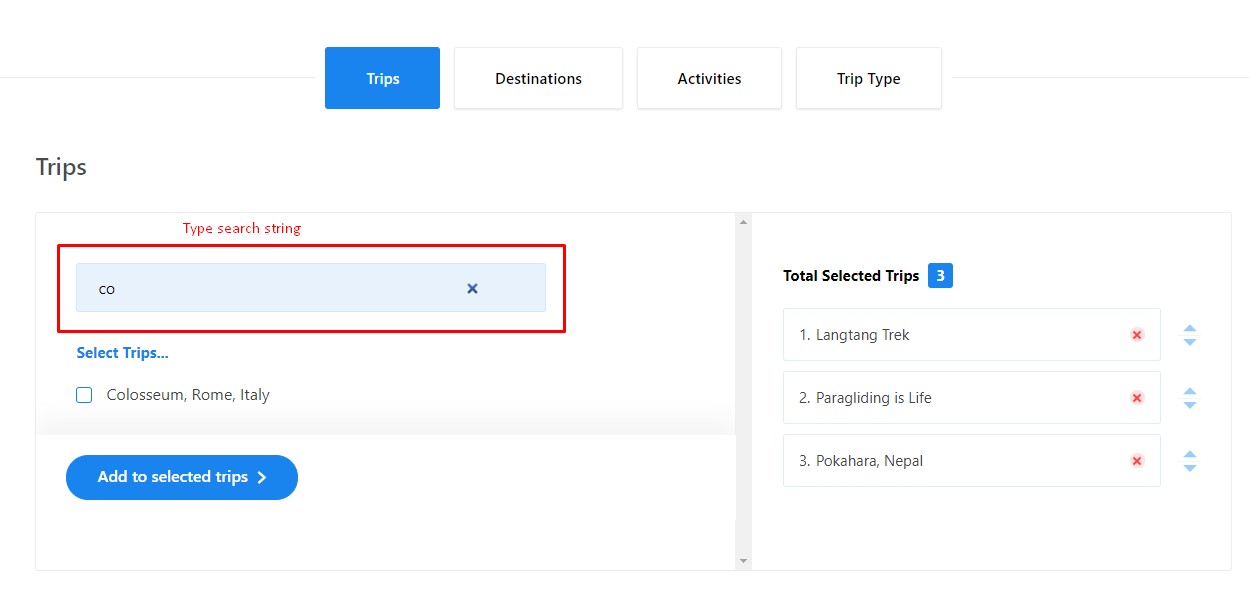
Trips Search #
The selection area in trips embedder popup also provides a search bar that lets you search through titles in the trips lists. The search bar helps you find your desired trips easily to add them to the selection.
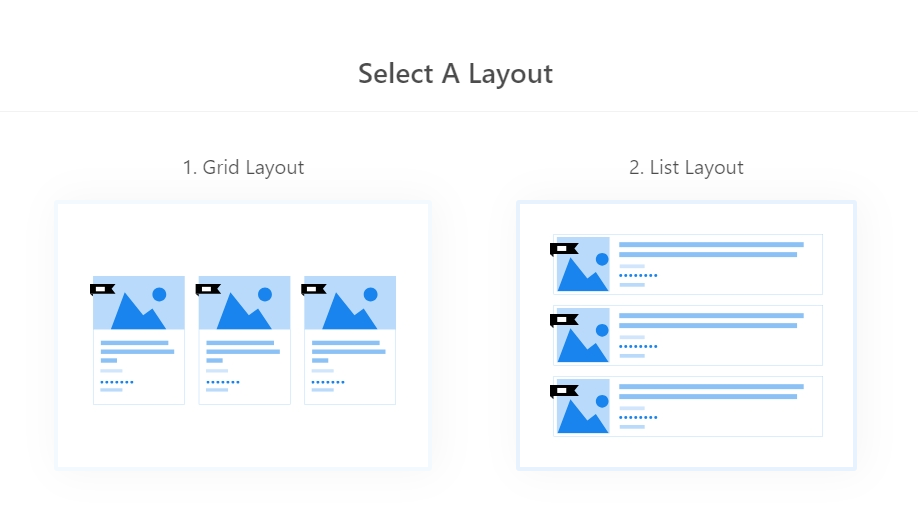
Layout Options #
The trips selection popup modal also consists of layout selection options below the selection area. You can choose to display embedded trips in either grid or list layout as per requirements. By default, the grid layout is selected in the embedder settings.
After trips selection and layout options configuration trips can be inserted with the insert button.
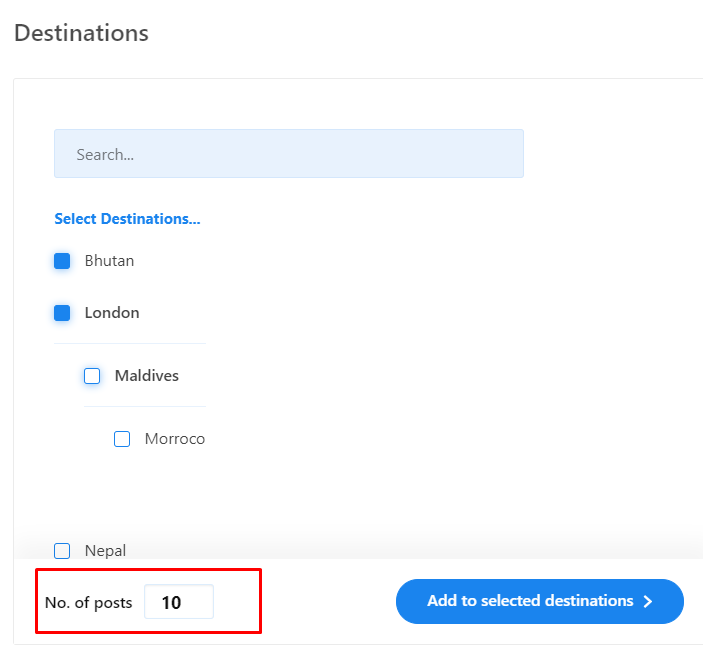
Number of posts #
An additional No. of posts input is available for the taxonomies tabs ( Destinations, activities and trip types ) inside the trips embedder popup modal.
When selecting terms for trips embed, you can define the total no. of posts to show from the selections. The field is blank by default and is optional input. When left blank, the trips count will be based upon the WordPress default “Posts per page” settings.
Embedding trips inside blog posts/pages ( Gutenberg ) #
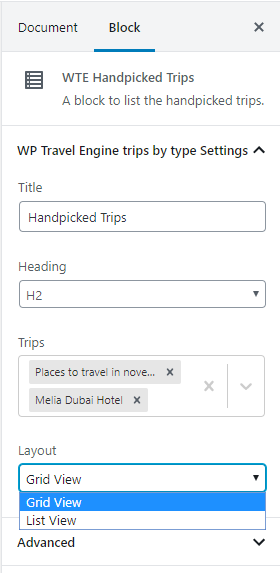
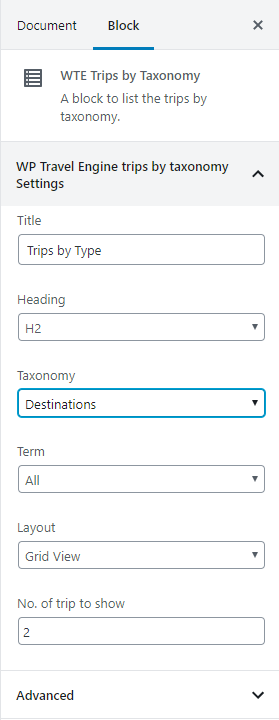
Trips Embedder addon provides two new Gutenberg blocks that let you embed trips in between your blog posts or pages while creating content with the new Gutenberg Editor.
External Embedding trips inside blog posts/pages #
It’s super easy to embed trips from your site into your or your affiliate’s external WordPress site. To embed trips into a post or page, place the given HTML into the content area. Trips Embedder will automatically turn the HTML into an Iframe and provide a live preview of your selected trips in the front end. The external website should not necessarily have WP Travel Engine and its add-ons installed.
The following are the steps to be followed to embeds the trips on the external website.
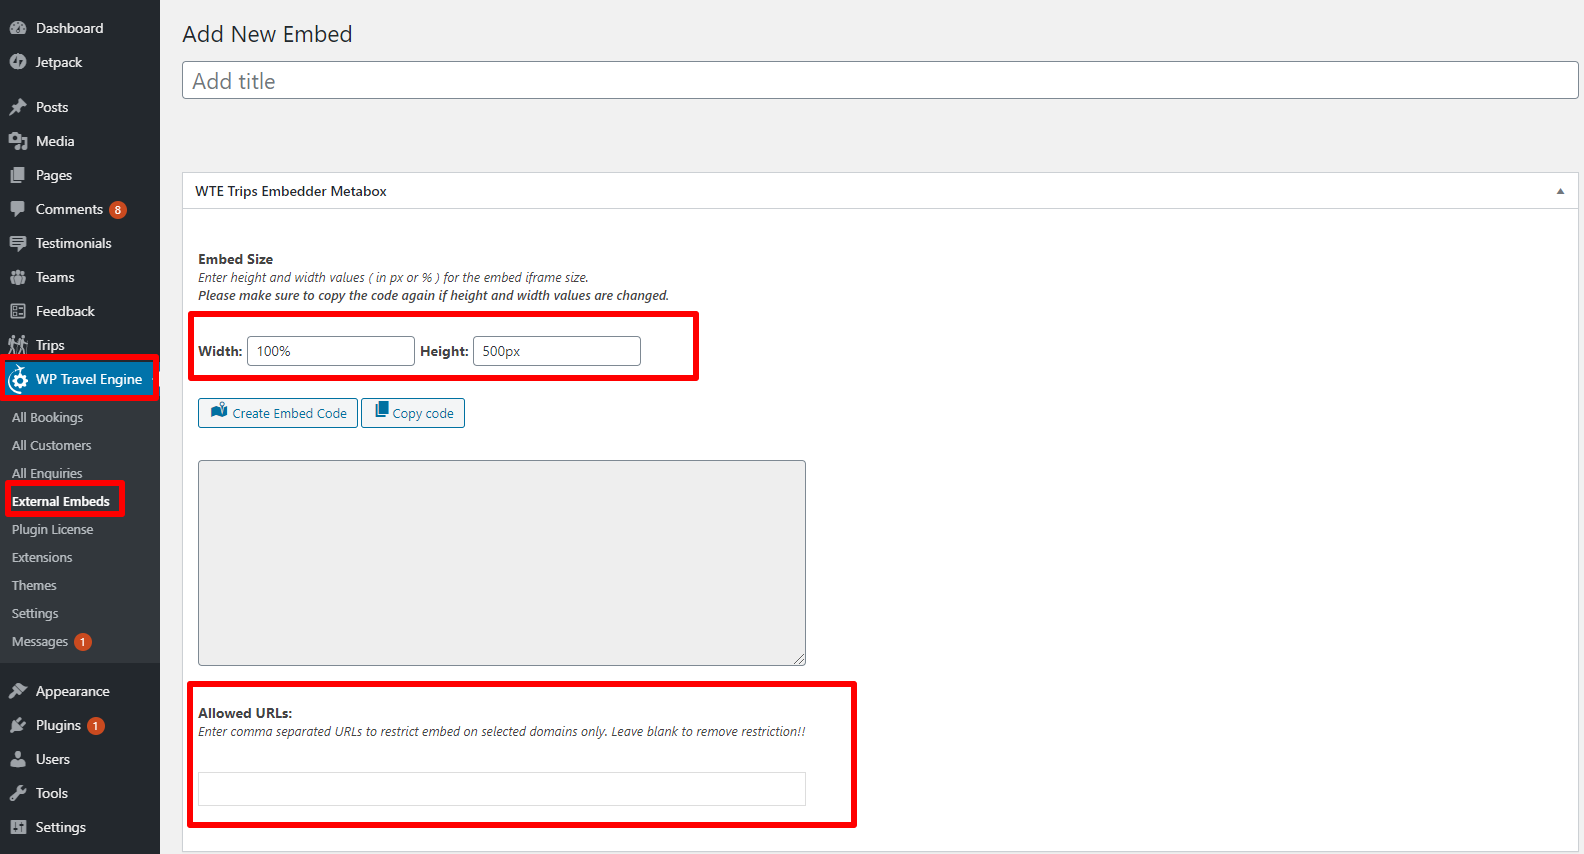
- When Trips Embedder plugin is activated, External Embeds is generated under the WP Travel Engine menu.
You need to click on Add New to create External Trips. There you can write the Title and change the size of the Width and Height of the external trips to be displayed on the posts/pages.
2. To create the Embed Code click on Create Embed Code. You can choose multiple trips, destinations, activities and trip types and add to selection for embed.
 After choosing desired trips to embed, you can add the trips to selection by clicking on the “Add to selected trips” button. This will move selected trips to the selection area.
When selection is done, you can also further drag-sort the trips to reorder or remove the selection by simply clicking on the cross icon beside each title.
Trips Search #
The selection area in trips embedder popup also provides a search bar that lets you search through titles in the trips lists. The search bar helps you find your desired trips easily to add them to the selection.
Layout Options #
The trips selection popup modal also consists of layout selection options below the selection area. You can choose to display embedded trips in either grid or list layout as per requirements. By default, the grid layout is selected in the embedder settings.
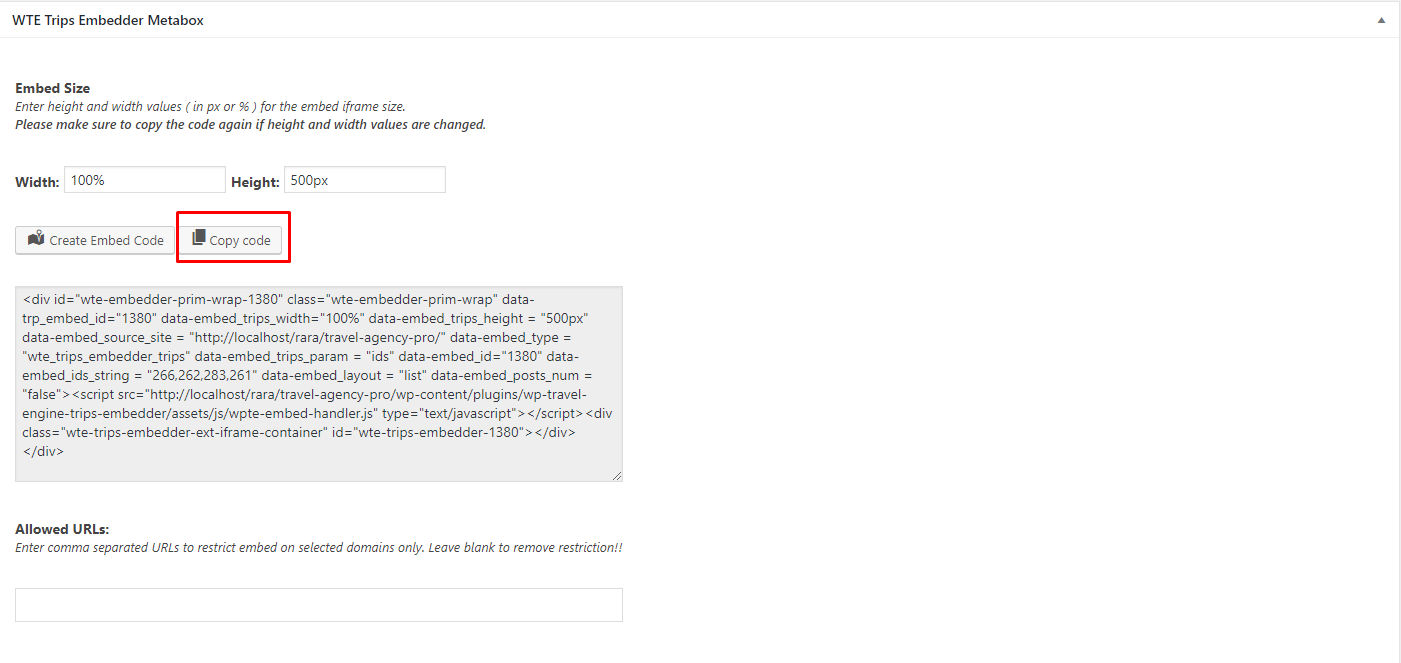
After trips selection and layout options configuration trips to generate embed code.
3. To copy the generated code, click on the Copy Code.
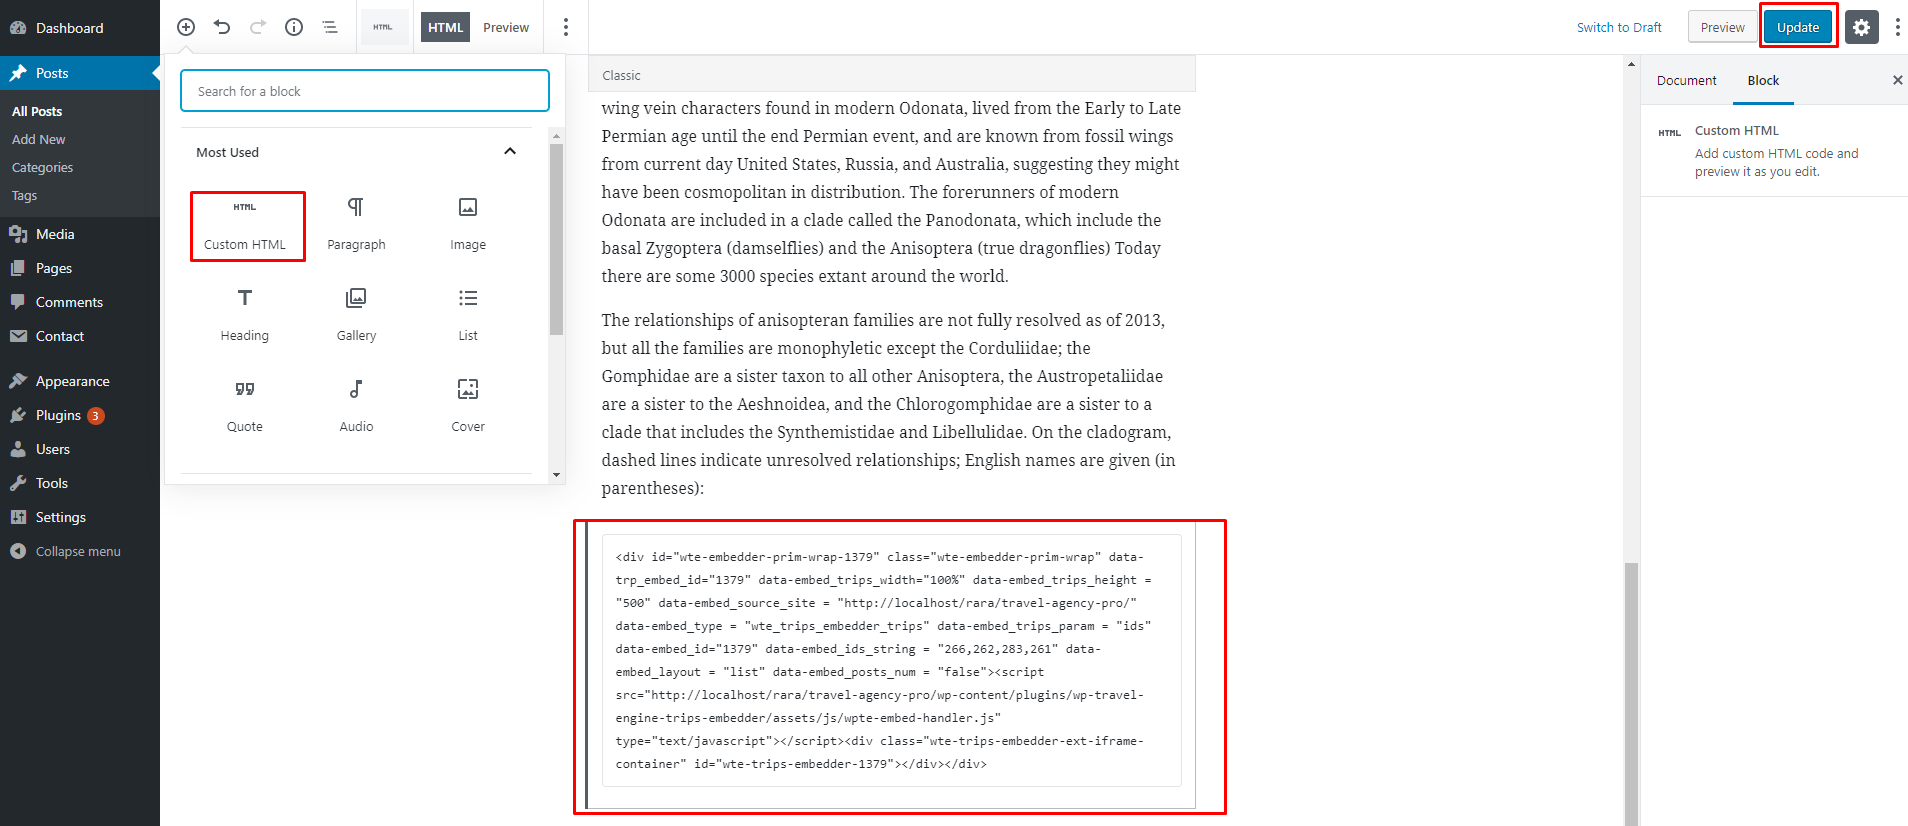
4. When you insert the code in pages/posts, insert the code in Custom HTML and update it.