File Downloads is a custom addon for WP Travel Engine plugin that helps you add downloadable files to the trip individual post.
With the addon, you can easily display the various available files that can be downloaded. Hence, this addon helps you extend the informative presentation of the trip adding transparency and clarity of the information to the user. This addon is also very handy to Tour Operators on conveying required info to users prior to or during the travel.
File Downloads requires WP Travel Engine plugin v-3.0.8 or later installed and activated on your website.
Key Features #
- Attach downloadable files to individual trips
- Display files in a user-friendly layout
- Share essential pre-trip or on-trip documents
- Assign files to specific trips only
- Improve transparency and trip information for users
Prerequisites #
- WordPress version 6.0 or higher
- WP Travel Engine plugin installed and activated
- WP Travel Engine Pro plugin installed and activated
- Partial Payment addon installed and activated
You can follow the video or the steps below to configure the
How to Install the File Download Add-on #
Feature Configuration #
Configure File Downloads Module #
To configure the global settings for File Downloads, go to WP Travel Engine > Settings > Extensions > File Downloads.
- Upload files and set global files from this setting.
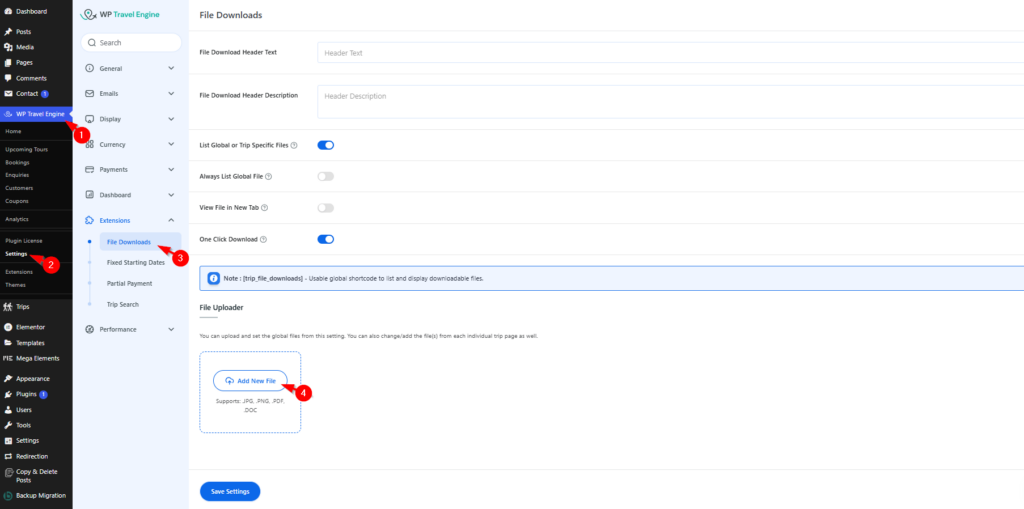
General Setting #
Here, along with the header text& Header Description fields, you will find a variety of options to configure the display of the uploaded files. These include an option to switch to global files if trip specific files aren’t available, another to force show global files at all times, show the files in a new tab if clicked, and an option to allow the one-click download.
- File Download Header Text: You can enter the text which will appear as header for the downloads section to the customer.
- File Download Header Description: This will feature a short description under the header. Use this field to add a description of the files that are available for download — anything from a summary of the information in the files to an attractive like to persuade customers to download the files.
- List Global or Trip Specific Files: If checked, this toggle button allows you to display global files if the plugin cannot find trip specific files. If left unchecked, the plugin only displays trip specific files. If no trip specific files are found, nothing will be displayed.
- Always List Global File: This option allows you to always display the global files. If checked, global files will be displayed first, and then the trip specific files. Files that are repeated across the two lists will be omitted.
View File in New Tab: If checked, the files will be opened in a new tab allowing customers to keep viewing the trip page.
One-Click Download: If checked, the files will be downloaded on click rather than opening in the browser. This option overrides the View File in the New Tab option.
File Uploader #
You can upload your files through the File Uploader, by pressing the Add New File button. The file browser will only display the file types which are compatible with the plugin including Pdf, Doc, Docx, images and text files. Uploaded files are displayed individually along with their filename in the File Uploader.
- Rename Files: You can easily rename uploaded files in the File Uploader, avoiding the hassles of having to re-upload misnamed files.
- Replace Files: In case you have uploaded the wrong file by mistake, the plugin allows you to simply replace that file with the correct one with a replace button.
- Delete Files: You can easily delete uploaded files from the File Uploader.
- Preview: You can quickly view the files you have uploaded. This only works for files like images, text files, and pdf files which can be opened by browsers but not for the Doc, Docx files.
Add Global File: This field is featured on the add/edit page and allows you to manually add specific global files to individu
Set Trip-Specific Files #
File Downloads can also be configured for each trip, allowing you to add or customize downloadable files for that trip.
- Go to Trips > All Trips and select the trip you want to edit.
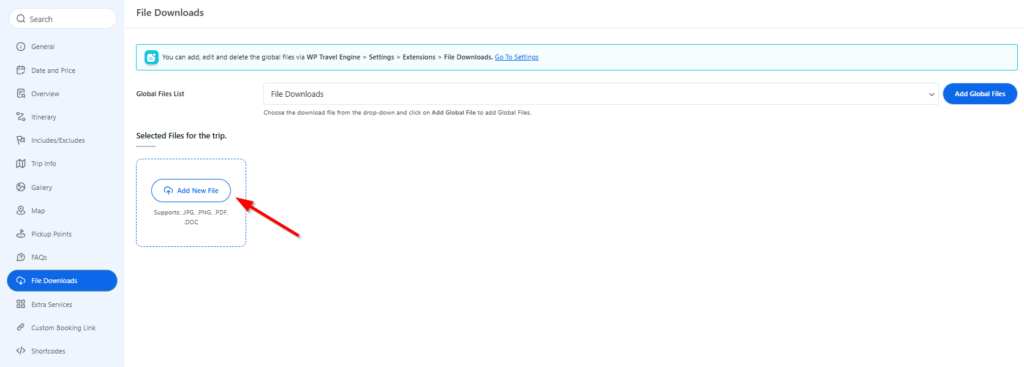
- Scroll down to the WP Travel Engine – Trip Settings section.
- Open the File Downloads tab to manage downloadable files for this trip.
- Global Files List: This section allows you to select files from the global file library that you have already added in the File Downloads settings. Selecting files here will attach those global files to the current trip.
- Selected Files for the Trip: Displays all files that are currently assigned to this specific trip. These files will be shown on the trip page based on your global and trip-level settings.
- Add New File: Use this option to add files that are unique to this trip and not included in the global file list. This is useful when a trip requires specific documents that should not be shared with other trips.
- Supported File Types: You can upload files in the following formats: .JPG, .PNG, .PDF, .DOC.
- After configuring the files as needed, click Update to save your changes and apply the file settings to the trip.
Displaying File in Front-end #
After the configuration is completed, you can display the files available for download anywhere on your site using the Shortcode: [trip_file_downloads]
Note: The file you have uploaded will only appear on the trip page if you add the Shortcode . Without the Shortcode, the uploaded files will not be displayed.
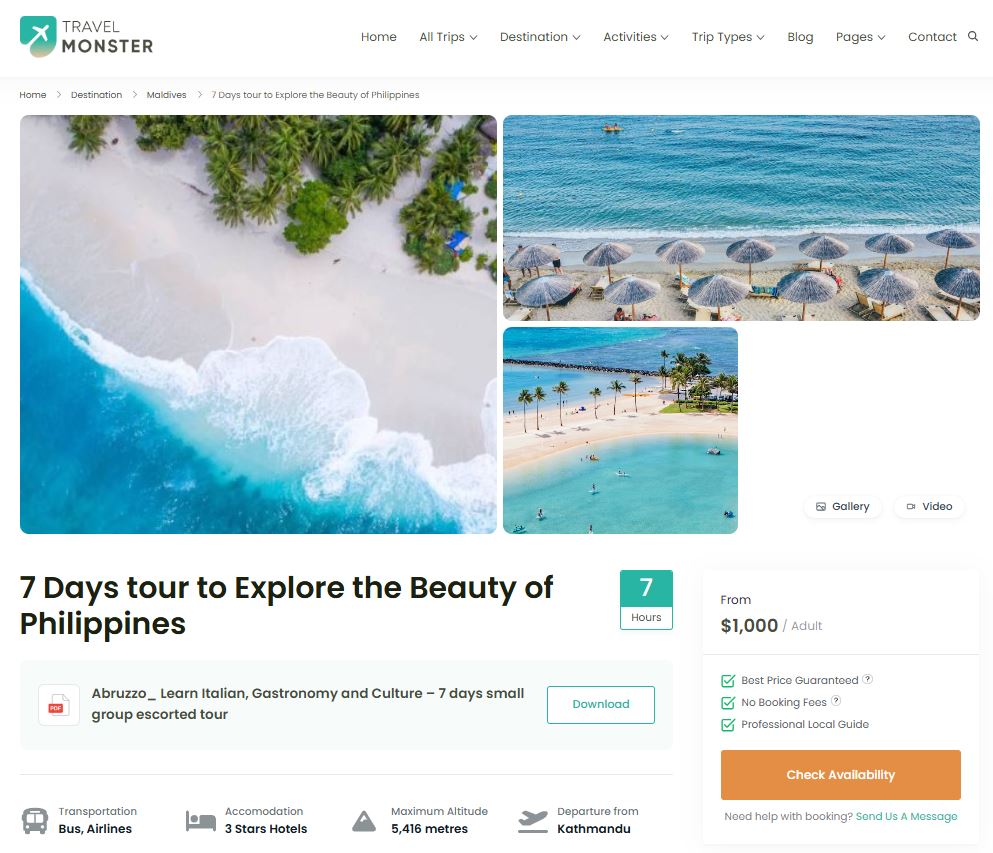
Once added, the files will be visible on the trip page, allowing users to easily view or download them.
Feel free to contact our support team for any other assistance.