With the WooCommerce Payment Gateway add-on, you can accept trip payments through various WooCommerce-supported gateways.
In this documentation, you will learn step-by-step about add-on installation, setup, and initial configuration options.
Requirement: To use this payment gateway, you need three things:
- WP Travel Engine plugin version 5.4.0 or later
- WooCommerce version: 6.4 or later
- WP Travel Engine – WooCommerce Payment Gateway version 1.1.1 or later
You can follow the video or the below steps to configure the WooCommerce Payment Gateway.
How to Install the WooCommerce Payment Gateway Add-on #
Note: To use our WooCommerce Payment Gateway in WP Travel Engine, you must install the WooCommerce plugin first.
You can easily install the WooCommerce plugin by clicking on the link provided: https://wordpress.org/plugins/woocommerce/
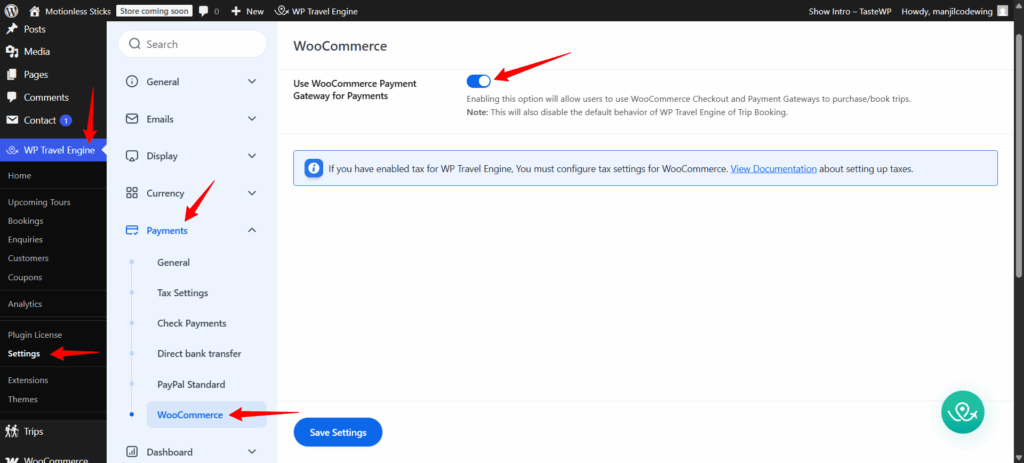
Configuring the WooCommerce Gateway #
To configure the main settings for the WooCommerce payment gateway, navigate to WP Travel Engine > Settings > Payments> WooCommerce.
Simply toggle on the WooCommerce Payment Gateway to switch it on. Then, click Save and Continue to secure your changes.
Setting WooCommerce Checkout Page #
Upon enabling the WooCommerce payment gateway, the checkout page is automatically assigned for each trip. If no page is assigned or you wish to designate a different page, follow these steps:
- Go to WP Travel Engine > Settings > General > Page Settings.
- Choose the desired checkout page from the “Checkout Page” drop-down menu.
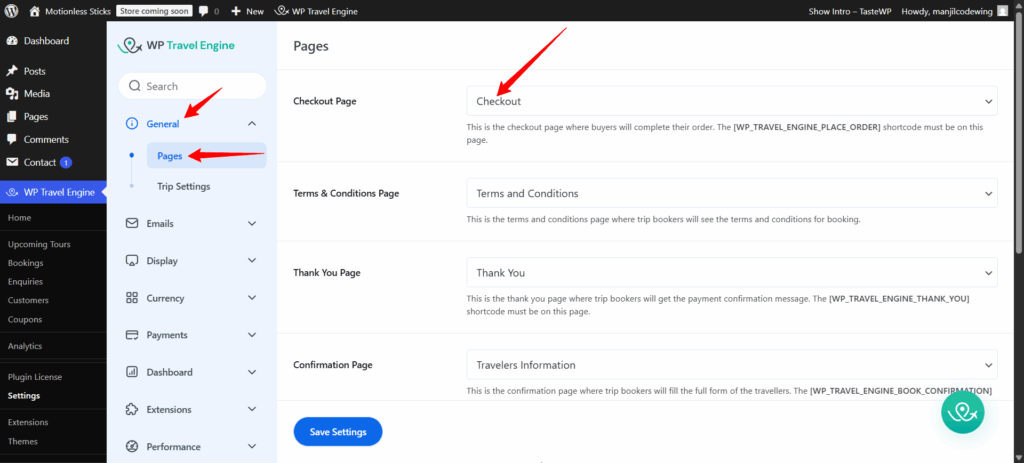
- Configure additional settings such as the Thank You Page and Terms and Conditions.
- Click Save and Continue.
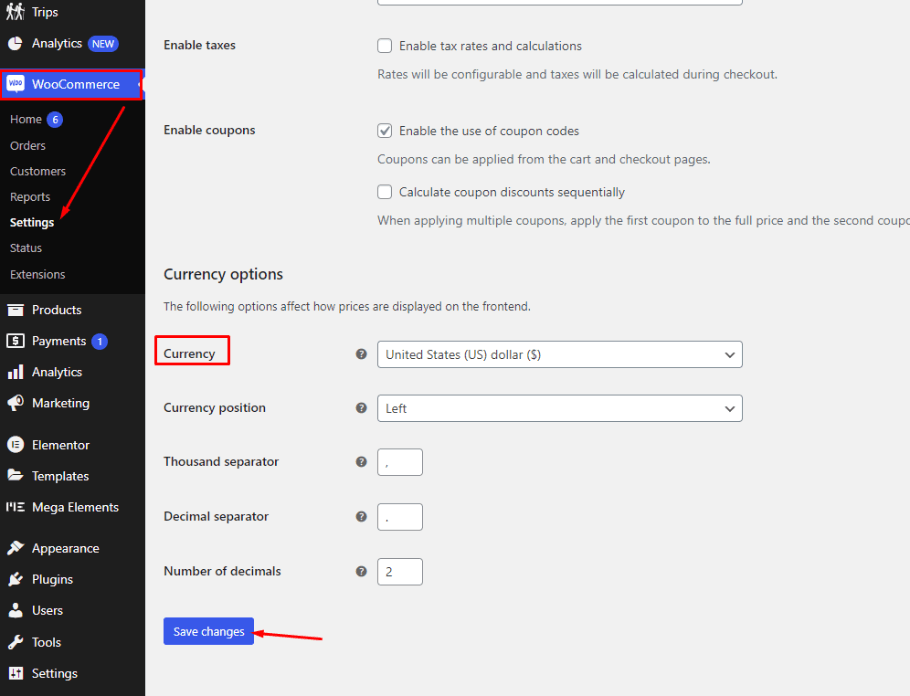
Setting the Currency in WooCommerce #
The final step to set up the WooCommerce Payment Gateway is to configure the currency in the WooCommerce plugin. This ensures that both WP Travel Engine and WooCommerce use the same currency value.
Follow these steps:
- Go to Dashboard > WooCommerce > Settings > General.
- Scroll down to the Currency options section.
- Select the same currency that you have used for the WP Travel Engine.
- Click Save Changes.
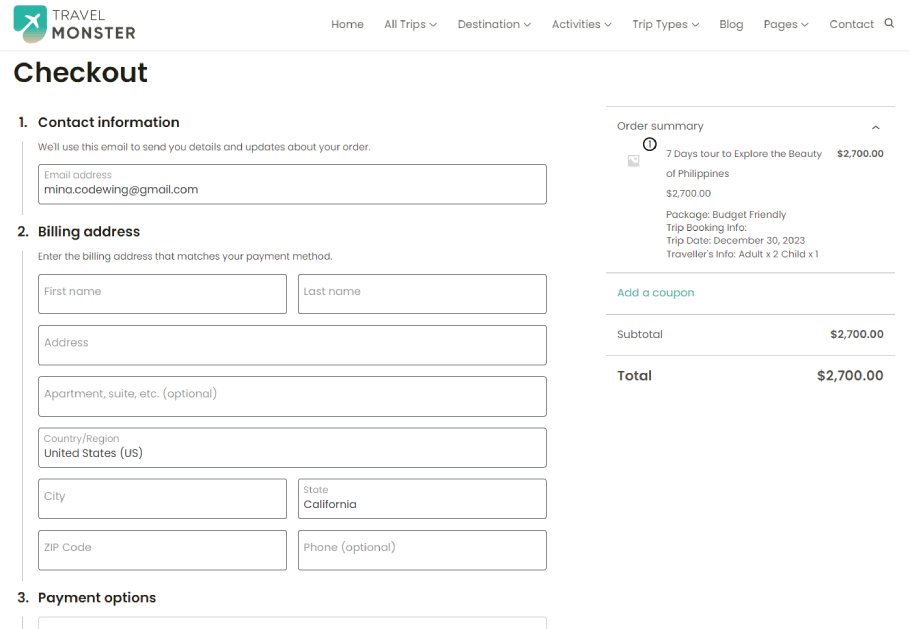
Trip Checkout Demo #
After all the required configurations are completed on the site backend, when your customers book a trip and proceed to checkout, they will be directed to the WooCommerce Checkout page.
Customers then need to fill in the required booking details and use the available payment gateway to make the payment. Once the payment is complete, they will be directed to the WooCommerce Order Received page.
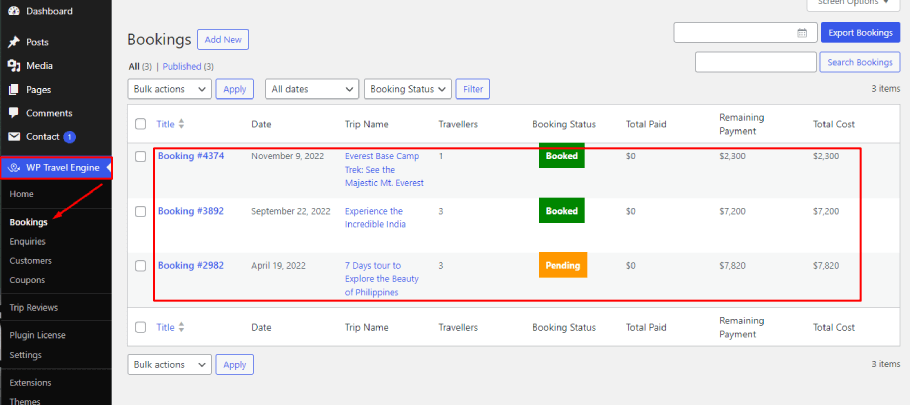
On the site backend, you (the admin) can view booking details via WP Travel Engine > Bookings and WooCommerce > Orders.