- Prerequisites
- How to Enable the Stripe Payment Gateway
- How to Configure Stripe Payment Gateway
- How to Add the Publishable Key and Secret Key
- How to Configure Webhooks in Stripe
- How to enable Preapproved Payment in Stripe
- Why enable toggle the Future Usage(Off Session)
- How to enable Link by Stripe
- Why Enable or Disable Apple Pay/Google Pay
- How to configure the device and browser setup for Apple/Google Pay
- How to Enable Payment Methods via the Stripe Dashboard
- Steps to Enable Stripe Payment Methods:
- TroubleShooting
- FAQS
Stripe is a leading global payment gateway that allows your travel website to accept online payments securely and efficiently. With the Stripe Payment Gateway addon for WP Travel Engine, you can accept major credit/debit cards, Apple Pay, Google Pay, and even support payment features like Link by Stripe or Pre-approved payments, all from within your booking form.
This integration helps travelers pay for trips in real-time while you enjoy a seamless and reliable transaction process.
Prerequisites #
Before you begin using Stripe with WP Travel Engine, make sure you have:
- Installed and activated the WP Travel Engine plugin.
- Purchased and installed the Stripe Payment Gateway Addon.
- A verified Stripe account (visit stripe.com to create one).
You can find the complete step-by-step tutorial for setting up the addon here.
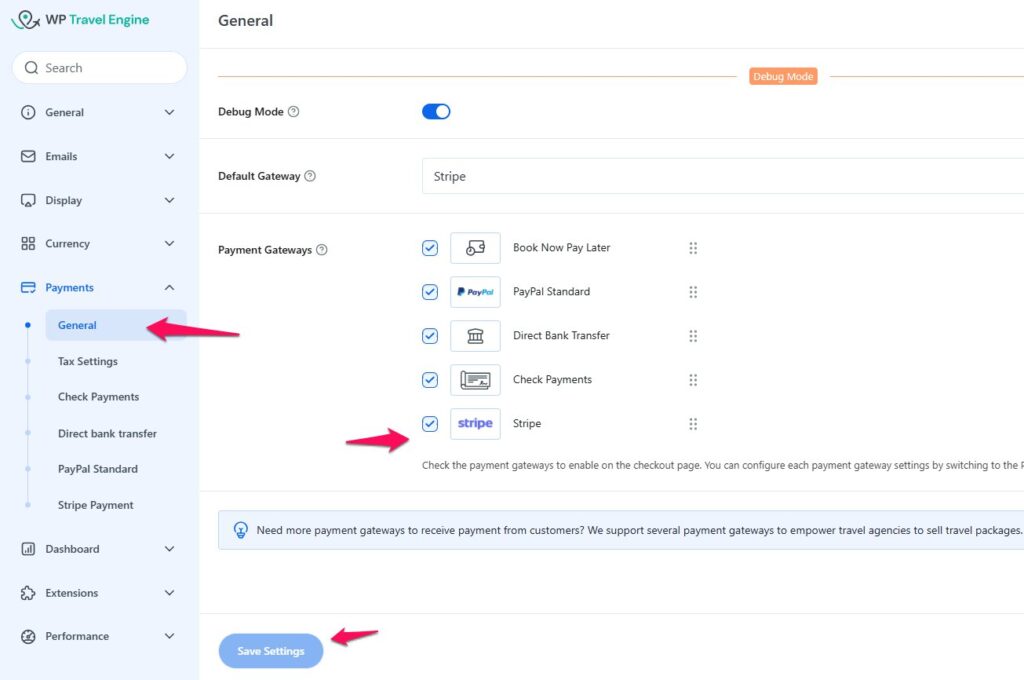
How to Enable the Stripe Payment Gateway #
- Go to your WordPress Dashboard.
- Navigate to WP Travel Engine > Settings > Payment > General.
- Under the list of payment gateways, locate Stripe and check the box to Enable it.
- Click Save Changes at the bottom of the page.
How to Configure Stripe Payment Gateway #
After enabling the Stripe Payment Gateway, you need to configure the Stripe Payment Gateway.
Please Navigate to WP Travel Engine > Settings > Payment > Stripe Payment.
How to Add the Publishable Key and Secret Key #
To connect your site with your Stripe account, you need to enter your API Keys:
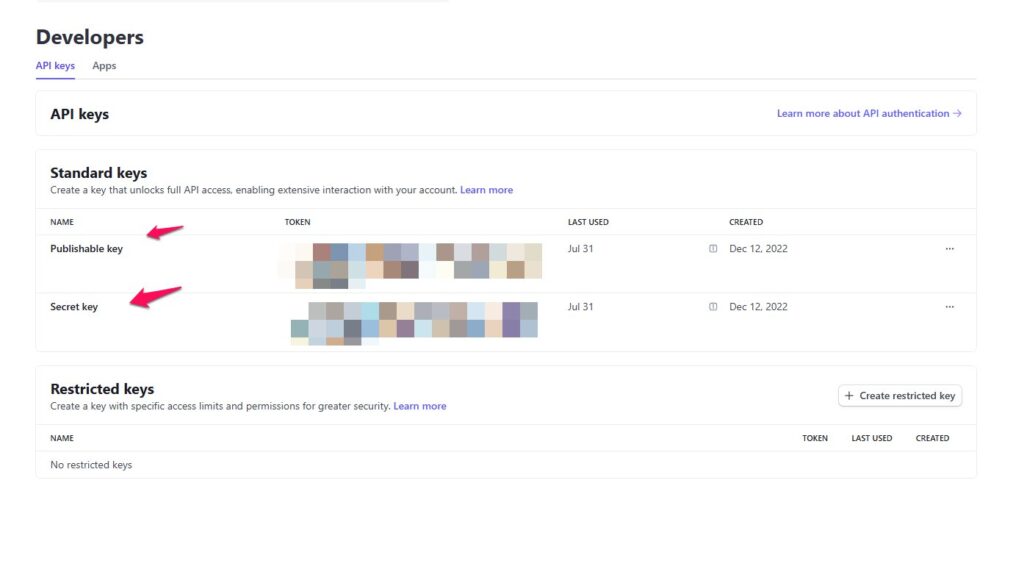
- Log in to your Stripe Dashboard.
- Navigate to Developers > API Keys.
- Copy your Publishable Key and Secret Key. Example:
- Publishable Key:
pk_live_xxxxxxxxx - Secret Key:
sk_live_xxxxxxxxx
- Publishable Key:
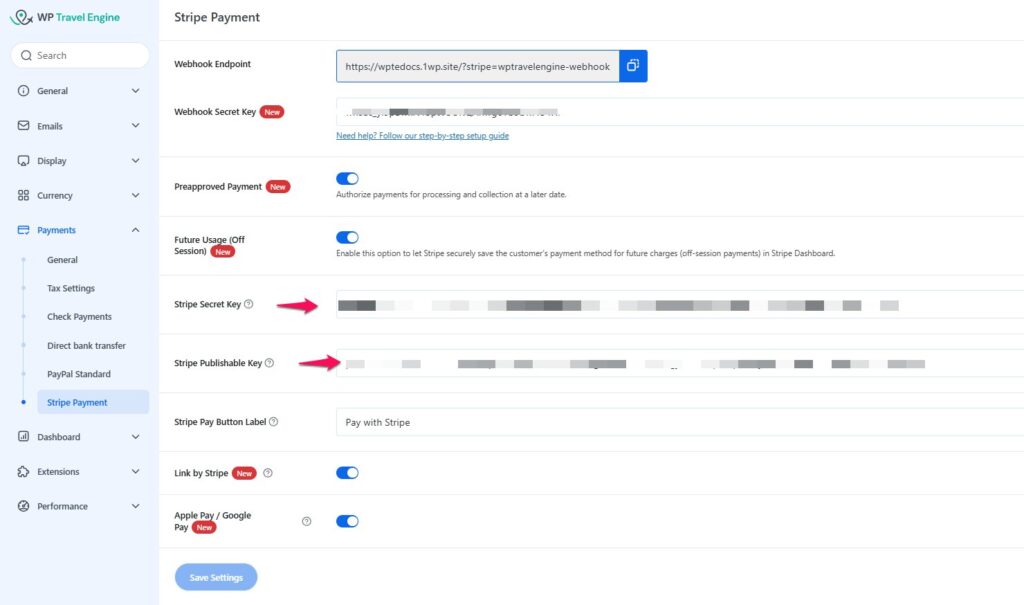
- Return to your WordPress dashboard.
- Go to WP Travel Engine > Settings > Payment > Stripe Payment.
- Paste the Publishable Key and Secret Key into their respective fields.
- Click Save Changes.
How to Configure Webhooks in Stripe #
Webhooks allow Stripe to notify your website about payment events, such as successful or failed payments, so your booking status stays updated.
Steps to Set Up Webhooks: #
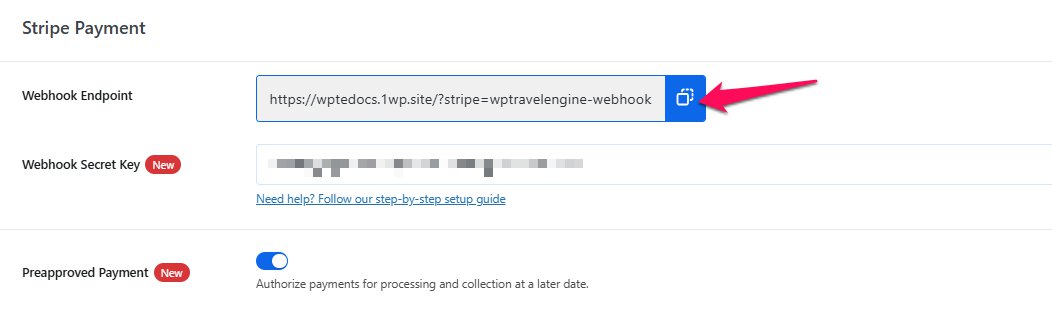
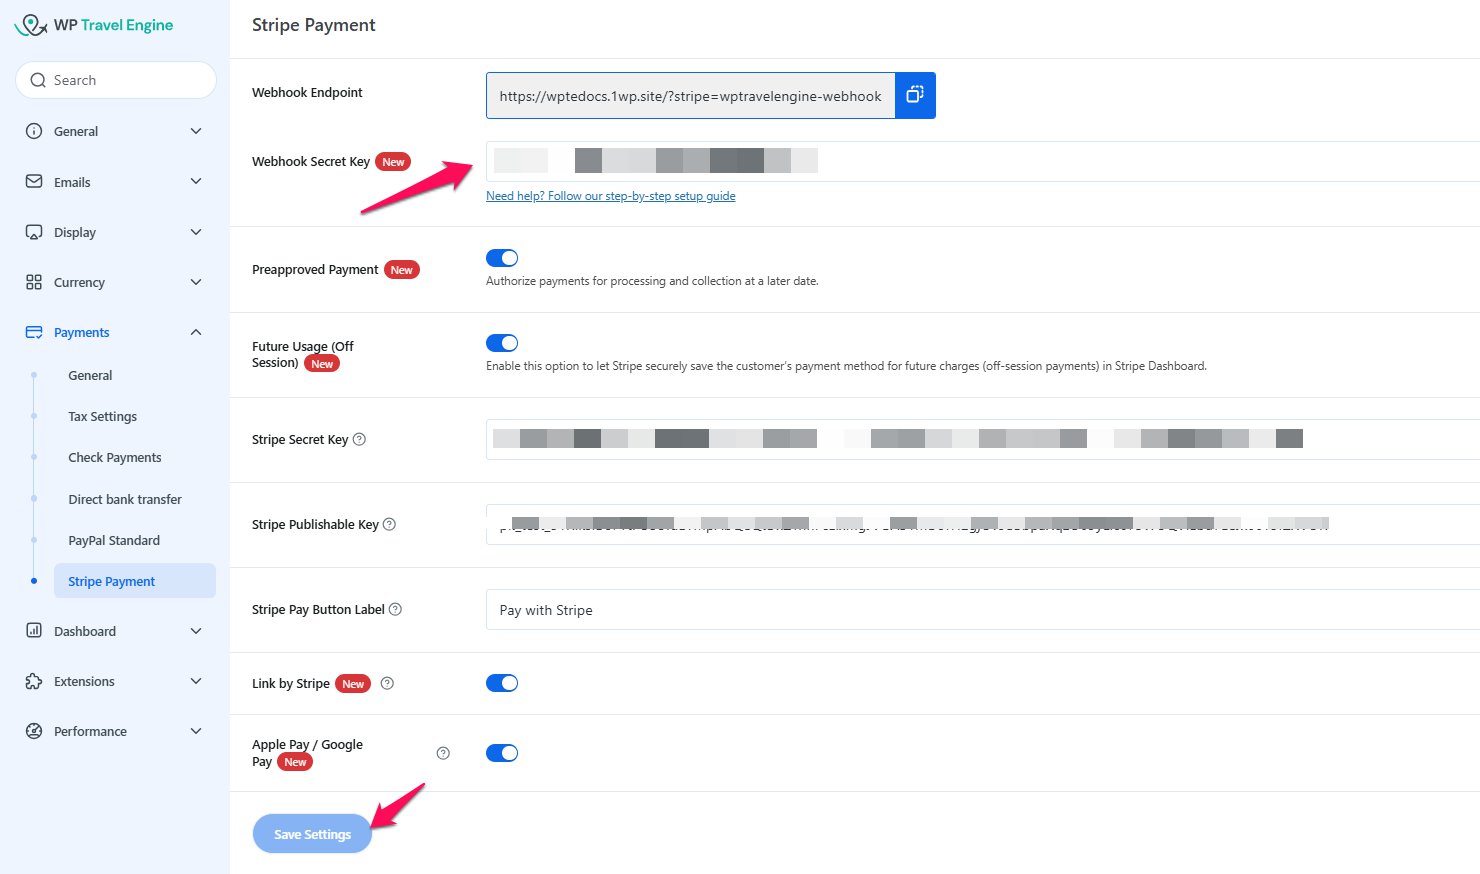
- In your WordPress admin, go to WP Travel Engine > Settings > Payment > Stripe Payment.
- Copy the Webhook Endpoint URL shown there (it looks something like
https://yoursite.com/??stripe=wptravelengine-webhook).
- Go to your Stripe Dashboard.
- Navigate to Developers > Webhooks and click + Add Endpoint/Destination.
- When adding the webhook endpoint, select only the Payment Intent and all the Payment Intent Events.
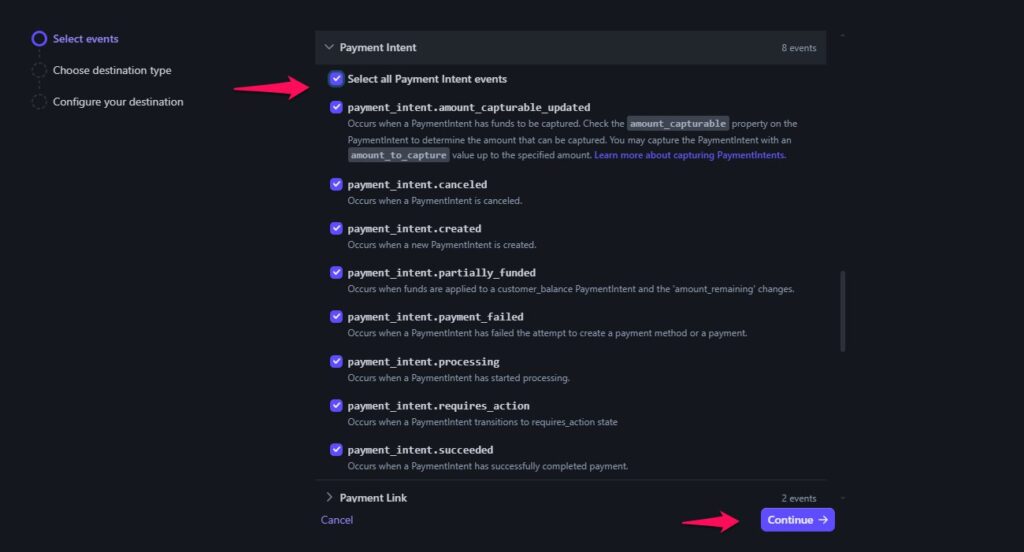
- After Selecting Events, you need to configure the Destination.
- Add the Endpoint URL that you have copied before.
- Click on the Create Destination Button.
- Once the Destination is created, you will find the Signing Secret Key.
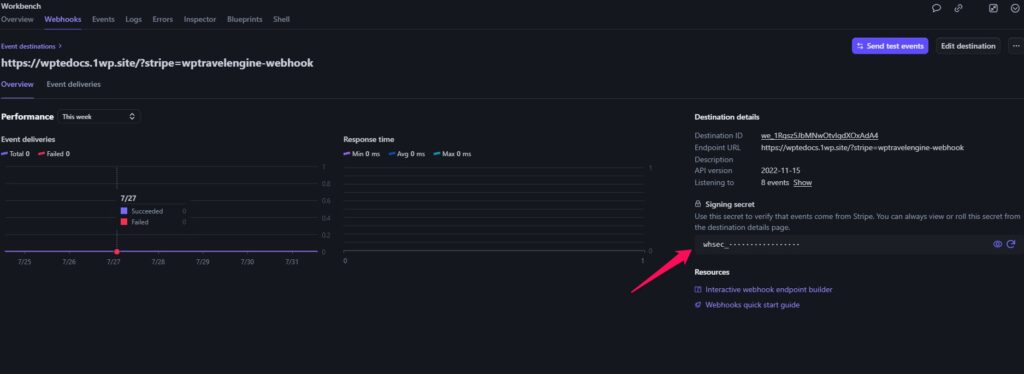
- You can copy the key and paste it into the Stripe Payment settings.
- Save the Changes.
How to enable Preapproved Payment in Stripe #
With Preapproved Payment, Stripe authorizes you to capture a traveler’s payment later, instead of charging them right away. This means:
- You can approve or reject the booking before the actual charge is made.
- Useful for manual review, limited availability trips, or requiring confirmation.
Enable it under:
- WP Travel Engine > Settings > Payment > Stripe Payment.
- Check Enable Preapproved Payment.
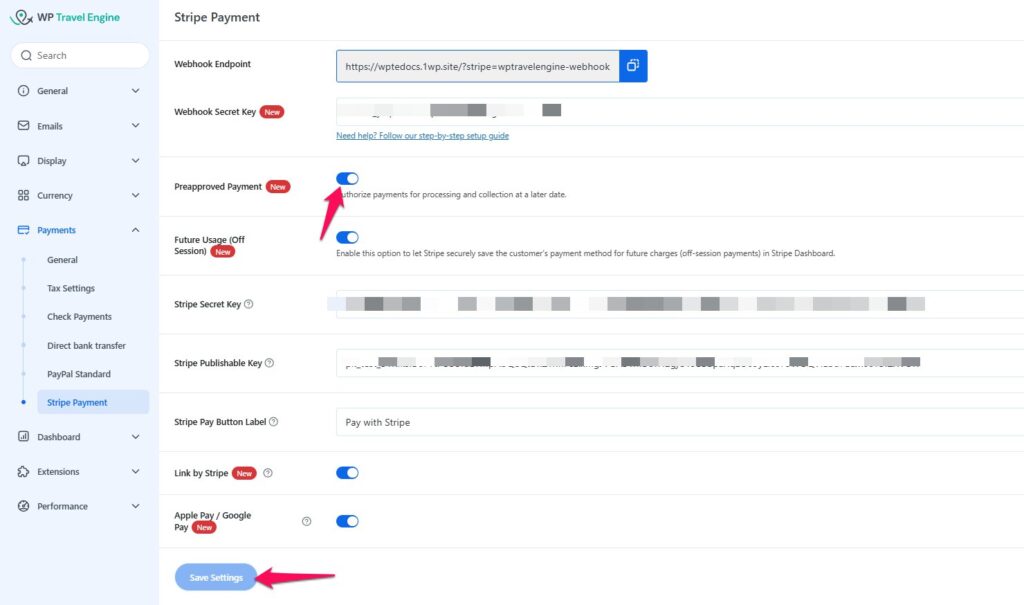
When approved, the charge is captured manually from the Stripe dashboard.
Why enable toggle the Future Usage(Off Session) #
The Future Usage (Off Session) option in WP Travel Engine’s Stripe Payment settings allows Stripe to securely save a customer’s payment method for future use.
When enabled, Admins can charge customers via the Stripe dashboard later without requiring customer authorization or re-entering their payment details. This is known as an off-session payment, where the customer is not actively completing the checkout.
How to Enable #
- Go to your WordPress Dashboard.
- Navigate to WP Travel Engine → Settings → Payments → Stripe Payment.
- Toggle Setup Future Usage (Off Session) to On.
- Save changes.
Once enabled, Stripe automatically stores the payment method during the initial booking checkout.
How to create a payment in Stripe. #
When you enable the Future Usage (Off-Session) option, payment details can be securely saved via the Stripe Dashboard for future transactions.
Steps to Create a Payment from Saved Details: #
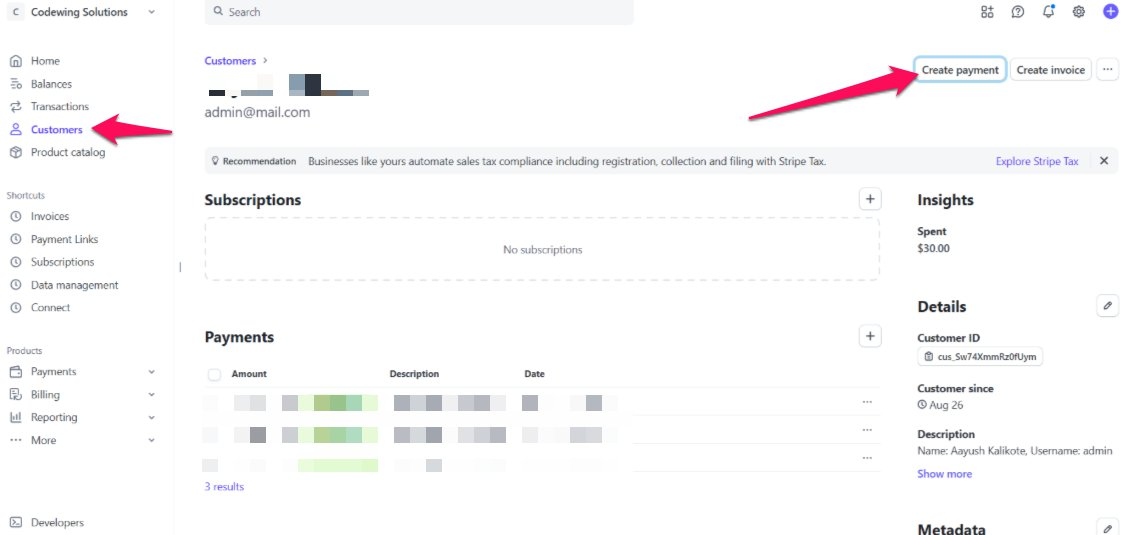
- Go to your Stripe Dashboard.
- Navigate to Customers.
- Select the customer who has already made a payment after the Future Usage feature was enabled.
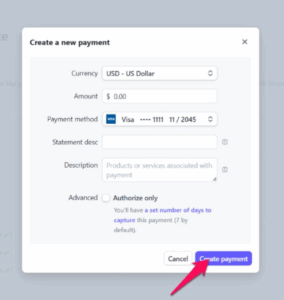
- Click on the Create Payment button.
- Proceed with the payment using the saved details.
Benefits of Setting Up Future Usage #
- Admin can charge for last-minute cancellations without asking the customer for details again.
- Admin can bill for extra add-ons or upgrades used during the trip.
- Save payment details without an initial payment, useful for onboarding customers and charging later.
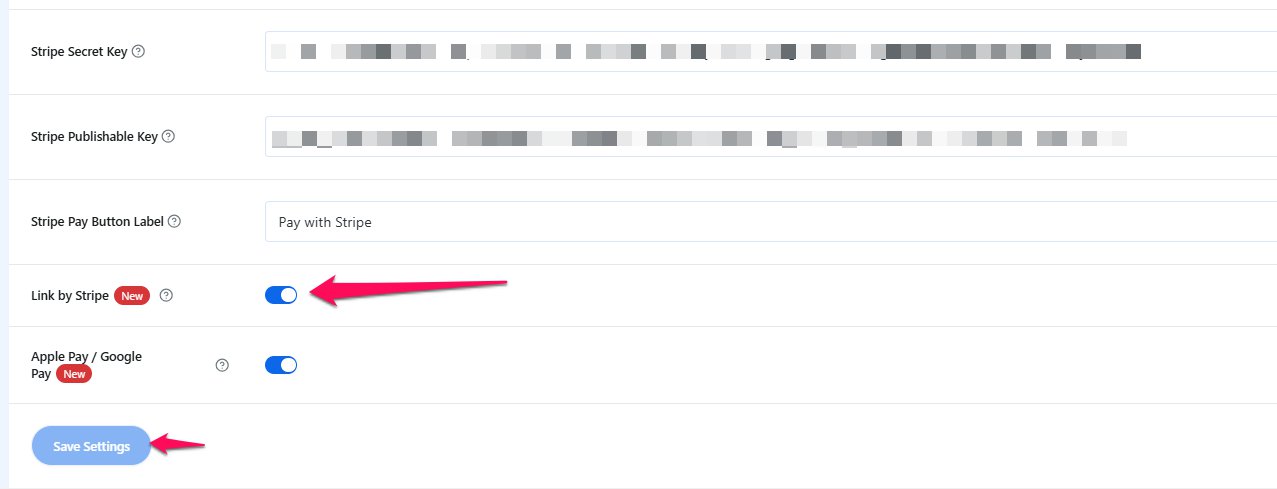
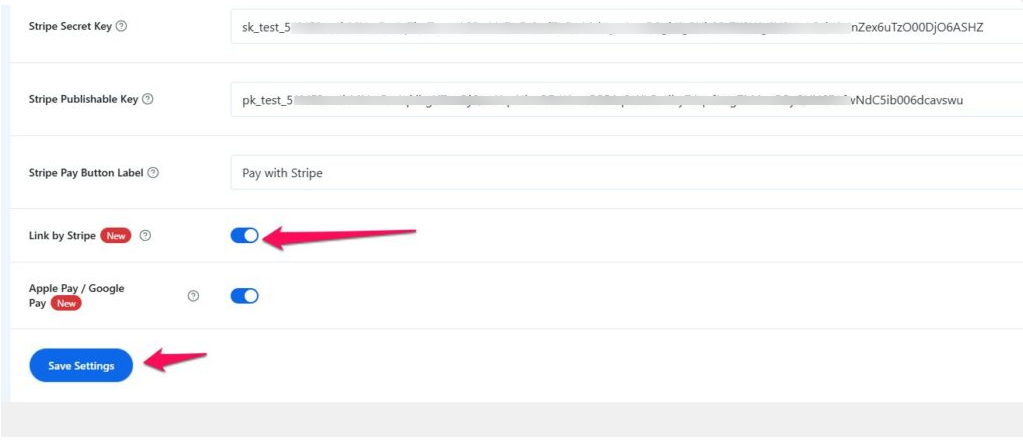
How to enable Link by Stripe #
Link is Stripe’s one-click checkout system. If a customer has saved their details with Stripe, they can complete future bookings instantly, without re-entering their card or address details.
Benefits:
- Fast and easy checkout for repeat customers.
- Improved conversion rates.
You can enable or disable Link in your Stripe Dashboard under Settings > Payment Methods > Stripe Payment > Link By Stripe.
Why Enable or Disable Apple Pay/Google Pay #
These payment methods offer a fast and trusted checkout experience, particularly for mobile users.
- Apple Pay is available on Safari browsers (Mac and iPhone).
- Google Pay works on Chrome, both on Android and desktop devices.
To enable them:
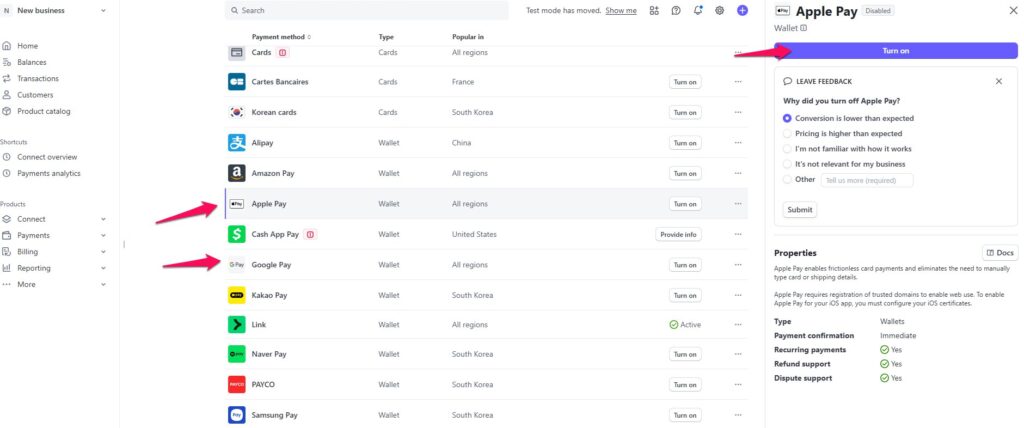
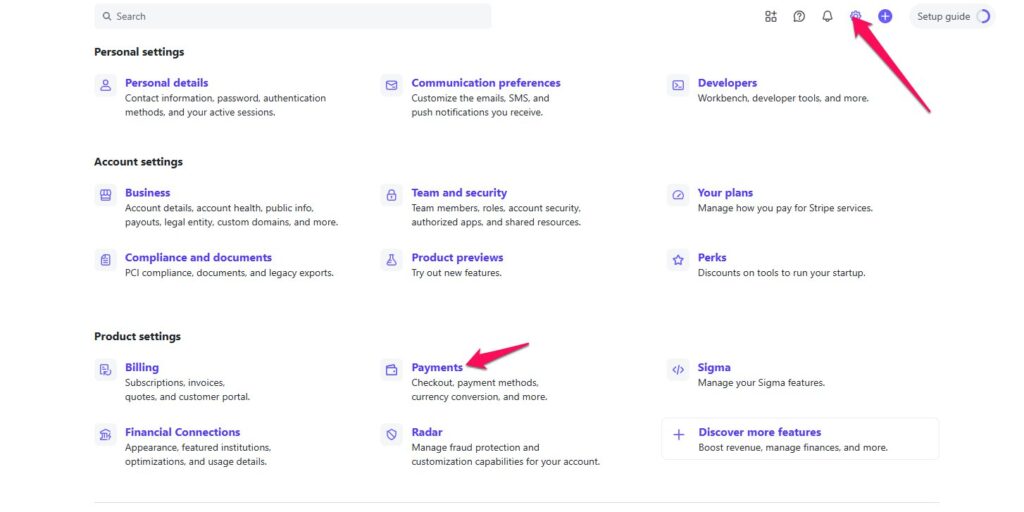
- Log in to your Stripe Dashboard.
- Navigate to Settings > Payment Methods.
- Enable both Apple Pay and Google Pay by clicking on the Turn On button.
- Next, make sure to enable the toggle in the WP Travel Engine settings as well.
- Go to Settings > Payment Methods > Stripe Payment, then turn on Apple Pay/Google Pay.
Once enabled, your WP Travel Engine checkout form will automatically support these payment options whenever a user’s browser and device allow it.
If you don’t see Apple Pay or Google Pay in the checkout demo, it may be because your device or browser does not meet the required conditions. Check the following:
How to configure the device and browser setup for Apple/Google Pay #
- Your wallet must have at least one valid card added.
- You must use a compatible device (Apple Pay or Google Pay supported).
- You must use a supported browser version:
- Chrome for Google Pay
- Safari for Apple Pay
- Allow your browser to access your wallet:
- Chrome: Settings → Autofill and passwords → Payment methods → Allow sites to check if you have payment methods saved
- Safari: Settings → Advanced → Allow websites to check for Apple Pay and Apple Card
- Do not use Chrome Incognito or Safari Private Browsing mode.
- Confirm you are in a supported region for Apple Pay or Google Pay.
- Stripe does not display Apple Pay or Google Pay for IP addresses in India or Stripe accounts based in India.
- For Apple Pay, confirm your device supports biometric authentication (Face ID or Touch ID).
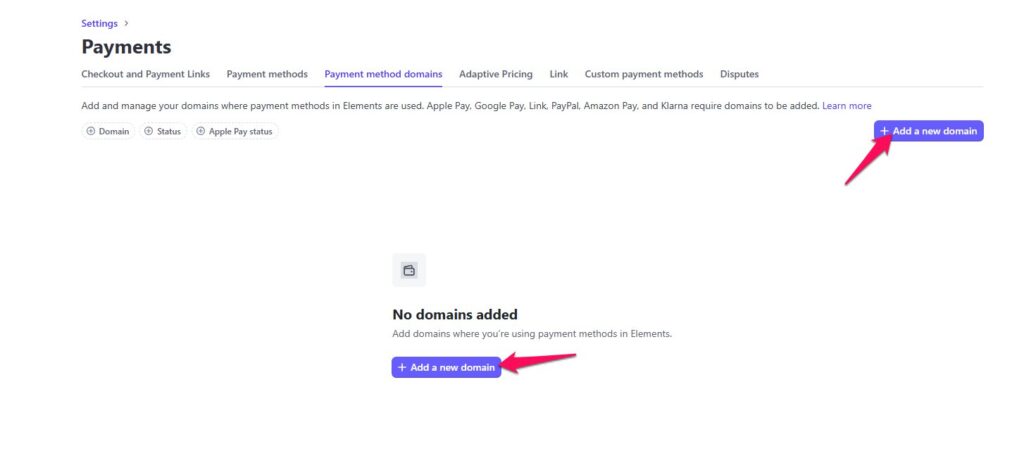
- To enable Apple Pay, you’ll need to register your domain or subdomain in the Stripe Dashboard under Payment (Settings). Please refer to the screenshot below for detailed instructions.
How to Enable Payment Methods via the Stripe Dashboard #
To offer multiple ways for your travelers to pay (such as credit cards, Apple Pay, Google Pay, Link, etc.), you must first enable these payment methods in your Stripe Dashboard.
Steps to Enable Stripe Payment Methods: #
No further action is needed on your website, WP Travel Engine will detect and support these automatically if compatible.
- Log in to your Stripe Dashboard.
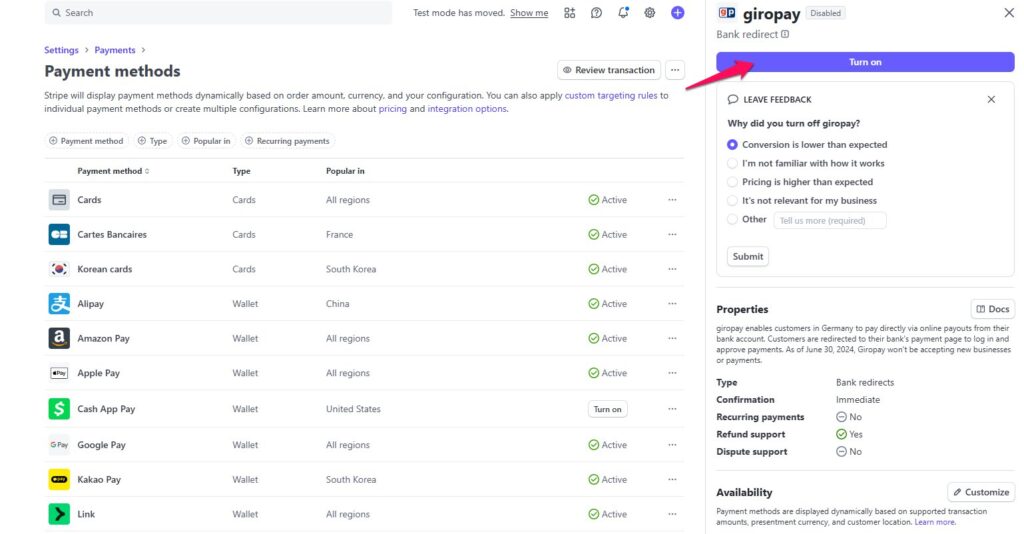
- Go to Settings > Payment Methods.
- Browse through the list of available payment options like:
- Card payments (Visa, MasterCard, AMEX, etc.)
- Apple Pay
- Google Pay
- Link by Stripe
- Buy now, pay later options (Klarna, Afterpay, etc.)
- Turn On the payment methods you want to accept.
The currency you select in WP Travel Engine directly affects which payment gateways appear during checkout. To set your preferred currency, go to WP Travel Engine > Settings > General > Currency and choose from the available options. Only the payment methods that support the selected currency will be shown to your customers.
For example, if you choose EUR (Euros), Stripe will display supported methods like card payments (Visa, MasterCard, AMEX), Apple Pay, Google Pay, and Klarna. These methods are widely supported for Euro transactions.
TroubleShooting #
- API Keys Not Working: Make sure you’ve copied both the Publishable and Secret keys correctly from your Stripe Dashboard.
- Webhooks Not Updating Booking Status: Ensure you’ve added the correct Webhook URL to your Stripe Dashboard. Under Events to Send, select all relevant Payment Intent events.
- Stripe Not Showing at Checkout: Go to WP Travel Engine > Settings > General > Currency and make sure Stripe supports your selected currency. Check if Stripe is enabled in Payment Settings. If using pre-approval, ensure it’s supported for your selected payment method.
- Payment Authorized But Not Captured: You may have Pre-Approval enabled. This requires manual capture of the payment from your Stripe Dashboard.
FAQS #
Do I need a Stripe account to use this addon? #
Yes. You must have a verified Stripe account to accept payments through this addon.
Can I use Stripe in test mode? #
Yes! You can test your checkout process using Test API keys from Stripe without processing real payments.
How do I find my API keys? #
Log in to the Stripe Dashboard, go to Developers > API keys to access both your Publishable and Secret keys.
What is Link by Stripe? #
It’s a one-click checkout method where returning customers can use saved info for faster transactions.
What is pre-approval payment? #
It’s a payment method where the card is authorized but not charged immediately. You must capture the payment manually later.
Feel free to contact our support team for any other assistance.